
55UHDAQNDT5Q - Television NOKIA - Free user manual and instructions
Find the device manual for free 55UHDAQNDT5Q NOKIA in PDF.


| Product Type | 4K UHD Smart Television |
| Brand | Nokia |
| Model | 55UHDAQNDT5Q |
| Screen Size | 55 inches (diagonal) |
| Resolution | 3840 x 2160 (4K UHD) |
| Display Technology | LED |
| Refresh Rate | 60 Hz |
| HDR Support | HDR10, HLG |
| Smart Platform | Android TV |
| Audio Output | 2 x 10W speakers |
| HDMI Ports | 3 x HDMI 2.0 |
| USB Ports | 2 x USB 2.0 |
| Wi-Fi | Built-in Wi-Fi 802.11ac |
| Bluetooth | Bluetooth 5.0 |
| Power Consumption (typical) | 120 W |
| Power Consumption (standby) | <0.5 W |
| Dimensions (with stand) | 1232 x 770 x 240 mm |
| Dimensions (without stand) | 1232 x 708 x 72 mm |
| Weight (with stand) | 14.5 kg |
| Weight (without stand) | 13.8 kg |
| VESA mount pattern | 200 x 200 mm |
| Energy Efficiency Class | G (EU) |
| Cleaning Instructions | Use a soft, dry cloth; avoid liquids and abrasive cleaners |
| Safety Features | Anti-tip strap included; automatic power-off when no signal |
Frequently Asked Questions - 55UHDAQNDT5Q NOKIA
User questions about 55UHDAQNDT5Q NOKIA
0 question about this device. Answer the ones you know or ask your own.
Ask a new question about this device
Download the instructions for your Television in PDF format for free! Find your manual 55UHDAQNDT5Q - NOKIA and take your electronic device back in hand. On this page are published all the documents necessary for the use of your device. 55UHDAQNDT5Q by NOKIA.
USER MANUAL 55UHDAQNDT5Q NOKIA
natural_image
Modern white and wooden TV set with a black screen on top, placed on a wooden cabinet (no visible text or symbols)Nokia Smart TV 43UHDADNDT52X / 50UHDADNDT52X / 50UHDAQNDT5Q 55UHDADNDT52X / 55UHDAQNDT5Q
Chapter 1: Introduction
Warning and precaution 3
Important safety instructions 3
Positioning the TV 5
Mounting on a wall 5
Precautions for using battery.... 6
Standard accessories 7
Base installation....7
Buttons on the TV 8
Sockets 9
Remote control functions 11
Chapter 2: General operation
Switching on 12
Switching off 12
Network connection 13
Initial setup 13
Chapter 3: Homepage operation
Using homepage - TV 14
Using homepage - Apps.... 14
Chapter 4: Using your TV
Accessing channels 15
Watching connected devices.... 15
Volume.... 15
Using quick access menu.... 15
Display & Sound 15
TV Settings 16
Channels setup (Only available in cable or Antenna connected) 16
Picture & Display 17
Sound 17
Smart zone 18
System 18
Audio connect (Two way wireless connectivity) application guide.... 20
Multimedia.... 22
Chapter 5: Other information
Troubleshooting 23
Specifications.... 24
License.... 26
Warranty terms & Conditions.... 27
Warning and precaution
Read all of the instructions before operating the television. Keep these instructions handy for later use.
Important safety instructions
- Read these instructions – All the safety and operating instructions should be read before this television is operated.
- Keep these instructions – The safety and operating instructions should be retained for future reference.
- Importance of all warnings – All warnings on the television and in the operating instructions should be adhered to.
- Follow all instructions – All operating and usage instructions should be followed.
- Do not use this television near water – The television should not be used near water or moisture – for example, in a wet basement or near a swimming pool etc.
- Use only dry cloth for cleaning.
- Do not block any ventilation openings. Install according to the manufacturer's instructions.
- Do not install near any heat sources such as radiators, heat registers, stoves, or other apparatus(including amplifiers) that produces heat.
- Do not defeat the safety purpose of the polarized or grounding plug. A polarized plug has two blades with one wider than the other. A grounding plug has two blades and a third grounding prong. The wide blade or the third prong is provided for your safety. If the provided plug does not fit into your outlet, consult an electrician for replacement.
- Protect the power cord from being walked on or pinched particularly at the plugs and at the point where they exit from the television.
- Only use attachments/accessories specified by the manufacturer.

Use only with the cart, stand, tripod, bracket, or table specified by the manufacturer, or sold with the television. When a cart or rack is used, use caution when moving the cart/television combination to avoid injury from tip-over.
- Unplug the television during lightning storms or when unused for long periods of time.
- Get your servicing from a qualified personnel. Servicing is required when the television has been damaged in any form, such as power supply cord or damaged plug, liquid has been spilled or objects have fallen on the television, the television has been exposed to rain or moisture and hence does not operate normally, or has been stopped working.
- Caution: These servicing instructions are for use of qualified service personnel only. To reduce the risk of electric shock, do not perform any servicing other than that contained in the operating instructions unless you are qualified to do so.
- Do not install this equipment in a closed space. Keep it in well ventilated conditions at open site. The ventilation should not be impeded by covering the ventilation openings with items such as newspaper, table-cloths, curtains etc.
- Caution – To prevent electric shock hazard, please replace grille.
- Please refer the information on rear enclosure for electrical and safety information before installing or operating the television.
- To reduce the risk of fire or electric shock, do not expose this television to rain or moisture.
- The television shall not be exposed to dripping or splashing and that no objects filled with liquids, such as vases, shall be placed on the television.
- For the terminals marked with symbol of “ 12 ” may be of sufficient magnitude to constitute a risk of electric shock. The external wiring connected to the terminals require installation by an instructed person or the used of ready-made leads or cords.
- To prevent injury, use the stand/wall-mount bracket to securely install this television on the table/wall in accordance with the installation instructions.
- Danger of explosion if battery is incorrectly replaced. Replace only with the same or equivalent type.
- The battery (battery or batteries or battery pack) shall not be exposed to excessive heat such as sunshine, fire or the like.
- Excessive sound pressure from earphones and headphones can cause hearing loss. Listening to music at high volume levels and for extended durations can damage one's hearing. In order to reduce the risk of damage to hearing, one should lower the volume to a safe, comfortable level, and reduce the amount of time listening at high levels.
- The appliance coupler is used as disconnect device, the disconnect device shall remain readily operable.
- When not in use and during movement, please take care of the power cord set, e.g. tie up the power cord set with cable tie. It shall be free from sharp edges and the like that can cause abrasion of the power cord set. When put into use again, please make sure the power cord set being not damaged, if any damages found, please look for the service person to replace the power cord set specified by the manufacturer or have the same characteristics as the original one.
- Attention should be drawn to environmental aspects of battery disposal.
- No fire objects such as lighted candles should be placed on the television. To prevent the spread of fire, keep fire objects or other open flames away from the television at all times.
- If the television has the symbol ☐ in its rating label and the power plug has two pins, it means that the equipment is a Class II or double insulated electrical appliance. It has been designed in such a way that it does not require a safety connection to electrical earth.(Only for Class II appliance)
- The following information are recommended to be included as far as applicable where applicable:
| ~ Refers to alternating current(AC). | ↓ Refers to stand-by. |
| ... Refers to direct current(DC). | I Refers to power ON. |
| ☐ Refers to Class II equipment. | § Refers to dangerous voltage. |
● Warning for television containing Coin / Button
Cell Batteries (Below instruction only used for the television containing a user-replaceable coin/button cell battery) Warning:
Refrain to ingest battery which can lead to chemical burn hazard. If the coin/button cell battery is swallowed, it can cause severe internal burns in just 2 hours and can lead to death. Keep new and used batteries away from children. If the battery compartment does not close securely, stop using the product and keep it away from children. If you think batteries might have been swallowed or placed inside any part of the body, seek immediate medical attention.
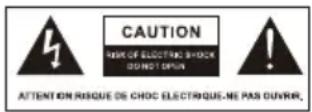
The lightning flash with arrowhead symbol within an equilateral triangle is intended to alert the user to the presence of non-insulated “dangerous voltage” within the product’s enclosure that may be of sufficient magnitude to constitute a risk of electric shock.
- To reduce the risk of electric shock, do not remove cover (or back). Refer to qualified service personnel to open it.
- The exclamation point within an equilateral triangle is intended to alert the user to the presence of important operating and maintenance instructions in the literature accompanying the television.
This product is RoHS compliant
Disposal of used electrical & electronics equipment

Packaging and electrical goods should be recycled appropriately, and not treated as household waste. Please dispose of this equipment at your applicable collection point for the recycling of electrical & electronic equipment waste. By ensuring the correct disposal of this product, you will help prevent potentially hazardous to the environment and to human health, which could otherwise caused by unsuitable waste handling of this product. The recycling of materials will help conserve natural resource. Please do not therefore dispose of your old electrical and electronic equipment with your household waste. For more detailed information about recycling of this product, Please contact your local city office, your household waste service or the shop where you purchased the product.
Positioning the TV
- Install Display on solid horizontal surface such as a table or desk. For ventilation, leave a space of at least 10cm free all around the set. To prevent any fault and unsafe situations, please do not place any objects on top of the set. This apparatus can be used in tropical and/or moderate climates.
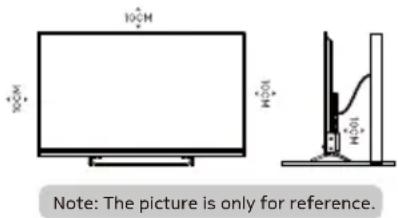
- Fix the rear of enclosure to wall (only for some countries)
-
Warning: Never place a television set in an unstable location. A television set may fall, causing serious personal injury or death. Many injuries, particularly to children, can be avoided by taking simple precautions such as:
-
Using cabinets or stands recommended by the manufacturer of the television.
- Only using furniture that can safely support the television.
- Ensuring the television is not overhanging the edge of the supporting furniture.
- Not placing the television on tall furniture (for example, cupboards or bookcases) without anchoring both the furniture and the television set to a suitable support.
- Not placing the television set on cloth or other materials that may be located between the television set and supporting furniture.
- Educating children about the dangers of climbing on furniture to reach the television or its controls.
If your existing television set is being retained and relocated, the same considerations as above should be applied. (Only for the TV with mass exceeds 7 kg)
Mounting on a Wall
- An optional wall mount can be used with your television.
Consult with your local dealer to purchase the recommended wall mount bracket. Carefully attach the wall mount bracket at the rear of the TV. Install the wall mount bracket on a solid wall perpendicular to the floor. If you are attaching the TV to other building materials, please contact qualified personnel to install the wall mount. Detailed instructions will be included with the wall mount. Please use a wall mount bracket
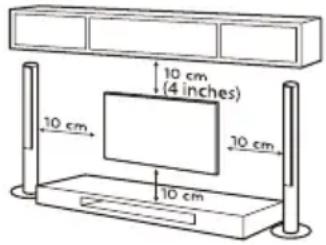
Note: The picture is only for reference.
where the device is adequately secured to the wall with enough space to allow connectivity to external devices.
- Disconnect the power before moving or installing the TV. Otherwise electric shock may occur.
- Remove the stand before installing the TV on a wall mount by performing the stand attachment in reverse.
- If you install the TV on a ceiling or slanted wall, it may fall and result in severe injury. Use an authorized wall mount and contact the local dealer or qualified personnel. Otherwise it is not covered by the warranty.
-
Do not over tighten the screws as this may cause damage to the TV and void your warranty.
-
To prevent injury, this apparatus must be securely attached to the floor/wall in accordance with the installation instructions.
- Use the screws and wall mounts that meet the following specifications. Any damages or injuries buy misuse or using an improper accessory are not covered by the warranty.
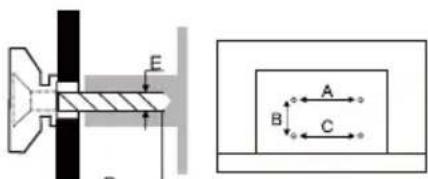
| Model Size | 43" 50" 55" | |||||||
| Top | Down | Top | Down | Top | Down | |||
| Screw | Diameter(mm) "E" | M6 M6 | M6 M6 | M6 M6 | ||||
| Depth(mm) "D" | Max | 12 12 | 12 | 12 12 | 12 | |||
| Min | 12 | 1212 | 12 12 | |||||
| Quantity | 2 2 2 | 2 2 2 | ||||||
| A*B*C | 300*300*300 | 300*300*300 | 300*300*300 | |||||
Note:
- The pictures are only for reference.
- For the TV sets with terminals towards the wall, in order to leave enough space to use the terminals, a rubber cushion is needed together with each screw to fix the wall mount. It is a small hollow pillar whose internal diameter 15 mm, external diameter is 18mm and height is >30mm.
Precautions For Using Battery
Improper using of the battery will cause leakage. So please do as the following methods and use carefully.
- Please note the batteries' polarity, to avoid short circuit.
- When the battery's voltage is insufficient which affect the use range, you should replace new battery. Remove the batteries from the remote control unit if you do not intend to use it for a long time.
- Do not use different types of batteries (for example, Manganese and Alkaline batteries) together.
- Do not put the battery into fire, and charge or decompose the battery.
- Please dispose batteries abide by relevant environmental protection regulation.
- WARNING: The batteries (battery pack or batteries installed) shall not be exposed to excessive heat such as sunshine, fire or the like.
Standard accessories
Note: The pictures are only for reference.
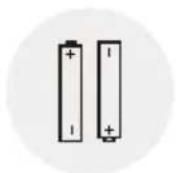
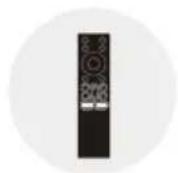
Batteries/2 Remote Control
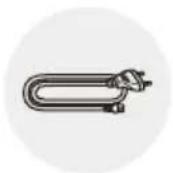
Power Cord
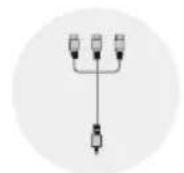
Mini AV IN Cable
User Manual/1
Wall Mounting Bracket
Installation Guide/1
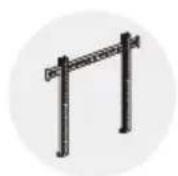
Wall Mount Bracket/1
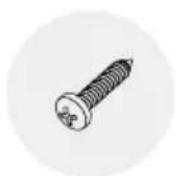
Base Stands Screws/4
Wall Mount Bracket Screws/4
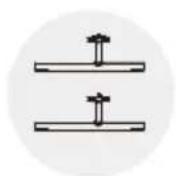
Base Stands/2
Base installation
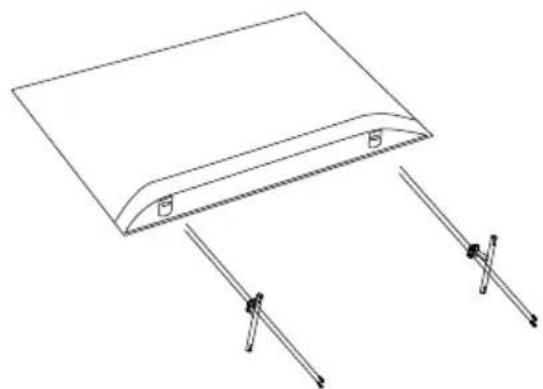
To fix the base stand by screws, and complete the installation.
Note: Illustrations below are provided for reference only and may differ from actual product appearance.
natural_image
Simple line drawing of a flat panel with two clamps and a handle, no text or symbols present.Buttons on the TV
Note: Picture only for reference.
button
Turns the TV on. When TV is on, short press it to confirm items, and long press to pop up the NAV menu.
Sockets
Note: The location and names of the sockets on the TV may vary according to TV model, and some sockets may not available for some models.
LAN → Lan RJ45 plug for connecting to external modem or network access equipment.
OPTICAL - Optical Socket This output can be used to connect a compatible digital audio receiver.
AV Audio Sockets (Input)
Mini AV → The AV IN sockets can be used to connect a range of equipment, including video recorders, camcorders, decoders, satellite receivers, DVD players, or games consoles.
ANTENNA/CABLE IN - Antenna/Cable In Socket (Input) This socket can be used to connect the outside aerial or cable network.
HDMI Socket (Input)
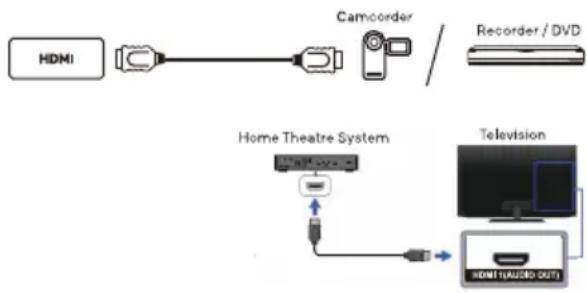
The HDMI (High-Definition Multimedia Interface) socket can be used to connect a PC with a compatible video card installed, certain DVD players or a high-definition compatible digital satellite decoder. This socket provides an uncompressed digital connection that carries both video and audio data by way of an integrated mini-plug cable.
Please note: Audio Return Channel (eARC) returns audio though the same HDMI channel that is used to send video to the TV. If switched on, you won't need a separate audio cable to return sound from the TV. eARC feature is available on HDMI 1.
flowchart
graph LR
    A["HDMI"] --> B["Camcorder"]
    B --> C["Recorder / DVD"]
    D["Home Theatre System"] --> E["+"]
    E --> F["+"]
    F --> G["+"]
    G --> H["+"]
    H --> I["+"]
    I --> J["+"]
    J --> K["+"]
    K --> L["+"]
    L --> M["+"]
    M --> N["+"]
    N --> O["+"]
    O --> P["+"]
    P --> Q["+"]
    Q --> R["+"]
    R --> S["+"]
    S --> T["+"]
    T --> U["+"]
    U --> V["+"]
    V --> W["+"]
    W --> X["+"]
    X --> Y["+"]
USB Sockets (Input) USB - These sockets can be used to connect an USB device. Note: The number of USB sockets on the TV may vary according to TV model.
Headphone Socket (Output) Allow you to connect earphones to listen to the sound coming from the TV. Note: Excessive sound pressure from earphones can cause hearing loss.
Connection notes
When connecting an external device, note the following.
The number of connectors and their names and locations may differ with the model.
Refer to the external device's user manual when connecting it to the TV. The number of external device connectors and their names and locations may differ with the manufacturer.
Connection notes for HDMI
•The following types of HDMI cables are recommended:
- High Speed HDMI Cable
- High Speed HDMI Cable with Ethernet
- Premium High Speed HDMI Cable
- Premium High Speed HDMI Cable with Ethernet
-
Ultra High Speed HDMI Cable
-
Use an HDMI cable with a thickness of 17 mm or less.
- Using a non-certified HDMI cable may result in a blank screen or a connection error.
- Some HDMI cables and devices may not be compatible with the TV due to different HDMI specifications.
- This TV does not support HDMI Tthernet Channel. Ethernet is a local Area Network(LAN) built with coaxial cables standardised by the IEEE.
- Use a cable shorter than 3 m to get the best UHD viewing quality.
- Many computer graphics adaptors do not have HDMI ports, but have DVI or DisplayPort ports instead. If your PC does not support HDMI video out, connect your PC with a DVI to HDMI to DisplayPort cable.
- When the TV is connected to an external device such as a DVD/BD player or a set-top box via HDMI, power sync mode will be automatically activated. In the power sync mode, the TV continues to detect and connect external devices via HDMI cable. This function can be deactivated by removing the HDMI cable of the connected device.
Note: The pictures are only for reference.
Remote control functions
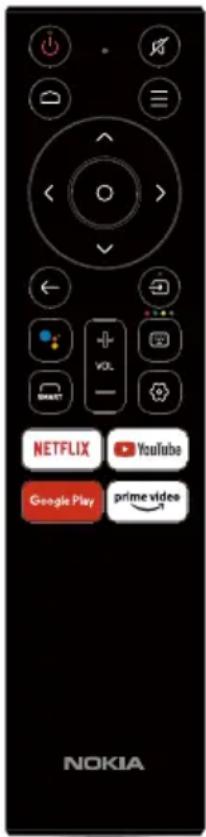
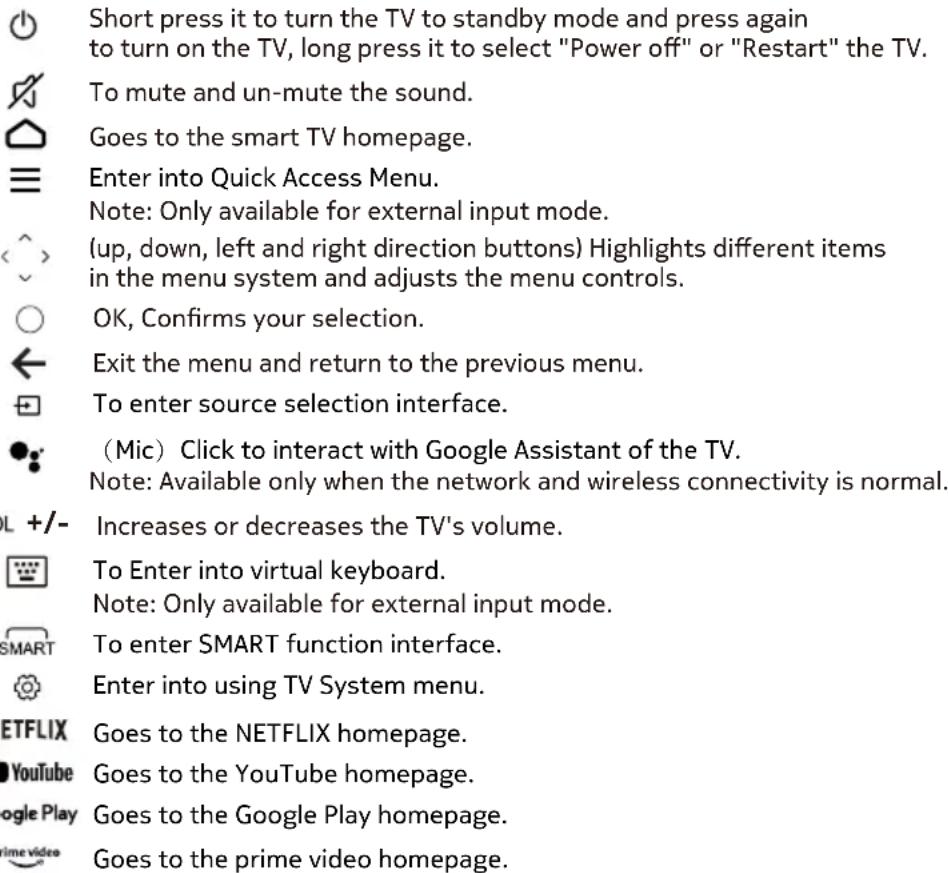
Most of your television's functions are available via the menus that appear on the screen. The remote control supplied with your set can be used to navigate through the menus and to configure all the general settings.
How to pair remote control with TV via wireless connectivity
natural_image
Close-up of a black remote control with white fingers pointing at the button (no text or symbols visible)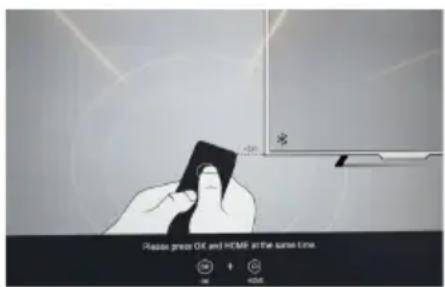
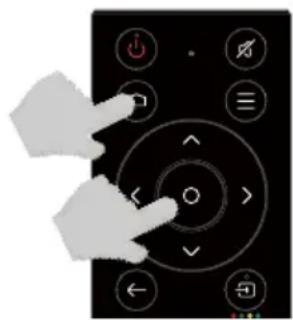
This is an infrared remote control with wireless connectivity intergrated, before using voice control, please pair it with the TV firstly.
The following steps are for your reference:
Step 1: Press △ button to enter the home page.
Step 2: Press ● button to enter the "RC pairing".
Step 3: Follow the "Settings tips page", Press OK and ⏰ together.
Step 4: When the pairing is finished, the screen will display “Success !”. Note: if it can't pair successfully for 2 minutes, please repeat the above steps for pairing again.
If you want to unpair the wireless connectivity remote, follow the steps below:
Step 1: Press 🔒 button to enter the home page.
Step 2: Press ▲/▼ ◀/▶ to choose Ⓞ, and then press OK to enter.
Step 3: Press ▼ to select “Remotes & Accessories” and then to choose the wireless connectivity remote name to enter next steps.
Step 4: Press unpair and then choose OK button.
Switching on
Follow the instructions on this page on how to switch on your TV set and the remote control before going on to following pages describing how to use the channel set-up procedure.
- Insert two batteries in the remote control.
Precautions on using batteries:
- Only use the battery types specified.
- Make sure you use the correct polarity.
- Do not mix new and used batteries.
- Do not use rechargeable batteries.
- Do not expose batteries to excessive heat such as sunshine, fire or the like, throw them in a fire, recharge them or try to open them, as this could cause them to leak or explode.
-
Remove the batteries from the remote control if you are not using it for a long period of time.
-
Connect an outside aerial to the ANTENNA IN socket at the back of the TV set.
- Connect the power cable firstly to the television, then to a mains socket.
- Now the TV set is in standby mode with power indicator. Press the ⏻ button on the remote control or on the TV set to turn on the TV.
Switching off
- To put the TV set into standby mode, press the ⏻ button on the remote control, the TV set remains powered up, but with low energy consumption.
- To switch off the TV set, long press ⏻ button on remote control and select “ power off ”, then unplug the power plug from the mains outlet.
Network connection
To access the internet, you must subscribe high speed broadband internet service from your internet service provider. Your TV can be connected to your home network in two ways:
- Wired, using the RJ45 (LAN) connector on the back panel.
- Wireless, using the internal wireless or external wireless USB adapter and your home wireless network.
Note: This function is not available for certain models. Instructions below are just the usual ways to connect your TV to the wired or wireless network. The connection method may be different depending on your actual network configuration. If you have any questions about your home network, please refer to your ISP (Internet Service Provider).
Connecting to a wired network
To connect to a wired network:
- Ensure you have:
• An ethernet cable long enough to reach your TV
• A router or modem with an available Ethernet port
• A high-speed internet connection
• An Ethernet (LAN) port on the back of the TV
-
Connect your ethernet cable to the router and to the Ethernet port on the back of the TV.
-
Use the Network Settings to configure the TV.
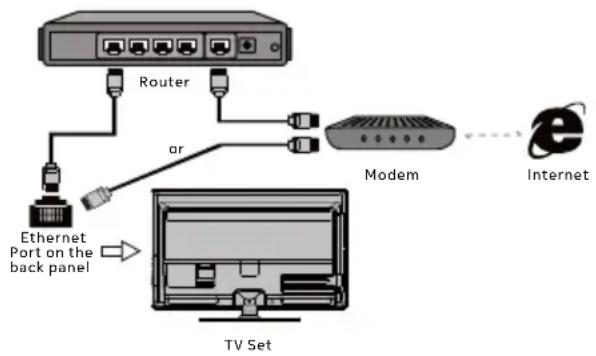
flowchart
graph TD
    A["TV Set"] --> B["Ethernet Port on the back panel"]
    B --> C["Router"]
    C --> D["Modem"]
    D --> E["Internet"]
    style A fill:#f9f,stroke:#333
    style B fill:#ccf,stroke:#333
    style C fill:#cfc,stroke:#333
    style D fill:#fcc,stroke:#333
    style E fill:#cff,stroke:#333
Connecting to a wireless network
To connect to a wireless network
- Ensure you have:
• A router broadcasting a high-speed wireless signal
• A high-speed internet connection
- A wireless USB Adapter (not need for a built-in wireless connection).
-
The TV set with Wi-Fi Module.
-
Use the Network menu to configure the TV.
Note: Some models may have internal wireless module, then the wireless USB adapter is unnecessary. Some external wireless adapters cannot be compatible with the TV.
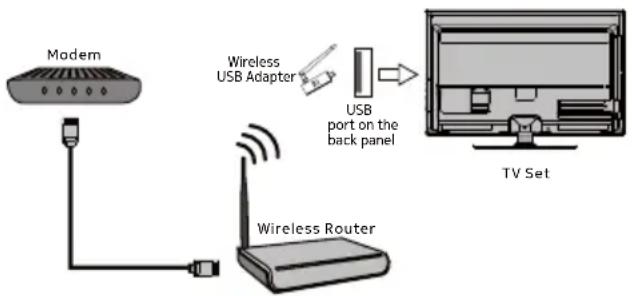
flowchart
graph TD
    A["Modem"] --> B["Wireless Router"]
    B --> C["TV Set"]
    D["Wireless USB Adapter"] --> E["USB port on the back panel"]
Initial setup
The first time you switch the set on, the Initial setup screen appears, which guides you through the initial setup process. Follow the on-screen instructions to finish the initial setup process such as selecting the language, connecting to the network, scanning channels, and more. During each step, either make a choice or skip the step. If you skip a step, you can perform the setup later from the settings menu.
Note: If the channel search retrieved only the analogue channels it could be caused by poor broadcasting and therefore is not covered by manufacturer warranty. Manufacturers cannot be held responsible for lack of or poor broadcasting in some areas.
Note: This manual is for common use. Figures and illustrations in this User Manual are provided for reference only and may differ from actual product appearance.
You can select all the features from homepage.
- Press △ to display homepage.
- Press ▲/▼/◄/► to select icons from the screen list.
- Press OK to enter each option.
- To exit the menu, press ← .
Using homepage - TV

Source: Select the input source from devices connected to TV through different ports.
Settings: Allows you to adjust TV settings.
Using homepage-Apps
Apps: Press ◀/▶ to select, press OK to Enter.
WARNING:
- Configure the network settings before using Smart TV applications.
- Slow responses and/or interruptions may occur, depending on your network conditions.
- If you experience a problem using an application, please contact the content provider.
- According to circumstances of the contents provider, an application's updates or the application itself may be discontinued.
- Depending on your country's regulations, some applications may have limited service or not be supported.
- Changes in application content may be made without prior notice by the service provider.
Accessing channels
Using the numeric buttons Press the corresponding numeric buttons on the remote control to access the channels.
Using the CHv/^buttons Press the CHv/^ buttons on the remote control or the corresponding buttons on the TV set to scroll through the channels.
Watching connected devices
Press SOURCE then press ▲/▼ to select your desired source, and then press OK to confirm.
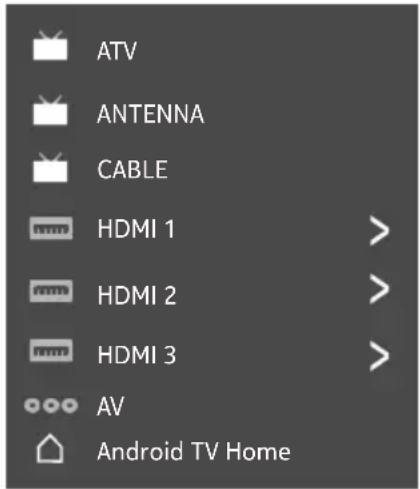
Note: The available source might differ depending on the model.
Volume
Volume control : Press the VOL +/- buttons on the remote control or the corresponding buttons on the TV set to increase or decrease the volume.
Sound mute : Press the ✗ button to temporarily mute the sound. Press this button again or the VOL + button to restore the sound.
Using quick access menu
Note: Some of the functions might be unavailable in certain sources. And for some models, certain options are not available.
This section explores the menus and settings of your TV. Each menu is outlined and detailed to help you get the most from your TV. To access the menu system:
- In TV mode, press ≡ on the remote control to display the quick access list.
- Press ▲/▼ to select the desired item, then press OK to open the corresponding submenu.
- In submenu, use ◀/▶ and OK buttons to make the adjustments, or use ▲/▼ to select an item, use OK to enter and operate according to the on-screen display or guide.
- Press return to the previous menu.
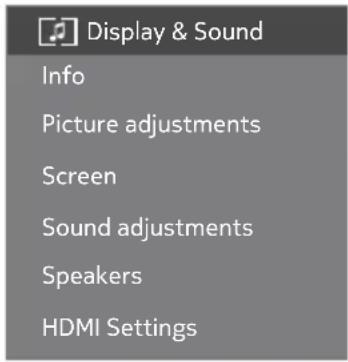
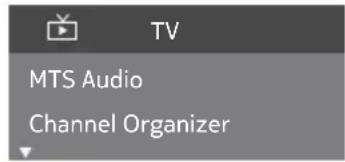
Display & Sound
Info: Select this option to view TV information.
Picture adjustments: Enter to adjust picture mode or Advanced settings.
Screen: Select this option to adjust the picture size.
Sound adjustments: Select this option to set the sound adjustments.
Speakers: To enter TV speaker settings.
HDMI Settings: Enter to set up HDMI devices for streamlined control.
TV setting
MTS audio: Enter to check MTS audio.
Scan channels: To setup Analogue or Digital channels.
Channel organizer: Press ▲/▼ to select Channel and
Press OK enter submenu, Press ▲/▼ to select Hide/Unhide, edit, delete channels, press OK to confirm.
Note: Display only under ATV/DTV source.
TV settings
The Settings menu allows you to check the TV with your preferences.
Note: Some of the functions might be unavailable in certain sources. And for some models, certain options are not available.
This section explores the menus and settings of your TV. Each menu is outlined and detailed to help you get the most from your TV. To access the menu system:
- In TV mode, press ⚙ on the remote control to display the quick access list.
- Press ▲/▼ to select the desired item, then press OK to open the corresponding submenu.
- In submenu, use ▲/▼ and OK buttons to make the adjustments, or use ▲/▼ to select an item, use OK to enter and operate according to the on-screen display or guide.
- Press to return to the previous menu.
Channels setup(Cables/Antennas)
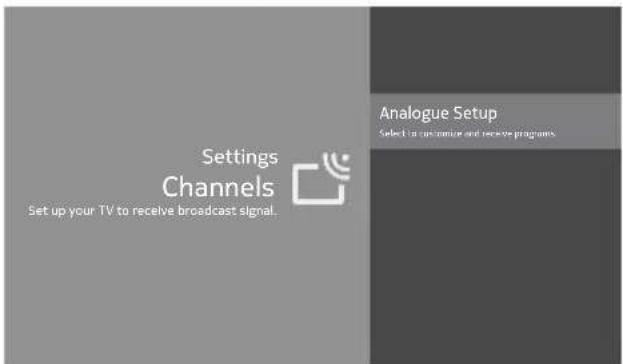
Analogue setup
- Analogue Auto Tuning: Press OK to start the automatic search process. The search may take a few minutes.
- Analogue Manual Tuning: Press OK to enter the interface. Press ▲/▼ to set program, TV system or color system item, then Press ▲/▼ select frequency and press OK to search channel.
- Teletext setup
(1) Preferred teletext: Press OK and then use ▲/▼ to select preferred teletext.
(2) Decoding page language: Press OK and then use ▲/▼ to select decoding page language.
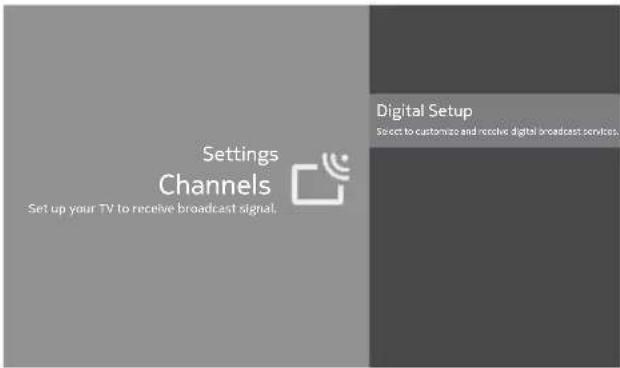
Digital setup
- Digital antenna tuning: Press OK to start the automatic search process. The search may take a few minutes. During the process, you can press ← and choose YES to exit.
- Subtitle setup:
(1) Subtitle setting: Include off, basic, hearing impaired.
(2) Primary preferred language:
Press OK and then use ▲/▼ to select primary preferred language.
(3) Second preferred language:
Press OK and then use ▲/▼ to select second preferred language.
- Teletext setup
(1) Preferred teletext: Press OK and then use ▲/▼ to select preferred teletext.
(2) Decoding page language: Press OK and then use ▲/▼ to select decoding page language.
- Audio setup
(1) Dialogue enhancement: Include off and on.
(2) Dialogue enhancement level:
Press OK and then use ◀/▶ to set dialogue enhancement level.
(3) Audio description: Include off and on.
(4) Audio description mixing level:
Press OK and then use ◀/▶ to set audio description mixing level.
(5) Audio type: Include normal, hearing impaired and visual impaired
(6) Primary preferred language:
Press OK and then use ▲/▼ to select primary preferred language.
(7) Secondary preferred language:
Press OK and then use ▲/▼ to select second preferred language.
Picture & Display
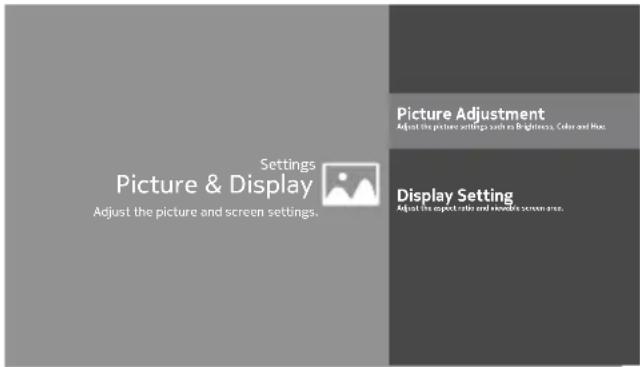
Picture adjustment:
- Picture mode: Optimize picture quality for general content. Use ▲/▼ to scroll through the picture preset settings: standard, dynamic, eye protect plus, movie and personal.
- Advanced settings:
Access advanced picture enhancing options.
Brightness: Adjust the brightness of the picture.
Color: Adjust the color saturation.
Clarity: Advanced technique for picture enhancement.
Motion: Select the motion compensation.
Reset: To reset picture adjustment.
Display setting:
- Screen mode: Adjust the picture size. Use ▲/▼ to scroll through the screen mode preset settings.
- Auto screen: Automatically adjusts screen mode based on the signal. Include on and off.
- Overscan: Adjust overscan display, include on/off.
Sound
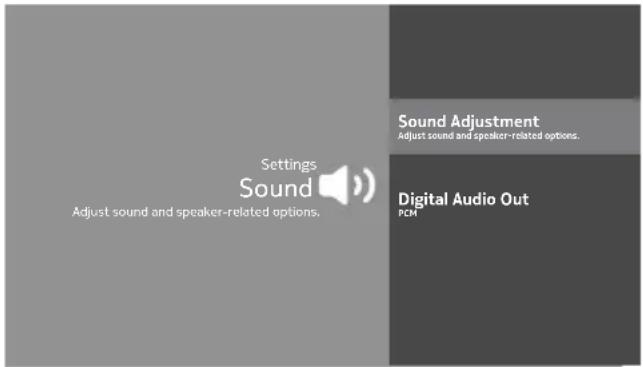
Sound adjustment: Adjust sound and speaker-related options.
- Sound mode: Optimize sound quality for general content. Use ▲/▼ to scroll through the sound preset settings: sports, standard, movie, music and news.
- Surround: Reproduces life-like surround sound when playing 5.1-channel audio sources. Include on and off.
- Dolby atmos: Open dolby atmos or not. Include on and off.
- Surround Virtualizer: It can be selected when dolby atmosphere. Include on and off.
- Dialogue enhance: Select the level. It can be selected when dolby atmos is on.
- Volume leveler: Select the level. it can be selected when dolby atmos is on.
- Advanced setting: Access advanced sound enhancing options.
Volume setting:
(1) Auto volume: Keeps the volume level constant for all programs and inputs. Include auto and off.
(2) eARC: Include on and off. Option will show after connected HDMI 2.0.
(3) Balance: Adjust the speaker balance.
(4) Digital audio out volume: Applied for PCM only. The volume levels between PCM and compressed audio will differ.
(5) Digital audio out delay: Set the delay time for digital audio.
Sound mode related:
(1) Surround effect: Use ◀/▶ to scroll through surround effect.
(2) Equalizer: Use ◀/▶ ▲/▼ to scroll through equalizer.
Reset: To return all sound settings to factory default.
Digital audio out: Optical out for audio signals from the digital audio out.
Smart zone

Enjoy music: Select this option to enter into audio only mode.
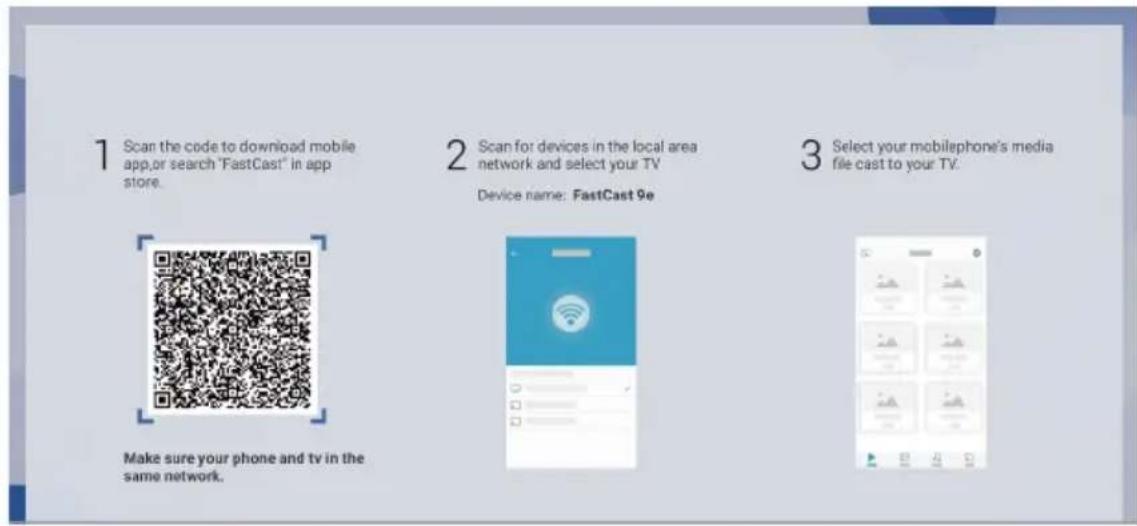
Fast cast: An app that quickly delivers mobile content to TV, allowing users to quickly deliver multimedia content such as photos, videos, music and more to TV terminals.
Cast local media:
- Scan the code to download mobile app, or search "Fastcast" in app store.
(Make sure your phone and tv in the same network.) - Scan for devices in the local area network and select your TV.
- Select your mobilephone's media file cast to your TV.
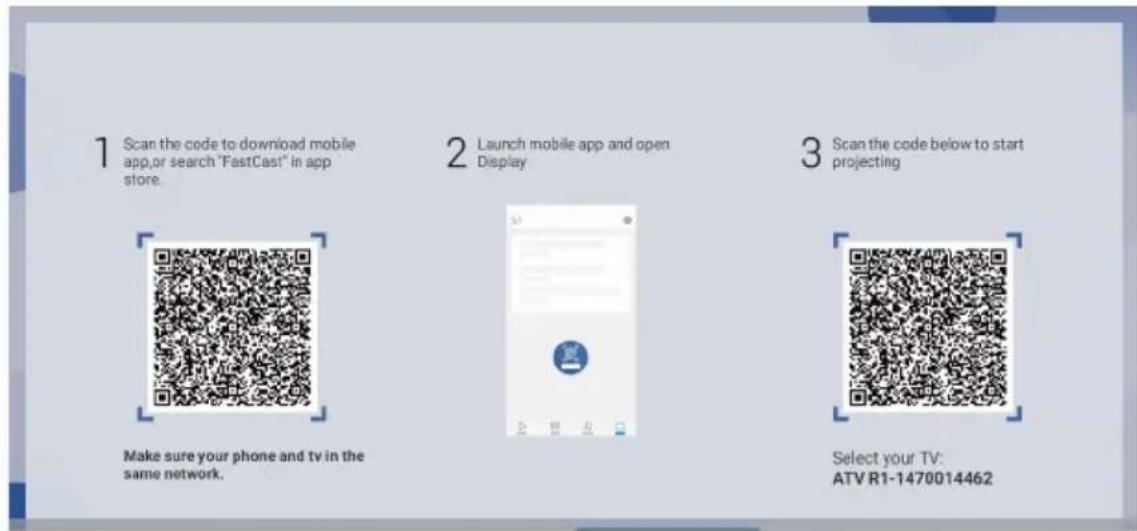
QR cast:
- Scan the code to download mobile app, or search "Fastcast" in app store.
(Make sure your phone and tv in the same network.)
-
Lanuch mobile app and open display.
-
Scan the code below to start projecting.
HotSpot:
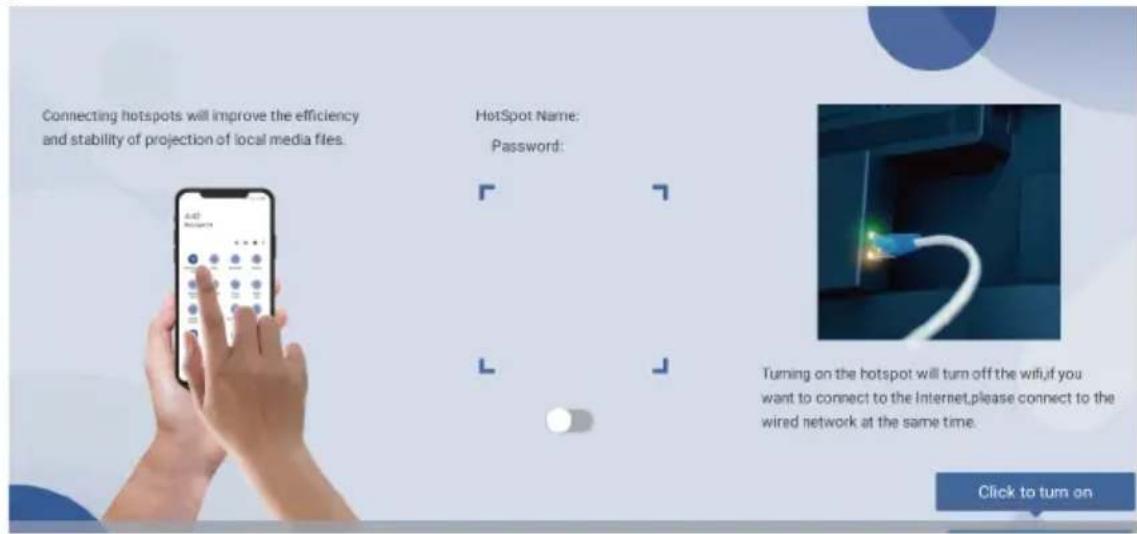
- Connecting hotspots will improve the efficiency and stability of projection of local media files.
- Turning on the hotspot will turn off the wifi, if you want to connect to the Internet, please connect to the wired network at the same time.
Note:
-
This function may be unavailable for some mobile devices, and it subject to chipset support the files format.
-
Recommendations of working environments:
A: Local area network speed recommendations on: 1M/S\~2M/S.
B: Files required: MP4, AVI, TS, FLV, f4v, m3u8 (subject to chipset supported).
- You can also connect smartphone to TV Hotspot.
Press "Hotspot" icon to get Hotspot information including WIFI SSID and password.
Sleep timer: The options include: off, 15min, 30min, 45min, 60min, 90min, 120min and off.
World clock: Enter to add world clock.
Meeting: Enter the meeting mode.
Night mode: Turn on to keep brightness to prevent disturb others. Clear brightness at a low level.
System
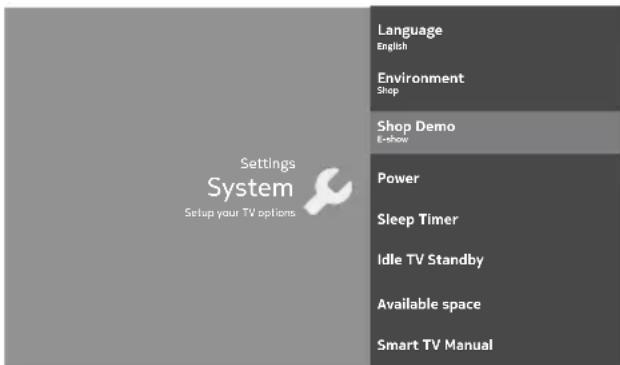
Language: Use▲/▼ to scroll through language.
Environment: Enter to set home or shop mode.
- Home mode: You would be able to view the standard settings for picture and sound modes.
- Shop mode: You can enjoy enhanced setting for picture and sound modes.
Note: Picture menu settings will not be accessible when you select shop mode.
Shop demo: Enter to set E-show or E-sticker.
Note: E-sticker is not available for certain model.
Power: Enter to set power mode.
- Wake on network: Enable wake on network settings.
- Network standby: Enable wake on ethernet settings.
Sleep timer: Set the TV to turn off automatically.
Idle TV standby: Select the inactivity time that TV enter standby.
Available space: Show the system storage size and memory size.
Smart TV manual: Show the guide to get smart TV manual by smartphone.
Using fast cast
Cast local media:
QR cast:
HotSpot:
Audio connect (Two way wireless connectivity) Application guide
Audio connect is a directional application for audio transmission. It supports the setting of two working modes. The first mode is to push audio from the TV to the audio peripheral. The second mode is to push audio to the TV from a wireless connectivity playback device (such as a mobile phone). In the initial state, the default mode is mode one. The following describes how to use the two working modes.
Mode 1: The TV sends audio to the audio peripherals
Step 1: Click on the homepage Apps to launch Audio Connect App, as shown below Figure 1:
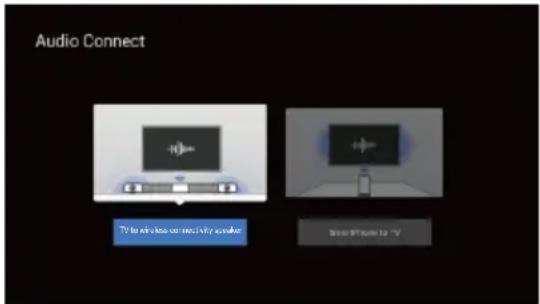
Figure 1
Step 2: Click [TV to wireless connectivity speaker], if the TV is already in the current mode, it will jump to the search wireless connectivity device interface. At this time, you can search for nearby wireless connectivity audio peripherals, and click Connect, as shown below Figure 2:
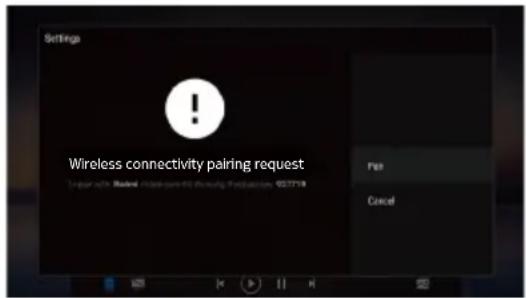
Figure 2
If TV is in Mode 2 above, at this time, click [TV to wireless connectivity speaker] to pop up a prompt dialog, Click Yes again to jump to the above Figure 2, as shown below Figure 3:
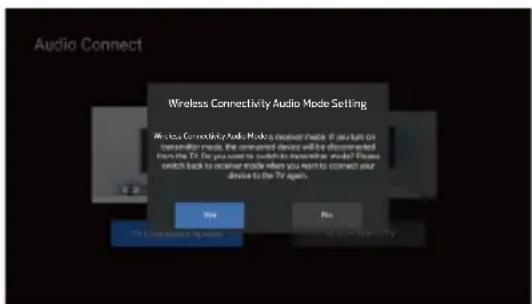
Figure 3
In the mode, after successfully connecting with peripheral devices such as wireless connectivity audio, when the TV side plays audio and video, audio will be output through the peripheral device.
Mode 2: Wireless connectivity playback device pushes audio to the T\
Step 1: Start the App according to Step 1 in the above mode 1, If the TV is in the mode at this time, select and click the [SmartPhone to TV] button to pop up a prompt dialog, as shown below Figure 4:
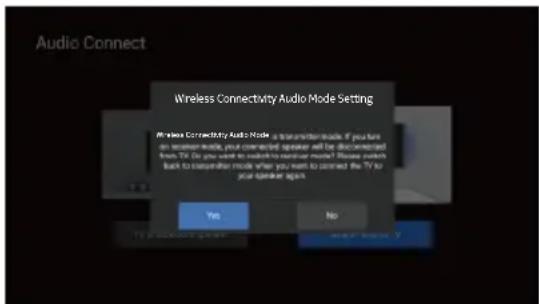
Figure 4
Step 2: Click Yes in the Step 1 prompt dialog, it will switch to mode two, and jump to something like the figure below Figure 5:
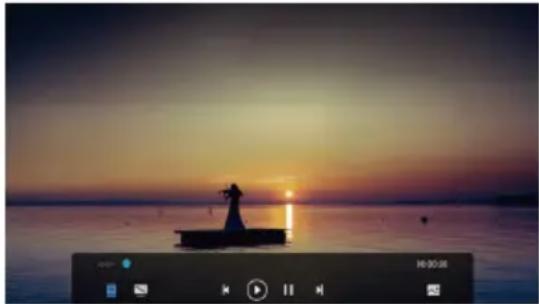
natural_image
Sunset over a calm lake with silhouetted figures on a small boat, captured in a video player interface (no text or symbols on the scene itself)Figure 5
Step 3: Open the list of handheld devices, as shown below Figure 6:
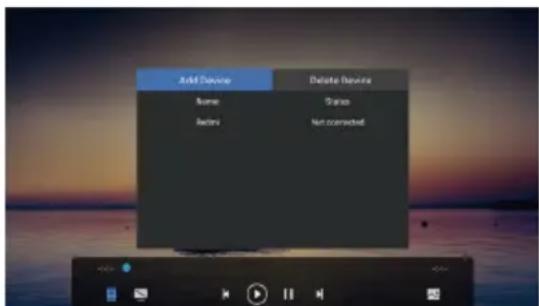
Figure 6
Add device
Click add device and you will be prompted as follows:
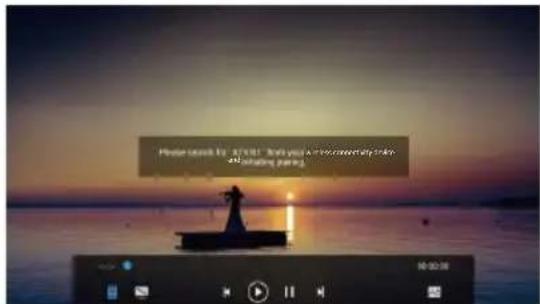
Figure 7
At this time, turn on wireless connectivity on the mobile phone and search for the current TV name. Click the device to connect. During the connection process, you need to click the pairing consent button on the TV and the mobile phone at the same time, as shown below:
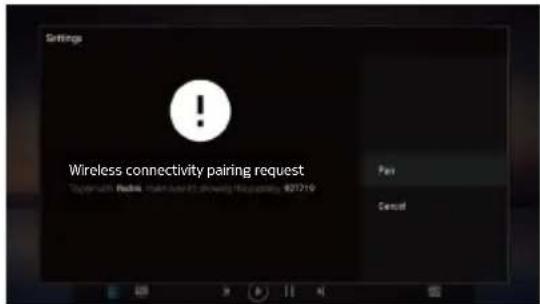
Figure 8
After the connection is successful, there will be connected devices in Figure 6 and then play music through the music player on the phone. The TV will display the playback progress, song information, and can control the playback status.
Delete device
Select Delete Device, then click a device in the list, click Yes to delete the device as shown below:
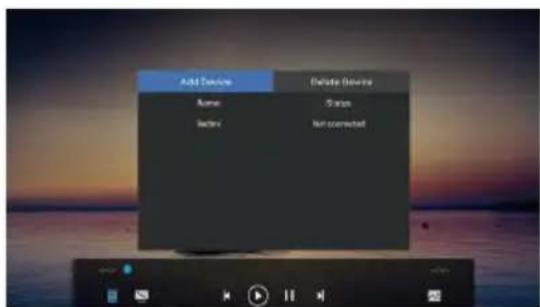
Figure 9
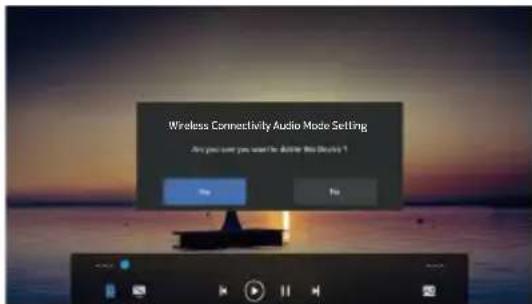
Figure 10
Uncheck delete device
Uncheck Delete Device, if you click the connected device, you can disconnect the device, as shown below:
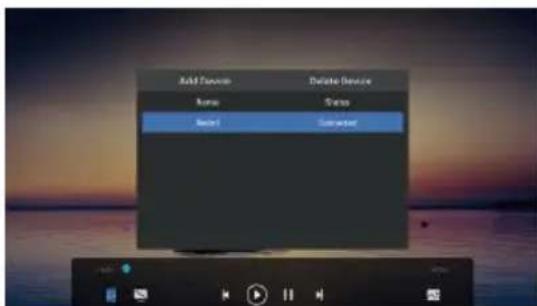
Figure 11
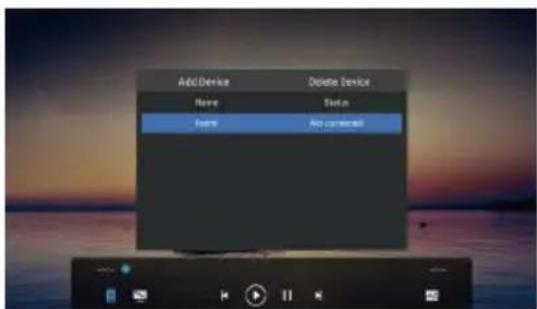
Figure 12
Uncheck delete device, if you click on a device that is not connected, the TV will initiate pairing connection, and the wireless connectivity interface on the TV and mobile phone will pop up Figure 8 and Figure 9 respectively. You need to click pairing. After the pairing is successful, you can Continue to use mobile phone to push music to TV.
Multimedia
Connect a USB device to a USB socket, the screen will show USB file name and then press OK to enter. If no USB device connected, the USB interface will be not displayed.
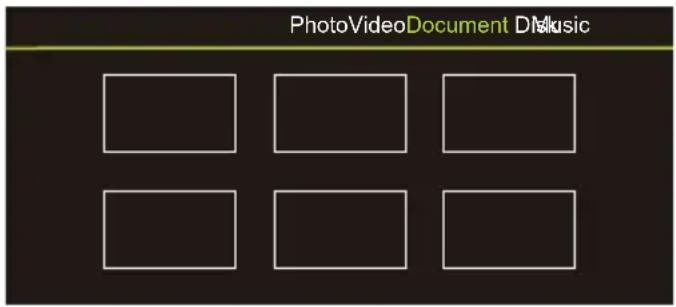
Video:
- Select Video icon, then press OK button to view movie file.
- Press Up, Down, Left or Right direction button to select your desired file and press OK to Play.
- While playing a Video, press OK Menu of remote to display the play console. For the Play console, Press OK key of remote to Play and Pause the video file. Left key of remote to Fast backward. Right key of remote to Fast forward.
- Use ≡ key to see more option: Photo scale, Looping mode, Subtitle, Audio track, Info and Setting.
- Press Return key of remote to Stop playing and Press Return to Exit.
Photo:
- Select Picture icon, then press OK button to view the picture.
- Press Up, Down, Left or Right direction button to select your desired picture file and press OK to show.
- While showing picture, press OK to display the play console. For Previous and Next use remote left and Right key.
- Use OK key to see more option: Manual play, Information, Play mode, BGM: on or off, Left rotation and Right rotation.
Music:
- Select Music icon, then press OK button to listen to Music.
- Press Up, Down, Left or Right direction button to select your desired file and press OK to Play.
- The Play console includes Previous, Play/Pause, Fast backward/Fast forward, Next.
Press ≡ key to see PlayList. - Press Return key of remote to Stop playing.
Disk:
- Select Disk icon, then press OK button to choose folder.
- Press Up, Down, Left or Right direction button to select your desired file and press OK to Play.
- Press Return key of remote to Stop playing.
Troubleshooting
Most problems you encounter with your TV can be corrected by consulting the following troubleshooting list.
No picture, no sound
- Check if the fuse or circuit breaker is working.
- Plug another electrical device into the outlet to make sure it is working or turned on.
- Power plug is in a bad contact with the outlet.
- Check the signal source.
No color
- Change the color system.
- Adjust the saturation.
- Try another channel. Black-white program may be received.
Remote control does not work
- Change the batteries.
- Batteries are not installed correctly.
- Main power is not connected.
No picture, normal sound
- Adjust the brightness and contrast.
- Broadcasting failure may happen.
Normal picture, no sound
- Press the Vol+ button to increase volume.
- Volume is set to mute, press the mute button to restore sound.
- Change the sound system.
- Broadcasting failure may happen.
Unorderly ripples on the picture
It is usually caused by local interference, such as cars, daylight lamps and hair driers. Adjust the antenna to minimize the interference.
Blank screen when connected computer system
Perhaps the TV can not recognize the resolution set by the PC. Suggest to change to the best resolution or other standard resolutions of the Windows system.
Snowy dots and interference
If the antenna is located in the fringe area of a television signal where the signal is weak, the picture may be marred by dots. When the signal is extremely weak, it may be necessary to install a special antenna to improve the reception.
- Adjust the position and orientation of the indoor/outdoor antenna.
- Check the connection of antenna.
- Fine tune the channel.
- Try another channel. Broadcasting failure may happen.
Ignition
Black spots or horizontal streaks appear, or the picture flutters or drifts. This is usually caused by interference from car ignition system, neon lamps, electric drills, or other electrical appliance.
Factory reset:
Home → Settings → Device Preference → About → Factory Reset
Network failure:
Check if the router works well. Make sure the TV has connected to the router successfully. sometimes unsynchronized time can impact network connection. In that case, manually change the time in settings menu via below path
Home → Settings → Device Preference → Date & Time Disable the automatic date and time, and set the date and time manually.
Smart player
For optimal experience of USB(Multimedia), Please download ES File explorer from Google play store.
"No support for the format of media file, play the next video!" appears or audio is normal but video is abnormal.
The media file maybe damaged. Check if the file can be played on the computer. Check if video and audio codec is supported.
"No support for the format of media file, play the next audio!" appears or audio is normal but video is abnormal.
The media file maybe damaged. Check if the file can be played on the computer. Check if video an audio codec is supported.
Due to differences in programming tools and other factors, some of the file formats that are listed may or may not work.
| Medium | File Format |
| Video | MPG, MPEG, MP4, MKV, AVI, ASF, FLV |
| Picture | JPEG, PNG, BMP |
| Music | MP3, WMA, AAC, FLAC |
Specifications
| Model: | 43UHDADNDT52X | 50UHDAQNDT5Q | 50UHDADNDT52X |
| Working voltage: | 100-240V~50/60Hz | 100-240V~50/60Hz | 100-240V~50/60Hz |
| Rated power consumption: | 100W | 140W | 120W |
| Dimensions without stand (WXHXD): | 965.5x570.8x107.7mm | 1120.3x656.7x111mm | 1120.3x656.7x111mm |
| Dimensions with stand (WXHXD): | 965.5x627x219.5mm | 1120.3x715.8x229mm | 1120.3x715.8x229mm |
| Net weight without stand: | 7.8kg | 11kg | 10.4kg |
| Net weight with stand: | 8.06kg | 11.3kg | 10.7kg |
| Ram Capacity | 2GB | ||
| Storage Memory | 16GB | ||
| RF aerial input: | 75 ohm unbalanced | ||
| Language of OSD: | Multiple options | ||
| System: | DTV: DVB - T/T2/CATV: PAL BG/I/DK | ||
| Channel coverage: | DVB-T/T2: 177.5Mhz~226.5Mhz474.Mhz~858MhzDVB-C: 51Mhz~858MhzATV: 47.25Mhz~870Mhz | ||
| Environment(only for Tropical climates zone): | Working temperature: 5°C~45°CWorking humidity: 20%~80%Storage temperature: -15°C~50°CStorage humidity: 10%~90% | ||
| Environment(only for Moderate climates zone): | Working temperature: 5°C-35°CWorking humidity: 20%~80%Storage temperature: -15°C~45°CStorage humidity: 10%~90% | ||
Note:
Some features may vary or not available in actual product, depends upon installation conditions & availability of required services in particular region.
Specifications
| Model: | 55UHDAQNDT5Q | 55UHDADNDT52X |
| Working voltage: | 100-240V~50/60Hz | 100-240V~50/60Hz |
| Rated power consumption: | 175W | 145W |
| Dimensions without stand (WXHXD): | 1234.9x713.5x110mm | 1234.9x713.5x110mm |
| Dimensions with stand (WXHXD): | 1234.9x782.7x229mm | 1234.9x782.7x229mm |
| Net weight without stand: | 13.06kg | 13.06kg |
| Net weight with stand: | 13.4kg | 13.4kg |
| Ram Capacity | 2GB | |
| Storage Memory | 16GB | |
| RF aerial input: | 75 ohm unbalanced | |
| Language of OSD: | Multiple options | |
| System: | DTV: DVB - T/T2/CATV: PAL BG/I/DK | |
| Channel coverage: | DVB-T/T2: 177.5Mhz~226.5Mhz474.Mhz~858MhzDVB-C: 51Mhz~858MhzATV: 47.25Mhz~870Mhz | |
| Environment(only for Tropical climates zone): | Working temperature: 5°C~45°CWorking humidity: 20%~80%Storage temperature: -15°C~50°CStorage humidity: 10%~90% | |
| Environment(only for Moderate climates zone): | Working temperature: 5°C-35°CWorking humidity: 20%~80%Storage temperature: -15°C~45°CStorage humidity: 10%~90% | |
Note:
Some features may vary or not available in actual product, depends upon installation conditions & availability of required services in particular region.
License
androidtv
Android TV, Google Play, Chromecast and Youtube are trademarks of Google LLC.

The Adopted Trademarks HDMI, HDMI High-Definition Multimedia Interface, and the HDMI Logo are trademarks or registered trademarks of HDMI Licensing Administrator, Inc. in the United States and other countries.

Dolby, Dolby Vision, Dolby Audio, Dolby Atmos, and the double-D symbol are trademarks of Dolby Laboratories Licensing Corporation. Manufactured under license from Dolby Laboratories. Confidential unpublished works. Copyright ©1992–2021 Dolby Laboratories. All rights reserved.
Note:
- The information in this document is subject to change without notice. The manufacturer accepts no liability for damage resulting directly or indirectly from faults, incompleteness or discrepancies between the user manual and the product described.
- In dry environment due to static electricity, the product may restart and return to the main OSD interface, USB player interface or the previous source mode. It is normal and please continue to operate the TV as you will.
Warranty Terms & Conditions:
Flipkart India Private Limited ("Company") warranties the product to be free from manufacturing defects or any other specific defect as may be specified in the Specific Terms and Conditions below. The warranty is for a period mentioned in the Specific Terms and Conditions below, the invoice (if not specified in the Specific Terms and Conditions below), as well as the product listing page, and such period shall commence from the date of purchase of the product by the first end user. This is a nontransferable warranty, valid only in the territory of India and extended only to the first end user customer ("Customer") basis the following terms and conditions, which the Customer is deemed to have accepted upon purchase of the product:
- The warranty period of the product is 1 year, commencing from the date of purchase, Warranty service which includes replacement or repairs, will be carried out through the Authorised Service Centers ("ASC/s") only.
- Warranty will be valid only when the original purchase invoice is presented at the time of service. Company reserves the right to decline warranty service, if the purchase invoice is not presented.
- In case of commercial usage of the product, warranty period would be limited to 90 days only.
- Warranty covers issues only pertaining to functional parts and manufacturing defects. It doesn't cover issues/damages resulting from an unauthorized adaptation/adjustments/tampering, improper installation/use, deviation from the instructions laid out in the user manual (if applicable), mishandling by the customer or third party in the absence of the company official/technician. It also doesn't cover normal wear and tear of the television parts under warranty.
- Warranty does not cover any external accessories and fittings to the product.
- All plastic, rubber, glass, or aesthetic parts and consumable replacements will be on a chargeable basis.
- Warranty shall not apply to damages caused to the product by accident, voltage fluctuations, lightening, ingress of water (beyond certified limits, if any), fire or any other natural calamity, improper ventilation, dropping or excessive shock, or any external cause beyond Company's control.
- Company shall retain all products or spare parts which are replaced and the ownership of the same shall vest with the Company.
- Company is not liable to provide repair services or spare parts after the period of warranty expires and the same if provided will be on a chargeable basis.
- Whilst the Company, through its ASC, shall make every effort to carry out the service at the earliest, it is expressly clarified that the Company is under no obligation to do so within a certain time period.
- Whilst Company would take all necessary steps to repair the product under warranty and maintain sufficient stock of the spare parts of the products, in certain cases, at its sole discretion, Company may due to non-availability of spare parts of the product or product being in a state which is beyond economic repair, offer a replacement scheme to the Customer. The terms of such replacement offer is subject to change from year to year and shall also be applicable on the maximum retail price of the product.
- All transportation & handling expenses incurred while replacing or repairing will be payable by the Customer.
-
Flipkart is not responsible for the functionality of any third-party application listed on Google Play Store. Some functions or services may not be available depending on the region or country. Any malfunction in the third-party application will be resolved through dedicated customer centre of the respective third-party application.
-
For any warranty claim requested by the Customer from the region beyond municipal limits of the jurisdiction of the ASC, a visit by an authorised service personnel may be arranged by the Company through its ASC, on a case to case basis, at its sole discretion and the charges towards such visit will be borne by the Customer.
-
Warranty shall be void if:
-
The type or serial no. on the product has been altered, removed or defaced.
- The product is not operated as per the instructions given in the User Manual, if any.
- The defects are caused by household pets, rats, cockroaches or any other animals or insects.
- The warranty automatically expires after the period of time stated in the product invoice even if the product may not be in use for any time for whatever reasons.
- This Warranty shall not affect Customer's statutory rights under any applicable law
- Customer agrees to indemnify and keep Company harmless against all damages, liabilities, costs, expenses, claims, suits and proceedings (including reasonable attorney's fee) that may be suffered by the Company as a consequence of: (i) violation of these terms and condition by the Customer; (ii) violation of applicable laws by the Customer; (iii) any action or inaction resulting in willful misconduct or negligence on the Customer's part.
- In the event of repairs of any part (s) of the product, the Warranty will thereafter continue and remain in force only for the unexpired period of the Warranty. Moreover, the time taken for repair and in transit whether under the Warranty or otherwise shall not be excluded from the Warranty period.
- None of the employees, sellers, dealers or ASCs of the Company have the authority to vary these terms and conditions.
- Customer agrees that the courts at Bangalore shall have the exclusive jurisdiction to settle any dispute that may arise in relation to this Warranty or these terms and conditions.
- COMPANY SHALL NOT BE LIABLE FOR ANY INDIRECT, SPECIAL, PUNITIVE, EXEMPLARY, SPECULATIVE OR CONSEQUENTIAL DAMAGES, INCLUDING, BUT NOT LIMITED TO, ANY LOSS OF USE, BUSINESS INTERRUPTION, AND LOSS OF INCOME OR PROFITS, IRRESPECTIVE OF WHETHER IT HAD AN ADVANCE NOTICE OF THE POSSIBILITY OF ANY SUCH DAMAGES.
- For any further information / assistance please contact our customer Redressal cell at:
Flipkart India Private Limited,
Buildings Alyssa, Begonia & Clove Embassy Tech Village,
Outer Ring Road,
Devarabeesanahalli Village,
Bangalore, Karnataka-560103 India
Tel. no.:080-46331010
Email: support.nokia@flipkart.com
KEEP OUT OF REACH OF CHILDREN
Children should be supervised to ensure that they do not play with the appliance.
Nokia Smart TV
43UHDADNDT52X
50UHDADNDT52X
50UHDAQNDT5Q
55UHDADNDT52X
55UHDAQNDT5Q
Your smart TV viewing experience just got more true-to-life.
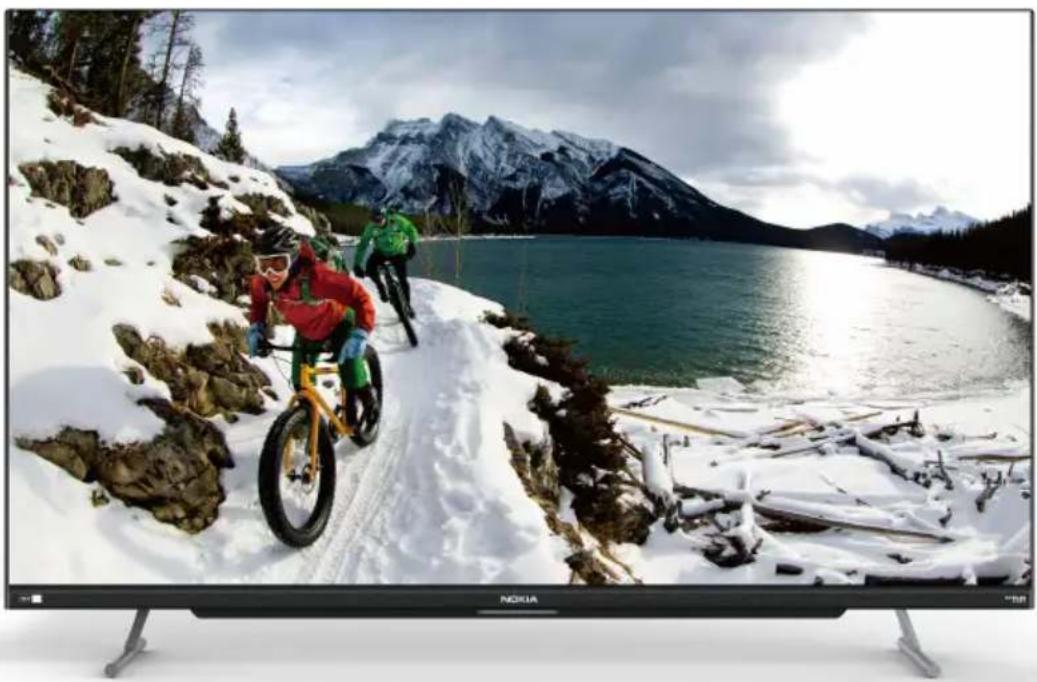
With Sound by JBL, 30W box speakers and 30W tweeters you don't just hear the sounds on Nokia Smart TV, you live each on-screen moment. The Dual band WiFi and Harman Audio EFX give seamless performance, taking entertainment to the next level.
natural_image
Nokia TV displaying a snowy mountain landscape with two cyclists on a snowy road beside a lake (no text or symbols visible)SOUND BY

Dual band WiFi
30W Box Speakers 30W Tweeters
HARMAN AudioEFX
- Chapter 1: Introduction
- Chapter 2: General operation
- Chapter 3: Homepage operation
- Chapter 4: Using your TV
- Chapter 5: Other information
- Warning and precaution
- Important safety instructions
- This product is RoHS compliant
- Disposal of used electrical & electronics equipment
- Positioning the TV
- Mounting on a Wall
- Note:
- Precautions For Using Battery
- Standard accessories
- Base installation
- Buttons on the TV
- Sockets
- AV Audio Sockets (Input)
- HDMI Socket (Input)
- Connection notes
- Connection notes for HDMI
- Remote control functions
- How to pair remote control with TV via wireless connectivity
- Switching on
- Switching off
- Network connection
- Connecting to a wired network
- Connecting to a wireless network
- Initial setup
- Using homepage - TV
- Using homepage-Apps
- WARNING:
- Accessing channels
- Watching connected devices
- Volume
- Using quick access menu
- Display & Sound
- TV setting
- TV settings
- Analogue setup
- Digital setup
- Picture adjustment:
- Display setting:
- Volume setting:
- Sound mode related:
- Smart zone
- Cast local media:
- QR cast:
- HotSpot:
- System
- Using fast cast
- Audio connect (Two way wireless connectivity) Application guide
- Add device
- Delete device
- Uncheck delete device
- Multimedia
- Video:
- Photo:
- Music:
- Disk:
- Troubleshooting
- No picture, no sound
- No color
- Remote control does not work
- No picture, normal sound
- Normal picture, no sound
- Unorderly ripples on the picture
- Blank screen when connected computer system
- Snowy dots and interference
- Ignition
- Factory reset:
- Network failure:
- Smart player
- "No support for the format of media file, play the next video!" appears or audio is normal but video is abnormal.
- "No support for the format of media file, play the next audio!" appears or audio is normal but video is abnormal.
- License
- androidtv
- Warranty Terms & Conditions:
Brand : NOKIA
Model : 55UHDAQNDT5Q
Category : Television