Arya ARGB Midi - PC Case Logic - Free user manual and instructions
Find the device manual for free Arya ARGB Midi Logic in PDF.


| Product Type | PC Case (Midi Tower) |
| Brand | Logic |
| Model | Arya ARGB Midi |
| Form Factor | Midi Tower |
| Motherboard Compatibility | ATX, Micro-ATX, Mini-ITX |
| Power Supply | ATX (not included) |
| Dimensions (W x H x D) | 200 x 450 x 400 mm |
| Weight | 5 kg |
| Material | Steel, Tempered Glass |
| Drive Bays | 2 x 3.5"/2.5" (internal), 2 x 2.5" (internal) |
| Expansion Slots | 7 |
| Front I/O Ports | 2 x USB 3.0, 1 x Audio In/Out, Power, Reset |
| Fan Support | Front: 3 x 120 mm or 2 x 140 mm (ARGB included); Rear: 1 x 120 mm ARGB; Top: 2 x 120/140 mm |
| Radiator Support | Front: up to 240/280 mm; Top: up to 240 mm; Rear: up to 120 mm |
| ARGB Features | Built-in ARGB controller, compatible with motherboard sync (e.g., 5V 3-pin) |
| Dust Filters | Front, top, bottom (removable) |
| Side Panel | Tempered Glass (hinged or screw-mounted) |
| Cleaning and Maintenance | Use a soft dry cloth; avoid liquids; clean dust filters regularly with a vacuum or compressed air |
| Safety Recommendations | Keep away from children; ensure proper ventilation; do not block air vents; place on stable surface |
| Spare Parts and Repairability | Replacement fans, filters, screws, and ARGB controller available from authorized vendors |
| Included Accessories | User manual, screw kit, cable ties, ARGB remote (if applicable) |
Frequently Asked Questions - Arya ARGB Midi Logic
User questions about Arya ARGB Midi Logic
0 question about this device. Answer the ones you know or ask your own.
Ask a new question about this device
Download the instructions for your PC Case in PDF format for free! Find your manual Arya ARGB Midi - Logic and take your electronic device back in hand. On this page are published all the documents necessary for the use of your device. Arya ARGB Midi by Logic.
USER MANUAL Arya ARGB Midi Logic
Panel I/O / Panel We/Wy
1 LED CONTROLLER
2 USB 3.0
3 USB 2.0
4 MIC
5 HEADPHONES
6 USB 2.0
7 HDD / POWER LED
8 RESET
9 POWER
Overview / Cechy
CPU MAX
159 MM

PSU MAX
160 MM

GPU MAX
310 MM
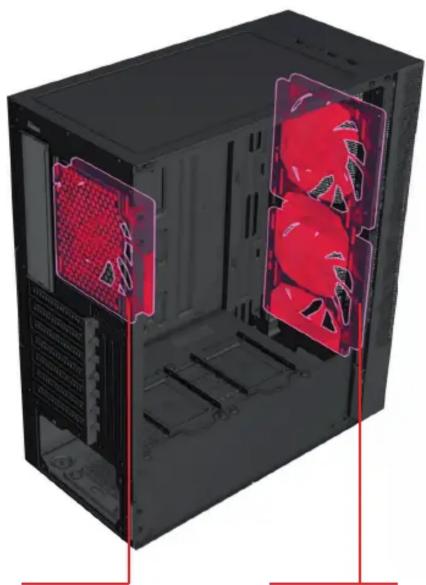
natural_image
3D cutaway view of a computer tower showing internal fan structures (no text or symbols)
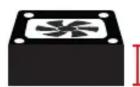
1 × 120 MM

2 × 140 MM


natural_image
Close-up of a black server chassis with red LED panel and red indicator lights (no text or symbols visible)DUST FILTERS / FILTRY

natural_image
Interior view of a black computer tower case showing internal compartments and red plastic components (no text or symbols visible)
natural_image
Interior view of a black computer case with red plastic components and white space (no text or symbols visible)HDD/SDD
EN
Quick start guide / installation:
-
Open the housing.
-
Install all the components of your computer by following the guidelines contained in individual assembly instructions for each component.
-
Install power supply and connect it to components of computer according to instructions from the power supply's manual and instructions from manual of components that require power connection.
a) If the power supply is mounted at the top of the case, the fan should be directed to the interior of the housing (down)
b) If the power supply is mounted in the bottom of the case, we suggest that the fan is facing the interior of the housing (up)
c) If using the housing with different than above power supply location, remember to keep proper air circulation inside the housing.
-
Check the assembly of components and power connections.
-
Close the cover.
-
Connect the monitor, keyboard, and other accessories to the PC.
-
Connect the power cord into the power supply and 230V electrical outlet.
-
Turn the power switch on the power supply to "I" position (if any).
This device was designed and made of high-quality reusable materials and components. If the device, its packaging, user's manual, etc. are marked with crossed waste container, it means they are subject to segregated household waste collection in compliance with the Directive 2012/19/UE of the European Parliament and of the Council. This marking informs that electric and electronic equipment shall not be thrown away together with household waste after it's been utilised. The user is obliged to bring the utilised equipment to electric and electronic waste collection point. Those running such collection points, including local collection points, shops or commune units, provide convenient system enabling to scrap such equipment. Appropriate waste management aids in avoiding consequences which are harmful for people and environment and result from dangerous materials used in the device, as well as improper storage and processing. Segregated household waste collection aids recycle materials and components of which the device was made. A household plays crucial role in contributing to recycling and reusing the waste equipment. This is the stage where the basics are shaped which largely influence the environment being our common good. Households are also one of the biggest users of small electrical equipment. Reasonable management at this stage aids and favours recycling. In the case of improper waste management, fixed penalties may be imposed in accordance with national legal regulations.
HU

Brand : Logic
Model : Arya ARGB Midi
Category : PC Case