VC42 - Uncategorized AVMATRIX - Free user manual and instructions
Find the device manual for free VC42 AVMATRIX in PDF.

User questions about VC42 AVMATRIX
0 question about this device. Answer the ones you know or ask your own.
Ask a new question about this device
Download the instructions for your Uncategorized in PDF format for free! Find your manual VC42 - AVMATRIX and take your electronic device back in hand. On this page are published all the documents necessary for the use of your device. VC42 by AVMATRIX.
USER MANUAL VC42 AVMATRIX
4.1 Hardware Installation....3
4.2 Driver Installation....4
5.DIP Funtions....4
6.Operating Instructions....5
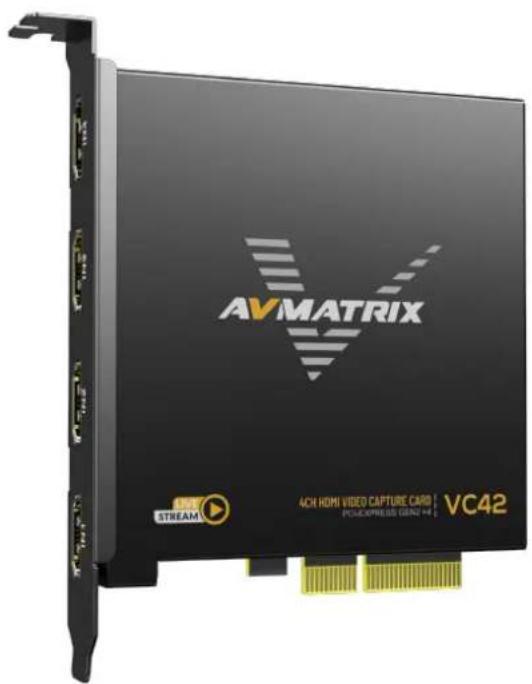
1.Brief Introduction
1.1 Overview
VC42 is a 4-Channel HDMI PCIE video capture card, it supports four HDMI inputs and capture, and compatible with console or PC games and digital cameras. HD video capture up to 1080p60 with bit up to 200Mbps, transfer bandwidth up to 2.5GB/S, VC42 can meet the needs of high-bandwidth, high-performance image acquisition and processing applications, ideal for use in live streaming platforms.
1.2.Main Features
● 4-channel HDMI 1.4 simultaneous input and capture
● Single-channel input and capture up to 1080p60 with bit rates up to 200Mbps
● Support YUV2 uncompressed video
● PCIE GEN2 x4, 2.5GB/S transfer bandwidth
● Support horizontal and vertical screen live capture
- Compatible with Windows 7 and above, Linux 18.04 and above
● Compatible with OBS/PotPlayer/XSplit and other live recording software
● Stable operation, 24 hours non-stop work
● Support one machine with multiple cards for multi-channel live streaming and recording
2.Interfaces
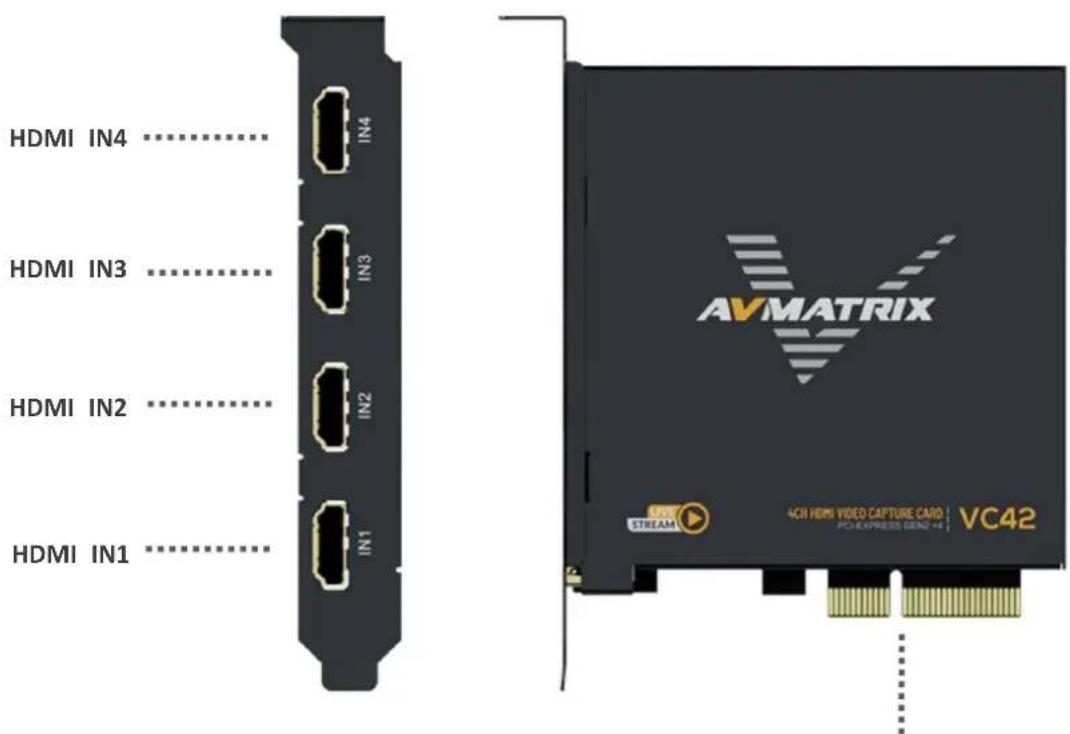
PCIE-X4 Interface
3. Specification
| CONNECTIONS | Host Interface | PCIE2.0x4 2.5GB/s transfer bandwidth |
| Video Interfaces | 4×HDMI1.4 inputs | |
| STANDARDS | HDMI Input Format | Up to 1080p60 each channel |
| Capture Format | 1920×1200, 1920×1080, 1600×1200, 1600×900, 1440×900, 1280×1024, 1280×800, 1280×720, 1080×1920, 1024×768, 800×600, 720×576, 720×480 60fps1920×1080, 1280×720, 1080×1920 59.94fps1920×1080, 1280×720 50fps1920×1080, 1280×720, 1080×1920, 800×600, 720×576, 720×480 30fps | |
| 1920×1080, 1280×720, 1080×1920 25fps | ||
| Capture Color Space | YUY2, uncompressed | |
| Audio Capture | 4×HDMI embedded audio capture | |
| Audio Codec | 16 bit PCM, 48kHz, 1536kbps | |
| Other Features | Support 1080i hardware de-interlacing, 3D noise redu algorithm | |
| SUPPORTS | Device Support | Support XBOX, PS4, SWITCH, Video player, TV box media box, etc. |
| OS Support | Windows 7 and above, Linux 18.04 and above | |
| Software Compatible | OBS, XSplit, VLC, VirtualDub, VMix, VidBlaster, Wire Microsoft Media Encoder, Adobe Flash Media Encode Any other DirectShow/V4L2/AVCaptureSession encoding/streaming software | |
| APIs Support | Windows(DirectShow, DirectSound/WASAPI) Linux(V4L2, ALSA) | |
| OTHERS | Power consumption | ≤2.0W |
| Temperature | Operating temperature: 0°C~60°C Storage Temperature: -20°C~70°C | |
| Relative Humidity | 5%~90% non-condensing | |
| Dimension | 120.1×88.4×21.6mm | |
| Weight | Net weight: 150g, Gross Weight: 195g |
4. Installation

Note: Only hold the edge of the card or the metal bracket when taking the card, do not the electronic components to prevent the chip from being harmed by static electricity.
The PCIE Card must not be plugged or unplugged while the system is powered. When the PCIE card added to or removed from the system, should be ensured that the computer is turned off.
4.1 Hardware Installation
Step1.Power off the computer device before the PCIE capture card installation.
Step2. Install the PCIE capture card into the PCIE-X4 Gen2 slot in your computer chassis and lock.
Step3. Connect the HDMI interface device signal source to the PCIE card interface and make sure the cable is connected properly.
Step4. Turn on the computer, beginning to install the PCIE capture card drivers.
4.2 Driver Installation
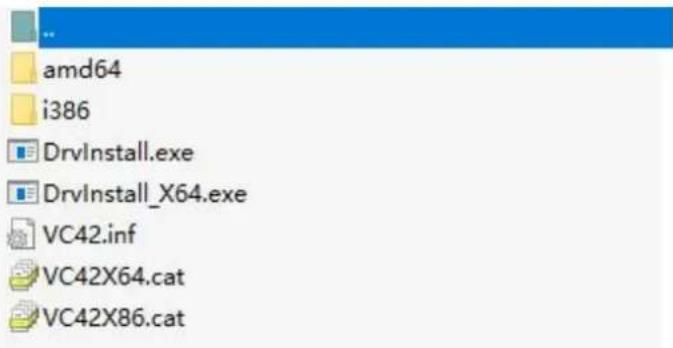
Step1. Download the driver from the AVMATRIX website at www.avmatrix.com and opening the driver.

| ■ Software | User Manual | Catalogue |
| Proudict | File Description | Link |
| VC12-4K | PC software for VC12-4K | V1.0 |
| VC41 & VC42 | PC software for VC41 & VC42 | V1.0 |
Step 2. When the driver is opened a notification of "Find Video Capture Card Driver: 1" will pop up indicates that the PCIE capture card has been recognized, then click "Install". Finally, Click "OK" to complete the installation.
Note: Supported Windows 7 and above, Linux 18.04 and above Operating Systems.
5.DIP Funtions
Multiple PCIE capture cards can be installed on one computer to work simultaneously to realize multi live streaming and capture. When working with multiple PCIE capture cards at the same time, you need adjust the dip switches on the PCIE card.
The dipswitch on the PCIE card provides the following settings. Make sure the setup dip code is diffe for each PCIE card.
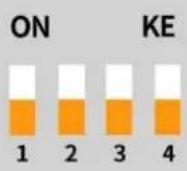 | 1.First cardWhen( SW1, SW2, SW3, SW4 ) is set to downward,it sets the PCIE card to first card. |
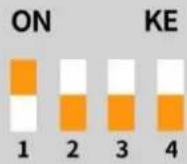 | 2.Second cardWhen( SW1 ) is set to upward, and ( SW2, SW3, SW4 ) is set to it sets the PCIE capture card to second card. |
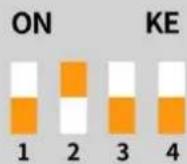 | 3.Third cardWhen( SW2 ) is set to upward, and ( SW1, SW3, SW4 ) is set to it sets the PCIE capture card to third card. |
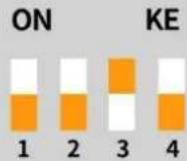 | 4.Fourth cardWhen( SW3 ) is set to upward, and ( SW1, SW2, SW4 ) is set to it sets the PCIE capture card to fourth card. |
6. Operating Instructions
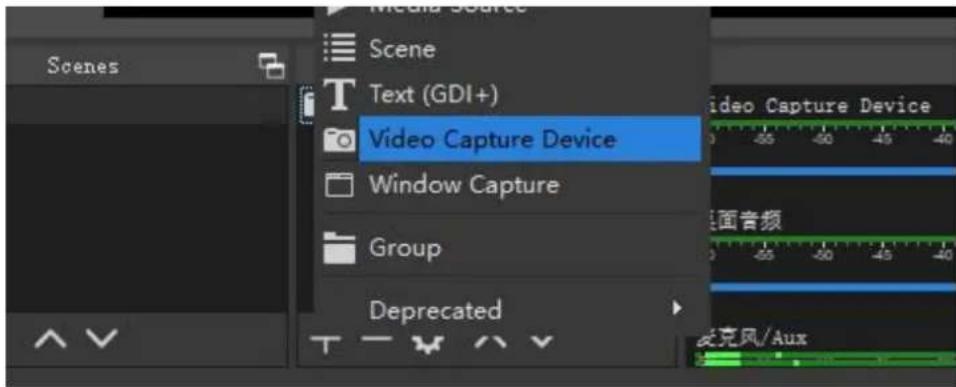
Step1. Open OBS Studio, click "+" and select "Video Capture Device".
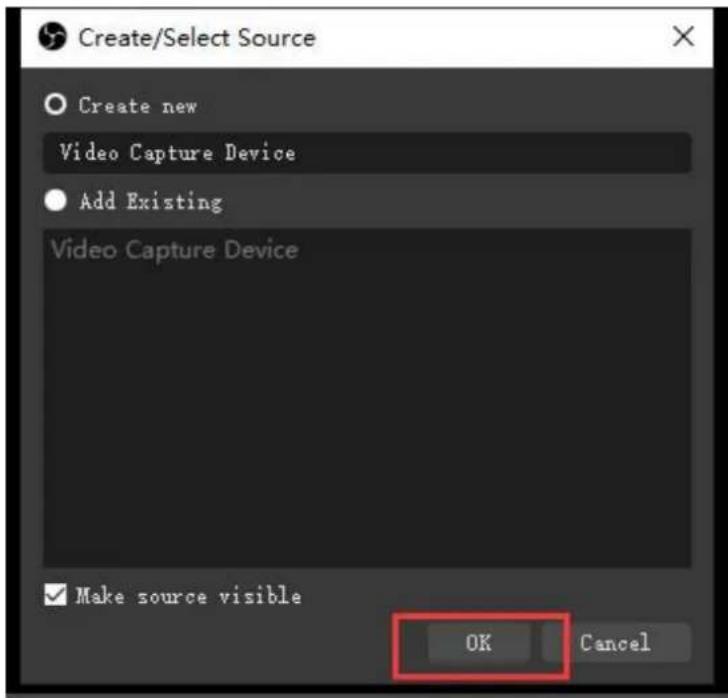
Rename the name of the signal source and click OK.
Step2. Right-click "Video Capture Device" and select properties, enter the properties interface, and select the signal source as your device. Users can set other parameter setting in the properties pages and click OK.
Step3. Click on the audio setting icon to setting audio, as shown in the picture. Then enter the prop and select the device.
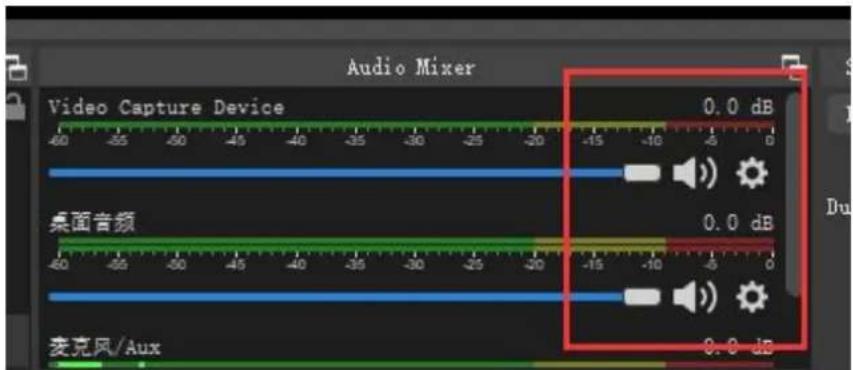
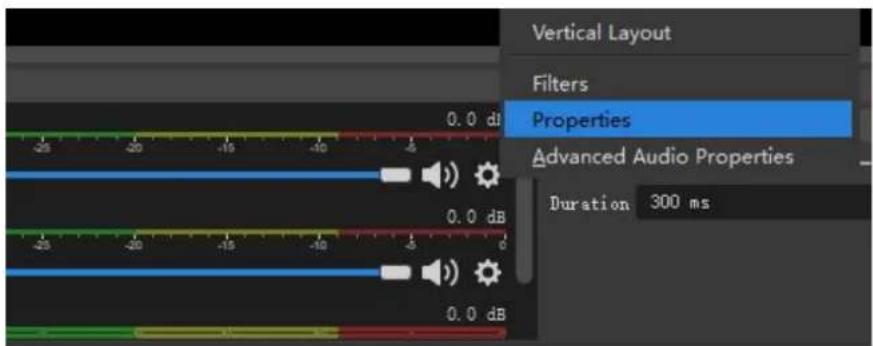
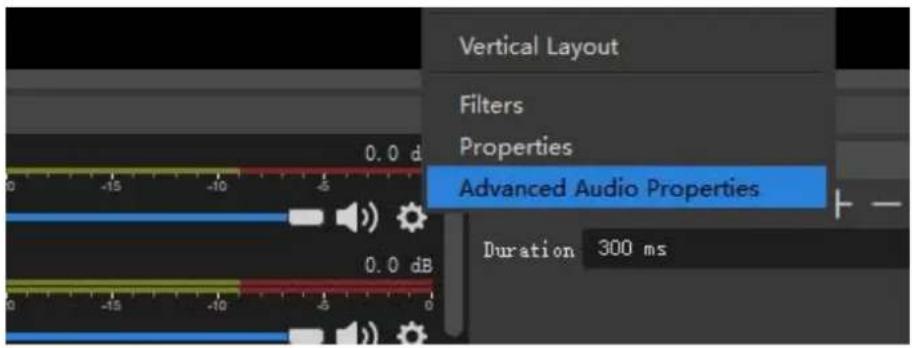
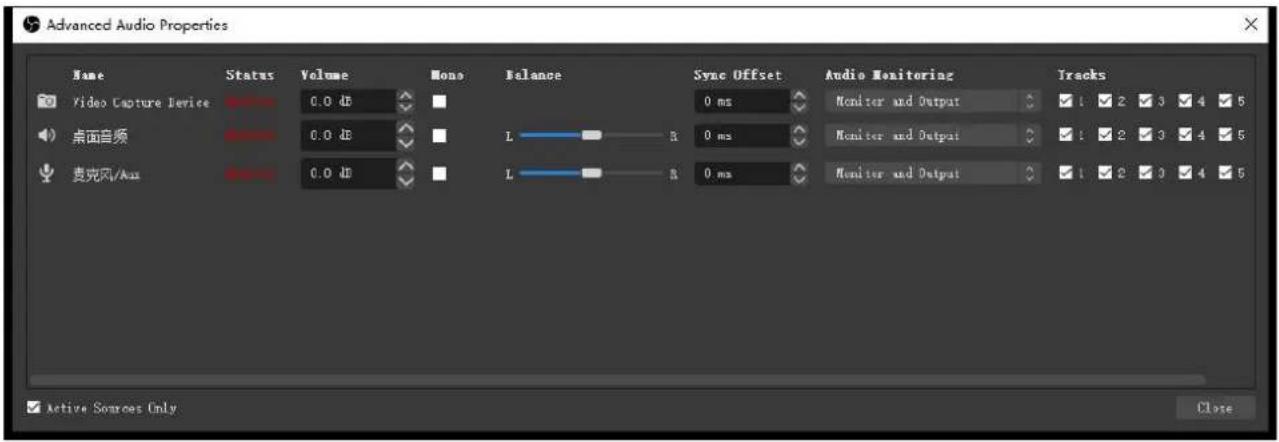
Step4. Enter "Advanced Audio properties" can change the setting about the volume, balance, audio monitoring, and Tracks etc.