
CKPUMPKIT - Water pump Summit - Free user manual and instructions
Find the device manual for free CKPUMPKIT Summit in PDF.


| Brand | Summit |
| Model | CKPUMPKIT |
| Product Type | Pump Kit for Kitchenette Water Dispenser |
| Compatible Models | C48ELPUMP, C48ELGLASSPUMP |
| Power Supply | 110V AC, 60Hz |
| Pump Type | Bottled Water Dispenser Pump System |
| Freshwater Capacity | 5 Gallons |
| Wastewater Capacity | 6 Gallons |
| Components Included | Pump, freshwater container, waste container, cut-off valve, compression sleeve, braided stainless steel faucet connectors, flexible drainage pipe, Teflon tape, mounting template, screws, nuts, washers |
| Installation Method | Wall-mount or floor placement |
| Cut-off Valve | 3/8 in. Brass Water Cut-off Valve |
| Faucet Connectors | 20 in. Length Braided Stainless Steel |
| Drainage Pipe | 1-1/2 in. Flexible Plastic |
| Mounting Template | 18x12 inches |
| Safety Features | On/Off switch, water cut-off valve to prevent leaks |
| Maintenance | Periodic cleaning of containers and pump; ensure dry environment |
| Warranty | Contact manufacturer for details |
| Manufacturer | Felix Storch, Inc. |
| Support | www.summitappliance.com |
Frequently Asked Questions - CKPUMPKIT Summit
User questions about CKPUMPKIT Summit
0 question about this device. Answer the ones you know or ask your own.
Ask a new question about this device
Download the instructions for your Water pump in PDF format for free! Find your manual CKPUMPKIT - Summit and take your electronic device back in hand. On this page are published all the documents necessary for the use of your device. CKPUMPKIT by Summit.
USER MANUAL CKPUMPKIT Summit
Assembly Instructions for Your Kitchenette Water Pump

natural_image
Interior view of a modern kitchen sink with water dispenser and cooling unit (no text or symbols visible)MODELS:
C48ELPUMP
C48ELGLASSPUMP
Write Serial Number (on lower left corner of inside cabinet) here:
Serial No.: ____
Felix Storch, Inc.
An ISO 9001:2015 registered company
770 Garrison Avenue
The Bronx, NY 10474
www.summitappliance.com
Pump Kit Installation – CKPUMPKIT
| Component | Quantity | ||
| Bottled Water Dispenser Pump System, 20ft 110V AC US Plug Water Dispensing Pump |  | 1 | |
| 5 Gallon Freshwater Container | 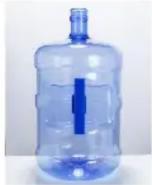 | 1 | |
| 6 Gallon Waste Container | 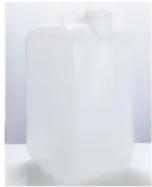 | 1 | |
| 3/8 in. Brass Water Cut-off Valve | 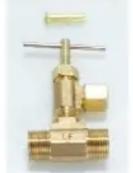 | 1 | |
| 1/4" Acetal Copolymer Compression Sleeve | 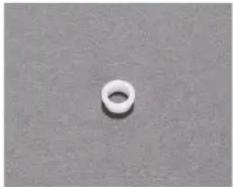 | 1 | |
| 20 in. Length Braided Stainless Steel Faucet Connector |  | 2 | |
| 1-1/2-in Flexible Plastic Drainage Pipe |  | 1 | |
| 1/2 in. x 520 in. White Teflon Tape | 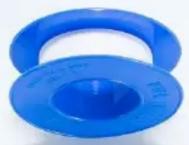 | 1 |
| Mounting Template (18x12) |  | 1 |
| 10-32 x 1 1/4" Phillips Head Truss Screw Stainless Steel |  | 4 |
| 10-32 Nylon Lock Nut Stainless Steel |  | 4 |
| 10 x 5/8" Fender Washer Stainless Steel | 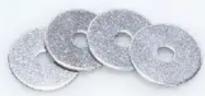 | 4 |
Installation Instructions
1) Open the cabinet of your combo kitchen. Move the wire shelf to the floor of the cabinet. This is to ensure nothing sits directly on the floor, keeping any cords or wires dry.
2) To install the faucet, set the gasket on top of the pre-drilled holes of the combo kitchen.
3) Insert the water faucet thought the gasket and secure the faucet with the provided nuts on the underside of the sink.
4) The pump will be secured to the outer wall of the combo kitchen, using four machine screws and nuts.
5) Place the provided template on the left side of the combo kitchen, in the top-right corner. It should align to the front edge and along the bottom edge of the stainless steel top.
6) Using a 14 " drill bit, drill the four template holes.
7) Secure the pump to the interior wall of the cabinet, using the four provided screws, washers, and nuts. Be sure the screw heads are on the outside of the cabinet.
NOTE: If mounting is not possible for your particular set-up, the pump can be placed on the floor of the cabinet. It is recommended to place it, so the ON/OFF switch is accessible.
8) The pump has two tubes, a thinner tube which runs to the metal water cut-off valve and a thicker water pull tube, which pulls water from your freshwater jug.
9) To connect the pump to the valve, place the valve nut over the water line.
10) The plastic sleeve has a wider and a narrower side. Place the plastic sleeve onto the water line through the larger side.
11) Insert the metal flange into the end of the water line as far as it will go.
12) Wrap the threading of the valve, then secure the water line to the cut off valve. Tighten the nut as much as you can.
13) Now that the water intake line is attached, wrap the other two threads of the cut-off valve in Teflon tape, then connect the small ends of the two faucet connector lines to the cut off valve.
14) Wrap the threads of the faucet underneath the sink, then attach the wider ends of the connector lines to the faucet.
15) Set the freshwater jug in the rear right-hand corner. Uncap the freshwater jug and insert the water pull into the freshwater jug. Be careful, as some water may overflow when the device is first inserted.
16) Attach the drainage pipe to the underside of the sink drain, then set the end into the wastewater jug.
17) Open the water cut-off valve.
If you need further assistance, contact Summit Tech. Support, or visit www.summitappliance.com/handwash-station to see a video of the installation.
Final Assembly

natural_image
Interior view of a modern stainless steel water dispenser with open door, water tank, and side outlets (no text or symbols visible)Brand : Summit
Model : CKPUMPKIT
Category : Water pump