
MD 16580 - Food processor MEDION - Free user manual and instructions
Find the device manual for free MD 16580 MEDION in PDF.


| Brand | Medion |
| Model | MD 16580 |
| Product Type | Food Processor |
| Motor Power | 800 W |
| Bowl Capacity | 2.0 L |
| Dimensions (W x D x H) | 30 x 25 x 20 cm |
| Weight | 4.5 kg |
| Voltage / Frequency | 220-240 V, 50/60 Hz |
| Functions | Chopping, slicing, shredding, mixing, kneading |
| Speed Settings | Variable with pulse function |
| Blade Material | Stainless steel |
| Bowl Material | Plastic (BPA-free) |
| Safety Features | Overload protection, non-slip feet, safety lock |
| Cleaning | Dishwasher-safe parts (bowl, lid, accessories) |
| Accessories Included | Mixing blade, slicing disc, shredding disc, dough hook, spatula |
| Cord Length | 1.2 m |
| Noise Level | < 80 dB |
| Warranty | 2 years |
Frequently Asked Questions - MD 16580 MEDION
User questions about MD 16580 MEDION
0 question about this device. Answer the ones you know or ask your own.
Ask a new question about this device
Download the instructions for your Food processor in PDF format for free! Find your manual MD 16580 - MEDION and take your electronic device back in hand. On this page are published all the documents necessary for the use of your device. MD 16580 by MEDION.
USER MANUAL MD 16580 MEDION
natural_image
Exterior view of a modern kitchen stand mixer with beige and gray models (no visible text or symbols)Contents
Information about this user manual....4
Explanation of symbols....4
Proper use....5
Safety instructions....5
Setting up the appliance ....7
Handle the appliance with care....7
Package contents......8
Appliance overview....9
Main unit....9
Overview of accessories....10
Preparations for use 12
Using the food processor 12
Using the mincer....13
Equipping the mincer for mincing 15
Equipping the mincer with the sausage attachment....16
Equipping the mincer for making pasta 18
Equipping the mincer for making kibbeh....18
Using the food processor....19
Mixing and kneading dough....19
Whisking egg whites 19
Whipping cream....19
Mixing milkshakes, cocktails or other liquids 20
Using the mincer 20
Chopping meat 20
Making sausages....20
Making biscuits....20
Recommended settings....21
Speeds and applications....21
After use....22
Cleaning 22
Troubleshooting 23
Prolonged non-use and transport 23
Disposal 24
Technical specifications 24
EU declaration of conformity....24
Spare parts....25
Service information 25
Legal Notice....25
Supplier/Producer/Importer 26
Privacy statement....26
Information about this user manual

Thank you for choosing our product. We hope you enjoy using this appliance.
Please read the safety instructions and the user manual carefully before using the appliance for the first time. Note the warnings on the appliance and in the user manual.
Always keep the user manual close to hand. If you sell the appliance or give it away, please ensure that you also pass on this user manual. It is an essential component of the product.
Explanation of symbols
If a block of text is marked with one of the warning symbols listed below, the hazard described in that text must be avoided to prevent the potential consequences described there from occurring.

DANGER!
This keyword denotes a high-risk hazard situation which will result in death or serious injury if it is not avoided.

WARNING!
This keyword denotes a medium-risk hazard situation which can result in death or a serious injury if it is not avoided.

CAUTION!
This keyword denotes a low-risk hazard situation which can result in moderate or minor injuries if it is not avoided.
NOTICE!
This keyword serves as a warning for possible damage to property.

This symbol provides useful additional information for assembling or operating the appliance.

Follow the instructions in the user manual!

CE labelling
Products that feature this symbol meet the requirements of the EU directives (see section entitled “EU declaration of conformity”).
Symbol for alternating current (AC)

Symbol used in the EU to indicate food contact materials such as packaging or appliance surfaces.


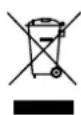
Dispose of packaging in compliance with environmental regulations (see section "Disposal").
Dispose of the appliance in compliance with environmental regulations (see section "Disposal").
Proper use
This appliance may only be used to knead and stir foods such as dough, crèmes, creams and egg whites in the mixing bowl. The mincer attachment is designed for chopping foods and for preparing minced meat, sausages, pasta, shortbread biscuits or kibbeh with the respective attachments.
The appliance is solely intended for this purpose and is only to be used for this. It must only be used as described in this user manual.
Any other use is considered to be improper use and can lead to material damage or personal injury.
- This appliance is designed for use in private households, but not for commercial purposes or similar household applications such as:
– in kitchens for staff in retail outlets, offices and other commercial areas
-on agricultural estates
-by customers in hotels, motels and other accommodation facilities
-in bed-and-breakfast establishments.
Please note that we shall not be liable in cases of improper use:
- Do not modify the appliance without our consent and do not use any auxiliary equipment that we have not approved or supplied.
- Only use replacement parts or accessories that we have supplied or approved.
- Comply with all the information in this user manual, especially the safety instructions. Any other use is considered improper and can cause personal injury or property damage.
Safety instructions
IMPORTANT SAFETY INSTRUCTIONS – READ CAREFULLY AND KEEP FOR FUTURE REFERENCE!

WARNING!
Risk of injury!
Risk of injury to children and persons with limited physical, sensory or mental abilities (for example, partially disabled people or older people with limited physical and mental abilities) or to those without experience and knowledge (such as older children).
- Keep the appliance and its accessories out of the reach of children.
- This appliance may be used by persons with reduced physical, sensory or mental abilities or by those without experience and/or knowledge, as long as they are supervised or have been instructed in the safe use of the appliance and have understood the dangers involved.
- Children must not be allowed to play with the appliance.
- This appliance must not be used by children. Keep the appliance and its mains cable out of reach of children.
- Cleaning and user maintenance must not be carried out by children.
- Children do not recognise the dangers that can arise when handling electrical appliances. Please be particularly careful while using the appliance if there are children nearby.

DANGER!
Risk of choking and suffocation!
Packaging fi Im can be swallowed or used improperly, creating a risk of choking and suffocation.
- Keep packaging material such as plastic film or plastic bags away from children.
- Do not let children play with the packaging material.

WARNING!
Risk of electric shock/short circuit!
There is a risk of electric shock/short circuit from live parts.
- Only connect the appliance to a properly installed and easily accessible socket that is close to where you are using the appliance. The local mains voltage must correspond to the technical specifications for the appliance.
- The power socket must be easily accessible so you can unplug the appliance from the mains quickly if necessary.
- Unplug the appliance from the socket:
-when you are cleaning or maintaining the appliance
-when you are assembling or disassembling the appliance
-if the appliance is damp or wet
-if you are no longer using the appliance
-when the appliance is unattended
-during thunderstorms.
- Always hold the plug to pull it out and never pull the cable.
-
Do not allow the mains cable to come into contact with hot objects or surfaces (e.g. cooker hob).
-
Do not use if the appliance or the mains cable is visibly damaged or if the appliance has been dropped.
-
Check the appliance and the mains cable for damage before using the appliance for the first time and after each use.
-
Completely unwind the mains cable.
- Do not kink or crush the mains cable.
- Do not use the appliance if you notice that it, or its mains cable, is damaged.
- Contact our Service team without delay if the appliance has been damaged during transport.
- Do not, under any circumstances, make any unauthorised modifications to the appliance or try to open and/or repair a component yourself.
- If there is damage to the mains connection cable on this appliance, it must be replaced by the manufacturer, its customer service department or another suitably qualified person. This is necessary to avoid hazards.
-
Do not let the appliance come into contact with water or other liquids. Keep the appliance, the mains cable and the mains plug away from wash basins, sinks or similar.
-
Do not place any objects filled with liquid (e.g. vases or drinks) on or near the appliance.
- Never touch the appliance or the mains cable with wet hands.
- Never immerse the appliance power unit in water or other liquids.
- Use the appliance indoors only. Do not use in damp environments.
- Do not expose the appliance to extreme conditions. Avoid:
–high humidity or wet conditions
-extremely high or low temperatures
-direct sunlight
-naked fl ames.
Setting up the appliance
- Place the appliance on a stable, level surface.
- Do not set up the appliance near heat sources such as gas or electric cookers.
- Never place the appliance on the edge of a table – it could tip over and fall.
- Ensure that the mains cable does not become a tripping hazard and do not use an extension cord.
Handle the appliance with care

CAUTION!
Risk of injury!
Touching moving, sharp-edged parts can cause cut or crush injuries.
- Do not touch the moving parts.
- Handle the cross blade with care when using and cleaning the mincer.
- Always remove accessories from the main appliance before cleaning.
- When using the mincer, only operate the appliance with the filling tray in place.
- Ensure that no foreign objects are in the feed chute or filling tray during operation.
- Never push food into the feed chute using your hands.
- Use only the pusher to push food into the feed chute.
- The cutting attachments are extremely sharp. Do not touch the blades.
- Never remove the filling tray before the cutting tools have stopped moving completely.
- Keep hair, clothing, hands, cutlery, cooking spoons or similar away from the appliance while you are using it, to avoid injuring yourself or damaging the appliance.
- As a matter of principle only use the appliance if it is fully assembled.
- Never use the mixing or kneading function at the same time as the mincer. Only use one function at any given time.

CAUTION!
Potential risk to health due to bacteria growth!
After preparation, bacteria can grow as a result of remaining food residues.
- Thoroughly clean the appliance and all accessories used immediately after each use.
NOTICE!
Possible damage to the appliance!
Using the appliance in a way that was not intended may damage it.
- Do not use the appliance for more than 5 minutes at a time. After 5 minutes of operation, allow the appliance to cool down for 10 minutes.
- If the cutting tool becomes blocked during operation, unplug the appliance and remove the blockage (see section "Cleaning" on page 22).
Package contents

DANGER!
Risk of choking and suffocation!
There is a risk of choking and suffocation due to swallowing or inhaling small parts or plastic wrap.
- Keep the plastic packaging out of the reach of children.
- Remove the product from the packaging and remove all packaging materials.
- Please check your purchase to ensure that all items are included. If anything is missing, please contact us within 14 days of purchase.
The following items are supplied with your product:
- Food processor
- Food processor accessories and attachments (see "Overview of accessories" on page 10)
- User manual and warranty card
Appliance overview
Main unit
A

1 Ventilation slots
2 Swivel arm lever
3 Handle when swivelling
4 Operating LED
5 Power level dial
6 Mains cable with mains plug
7 Suction feet
8 Feet
9 Base plate
10 Mixing bowl handle
11 Mixing bowl
12 Mincer connection cover
13 Mincer release button (beneath the cover, not shown)
Overview of accessories
Stirring attachments
B

natural_image
Pure diagram of a hook with a handle and base, no text or symbols present
natural_image
Pure technical line drawing of a symmetrical mechanical or architectural component (no text or symbols)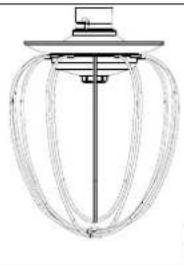
natural_image
Technical line drawing of a mechanical component with internal structure (no text or symbols)161
14 Dough hook
15 Beater
16 Whisk
C

natural_image
Line drawing of a curved mechanical component with a triangular top and base (no text or symbols)17 Splash-guard lid with fi Iler opening
Mincer accessories
D

18 Pusher
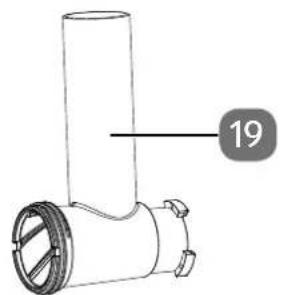
19 Worm housing
20 Filling tray
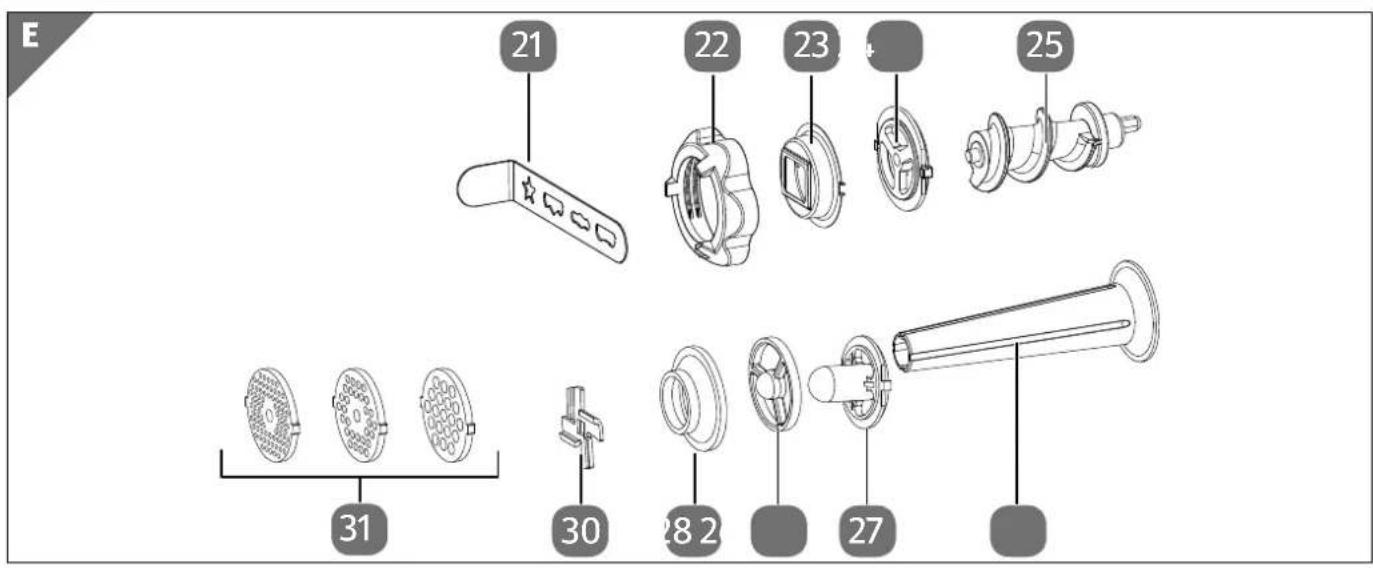
21 Biscuit press attachment
22 Attachment ring
23 Holder for biscuit press attachment
24 Worm gear for biscuits
25 Worm screw
26 Sausage fi lling nozzle
27 Kibbeh attachment
28 Sausage attachment
29 Kibbeh nozzle
30 Cross blade
31 Perforated cutting blade discs

32 Pasta attachments
Preparations for use
- Remove all packaging materials.
- Before using for the first time, rinse the accessories thoroughly with warm water and washing-up liquid. Dry everything thoroughly.

CAUTION!
Risk of injury!
There is a risk of crushing due to rotating and moving parts.
- The appliance must be switched off and disconnected from the mains before replacing any accessories or additional parts that move during operation.
NOTICE!
Possibility of damage to the appliance!
There is a risk of overheating due to excessive operation.
- Do not use the appliance for more than approx. 5 minutes at a time.
- After 5 minutes of operation, allow the appliance to cool down for 10 minutes.

Running noise when using the appliance for the first time
There may be increased running noise during the first 10–20 minutes of total running time. The high-quality grease used has a very high viscosity that subsides after a longer period of total running time. Once the grease has reached its ideal viscosity, the running noises will become quieter.
Using the food processor
- Turn the power level dial 5 to "0" and press the swivel arm lever 2 to raise the swivel arm.

natural_image
Technical line drawings of a kitchen mixer and its mechanical component (no text or symbols)- Insert the required stirring attachment (dough hook 14, beater 15 or whisk 16) into the processor as shown in Fig. 1a and 1b.
The stirring attachments can only be inserted into the processor and rotate when the locking tab is seated in the corresponding recess on the appliance.
-
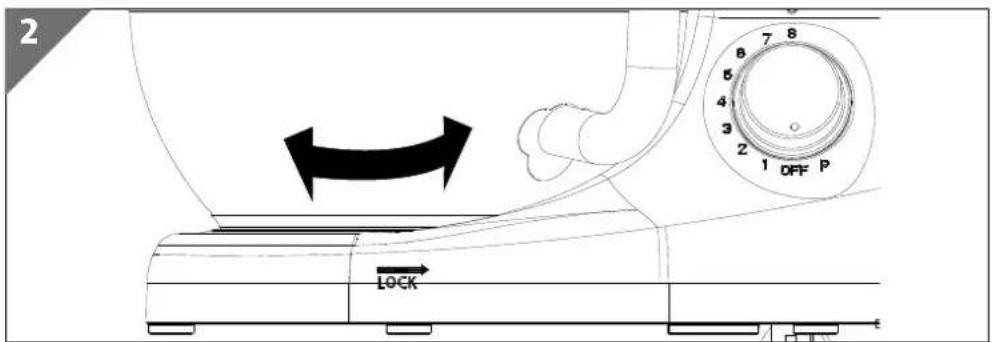
Place the mixing bowl 11 onto the holder on the base plate 9, rotate the mixing bowl in the direction of the arrow (see the LOCK imprint) until it comes to a stop to lock the mixing bowl 11.
-
Next, add the ingredients to the mixing bowl 11. Make sure that you do not overfill the mixing bowl 11 (max. approx. 1.5 kg fl our).
-
Put the splash-guard 16 onto the mixing bowl 11:
To add filling while the appliance is in use, use the filling opening.
- Press back the swivel arm lever 2 (towards the symbol) and lower the swivel arm. Make sure that the swivel arm is firmly locked in place on the housing base.
Using the mincer

CAUTION!
Risk of injury!
There is a risk of injury due to moving and sharp parts.
- When using as a mincer, place the mixing bowl so that the rotating attachment for the stirrer is protected. There is a risk of crushing!
- Take care when handling the sharp edges of the cross blade 30 .
-
To completely disconnect the food processor from the power supply, unplug the plug from the power socket.
-
If necessary, press back the swivel arm lever 2 (towards the symbol) and lower the swivel arm. Make sure that the swivel arm is firmly locked in place on the housing base.
natural_image
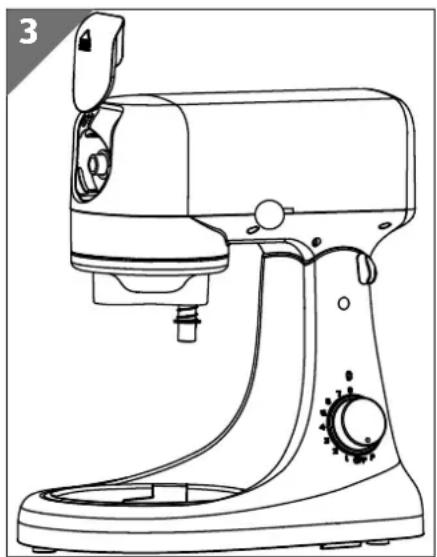
Line drawing of a kitchen mixer with control panel and handle (no text or symbols)- Slide up the mincer connection cover 12 and place the cover safely to one side (see Fig. 3).

natural_image
Line drawing of a kitchen stand mixer with a separate close-up view (no text or labels)
natural_image
Line drawing of a kitchen electric shaver with handle and control knob (no text or symbols)- Place the worm housing 19 in the mincer connection 12 as shown in Fig. 4 and turn one rotation to the left so that the filler opening is pointing upwards (see Fig. 5). Make sure that the worm housing 19 is seated securely in the mincer connection 12 on the food processor.

natural_image
Line drawing of a kitchen brush and a hand inserting a screw into a cylindrical tool (no text or symbols)- Place the worm screw 25 into the worm housing 19 with the hexagonal piece forward.
- Then select the right tool for your application and mount the tool as follows.
- Finally, screw the attachment ring 22 clockwise onto the thread in each case.
Equipping the mincer for mincing
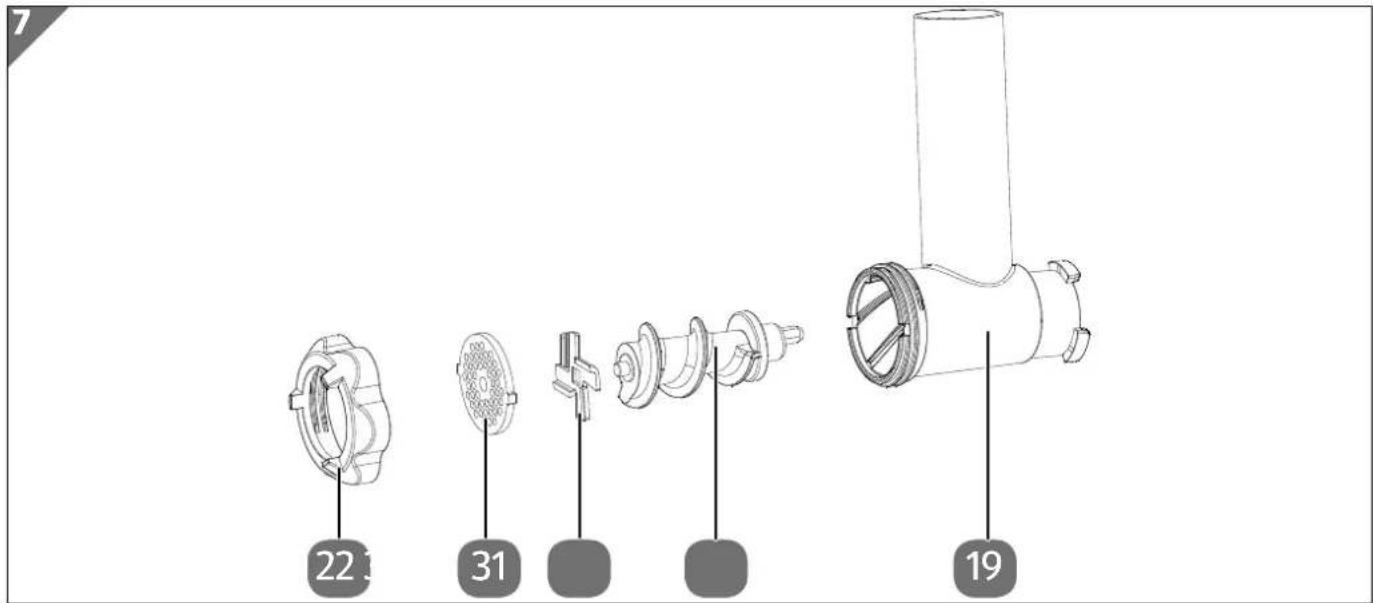
To produce minced meat (to mince), use the cross blade 30 and one of the three perforated cutting blade discs 31 depending on the required result.
- Place the cross blade 30 onto the worm screw and the perforated cutting blade discs 31 together in the order shown in Fig. 7.
- Finally, screw the attachment ring 22 clockwise onto the thread of the worm housing 19.
natural_image
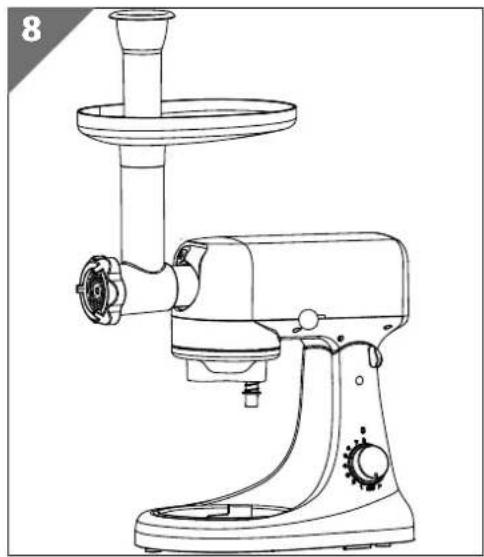
Line drawing of a kitchen feeder with handle and spout (no text or symbols)- Place the fi lling tray20 from above onto the worm housing feed chute (see Fig. 8).
- Place the meat into the fi lling tray20 and use the pusher 18 to push the meat into the feed chute. Do not use the mincer for more than 5 minutes; after this take a break for at least 10 minutes.
Equipping the mincer with the sausage attachment
Processing prepared sausage meat

Use the sausage attachment 28 and sausage fi lling nozzle 26 to fi ll sausage meat into natural or artificial sausage skins.
When processing prepared sausage meat, proceed as follows:
- Assemble the accessories as shown in Fig. 9.
- Finally, screw the attachment ring 22 clockwise onto the thread of the worm housing 19.
- Place the fi lling tray20 from above onto the worm housing feed chute (see Fig. 7).
- Place the sausage meat into the filling tray20 and use the pusher 18 to push the sausage meat into the feed chute.
Mincing meat and making sausages in one process

- To mince pieces of meat and produce sausages in one process, mount the mincer with perforated cutting blade disc 31 and cross blade 30 as well as the sausage filling nozzle 25 (see Fig. 10).
- Finally, screw the attachment ring 22 clockwise onto the thread of the worm housing 19.
- Place the fi lling tray20 from above onto the worm housing feed chute (see Fig. 7).
- Place the meat into the filling tray20 and use the pusher 18 to push the meat into the feed chute.
Equipping the mincer for making biscuits
11
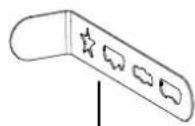
21

[Non-Text]

[Non-Text]

[Non-Text]

[Non-Text]

natural_image
Technical line drawing of a mechanical pipe fitting with a cylindrical component and flanged side (no text or symbols)192
To make biscuits from biscuit dough, mount the holder 23 and biscuit press attachment 21 as well as the worm gear 24 in the order as shown in Fig. 11.
The worm gear 24 and holder 23 are already pre-mounted.
- Screw the attachment ring 22 clockwise onto the thread of the worm housing 19.

natural_image
Line drawing of a kitchen feeder with handle and control panel (no text or symbols)- Push the biscuit press attachment 21 sideways into the holder 23. Push the press attachment over the filling opening that you wish to use for your baked goods (see Fig. 12).
- Place the fi lling tray20 from above onto the worm housing feed chute (see Fig. 12).
- Place the dough into the filling tray20 and use the pusher 18 to push the dough into the feed chute.
Equipping the mincer for making pasta
13
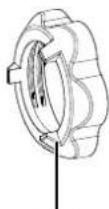
22

32

natural_image
Technical line drawing of a mechanical component with multiple cylindrical parts and a vertical line (no text or symbols)The image is too blurry to recognize any text content.

natural_image
Technical line drawing of a mechanical pipe fitting with flanged ends and a cylindrical shaft (no text or symbols)19
To make pasta from pasta dough, use one of the four pasta attachments 32 (see Fig. 13).
- Assemble the accessories as shown in Fig. 13.
- Screw the attachment ring 22 clockwise onto the thread of the worm housing 19.
- Place the fi lling tray20 from above onto the worm housing feed chute.
- Place the dough into the filling tray20 and use the pusher 18 to push the dough into the feed chute.
Equipping the mincer for making kibbeh
14

[Non-Text]

27
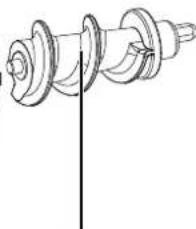
natural_image
Technical line drawing of a mechanical component with no visible text or symbols25

natural_image
Technical line drawing of a mechanical component with a cylindrical shaft and flanged end (no text or symbols)192
To make kibbeh mixture, use the kibbeh nozzle 29 and kibbeh attachment 27.
- Assemble the accessories as shown in Fig. 14.
- Finally, screw the attachment ring 22 clockwise onto the thread of the worm housing 19.

natural_image
Line drawing of a kitchen feeder with a side-mounted blade and handle (no text or symbols)- Place the fi lling tray20 from above onto the worm housing feed chute (see Fig. 15).
- Place the kibbeh mixture into the filling tray20 and use the pusher 18 to push the kibbeh mixture into the feed chute.
Using the food processor
Mixing and kneading dough
- To knead dough, use the dough hook 14 or the beater 15.
- To achieve the best mixture for kneading dough, use a ratio of 5:3 flour to water. Fill the mixing bowl 11 to max. 3/4 full.
- When fi lling the mixing bowl 11 , make sure that you do not exceed the maximum fi lling capacity of 1.5 kg
- When using the dough hook 14 or beater 15, first switch the power level dial 5 to power level 1 for 30 seconds and then to level 2 for at least 30 seconds and finally level 3 for max. 5 minutes.
- Do not use the dough hook 14 or beater for more 15 than 5 minutes; after this take a break for at least 10 minutes.
Whisking egg whites
- Use the whisk 16 to beat egg whites.
- To whisk, set the power level dial 5 to level 7 or 8 and beat the egg whites without interruption for approx. 5 minutes until the egg whites have become stiff.
- Do not whisk more than 15 egg whites at one time.
- Do not use the whisk 16 for more than 5 minutes; after this take a break for at least 10 minutes.
Whipping cream
- Use the whisk 16 to whip cream. Use fresh cream.
- For approx. 250 ml whipping cream, set the power level dial 5 to level 7 or 8 and whip the cream for approx. 3 to 5 minutes.
- Make sure that you do not exceed the maximum fi lling capacity when fi lling the mixing bowl with fresh milk, cream or other ingredients.
- Do not use the whisk 16 for more than 5 minutes; after this take a break for at least 10 minutes.
Mixing milkshakes, cocktails or other liquids
- Use the whisk 16 for mixing milkshakes, cocktails and other liquids.
- Mix the ingredients according to your recipe for approx. 3 to 5 minutes at a power level of 1 to 8.
- Do not exceed the maximum filling capacity of the mixing bowl 11.
- Do not use the whisk 16 for more than 5 minutes; after this take a break for at least 10 minutes.
Using the mincer
Chopping meat
- Do not chop hard ingredients such as bones.
- Cut the meat into small pieces (no sinews, no bones, approx. 20 x 20 x 60 mm), so that it can be chopped easily in the worm housing.
Making sausages
You can use either natural or artificial sausage skins.
When using natural skins, soak these in water for a little while beforehand. Tie a knot at the end of the skin.
- Push the skin over the sausage filling nozzle26.
- The sausage mixture is then pushed through the sausage filling nozzle 26, flling the sausage skin.
- Make sure that the sausage skin is filled “loosely”, because sausages expand when cooked or grilled, and the skin can tear.
- Once the first sausage has reached the required length, press the sausage together at the end of the sausage filling nozzle using your fingers.
- Twist the sausage once or twice around its own axis.
- To make handling easier, you can switch off the appliance after each sausage length.
Making biscuits
- Prepare a surface that you can place your biscuits on later.
- Using the biscuit press attachment 21, you can shape the prepared biscuit dough in different ways.
- Once you have pre-assembled the worm housing 19 with biscuit attachment 23 / 24 on the appliance, push the biscuit press attachment 21 sideways into the holder 23. Push the biscuit press attachment over the filling opening that you wish to use for your baked goods (see Fig. 12).
- Do not use the mincer for more than 5 minutes; after this take a break for at least 10 minutes.
Recommended settings
| Level Ideal for ... Notice! | ||
| 1 | StirringUse level 1 for stirring, mixing or combining. Use this level for adding liquids to dry ingredients or for adding dry ingredients (e.g. fl our) to dough. | For short, powerful and continuous pulse movements, turn the power level dial 5 to “P” repeatedly. |
| 2-3 | MixingUse level 2-3 for quick stirring and slow mixing. Can be used for mixing heavy pieces of dough and sweets, and for puréeing potatoes or vegetables. Can also be used for mixing and kneading yeast dough. | |
| 4-5 | Mixing, whiskingUse level 4-5 for mixing semi-heavy doughs (e.g. biscuits) and cake mixes at a medium speed. This level can also be used for combining sugar and shortening or adding sugar to egg white for meringues. | |
| 5-6 | Whisking, creamingUse level 5-6 for whisking or whipping creams, frostings and creamy fillings. These levels are suitable for cake mixes, doughnuts and other baked goods. | |
| 6-8 | Quick whiskingUse levels 6-8 for cream, egg white and cooked frostings. | |
| 8 | Brief whiskingUse level 8 for whisking smaller quantities of cream or egg white. | |
Speeds and applications
| Application Tool Level | Ingredient quantity | ||
| Kneading heavy doughs(e.g. bread, pasta dough or short pastry) | Dough hook 14 | 1-3 Max. 1.5 kg | |
| Combining semi-heavy to heavy doughs(e.g. cake mixture) | Beater 15 | 3-5 Max. 1.5 kg | |
| Combining light doughs(e.g. waffle mix, biscuit dough or egg dishes) | Beater 15 | 1-5 | Min. 200 mlMax. 1.5 l |
| Crèmes(e.g. cake fi llings and crèmes) | Whisk 16 | 5-8 | Min. 200 mlMax. 1.0 l |
| Brief whisking(e.g. whipping small quantities of crèmes or egg white) | Whisk 16 | 8 | Min. 4 eggsMax. 20 eggs |
| Mincing meat Mincer | 30 / 31 | 6-8 | |
| Making pasta Pasta accessory | 32 | 6-8 | |
| Making biscuits Biscuit accessory | 21 / 23 / 24 | 6-8 | |
| Making sausages Sausage attachment | 26 / 28 | 6-8 | |
| Making kibbeh Kibbeh attachment | 27 / 29 | 6-8 |
Afteruse
- Switch off the appliance.
- Unplug the mains plug.
When using the food processor
- Press the swivel arm lever 2 toward the symbol, the swivel arm raises.
- Remove the stirrer. To do this, open the lock buy turning anti-clockwise.
- Turn the stirrer 11 clockwise slightly to remove it.
- Loosen the finished dough using a spatula and remove it from the mixing bowl.
– Clean the parts used as described in “Cleaning” on page 22.
When using the mincer
- Remove the accessories in reverse order as described in "Using the mincer" on page 13.
- Press the release button 13 to enable the removal of the worm housing.
- Slide the cover 12 onto the mincer connection.
- Clean the parts used as described in "Cleaning" on page 22.
Cleaning

WARNING!
Risk of electric shock!
There is a risk of electric shock due to live parts.
- Before cleaning, set the power level dial 5 to "0" and unplug the mains plug.
- Never immerse the appliance in water or liquids!
- Always unplug the appliance plug from the power socket before cleaning or servicing and before fitting or removing accessories.
- Always disconnect accessories from the main appliance before cleaning.

WARNING!
Risk of injury!
There is a risk of injury due to sharp-edged blades on the meat knives.
- Do not touch the sharp blades.
- To avoid injuries, use a cleaning brush or similar suitable cleaning agent to clean the blades.

CAUTION!
Potential risk to health due to bacteria growth!
After preparation, bacteria can grow as a result of remaining food residues.
- Thoroughly clean the appliance and all accessories used immediately after each use.
NOTICE!
Possibility of damage to the appliance!
Sensitive surfaces
- Do not use any aggressive or abrasive cleaning agents, sharp or metallic cleaning implements such as wire brushes, knives or hard spatulas.
- Do not put the appliance in the dishwasher, this would irreversibly damage the appliance.
- Remove the accessories as described in "After use" on page 22.
Motor housing:
- Clean the appliance housing using a slightly damp cloth with washing-up liquid. Dry it using a cloth.
Dough hook 14, beater 15, whisk 16, cross blade 30, feed chute 20, perforated cutting blade discs 31 and mixing bowl 11:
- Clean these accessories with warm water and washing-up liquid or in the dishwasher.
Other accessories and the splash-guard:
- The splash-guard 17 and other parts are not dishwasher safe. Clean the parts with lukewarm water and a little washing-up liquid.
Accessories such as the worm screw 25, feed chute with worm housing 19 and attachment ring 22:
- These components made of die cast aluminium are not suitable for cleaning in the dishwasher.
Troubleshooting
| Problem Possible cause Solution | ||
| The appliance cannot be started. | The mains plug 6 is not properly inserted. | - Plug the mains plug 6 into the socket correctly. |
| The mains socket is faulty. - Check the mains socket by connecting another appliance. | ||
| The appliance stops suddenly. | The appliance is overloaded. | - Switch off the appliance and allow it to cool down.- If necessary, reduce the amount of remaining ingredients. |
| The accessory has not been attached correctly. | - Check that the accessory is attached correctly. | |
Prolonged non-use and transport
- If you are not going to use the appliance for an extended period of time, pull out the mains plug 6, clean the appliance and accessories as described and store the appliance in a dry, dust-free and frost-free environment that is not exposed to direct sunlight.
- To avoid damaging the product during transport, we recommend that you use the original packaging.
Disposal
PACKAGING

Your appliance has been packaged to protect it from damage in transit. The packaging is made of materials that can be recycled in an environmentally friendly manner.
APPLIANCE

All old appliances marked with the symbol shown must not be disposed of in normal household waste. In accordance with Directive 2012/19/EU, the appliance must be properly disposed of at the end of its service life.
This involves separating the materials in the appliance for the purpose of recycling and minimising the environmental impact.
Take old appliances to an electrical scrap collection point or a recycling centre.
Contact your local waste disposal company or your local authority for more information on this subject.
Technical specifications
Supplier's name or trademark: MEDION®
Supplier's address: MEDION AG
Am Zehnthof 77
45307 Essen
GERMANY
Model: MD 16580
Rated voltage: 220–240 V\~, 50–60 Hz
Rated power: 1000 W
Protection class: I (the appliance must be earthed)
Mixing bowl: 4.6 litre
Max. filling capacity for fl our: 1.5 kg
Appliance dimensions (W x H x D): Approx. 32.5 x 34 x 20.5 cm
EU declaration of conformity

MEDION AG hereby declares that this appliance complies with the fundamental requirements and the other relevant provisions of:
• EMC Directive 2014/30/EU
• Low Voltage Directive 2014/35/EU
• Ecodesign Directive 2009/125/EC
• RoHS Directive 2011/65/EU.
Spare parts
Please visit our MEDION Service Shop at https://www.medion.com/medionserviceshop. to order any spare parts you need.
You will be able to find all suitable spare parts for your product there.
All available spare parts can be purchased for a period of 7 years.
Service information
Please contact our Customer Service team if your device ever stops working the way you want or expect it to. There are several ways for you to contact us:
- In our Service-Community, you can meet other users, as well as our staff, and you can exchange your experiences and pass on your knowledge there.
You will find our Service-Community at community.medion.com.
• Alternatively, use our contact form at www.medion.com/contact. - You can also contact our Service team via our hotline or by post.
| Opening times Hotline | number UK |
| Mon – Fri: 08.00 – 20.00Sat – Sun: 10.00 – 16.00 | 1 0333 3213106 |
| Hotline number Ireland | |
| 1 1800 992508 | |
| Service address | |
| MEDION Electronics Ltd.120 Faraday Park, Faraday Road, DorcanSwindon SN3 5JF, WiltshireUnited Kingdom | |

You can download this and many other sets of operating instructions from our service portal at www.medionservice.com.
You can also scan the QR code on the side of the screen, to download the operating instructions onto your mobile device from the service portal.
Legal Notice
Copyright © 2022
Date: 21.06.2022
All rights reserved.
These operating instructions are protected by copyright.
Mechanical, electronic and any other forms of reproduction are prohibited without the written permission of the manufacturer.
Copyright is owned by the company:
MEDION AG
Am Zehnthof 77
45307 Essen
Germany
Please note that you cannot use the address above for returns. Please always contact our Customer Service team first.
Supplier/Producer/Importer
Please note that you cannot use the address below for returns. Please contact the Service Centre mentioned above.
MEDION AG
Am Zehnthof 77
45307 Essen
Germany
Privacy statement
Dear customer,
We wish to inform you that we, MEDION AG, Am Zehnthof 77, D-45307 Essen, Germany process your personal data as a data controller.
For matters regarding data protection, we are supported by our company data protection officer who can be contacted at MEDION AG, Datenschutz, Am Zehnthof 77, D-45307 Essen; datenschutz@medion.com. We process your data for the purpose of warranty processing and associated processes (e.g. repairs) and therefore rely on processing your data for the sales contract concluded with us.
Your data will be provided to repairers contracted to us for the purpose of warranty processing and associated processes. We generally store your personal data for a period of three years in order to fulfil your legal warranty rights.
You have the right to be informed of the personal data concerned as well as the right to rectification, deletion, restriction of processing, the right to object to processing, as well as the right to data portability.
In case of access and cancellation rights, restrictions apply according to S 34 and S 35 of BDSG (Federal Data Protection Act) (Art. 23 GDPR). In addition, there is a right of appeal to a competent data protection supervisory authority (Article 77 GDPR in conjunction with S 19 BDSG). The state official for data protection and freedom of information for MEDION AG is Nordrhein Westfalen, P box 200444, 40212 Düsseldorf, Germany, www.ldi.nrw.de.
The processing of your data is necessary for warranty processing: it is not possible to process the warranty without the provision of the required data.
Great care has gone into the manufacture of this product and it should therefore provide you with years of good service when used properly. In the event of product failure within its intended use over the course of the first 3 years after date of purchase, we will remedy the problem as quickly as possible once it has been brought to our attention. In the unlikely event of such an occurrence, or if you require any information about the product, please contact us via our helpline support services, details of which are to be found both in this manual and on the product itself.
Appliances can be used by persons with reduced physical, sensory or mental capabilities or lack of experience and knowledge if they have been given supervision or instruction concerning use of the appliance in a safe way and understand the hazards involved.

PRODUCED IN CHINA FOR:
MEDION AG
AM ZEHNTHOF 77
45307 ESSEN
GERMANY
AFTER SALES SUPPORT
819721/819722

GBIE0333 3213106 1800 992508
National rate Free Hotline

www.medion.co.uk
MODEL:
MD 16580
11/2022
3
YEAR WARRANTY
- Contents
- Information about this user manual....4
- Proper use....5
- Safety instructions....5
- Package contents......8
- Appliance overview....9
- Preparations for use 12
- Using the food processor....19
- Using the mincer 20
- Recommended settings....21
- After use....22
- Cleaning 22
- Troubleshooting 23
- Prolonged non-use and transport 23
- Disposal 24
- Technical specifications 24
- EU declaration of conformity....24
- Spare parts....25
- Service information 25
- Legal Notice....25
- Privacy statement....26
- Information about this user manual
- Explanation of symbols
- DANGER!
- WARNING!
- CAUTION!
- NOTICE!
- CE labelling
- Proper use
- Safety instructions
- Risk of injury!
- Risk of choking and suffocation!
- Risk of electric shock/short circuit!
- Setting up the appliance
- Handle the appliance with care
- Potential risk to health due to bacteria growth!
- Possible damage to the appliance!
- Package contents
- Appliance overview
- Main unit
- Overview of accessories
- Stirring attachments
- Mincer accessories
- Preparations for use
- Possibility of damage to the appliance!
- Running noise when using the appliance for the first time
- Using the food processor
- Using the mincer
- Equipping the mincer for mincing
- Equipping the mincer with the sausage attachment
- Processing prepared sausage meat
- Mincing meat and making sausages in one process
- Equipping the mincer for making biscuits
- 11
- Equipping the mincer for making pasta
- 13
- Equipping the mincer for making kibbeh
- 14
- Mixing and kneading dough
- Whisking egg whites
- Whipping cream
- Mixing milkshakes, cocktails or other liquids
- Chopping meat
- Making sausages
- Making biscuits
- Afteruse
- When using the food processor
- When using the mincer
- Cleaning
- Risk of electric shock!
- Sensitive surfaces
- Motor housing:
- Other accessories and the splash-guard:
- Prolonged non-use and transport
- Disposal
- APPLIANCE
- Technical specifications
- EU declaration of conformity
- Spare parts
- Service information
- Legal Notice
- Supplier/Producer/Importer
- Privacy statement
- PRODUCED IN CHINA FOR:
Brand : MEDION
Model : MD 16580
Category : Food processor