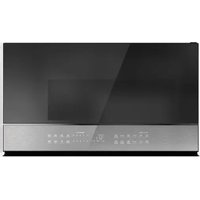
CVM721M2NS5 - Microwave Café - Free user manual and instructions
Find the device manual for free CVM721M2NS5 Café in PDF.


| Brand | Café |
| Model | CVM721M2NS5 |
| Product Type | Over-the-Range Microwave Oven |
| Installation | Above gas or electric cooking equipment, 36" or less wide |
| Power Source | 120V, 60Hz, AC, grounded 3-prong outlet |
| Turntable | Removable glass turntable with support |
| Cooking Modes | Microwave, Sensor Cooking, Auto Cook, Reheat, Defrost (Weight/Time), Steam Cook, Popcorn, Potato, Express Cook, Add 30 Sec |
| Power Levels | 10 levels (1-10), including High 10 (100%), Med-High 7 (70%), Medium 5 (50%), Low 2-3 (20-30%), Warm 1 (10%) |
| Control Panel | Touchpad with digital display, including Settings, Chef Connect, WiFi Connect, Lock Control, Reset Filter, Steam Clean |
| Smart Features | WiFi Connect (remote monitoring and control via Café Appliances Kitchen App), Chef Connect (Bluetooth sync with compatible range), Remote Enable |
| Vent Fan | 4 speeds (Low, Medium, High, Boost) + Auto Fan, automatic shutdown after cooling |
| Lighting | Cooktop surface light (LED, replaceable), oven cavity light (LED) |
| Filters | Reusable metal vent filters (clean monthly), optional charcoal filter for recirculation (replace every 6-12 months, indicator light) |
| Cleaning | Steam Clean cycle; manual cleaning with mild soap and water; avoid abrasives, ammonia, or alcohol |
| Safety Features | Door interlocks, child lock (Control Lock-Out), auto shut-off, superheated water precaution |
| Warranty | 1 year parts and labor, 5 year limited on magnetron |
| Dimensions (Approx.) | 30" W x 17" H x 16" D (typical for OTR) |
| Weight (Approx.) | 77 lbs |
| Optional Accessories | Filler panel kit JX36BSS, recirculating charcoal filter kit, 15" cabinet installation kit JX15BUMPBB/JX15BUMPWW |
Frequently Asked Questions - CVM721M2NS5 Café
User questions about CVM721M2NS5 Café
0 question about this device. Answer the ones you know or ask your own.
Ask a new question about this device
Download the instructions for your Microwave in PDF format for free! Find your manual CVM721M2NS5 - Café and take your electronic device back in hand. On this page are published all the documents necessary for the use of your device. CVM721M2NS5 by Café.
USER MANUAL CVM721M2NS5 Café
natural_image
Top-down view of a festive table setting with ornate plates, cutlery, and floral arrangements (no text or symbols visible)
natural_image
Solid dark green rectangle with no visible text, symbols, or features.CAFE
DISTINCT BY DESIGN
Owner's Manual
natural_image
Solid red rectangular background with no text, symbols, or discernible features.
natural_image
Top-down view of fresh mushrooms on a wooden cutting board with herbs and scattered food items (no text or symbols visible)CAFE
DISTINCT BY DESIGN™
Owner's Manual
MICROWAVE OVEN
Model: CVM721
Contents
Safety Information....3 Care And Cleaning....21
Using the Microwave Optional Accessories 23
Features....Toubleshooting....23
About the Features 7 Reabscouting 20
Other Features ....Limited Warranty....25
WiFi Connect 20 Consumer Support 26
Remote Enabled Equipment 20
Write the model and serial numbers here:
Model # ____
Serial #
You can find them on a label under the cooktop.
English • Español
THANK YOU FOR MAKING CAFÉ A PART OF YOUR HOME.
We take pride in the craftsmanship, innovation and design that goes into every Café product, and we think you will too. Among other things, registration of your appliance ensures that we can deliver important product information and warranty details when you need them.
Register your Café appliance now online. Helpful websites are available in the Consumer Support section of this Owner's Manual. You may also mail in the pre-printed registration card included in the packing material.
CAFE
DISTINCT BY DESIGN™
IMPORTANT SAFETY INSTRUCTIONS READ ALL INSTRUCTIONS BEFORE USING THE APPLIANCE
WARNING
To reduce the risk of burns, electric shock, fire, injury to persons, or exposure to excessive microwave energy:
When using electrical appliances, basic safety precautions should be followed, including the following:
- Read all instructions before using this appliance.
- Read and follow the specific “PRECAUTIONS TO AVOID POSSIBLE EXPOSURE TO EXCESSIVE MICROWAVE ENERGY” found on page 5.
■ Use this appliance only for its intended use as described in this manual. Do not use corrosive chemicals or vapors in this appliance. This microwave oven is specifically designed to heat, dry or cook food, and is not intended for laboratory or industrial use.
■ This appliance should be serviced only by qualified service personnel. Contact nearest authorized service facility for examination, repair, or adjustment.
INSTALLATION
■ Install or locate this appliance only in accordance with the provided installation instructions.
This appliance must be grounded. Connect only to a properly grounded outlet. See the "GROUNDING INSTRUCTIONS" found on page 5.
■ This microwave oven is ETL listed for installation over both gas and electric ranges.
This unit is suitable for use above gas or electric cooking equipment, 36" or less wide.
- Do not operate this appliance if it has a damaged power cord or plug, if it is not working properly, or if it has been damaged or dropped.
- Keep power cord away from heated surfaces.
■ Do not let cord hang over edge of table or counter.
■ Do not immerse power cord or plug in water.
■ Do not cover or block any opening on the appliance.
- Do not store this appliance outdoors. Do not use this product near water - for example, in a wet basement, near a swimming pool, or in a similar location.
■ Do not mount over a sink.
TO REDUCE THE RISK OF FIRE IN THE CAVITY:
— Do not overcook food. Carefully attend appliance when paper, plastic or other combustible materials are placed inside the oven while cooking.
— Remove wire twist-ties and metal handles from paper or plastic containers before placing them in the oven.
— If materials inside the oven ignite, keep the oven door closed, turn the oven off and disconnect the power cord, or shut off power at the fuse or circuit breaker panel.
— Do not store any materials in the oven when not in use. Do not leave paper products, cooking utensils, or food in the cavity when not in use.
— Do not operate the microwave feature without food in the oven.
TO REDUCE THE RISK OF BURNS
■ Be careful when opening containers of hot food. Use pot holders and direct steam away from face and hands.
■ Vent, pierce, or slit containers, pouches or plastic bags to prevent build-up of pressure.
■ Be careful when touching the turntable, door, or walls of the oven which may become hot during use.
■ Liquids and certain foods heated in the microwave oven can present a risk of burn when removing them from the microwave. The potential for a burn is greater in young children, who should not be allowed to remove hot items from the microwave.
READ AND SAVE THESE INSTRUCTIONS
IMPORTANT SAFETY INSTRUCTIONS READ ALL INSTRUCTIONS BEFORE USING THE APPLIANCE
WARNING
OPERATING
■ As with any appliance, close supervision is necessary when used by children.
■ Do not operate the oven without the turntable in place. The turntable must be unrestricted so it can turn.
■ Make sure all cookware used in your microwave oven is suitable for microwaving. Most glass casseroles, cooking dishes, measuring cups, custard cups, pottery or china dinnerware which does not have metallic trim or glaze with a metallic sheen can be used in compliance with cookware manufacturers' recommendations.
■ Do not store anything directly on top of the microwave surface when the microwave is in operation.
■ Some products such as whole eggs and sealed containers - for example, closed jars - are able to explode and should not be heated in the microwave oven.
■ Do not overcook potatoes. They could dehydrate and catch fire.
■ Do not cover any other part of the oven with metal foil. This will cause overheating of the oven.
■ Cook meat and poultry thoroughly—meat to at least an INTERNAL temperature of 160^ F and poultry to at least an INTERNAL temperature of 180^ F. Cooking to these temperatures usually protects against foodborne illness.
■ This oven is not approved or tested for marine use.
CLEANING
- Keep the oven free from grease buildup.
■ Do not clean with metal scouring pads. Pieces can burn off the pad and touch electrical parts involving risk of electric shock.
■ When cleaning surfaces of door and oven that come together on closing the door, use only mild, nonabrasive soaps, or detergents applied with a clean sponge or soft cloth. Rinse well.
SUPER HEATED WATER
■ Liquids, such as water, coffee, or tea, are able to be overheated beyond the boiling point without appearing to be boiling. Visible bubbling or boiling when the container is removed from the microwave oven is not always present. THIS COULD RESULT IN VERY HOT LIQUIDS SUDDENLY BOILING OVER WHEN THE CONTAINER IS DISTURBED OR A SPOON OR OTHER UTENSIL IS INSERTED INTO THE LIQUID.
■ To reduce the risk of injury to persons:
- Do not overheat the liquid.
- Stir the liquid both before and halfway through heating it.
- Do not use straight-sided containers with narrow necks.
- After heating, allow the container to stand in the microwave oven for a short time before removing the container.
- Use extreme care when inserting a spoon or other utensil into the container.
READ AND SAVE THESE INSTRUCTIONS
IMPORTANT SAFETY INSTRUCTIONS READ ALL INSTRUCTIONS BEFORE USING THE APPLIANCE
PRECAUTIONS TO AVOID POSSIBLE EXPOSURE TO EXCESSIVE MICROWAVE ENERGY
(a) Do Not Attempt to operate this oven with the door open since open-door operation can result in harmful exposure to microwave energy. It is important not to defeat or tamper with the safety interlocks.
(b) Do Not Place any object between the oven front face and the door or allow soil or cleaner residue to accumulate on sealing surfaces.
(c) Do Not Operate the oven if it is damaged. It is particularly important that the oven door close properly and that there is no damage to the:
(1) door (bent),
(2) hinges and latches (broken or loosened),
(3) door seals and sealing surfaces.
(d) The Oven Should Not be adjusted or repaired by anyone except properly qualified service personnel.
GROUNDING INSTRUCTIONS
WARNING
Improper use of the grounding plug can result in a risk of electric shock.
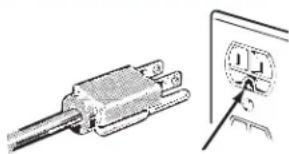
natural_image
Technical illustration of a plug-in connector with a close-up view showing internal components (no text or symbols)Ensure proper ground exists before use.
This appliance must be grounded. In the event of an electrical short circuit, grounding reduces the risk of electric shock by providing an escape wire for the electric current.
This appliance is equipped
with a power cord having a grounding wire with a grounding plug. The plug must be plugged into an outlet that is properly installed and grounded.
Consult a qualified electrician or service technician if the GROUNDING INSTRUCTIONS are not completely understood, or if doubt exists as to whether the appliance is properly grounded.
If the outlet is a standard 2-prong wall outlet, it is your personal responsibility and obligation to have it replaced with a properly grounded 3-prong wall outlet. Do not under any circumstances cut or remove the third (ground) prong from the power cord.
Do not use an extension cord. If the power cord is too short, have a qualified electrician or service technician install an outlet near the appliance.
For best operation, plug this appliance into its own electrical outlet to prevent flickering of lights, blowing of fuse or tripping of circuit breaker.
NOTICE: PACEMAKERS
Most pacemakers are shielded from interference from electronic products, including microwaves. However, patients with pacemakers may wish to consult their physicians if they have concerns.
VENT FAN
WARNING
The fan will operate automatically under certain conditions. Take care to prevent the starting and spreading of accidental cooking fires while the vent fan is in use.
■ Clean the underside of the microwave often. Do not allow grease to build up on the microwave or the fan filters.
In the event of a grease fire on the surface units below the microwave oven, smother a flaming pan on the surface unit by covering the pan completely with a lid, a cookie sheet or a flat tray.
■ Use care when cleaning the vent fan filters. Corrosive cleaning agents, such as lye-based oven cleaners, may damage the filters.
■ When preparing flaming foods under the microwave, turn the fan on.
■ Never leave surface units beneath your microwave oven unattended at high heat settings. Boilovers cause smoking and greasy spillovers that may ignite and spread if the microwave vent fan is operating. To minimize automatic fan operation, use adequate sized cookware and use high heat on surface units only when necessary.
READ AND SAVE THESE INSTRUCTIONS
Features
Throughout this manual, features and appearance may vary from your model.

- Door Handle
- Door Latches
- Window with Metal Shield
Screen allows cooking to be viewed while keeping microwaves confined in the oven.
- Removable Turntable
Do not operate the oven in the microwave mode without the turntable and turntable support seated and in place.
- Removable Turntable Support
Do not operate the oven in the microwave mode without the turntable and turntable support seated and in place.
- Deflector
Provides robustness from cooktop heat. Do not remove.
Cooking Controls

Express Cook


Sensor Cooking
| Auto Cook | Reheat | Defrost | Steam Clean | Settings | Chef Connect |
| Steam Cook | Potato | Popcorn | Reset Filter | Lock Control | Hold 3 Sec |
| Hold 3 Sec | Hold 3 Sec | WiFi Connect |
Check the Convenience Guide before you begin.

Time Features
| Press | Enter | |
| COOK TIME Amount of cooking time | ||
| DEFROST Weight or time | ||
| TIMER | ||
| POWER LEVEL Power level 1 to 10 | ||
| ADD 30 SEC Starts immediately! | ||
| EXPRESS COOK | Starts | immediately! |

Sensor/Convenience Features
| Press | Enter |
| AUTO COOK Press pad to select food | |
| POPCORN | Start immediately |
| REHEAT Press pad to select food | |
| POTATO | Start immediately |
| STEAM COOK Press pad to select food | |
About the features
Cook Time
Allows you to microwave for any time up to 99 minutes and 99 seconds.
Power level 10 (HIGH) is automatically set, but you may change it for more flexibility.
- Press Cook Time.
- Enter cooking time.
- Press START.
Cooking will start when the countdown begins in the display.
You may open the door during Cook Time to check the food. Close the door and press START to resume cooking.
Cook Time
Express Cook
Start Pause
Express Cook
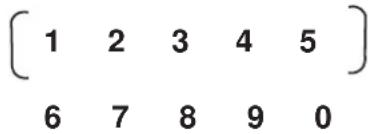
This is a quick way to set cooking time for 1-5 minutes.
- Press one of the Express Cook pads (from 1-5) for 1-5 minutes of cooking at power level 10.
For example, press the 2 pad for 2 minutes of cooking time.
The power level can be changed as time is counting down. Press POWER LEVEL and enter 1-10.
NOTE: Express Cook function pertains to pads 1-5 only.
Express Cook

Add 30 Sec
This will add 30 seconds to the time counting down each time the pad is pressed. Each touch will add 30 seconds, up to 99 minutes and 99 seconds.
Add 30 sec can also be used like an express 30 seconds button. The microwave oven will start immediately when pressed. Add
Add 30 Sec
Weight Defrost
Use Weight Defrost for meat, poultry and fish. Use Time Defrost for most other frozen foods. (Time Defrost is explained on page 9.)
- Press DEFROST once for Weight Defrost.
- Enter the weight in pounds.
- Press START.
Cooking will start when the countdown begins in the display.
![Defrost Express Cook [ 1 2 3 4 5 ] 6 7 8 9 0 ]](/content/2026/05/1044643/images/4899ec6fa43d488669f7a92e3b12110ed553c5aa255e6f8e9b6b27dd1df4ca32.jpg)
Defrosting Tips
- Remove meat from package and place on microwave-safe dish.
- When the oven signals, turn the food over. Remove defrosted meat or shield warm areas with small pieces of foil.
- After defrosting, most meats need to stand 5 minutes to complete defrosting. Large roasts should stand for about 30 minutes.
Conversion Guide
| If the weight of food is stated in pounds and ounces, the ounces must be converted to tenths (.1) of a pound. | |
| Ounces | Pounds |
| 1-2 | .1 |
| 3 | .2 |
| 4-5 | .3 |
| 6-7 | .4 |
| 8 | .5 |
| 9-10 | .6 |
| 11 | .7 |
| 12-13 | .8 |
| 14-15 | .9 |
Time Defrost
Allows you to defrost for a selected length of time. See the Defrosting Guide on page 14 for suggested times (Weight Defrost is explained on page 8).
- Press DEFROST twice for Time Defrost.
- Enter defrosting time in minutes and seconds.
- Press START.
Cooking will start when the countdown begins in the display.
At one half of selected defrosting time, turn food over and break apart or rearrange pieces for more even defrosting. Shield any warm areas with small pieces of foil. The oven will continue to defrost if you don't open the door and turn the food.
Noises may be heard during defrosting. This is normal when oven is not operating at High power.
Defrosting Tips
- Foods frozen in paper or plastic can be defrosted in the package. Closed packages should be slit, pierced or vented AFTER food has partially defrosted. Plastic storage containers should be partially uncovered.
- Family-size, prepackaged frozen dinners can be defrosted and microwaved. If the food is in a foil container, transfer it to a microwave-safe dish.
- Foods that spoil easily should not be allowed to sit out for more than one hour after defrosting. Room temperature promotes the growth of harmful bacteria.
- For more even defrosting of larger foods, such as roasts, use Time Defrost. Be sure large meats are completely defrosted before cooking.
- When defrosted, food should be cool but softened in all areas. If still slightly icy, return to the microwave very briefly, or let it stand a few minutes.
![Defrost Express Cook [ 1 2 3 4 5 ] 6 7 8 9 0 Start Pause](/content/2026/05/1044643/images/199eb54fddf3135bc3194ee66f7cb4c742c8116f76917f73be8bcd7c59d1da8e.jpg)
About the features
| Defrosting Guide | ||
| Food Time | Comments | |
| Breads, CakesBread, buns or rolls (1 piece)Sweet rolls (approx. 12 oz.) 2 | 1/4 min.to 4 min. Rearrange after half of time. | |
| Fish and SeafoodFillets, frozen (1 lb.) 6 to 9 min. | ||
| FruitPlastic pouch—1 or 2 1 to 5 min.(10-oz. package) | ||
| MeatBacon (1 lb.) 2 to 5 min.Franks (1 lb.)Ground meat (1 lb.) 4 to 6 minRoast: beef, lamb, veal,porkSteaks, chops and cutlets 4 to | 2 to 5 min.Turn meat over after 9 to 13 min. per lb. Use power level 10.8 min. per lb. Place unwrapped meat in cooking dish. Turn over after first half of time and shield warm areas with foil. After second half of time, separate pieces with table knife. Let stand to complete defrosting. | Place unopened package in oven. Let stand 5 minutes after defrosting.Place unopened package in oven. Microwave just until franks can be separated. Let stand 5 minutes, if necessary, to complete defrosting.first half of time.Use power level 10. |
| PoultryChicken, broiler-fryer, cut up(2 1⁄2 to 3 lbs.)Chicken, whole (2 1⁄2 to 3 lbs.)Cornish hen 7 to 13 min. per Turkey breast (4 to 6 lbs.) 3 to | 14 to 20 min. Place wrapped chicken in dish. Unwrap and turn over after first half of time. After second half of time, separate pieces and place in cooking dish. Microwave 2 to 4 minutes more, if necessary. Let stand a few minutes to finish defrosting.20 to 25 min. Place wrapped chicken in dish. After first half of time, unwrap and turn chicken over. Shield warm areas with foil. To complete defrosting, run cool water in cavity until giblets can be removed. Place unwrapped hen in oven breast-side-up. Turn over after first half of time. Run cool water in cavity until giblets can be removed.8 min. per lb. Place unwrapped breast in microwave-safe dish breast-side-down. After first half of time, turn breast-side-up and shield warm areas with foil. Defrost for second half of time. Let stand 1 to 2 hours in refrigerator to complete defrosting. | |
The Sensor Features detect the increasing humidity released during cooking. The oven automatically adjust the cooking time to various types and amounts of food.
Do not use the Sensor Features twice in succession on the same food portion - It may result in severely overcooked or burnt food. Be sure to let the oven cool down for 5 - 10 minutes before starting the next sensor cook.
If food is undercooked after the countdown, use Cook Time for additional cooking time
- The proper containers and covers are essential for best sensor cooking.
- Always use microwave-safe containers and cover them with lids or vented plastic wrap. Never use tight-sealing plastic covers - they can prevent steam from escaping and cause food to overcook.
- Be sure the outside of the cooking container and the inside of the microwave oven are dry before placing food in the oven. Beads of moisture turning into steam can mislead the sensor.

Dry off dishes so they don't mislead the sensor.
How to Change the Automatic Settings
To reduce time by 10%:
Press 1 after the feature pad.
To add 10% to cooking time:
Press 9 after the feature pad.
Auto Cook
Allows you to microwave food choices with sensor.
- Press AUTO COOK button.
- Enter the food type code. See Cooking Guide for AUTO COOK below for codes or check the display for food types..
- Press START.
The oven signals when steam is sensed and the time remaining begins counting down.
Do not open the oven door until time is counting down. If the door is opened before time is counting down 4 beeps are emitted while the display will Scroll & Cycle "SENSOR ERROR" until CANCEL is pressed. The sensor cook will be cancelled as well. If the Door is opened during the counting down, close it and press START immediately.
![Auto Cook Express Cook [ 1 2 3 4 5 ] 6 7 8 9 0 ]](/content/2026/05/1044643/images/3788dc477ff9e4266b1179a442b62d249c62a218007c1cd7ac3a068bc70ce2d8.jpg)
Start Pause
Cooking Guide for Auto Cook Feature
| CODE ENTRY | FOOD COMMENTS | |
| 1 Chicken | ||
| 2 | F i | s h |
| 3 Ground Meat | ||
| 4 Veggies Enter veggies type | ||
About the features
Popcorn
To use the Popcorn feature:
- Place the package of popcorn in the center of the microwave.
- Press POPCORN. The oven starts immediately.
Your popcorn bag may get stuck and stop rotating, but this will not affect the cooking performance. Do not open the door even if the bag is not rotating.
Using the vent function in combination with the popcorn sensor feature may lead to over cooking.
Popcorn
How to Change the Automatic Settings
To reduce time by 10%:
Press 1 after the feature pad.
To add 10% to cooking time:
Press 9 after the feature pad.
If food is undercooked after the countdown, use Cook
Time for additional cooking time. We recommend 30 seconds and watch carefully.
Reheat
The Reheat feature reheats servings of previously cooked foods or a plate of leftovers.
- Press REHEAT.
- Using the cooking guide below, enter food code. For example, 1 for Pasta.
- Press START/PAUSE. The oven signals when steam is sensed and the time remaining begins counting down.
Do not open the oven door until time is counting down. If the door is opened before time is counting down 4 beeps are emitted while the display will Scroll & Cycle "SENSOR ERROR " until CANCEL is pressed. The sensor cook will be cancelled as well. If the Door is opened during the counting down, close it and press START immediately.
Reheat
After removing food from the oven, stir, if possible, to even out the temperature. If the food is not hot enough, use Cook Time to reheat for more time. Reheated foods may have wide variations in temperature. Some areas may be extremely hot.
It is best to use Cook Time for these foods:
- Bread products.
- Foods that must be reheated covered.
- Foods that need to be stirred or rotated during reheating.
- Foods calling for a dry look or crisp surface after reheating.
How to Change the Automatic Settings
To reduce time by 10%:
Press 1 after the feature pad.
To add 10% to cooking time:
Press 9 after the feature pad.
Cooking Guide for Reheat Feature:
| Code Entry Food | |
| 1 | P |
| 2 Pizza | |
| 3 Plate | |
| 4 Soup |
a
Potato
To use the Potato feature:
- Place the potato in the center of the microwave.
- Press POTATO.
The oven starts immediately.
Do not open the oven door until time is counting down. If the door is opened before time is counting down 4 beeps are emitted while the display will Scroll & Cycle "SENSOR ERROR " until CANCEL is pressed. The sensor cook will be cancelled as well. If the Door is opened during the counting down, close it and press START immediately.
Potato
How to Change the Automatic Settings
To reduce time by 10%:
Press 1 after the feature pad.
To add 10% to cooking time:
Press 9 after the feature pad.
Microwave Terms
| Term Definition | |
| Arcing Arcing is the microwave term for sparks in the oven. Arcing is caused by:metal or foil touching the side of the oven.foil that is not molded to food (upturned edges act like antennas).metal such as twist-ties, poultry pins, gold-rimmed dishes.recycled paper towels containing small metal pieces. | |
| Covering | Covers hold in moisture, allow for more even heating and reduce cooking time. Venting plastic wrap or covering with wax paper allows excess steam to escape. |
| Shielding | In a regular oven, you shield chicken breasts or baked foods to prevent over-browning. When microwaving, you use small strips of foil to shield thin parts, such as the tips of wings and legs on poultry, which would cook before larger parts. |
| Standing Time | When you cook with regular ovens, foods such as roasts or cakes are allowed to stand to finish cooking or to set. Standing time is especially important in microwave cooking. Note that a microwaved cake is not placed on a cooling rack. |
| Venting | After covering a dish with plastic wrap, vent the plastic wrap by turning back one corner so excess steam can escape. |
Steam Cook
Use the Steam Cook feature to steam certain preprogrammed foods.
- Press Steam Cook button.
- Enter the food type code you wish to Steam Cook. See Cooking Guide for Steam Cook below for codes or check the display for food types.
- Place steamer bowl with water, salt (if necessary), and food in the microwave with the steam vents on the steamer bowl in the OPEN position.
- Press START button to being cooking.
NOTE: The NordicWare Rice Cooker/Steamer Bowl should be used for best cooking results.
![Steam Cook Express Cook [ 1 2 3 4 5 ] 6 7 8 9 0 Start Pause](/content/2026/05/1044643/images/10c30731311966d7a849642c5b3569855a8b0b1a9c4f72a069da8386e8f28c0d.jpg)
Cooking Guide for Steam Cook Feature
| Code Entry | Food Amount Entry | |
| 1 Rice | 1 - 1 cup white | 2 - 1 cup brown |
| 2 Asparagus | 1 - 1 | cup2 - 2 cups |
| 3 Broccoli | 1 - 1 | cup2 - 2 cups |
| 4 Brussel Sprouts | 1 - 1 cup2 - 2 cups | |
| 5 Carrots | 1 - 1 | cup2 - 2 cups |
| 6 Cauliflower | 1 - 1 cup | 2 - 2 cups |
| 7 Zucchini | 1 - 1 | cup2 - 2 cups |
Changing the Power Level
The power level may be entered or changed before or during cooking. Power Level is set for Level 10 (High) unless it is changed.
- Press Power Level button.
- Enter new power level by using the number pads or press the Power Level button multiple times until you find the level you want.
- After you have selected the power level, wait five seconds. The display will go back to the Cook Time screen.
- Enter cooking time and press START.
OR
- Press Cook Time button.
- Enter your cooking time.
- Press Power Level button.
- Enter new power level by using the number pads or press the Power Level button multiple times until you find the level you want.
-
After you have selected the power level, wait five seconds. The display will go back to the Cook Time (Enter Time) screen.
-
Press START.
Variable power levels add flexibility to microwave cooking. The power levels on the microwave oven can be compared to the surface units on a range. Each power level gives you microwave energy a certain percent of the time. Power level 7 is microwave energy 70% of the time. Power level 3 is energy 30% of the time. Most cooking will be done on High (power level 10) which gives you 100% power. Power level 10 will cook faster but food may need more frequent stirring, rotating or turning over. A lower setting will cook more evenly and need less stirring or rotating of the food. Some foods may have better flavor, texture or appearance if one of the lower settings is used. Use a lower power level when cooking foods that have a tendency to boil over, such as scalloped potatoes and some casseroles.
Rest periods (when the microwave energy cycles off) give time for the food to “equalize” or transfer heat to the inside of the food. An example of this is shown with Power level 3—the defrost cycle. If microwave energy did not cycle off, the outside of the food would cook before the inside was defrosted.
Here are some examples of uses for various power levels:
High 10 (100%): Fish, bacon, vegetables, boiling liquids.
Med-High 7 (70%): Gentle cooking of meat and poultry; baking casseroles and reheating.
Medium 5 (50%): Slow cooking and tenderizing for stews and less tender cuts of meat.
Low 2 or 3 (20 or 30%): Defrosting; simmering; delicate sauces.
Warm 1 (10%): Keeping food warm; softening butter.
NOTE: You can also change the power level during many cooking modes by pressing the power level button entering a valid power level.
![Power Level Express Cook [ 1 2 3 4 5 ] 6 7 8 9 0 Start Pause](/content/2026/05/1044643/images/6cfeb133bfe0aefe4e3741a7a53cdfbbe2bfd58543c6ea93dab0e78ea6077323.jpg)
Other Features
| Start/PauseIn addition to starting many functions, START/PAUSEallows you to stop cooking without opening the door orclearing the display and resume cooking later. | StartPause |
| Cancel/OffPress the CANCEL/OFF button to stop and cancelcooking at any time. | CancelOff |
| Control Lock-OutYou may lock the control panel to prevent the oven frombeing accidentally started during cleaning or being usedby children.To lock or unlock the controls, press and hold the LOCKCONTROLbutton for three seconds. When the controlpanel is locked, LOCKED will be displayed anytime abutton or dial is pressed. “CONTROL LOCK IS ON” willshow in the display. | LockControlHold 3 Sec |
| Surface LightPress SURFACE LIGHTonce for low light, twice for highlight or a third time to turn the light off.Note:If the microwave is working and the vent fan is onBoost speed, the surface lights will be turned to low lightautomatically. | SurfaceLight |
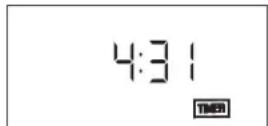
| TimerNOTE:The Timer indicator will be lit while the timer is operating.The Timer operates as a minute timer and can be used at anytime, even when the oven is operating.1. Press the Timer button.2. Enter a time.3. Press the Timer button to start.To cancel, press the Timer button.When time is up, the oven will signal.To turn off the timer signal, press Timer. | TimerOn/Off |
Other Features
Steam Clean
- Press the Steam Clean button.
- Put steam bowl with 1/4 cup of water.
- Press the dial or Start/Pause to start.
Once the cycle is terminated, wipe oven cavity with paper towel or cloth.
Steam Clean
Display
If you have the Timer counting down and you are using the Cook Time at the same time, you can change the display to show either the timer or the cook time countdown.
If the display shows the time for the Timer and you would like to view the Cook Time, press the COOK TIME button.

If the display shows the time for the Cook Time and you would like to view the Timer, press the TIMER button
Wifi Connect
Empowers you to remotely monitor and control your microwave oven using your smart phone or tablet. For example, you could view the current status of the microwave or turn it on and off. To get started, download and open the Café Appliances Kitchen App using your smart device. To enable this feature, follow the instructions provided in the app. To disable this feature and remove the microwave from the WiFi network, press and hold the WiFi Connect button for 3 seconds. You
have successfully disabled this feature when the WiFi icon in the display is no longer illuminated. For further instructions, visit our website at cafeappliances.com/connect.
WiFi Connect Hold 3 Sec
Vent Fan
The vent fan removes steam and other vapors from surface cooking.
Press Vent Fan once for low fan speed, twice for medium fan speed, three times for high fan speed, four times for boost speed or five times to turn the fan off
Automatic Fan
An automatic fan feature protects the microwave from too much heat rising from the cooktop below it. It automatically turns on if it senses too much heat.
If you have turned the fan on you may find that you cannot turn it off. The fan will automatically turn off when the internal parts are cool. It may stay on for 30 minutes or more after the cooktop and microwave controls are turned off.
Vent Fan
Insert Food Reminder
A reminder will show on the display if the user tries to start the cooking cycle without placing food inside the microwave oven within 5 minutes prior to starting the cooking cycle.
Cooking Complete Reminder
To remind you that you have food in the oven, the oven will display "Food is ready" and beep once a minute until you either open the oven door or press the CANCEL/OFF button.
Settings
Settings allow to change the default settings of your OTR.
- Press the Settings pad. "SELECT SETTING ITEM
1- CLOCK SETTING
2- CLOCK MODE
3- BEEPER VOLUME
4- LIGHT SYNC
5- VENT FAN SYNC
6- SYNC SUTO OFF
7- TURN TABLE
8- DISPLAY ON/OFF
9- REMOTE ENABLE
0- EXIT
- Select the item to change the settings. See below tables for detail Guide
Settings
| Code Entry Items | for setting Level Entry | |
| 1 CLOCK | Setting Entry valid number for setting clock time | |
| 2 Clock Mode 0 - 12 hours | 1 - 24 hoursDefault is 12 hours | |
| 3 Beeper Volume 0 - Mute | 1 - Low2 - Normal3 - LoudDefault is normal | |
| 4 | Chef Connect Feature: Light Sync - Selects the light level at which the surface lights will automatically turn on when paired range's burner is turned on. Select "Off" to disable this feature. Surface light will turn on manually. | 0 - Off1 - Low2 - HighDefault is High |
| 5 Chef Connect Feature: Vent Fan Sync - Selects the fan speed at which the vent fan will automatically turn on when paired range's burner is turned on. Select "Off" to disable this feature. Vent fan will turn on manually. | 0 - Off1 - Low2 - Medium3 - High4 - BoostDefault is OFF | |
| 6 Chef Connect Feature: Sync Auto Off - When the Light/Vent fan sync mode is enabled (ON), this will automatically turn OFF the light/fan when the range burner has been turned off. Select the period of time the light/fan will remain on until the microwave automatically turns it off. | 0 - 0 minutes1 - 5 mintues2 - 10 minutes3 - 15 minutes4 - ManualDefault is 15 minutes | |
| 7 Turntable On/Off 0 - OFF | 1 - ONdefault setting is ON" | |
| 8 Display On/Off 0 - OFF | 1 - ONdefault setting is ON | |
| 9 Remote Enable: Remote Enable On/Off feature could enable you to start the microwave from a remote source or avoid you unintendedly to control your microwave remotely. For turn on/off this feature please press "Settings" button on the control panel then press "9" to select this feature then press "1" for On and "0" for Off function. | 0-OFF1-ONDefault is On | |
| 0 Setting Exit | ||
Other Features
Chef Connect
Use the Chef Connect feature for connecting your microwave to a GE Appliances range to sync your vent fan, cooktop surface lights and clock via Bluetooth technology.
- You must have a Chef Connect enabled range. To pair your microwave for the first time, initiate the Chef Connect process on the GE Appliances range. Refer to the range owner's manual for instructions
- On the microwave, hold Chef Connect button for 3 seconds. The Bluetooth icon ✗ on the display will start flashing as the microwave starts to search and pair with your GE Appliances range. The icon ✗ will remain ON after pairing successfully.
If a GE Appliances range is not found within 2 minutes during search mode the microwave will stop searching and the Bluetooth icon ✗will turn OFF.
On initial setup, the setup protocol will start.
If the Chef Connect feature is enabled the default settings are as follows:
- Display clock sync: ON
- Auto cooktop light: ON (HIGH setting)
- Auto vent fan: OFF
-
Auto off: 15 minutes
-
Select 1 to sync the surface lights to your GE Appliances range. It allows the microwave surface lights to turn on at HIGH level automatically when the paired range's cooktop burner turns on.
-
Select 1 to sync the vent fan to your GE Appliances range. This allows the microwave vent fan to turn on at LOW speed automatically when the paired range's cooktop burner turns on.
Pairing is now complete, the Chef Connect feature is now on.
NOTE: If there is no sync option selected during set up, 5 minutes after icon *turns on, the units will return to stand-by mode.
After completing the setting per above steps, your microwaves vent fan and cooktop light will be set to turn on automatically when the cooktop burner is turned on. The cooktop and range clock display will be synced to display the same time. The vent fan and cooktop light will be set to automatically turn off 15 minutes after the cooktop burner is turned off.
If desired, the light, fan, and auto off settings can now be changed using settings options 4, 5, and 6, respectively.
Press Chef Connect once to turn off and twice to re-connect. The icon ✗will illuminate when on.
In the case of an unintended disconnect such as lost power to the microwave or range the connection will remain after power resumed. For very short power interruptions, the power may need to be reset in order to reconnect
Chef Connect
Hold 3 Sec
Reset Filter
The red LED indicator will light every 6 months as a reminder to replace the charcoal filter.
After replacing the charcoal filters, Hold the Rest Filter for 3 seconds to turn off the Red LED indicator.
Reset
Filter
Hold 3 Sec
Charcoal Filter
The charcoal filter cannot be cleaned. It must be replaced. See back cover for ordering online at cafeappliances.com.
If the model is not vented to the outside, the air will be recirculated through a disposable charcoal filter that helps remove smoke and odors.
The charcoal filter should be replaced when it is noticeably dirty or discolored (usually after 6 to 12 months, depending on usage). See Optional Kits page 23, for more information.
CHARCOAL FILTER REPLACEMENT
-
Unplug the microwave oven.
-
Remove the vent grille mounting screws.
-
Tip the grille forward, then lift out to remove.
-
Remove the charcoal filter.
-
Slide a new charcoal filter into place.
-
Slide the bottom of the vent grille into place. Push the top until is snaps into place. Replace the mounting screws
-
Plug in the microwave oven.

natural_image
Line drawing of an open microwave oven with a door and side sink (no text or symbols)WiFi Connect
Connecting your WiFi Connect enabled microwave oven (on some models)
Your Café Appliances microwave oven is designed to provide you with two-way communication between your appliance and smart device. By using the Café Appliances WiFi Connect features, you will be able to control essential operations such as turning on and off your microwave, convenience features, cook time, timers using your smartphone, tablet or voice control device.
What you will need:
- Know the password of your home WiFi router.
- Download the Café Appliances Kitchen App to your smart device.
- Follow the app on-screen instructions to connect your Café microwave.
For further instructions, visit: cafeappliances.com/connect.
WiFi Connect Hold 3 Sec
Remote Enable On/Off Feature
Remote Enable is a feature that allows you to start the microwave from a remote source such as the Cafe Appliances Kitchen App or Voice Commands from Amazon Alexa or Google Assistant.
When the Remote Enable feature is off, you will still receive messages from your microwave, you can turn off the microwave, or you can use the timer and clock from your smart device.
When the Remote Enable feature is on, you need to have opened the microwave door within the last 5 minutes. The 5 minute restriction is to help ensure food is in the microwave before starting the cooking cycle.
To turn this feature on/off select the Settings button on the control panel and then press "9" to select this feature. Press "1" for Remote Enable On and "0" for Remote Enable Off.
Settings
Remote Enable Equipment
This device complies with part 15 of the FCC Rules. Operation is subject to the following two conditions: (1) This device may not cause harmful interference, and (2) this device must accept any interference received, including interference that may cause undesired operation.
The wireless communication equipment installed on this microwave has been tested and found to comply with the limits for a Class B digital device, pursuant to part 15 of the FCC Rules. These limits are designed to:
(a) provide reasonable protection against harmful interference in a residential installation. This equipment generates, uses, and can radiate radio frequency energy and, if not installed and used in accordance with the instructions, may cause harmful interference to radio communications. However, there is no guarantee that interference will not occur in a particular installation. If this equipment does cause harmful interference to radio or television reception, which can be determined by turning the equipment off and on, the user is encouraged to try to correct the interference by one or more of the following measures:
■ Reorient or relocate the receiving antenna.
■ Increase the separation between the equipment and receiver.
■ Connect the equipment into an outlet on a circuit different from that to which the receiver is connected.
■ Consult the dealer or an experienced radio/TV technician for help.
(b) accept any interference received, including interference that may cause undesired operation of the device.
NOTE: Any changes or modifications to the wireless communication device installed on this oven that are not expressly approved by the manufacturer could void the user's authority to operate the equipment.
RF Exposure - This device is only authorized for use in a mobile application. At least 20 cm of separation distance between the transmitting antenna device and the user's body must be maintained at all times.
Helpful Hints
An occasional thorough wiping with a solution of baking soda and water keeps the inside fresh.
Be certain the oven control is turned off before cleaning any part of this oven.

natural_image
Illustration of various food items including baking soda, beer bottle, and cheese (no text or symbols)How to Clean the Inside
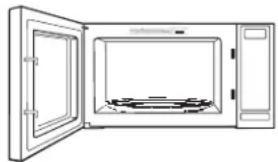
Walls, Floor, Inside Window, Metal and Plastic Parts on the Door
Some spatters can be removed with a paper towel; others may require a damp cloth. Remove greasy spatters with a sudsy cloth, then rinse with a damp cloth. Do not use abrasive cleaners or sharp utensils on oven walls.
To clean the surface of the door and the surface of the oven that come together upon closing, use only mild,
nonabrasive soaps or detergents using a sponge or soft cloth. Rinse with a damp cloth and dry.
Never use a commercial oven cleaner on any part of your microwave.
natural_image
Line drawing of a microwave oven with open door and lid (no text or symbols)Removable Turntable and Turntable Support
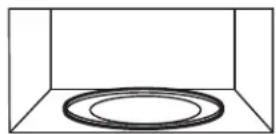
To prevent breakage, do not place the turntable into water just after cooking. Wash it carefully in warm, sudsy water or in the dishwasher. The turntable and support can be broken if dropped. Remember, do not operate the oven in the microwave mode without the turntable and support seated and in place.
How to Clean the Outside
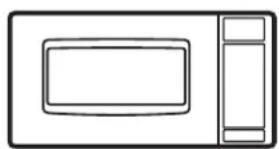
Do not use cleaners containing ammonia or alcohol on the microwave oven. Ammonia or alcohol can damage the appearance of the microwave.
Case
Clean the outside of the microwave with a sudsy cloth. Rinse with a damp cloth and then dry. Wipe the window clean with a damp cloth.
Control Panel and Door
Wipe with a damp cloth. Dry thoroughly. Do not use cleaning sprays, large amounts of soap and water, abrasives or sharp objects on the panel—they can damage it. Some paper towels can also scratch the control panel.
Door Surface
It is important to keep the area clean where the door seals against the microwave. Use only mild, non-abrasive detergents applied with a clean sponge or soft cloth. Rinse well.
Power Cord
If the cord becomes soiled, unplug and wash with a damp cloth. For stubborn spots, sudsy water may be used, but be certain to rinse with a damp cloth and dry thoroughly before plugging cord into outlet.
Stainless Steel (on some models)
Do not use a steel-wood pad; it will scratch the surface.
To clean the stainless steel surface, use a hot, damp cloth with a mild detergent suitable for stainless steel surfaces. Use a clean, hot, damp cloth to remove soap. Dry with a dry, clean cloth. Always scrub lightly in the direction of the grain.
natural_image
Simple line drawing of a microwave oven with front and back panels (no text or symbols)Care and Cleaning
Removing and Cleaning the Filters
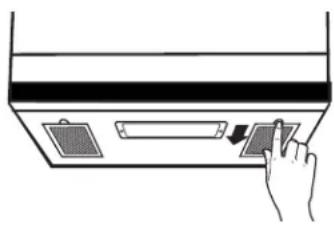
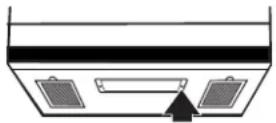
To remove, slide them to the rear using the tabs. Pull down and out.
To clean the vent filters, soak them and then swish around in hot water and detergent. Don't use ammonia or ammonia products because they will darken the metal. Light brushing can be used to remove embedded dirt.
Rinse, shake and let dry before replacing.
To replace, slide the filters into the frame slots on the back of each opening. Press up and to the front to lock into place.
natural_image
Hand inserting a card into a ceiling-mounted device (no text or symbols visible)Cooktop Lights/Nite Lights
Replace with LED lamp. See back cover for ordering online at cafeappliances.com
- To replace the cooktop light/nite light, first disconnect the power at the main fuse or circuit breaker panel, or pull the plug.
- Remove the screw from the side of the light compartment cover and lower the cover until it stops.
- Be sure the LED lamp is cool before removing. Remove a screw and connector from LED lamp
- Connect LED lamp and secure using the screw. Raise the light cover and replace the screw. Connect electrical power to the oven.
Remove screw.

Replacing the Oven Cavity Light
- Disconnect power at the main fuse or circuit breaker panel.
- Press the charcoal access door at the top to open
- Remove charcoal filter if present. NOTE: Charcoal filter is an optional kit, you may not have one.
-
Press the retainer holding the lamp shield in place.
-
Pull the lamp shield out. Unscrew the LED light out and replace with the new LED board. Order LED board from your Café supplier.
- Return the lamp and lamp shield to original position and replace charcoal filter.
- Replace the grill and 2 screws. Reconnect power to the oven.
Vent Fan
The vent fan has two metal reusable vent filters.
Models that recirculate air back into the room also use a charcoal filter.

Reusable vent filters (on all models).
Reusable Vent Filters
The metal filters trap grease released by foods on the cooktop. They also prevent flames from foods on the cooktop from damaging the inside of the oven.
For this reason, the filters must always be in place when the hood is used. The vent filters should be cleaned once a month, or as needed.
Filler Panel Kits
JX36BSS - Stainless
When replacing a 36" range hood, filler panel kits fill in the additional width to provide a custom built-in appearance.
For installation between cabinets only; not for end-of-cabinet installation. Each kit contains two 3" wide filler panels.

Recirculating Charcoal Filter Kit
Filter kits are used when the microwave oven cannot be vented to the outside.
15" Cabinet Installation Kit
JX15BUMPBB - Black
JX15BUMPWW - White
For use when installing with 15" depth cabinets.
Available at extra cost from your GE Appliances supplier.
See back cover for ordering online at
cafeappliances.com.
Troubleshooting Tips
Things That Are Normal With Your Microwave Oven
■ Steam or vapor escaping from around the door.
■ Light reflection around door or outer case.
■ Dimming oven light and change in the blower sound at power levels other than high.
■ Dull thumping sound while oven is operating.
■ TV-radio interference might be noticed while using the microwave. Similar to the interference caused by other small appliances, it does not indicate a problem with the microwave. Plug the microwave into a different electrical circuit, move the radio or TV as far away from the microwave as possible or check the position and signal of the TV/radio antenna.
FEDERAL COMMUNICATIONS COMMISSION RADIO FREQUENCY INTERFERENCE STATEMENT (U.S.A. ONLY)
This equipment generates and uses ISM frequency energy and if not installed and used properly, that is in strict accordance with the manufacturer's instructions, may cause interference to radio and television reception. It has been type tested and found to comply with limits for ISM Equipment pursuant to part 18 of FCC Rules, which are designed to part 18 of FCC Rules, which are designed to provide residential installation.
However, there is no guarantee that interference will not occur in a particular installation. If this equipment does cause interference to radio or television reception, which can be determined by turning the equipment off and on, the user is encouraged to try to correct the interference by one or more of the following:
■ Reorient the receiving antenna of the radio or
television.
■ Relocate the Microwave Oven with respect to the receiver.
■ Move the microwave oven away from the receiver.
- Plug the microwave oven into a different outlet so that the microwave oven and the receiver are on different branch codes.
The manufacturer is not responsible for any radio of TV interference caused by unauthorized modification to this microwave oven. It is the responsibility of the user to correct such interference.
Troubleshooting Tips... Before you schedule service
Save time and money! Review the charts on the following pages first and you may not need to schedule service.
| Problem Possible Causes What To Do | ||
| Oven will not start A fuse in your home may be blown or the circuit breaker tripped. | Replace fuse or reset circuit breaker. | |
| Power surge. Unplug the microwave oven, then plug it back in. | ||
| Plug not fully inserted into wall outlet. Make sure the 3-prong plug on the oven is fully inserted into wall outlet. | ||
| Door not securely closed. Open the door and close securely. | ||
| Control panel lighted, yet oven will not start | Door not securely closed. Open the door and close securely. | |
| START button not pressed after entering cooking selection. | Press START. | |
| Another selection entered already in oven and OFF/CLEAR button not pressed to cancel it. | Press OFF/CLEAR. | |
| Cooking time not entered after pressing TIME COOK. | Make sure you have entered cooking time after pressing TIME COOK. | |
| OFF/CLEAR was pressed accidentally. | Reset cooking program and press START. | |
| Food weight not entered after selecting AUTO DEFROST. | Make sure you have entered food weight after selecting AUTO DEFROST. | |
| Food type not entered after pressing COOK. | Make sure you have entered a food type. | |
| CONTROL LOCKED appears on display | The control has been locked. | Press and hold OFF/CLEAR for about 3 seconds to unlock the control. |
| HOT appears on display | The temperature inside the oven is greater than 200°F. | This is normal. |
| One of the sensor cooking pads was pressed when the temperature inside the oven was greater than 200°F. | These features will not operate when the oven is hot. | |
For additional product FAQs and troubleshooting tips Scan the QR code or visit: GEAppliances.com/ge/service-and-support/faq-microwaves.htm

Café Microwave Oven Limited Warranty
cafeappliances.com
All warranty service is provided by our Factory Service Centers, or an authorized service technician. To schedule service online, visit us at cafeappliances.com/service. Please have your serial number and your model number available when scheduling service.
| For the period of | Café will replace |
| One yearFrom the dateof the originalpurchase | Café will choose to replace or service the defective unit. In the event of service, Café willprovide any part of the microwave oven which fails due to a defect in materials or workmanship.During this limited one-year warranty, GE Appliances will also provide, free of charge, all laborand related service costs to replace the defective part when the unit is serviced. |
| Five yearFrom the dateof the originalPurchase | For the period of Five Years from the date of the original purchase, Café will choose toeither replace the unit or replace the magnetron tube, if the magnetron tube fails dueto a defect in materials or workmanship. During this five –year limited warranty, you will beresponsible for any labor or in-home service cost. |
What Café will not cover:
■ Service trips to your home to teach you how to use the product.
■ Improper installation, delivery or maintenance. If you have an installation problem, contact your dealer or installer. You are responsible for providing adequate electrical, exhausting, and other connecting facilities.
■ Failure of the product or damage to the product if it is abused, misused (for example, cavity arcing from wire rack or metal/foil), or used for other than the intended purpose or used commercially.
■ Replacement of house fuses or resetting of circuit breakers.
■ Damage to the product caused by accident, fire,
floods, or acts of God.
■ Damage to finish, such as surface rust, tarnish, or small blemishes not reported within 48 hours of delivery.
■ Incidental or consequential damage caused by possible defects with this appliance.
■ Damage caused after delivery.
■ Product not accessible to provide required service.
■ Service to repair or replace light bulbs, except for LED lamps.
EXCLUSION OF IMPLIED WARRANTIES
Your sole and exclusive remedy is product repair as provided in this Limited Warranty. Any implied warranties, including the implied warranties of merchantability or fitness for a particular purpose, are limited to one year or the shortest period allowed by law.
This limited warranty is extended to the original purchaser and any succeeding owner for products purchased for home use within the USA. If the product is located in an area where service by a Café Authorized Servicer is not available, you may be responsible for a trip charge or you may be required to bring the product to an Authorized Café Service location for service. In Alaska, the limited warranty excludes the cost of shipping or service calls to your home. Some states do not allow the exclusion or limitation of incidental or consequential damages. This limited warranty gives you specific legal rights, and you may also have other rights which vary from state to state. To know what your legal rights are, consult your local or state consumer affairs office or your state's Attorney General.
Warrantor: GE Appliances, a Haier company
Louisville, KY 40225
Extended Warranties: Purchase a Café extended warranty and learn about special discounts that are available while your warranty is still in effect. You can purchase it online anytime at
cafeappliances.com/extended-warranty
Café Service will still be there after your warranty expires.
Consumer Support
Café Website
Have a question or need assistance with your appliance? Try the Café website 24 hours a day, any day of the year! You can also shop for more great Café products and take advantage of all our on-line support services designed for your convenience. In the US: cafeappliances.com
Register Your Appliance
Register your new appliance on-line at your convenience! Timely product registration will allow for enhanced communication and prompt service under the terms of your warranty, should the need arise. You may also mail in the pre-printed registration card included in the packing material. In the US: cafeappliances.com/register
In Canada: cafeappliances.ca/registration
Schedule Service
Expert Café repair service is only one step away from your door. Get on-line and schedule your service at your convenience any day of the year. In the US: cafeappliances.com/service
Extended Warranties
Purchase a Café extended warranty and learn about special discounts that are available while your warranty is still in effect. You can purchase it on-line anytime. Café Service will still be there after your warranty expires.
In the US: cafeappliances.com/extended-warranty
Remote Connectivity
For assistance with wireless network connectivity (for models with remote enable), visit our website at cafeappliances.com/connect
Parts and Accessories
Individuals qualified to service their own appliances can have parts or accessories sent directly to their homes (VISA, MasterCard and Discover cards are accepted). Order on-line today 24 hours every day.
In the US: cafeappliances.com/parts
Instructions contained in this manual cover procedures to be performed by any user. Other servicing generally should be referred to qualified service personnel. Caution must be exercised, since improper servicing may cause unsafe operation.
Contact Us
If you are not satisfied with the service you receive from Café, contact us on our website with all the details including your phone number, or write to:
In the US: General Manager, Customer Relations | Café Appliances, Appliance Park | Louisville, KY 40225 cafeappliances.com/contact
CAFE
DISTINCT BY DESIGN™
natural_image
Technical illustration of a plug-in socket and its electrical outlet (no text or symbols)natural_image
Simple line drawing of a cooking pot (no text or symbols)Cubierto

natural_image
Simple line drawing of a container with liquid and a handle, no text or symbols presentVentilado

natural_image
Simple line drawing of a rectangular container with water droplets inside, crossed out by a black 'X' symbol (no text or labels)7- TURN TABLE
8- DISPLAY ON/OFF
9- REMOTE ENABLE
0- EXIT
natural_image
Line drawing of an open microwave oven with a door open and a black arrow pointing to the interior (no text or symbols)Conexión WiFi
natural_image
Illustration of various food items including baking soda, milk bottle, and rolled cheese (no text or symbols)natural_image
Line drawing of a microwave oven with open door and control panel (no text or symbols)

GEAppliances.com/ge/service-and-support/faq-microwaves.htm

Louisville, KY 40225
cafeappliances.com/extended-warranty
En EE.UU.: General Manager, Customer Relations | Café Appliances, Appliance Park | Louisville, KY 40225 cafeappliances.com/contact
- CAFE
- Owner's Manual
- MICROWAVE OVEN
- Contents
- English • Español
- THANK YOU FOR MAKING CAFÉ A PART OF YOUR HOME.
- IMPORTANT SAFETY INSTRUCTIONS READ ALL INSTRUCTIONS BEFORE USING THE APPLIANCE
- WARNING
- INSTALLATION
- TO REDUCE THE RISK OF FIRE IN THE CAVITY:
- TO REDUCE THE RISK OF BURNS
- READ AND SAVE THESE INSTRUCTIONS
- OPERATING
- CLEANING
- SUPER HEATED WATER
- PRECAUTIONS TO AVOID POSSIBLE EXPOSURE TO EXCESSIVE MICROWAVE ENERGY
- GROUNDING INSTRUCTIONS
- NOTICE: PACEMAKERS
- VENT FAN
- Features
- Cooking Controls
- About the features
- Cook Time
- Express Cook
- Add 30 Sec
- Weight Defrost
- Defrosting Tips
- Time Defrost
- How to Change the Automatic Settings
- Auto Cook
- Popcorn
- Reheat
- Potato
- Steam Cook
- Changing the Power Level
- OR
- Other Features
- Steam Clean
- Display
- Wifi Connect
- Automatic Fan
- Insert Food Reminder
- Cooking Complete Reminder
- Settings
- Chef Connect
- Reset Filter
- Charcoal Filter
- CHARCOAL FILTER REPLACEMENT
- Connecting your WiFi Connect enabled microwave oven (on some models)
- What you will need:
- Remote Enable On/Off Feature
- Remote Enable Equipment
- Helpful Hints
- How to Clean the Inside
- Walls, Floor, Inside Window, Metal and Plastic Parts on the Door
- Removable Turntable and Turntable Support
- How to Clean the Outside
- Case
- Control Panel and Door
- Door Surface
- Power Cord
- Stainless Steel (on some models)
- Care and Cleaning
- Removing and Cleaning the Filters
- Cooktop Lights/Nite Lights
- Replace with LED lamp. See back cover for ordering online at cafeappliances.com
- Replacing the Oven Cavity Light
- Reusable Vent Filters
- Filler Panel Kits
- JX36BSS - Stainless
- Recirculating Charcoal Filter Kit
- 15" Cabinet Installation Kit
- Troubleshooting Tips
- Things That Are Normal With Your Microwave Oven
- FEDERAL COMMUNICATIONS COMMISSION RADIO FREQUENCY INTERFERENCE STATEMENT (U.S.A. ONLY)
- Troubleshooting Tips... Before you schedule service
- Café Microwave Oven Limited Warranty
- cafeappliances.com
- What Café will not cover:
- EXCLUSION OF IMPLIED WARRANTIES
- Consumer Support
- Café Website
- Register Your Appliance
- Schedule Service
- Extended Warranties
- Remote Connectivity
- Parts and Accessories
- Contact Us
- Conexión WiFi
Brand : Café
Model : CVM721M2NS5
Category : Microwave