
Voice Tracer VTR7800 - Dictaphone PHILIPS - Free user manual and instructions
Find the device manual for free Voice Tracer VTR7800 PHILIPS in PDF.


| Product Type | Digital Voice Recorder (Dictaphone) |
| Model | Voice Tracer VTR7800 |
| Brand | Philips |
| Dimensions (W x H x D) | Approx. 115 x 45 x 18 mm |
| Weight | Approx. 95 g (including battery) |
| Power Supply | 2 x AAA batteries (not included) |
| Recording Format | MP3 / PCM (WAV) |
| Memory Capacity | Built‑in 8 GB (approximately 1,400 hours in MP3 mode) |
| Recording Modes | High quality (PCM), Standard (MP3), Long play |
| Microphone | Built‑in stereo microphone; sensitivity adjustable |
| Speaker | Built‑in speaker (mono) |
| Display | LCD with backlight (time, battery, file info) |
| Connectivity | USB 2.0 (Micro‑USB) for file transfer and charging (if using rechargeable batteries) |
| File Management | Folder structure, voice activation (VOR), automatic gain control, low‑cut filter |
| Playback Features | Variable speed, repeat A‑B, fast forward/rewind |
| Care & Cleaning | Use a soft dry cloth; avoid solvents. Keep micro‑USB port free of dust. |
| Safety | Do not disassemble. Keep away from moisture and extreme temperatures. |
| Spare Parts & Repairability | Batteries user‑replaceable. USB port not user‑serviceable. Check Philips support for accessories (e.g., remote microphone). |
| General Information | Supports up to 4 recording folders; password protection optional. PC/Mac compatible (drag and drop). |
Frequently Asked Questions - Voice Tracer VTR7800 PHILIPS
User questions about Voice Tracer VTR7800 PHILIPS
0 question about this device. Answer the ones you know or ask your own.
Ask a new question about this device
Download the instructions for your Dictaphone in PDF format for free! Find your manual Voice Tracer VTR7800 - PHILIPS and take your electronic device back in hand. On this page are published all the documents necessary for the use of your device. Voice Tracer VTR7800 by PHILIPS.
USER MANUAL Voice Tracer VTR7800 PHILIPS

注意

提示
录音界面说明:
I.1 Product features 33
2 Important Notice 34
2.1 Safety 34
2.2 Hearing protection 34
3 Your Digital Voice Recorder 36
- I What's in the box 36
3.2 Overview 36
4 Start to Use 38
4.1 Turn On / Off 38
4.2 Charging methods 39
4.3 Press hold (hold function) 39
4.4 Connecting with the computer 39
5 Recording 41
5.1 Long-distance recording 43
5.2 Noise-reducing recording 43
5.3 External microphone recording 43
5.4 Telephone recording 44
6 Voice Mode 45
6.1 Voice play 46
6.2 File editing 46
6.3 Variable playback 47
6.4 Repetition mode 47
6.5 Bookmark 47
6.6 File protection 47
6.7 Delete file 47
7 Music Mode 49
7.1 Playback mode 50
7.2 Variable playback 50
7.3 Repetition mode 50
7.4 Bookmark 51
7.5 Delete file 51
8 System Settings 52
8.1 File menu 52
8.2 Recording settings 53
8.3 Screen settings 55
8.4 Device settings 56
9 FAQ 59
9.1 Failure to start the recorder 59
9.2 Failure to record 59
9.3 Failure to play recorded clip 59
EN 31
10 Technical Parameters 60
10.1 Memory 60
10.2 Dimensions & weight 60
10.3 System requirements 60
10.4 Recording 60
10.5 Operational conditions 60
I Welcome
Welcome to the world of Philips! We are honored by your choice and purchase of Philips' products. You can have Philips' comprehensive technical supports from our website, e.g. user's manuals, software downloading and warranty information etc.
www.philips.com
1.1 Product features
- Quick Voice Recording: Simply press the Voice Recording button for the first time to record, and the second time to save recorded clips.
• Supports long-distance recording.
• Supports multi-scene recording with multiple purposes.
• Supports editing of the recorded files on the recorder. - HD speaker: The high-quality speaker we have chosen for you will make sure that you enjoy the recorded file or music file as if you were on the scene.
- Recorded formats include the frequently seen MP3 and WAV with compatibility for 96kHz/24bit PCM recording.
• Voice-controlled recording function. - Use high-speed USB 2.0 to ensure quick access to the recorded file and data. It can also be used as a mass
storage device to ensure maximum compatibility.
EN 33
2 Important Notice
2.1 Safety
- To avoid shorting, please do not place the product in a moist environment.
- Do not place the product near heating equipment or any place with direct sunlight.
- Please note that, do not crush the cable especially near the port.

Warning
- Special Announcement: Before using the product, please read the Manual carefully. The Company shall not be held liable for any data loss due to incorrect manual operation or force majeure. We specially recommend that users make additional copies of the files in the device.
- Images are for reference only. Philips reserves the right to change the color/appearance/design/parameters/product functions without prior notice.
2.2 Hearing protection
When using the earphone, please follow the instructions below:
- Adjust the volume to an appropriate level and avoid excessive use of the earphone.
- Special note: Do not adjust the volume to a level beyond the bearable range of your ears.
- Do not adjust the volume to a level higher than that of the ambient environment.
- Please exercise caution or suspend the use of your earphone in case of dangers.
- Do not use the earphones when driving, cycling and skateboarding. Otherwise, you will be violating traffic laws and other related laws.
English
EN 35
3 Your Digital Voice Recorder
3.1 What's in the box:

3.2 Overview:

① Earphone hole
② External microphone hole
③ Line in
④ Power on/off
⑤ Card insertion hole
⑥ Imbedded middle microphone
⑦ Imbedded side microphone
⑧ Indicator light
⑨ Display
10 Stop
⑪ Play / Pause
⑫ Increase volume / Menu selection
⑬ Previous clip / Quick playback / Menu selection button
⑭ Decrease volume / Menu selection
⑮ Next clip / Fast forward / Menu selection button
⑯USB port
17 Recording button
⑱ FOCUS button
⑲Bookmark / File switch button
20 Recording gain adjustment button
21 Noise reduction switch
22Variable-speed play button
23 Delete button
24Speaker
4 Start to Use
4.1 Turn On / Off

Note
- Please recharge the device for three hours before using it for the first time!
Turn On: During shutdown mode, press the ON button for 2-3 seconds, and the device will be turned on, showing the Philips logo.
Turn Off: During the ON mode, press the OFF button for 2-3 seconds and then the device will be turned off, showing the Philips logo before shutdown.
The turn On / Off display is shown below:

When the device is turned on, the display of pause the play of recorded clip is shown below.
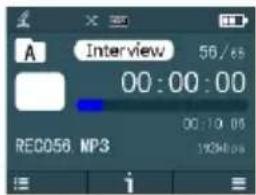
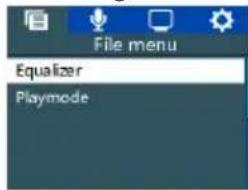
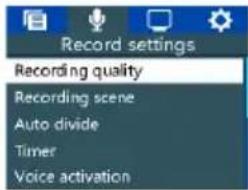
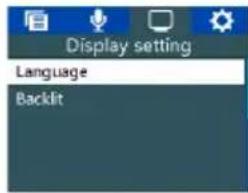
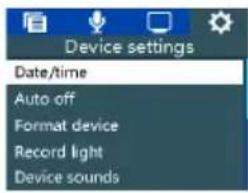
On the PAUSE display, press Menu to prop up the Settings menu, and then press "→" → choose from the menu. Press Play button (▶) to confirm selection. In the Settings page, there are four menus, as shown below representing File Menu, Recording Settings, Screen Setting and Device Setting.

Reminder
- If your recorder can no long work normally, please check if it is out of battery
- When the power sign is showing "please charge your device.
4.2 Charging methods
(I) Use the USB cable to connect the device and the PC as shown below.
(2) Use special charger to charge the device as shown below. When the device is connected as mentioned above, the device enters the charging mode. The power sign will go from zero to three bars when the three indicator lights will all be turned on during the process. Normally, it takes 3 hours to fully charge the device. When the device is fully charged, the power sign shows three bars and the three indicator lights will go off.


Note
- When the recorder is connected with the computer, the manual operations on the recorder will become invalid.
4.3 Press hold (hold function)
(I) When the ON/OFF button is pushed to a locked position, the recorder will be locked and all button pressing will be invalid. The screen will temporarily show the locked sign and then disappear as shown below:
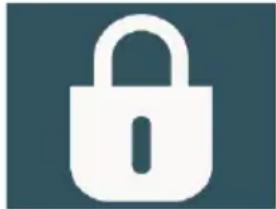
(2) If you want to disable the HOLD function please push the ON/OFF button downward.
4.4 Connecting with the computer
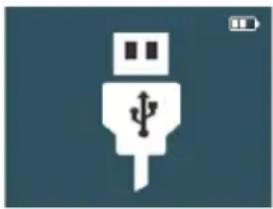
The recorder can be used as a mass-volume USB storage device for storing, backing up and removing the files. You do
not need to install software to connect the recorder with the computer via a USB cable as shown below:

Reminder
- When importing or exporting files from the recorder, please do not disconnect the recorder and the computer. Otherwise, the file will be damaged.
5 Recording
When you use the recorder for the first time, please pay attention to the instructions in this section!
(I)When the voice mode is off, press" "button and select the folder you want.
(2)Press the Record button to enter the recording pause interface. When you press the Record button for the second time, you will begin recording. When the Record indicator light goes red, please place the internal microphone near the sound source.
(3) During the Recording mode, press Record button to pause recording. When the red light flickers, the screen will show the recording pause logo.
(4)Press the Record button again to resume recording.
(5) During the recording process, press FOCUS button to show the gain adjustment button. You can turn around the button to adjust recording gain. Please adjust recording gain to appropriate level to ensure recording quality.
(6)Press FOCUS button again to cancel the recording gain adjustment.
(7) During the recording mode press "button to insert the recording bookmark. A total of 10 bookmarks are supported.
(8)Press STOP button to stop recording and go back to the pay pause screen for the current recorded clip.
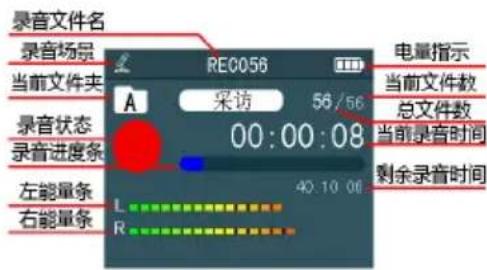
The reference interface for recording is shown below:

Illustration on recording interface:
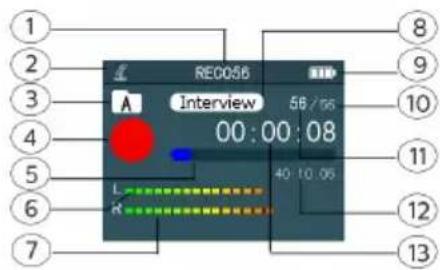
① Name of recorded file
② Recording scene
③ Current folder
④ Recording state
⑤ Recording progress bar
⑥ Left energy bar
⑦ Right energy bar
⑧ Recording scene mode
⑨ Power indicator
⑩ Current file ordinal
⑪ Total number of files
⑫ Remaining play time
⑬ Current recording time

Note
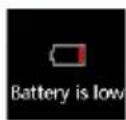
- When the batter symbol shows empty, it means the device is low on battery. In case of low battery, the device can be automatically turned off. If you are recording, the device will auto-save the recorded clip and be turned off. If there is low battery, please recharge your device. The logo shown when batter is low is shown below.

Reminder
- Before recording, please select the recording type and scenario of your choosing. Please note that during the stop mode, press “”button to choose among five folders A, B, C, D, and MUSIC. You can store any recorded clip in any of the four folders A, B, C, and D. Each folder can store 99 recorded clips.When one folder has stored 99 files, the system will auto store the recorded clip in the next folder. If all folders are full and you want to continue recording, please delete some of the unnecessary files.
- Please do a recording test to ensure that the settings of your recorder are correctly set.
• Each folder can store 99 files which means a total of 396 files can be stored. - When the recorded hours exceed the maximum volume or reach the 396 file limit, recording will stop. You need to delete some of the recorded clips or transfer them to your computer.
- Do not cut off power during recording mode. Otherwise, the recorded information or file will be damaged.
- If you want to record for long hours, please charge your device before use.
- If you choose TF memory, the recorded file will be stored in the memory card. Please note that if the recording
quality is set at 96K/24bit or 96k/16bit, the clips will be stored in internal FLASH by default.
5.1 Long-distance recording
If you want to record from a large distance (10m), you can set the recording scenario as long-distance recording. When choosing long-distance recording, please place mic near the sound source. During recording, if external microphone or LINE IN is detected, long-distance recording will be invalid. The device will default to external microphone or LINE IN recording.

Note
- The recording type for long-distance recording is 48khz/1536kbps.
- Long-distance recording mode should not be used in noisy environment.
5.2 Noise-reducing recording
In an environment of noise, you can use the noise-reducing mode for recording high-resolution clips. Turn on the noise
reduction button and press Record to enter the recording pause interface and then press Record button to enter the noise reduction mode.

Note
- The recording type for noise reduction mode is by default 12khz/384kbps. During the recording process, if external microphone or LINE IN is detected, long-distance recording will be invalid. The device will default to external microphone or LINE IN recording.
5.3 External microphone recording
When you choose to use the external microphone for recording, please insert the microphone to the external microphone socket, and then press Record for recording. After external microphone is inserted, the internal microphone will be turned off.

Note
- The external microphone port must be dual-sound track. No direct connection with sound system is allowed during recording.
- When recording, please adjust the external volume to an appropriate level before recording.
Details steps are shown below:

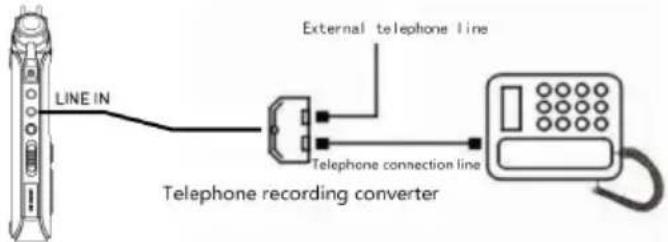
5.4 Telephone recording
Insert the telephone cable and accessory telephone connection line into the recording converter. The method of operation is the same as using the microphone for recording.
6 Voice Mode
The reference interface of voice stopping is as follows:
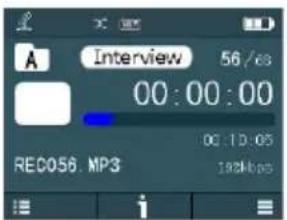
Illustration on the reference interface of voice stopping:

① Play mode ⑩ Number of current file
② Icon of recording scene mode ⑪ Battery indicator
③ Play mode ⑫ Total number of files
④ Play status ⑬ Current duration
⑤ Play progress bar ⑭ Total duration
⑥ Current play file name ⑮ File information icon
⑦ File list icon ⑯ Bit rate of current file
⑧ Equalizer ⑰ Information icon
⑨ Recording scene mode

Note
- In the STOP mode, press “” button to switch among the five folders of A, B, C, D and MUSIC. In folders of A, B, C and D, you can directly switch to MUSIC folder by pressing “” button.
6.1 Voice play
(I)Press " " button to select required folder.
(2)Press "or " button to select the file to play.
(3)Press "MENU" key to select the icon of the file list, press "PLAY" button to confirm access to the file list browsing; press the "+" or "-" button to select the file to play, press "PLAY" button to confirm.
(4)Press "PLAY" button to start play, and the recorder's indicator will turn green.
(5)Use "+" or "-" button to adjust the volume.
(6)Press "STOP" button to end the play. In STOP mode, press "MENU" button to select the file list icon, then press "or " " to select the menu icon, and press "PLAY" to confirm entering the menu list.
(7) In STOP mode, press "STOP" button to display file information such as file name, sampling rate and file size.
(8) During the play, press the PLAY button to pause, press the PLAY button again to resume the play.
(9)Press "◀◀" or "◀◀" button to quickly play backward or forward the current file.

Reminder
- When the earphone is inserted into the hole, the recorder speaker will stop working.
6.2 File editing
In the process of playing the recorded file, short press the MENU button to switch the editing function and confirm the selection by pressing PLAY button. Function icons of Append, Insert, Divide and Cut are displayed in turn on the information icon.

Reminder
- In the absence of any action, this function will be automatically cancelled after 8 seconds.
(I)Append: Insert a recording clip at the end of a file.
(2)Insert: Insert a recording clip between the current playback points of a file.
(3) Divide: Divide a file from the current playback point into two files.
(4) Cut: Press the "FOCUS" button to set the start point, press the "PLAY" button to confirm the end point, and cut out the middle section of the start point and end point of
the file; if the start point isn't set by pressing the "FOCUS" button, press the "PLAY" button, then cut out the second half of the file at the current playback point of the current file.
6.3 Variable playback
For this operation, please refer to the variable playback section of the music file.
6.4 Repetition mode
In the playback process, long press the MENU button will enter the repetition mode. For the specific operation of A-B repetition, please refer to the A-B repetition operation section of the "Music Play" section.
6.5 Bookmark
Refer to bookmark section of music file for this operation.
6.6 File protection
In the STOP interface of playing recording, press the "FOCUS" button will pop up the file protection menu. Press the "PLAY" button to enter the "LOCK" and "UNLOCK" options. Reference pictures are as follows:

Select "LOCK" to lock the file and "UNLOCK" to unlock. After the file is locked, select DELETE FILE will prompt a message saying "the file is locked" and needs to be unlocked before it can be deleted.
6.7 Delete file
On the STOP interface of playing recordings, by pressing the DELETE button, the interface shown in the first picture below will be displayed. The following are related reference pictures for performing the deletion operation:
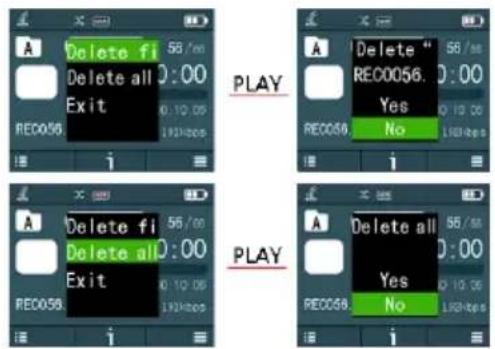
On the deletion list interface, press the "+" button or "-" button to select deleting a single file or all files; on the deletion file interface, press the "+" button or "-" button to select "YES" to confirm deletion, select "NO" to exit the deletion interface, and press the play button to execute the command.
7 Music Mode
In voice mode, press “” button to switch folders or long press “” button to directly switch music folders. The reference interface for music play is shown as below:
Support MP3, WMA, WAV, AAC, FLAC, APE, OGG.
WAV: bit rate above 192KHZ/24bit is not supported.
FLAC: bit rate above 96KHZ/24bit and 192KHZ/24bit is not supported.
WMA: bit rate above 48KHZ/24bit and 96KHZ/24bit is not supported.
APE: 192KHZ/24bit is not supported.
ALAC: Not supported.
ACC: Not supported.
Music files can only be played in the "MUSIC" folder. Illustration of music play interface:
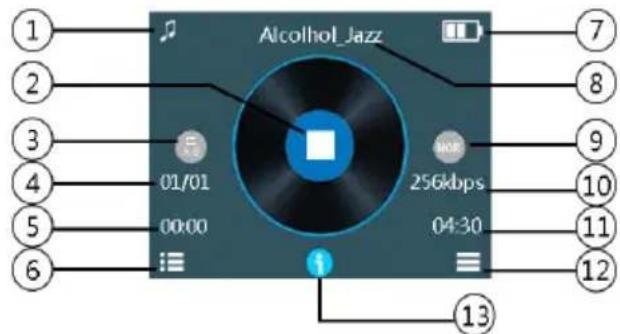
Music icon
② PLAY sate
③ PLAY mode
④ Current file quantity
⑤ Current duration of play
6 List icon
⑦ Battery indicator
⑧ File name
⑨ Equalizer
10 File bit rate
① Total duration
② Menue icon
⑬ File information icon
7.1 Playback mode
On the interface of music play, press “◀ and “ ”▶▶▶▶▶▶▶▶▶▶▶▶▶▶▶▶▶▶▶▶▶▶▶▶▶▶▶▶▶▶▶▶▶▶▶▶▶▶▶▶▶▶▶▶▶▶▶▶▶▶▶▶▶▶▶▶▶▶▶▶▶▶▶▶▶▶▶▶▶▶▶▶▶▶▶▶▶▶▶▶▶▶▶▶▶▶▶▶▶▶▶▶▶▶▶▶▶▶▶▶>
7.2 Variable playback
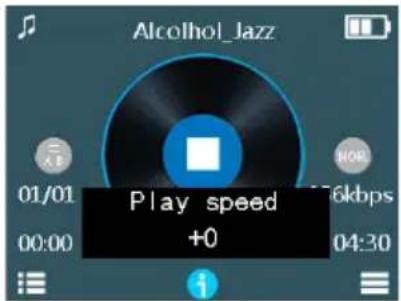
Short press "SPEED" button to enter the adjustment interface of play speed. The reference interface is shown as below:

Press “+” button or “-” button to adjust playback speed. Press “PLAY” to confirm.
7.3 Repetition mode
During playback, press the MENU button to enter the repetition mode. Set AB repetition:
- In the playback state, short press the MENU button to enter the repetition state, but at this time the "A" of "A-B" in the display screen flickers until the start point A of repetition is confirmed, and short press "▶▶▶▶▶▶▶▶▶▶▶▶▶▶▶▶▶▶▶▶▶▶▶▶▶▶▶▶▶▶▶▶▶▶▶▶▶▶▶▶▶▶▶▶▶▶▶▶▶▶▶▶▶▶▶▶▶▶▶▶▶▶▶▶▶▶▶▶▶▶▶▶▶▶▶▶▶▶▶▶▶▶▶▶▶▶▶▶▶▶▶▶▶▶▶▶▶▶▶▶>
- Set the end point of repetition: After setting the start point A, the B of "A-B" flickers on the screen, then short press "→" to set the end point B of repetition, "A-B" will display on the screen. When the repetition icon shows "A-B", the repetition between A and B points starts. After reaching the set times, "A" in "A-B" icon flickers until the start point A is confirmed and the recorder returns to normal playback. If repetition is no longer needed, exit the repetition mode in the following ways.
- Cancel repetition: short press the "PLAY" button to cancel the previous setting of AB Repetition, and pause playback. Short press the "STOP" button to cancel the previous setting of AB Repetition and stop playing. Press the "MENU" button to cancel the previous setting of AB Repetition and return to the normal play state.
7.4 Bookmark
During playback, short press “” button to insert bookmark. 10 bookmark files are supported. During playback, long press “” button to pop up the bookmark menu, including Go to Bookmark Playback and Delete Bookmark. Press the “+” button and “-” button to select the “Go to Bookmark Playback” menu, and press the “PLAY” button to confirm the list of Bookmark Playback. The reference interface is as follows:

- Press the "+"button and "-" button to select the bookmark point to play.
- Press the "PLAY" button to enter bookmark playback. Operation of deleting bookmarks is similar to that of playing bookmarks.

Reminder
- During Stop mode, press Stop button to check file information, including file name, author, sampling rate and file size.
7.5 Delete file
Please refer to the section on Delete Audio File. The lyric shows that the product supports “*.lrc” format to ensure synchronized play of music and lyric.

Note
- The name of the lyric file should be consistent with the name of the music file.
8 System Settings
You can set the following according to your personal preferences. In voice or music mode, long press "MENU" button to enter the file menu interface, and press "previous" button and "next" button to select the system settings. The relevant reference pictures of the interface are shown as below, including file menu, recording settings, screen settings and device settings.
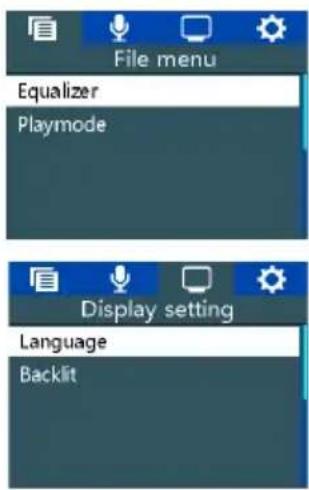

8.1 File menu
File menu bar includes equalizer and playback mode, which can be set according to personal preferences.
8.1.1 Equalizer
In the file menu bar, select the "equalizer" menu and press the "PLAY" button to enter the equalizer. The equalizer includes sound effects of "off, rock, pop, soft, jazz, classical, bass". The reference interface is as follows:
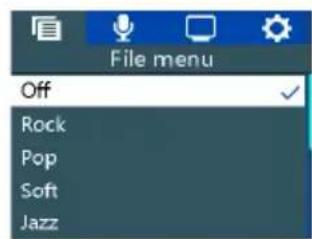
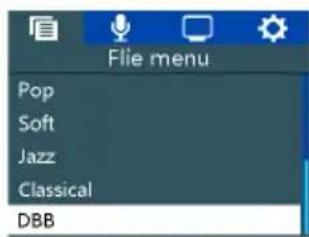
In the equalizer, you can use the "+" button and "-" button to select the appropriate mode, and then press the "PLAY" button to confirm.
8.1.2 Play mode
Select the Play Mode menu in the File Menu Bar and press the "PLAY" button to enter the Play Mode menu where you can choose your desired Play Mode. The reference interface is shown as below:

Off: Automatically stop playing after playing the files in the current folder.
Random: Play files in the current folder randomly.
Folder: Loop the files of the current folder.
Document: Play the current file in a single loop.
8.2 Recording settings
Recording settings bar includes recording quality, recording scenario, automatic segmentation, timer and voice control. Corresponding settings can be made according to relevant applications.
8.2.1 Recording quality
Recording quality includes multiple recording types such as PCM 96KHz/24bit, PCM 96KHz/16bit, PCM 48KHz/16bit, PCM 32KHz/16bit, MP3 192kbps, MP3 128kbps. The reference interface is shown as below:

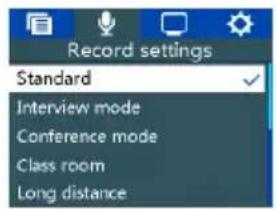
8.2.2 Recording scene
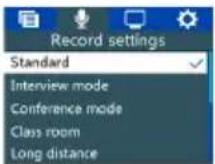
Recording scenario includes diary mode, interview mode, meeting mode, teaching mode, long-distance mode, which are applicable to most of the application scenarios. Reference interface is shown as below:
EN 53
Diary mode: can be used for voice recording in daily life to record everything in life.
Interview mode: can be used to record conversations with interviewees.
Conference mode: can be used for recording in conference venues.
Teaching mode: can be used for recording in teaching place. Long-distance mode: can record sound within 10 meters.

Reminder
- Regardless of the recording type, when inserting an external microphone/Line in, recoding priority is given to an external microphone/Line in; long-distance recording mode has no earphone monitoring function and is not applicable to noisy environment, so please align your microphone with the sound source when recording.
8.2.3 Automatic segmentation
Automatic segmentation includes 30 minutes, 60 minutes and Off. The reference interface of automatic segmentation function is as follows:

8.2.4 Timer
Timer: Preset a time first. When the system time reaches the preset time, the system will record automatically. From the function menu, select the "Timer" menu and press the "PLAY" button to enter the Timing Recording Settings menu. The reference interface is shown as below:
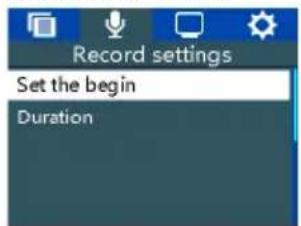
Set start, set date and set time. Reference interface of settings is shown as below:

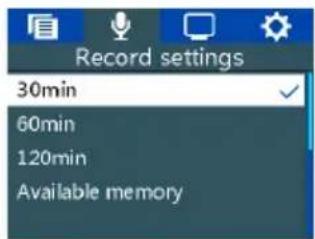
DURATION is used to set the recording duration of timing recording. 30 minutes, 60 minutes, 120 minutes and No Restriction can be set. The reference interface is as follows:

Note
- Please check whether the battery is sufficient before setting the timing recording.
8.2.5 Voice control
Once the voice control function is enabled, the recorder will automatically start recording when the device detects sound; when no sound is detected, the recorder will automatically stop recording; when sound is detected again, the recorder will automatically start recording. The reference interface pictures of the voice control settings are as follows:

8.3 Screen settings
Screen settings include Language and Back Light.
8.3.1 Language
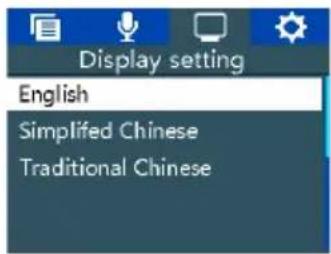
In the Language Selection menu, there are three languages including English, Simplified Chinese and Traditional Chinese. The reference interface of language selection is as follows:
8.3.2 Back light
20 seconds, 30 seconds, 45 seconds, 60 seconds and Always-ON are available for back light duration. Without any action on the device within the set time, the back light will automatically go off. If you choose "Always-ON", the back light will be always on.

8.4 Device settings
The device settings bar includes Date/Time, Automatic Shutdown, Format Device, Recording Indicator, Device Sound, MemorySelection, Information and Restore Factory Settings.
8.4.1 Date/Time
Reference pictures of system time setting interface are shown as below:

On this interface, current time and display format of the system time can be set.
For example, when selecting the time format "Set Time Format" menu, the following reference interface will be displayed:

Two time display formats including 12-hour system and 24-hour system are available under this interface. The default system is 12-hour system. For example, selecting "Set Date" menu, the following reference interface will be displayed:

Under this interface, press "+" or "-" and "*" or "-" set the real-time date.
Press "ind" choose year, month and day; Press "+" or "-" to change the corresponding position value. Selecting the "Set Time" menu, the following reference interface will display:
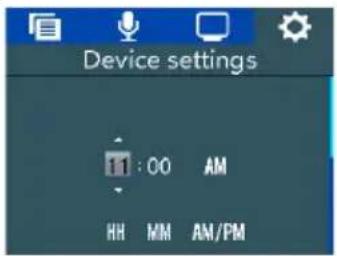
Under this interface, press "+" or "-" and "◀" or " "▶" set the real-time time.
Press “” and “” to choose hour and minute; Press “+” or “-” to change the corresponding position value.
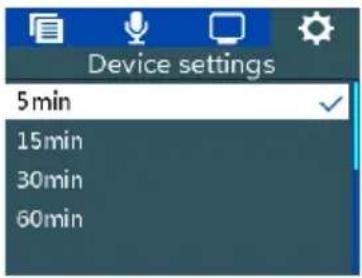
8.4.2 Auto shutdown
The system will shut down automatically if there is no action on the device within the set time. The reference interface for auto shutdown settings is as follows:
Format native memory/external card.
8.4.4 Recording indicator
Turning on the recording indicator, the recording indicator will be on while recording, and the recording indicator will not be on when turning off the indicator.
8.4.5 Device sound
When turning on the device sound, there is a key tone in the key operation. When turning off, the key operation is silent.
8.4.6 Memory selection
Native memory or external card memory.
8.4.7 Information
The information menu includes disk information, card information and firmware version.
Disk information: used to view local memory size and remaining space information.
Card information: used to view the card memory size and the remaining space information.
Firmwareversion:usedtoviewfirmwareversioninformation.
8.4.8 Restore factory settings
Reset device settings.
9 FAQ
This section has listed all the frequently asked questions to help you address the simple issues during use of the voice/video recorder. If such issues persist, please consult our dealers or visit our official website: www.philips.com/support
9.1 Failure to start the recorder
The batter has run out and you need to charge your device.
9.2 Failure to record
If the recorder has exceeded the maximum file limit or the maximum volume, please delete some of the recorded clips or transfer them to external memory devices.
9.3 Failure to play recorded clip
The recorder might be in a HOLD mode. Unlock the HOLD button. If the batter has run out, please recharge your device.
10 Technical Parameters
10.1 Memory
External Memory
Standard Recording Hours (8GB): around 136 hours under MP3 128kbps recording mode; around 6 hours under PCM 96khz/16bit recording mode.
Standard Recording Hours (16GB): around 272 hours under MP3 128kbps recording mode and around 12 hours under PCM 96khz/16bit recording mode.
Internal Storage Type: NAND Flash Memory
Portable Storage Device (PC): Yes
Memory Card: Yes
10.2 Dimensions & weight
Width* Height*Depth: 126×59.5×21.5 (mm)
Weight (including Battery): 176g
10.3 System requirements
Operating System: Windows 7,8,10/Vista/XP/2000, Mac OS X, Linux
Port: USB
10.4 Recording
PCM 96KHz/24bit: bit rate 4608kbps, WAV PCM format
96KHz/16bit: bit rate 3072kbps, WAV PCM format
PCM 48KHz/16bit: bit rate 1536kbps, WAV format
PCM 32KHz/16bit: bit rate 1024kbps, WAV format
MP3 44KHz: bit rate 192kbps, MP3 format
MP3 44KHz: bit rate 128kbps, MP3 format
10.5 Operational conditions
Temperature: 5°C -45°C
Humidity: 10%-90%, uncondensed
English
EN 61
Warranty card
质保书

year warranty
一年质保
Type: VTR7800
Serial nr:
Date of purchase
购买日期
Dealer's name, address and signature
销售商名称、地址及签字
www.philips.com/welcome
This document is printed on chlorine free produced paper Data subject to change without notice
This product was brought to the market by Speech Processing Solutions GmbH or one of its affiliates, further referred to in this document as SPS, which is the manufacturer of the product. SPS is the warrantor in relation to the product with which this booklet was packaged.
For China only
只限中国地区
Printed in China

EN 63

© 2019 Speech Processing Solutions GmbH.
Register your product and get support at
www.philips.com/welcome

- 注意
- 提示
- 2 IMPORTANT NOTICE 34
- 3 YOUR DIGITAL VOICE RECORDER 36
- 4 START TO USE 38
- 5 RECORDING 41
- 6 VOICE MODE 45
- 7 MUSIC MODE 49
- 8 SYSTEM SETTINGS 52
- 9 FAQ 59
- 10 TECHNICAL PARAMETERS 60
- I WELCOME
- 1.1 PRODUCT FEATURES
- 2 IMPORTANT NOTICE
- 2.1 SAFETY
- WARNING
- 2.2 HEARING PROTECTION
- 3 YOUR DIGITAL VOICE RECORDER
- 3.1 WHAT'S IN THE BOX
- 3.2 OVERVIEW
- 4 START TO USE
- 4.1 TURN ON / OFF
- NOTE
- REMINDER
- 4.2 CHARGING METHODS
- 4.3 PRESS HOLD (HOLD FUNCTION)
- 4.4 CONNECTING WITH THE COMPUTER
- 5 RECORDING
- 5.1 LONG-DISTANCE RECORDING
- 5.2 NOISE-REDUCING RECORDING
- 5.3 EXTERNAL MICROPHONE RECORDING
- 5.4 TELEPHONE RECORDING
- 6 VOICE MODE
- 6.1 VOICE PLAY
- 6.2 FILE EDITING
- 6.3 VARIABLE PLAYBACK
- 6.4 REPETITION MODE
- 6.5 BOOKMARK
- 6.6 FILE PROTECTION
- 6.7 DELETE FILE
- 7 MUSIC MODE
- 7.1 PLAYBACK MODE
- 7.2 VARIABLE PLAYBACK
- 7.3 REPETITION MODE
- 7.4 BOOKMARK
- 7.5 DELETE FILE
- 8 SYSTEM SETTINGS
- 8.1 FILE MENU
- 8.1.1 EQUALIZER
- 8.1.2 PLAY MODE
- 8.2 RECORDING SETTINGS
- 8.2.1 RECORDING QUALITY
- 8.2.2 RECORDING SCENE
- 8.2.3 AUTOMATIC SEGMENTATION
- 8.2.4 TIMER
- 8.2.5 VOICE CONTROL
- 8.3 SCREEN SETTINGS
- 8.3.1 LANGUAGE
- 8.3.2 BACK LIGHT
- 8.4 DEVICE SETTINGS
- 8.4.1 DATE/TIME
- 8.4.2 AUTO SHUTDOWN
- 8.4.4 RECORDING INDICATOR
- 8.4.5 DEVICE SOUND
- 8.4.6 MEMORY SELECTION
- 8.4.7 INFORMATION
- 8.4.8 RESTORE FACTORY SETTINGS
- 9 FAQ
- 9.1 FAILURE TO START THE RECORDER
- 9.2 FAILURE TO RECORD
- 9.3 FAILURE TO PLAY RECORDED CLIP
- 10 TECHNICAL PARAMETERS
- 10.1 MEMORY
- 10.2 DIMENSIONS & WEIGHT
- 10.3 SYSTEM REQUIREMENTS
- 10.4 RECORDING
- 10.5 OPERATIONAL CONDITIONS
- WARRANTY CARD
- 质保书
Brand : PHILIPS
Model : Voice Tracer VTR7800
Category : Dictaphone