
ITTB2022 - Turntable iLive - Free user manual and instructions
Find the device manual for free ITTB2022 iLive in PDF.


| Product Type | Vinyl Turntable |
| Brand | iLive |
| Model | ITTB2022 |
| Speed Settings | 33 1/3, 45, 78 RPM |
| Drive System | Belt Drive |
| Bluetooth | Built-in Bluetooth transmitter (pair with Bluetooth speakers) |
| Built-in Preamp | RIAA preamp (switchable Line Out / Phono) |
| Audio Outputs | RCA stereo line out |
| Tone Arm | Adjustable counterweight, anti-skating control, lift and return |
| Pitch Adjustment | Yes (fine-tune speed) |
| Stylus | Replaceable, rated for 300 hours of play |
| Power Supply | AC power adapter (included) |
| Included Accessories | 45 RPM adapter, plastic calibration tube, RCA audio cable, product guide |
| Dimensions (Approx.) | 17 x 14 x 5 inches (not official) |
| Weight (Approx.) | 8 lbs (not official) |
| Safety | Double insulation, FCC Class B compliant |
| Warranty | See user manual or iLiveElectronics.com |
Frequently Asked Questions - ITTB2022 iLive
User questions about ITTB2022 iLive
0 question about this device. Answer the ones you know or ask your own.
Ask a new question about this device
Download the instructions for your Turntable in PDF format for free! Find your manual ITTB2022 - iLive and take your electronic device back in hand. On this page are published all the documents necessary for the use of your device. ITTB2022 by iLive.
USER MANUAL ITTB2022 iLive
natural_image
Black and white photo of a vintage printograph with open lid and textured base (no visible text or symbols)3 Speed Turn Table
User's Guide for Model ITTB2022 v2928-01
For the most up-to-date version of this User's Guide, go to: www.iLiveElectronics.com
Safety Instructions & Warnings

WARNING: To reduce the risk of electric shock, do not remove cover (or back). No user-serviceable parts inside. Refer servicing to qualified service personnel.

The exclamation point within an equilateral triangle is intended to alert the user to the presence of important operating and maintenance (servicing) instructions in the literature accompanying the appliance.

The lightning flash with arrowhead symbol, within an equilateral triangle, is intended to alert the user to the presence of uninsulated “dangerous voltage” within the product’s enclosure that may be of sufficient magnitude to constitute a risk of electric shock to persons.

This symbol indicates that this product incorporates double insulation between hazardous mains voltage and user accessible parts.
WARNING: DO NOT INGEST BATTERY, CHEMICAL BURN HAZARD.

WARNING: This product can expose you to chemicals including lead, which is known to the State of California to cause cancer and birth defects or other reproductive harm. For more information go to www.P65Warnings.ca.gov. This product meets and complies with required Federal product guidelines
Important Safety Instructions
- Read these Instructions.
- Keep these Instructions.
- Heed all Warnings.
- Follow all instructions.
- Do not use this apparatus near water.
- Clean only with a dry cloth.
- Do not block any ventilation openings. Install in accordance with the manufacturer's instructions.
- Do not install near any heat sources such as radiators, heat registers, stoves, or other apparatus (including amplifiers) that produce heat.
- Do not defeat the safety purpose of the polarized or grounding - type plug. A polarized plug has two blades with one wider than the other. A grounding type plug has two blades and a third grounding prong. The wide blade or the third prong are provided for your safety. When the provided plug does not fit into your outlet, consult an electrician for replacement of the obsolete outlet.
- Protect the power cord from being walked on or pinched particularly at plugs, convenience receptacles, and the point where they exit from the apparatus.
- Only use attachments/accessories specified by the manufacturer.
- Unplug this apparatus during lightning storms or when unused for long periods of time.
- Refer all servicing to qualified service personnel. Servicing is required when the apparatus has been damaged in any way, such as power-supply cord or plug is damaged, liquid has been spilled or objects have fallen into the apparatus, the apparatus has been exposed to rain or moisture, does not operate normally, or has been dropped.
- Use only with a cart, stand, tripod, bracket, or table specified by the manufacturer, or sold with the apparatus. When a cart is used, use caution when moving the cart/apparatus combination to avoid injury from tip-over.

FCC Warnings
Warning: Changes or modifications to this unit not expressly approved by the party responsible for compliance could void the user's authority to operate the equipment.
NOTE: This equipment has been tested and found to comply with the limits for a Class B digital device, pursuant to Part 15 of the FCC Rules. These limits are designed to provide reasonable protection against harmful interference in a residential installation. This equipment generates, uses, and can radiate radio frequency energy and, if not installed and used in accordance with the instructions, may cause harmful interference to radio communications. However, there is no guarantee that interference will not occur in a particular installation. If this equipment does cause harmful interference to radio or television reception, which can be determined by turning the equipment off and on, the user is encouraged to try to correct the interference by one or more of the following measures:
• Reorient or relocate the receiving antenna.
- Increase the separation between the equipment and receiver.
- Connect the equipment into an outlet on a circuit different from that to which the receiver is connected.
- Consult the dealer or an experienced radio/TV technician for help.
Additional Warnings and Precautions
- CAUTION: TO PREVENT ELECTRIC SHOCK, MATCH WIDE BLADE OF PLUG TO WIDE SLOT, FULLY INSERT.
- Mains plug is used as disconnect device and it should remain readily operable during intended use. In order to disconnect the apparatus from the mains completely, the mains plug should be disconnected from the mains socket outlet completely.
- WARNING: Shock hazard - Do Not Open.
- Caution and marking information is located at the rear or bottom of the apparatus.
- WARNING: To reduce the risk of fire or electric shock, do not expose this apparatus to rain, moisture, dripping, or splashing.
- Objects filled with liquids, such as vases, shall not be placed on the apparatus.
- CAUTION: Use of controls or adjustments or performance of procedures other than those specified may result in hazardous radiation exposure.
- WARNING: Changes or modifications to this unit not expressly approved by the party responsible for compliance could void the user's authority to operate the equipment
- WARNING: Do not place this unit directly onto furniture surfaces with any type of soft, porous, or sensitive finish. As with any rubber compound made with oils, the feet could cause marks or staining where the feet reside. We recommend using a protective barrier such as a cloth or a piece of glass between the unit and the surface to reduce the risk of damage and/or staining.
- WARNING: Use of this unit near fluorescent lighting may cause interference regarding use of the remote. If the unit is displaying erratic behavior move away from any fluorescent lighting, as it may be the cause.
- CAUTION: Danger of explosion if battery is incorrectly replaced. Replace only with the same or equivalent type.
- Battery shall not be exposed to excessive heat such as sunshine, fire or the like.
-
Keep new and used batteries away from children. If the battery compartment does not close securely, stop using the product and keep it away from children.
-
If you think batteries might have been swallowed or placed inside any part of the body, seek immediate medical attention.
- Do not mix old and new batteries.
- Completely replace all old batteries with new ones.
- Do not mix alkaline, standard (carbon-zinc), or rechargeable (ni-cad, ni-mh, etc) batteries.
- Batteries should be recycled or disposed of as per state and local guidelines.
Table of Contents
Get to Know Your Turntable-5
Features-5
What's in the Box?–5
Top-6
Rear-6
Controls-7
Let's Get Started-8
Power -8
Loading a Record-8
Using the Counterweight-9
Connecting to a Bluetooth Speaker-10
Connecting to External Speakers-11
Line Out-11
Phono-11
Hints and Tips-12
Anti-Skating-12
Pitch Adjustment-12
Stylus Replacement-12
Usage Tips-12
Sound Issues-12
Get to Know Your Turntable
Features
• Built-in Bluetooth transmitter for connecting to Bluetooth speakers
- Lift and return action of the tone arm at the end of a record
- Belt Drive
- Pitch Adjustment
- Anti-Skate Adjustment
- Plays 33, 45, and 78rpm records
• Built-in RIAA preamp - RCA stereo audio output
- AC power adapter
What's in the Box?
- Turntable
• 12mm plastic calibration tube - 45 rpm adapter
- Phono cartridge
• RCA stereo audio cable 3.9 ft (1.2m) - Product Guide
Get to Know Your Turntable
Top

Rear

- 45rpm Adapter
- Bluetooth ON/OFF
- Platter 7. RCA Line Out
- Tone Arm Lift Switch 8. AC Power Input
- Tone Arm 9. Line Out/Phono
- Cartridge & Stylus
Controls

- Counterweight Adjustment: Turn to adjust the amount of weight placed on the record by the stylus.
- Anti-Skating Adjustment: Turn to adjust the inward tracking of the stylus on the record.
- Pitch Adjustment: Turn to fine tune the speed of the platter as it spins.
- Pair Bluetooth: Press to begin pairing to a Bluetooth speaker.
- 78/45/33/OFF: Turn to power ON the turntable and select the play speed. The speed should match the type of record you are going to play.
- Power/Bluetooth Pairing Indicator: Turn to power ON the turntable, indicated by a RED LED. When the turntable is pairing to a Bluetooth speaker, the light will quickly flash blue, then turn solid when successfully paired.
Let's Get Started
Power
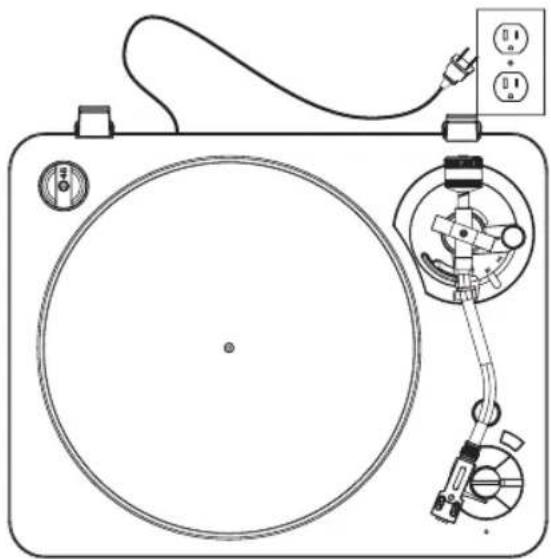
Plug the AC power cord into a standard wall outlet.
natural_image
Top-down line drawing of a vintage round dial with attached electrical socket and mechanical components (no text or symbols)Loading a Record
- Place your record on the platter, aligning it with the center spindle.
- Set the speed selector dial to match your record type - 33, 45, or 78. If you are playing a 45rpm record, be sure to place the 45rpm adapter on the platter first, so that it is between the platter and the record.
- Remove the protective cover on the stylus, then release the lock on the tone arm.
- Use the tone arm lift switch to raise the tone arm upwards, then carefully move it into position over the record.
- As the tone arm moves into position, the platter will start spinning. Use the tone arm lift switch to lower the tone arm stylus onto the record. When the stylus comes into contact with the grooves on the record, the turntable will send audio to the connected speakers.
Using the Counterweight
The Counterweight controls how much pressure the stylus will put on a record. If there is too much pressure, the sound may become distorted. If there is too little pressure, the stylus may skip out of the grooves on a record. The Product Guide recommends using 4 grams of pressure on a record. Use the following directions as an alternative guide if the Product Guide recommendations are not effective. The Plastic Calibration Tube will assist you in using the Counterweight effectively.

Screw the Counterweight all the way onto the Tone Arm.

Slide on the included Plastic Calibration Tube and unscrew the counterweight until the plastic tube is flush with the end of the tone arm.
Connecting to a Bluetooth Speaker
- Start by enabling Pairing Mode on the Bluetooth Speaker you want to use. Before beginning the pairing process, be sure no other devices are connected to the speaker.
- On the turntable, turn Bluetooth Mode ON by adjusting the switch on the back of the unit.
- Press the Pair button on the turntable to begin pairing to your speaker. The indicator light on the turntable will quickly flash blue while it attempts to connect to the speaker.
- When successfully paired, the indicator light on the turntable will turn solid. Note: If the turntable fails to connect, the indicator light will keep flashing blue. Press the Pair button to try again.
- Audio from the record will now be heard through the connected speakers. Use the volume control on the speakers to adjust the audio level.
Connecting to External Speakers
- Use an RCA audio cable to connect to a pair of external speakers. Connect the Line Out ports on the turntable to the corresponding color-coded ports on the speakers.
- Set the selector switch on the back of the turntable to Line Out to send audio to the speakers.
- IMPORTANT! If you are connecting the turntable to speakers through a preamp, set the switch on the back of the turntable to Phono. Improper selection of the switch will result in either no sound or explosive sound.
- Audio from the record will now be heard through the connected speakers. Use the volume control on the speakers to adjust the audio level.
Line Out

Phono

Hints and Tips
Anti-Skating
The Anti-Skating dial adjusts the inward tracking of the tone arm on the record. Usually, the dial should be left in its lowest setting. However, if the turntable is experiencing excessive skipping as the record plays, increase the anti-skating effect in increments of 1 using the dial.
Pitch Adjustment
The Pitch Adjustment dial will increase or decrease the speed of the platter as it spins. This can be used to fine tune the speed of the record as it plays. If the speed or sound seems a little off, use the dial to correct the audio distortion.
Stylus Replacement
The stylus is rated for 300 hours of play. However, if you notice a change in audio quality, you should replace the stylus as soon as you can. Prolonged use of a worn out stylus can damage records.
- To replace a stylus, first, be sure the turntable is powered OFF, then carefully pull the stylus simultaneously downward and forward off of the tone arm.
- Insert the new stylus and press upwards until it clicks into place.
Usage Tips
- Close the top cover to prevent dust from collecting on the turntable or your records. Dust and other particles can interfere with the stylus as it tracks in the grooves of a record.
- Be sure to lock the tone arm in place before transporting the turntable.
- Do not place anything on the turntable or the top cover, especially when it is in use.
Sound Issues
- When playing a record, if you notice feedback or whining from the speakers, please make sure that the speakers and the turntable are not on the same surface.
Customer Support
Contact Information
Website: www.iLiveElectronics.com
Email Support: prodinfo@dpiinc.com
Email Parts: partsinfo@dpiinc.com
Phone Support: 1-888-999-4215
Warranty
For Warranty Information and the most up-to-date version of this User's Guide, go to: www.iLiveElectronics.com
International Support
To download this User's Guide in English, Spanish, and French, or to get answers to frequently asked questions, visit the support section at:
www.iLiveElectronics.com

Protect for Today Sustain for Tomorrow
Copyright © 2022 Digital Products International (DPI, Inc.) All other trademarks appearing herein are the property of their respective owners. Specifications are subject to change without notice.


- Speed Turn Table
- Safety Instructions & Warnings
- Important Safety Instructions
- FCC Warnings
- Additional Warnings and Precautions
- Table of Contents
- Get to Know Your Turntable
- Features
- What's in the Box?
- Controls
- Let's Get Started
- Power
- Loading a Record
- Using the Counterweight
- Connecting to a Bluetooth Speaker
- Connecting to External Speakers
- Hints and Tips
- Anti-Skating
- Pitch Adjustment
- Stylus Replacement
- Usage Tips
- Sound Issues
- Customer Support
- Contact Information
- Warranty
- International Support
Brand : iLive
Model : ITTB2022
Category : Turntable