
AGS792W - Cooker Artusi - Free user manual and instructions
Find the device manual for free AGS792W Artusi in PDF.


| Product Type | Freestanding Gas Cooker |
| Brand | Artusi |
| Model | AGS792W |
| Overall Dimensions (H x W x D) | 900 mm x 790 mm x 600 mm |
| Weight | 55 kg |
| Power Supply | 220-240 V, 50/60 Hz (electric ignition and oven light) |
| Gas Connection | Natural gas or LPG convertible (injector set included) |
| Number of Hob Burners | 4 gas burners |
| Burner Types | 1 triple-ring wok burner, 1 rapid burner, 2 semi-rapid burners |
| Oven Type | Gas oven with electric thermostat and fan assist |
| Oven Capacity | 68 L |
| Oven Functions | Gas baking, grill, and fan-forced convection |
| Control Type | Knobs for gas burners and oven settings |
| Ignition | Automatic electronic ignition on hob and oven |
| Cleaning | Enamel interior for easy wipe-down; removable oven door for easy cleaning |
| Safety Features | Flame failure safety device on all gas burners; oven door triple-glazed for low external temperature |
| Spare Parts | Available through authorized Artusi service centers (grates, knobs, burner caps, oven shelves) |
| Colour | White |
| Energy Efficiency Class | A (oven) |
Frequently Asked Questions - AGS792W Artusi
User questions about AGS792W Artusi
0 question about this device. Answer the ones you know or ask your own.
Ask a new question about this device
Download the instructions for your Cooker in PDF format for free! Find your manual AGS792W - Artusi and take your electronic device back in hand. On this page are published all the documents necessary for the use of your device. AGS792W by Artusi.
USER MANUAL AGS792W Artusi
PACKAGING: All packaging materials (plastic bags, polystyrene foam, etc.) are potentially dangerous and should be kept away from children.
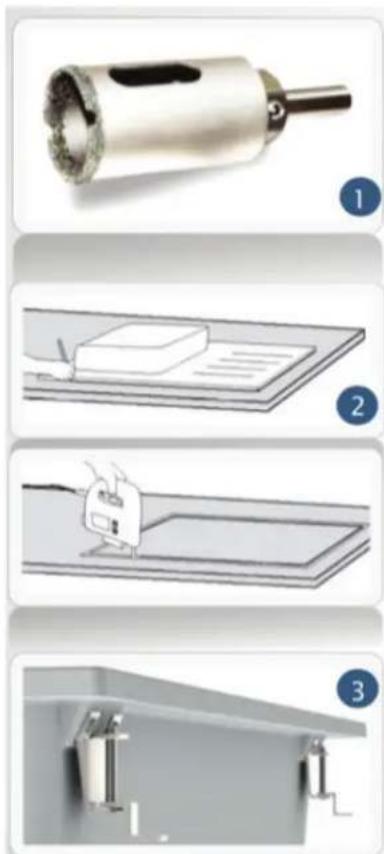
1. HOLES FOR THE TAP CONNECTIONS
The sink comes to you with pre-prepared semi-bores of ∅ 35 mm on both sides. This lets you choose the side where you wish to install the tap. After deciding which side you wish to use, the hole can be completed using a DIAMOND CORE installed on a manual drill, taking care to work from the non-visible side.
2. BORING THE WORK SURFACE FOR INSERTING THE SINK
Place the sink upside-down on the work surface where it is to be installed. Trace around the outer edge of the sink using a pencil. Now move the sink and draw a dotted line 1cm inside the one you have just drawn using the sink as a template. Cut along the dotted line using the appropriate tools.
3. FITTING THE SINK INTO THE WORK SURFACE
All our sinks come equipped with pre-installed mounting clamps. The following steps explain how to install the sink correctly: A special sealant is supplied with the sink. Apply it all around the outer edge of the sink, wherever it will come into contact with the work surface when the installation is complete. Make sure that all the clasps of the fastenings are facing inwards. Insert the sink into the cut-out area of the work surface making sure it is centred. Tighten the fastenings using the adjusting screws, starting from the centre and working in a criss-cross order.
INSTALLING THE DRAINAGE (DRAINS AND DRAIN-TRAPS)
Follow the instructions provided with the drain accessories.
UPKEEP AND CARE
Your sink will last longer if it is taken care of properly. Correct care also helps to keep it looking attractive for a long time.
1. ROUTINE CARE
The best way to clean the sink is to use a soft cloth or sponge, with commonly available detergents diluted in warm water. Strong detergents should not be used. The surface of the sink should be washed with water, drying the damp parts with a spongy cloth. This will help prevent the formation of lime scale marks, especially on darker coloured sinks.
2. REMOVING STUBBORN STAINS
Traces of stubborn dirt can be removed with a cloth soaked in diluted bleach or alcohol or, in extreme cases, with acetone. After this, rinse the surface well with water.
3. SPECIAL CLEANING
The sink is composed of a mixture with a high percentage of inert fillers that make the product very hard and strong. This particular characteristic may cause streaking due to the continual rubbing of metal pans. The streaks are due to the release of small particles of metal, which can be removed with a brush (like Scotch Brite), together with commonly used detergents.
4. FURTHER RECOMMENDATIONS
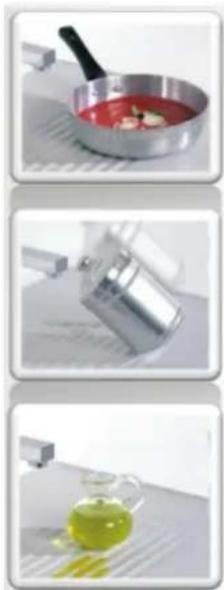
Do not use highly alkaline substances like ammonia or caustic soda. Do not put pans or coffee-pots that have just been taken off the heat (which sometimes reach 500^ C) directly in the sink. Do not pour boiling oil into the sink, as this could deform the drain pipes. Do not cut food directly in the sink. Chopping boards should be used for this purpose. Lime scale residue can be removed with vinegar or acetic acid. Do not put pans or coffee pots that have just been taken off the heat (which sometimes reach 500^ C) directly in the sink.
natural_image
Three-panel image showing a cooking step: adding sauce in a pan, pouring liquid into a container, and pouring green liquid from a glass pitcher (no text or symbols visible)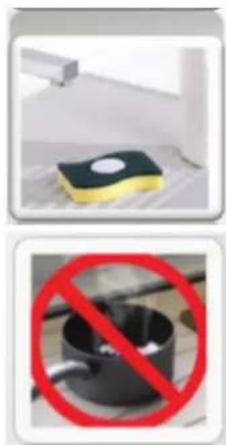
natural_image
Two-panel image showing a yellow sponge on a surface and a black pot with a red prohibition symbol (no text or labels)Brand : Artusi
Model : AGS792W
Category : Cooker