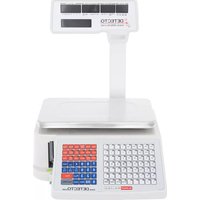
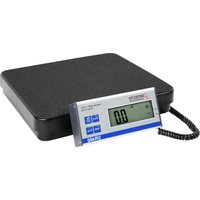
DL1060P - Scale Cardinal Detecto - Free user manual and instructions
Find the device manual for free DL1060P Cardinal Detecto in PDF.


| Product Type | Digital Scale |
| Brand | Cardinal Detecto |
| Model | DL1060P |
| Capacity | 1000 g |
| Readability | 0.01 g |
| Dimensions (W x D x H) | 25 x 20 x 8 cm |
| Weight | 2 kg |
| Power Supply | AC Adapter (included) or 6 AA batteries |
| Display Type | LCD with backlight |
| Units of Measurement | g, kg, oz, lb, lb:oz |
| Key Features | Tare function, auto-zero, calibration, counting mode, overload indicator |
| Construction Material | Stainless steel platform, ABS plastic housing |
| Calibration | External calibration via included weights (200 g) |
| Operating Temperature | 10°C to 30°C |
| Warranty | 1 year limited |
| Package Includes | Scale, AC adapter, calibration weight, user manual |
| Cleaning Instructions | Wipe with a damp cloth; do not immerse in water |
| Safety | Overload protection, auto-off after 5 minutes of inactivity |
Frequently Asked Questions - DL1060P Cardinal Detecto
User questions about DL1060P Cardinal Detecto
0 question about this device. Answer the ones you know or ask your own.
Ask a new question about this device
Download the instructions for your Scale in PDF format for free! Find your manual DL1060P - Cardinal Detecto and take your electronic device back in hand. On this page are published all the documents necessary for the use of your device. DL1060P by Cardinal Detecto.
USER MANUAL DL1060P Cardinal Detecto
DL Series
Price Computing Scale with Integral Printer
Operation Manual
8529-0637-2M Rev A 11/15
PO BOX 151 • WEBB CITY, MO 64870 PH (417) 673-4631 • FAX (417) 673-5001 www.detecto.com
Technical Support: Ph: 866-254-8261 • tech@cardet.com
INTRODUCTION
Thank you for purchasing our Detecto DL Series Price Computing Scale with Integral Printer. Your scale has been designed to operate from 115 VAC 50/60 Hz.
This manual will guide you through setup and operation of your scale. Please read it thoroughly before attempting to operate this scale and keep it handy for future reference.
COPYRIGHT
All rights reserved. Reproduction or use, without expressed written permission, of editorial or pictorial content, in any manner, is prohibited. No patent liability is assumed with respect to the use of the information contained herein.
DISCLAIMER
While every precaution has been taken in the preparation of this manual, the Seller assumes no responsibility for errors or omissions. Neither is any liability assumed for damages resulting from use of the information contained herein. All instructions and diagrams have been checked for accuracy and ease of application; however, success and safety in working with tools depend to a great extent upon the individual accuracy, skill and caution. For this reason the Seller is not able to guarantee the result of any procedure contained herein. Nor can they assume responsibility for any damage to property or injury to persons occasioned from the procedures. Persons engaging the procedures do so entirely at their own risk.
SERIAL NUMBER ____
DATE OF PURCHASE ____
PURCHASED FROM ____
RETAIN THIS INFORMATION FOR FUTURE USE
PRECAUTIONS
Before using this product, read this manual and pay special attention to all "NOTIFICATION" symbols:

IMPORTANT

ELECTRICAL
WARNING

STATIC
SENSITIVE
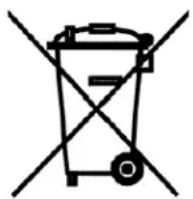
PROPER DISPOSAL
When this device reaches the end of its useful life, it must be properly disposed of. It must not be disposed of as unsorted municipal waste. Within the European Union, this device should be returned to the distributor from where it was purchased for proper disposal. This is in accordance with EU Directive 2002/96/EC. Within North America, the device should be disposed of in accordance with the local laws regarding the disposal of waste electrical and electronic equipment.
It is everyone's responsibility to help maintain the environment and to reduce the effects of hazardous substances contained in electrical and electronic equipment on human health. Please do your part by making certain that the device is properly disposed of. The symbol shown to the right indicates that this device must not be disposed of in unsorted municipal waste programs.
FCC COMPLIANCE STATEMENT
This equipment generates, uses and can radiate radio frequency and if not installed and used in accordance with the instruction manual, may cause interference to radio communications. It has been designed within the limits for a Class A computing device pursuant to Subpart J of Part 15 of FCC rules to provide reasonable protection against such interference when operated in a commercial environment. Operation of this equipment in a residential area may cause interference in which case the user will be responsible to take whatever measures necessary to correct the interference.
You may find the booklet "How to Identify and Resolve Radio TV Interference Problems" prepared by the Federal Communications Commission helpful. It is available from the U.S. Government Printing Office, Washington, D.C. 20402. Request stock No. 001-000-00315-4.
TABLE OF CONTENTS
SPECIFICATIONS 1
ABREVIATIONS AND GLOSSARY 2
INSTALLATION 3
Attachment of Tower Display 3
Placement 3
Level Adjustment 3
Power Connection 3
PRINTER 4
Install Gap Labels 4
Gap Paper Mounts Recycle 6
Install Plain Paper 6
Operations Concerning Paper 7
Abnormity of Gap Paper Print 7
KEYPAD FUNCTIONS 8
DISPLAY ANNUNCIATORS 12
Tare (lb) Window 12
Weight (lb)/Pcs Window 12
Change (\)/Unit \/lb Window 12
Total Price (\$) Window 13
Dot Matrix Display 13
SET DATE, TIME AND STORE NAME 15
FAST PLU PROGRAMMING 16
QUICK KEY PROGRAMMING 17
OPERATION 18
Basic PLU Transaction 18
By Weight 18
By Count 18
Tare 18
Weight Tare 18
Keypad Tare 19
Lock and Unlock Tare 19
Batch Print Mode (only for piece count PLU) 20
Pre-Pack Mode (only for weight PLU) 20
Temporary-Sale by Weight 21
Temporary-Sale by Count 21
Price Discount by Subtraction 21
TABLE OF CONTENTS, CONT.
Print Total Report 22
Print PLU Report 23
Clear Report Information Manually 24
Clear All Reports and Records Information 24
PRINT FORMAT 25
BARCODE PRINTING 26
ERROR CODES 27
CARE AND CLEANING 29
SPECIFICATIONS
| Models: | DL1030, DL1030P | |
| Capacity | 30 lb (15kg) | |
| Division Value: | 0 – 30 lb x .01 lb (0 – 15 kg x .005 kg) | |
| Platform Size: | L x W = 12.8 x 8.9 in (324 x 226 mm) | |
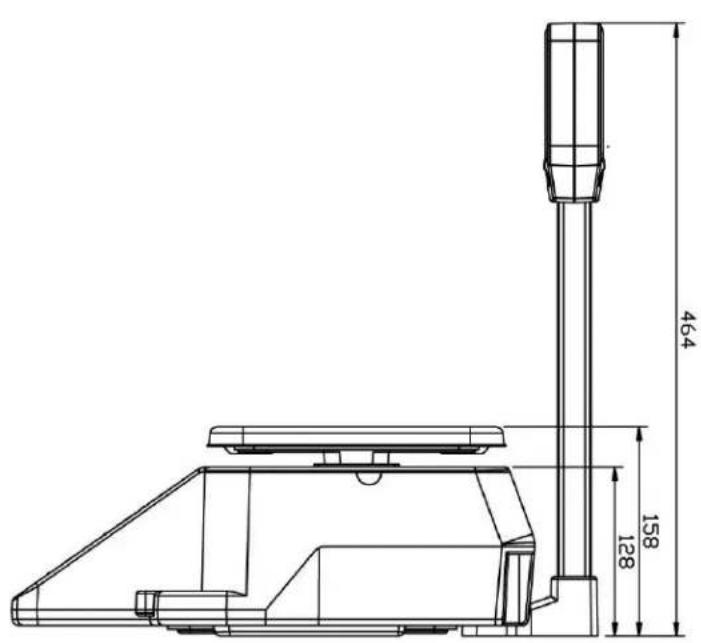
| Scale Size: Integrated Rear Display With Tower Display | L x W x H = 15.6 x 13.8 x 6.2 in (396 x 351 x 158 mm) L x W x H = 17.6 x 13.8 x 18.3 in (448 x 351 x 464 mm) | |
| Display: | 4 Window LED display 1 Dot matrix Text screen | |
| LED Display: | 4 digits for tare 5 digit for weight, | 6 digit for unit price 6 digit for total price |
| Power: | 20VDC, 4A with positive center, AC adaptor | |
| Operating Temperature: | 32 ~ 104°F (0° ~ 40°C) | |
| Printer: | Thermal Print | |
| Print Media: | 58mm x 40mm and 40mm x 30mm gap thermal paper 58mm and 40mm width plain thermal paper | |
| PLU: | 5990 | |

ABREVIATIONS AND GLOSSARY
| PLU | Price or Product Look Up. e.g. Identification number affixed to produce and other products |
| Weight PLU | By Weight PLU |
| Count PLU | By Count PLU |
| Dept. | Department |
| U. Price | Unit price |
| T. Price | Total Price |
| Prog | Program key or menu |
| F Prog | Fast program key or menu |
| Spec | Specification. Parameter that control the behavior of the scale |
| T-Sale | Temporarily Sale |
| Amount | The quantity of the goods, weight or count. It means weight (lb) for weight PLU and count (pcs) for count PLU |
INSTALLATION
Included in carton find:
Scale
- Tray - 2 pcs: plastic tray & metal top
➢ Display pole and screw pack (DL1030P only)
➢ Operation Manual
DL Series Setup Utility CD
▶ Four (4) overlays for shortcut PLU
Power Cord
Attachment of Tower Display
Remove cover tower bracket on bottom of base. Place the tower display in close proximity to the base. Connect tower cable to circuit board in base. Gently slide the tower post into the bracket. Fasten the tower to base with two bolts provided. Replace bracket cover.
Placement
Place the scale in an environment free of excessive dust and moisture and on a stable, vibration-free level surface away from direct sunlight and any rapidly moving air source (heating/cooling vents, fans, etc.). This will prevent sudden temperature changes and air currents that may result in unstable weight readings.

WARNING! DO NOT place the scale on any unstable cart, stand or table. The scale may fall causing injury to the operator, and damage the unit, or proper operation of the scale may be inhibited.
Level Adjustment
Check to make certain the scale is level. The level indicator is located at the front of the scale. If the scale is not level (the bubble will not be centered), adjust the mounting feet as required to center the bubble and attain a level scale.
Power Connection
The scale uses an external AC power cord that is to be used in a standard 110/120 VAC 50/60Hz grounded wall outlet.
PRINTER
Install Gap Labels
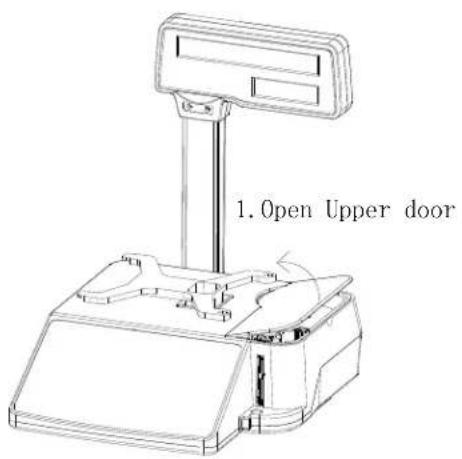
Step 1 - Open door of scale printer
Step 2 - Remove paper retainer

Step 3 - Paper through
PRINTER, CONT.

Step 4 - Paper path

Step 5 - Finish paper install
![11. Cover door 12. Press [Feed]](/content/2026/05/1043098/images/71e5bd108644fe9ee6119ee6daa202197151c32b0c3096b73d73960cc5ac0741.jpg)
Step 6 - Close door of scale printer
PRINTER, CONT.
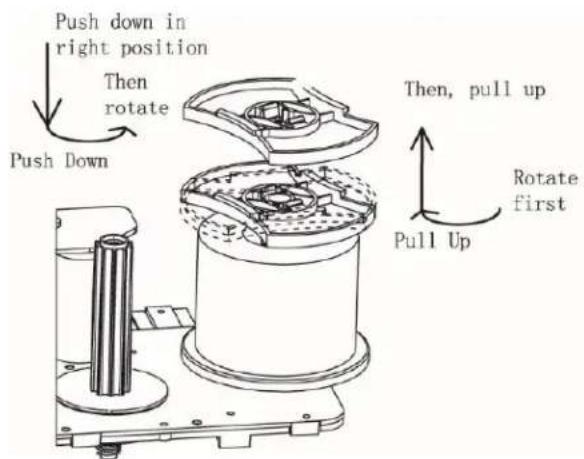
Gap Paper Mounts Recycle

natural_image
Technical line drawing of mechanical components including gears, shafts, and circular parts (no text or symbols)Pull out spring
Step 7 - Gap paper mounts recycle
Install Plain Paper
Different from the way in installing gap paper shown. U-shaped paper retaining spring is not needed anymore. All you need to do is to put the paper into the paper sensor and let the tear part be outside.
PRINTER, CONT.
Operations Concerning Paper
➢ 【Paper Type】: Make sure the type of paper set is the same as the type used. When 『Gap Paper』 is light in the display, you should set to use gap paper. Otherwise you should set to use plain paper. If the type of paper you set to use is different from the type currently used, please long press 【Paper Type】 to change the set.
➢ 【Feed】: After installing the paper, press 【Feed】. You can also press 【Feed】 to clear abnormalities of the printer and make paper roll for a certain length.
Abnormity of Gap Paper Print
Users of plain paper don't do any adjustment for this.
Abnormity of printer parameters may happen when gap paper prints are abnormal, paper goes out continuously, or printer can' work after one paper is printed, printing parameter maybe have abnormality
Users need to check if paper type is right first. Then users could follow these operations below to eliminate malfunctions:
➢ Install gap paper, and make the edge of gap paper not exceed print head. (Not block the paper-out sensor)
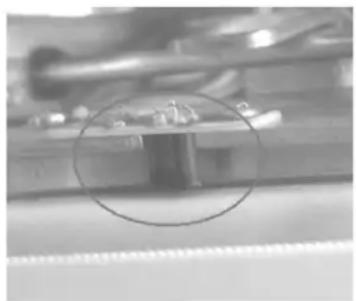
natural_image
Close-up of a mechanical component with a circled area highlighting a small rectangular feature (no visible text or symbols)Paper-Out sensor
Switch off the scale. Press the 【Feed】key then switch on the scale, hold this key until finished self-checking and go into work interface
➢ Printer would roll out the paper at the length of 50mm. automatically
➢ After the paper is rolled out, malfunctions have been eliminated if without any warning. If alarm E7.10 means calibration abnormality, pls try again after confirming the sticker perper has been used.
➢ Then, press 【Feed】 to print the test page
➢ Go to normal operation processes.
KEYPAD FUNCTIONS

DL1030 Keypad and Front Display

DL1030 Rear Display
KEYPAD FUNCTIONS, CONT.
![a/A b/B c/C d/D e/E + - * / f/F g/G h/H i/I j/J ( ) { } k/K l/L m/M n/N o/O [ ] ' * p/P q/Q r/R s/S t/T @ # & $ u/U v/V w/W x/X y/Y % ^ ` z/Z SP < = > | \ _ ~ ! ? . ; End Del Insert IME Sale Prog Account Print Time Feed F-Prog Shift Pre-Pack Lock PLU Auto Print Batch Print Zero -NUM Paper Type @Price T-Sale Re-Print Tare 7 8 9 X ↑V1 Amend 4 5 6 ←V2 V3 →V4 1 2 3 PLU Print 0 00 Back Cancel Accu/Confirm www.DetectO.com DL1030P 30 lb x 0.01 lb](/content/2026/05/1043098/images/d66aefec2133af97783aabb4208c75ca98645074675d106000dba2e834b851a5.jpg)
DL1030P Keypad
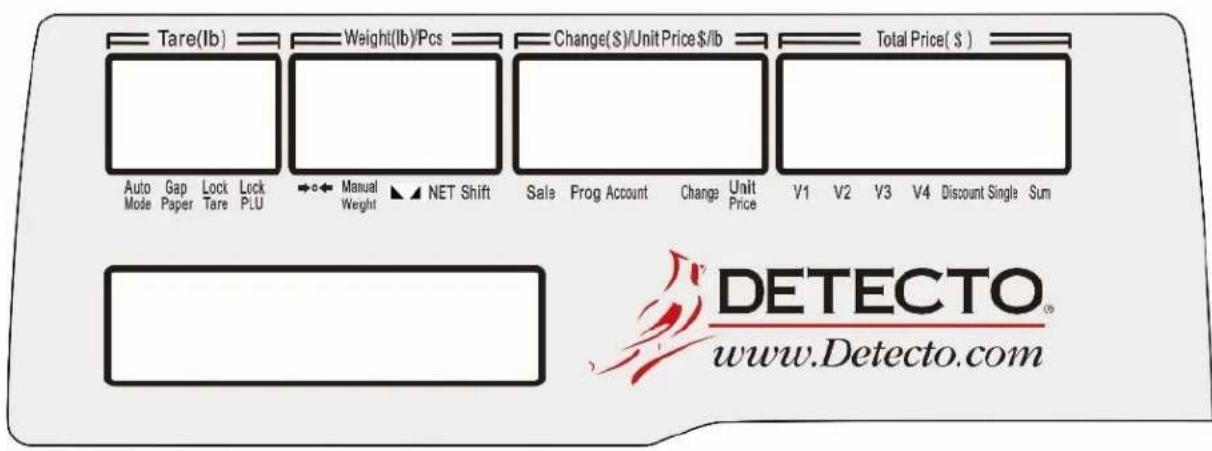
DL1030P Display
KEYPAD FUNCTIONS, CONT.
| Key | Function |
| Sale | Enter sale mode and execute the operation of goods sale. |
| Prog | Enter program mode to program parameters, PLU, print formats, time, etc. |
| Account Print | Enter Account mode to inquire about transaction data or print reports and so on. |
| Time | Display current time and return to the previous interface when you press it again. |
| Feed | Press this key to feed gap thermal paper and plain thermal paper through the printer. Unprinted buffer data will be cleared in the process of feed. |
| F-Prog | Quick access to changing setting and values of PLU's in sales mode. It is always used for combination of keys, which is similar to F keys of a PC keyboard. Please refer to process instructions to understand the use of combination keys. |
| Shift | Used for extending PLU shortcut key, and switching case sensitivity in text input interface. |
| Pre-Pack | These keys allows you to switch between other sales modes. If the current sale buffer is empty, the user can long-press these keys to reenter sales mode selected. |
| Lock PLU | |
| Auto Print | |
| Batch Print | |
| Zero | Clear current weight and reset to zero within allowed range. |
| -NUM | Discount in subtraction. |
| Paper Type | Press for 4 seconds to switch between gap thermal paper and plain thermal paper. |
| @ Price | Used to override the unit price of the PLU. When spec 083 is active, modified price will be saved. |
| T-Sale | Set input number as Unit Price and set a temporary PLU. You can amend the temporary weight PLU's unit in Spec |
| Re-print | Repeat last print in current buffer (Repeated print data would not be stored in deal records as sale record.). This function can be forbidden in Spec. |
| Tare | Manually enter and remove Tare. |
KEYPAD FUNCTIONS, CONT.
| Key | Function |
| 0 – 9, 00 | Numerical keys to input corresponding numbers. |
| X | Input count amount in count sale or do temporary count goods sale according to input U.Price. |
| Amend | Amend transaction data in sale interface and store amended data in the program interface. |
| V1-V4↑←↓→(Arrows) | Activate corresponding sale buffers.Switch among sequential steps and numbers in the program and account interfaces. |
| PLU | When you type a PLU number and press this key, it will call up that PLU |
| Print labels or receipts according to setting | |
| Back | Delete the last input data. Return to previous step without saving. |
| Cancel | Clear data, cancel operations or go back to previous step |
| Accu/Confirm | Save accumulative transaction data into activated sale buffer and other confirmation operations. |
| SP | Input a Space when entering characters. |
| End | End character, all characters after cursor are deleted |
| Del | Delete the character at position of cursor |
| Insert | Enter into insert mode. Insert mode is activated when cursor is flashing |
| IME | Input method editor. Switch the input languages: En-1(in small letters), En-2 (in big letters), press accumulate to confirm |
DISPLAY ANNUNCIATORS
Tare (lb) Window
| Annunciator | Function |
| Auto Mode | Is turned on to indicate auto mode. When in auto mode, lock PLU will active. In this mode, pre-pack or batch print is executed based on Spec078 and Spec079. |
| Gap Paper | Is turned on when paper type is gap paper. It is off when paper type is plain paper. |
| Lock Tare | Is turned on when tare is locked. Long press【Tare】would lock tare. Under this condition, tare would not be cleared after the sale. Long press【Tare】again would exit lock tare. |
| Lock PLU | Is turned on when PLU is locked. Long press【PLU】would lock PLU. Under this condition, former PLU sale state would remain the same after the sale. And it will last until new PLU is transferred. Long press【PLU】again would exit lock PLU. |
Weight (lb)/Pcs Window
| Annunciator | Function |
| →0← | Zero weight annunciator – Is turned on when weight is at zero and stable |
| Manual Weight | Is turned on when manual weight is displayed. |
| ▲▲ | Stable weight indicator – Is turned on when weight is stable |
| NET | Net weight indicator |
| Shift | Is turned on when 【Shift】 key is pressed. |
Change (\)/Unit Price \/lb Window
| Annunciator | Function |
| Sale | Indicates Scale is in Sale Mode |
| Prog | Is turned on when in Program Mode |
| Account | Is turned on when in Account Mode |
| Change | Is turned on to indicate the data in Change()/Unit Price/lb window is displayed as change. |
| Unit Price | Is turned on to indicate the data in Change()/Unit Price/lb window is displayed as goods U.Price. |
DISPLAY ANNUNCIATORS, CONT.
Total Price (\$) Window
| Annunciator | Function |
| V1 ~ V4 | Is turned on when there are buffers in V1~V4 records. Will be flashing when in edit mode. |
| Discount | To display single means that current goods has been discounted in U.Price; To display total means that current accumulative total has been discounted in T.Price |
| Single | Is turned on when total price of current goods is displayed in Total Price() window |
| Sum | Is turned on when the sum total price of current sale buffers (V1~V4) is displayed in Total Price() window |
Dot Matrix Display
DI103P units have an additional 160×32 dot matrix LCD display. It displays time or ad-message or accumulation record in idle mode; and displays PLU's name in PLU mode.
Dash, under line, above line, three lines of special symbols
SET DATE, TIME AND STORE NAME
Set Time & Date
| Scale State / Operation | Key | Display | Comment | |||
| Tare | Weight / Pcs | Change / Unit Price | Total | |||
| Idle | 【Prog】【1】【1】. | F23 | PLU.00 | noSEt | 0 | 【Prog】on |
| Move cursor to display position to be changed | 【←V2】【→V4】 | |||||
| Use Number keys to enter time & date | 【0】-【9】 | |||||
| Save settings | 【Amend】 | |||||
| Return to normal operation | 【Sale】 | |||||
Program Store Name
| Scale State / Operation | Key | Display | Comment | |||
| Tare | Weight / Pcs | Change / Unit Price | Total | |||
| 『Sale Idle』 | 0.000 | 0.000 | 0.00 | 0.00 | 【Sale】, 【Sum】 on. | |
| Enter program | 【Prog】 | P1 | TMSet | 【Prog】 on. | ||
| Enter TMSet | 【1】 | P11 | TMSet | Time | ||
| Enter String | 【3】 | P13 | ST.000 | ShopN | Push-OK | ST.000 is store name. |
| String No. | String Info | |||||
| Switch to device name | 【→】 | P13 | ST.001 | ScaleN | Push-OK | ST.001 is device name. |
| Switch to store name | 【←】 | P13 | ST.000 | ShopN | Push-OK | |
| Enter editing | 【Confirm】 | EN-1 | 0 | |||
| Clear original text | 【End】 | EN-1 | 0 | In view of have original text, Suggesting users press【End】 before editing to clear former text.. If modify on original literal, use【←】【→】 to move cursor to target position | ||
| Switch to EN-2 | 【Switch】 | EN-2 | 0 | 0 | ||
| Save editing text | 【Amend】 | P13 | PLU.14 | Name | OK-Edit | Save to the scale. |
| Return to sale mode | 【Sale】 | 0.000 | 0.000 | 0.00 | 0.00 | 【Sale】, 【Sum】 on. |
FAST PLU PROGRAMMING
Fast Programming of PLU
| Scale State / Operation | Key | Display | Comment | |||
| Tare | Weight / Pcs | Change / Unit Price | Total | |||
| Enter program mode Press F-Prog + PLU at same time | 【F-Prog】+【PLU】. | F23 | PLU.00 | noSEt | 0 | [Prog] on |
| Enter PLU Press right arrow | 【1】【0】.【→】. | F23 | PLU.00 | noSEt | 10 | |
| Enter item code Press right arrow | 【1】【2】【3】【4】【→】. | F23 | PLU.01 | lcode | 1234 | |
| Enter unit of measure: weight or count Press right arrow | 【1】【→】. | F23 | PLU.03 | Unit | 1 | 0, 1 = Default weight lb.6 = Weight lb.2 = Piece Count |
| Enter unit price Press right arrow | 【2】【5】【0】【→】. | F23 | PLU.04 | Price | 2.50 | |
| Tare | 【→】. | F23 | PLU.06 | |||
| PLU name | F23 | PLU.14 | Name | OK-Edit | ||
| Enter Text edit mode | 【Accu/Confirm】 | En-1 | 0 | |||
| Note: | Press 【IME】.Input-Method-Edit to switch input typeEn-1 LowercaseEn-2 UppercaseUTF-8ISN Code | |||||
| Enter PLU Name using Alpha-Numeric Keys | 【A】-【Z】..【0】-【9】.. | Press【Shift】to change letter case | ||||
| Example | 【A】【p】【p】【l】【e】 | |||||
| Save PLU Name Press right arrow | 【Amend】【→】. | |||||
| Shelf Date Print Press right Arrow | 【0】.or【1】.【→】. | F23 | PLU.26 | PS-Ud | 1 | O= No, 1= Yes |
| If Shelf Date Print Yes Enter Shelf Days using numeric keys | 【1】-【9】. | F23 | PLU.31 | PC-Ud | X | Where X= number of days entered |
| Save PLU | 【Amend】 | F23 | PLU.00 | noSEt | 0 | |
QUICK KEY PROGRAMMING
Programming of Quick Key
【QK】 denotes the Quick Key to be programmed such as a/A.
| Scale State / Operation | Key | Display | Comment | |||
| Tare | Weight / Pcs | Change / Unit Price | Total | |||
| Enter Quick Key Program Mode | 【F-Prog】+【QK】. | F14 | SCPLU | 1-01 | 1 | |
| Enter PLU | 【1】【0】. | F14 | SCPLU | 1-01 | 10 | |
| Save | 【Amend】 | F14 | SCPLU | |||
OPERATION
Basic PLU Transaction
By Weight.
| Scale State / Operation | Key | Display | Comment | |||
| Tare | Weight / Pcs | Change / Unit Price | Total | |||
| Idle | 0.00 | 0.000 | 0.00 | 0.00 | ||
| Place goods on scale | 0.00 | 2.00 | 0.00 | 0.00 | ||
| Enter PLUPress PLU | 【1】【0】.【PLU】. | 0.00 | 2.000 | 2.50 | 5.00 | |
| Print Label | 【Print】. | 0.00 | 2.000 | 0.00 | 0.00 | |
| Remove goods | 0.00 | 0.00 | 0.00 | 0.00 | ||
By Count
| Scale State / Operation | Key | Display | Comment | |||
| Tare | Weight / Pcs | Change / Unit Price | Total | |||
| Idle | 0.00 | 0.000 | 0.00 | 0.00 | ||
| Enter PLUPress PLU | 【1】【2】.【PLU】. | 0.00 | 0.00 | 1.00 | 1.00 | |
| Enter PLU quantity | 【X】.【5】. | 0.00 | 5 | 1.00 | 5.00 | |
| Print Label | 【Print】. | 0.00 | 0.00 | 0.00 | 0.00 | |
Tare
Weight Tare
Examples show tare of container weighing 0.25 lb.
| Scale State / Operation | Key | Display | Comment | |||
| Tare | Weight / Pcs | Change / Unit Price | Total | |||
| Idle | 0.00 | 0.000 | 0.00 | 0.00 | ||
| Place container on scale | 0.00 | 0.25 | 0.00 | 0.00 | ||
| Press Tare | 【Tare】 | 0.25 | 0.00 | 0.00 | 0.00 | Tare on |
| Note: | With all weight removed, press Tare key again to cancel | Tare off | ||||
OPERATION, CONT.
Keypad Tare
| Scale State / Operation | Key | Display | Comment | |||
| Tare | Weight / Pcs | Change / Unit Price | Total | |||
| Idle | 0.00 | 0.000 | 0.00 | 0.00 | ||
| Enter Tare weight using numeric keys | 【2】【5】 | 0.00 | 0.25 | 0.00 | 0.00 | |
| Press Tare | 【Tare】 | 0.25 | -0.25 | 0.00 | 0.00 | Tare on |
| Note: | Weight will show negative until container placed on scale | |||||
| Note: | With all weight removed, press Tare key again.to cancel | Tare off | ||||
Lock and Unlock Tare
Lock Tare and Unlock Tare
| Operations | Keys | Display | Comment | |||
| Tare | Weight / Pcs | Change/ Unit Price | Single/ Total | |||
| Lock tare | Long Press【Tare】 | 『Lock Tare』 on | ||||
| Other operations | ||||||
| Unlock tare | Long Press【Tare】 | 『Lock Tare』 off | ||||
Note 1 When you long press 【Tare】, you can hear one beep first (beep for correctness or error). Hold pressing for 4 seconds you will hear the beep for correctness.
Note 2 Once tare locked, it cannot be changed or cleared automatically.
Note 3 Only manual tare can change tare. If a PLU has PLU Tare, Lock Tare cannot overwrite PLU tare.
Note 4 Once tare locked, it cannot be unlocked unless users unlock tare manually.
OPERATION, CONT.
Batch Print Mode (only for piece count PLU)
Example PLU11 is weight PLU with Unit Price \$2.00/pc
| Operations | Keys | Display | Comment | |||
| Tare | Weight / Pcs | Change/ Unit Price | Single/ Total | |||
| 『Sale Idle』 | 0.000 | 0.000 | 0.00 | 0.00 | 『Sale』,『Sum』on. | |
| Enter batch print mode | 【Batch Print】 | 0.000 | 0.000 | 0.00 | 0.00 | 『Auto Mode』on |
| Transfer PLU11 | 【1】【1】【PLU】 | 5.00 | 5.00 | 『Unit Price』,『Single』on. | ||
| Input quantity | 【×】【5】 | 5 | 5.00 | 25.00 | If quantity is 1, omit this step | |
| Confirm sale object | 【Print】 | Input | Count | 0 | ||
| Input the number of print copies | 【5】 | Input | Count | 5 | ||
| Confirm the number | 【Accu/Confirm】 | |||||
| Print 5 copies | Press【Cancel】to exit print in midway. | |||||
| Print ends | 5 | 5.00 | 5.00 | |||
| Exit quantity input | 5.00 | 25.00 | ||||
| Exit Batch Print | 【Batch Print】 | 0.000 | 0.00 | 0.00 | 0.000 | 『Auto Mode』off. |
Pre-Pack Mode (only for weight PLU)
Example PLU10 is weight PLU with Unit Price \$2.00/lb.
| Operations | Keys | Display | Comment | |||
| Tare | Weight / Pcs | Change/ Unit Price | Single/ Total | |||
| 『Sale Idle』 | 0.000 | 0.000 | 0.00 | 0.00 | [Sale], [Sum] on. | |
| Enter prepack mode | 【Pre-Pack】 | 0.000 | 0.000 | 0.00 | 0.00 | [Auto Mode], [Lock PLU] on |
| Transfer PLU10 | 【1】【0】【PLU】 | 0.000 | 0.000 | 2.00 | 0.00 | [Unit Price], [Single] on. |
| Put goods PLU10 on | 0.000 | 0.900 | 2.00 | 1.80 | ||
| After weight is stable. | 0.000 | 0.900 | 0.00 | 1.80 | Print automatically. | |
| Take goods PLU10 off | 0.000 | 0.000 | 0.00 | 0.00 | ||
| Put goods PLU10 on | 0.000 | 1.900 | 2.00 | 3.80 | ||
| After weight is stable. | 0.000 | 1.900 | 0.00 | 0.00 | Print automatically. | |
| Take goods PLU10 off | 0.000 | 0.000 | 0.00 | 0.00 | ||
| Exit PLU | 【Cancel】 | [Sum] on. | ||||
| Exit Auto Mode | 【Pre-Pack】 | [Auto Mode], [Lock PLU] off. | ||||
OPERATION, CONT.
Temporary-Sale by Weight
Temporary-Sale by Count
Price Discount by Subtraction
Total reports are divided into total daily report, total monthly report, total quarterly report and total manual report. Each report owns 32 buffer zones (0\~31).
Take total daily report as an example: The buffer zone 0 stores total daily report of current day; buffer zone 1 stores total daily report of the last day. The rest may be deduced by analogy. So buffer zone 31 stores total daily report of the day dating back to 31 days ago.
Total monthly report and total quarterly report works in the same way, storing total report of the last x months or quarters (x=0\~31).
Total manual report would take operation A51 as time point to divide the storage. The buffer zone delays a position automatically when a report is cleared (That means: Buffer 31 records the information which was stored in buffer 30. By analogy, buffer 1 record the information which was stored in buffer 0 and information stored in buffer 0 is cleared. Then start accumulating in buffer 0.).
When printing total report, system would request to input 2 numbers. And the scale would print total buffer which is added up with the buffers whose numbers are between the 2 input numbers.
Print Daily Reports of Today and Yesterday
| Operations | Keys | Display | Remarks | |||
| Tare | Weight/ Count | Change/ U.Price | Single/ Total | |||
| 『Sale Idle』 | 0.000 | 0.000 | 0.00 | 0.00 | 『Sale』,『Sum』 on. | |
| Enter Account | 【Account】 | A1 | Total | 『Account』 on. | ||
| Enter total report | 【1】 | A11 | Total | Daily | 【1】: Total report【2】: Dept. report【3】: Class report【4】: PLU report | |
| Enter total daily report | 【1】 | Input | 2 – 1 | 0 | 【1】: Daily report【2】: Monthly report【3】: Quarterly report【4】: Manual report | |
| Input start number | 【0】【Confirm】 | Input | 2 – 2 | 0 | Start from today. | |
| Input end number | 【1】【Confirm】 | ... | ... | ... | ... | End at yesterday. |
| A11 | Total | Daily | 0 | Print daily report of today. (Note 4) | ||
| A11 | Total | Daily | 1 | Print daily report of yesterday. (Note 4) | ||
| A11 | Total | Daily | End of print. | |||
| Return to sale mode | 【Sale】 | 0.000 | 0.000 | 0.00 | 0.00 | 『Sale』,『Sum』 on. |
Note 1 If some buffers store no data, these buffers would be skipped off without printing.
Note 2 If end number input is 0, system would only print the buffer appointed by start number.
Note 3 If end number input is not 0 and less than start number, no buffer would be printed.
Note 4 The hints about currently print object may appear on the screen for just a few moment when system is printing.
REPORT PRINTING OPERATION, CONT.
Print PLU Report
The scale could print PLU reports whose number is less than 1000.
When printing PLU reports, system would orderly print those PLU reports whose serial numbers is between the 2 input numbers as well as the 2 input numbers.
Print PLU Daily Reports with the Numbers from 10 to 20
| Operations | Keys | Display | Remarks | |||
| Tare | Weight/ Count | Change/ U.Price | Single/ Total | |||
| 『Sale Idle.』 | 0.000 | 0.000 | 0.00 | 0.00 | 『Sale』,『Sum』 on. | |
| Enter Account | 【Account】 | A1 | Total | 『Account』 on. | ||
| Enter PLU report. | 【4】 | A41 | PLU | Daily | 【1】: Total report【2】: Dept. report【3】: Class report【4】: PLU report | |
| Enter PLU daily report | 【1】 | Input | 2 – 1 | 0 | 【1】: Daily report【2】: Monthly report【3】: Quarterly report【4】: Manual report | |
| Input start number | 【1】【0】【Confirm】 | Input | 2 – 2 | 0 | Start from PLU10. | |
| Input end number | 【2】【0】【Confirm】 | ... | ... | ... | ... | End to PLU20. |
| 10 | Print daily report of PLU10. | |||||
| 11 | Print daily report of PLU11. | |||||
| ... | ||||||
| End of print. | ||||||
| Return to sale mode | 【Sale】 | 0.000 | 0.000 | 0.00 | 0.00 | 『Sale』,『Sum』 on. |
Note 1 If some buffers store no data, these buffers would be skipped off without printing
Note 2 If end number input is 0, system would only print the buffer appointed by start number.
Note 3 If end number input is not 0 and less than start number, no buffer would be printed.
REPORT PRINTING OPERATION, CONT.
Clear Report Information Manually
The information in manual reports would not be cleared automatically unless users enter A51 (clear current manual report) interface to clear it. After this operation, manual reports of all departments, classes and PLU would be cleared, and total manual report would delay its serial number.
Clear Information in Manual Report
Clear All Reports and Records Information
Clear All Reports and Records Information
Note 1 This operation would clear the records of all deals. And it's irreversible. Please operate it carefully.
PRINT FORMAT
➢ Paper Type: Press 【Paper Type】 for 4 seconds to switch between gap paper and plain paper.
➢ Format: There are 9 kinds of default print formats.
➢ Label Size: 58mm x 40mm and 40mm x 30mm label, 58mm and 40mm width plain paper are available in default print formats. When using different type of paper, please adjust the corresponding Spec shown in the table below.
| Paper type | Print type | Spec | Instructions | ||
| 000 | 005 | 027 | |||
| 58mm x 40mm gap paper | Label print | 1 | 4 | 50 | Default |
| Receipt print | 7 | 7 | 50 | Not recommend | |
| 40mm x 30mm gap paper | Label print | 2 | 5 | 36 | |
| Receipt print | 8 | 8 | 36 | Not recommend | |
| 58mm width plain paper | Label print | 1 | 4 | 50 | |
| Receipt print | 7 | 7 | 50 | ||
| 40mm width plain paper | Label print | 2 | 5 | 36 | |
| Receipt print | 8 | 8 | 36 | ||
➢ Print formats include label print and receipt print. If user needs custom print format, please use PC software to change or contact with appointed after-service center.
Don't print bills while selling: amend Spec003 and Spec008 to 0. If some specific deals need to print bills, please press 【Reprint】.
To print a few copies of one bill, put the amount into Spec003 and Spec008.
To print two different kinds of bills: set the type of bill 1 in Spec000\~Spec009, and bill 2 in Spec010\~Spec019. Strongly suggest users contact with appointed after-service center.
➢ Set grey level of gap thermal paper in Spec022.
➢ Set grey level of plain thermal paper in Spec023.
➢ Set plain thermal paper in Spec 025, the position for cut-off paper suggest Spec025 not less than 30.
You can set different kinds of print formats and barcode types for each PLU. You can check the details in PLU parameters for print formats and barcode types. Set the value of these parameters to 0 if you choose the system type.
The procedures to confirm print format: take bill 1 as an example. If two or more goods are sold, print sum bill and use Spec005 as print format. If only one good is sold, print the item bill. If sale PLU has been set for a specific print format (not 0), system would use the print format. If no specific print format has been set to sale PLU (The setting number is 0.), the print format would be Spec000.
BARCODE PRINTING
➢ Can print various kinds of bar code, 9 kinds of default barcode settings.
- Can scan inner code and external code.
Barcodes can be divided by use into item barcodes and total barcodes, which are printed in item labels and total labels respectively.
➢ Factory default barcodes support 5-digits total price and 6-digits total price. Please select the barcode compatible with the POS
| Goods Code | Digits of Price | Spec | Suggestion | |||
| 001 | 006 | 002 | 007 | |||
| Flag Code Using PLU No. | 5 Default | 1 | 7 | xx | xx00000 | x...is the flag code which is reserved for scale in POS system. User could define 0 as a MISC code for PLU Number never equal to 0. |
| 6 | 4 | 8 | xx | xx0000 | ||
| Flag Code Using PLU Item-Code | 5 | 2 | 7 | xx | xxyyyyy | x...is the flag code which is reserved for scale in POS system. y... is a MISC code for total label. PLU's Item-Code is code in POS system. |
| 6 | 5 | 8 | xx | xxyyyy | ||
| No Flag Code Using PLU Item-Code | 5 | 3 | 7 | yxyyyyy | No flag code defined. y... is a MISC code for total label. PLU's Item-Code is code in POS system. | |
| 6 | 6 | 8 | yxyyyyy | |||
Note 1 If users need special bar code format, please use PC suite or contact their service center.
ERROR CODES
| Number | Alarm instructions | Methods to handle |
| E0.01 | Weight is not stable when the scale start-up. | Make sure there is no goods on the tray and the tray is stable. |
| E0.02 | Exceed the allowed start-up zero range | Make sure there is no goods on the tray and the tray is on the bracket. |
| E1.01 | Prog data is invalid. | Input valid data again. |
| E1.03 | The selected print format do not exist | Set print format again |
| E1.10 | Sale at 0 price is forbidden. | The sale whose sell price is 0 is forbidden. Refer to Spec070. |
| E1.11 | Exceed the largest sale price. | Total price or grand total price of sold goods exceeds the largest sale price. |
| E1.12 | Need to return to zero point | Return to weight zero before sale. Refer to Spec069. |
| E1.13 | Exceed accumulative limit | The accumulative times are over buffer accumulate limit |
| E1.14 | There is data in buffer and cannot print in single. | Print the data in buffers first. Then print this sale or switch to other buffers. |
| E1.18 | System cannot execute accumulative operations while locking PLU. | Before accumulative operations, system needs to exit lock PLU (or auto mode) first. |
| E1.19 | System cannot switch buffers into buffer with accumulation while locking PLU. | Operate in current buffer, or exit lock PLU (or auto mode). |
| E1.21 | Less than smallest sale weight | Weight needs to be larger than smallest sale weight. |
| E1.22 | Larger than largest sale weight | Weight needs to be smaller than largest sale weight. |
| E1.23 | Discounted Unit Price has to be less than discount lower limit. | Discounted in allowed range, or amend the allowed range. |
| E1.24 | Discounted Unit Price has to be higher than discount upper limit. | |
| E1.30 | Cannot enter special sale mode | Selected PLU have conflict with special sale mode, select again |
| E7.01 | Some keys are pressed when the scale starts. | Please confirm that no keys are pressed.In this interface, the last window display pressed keys. 8-5 means the key in 8th column from the left and 5th row from the top is pressed.In this interface, the second window displays the calibrated times. |
ERROR CODES, CONT.
| Number | Alarm instructions | Methods to handle |
| E7.11 | Gap paper is not taken away. | Take away the printed label paper. If there is still alarm this problem, do as the way in chapter:Abnormity of Gap Paper Print to detect. |
| E7.12 | Print mouth is not closed tight. | Install the paper and close mouth. |
| E7.13 | Printer is working. | Please wait for a few seconds and try again. |
| E7.14 | Lack of plain paper | Reinstall plain paper or the paper type cannot match. |
| E7.15 | Lack of gap paper | Reinstall label paper or the paper type cannot match. If there is still alarm this problem, do as the way in chapter:Abnormity of Gap Paper Print to detect. |
| E7.16 | The scale cannot find the gap intervals. | The paper type cannot match and change the type to plain paper or reinstall gap label paper. If there is still alarm this problem, do as the way in chapter:Abnormity of Gap Paper Print to detect. |
| E7.17 | The scale cannot find gap alignment positions. | Label paper is used up or paper type cannot match with set paper type. Please reinstall label paper. |
| E7.18 | The printer is overheated and it needs to cool down. | Please wait for a few seconds and try again. |
| E7.19 | There is no response from the printer. | The printer may not be connected or in the state that the printer could not print. |
| E7.30 | Alarm for full storage of deals records. | Enter Account interface. Calculate reports and then clear the reports. |
CARE AND MAINTENANCE
DO NOT submerge, pour or spray water directly on the scale base or weight display.
DO NOT expose the scale base or display to direct sunlight or temperature extremes.
DO NOT place the scale base or display in front of heating/cooling vents.
DO NOT use acetone, thinner or other volatile solvents for cleaning.
DO clean the scale base or display with a damp soft cloth and mild non-abrasive detergent.
DO remove power before cleaning with a damp cloth.
DO provide clean AC power and adequate protection against lightning damage.
DO keep the surroundings clear to provide clean and adequate air circulation.
- DL Series
- Price Computing Scale with Integral Printer
- Operation Manual
- INTRODUCTION
- COPYRIGHT
- DISCLAIMER
- PRECAUTIONS
- PROPER DISPOSAL
- FCC COMPLIANCE STATEMENT
- TABLE OF CONTENTS
- TABLE OF CONTENTS, CONT.
- INSTALLATION
- Included in carton find:
- Attachment of Tower Display
- Placement
- Level Adjustment
- Power Connection
- PRINTER
- Install Gap Labels
- PRINTER, CONT.
- Gap Paper Mounts Recycle
- Install Plain Paper
- Operations Concerning Paper
- Abnormity of Gap Paper Print
- DISPLAY ANNUNCIATORS
- DISPLAY ANNUNCIATORS, CONT.
- Dot Matrix Display
- SET DATE, TIME AND STORE NAME
- FAST PLU PROGRAMMING
- QUICK KEY PROGRAMMING
- Programming of Quick Key
- OPERATION
- Basic PLU Transaction
- Tare
- OPERATION, CONT.
- Lock and Unlock Tare
- Batch Print Mode (only for piece count PLU)
- Pre-Pack Mode (only for weight PLU)
- REPORT PRINTING OPERATION, CONT.
- Print PLU Report
- Clear Report Information Manually
- Clear All Reports and Records Information
- PRINT FORMAT
- BARCODE PRINTING
- CARE AND MAINTENANCE
Brand : Cardinal Detecto
Model : DL1060P
Category : Scale