
FDBP 200901-E - Sander Fieldmann - Free user manual and instructions
Find the device manual for free FDBP 200901-E Fieldmann in PDF.


| Product Type | Random Orbital Sander |
| Model | FDBP 200901-E |
| Rated Voltage | 230 V ~ 50/60 Hz |
| Rated Power | 200 W |
| No-Load Speed | 13,000 min⁻¹ |
| Orbit Diameter | 2.5 mm |
| Sandpaper Size | 125 mm (5 in) hook-and-loop |
| Dust Collection | Built-in dust port with dust bag |
| Weight | 1.3 kg |
| Dimensions (L x W x H) | 240 x 120 x 150 mm |
| Cable Length | 2 m |
| Sound Pressure Level | 82 dB(A) |
| Vibration Level | 2.5 m/s² |
| Protection Class | II (Double Insulated) |
| Maintenance | Regularly clean dust ports; replace sandpaper when worn |
| Safety Features | Double insulation, switch lock, dust extraction |
| Spare Parts Availability | Sanding pads, dust bags, carbon brushes |
| Intended Use | Sanding wood, metal, plastic, and painted surfaces |
Frequently Asked Questions - FDBP 200901-E Fieldmann
User questions about FDBP 200901-E Fieldmann
0 question about this device. Answer the ones you know or ask your own.
Ask a new question about this device
Download the instructions for your Sander in PDF format for free! Find your manual FDBP 200901-E - Fieldmann and take your electronic device back in hand. On this page are published all the documents necessary for the use of your device. FDBP 200901-E by Fieldmann.
USER MANUAL FDBP 200901-E Fieldmann
natural_image
Abstract black and white spiral pattern with no text or symbolsFIELDMANN®
Home & Garden Performance
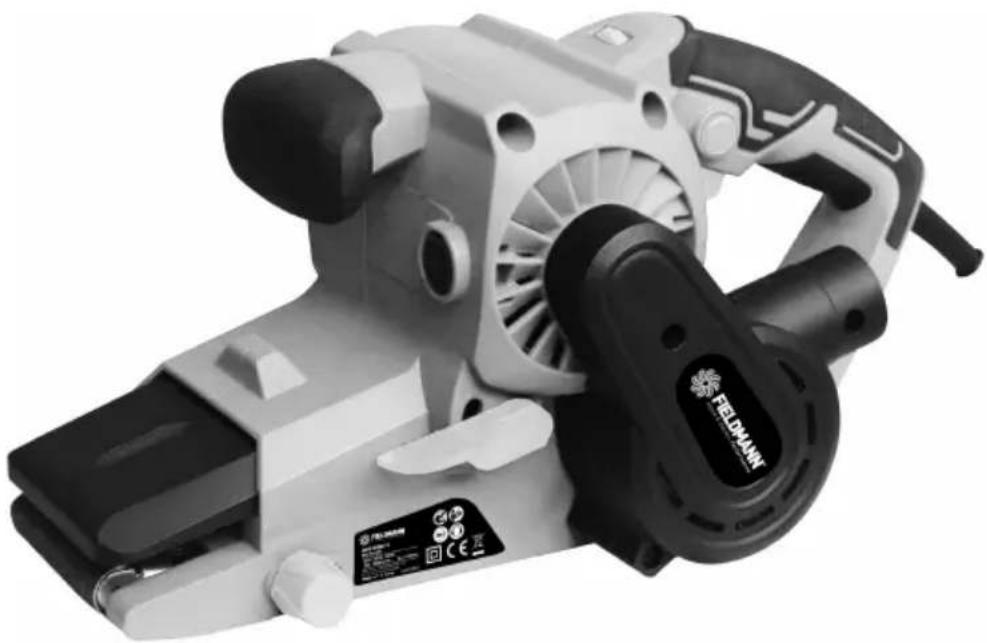
natural_image
Exterior view of a FELDMAN electric shaver tool (no signage or text visible on the device itself)FDBP 200901-E
A
BELT SANDER
INSTRUCTION MANUAL
Thank you for your purchase of the belt sander. For your personal safety, read and understand the Instruction Manual before using. Keep the Instruction Manual in a safe place for future reference.
CONTENTS
- SYMBOLS 5
- MACHINE DESCRIPTION AND ITEMS DELIVERED 6
- GENERAL SAFETY INSTRUCTIONS 6
- SPECIAL SAFETY INSTRUCTIONS .... 10
- USE AND OPERATION 12
- WORKING WITH ANGLE GRINDER 13
- CLEANING AND MAINTENANCE 14
- OPERATION AND MAINTENANCE HINTS 15
- TECHNICAL SPECIFICATIONS 16
- DISPOSAL 18
1. SYMBOLS

The product complies with the applicable standards and regulations.

Read the Instruction Manual attentively prioritouse.

Double-insulated.

Use eyes protective equipment

Use ears protectiove equipment

Wear a breathing mask.

natural_image
Symbol of a trash bin crossed with no text or numbers, representing waste sorting or disposal (no text present)Subjected to recycling
2. MACHINE DESCRIPTION AND ITEMS DELIVERED
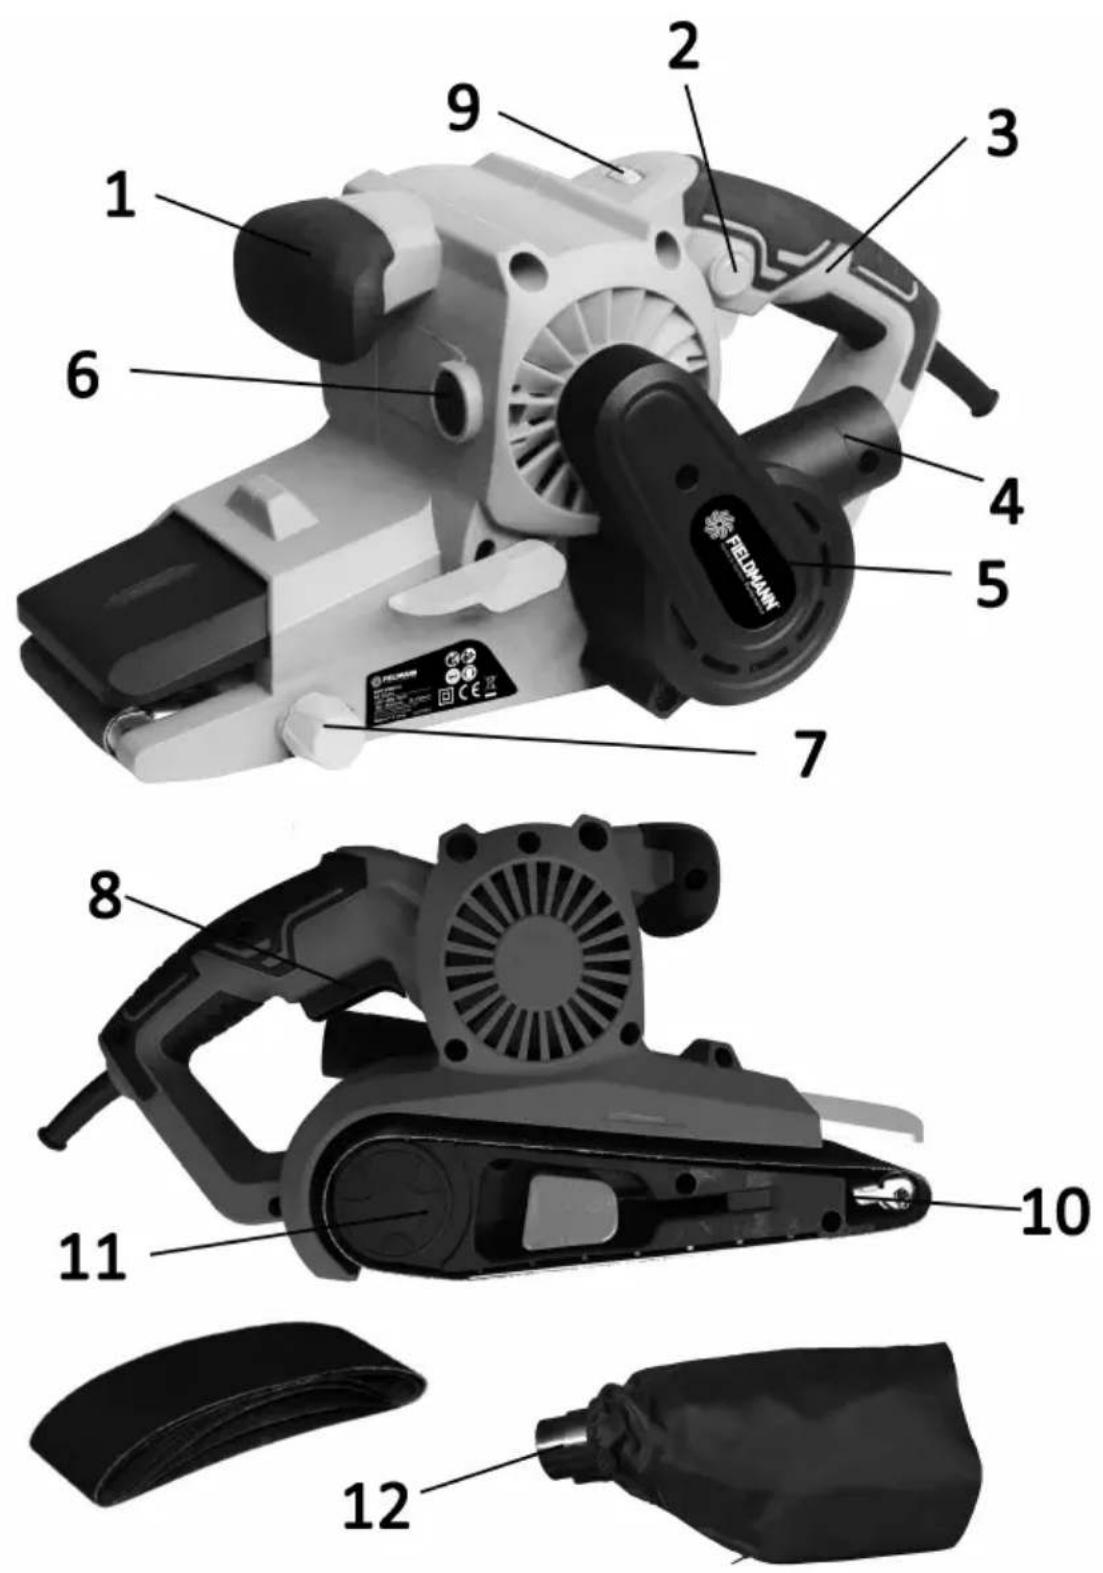
Machine Description (See fig. 1)
- Front Handle 2. Lock On Button
- Rear Handle 4. Dust Extraction Port
- Drive Belt Housing Cover 6. Brush Access Caps
- Belt Tracking Adjuster 8. On/Off Trigger
- Speed Control Dial 10. Front Roller
- Belt Release Lever
- Dust Bag
Items Delivered
Remove all contents from the box and inspect to ensure no damage was incurred during shipping, and that the items listed below are included.:
Belt sander
* Instruction Manual
Should the components be missing or damaged, contact the dealer of the machine.
3. GENERAL SAFETY INSTRUCTIONS
Please read these safety instructions carefully, remember them and keep them in a safe place
WARNING! When using electric machinery and power tools, it is important to abide by and adhere to the following safety instructions for reasons of protection against injury caused by electric current, injury of persons and risk of starting fires. The term "power tools" used in the instructions below refers to power tools that are plugged into a power supply (by a power cord) as well as tools running on a battery pack (cordless). Keep all warnings and instructions for further use.
Work environment
Keep the work area clean and well lit. Untidiness and dark places on the job site are usually causes of accidents. Store tools that are not used.
Do not use power tools in an environment where there is risk of starting a fire or explosion; this refers to places where there are flammable liquids, gases or dust. Sparks form on the power tool's commutator, which can cause dust or fume ignition.
When using power tools, unauthorized persons, especially children, should be denied entry to the job site! In case you are interrupted, you can lose control of the current activity. In any case, do not leave the power tool without supervision. Prevent animals from approaching the equipment.
Electrical safety
The power tool's power plug must correspond to the power outlet. Never alter the plug in any way. If the tool's plug has a safety peg, never use an adapter of any kind. Undamaged plugs and corresponding outlets prevent the risk of injury by electric current. If the power cord is damaged, it must be replaced by a new power cord that can be obtained from an authorized service centre or the importer.
Avoid bodily contact with grounded items, e.g. piping, radiators, kitchen ranges and refrigerators. The risk of injury by electric current is greater if your body is connected to the ground.
Do not expose power tools to rain, moisture or dampness. Never touch power tools with wet hands. Never wash power tools with running water and never submerse them into water.
Do not use the power cord for any other purpose than originally intended. Never carry or pull the power tools by the power cord. Do not pull the plug out of the outlet by pulling on the cord. Avoid mechanical damage to the power cord by sharp or hot objects.
Power tools were manufactured exclusively for the AC power supply. Always check if the electrical voltage corresponds to the data printed on the tool's serial number label.
Never work with a tool that has a damaged power cord or plug, or that has fallen on the ground and is damaged in any way.
In the case of using an extension cord, always check that its technical parameters correspond to the data printed on the tool's serial number label. If the power tool is used outdoors, use an extension cord that is appropriate for exterior use. When using an extension cable drum, the cord must be unwound to prevent the cord from overheating.
If the power tool is used in moist areas or outdoors, it is permitted to use it only if it is plugged into an electric circuit with a residual current device ≤30 mA. Using a circuit with an RCD lowers the risk of injury by electric current.
Grasp hand power tools at the designated isolated grip areas because, during operation, one may come into contact with the cutting or drilling fittings with a hidden conductor or with the power cord.
Personal safety
When using a power tool, be careful and alert, pay special attention to the activity you are doing. Concentrate on your work. Do not work with power tools if you are tired or if you are under the influence of drugs, alcohol or medication. When using power tools, even a momentary lapse in attentiveness can lead to severe personal injury. Do not eat, drink or smoke while working with power tools.
Use protective gear. Always use eye protection. Use protective gear corresponding to the type of work you are doing. Protective gear such as respirators, safety shoes with antiskid treatment, head protection or ear protection, used in accordance with working conditions, lower the risk of personal injury.
Avoid unintentional operation of tools. Do not carry tools that are plugged into the electric grid with your finger on the switch or release trigger. Before connecting the tool to a power supply, make sure that the switch or release trigger are in the "off" position. Carrying tools with your finger on the switch or plugging the tool into an outlet with the switch in the "on" position can cause serious injury.
Before turning tools on, remove all adjustment wrenches and tools. The adjustment wrench or tool that stays connected to the rotating part of the power tool can cause personal injury.
Always stand firmly and keep your balance. Work only in places that you can reach safely. Never overestimate your own strength. Do not use power tools if you are tired.
* Dress appropriately. Use working clothes. Do not wear loose clothing or jewellery. Make sure that your hair, clothing, gloves or other body parts do not come overly close to rotating or heated parts of the power tool.
Connect the equipment to the dust exhaust. If the tool offers the possibility to connect equipment for capturing dust or dust suction, make sure that it is properly connected and used. Using this equipment can reduce danger resulting from dust.
* Firmly fasten the workpiece. Use a carpenter's clamp or vice to secure the piece you will be cutting.
Do not use power tools if you are under the influence of alcohol, drugs, medication or other narcotics or addictive substances.
This equipment is not intended to be used by persons with limited physical, sensory or mental abilities (including children) or persons with insufficient experience and knowledge, unless they are supervised or received instructions to use the equipment from a person responsible for his/her safety. Children must be supervised in order to ensure that they are not playing with the equipment.
Using power tools and their maintenance
Always disconnect the power tool from the electric grid if there is any problem during work, before every cleaning or maintenance, during every shift and after finishing work! Never work with power tools if they are damaged in any way.
If the tool starts emitting abnormal noises or odours, immediately stop working.
Do not overload power tools. The power tool will function better and more safely if it operates at speeds for which it was designed. Use correct tools that are designated for the given activity. The correct tool works better and more safely.
Do not use power tools that cannot be turned on safely and cannot be turned on and off with a control switch. Using this type of tool is dangerous. Faulty switches must be repaired at a certified service centre.
* Disconnect the tool from the power supply before you start setting, changing accessories or maintenance. This measure will prevent the risk of accidental start-up.
Store unused power tools so that they are out of the reach of children and unauthorized persons. Power tools in the hands of inexperienced users can be dangerous. Store power tools in a dry and safe place.
Keep power tools in good condition. Regularly check the setting of moving parts and their movability. Check if the protective cover or other parts that can limit the safe functioning of the power tool are not damaged. If the tool is damaged, ensure its proper repair before the next use. Many injuries are caused by poorly maintained power tools.
- Keep cutting tools sharp and clean. Properly maintained and sharpened tools make work easier, limit the risk of injury and work with them is much more easily controlled. Using other accessories than those listed in the instruction manual can cause damage to the tool and can cause injury.
Use power tools, accessories, work tools, etc. in accordance with these instructions and in a way that is described for the specific power tool and with regard to the given working conditions and the type of job. Using tools for other purposes than those intended can lead to dangerous situations.
Service
Do not change parts of the tool, do not perform repairs on your own and do not interfere with the tool's construction in any way. Leave tool repairs to qualified persons.
Each repair or product modification performed without our company's permission is inadmissible (it can cause injury or harm to the user).
* Always leave tools to be repaired in a certified service centre. Use only original or recommended spare parts. This will ensure your and your tool's safety.
4. SPECIAL SAFETY INSTRUCTIONS
⚠ WARNING! Before use, please read these safety instructions and keep them in a safe place.
Upon failure to follow the instructions specified in this manual, there is a risk of injury.
Angle grinder conforms to applicable technical regulations and standards.
Safety warning for works such as grinding, surfacing, wire brushing, polishing or abrasive cutting
These electro-mechanical tools are intended for use as grinder. It is necessary to read all safety warnings, instructions, illustrations and specifications for the electro-mechanical tools. Non-compliance with the below mentioned instructions can lead to injury by electrical current, fire and/or serious injury.
* Accessories not specifically designed and recommended by the tool's manufacturer may not be used. The mere fact, that an accessory can be connected to your tool does not guarantee its safe operation.
The nominal speed of the accessory has to be at least equal the maximal speed marked on the tool. Accessories, operating at higher speeds than its nominal speed, can break and fall apart.
The outer diameter and thickness of the accessory has to be within the limits of the nominal range for particular electromechanical tools. The accessories of incorrect size cannot be sufficiently guarded or controlled.
It is prohibited to use damaged accessories.
Personal protective equipment has to be used. According to condition a face shield or safety goggles have to be used. Use dust mask, hearing protection, gloves and work apron, capable of arresting small fragments of the abrasive material or work piece, as appropriate. Eye protection has to be capable of arresting flying fragments, generated during various work activities. Dust mask or respirator has to be able of filtering particles, generated during a particular activity. Long-term exposure to high-intensity noise can cause loss of hearing.
Bystanders have to keep a safe distance from the working area. Everyone entering the working area has to use personal protective equipment. Fragment of the work piece or damaged accessories may fly away and cause injury even outside the immediate working area.
During work, during which the tool can touch a hidden wiring or its own power supply, the electromechanical tool has to be held by the insulated holding surfaces. Contact of the tool with a "live" wire can cause the metallic parts of the electromechanical tool to become "live" and may cause an injury by electric current.
Mobile power supply has to be placed outside the reach of the rotating tool. In case the operator looses control, the mobile power supply can be cut or ground through, and a hand or arm of the operator may be dragged to the rotating tool.
Electromechanical tool may not be put down before the tool stops completely. Rotating tool may get caught on a surface and may pull the tool out of the operator's control. Electromechanical tool may not be started while the tool is carried by the operator. Rotating tool may, in case of a accidental contact, catch clothing and be pulled to the body.
* Ventilation holes of the tool have to the cleaned regularly. The motor ventilator brags dust into the casing and excessive accumulation of metallic dust can cause an electric hazard. Work with electromechanical tool in the vicinity of flammable materials is prohibited.
Ignition of the materials by sparks may occur.
Use of accessories requiring cooling by liquid is prohibited. Use of water or other coolants
* may cause injury or death by electric current.
Safety warning for works such as grinding, surfacing, wire brushing, polishing or abrasive cutting
Kick-back is a sudden reaction on pinching or seizing of a rotating disk, support block, brush or other accessory. Pinching or seizing causes sudden stoppage of a rotating tool, which subsequently causes, that uncontrolled tool moves in the opposite direction to the rotation of the tool in the moment of seizing.
Kick-back is a consequence of the use of electromechanical tools and/or incorrect working procedures of conditions and it can be prevented by the compliance with the below described safety measures.
The tool has to be held firmly while maintaining a correct position of the body and arms to resist the forces of the kick-back. Auxiliary handle has to be used if the tool is fitted with it, for maximum control of the kick-back or reaction torque when starting the tool. The operator can control the reaction torques and the kick-back forces if the correct safety measures are observed.
Do not put hands in the vicinity of the rotating tool. The kick-back of the tool may throw the operators arm away.
Do not stand in the area, into which the tool might be thrown by the kick-back. Kick-back will throw the tool in the opposite direction to the movement of the disk at the moment of seizure.
Pay special attention to the machining of corners, sharp edges etc. Prevent skipping and seizure of the tool. Corners, sharp edges or skipping tends to cause seizure of a rotating tool and loss of control or kick-back.
Additional safety instructions for surfacing Safety warnings specific for surfacing:
Follow the manufacturer's instructions while selecting the sand paper. Large sand paper, which extends over the grinding disk, represents a risk of tearing and may cause seizure, tearing of the disk or a kick-back.
5. USE AND OPERATION
* This angle grinder is intended for household or hobby use only.
The manufacturer and importer do not recommend using this tool in extreme conditions and under high load.
Any other additional requirements must be agreed between the manufacturer and the customer.
Use the machine and attachments (note the manufacturer's specifications) only for the intended range of applications.
* Any other use is strictly forbidden.
* Carefully unpack and inspect your sander. Fully familiarise yourself with all functions/features of the tool
* Ensure that all parts of your sander are present and in good condition. If any part is missing, or damaged, have such parts replaced before attempting to use this tool. Always use dust extraction where available, or a dust bag where not
Fitting sanding belts
WARNING: Before fitting sanding belts, ensure that the sander is disconnected from the power supply.
Place the sander upside down on a workbench or similar solid, flat surface
Pull out the Belt Release Lever (11). This retracts the Front Roller (10) and slackens the sanding belt. The worn belt can now be removed
Fit the new sanding belt, positioning it squarely over the rollers
Close the belt release lever. The belt should now be taut and secure
Once fitted, it may be necessary to adjust the front roller to ensure that the belt runs true
* Keep the sander inverted on the work bench, and connect it to power
Hold the sander firmly by the Rear Handle (3) and depress the On/Off Trigger (8). Observe any sideways motion of the belt
If needed, turn the Belt Tracking Adjuster (7) clockwise to move the belt left, or anti-clockwise to move the belt right until the belt runs true
* Disconnect the sander from power
Fitting theDus tbag
* Push fit the Dust Bag (12) onto the Dust Extraction Port (4) or connect a dust extraction system to the dust port before use
Do not allow the dust bag to become more than two thirds full before emptying, so that it can operate efficiently to provide a safer and cleaner work environment
6. WORKING WITH BELT SANDER
Switching on
To start the machine, squeeze the On/Off Trigger (8). To stop the machine, release the trigger
For extended continuous use, you can lock the on/off trigger in the 'on' position:
-
Squeeze the on/off trigger and depress the Lock On Button (2); the machine will continue to run when the on/off trigger is released
-
To stop the machine, squeeze and release the on/off trigger
Speed control
The speed of the machine can be varied
To adjust the speed, rotate the Speed Control Dial (9).
A higher number indicates a higher operating speed
It is highly recommended that you practice working with scrap
material until the optimum sanding speed is determined
Sanding
Before starting to sand, ensure that the material to be sanded cannot move or slip. Use clamps as necessary, and always keep both hands on the machine
To achieve a high quality finish efficiently, always start with a coarse grade of sanding belt, and work through to finer grades until the desired finish is achieved
Before connecting the machine to the power supply, check that the trigger switch is in the off position, and that the sanding belt is properly fitted
- Connect the sander to the power supply
- Raise the sander off the work surface, and switch on. Allow the sander to reach its full operating speed
- Keeping a secure hold of the machine, lower the sander onto the work surface. To avoid unnecessary damage to the work surface, keep the movement direction of the sanding belt parallel with the natural grain of the wood
- Move the sander slowly across the surface that is to be sanded until the desired amount of material has been removed
- Always lift the sander away from the surface of the workpiece before stopping the motor
- Ensure that the motor has come to a complete stop before placing the machine down
- Always disconnect the machine from the power supply before leaving it unattended
7.CLEANING AND MAINTENANCE
WARNING: Always remove the plug from the mains power supply before carrying out any maintenance/cleaning.
Cleaning:
Keep your machine clean at all times. Dirt and dust will cause internal parts to wear quickly, and shorten the machine's service life. Clean the body of your machine with a soft brush, or dry cloth. If available, use clean, dry, compressed air to blow through the ventilation holes
* Your tool requires no additional lubrication or maintenance. It contains no parts that can be repaired by you.
* Never use water or chemical cleaners to clean your tool. Wipe the tool using a dry cloth. Keep
the engine fan apertures clean.
If you notice very weak sparking in the engine area, your tool is in good order. If the sparking is more intense, it indicates the engine fault.
* Never clean any part of the toll using a hard, sharp or rough object.
Inspection and Replacement of Carbon Brushes
* Carbon brushes need to be checked on a regular basis.
In case of wear and tear, replace both carbon brushes simultaneously. Attach the carbon brush holders.
After attaching new carbon brushes, let the grinder run, without load, for 5 minutes.
* Use only correct types of carbon brushes.
* Over time the carbon brushes inside the motor may become worn
Excessively worn brushes may cause loss of power, intermittent failure, or visible sparking
* A spare pair of brushes is supplied with this tool. To replace the brushes, remove the Brush Access Plugs (7) from both sides of the machine. The worn brushes can then be withdrawn, and replaced with new. Replace the brush access plugs. Alternatively, have the machine serviced at an authorised service centre
* Note: Alwaysreplacebothbrushes. Neverreplace just one, evenifthewear on thebrushes is not uniform
Drive belt
* A spare drive belt is supplied with this tool. If you need to replace the belt, remove the Belt Drive Housing Cover (5) and thread the new belt onto the rollers. Then refit the cover to the housing
Store the machine, Instruction Manual and the accessories in the original packaging. In this way you will always have all the information and parts ready to hand.
Devices are to a large extent free of maintenance, you only need a damp cloth to clean the casing. Do not drop electrical machines into water. Please note additional hints given in the Instruction Manual.
9. TECHNICAL SPECIFICATIONS
Power supply.... 230V\~ / 50Hz
Power input....900W
Speed....200-380 rpm
Protection class....II
Power supply cable length.... 1.8 m
LpA: (sound pressure level).... 90.4 dB(A)
LwA: (sound power level).... 101.4 dB (A)
Vibration level....ah.D1 = 1.89 ms ^-2 , K = 1.5 ms ^-2
Instructions Manual - language version only.
Amendments to text and technical parameters are reserved.
Changes in the text, design and technical specifications may change without prior notice and we reserve the right to make these changes. keep it from turning as the drill bit rotates.
Troubleshooting
Suspected malfunctions are often due to causes the user can fix themselves. Therefore check the product using this section .In most cases the problem can be solved quickly .
WARNING!
Only perform the steps described within these instruction s! All further inspection, maintenance and repair work must be performed by an authorized service centre or a similarly qualified specialist if you cannot solve the problem yourself!
| Problem Possible Cause Solution | ||
| 1. Product does not start 1.1 Not connected to power supply1.2 Power cord or plug is defective1.3 Other electrical defect to the product | 1.1 Connect to power supply1.2 Check by a specialist electrician1.3 Check by a specialist electrician | |
| 2. Product does not reach full power | 2.1 Extension cord is not suitable for operation with this product.2.2 Power source (e.g. generator) has too low voltage2.3 Air vents are blocked | 2.1 Use a proper extension cord2.2 Connect to another power source2.3 Clean the air vents |
| 3. Unsatisfactory result | 3.1 Disk bit is dull/damaged3.2 Disk bit is not suitable for work piece material | 3.1 Replace with new one3.2 Use proper drill bit |
| 4. Excessive vibration or noise | 4.1 Disk bit is dull/damaged4.2 Bolts /nuts are loose | 4.1 Replace with a new one4.2 Tighten bolts/nuts |
10.DISPOSAL
The machine and its accessories are made of various materials, e.g. of metal and plastics. Hand-over damaged components to sorted waste. Get yourselves informed at a respective authority.
INSTRUCTIONS AND INFORMATION ON DISPOSAL OF USED PACKAGING.
Put any used package material to the place determined by the municipality for waste disposal.
DISPOSAL OF USED ELECTRIC AND ELECTRONIC EQUIPMENT
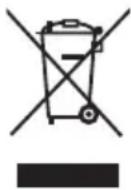
This symbol on products or accompanying documents means that used electric or electronic products must not be put to ordinary municipal waste. Hand over such products to determined collection points for proper disposal, restoration and recycling. Alternatively, in some countries of the European Union or other European countries you can return your products to your local dealer when you buy an equivalent new product. By dutiful disposal of this product you can preserve precious natural resources and you help prevent any potential adverse effects on the environment and human health which could be the results of wrong waste disposal. Ask your local authority or the nearest collection point for additional details. In case of improper disposal of this waste kind penalties can be imposed in accordance with national regulations.
For companies in the European Union countries
Should you want to dispose of electric and electronic devices, ask your dealer or vendor for necessary information. Disposal in other countries outside the European Union. Should you want to dispose of this product, ask your local authorities or your dealer for necessary information about disposal method.
CE
This product fulfils all basic requirements of the EU directives that apply to it.
Text, design and technical specifications can change without prior notice and we reserve the right for their change.


- FIELDMANN®
- BELT SANDER
- INSTRUCTION MANUAL
- CONTENTS
- SYMBOLS
- MACHINE DESCRIPTION AND ITEMS DELIVERED
- Machine Description (See fig. 1)
- Items Delivered
- GENERAL SAFETY INSTRUCTIONS
- Please read these safety instructions carefully, remember them and keep them in a safe place
- Work environment
- Electrical safety
- Personal safety
- Using power tools and their maintenance
- Service
- SPECIAL SAFETY INSTRUCTIONS
- Safety warning for works such as grinding, surfacing, wire brushing, polishing or abrasive cutting
- USE AND OPERATION
- Fitting sanding belts
- Fitting theDus tbag
- WORKING WITH BELT SANDER
- Switching on
- Speed control
- Sanding
- 7.CLEANING AND MAINTENANCE
- Cleaning:
- Inspection and Replacement of Carbon Brushes
- Drive belt
- TECHNICAL SPECIFICATIONS
- Troubleshooting
- WARNING!
- 10.DISPOSAL
- INSTRUCTIONS AND INFORMATION ON DISPOSAL OF USED PACKAGING.
- DISPOSAL OF USED ELECTRIC AND ELECTRONIC EQUIPMENT
- For companies in the European Union countries
- CE
Brand : Fieldmann
Model : FDBP 200901-E
Category : Sander