MP310 Plus - Mp3 player Truly - Free user manual and instructions
Find the device manual for free MP310 Plus Truly in PDF.


| Product Type | Digital Photo & Audio Player (MP3 Player) |
| Model | MP310 Plus |
| Brand | Truly |
| Storage Capacity | 1 GB internal flash memory |
| Display | 1.5-inch STN color LCD, 128 x 160 pixels, 65536 colors |
| Audio Formats Supported | MP3, WMA, Secure WMA |
| Bit Rate | MP3: 8-384 Kbps; WMA: 32-192 Kbps |
| Recording Format | MP3 |
| Recording Time | Approx. 8 hours (128 MB low quality) – actual time depends on capacity |
| FM Radio Frequency Range | 76.0 - 108.0 MHz |
| Battery Type | Rechargeable Li-ion |
| Battery Charging Time | Approx. 3 hours |
| Playback Time | Approx. 11 hours (MP3, half brightness) |
| Dimensions (L x W x H) | 77 x 50 x 13 mm |
| Connectivity | USB 2.0 (Full Speed), Line-in, Earphone jack |
| Transfer Rate | > 500 KBps |
| Maximum Output Power | 4.0 mW per channel (earphone) |
| Charging Methods | AC charger or USB connection to PC |
| Software Included | TMusic Music Management, LRC Lyric Editor, Image2Logo |
| System Requirements | Windows 98/2000/XP/ME, USB port, Pentium 200 MHz, 32 MB RAM, 60 MB HDD |
| Accessories Included | Earphone, Charger, USB cable, LINE IN cable, Installation CD, Quick start manual |
| Functions | Music playback, Recording (mic/line-in/FM), FM radio, Picture browsing, E-book, Games, Themes, A-B repeat, EQ settings |
| Care and Cleaning | Use soft dry cloth; avoid liquids, extreme temperatures, moisture, dust, magnetic fields, direct sunlight |
| Safety | Do not disassemble; use only recommended accessories; avoid impact; protect hearing by adjusting volume |
| Spare Parts & Repairability | Contact dealer or Truly customer service for service; battery and accessories from manufacturer recommended |
Frequently Asked Questions - MP310 Plus Truly
User questions about MP310 Plus Truly
0 question about this device. Answer the ones you know or ask your own.
Ask a new question about this device
Download the instructions for your Mp3 player in PDF format for free! Find your manual MP310 Plus - Truly and take your electronic device back in hand. On this page are published all the documents necessary for the use of your device. MP310 Plus by Truly.
USER MANUAL MP310 Plus Truly
MP310 Plus Digital Player

natural_image
Exterior view of a TRULY digital audio recording device with colorful screen and earphones (no text or symbols visible)User's Manual
Overview
Welcome to the World of Pic'N Roll! We are pleased that you have chosen the TRULY® Pic'N Roll MP310 Plus Digital Photo & Audio Player. Please be sure to read this manual carefully before using this unit.
Safety Instructions
- This electronic unit is of high precision. Please do not try to disassemble this unit yourself.
- Do not subject this unit to severe impact.
- Do not expose to extreme temperatures, moistures, dusty area, magnetic field or direct sunlight.
- Clean the unit with soft cloth. Avoid using any chemical solutions.
- Do not subject to water. Avoid placing this unit near objects that contain liquor, such as glasses.
- To avoid permanent hearing loss, please adjust the volume properly before use.
- Do not try to modify any part of this unit.
- Only use the battery, charger and accessories that are recommended by the manufacturer. Otherwise, it is dangerous and will violate the warranty terms.
- Dispose of this unit and its accessories according to your local environmental regulations.
- If you have any problems when using this unit, please contact your local dealer or our customer service center.
Declarations
- Truly Electronics Mfg. Ltd. assumes no responsibility for any damaged or loss data caused by accidental deletion of data as a result of malfunction, repairs or battery replacement. Making backups of important data on other media to protect against data loss is strongly recommended.
- This manual is based on the first version of this unit. Should there be any changes, please see the revised manual in the supplied installation CD or the corresponding manual on our company's website at http://www.truly.net.
- Should there be any upgrade, please visit our website at http://www.truly.net to download the latest drivers.
- The pictures shown in this manual maybe slightly different from the actual product screen.
- Design of this unit is subject to change without notice.
FCC Notice:
This device complies with Part 15 of the FCC Rules. Operation is subject to the following two conditions:
(1) This device may not cause harmful interference.
(2) This device must accept any interference received, including interference that may cause undesirable operation.
Content
Introduction 1
- Features 1
- Package Contents 1
- System Requirements 1
- Specification 1
Buttons, Display and Battery Information 2
- Buttons / Ports 2
- LCD Display 3
- Battery 3
Connect to PC 3
- USB Drivers (Win98 only) 3
- Using as a removable disk 4
MP310 Plus Software Installation, Operation and Removal 4
- Installation 4
- Operation 4
- Removal 6
Menu 7
Operation 7
- Play music and Turn off the player 7
- Hold 7
- EQ mode 7
- Play mode 7
- A-B Repeat 7
- Record 7
- FM Radio 8
- Games 9
- E-book 9
- Picture browsing 10
- System settings 10
- Memory management 11
- Automatic power off 11
Appendix 11
Trouble Shooting 11
Introduction
1. Features
| Features | Description |
| Playing music: | Supports MP3, WMA, and secure WMA music format. Built-in EQ equalizer for optimal sound quality. A-B repeat. Display lyric (LRC format) while playing. |
| Recording: | FM recording and external recording (built-in microphone) |
| FM Radio: | Manually/Automatically search and store stations. Normal mode and wide mode. |
| Picture browsing: | Listening to music or radio while browsing pictures. Automatic playback. |
| E-book: | Listen to the music or radio while reading. Automatic page down. |
| Games: | Listen to the music or radio while playing games. |
| Themes: | Choice of different color themes. |
| Power off: | Automatic power off and timed power off. |
2. Package Contents
MP310 PLUS should include the following accessories. Please contact the dealer if any of the listed items is missing from the package.
- Earphone (1)
- Charger (1)
- USB cable (1)
• LINE IN cable (1)
• Installation CD (1) - Quick start manual
3. System Requirements
• Microsoft Windows 98/2000/XP/ME
- USB port
• Pentium 200MHz CPU or higher
- CD-ROM drive
- 60MB hard disk space or more
• 32MB memory or more
4. Specifications
| Product name: | MP310 Plus |
| Storage media: | Built-in 1G flash memory |
| Port: | USB2.0 (Full Speed) |
| Transfer rate: | >500KBps |
| Recording format: | MP3 |
| Bit Rate: | MP3 (8Kbps~384Kbps);WMA (32Kbps~192Kbps) |
| Recording time: | Approximate 8 hours (128M using low encoding quality) |
| LCD display: | 65536 colors STN color LCD;128 x 160 (display pixels) |
| Battery charging time: | Approximate 3 hours |
| Playing time: | Approximate 11 hours when playing MP3 (half brightness) |
| Battery: | Li-ion battery |
| Maximum output: | Earphone 4.0mw x 2 |
| FM frequency range: | 76.000 - 108.000MHz(FM frequency) |
| Dimension: | 77mm(L.) x 50mm(W) x 13mm(H) |
Buttons / Display / Battery information
1. Buttons / Ports introduction

(a) Play / Pause / Conform.
(b)/(c) Volume +/-. When in menu mode, press to move cursor up/down. When in game mode, press to move up/down.
(d)/(e) Press to skip to the previous / next track. Press and hold while playing to fast rewind / forward through tracks. Press to move left / right while playing games. Press to search a station when in manual searching mode.
(f) Press to display option menu; Press and hold to lock/unlock when in playing, recording or FM radio mode.
(g) When the unit is turned on / off, press and hold to turn off / on.
When in menu mode, press to exit and go back to the upper level menu.
(h) Microphone, used for recording.
(i) Earphone jack.
(j) Line in / USB port / DC in.
(k) Press to start A-B repeating while playing. Press to start FM recording when in FM radio mode.
(I) Press to select different EQ modes while playing.
(m) RESET. Press to reset the system when the system is down or behaves abnormally.
2. LCD Display

(d) (f)(e)
Figure 1
(a) Buttons are locked
(b) Current track number
(c) Current track elapsed time
(d) Play/Pause
(e) EQ mode
(f) Play mode
3. Battery
You can charge your battery in two ways:
(a) Using the charger.
(b) Connect this unit to the USB port of your PC using the supplied USB cable (Figure 2), click “ ” button in the lower right corner on the desktop, follow the steps to disconnect this unit from your PC safely. When in the main menu (Figure 3) Press and hold [A-B] to start charging the battery.

natural_image
Line drawing of a computer interface showing cable connection to tower (no text or symbols)Figure 2
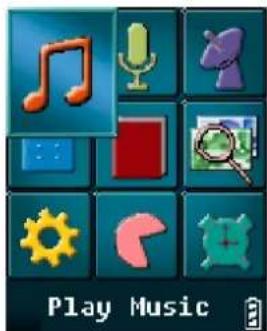
Figure 3
Note: • Do not touch the battery with wet hands.
- Be sure to fully charge the battery when the battery is charged for the first time or after long-term storage.
• Overcharging or undercharging will shorten the battery life. - For optimum battery life, be sure to fully discharge the battery before charging. Recharge the battery several times if necessary (fully discharge before fully charge).
- When charging the battery, a flashing battery icon will be shown on the display. The battery icon stops flashing when charging is finished. It takes approximately 3 hours to fully charge a battery.
Connect to PC
Note: • You can download / upload any types of files to / from this unit. Files whose types are not MP3 / WMA or recorded file format will not be displayed.
- To prevent against data loss when disconnecting this player from your PC's USB port, please click the " ” icon on the lower right corner of the desktop and follow the steps to safely disconnect this player from your PC.
1. Win98 USB driver
In Windows ME / 2000 / XP, this player can be used as a removable disk. In other operating systems, you must install the supplied driver.
Insert the supplied installation CD in the CD-ROM drive, wait until the main interface is shown (Figure 4). In Windows 98, click [Install MP30x Win98driver] and follow the instructions to install the driver. When finished, connect this player with your PC using the supplied USB cable, a "Removable Disk" will be listed in "My Computer". Click "Exit" to exit the main interface.

Figure 4
2. Using as a removable disk
Connect this player with your PC using the supplied USB cable:
The display will show (Figure 5), double click "My Computer", you will find a "Removable Disk" icon in the directory (assume it is disk H).

Figure 5
Download (from PC to player):
Copy and paste the desired files in the PC to disk H.
Upload (from player to PC):
Copy and paste the desired files in disk H to the destination directory.
Delete:
Right click on the file that you want to delete and select "Delete", or press the [Delete] key on your keyboard directly.
Format:
A removable disk will be listed in "My Computer" after the player is successfully connected to your PC. Right click at the removable disk and select "Format" (Figure 6), in the "File System" drop down list, select "FAT" or "FAT32". Press "Start" to start formatting. Click "Close" when the process is finished.

Figure 6
MP310 Plus software installation, operation and removal
Note: • The following operation is in Win2000. The screenshots may be different if you are using a different operating system. The following screenshots are for reference only.
1. Installation
Insert the installation CD to your PC's CD-ROM drive, wait until the main interface is shown (Figure 4), click "Read MP310 Plus user's manual". This manual contains information about how to operate this player. This document is in PDF format. If you can not read PDF files, please click "Install Adobe Acrobat Reader" to install the reader.
Click "Install T-music Music Management Software", follow the instruction to install the music management software (includes "LRC Lyric Editor", "TMusic" and "U Disk Detector").
Click "Image2Logo" and follow the instructions to install Image2Logo.
2. Operation
TMusic Music Management Software Operationa)
LRC lyric editor operation
Please refer to the help file of LRC lyric editor.
T-Music Operation
Please refer to the help file of TMusic.
U Disk Detector
If this unit is not recognized by your operating system, run "U Detector" to help you find the U disk.
Image2Lgo software operationb)
Image2Lgo (it resizes JPG, BMP, GIF format files so that they can be shown in the display)
Double click on the "Image2Lgo" icon on the desktop or click "Start - Program - Image2Lg" to start the program (Figure 7).

Figure 7
Introduction:


Operation:
Click [File - Open Image File] to [Open image file] dialog (Figure 8).

Figure 8
Open the selected image file (Figure 9).

natural_image
Close-up photo of a red rose surrounded by white flowers and green leaves, displayed within an image viewer interface (no text or symbols on the flower image itself)Figure 9
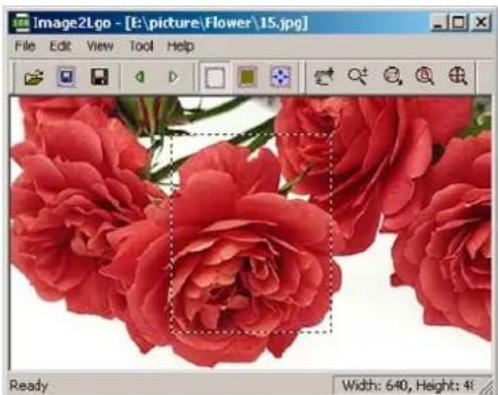
Click [Move] button to move the frame to the desired position. (Figure 11).
natural_image
Close-up photo of red roses with a white background, displayed within an image viewer window (no text or symbols on the roses themselves)Figure 11
Click [Drag and Resize] button to resize the picture. Click [Show Output Frame] button to select the part of picture that will be used as the start-up image. (Figure 12)

natural_image
Close-up photo of red roses with white flowers and green leaves, displayed within a photo editing window (no text or symbols on the image itself)Figure 12
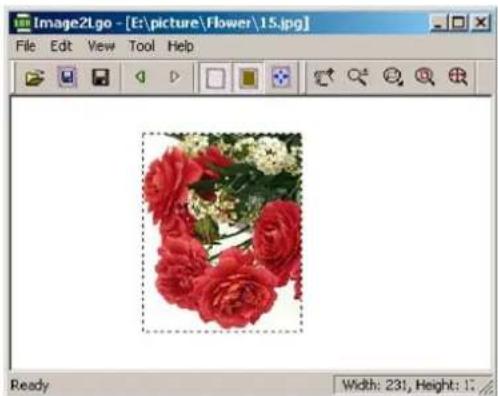
Click [Set Background To White] button to preview the final start-up image.(Figure 13)
natural_image
Image of a red rose with white flowers, displayed in an image viewer window (no text or symbols on the flower image itself)Figure 13
If you are satisfied, click [Save] button to save the selected picture as a [*.lgo] file, or continue to edit the image until you are satisfied.
3. Removal
Double click [Add / Remove Programs] in [Control Panel] (Figure 14), select TMusic1.00 and click [Change / Remove] button. Follow the instructions to uninstall TMusic1.00. You can also click [Start/Program / Uninstall Tmusic] to uninstall the software (the procedure for uninstalling Image2L.go is the same).

Figure 14
Menu
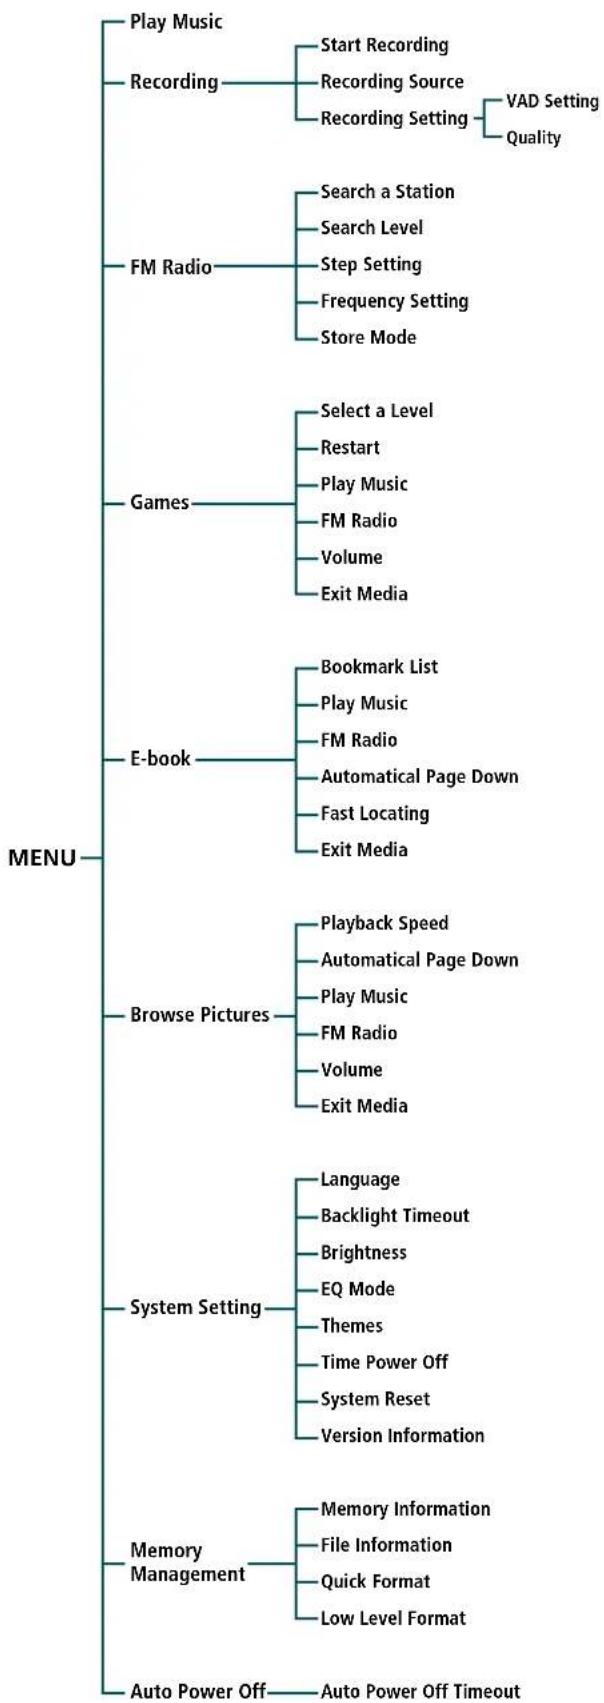
flowchart
graph TD
    A["Play Music"] --> B["Recording"]
    B --> C["Start Recording"]
    B --> D["Recording Source"]
    B --> E["Recording Setting"]
    E --> F["VAD Setting"]
    E --> G["Quality"]
    H["FM Radio"] --> I["Search a Station"]
    H --> J["Search Level"]
    H --> K["Step Setting"]
    H --> L["Frequency Setting"]
    H --> M["Store Mode"]
    N["Games"] --> O["Select a Level"]
    N --> P["Restart"]
    N --> Q["Play Music"]
    N --> R["FM Radio"]
    N --> S["Volume"]
    N --> T["Exit Media"]
    U["E-book"] --> V["Bookmark List"]
    U --> W["Play Music"]
    U --> X["FM Radio"]
    U --> Y["Automatical Page Down"]
    U --> Z["Fast Locating"]
    U --> AA["Exit Media"]
    AB["Browse Pictures"] --> AC["Playback Speed"]
    AB --> AD["Automatical Page Down"]
    AB --> AE["Play Music"]
    AB --> AF["FM Radio"]
    AB --> AG["Volume"]
    AB --> AH["Exit Media"]
    AI["System Setting"] --> AJ["Language"]
    AI --> AK["Backlight Timeout"]
    AI --> AL["Brightness"]
    AI --> AM["EQ Mode"]
    AI --> AN["Themes"]
    AI --> AO["Time Power Off"]
    AI --> AP["System Reset"]
    AI --> AQ["Version Information"]
    AR["Memory Management"] --> AS["Memory Information"]
    AR --> AT["File Information"]
    AR --> AU["Quick Format"]
    AR --> AV["Low Level Format"]
    AW["Auto Power Off"] --> AX["Auto Power Off Timeout"]
Operations
Note: • Please make sure that the player is fully charged and the earphone is connected.
1. Play music and power off
Turn on / offa)
Press and hold [ESC / Φ to turn on / off this unit.
When the player is not playing or recording, it will turn off automatically if there is no operation for one minute or longer, which you can change in the system setting menu. (This feature will be disabled if the player is connected to the PC, playing music files, browsing pictures/E-books, recording, playing games, or in FM radio mode.)
Play music (Power on)b)
Press and hold [ESC / Ⓥ button. Press [ ] ▶r [ ] ▶▶ button to select Figure 2, press ▶/■ button. Select the desired file and press ▶/■ button again (Figure 15).

Figure 15
Pausec)
Press [▶] button.
Exit the interfaced)
Press [ESC / Φbutton.
Volume adjustmente)
Press [VOL+] or [VOL-] button.
Skip to the Previous / Next trackf)
Press [k] or [ ] button.
2. Hold
When in playing music / recording / FM radio mode, press and hold [MENU] button to lock the keys (Figure 1). To release the hold feature, press and hold [MENU] button to unlock.
3. EQ mode
Press EQ button to select the desired EQ mode (Figure 1). NOR / ROC / BAS / CLA / POP / JAZ / TRE.
4. Play mode
Press and hold [EQ] button to select play mode (Figure 1), Normal 📄, Repeat One ⏻, Repeat All 🌐, Shuffle.
Normal : Play the tracks in the currently directory.
Repeat One: Repeatedly play the current track.
Repeat All: Repeatedly play all of the tracks in the current directory.
Shuffle : Randomly play the tracks in the current directory.
5. A-B repeat
While in playing music mode, press [A-B] button to set the start point A, “A” will appear on the display. Press [A-B] again to set the end point B, “A” will appear on the display. Press [A-B] again to cancel A-B repeating.
6. Record
a) Start Recording
Press [K] or [ ] button to select Figure 16. Press [ / ] button (Figure 17). Press ▶/ again to start recording, press [ESC / O] button to stop recording.

Figure 16

Figure 17
b) Recording Sources (Signal Sources)
MIC : Using built-in microphone.
LINE IN : Using LINE IN port to receive external audio signals.
Note: • In the recording setting menu, select MIC as the recording source.
• The files will be saved as MP3 files in the Voice directory in the order of VORC001, V002.
- If the recording time is less than 2 seconds, the player will not save the file and an error message will be shown in the display.
Recording Settingsc)
Recording settings includes: VAD setting and quality setting.
Note: • VAD setting (only available the MIC is selected as the recording source)
If VAD is turned ON, the player will not start recording when you press "Start Recording", until the external signal level exceeds a threshold that is set by the user; If VAD is turned OFF, the player will start recording when you press "Start Recording", even when there is no signal.
Quality setting: press [▶] or [ ] ▶tton to select the desired quality, including low, medium, and high. The higher the quality you select, the higher the quality the final files will be. Press [▶/■] button to return to the upper level menu.
Line In recordingd)
Connect this unit with external audio devices using the supplied Line-in cable, which will avoid being interfered by external noises. Press [Start Recording], then press [▶/■] button to start recording.
Note: • In the recoding setting menu, select LINE IN as the recording source.
- The files will be saved as MP3 files in the Audio directory in the order of AUDI001, V002.
- If the recording time is less than 2 seconds, the player will not save the file and an error message will be shown in the display.
7. FM Radio
Store a Stationa)
Press [▶] or [ ] button to select Figure 18. If no station is stored, press [▶/■] button (Figure 19), press [▶] button to enter searching mode (Figure 20). Press [◀◀] or [▶◀] button to search a station, press [A-B] button, the system will ask you whether to store the station. Press [▶/■] button to store the station. If there are stored stations, the display will show Figure 21.


Figure 19Figure 18
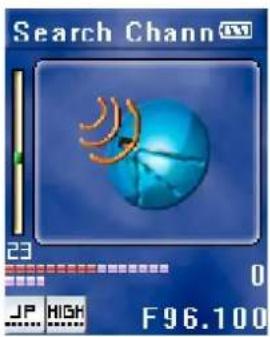
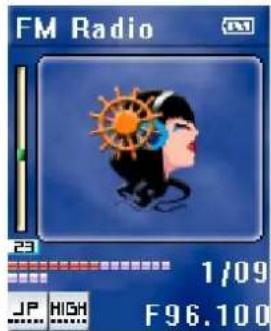
Figure 21 Figure 20


Figure 23 Figure 22
Search a stationb)
Press [Kor [ ] ▶lton.Manual Search :
Automatic Search: Press and hold [◀◀] or [▶▶] button.
c) FM Recording
When in FM radio mode (Figure 21), press [A-B] button to start recording. Press [ESC/∅] button to stop recording.
Note: • The files will be saved as MP3 files in the Voice directory in the order of FMRC001, 002.
d) Search Level
Figure 19 select Search Level, press | or [▶] button to select search level. Press ▶ button to return to the upper level menu.
e) Delete A Station
Figure 23 press [A-B] button to delete a station, the system will ask you whether to delete the selected station, press [▶/■] button to confirm your operation.
8. Games
Press [Kor [ ] button to select Figure 24 and press [ / ] ▶■ button to enter.

Figure 24
This player has three games:a)
Russian blocks
Operation:
Press [▶] button to start the game. Move and rotate the blocks. A row will be removed when it is fully occupied by blocks. Game is over when a block reaches the top of the window. The next block will be displayed in the top right corner of the window. Press [◀◀] or [▶◀◀] button to move a block to the left or right. Press [VOL+] to change the orientation of a block. Press [VOL-] button to make the block fall faster.
Level:
There are 9 levels, the higher the level, the faster blocks will fall.
Jigsaw
Operation:
Press [▶] button to start that game. You are allowed to move one step at a time. Press [EQ] button to view the original picture. Press [VOL+] / [VOL-] button or [◀◀] or [▶◀] button to move the selected block. Press [▶] button to select the block that you want to move, the frame of the selected block will change to red. Then, press [VOL+] / [VOL-] button or [◀◀] or [▶◀] button to move the selected block.
Level:
There are three levels: easy, normal, and difficult, which allows you to view the original pictures five times, four times, and three times respectively. The original picture will be displayed at the beginning of the game.
Pushing boxes
Operation:
Push all of the boxes to the blue area. You are allowed to push one box at a time. You can walk into the blue area if necessary.
Level:
There are 30 levels. The higher the level, the more difficult the game will be.
FM Radiob)
When in game mode, press [MENU] button (Figure 25), press [VOL-] button to select "FM Radio", press [▶/■] button (Figure 23), press [▶/■] button to start listening. Press [ESC / Ⓑ] button to resume reading E-book. Select "Exit media" to stop listening to the FM radio.
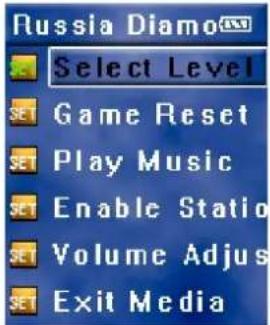
Figure 25
Playing Musicc)
When in game mode, press [MENU] button (Figure 25), press [VOL-] button to select "Play Music", press [▶/■] button (Figure 3). The following operation is the same as that of playing music. Press [ESC / Ⓑ] button to resume reading E-book. Select "Exit Media" to stop playing music.
9. E-book
Press [◀] or [ ] ▶ button to select Figure 26, press [ / ] ▶ ■ button, select the file you want to read (Figure 27), press [▶/■] button to start reading the selected E-book.

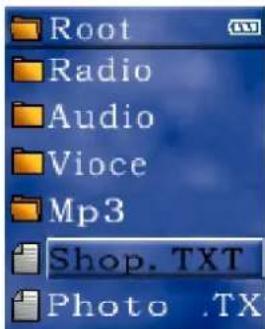
Figure 27 Figure 26
Add Bookmarksa)
Press [EQ] button (Figure 28).

Figure 28
Manual Page Downb)
Press [K] or [ ] button.
Automatic Page Downc)
Press [MENU] button (Figure 29), select "Page Down Setting" and enable "Automatic Page Down".
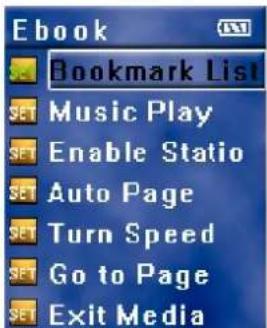
Figure 29
Play Music / FM Radiod)
The operation is the same as that in game mode.
Picture browsing10.
Press [◀] or [ ] ▶ button to select Figure 30, press [ / ] ▶ ■ button, select the file that you want to browse. Figure 31 press [▶/■] button to start browsing the selected picture.

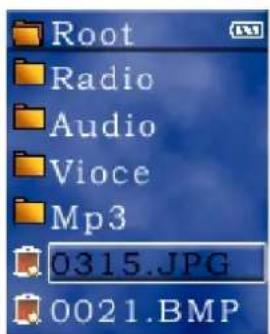
Figure 31 Figure 30
Automatic Playbacka)
Press [MENU] button (Figure 32), select [Automatic Playback] and enable automatic playback.
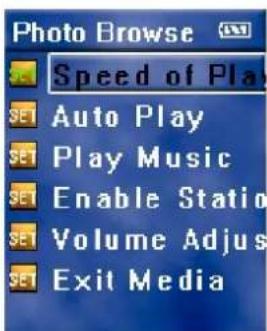
Figure 32
The operation is the same as that in game mode.
System Settings11.
Press [◀] or [ ] button to select Figure 33, press [ ] or [▶] button to select the submenus (Figure 34, 35).


Figure 34Figure 33
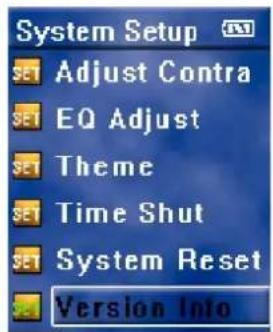
Figure 35
Languagea)
This player supports Simplified Chinese, Traditional Chinese, and English.
Backlight Timeout / Brightness / EQ Modeb)
Press [Kor [ ] ▶lton to adjust the backlight timeout / brightness / EQ.
c) Themes
You can choose different color themes.
d) Timed Power Off
Enter the [Timed Power Off] submenu, and then you can enable / disable timed power off. Press ▶/■ button to confirm your operation. When in the [Timed Power Off] submenu, you can set the time, at which the player will power off automatically.
e) System Reset
The system will be reset to the default status and all your settings will be lost.
f) Version Information
Display the model number of this player, date and version information.
Memory Management12.
Press [◀] or [ ] button to select Figure 36, press [ ] or [▶] button to select the desired submenu (Figure 37).

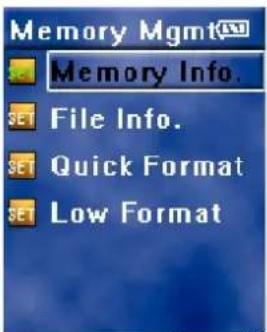
Figure 37 Figure 36
Browse all of the files and directories in the root directory. Select a file and press [▶/■] button to display the file's information. Press [MENU] button to delete a file. Select a directory and press [▶/■] button to enter the selected directory.
Note: • You can not delete a directory.
Quick / Low-level Formatc)
The difference between the two is whether the error detection task is performed. Quick format will not perform the error detection task, while low-level format will. However, low-level format is much slower than quick format. If you just need to erase the data in your flash memory, a quick format is recommended. If your player behaves abnormally over and over again, we recommended the low-level format.
Automatic Power Off13.
Press [Kor [ ] button to select Figure 38, you can set the power off timeout. The player will turned off automatically if no operation is performed for the time that is specified by the user.

Figure 38
Note: • This feature is disabled when the play is in playing music/picture browsing / E-book mode.
Appendix
Trouble Shooting
Q: Why can some WMA format songs on the digital player not be played?
A: There are many different music formats for songs on the Internet and many of them are in WMA format. Some of these WMA format songs are subject to DRM (license) copyright protection, which may cause unauthorized copies of some songs to become unplayable. This system protects the original owner of the songs. Some websites offer songs without license protection, and you may copy and play them as you wish - just like songs in mp3 format. However, some websites only offer songs in WMA format with license protection (for example: www.napster.com and www.musicmatch.com). To play these songs you can only use your PC with a Windows Media Player that has obtained the correct license protection. (Windows Media Player is a free Microsoft product that allows you to play WMA streaming media files. You can download it from many websites.) You cannot copy and play these songs on another PC without license protection. This prevents the spreading of unauthorized and illegal copies of songs and protects the song's copyright owner.
If you have WMA format songs with the corresponding license protection, you still cannot just copy the songs from your PC to the digital player. You need to open Windows Media Player first. From its menu select "Document", "Open" and open all the WMA songs you want to copy (if all of them can be played, you can transfer them to your player). Connect the digital player to your PC via a USB cable, and the screen of the player will display "Communicating". Next a portable disk (e.g. F:) will be displayed. Now click the "Portable Device" option on the left hand side of the Windows Media Player. A list of the music to copy will appear. Select all the songs you want to copy and then click the "Copy Music" button in the top left hand corner of the screen. The selected songs can now be transferred to your player with the required license protection authorization.
Q: How many minutes of MP3/WMA songs can be stored on the player?
A: This depends upon the player's memory capacity, and how much is available for storage. One minute's MP3/WMA music occupies approximately 1Mb of space, so if the capacity of the memory is 128Mb then it can store around 128 minutes of music.
Having problems transferring files?Q:
A: 1) Please make sure that the USB cable is properly connected to the player and the PC.
2) Please check that there is enough memory available to accommodate the files that you wish to transfer.
Lost data?Q:
A: Some data loss can be caused by an unstable power supply during the transfer process. Our company does take responsibility for any files that are lost or damaged. We strongly recommend that our customers keep back-up copies of all important files.
Why do different songs play at different volumes?Q:
A: Depending on how a song is recorded, and how the volume levels were set at that time, songs can have different volumes levels and some can sound much louder than others.
Q: Why can some files, which are smaller in size than the available space on the player, still not be transferred?
A: The CMOS chip inside the player allocates 16KB or 32KB to one memory track. A one Byte file will take one track. Therefore some files are smaller than the available memory but still cannot be transferred to the player.
Q: Why I can only download a limited quantity of files into my player while there is plenty of space on it?
A: The number of files you can store in the ROOT directory of a local disk largely depends on the length of file names. The longer the file name is, the fewer files. A maximum number of 512 files are allowed to be stored in the ROOT directory. Note that this restriction only applies to the ROOT directory. Create as many folders as you need to store more files.
How do I create new folders in my MP3 player?Q:
A: Connect the MP3 player to your PC using the supplied USB cable. In the Removable Disk window, select File > New > Folder.
My player won't start, what has happened?Q:
A: Could the following have occurred?
1) During an upgrade of the player's hardware, an accidental error might have occurred or the USB cable was unplugged.
The Flash disk has been physically damaged.2)
3) An unreliable power supply has resulted in an automatic power off after start up.
Technical Support
Please visit our website at www.picnroll.com for the latest product information & downloads. If you are unable to find the solution in the FAQs, please contact us at techsupport@trulyusa.com, or call us at 1-866-pic-n-roll (1-866-742-6765).
"Pic'N Roll" is a registered trademark in the US Patent & Trademark Office. All other product or service names are the property of their respective owners.
2005 Truly (U.S.A.) Inc. All Rights Reserved. Specifications are subject to change without notice.
- MP310 Plus Digital Player
- Overview
- Safety Instructions
- Declarations
- FCC Notice:
- Content
- Introduction 1
- Buttons, Display and Battery Information 2
- Connect to PC 3
- MP310 Plus Software Installation, Operation and Removal 4
- Menu 7
- Operation 7
- Appendix 11
- Introduction
- Features
- Package Contents
- System Requirements
- Specifications
- Buttons / Display / Battery information
- Buttons / Ports introduction
- LCD Display
- Battery
- Connect to PC
- Win98 USB driver
- Using as a removable disk
- Download (from PC to player):
- Upload (from player to PC):
- Delete:
- Format:
- MP310 Plus software installation, operation and removal
- Installation
- Operation
- TMusic Music Management Software Operationa)
- LRC lyric editor operation
- T-Music Operation
- U Disk Detector
- Image2Lgo software operationb)
- Introduction:
- Operation:
- Removal
- Menu
- Operations
- Play music and power off
- Turn on / offa)
- Play music (Power on)b)
- Exit the interfaced)
- Volume adjustmente)
- Skip to the Previous / Next trackf)
- Hold
- EQ mode
- Play mode
- A-B repeat
- Record
- a) Start Recording
- b) Recording Sources (Signal Sources)
- Recording Settingsc)
- Line In recordingd)
- FM Radio
- Store a Stationa)
- Search a stationb)
- c) FM Recording
- d) Search Level
- e) Delete A Station
- Games
- This player has three games:a)
- Russian blocks
- Level:
- Jigsaw
- Pushing boxes
- FM Radiob)
- Playing Musicc)
- E-book
- Add Bookmarksa)
- Manual Page Downb)
- Automatic Page Downc)
- Play Music / FM Radiod)
- Picture browsing10.
- Automatic Playbacka)
- System Settings11.
- Languagea)
- Backlight Timeout / Brightness / EQ Modeb)
- c) Themes
- d) Timed Power Off
- e) System Reset
- f) Version Information
- Memory Management12.
- Quick / Low-level Formatc)
- Automatic Power Off13.
- Appendix
- Trouble Shooting
- Lost data?Q:
- Why do different songs play at different volumes?Q:
- How do I create new folders in my MP3 player?Q:
- My player won't start, what has happened?Q:
- Technical Support
Brand : Truly
Model : MP310 Plus
Category : Mp3 player