NVD-35 Mark II - Digital decoder DataVideo - Free user manual and instructions
Find the device manual for free NVD-35 Mark II DataVideo in PDF.

User questions about NVD-35 Mark II DataVideo
0 question about this device. Answer the ones you know or ask your own.
Ask a new question about this device
Download the instructions for your Digital decoder in PDF format for free! Find your manual NVD-35 Mark II - DataVideo and take your electronic device back in hand. On this page are published all the documents necessary for the use of your device. NVD-35 Mark II by DataVideo.
USER MANUAL NVD-35 Mark II DataVideo
natural_image
Illustration of a data video device with ports and buttons (no text or symbols on the device body)IP VIDEO DECODER
NVD-35 MARK II
Instruction Manual
Contents
FCC COMPLIANCE STATEMENT 4
WARNINGS AND PRECAUTIONS 4
WARRANTY 5
STANDARD WARRANTY....5
THREE YEAR WARRANTY....6
DISPOSAL 6
PRODUCT OVERVIEW 7
FEATURES 7
FRONT PANEL 9
REAR PANEL ....10
HOW TO FIND THE NVD-35 MARK II ON AN IP NETWORK....12
HOW TO USE THE NVD-35 MARK II IP FINDER UTILITY SOFTWARE .... 12
NVD-35 MARK II LOGIN USING A WEB BROWSER ....13
DEFAULT LOGIN DETAILS 13
NVD-35 MARK II WEB BROWSER HOME PAGE....14
SETTINGS OPTION....14
SETTINGS > AUDIO SETUP....14
SETTINGS > DISPLAY SETUP....15
SETTINGS > NETWORK SETUP ......16
SETTINGS > LIVE STREAM SETUP ....18
DECODING VIDEO FROM THE NVS-33/35/40 ENCODER....20
DECODING A RTMP PUSH STREAM 20
DECODING OTHER STREAM TYPES....21
DECODING FROM A VIDEO SHARING WEBSITE 21
SETTINGS > ACCOUNT SETUP ....22
SETTINGS > STB MODE....23
RMC-12 IR REMOTE....24
SETTINGS > PLUGINS.... 25
SETTINGS > CLOUD.... 25
CONNECT THE NVD-35 MARK II TO DV CLOUD 25
CONTROL VIA DV CLOUD....27
LINK TO A LIVE CHANNEL ON DV CLOUD....28
AUTOMATIC FIRMWARE UPDATES.... 30
DATAVIDEO NVD-35 MARK II SOCKET COMMANDS.... 31
PORT FORWARDING ON YOUR FIREWALL / ROUTER 32
SPECIFICATIONS.... 33
SERVICE & SUPPORT 36
Disclaimer of Product & Services
The information offered in this instruction manual is intended as a guide only. At all times, Datavideo Technologies will try to give correct, complete and suitable information. However, Datavideo Technologies cannot exclude that some information in this manual, from time to time, may not be correct or may be incomplete. This manual may contain typing errors, omissions or incorrect information. Datavideo Technologies always recommend that you double check the information in this document for accuracy before making any purchase decision or using the product. Datavideo Technologies is not responsible for any omissions or errors, or for any subsequent loss or damage caused by using the information contained within this manual. Further advice on the content of this manual or on the product can be obtained by contacting your local Datavideo Office or dealer.
FCC Compliance Statement
This device complies with part 15 of the FCC rules. Operation is subject to the following two conditions:
(1) This device may not cause harmful interference, and
(2) This device must accept any interference received, including interference that may cause undesired operation.
Warnings and Precautions
- Read all of these warnings and save them for later reference.
- Follow all warnings and instructions marked on this unit.
- Unplug this unit from the wall outlet before cleaning. Do not use liquid or aerosol cleaners. Use a damp cloth for cleaning.
-
Do not use this unit in or near water.
-
Do not place this unit on an unstable cart, stand, or table. The unit may fall, causing serious damage.
-
Slots and openings on the cabinet top, back, and bottom are provided for ventilation. To ensure safe and reliable operation of this unit, and to protect it from overheating, do not block or cover these openings. Do not place this unit on a bed, sofa, rug, or similar surface, as the ventilation openings on the bottom of the cabinet will be blocked. This unit should never be placed near or over a heat register or radiator. This unit should not be placed in a built-in installation unless proper ventilation is provided.
-
This product should only be operated from the type of power source indicated on the marking label of the AC adapter. If you are not sure of the type of power available, consult your Datavideo dealer or your local power company.
-
Do not allow anything to rest on the power cord. Do not locate this unit where the power cord will be walked on, rolled over, or otherwise stressed.
-
If an extension cord must be used with this unit, make sure that the total of the ampere ratings on the products plugged into the extension cord do not exceed the extension cord's rating.
-
Make sure that the total amperes of all the units that are plugged into a single wall outlet do not exceed 15 amperes.
-
Never push objects of any kind into this unit through the cabinet ventilation slots, as they may touch dangerous voltage points or short out parts that could result in risk of fire or electric shock. Never spill liquid of any kind onto or into this unit.
-
Except as specifically explained elsewhere in this manual, do not attempt to service this product yourself. Opening or removing covers may expose you to dangerous voltage points or other risks, and will void your warranty. Refer all service issues to qualified service personnel.
-
Unplug this product from the wall outlet and refer to qualified service personnel under the following conditions:
a. When the power cord is damaged or frayed;
b. When liquid has spilled into the unit;
c. When the product has been exposed to rain or water;
d. When the product does not operate normally under normal operating conditions. Adjust only those controls that are covered by the operating instructions in this manual; improper adjustment of other controls may result in damage to the unit and may often require extensive work by a qualified technician to restore the unit to normal operation;
e. When the product has been dropped or the cabinet has been damaged;
f. When the product exhibits a distinct change in performance, indicating a need for service.
Warranty
Standard Warranty
- Datavideo equipment are guaranteed against any manufacturing defects for one year from the date of purchase.
- The original purchase invoice or other documentary evidence should be supplied at the time of any request for repair under warranty.
- The product warranty period beings on the purchase date. If the purchase date is unknown, the product warranty period begins on the thirtieth day after shipment from a Datavideo office.
- All non-Datavideo manufactured products (product without Datavideo logo) have only one year warranty from the date of purchase.
- Damage caused by accident, misuse, unauthorized repairs, sand, grit or water is not covered under warranty.
- Viruses and malware infections on the computer systems are not covered under warranty.
- Any errors that are caused by unauthorized third-party software installations, which are not required by our computer systems, are not covered under warranty.
- All mail or transportation costs including insurance are at the expense of the owner.
- All other claims of any nature are not covered.
- All accessories including headphones, cables, and batteries are not covered under warranty.
- Warranty only valid in the country or region of purchase.
- Your statutory rights are not affected.
Three Year Warranty
- All Datavideo products purchased after July 1st, 2017 are qualified for a free two years extension to the standard warranty, providing the product is registered with Datavideo within 30 days of purchase.

- Certain parts with limited lifetime expectancy such as LCD panels, DVD drives, Hard Drive, Solid State Drive, SD Card, USB Thumb Drive, Lighting, Camera module, PCIe Card are covered for 1 year.
- The three-year warranty must be registered on Datavideo's official website or with your local Datavideo office or one of its authorized distributors within 30 days of purchase.
Disposal

natural_image
Symbol of a trash bin crossed with no text or labels, representing waste sorting or disposal (no text present)For EU Customers only - WEEE Marking
This symbol on the product or on its packaging indicates that this product must not be disposed of with your other household waste. Instead, it is your responsibility to dispose of your waste equipment by handing it over to a designated collection point for the recycling of waste electrical and electronic equipment. The separate collection and recycling of your waste equipment at the time of disposal will help to conserve natural resources and ensure that it is recycled in a manner that protects human health and the environment. For more information about where you can drop off your waste equipment for recycling, please contact your local city office, your household waste disposal service or the shop where you purchased the product.

CE Marking is the symbol as shown on the left of this page. The letters "CE" are the abbreviation of French phrase "Conformité Européenne" which literally means "European Conformity". The term initially used was "EC Mark" and it was officially replaced by "CE Marking" in the Directive 93/68/EEC in 1993. "CE Marking" is now used in all EU official documents.
Product Overview
The Datavideo NVD-35 MARK II is a wired IP video decoder with SDI, Composite and analogue audio outputs.
The NVD-35 MARK II decodes all common protocols including SRT, RTSP, RTMP, UDP, TCP, HTTP, HLS and MPEG-TS and can output SD/HD video at resolutions up to 1080p60.
Decodes directly from YouTube Live, UStream and most major CDNs without any 3rd party advertising.
The NVD-35 MARK II is the perfect partner to the Datavideo NVS-33/35/40 IP encoders allowing full HD point to point video links over Ethernet, WiFi or the Internet.
When connected to dv Cloud (https://www.dvcloud.tv/) the NVD-35 MARK II is controllable from anywhere in the world and can be easily connected to any encoder via the cloud.
When connected to a Datavideo DVS-200 server or dv Cloud, the NVD-35 MARK II can function as an IPTV set top box downloading a channel list of both live and pre-recorded streams automatically.
Features
- Operates on standard 10/100Mb Ethernet networks
• Excellent image quality with very low delay - Unicast and multicast support
- Supports RTSP (Unicast/Multicast), RTMP, UDP (Unicast/Multicast), TCP, HTTP, HLS and MPEG-TS
• Supports SRT listener mode
• Built in RTMP server for point to multipoint distribution - Direct decoding from most major CDNs without any 3rd party advertising
- Remote control via dv Cloud
- Channel list download from DVS-200 Cloud Streaming Server
- Feature-rich WebUI for configuration and control
• Built in video scaler
• Supports Full HD video and audio - Supports simultaneous digital embedded and analogue audio output
• Supports remote control by socket commands
- Small form factor, rack mountable using RMK-1
• Supports SDI and Composite video output
Front Panel
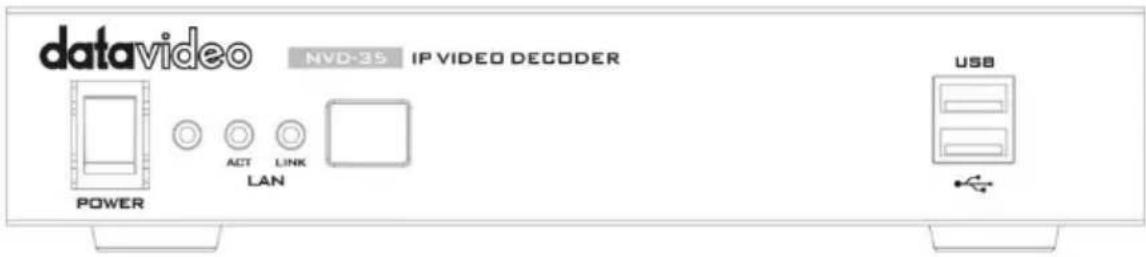

Power On/Off Switch
Switches the power On / Off
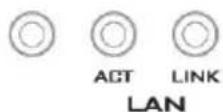
Status LED
Power LED: The red power LED indicates that the NVD-35 MARK II has an active power supply.
ACT LED: The flashing yellow ACT LED indicates LAN activity (data upload and download).
LINK LED: The green LINK LED indicates active LAN link.
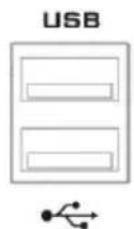
USB
Functions currently under development.
Rear Panel
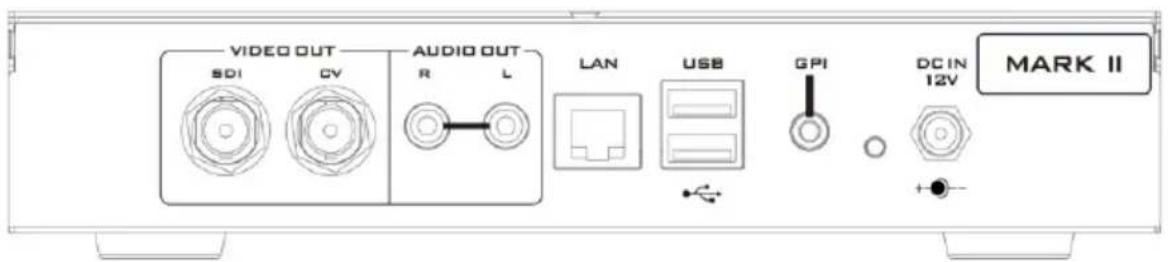
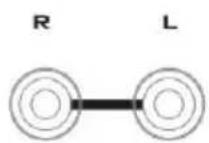
AUDIO OUT (RCA)
RCA stereo for a line level analogue audio.
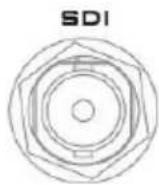
SDI OUT
SDI digital signal output connector.

CVBS OUT (BNC)
Composite video output
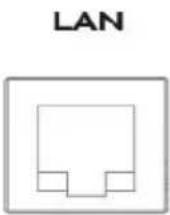
Ethernet Port (RJ-45)
10/100M base Ethernet Network interface
DC IN 12V


DC In Socket
Connect the supplied 12V PSU to this socket. The connection can be secured by screwing the outer fastening ring of the DC In plug to the socket.

Reset Button
Press and hold for at least 5 seconds to reset the device to its factory default settings (including the password).
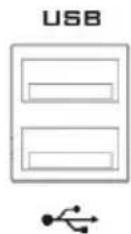
USB
Functions currently under development.

GPI
A contact closure GPI (General Purpose Interface) switch under development.
How to find the NVD-35 MARK II on an IP network
By default, once the physical connections have been made, the NVD-35 MARK II will try to obtain an IP Address from a DHCP network server. As we will see this can be changed later to a Static IP address if required.
How to use the NVD-35 MARK II IP Finder Utility Software
Datavideo supply a free, Windows based utility, called NVD & NVP IP Finder. The utility is also available for download on the product page of the official website.
The first time this software is used on the computer you may need to allow it permission through your computers firewall / anti-virus software in order for it to be able to scan or search the local network.
![NVD & NVP IP Finder V0003 NVD-35[192.168.1.233] Ethernet[192.168.1.127] Stop Scan Exit](/content/2026/05/1042387/images/26712c27786f1c74cd9e5795a91733dec129233ebfcdddfff86ecd3845344a48.jpg)
When the utility scans the LAN that the computer is connected to, it displays the current IP address for any NVD-35 MARK II units found on this local IP network. Double clicking on the device listed will automatically open your computers default web browser and navigate to the login page of the NVD-35 MARK II. If you are using an Apple computer then you can use an alternative utility app such as Fing or Network Analyzer Lite.
NVD-35 MARK II Login using a Web Browser
Type the numbers of the IP address for the NVD-35 MARK II into the search bar of the browser. Remember to include the dots in between the numbers. When entered you will then be asked to login to the NVD-35 MARK II.
Alternatively you can simply double click the IP address listed in the NVD-35 MARK II IP finder.
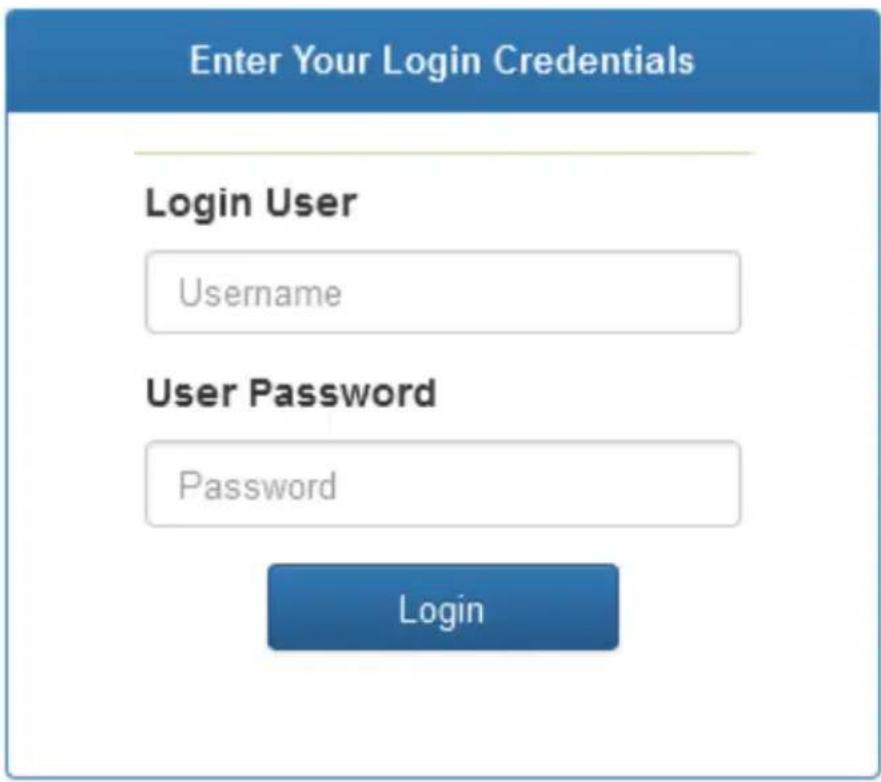
Default Login Details
All NVD-35 MARK II units are delivered from the factory with the same default user name and password. This can be changed at a later stage to suit your needs.
$$ \text { User } = \text { admin } $$
$$ \text { Password } = 0 0 0 0 0 0 [ \text { Zero six times } ] $$
Please Note: We recommend Google Chrome or Mozilla Firefox web browsers.
NVD-35 MARK II Web Browser Home Page
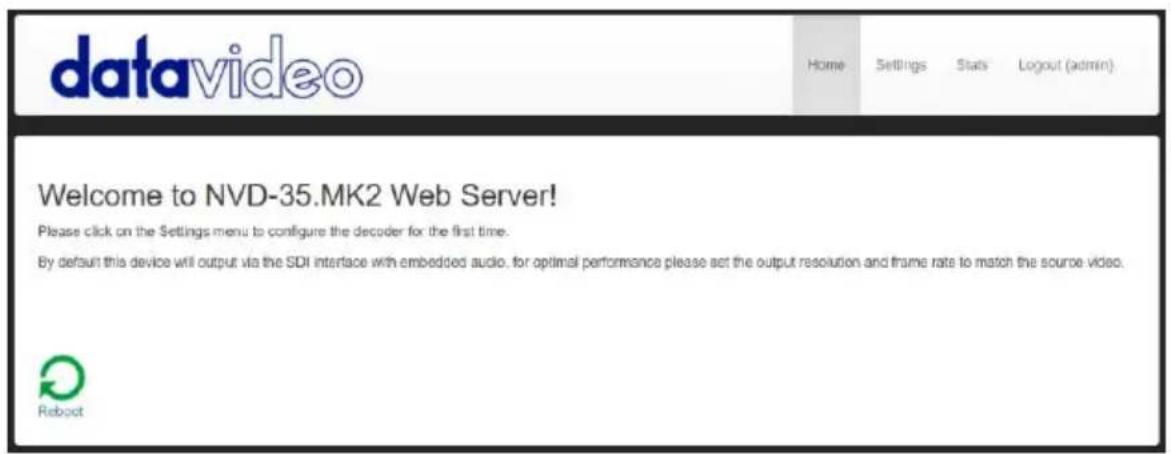
Once we have logged into the NVD-35 MARK II we are presented with the Home page.
Settings option
When clicked, the Settings option tab will open a new page. There are five sections of settings which can be looked at. These are: Audio Setup, Display Setup, Network Setup, Live Stream Set Up, Cloud and Account Setup, STB Mode, CEC Control and Plugins.
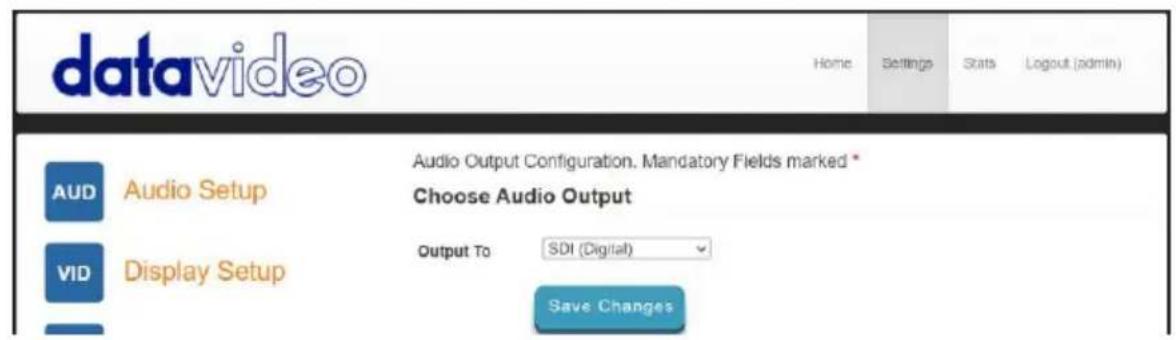
Settings > Audio Setup
By default, the NVD-35 MARK II will output audio over the digital SDI connection. Alternatively, you can choose to output via the analogue audio via the RCA connections.
Settings > Display Setup
By default the NVD-35 MARK II will output video over the digital SDI port at a resolution of 720P 50 fps and YUV colourspace.
Please note: The set resolution is only applied when the stream is decoding, the device will output your monitors preferred resolution as it boots.
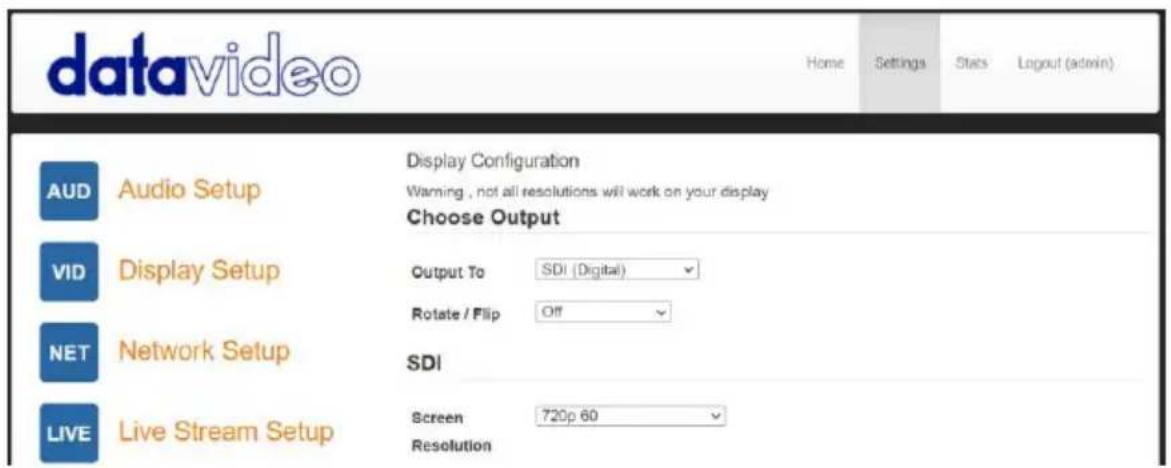
Output To
Here you can select to output video digitally over SDI or over the SD analogue composite connection.
SDI (Digital)
When digital is selected you can select a screen resolution from SD PAL/NTSC right up to HD 1080P60/50. The NVD-35 MARK II will scale your source video to match the output resolution however the aspect ratio (4:3 or 16:9) should be matched to avoid black space on the output, for optimal performance match the output resolution to the source video. The colour space can be switched between YUV (YCbCr) and RGB, most video equipment will use the YUV colour space however if the colors appear wrong on your display please try RGB.
Composite (Analogue)
When analogue is selected the UI will change and you can only select between PAL and NTSC resolution with a 4:3 or 16:9 aspect ratio.
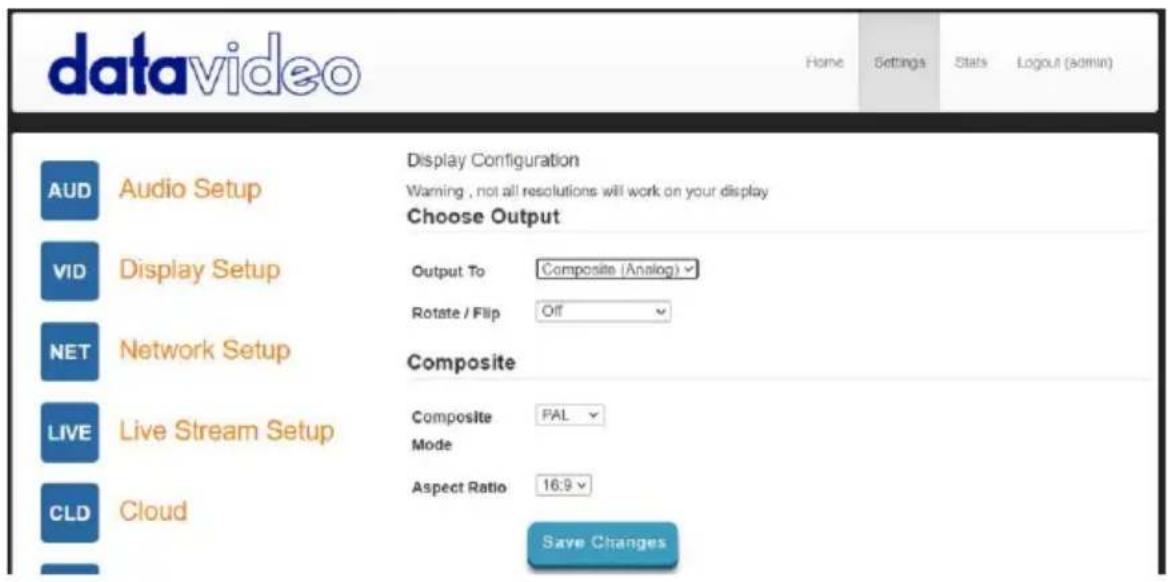
Rotate / Flip
Provides the option to rotate or flip (mirror) the video output, default is off.
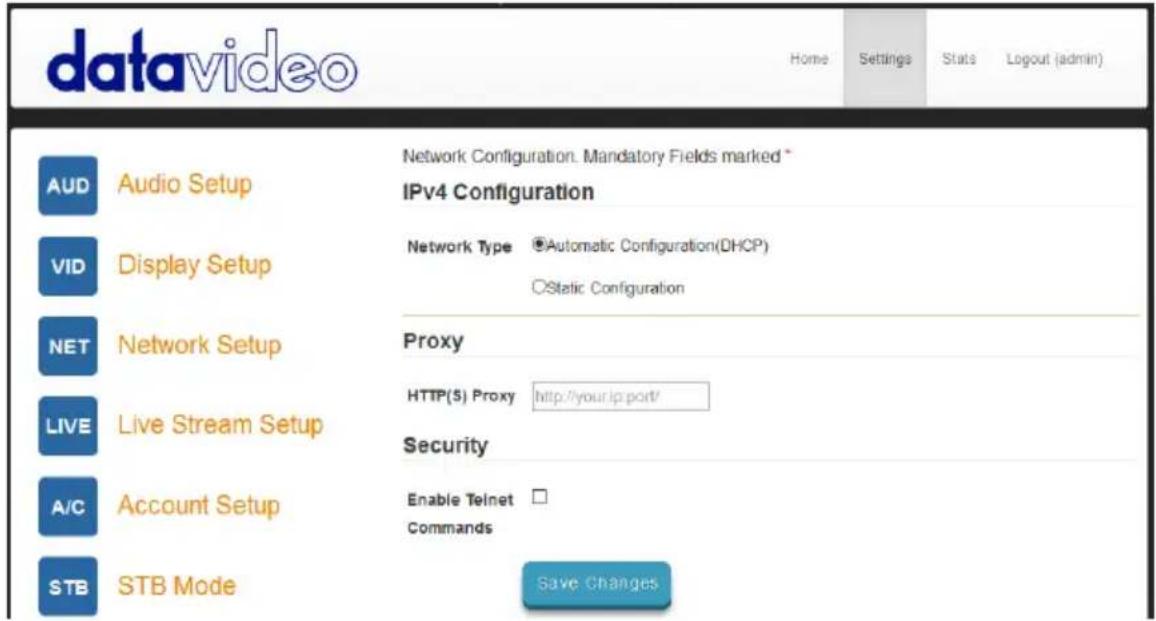
Settings > Network Setup
By default the NVD-35 MARK II will obtain its IP address automatically from a DHCP server.
If you intend to use the NVD-35 MARK II directly connected to a PC or network without a DCHP server then you should assign a manually set IP address by selecting 'Static Configuration'.
We recommend that only advanced users who are aware of IP addressing set the manual 'Static Configuration' IP address. Your local network administrator or I.T. support may be able to help you with this.
Proxy
Here you can set the NVD-35 MARK II to connect to the internet via a proxy server. Proxy server is also a way to bypass a firewall if there is one. Simply enter the proxy IP and the port number as depicted below.
Proxy
HTTP(S) Proxy
http://your.ip:port/
Time
By default, the NVD-35 MARK II will synchronize its internal clock with public NTP servers, if your network does not allow connections to external server you can specify your internal NTP servers here. It is important the internal clock is correct for secure HTTPS:// stream sources to work.
Time
NTP
Leave blank for defaults
Servers(comma
separated)
Security
Here you can enable the internal telnet server, this is used so that the NVD-35 MARK II can be controlled by third party applications using socket commands. Please see the socket commands section of this manual for more information.
Settings > Live Stream Setup
From this page you can configure the source stream for the decoder. The NVD-35 MARK II supports the following stream types:
• RTSP over UDP (Unicast / Multicast)
- RTSP over TCP
- RTSP over HTTP
• SRT (Secure Reliable Transport) caller
- MPEG-TS over UDP
- RTMP Pull
• RTMP Push (Internal Server)
• UDP raw (Unicast/Multicast)
- HLS over HTTP
- MPEG-TS over TCP Pull
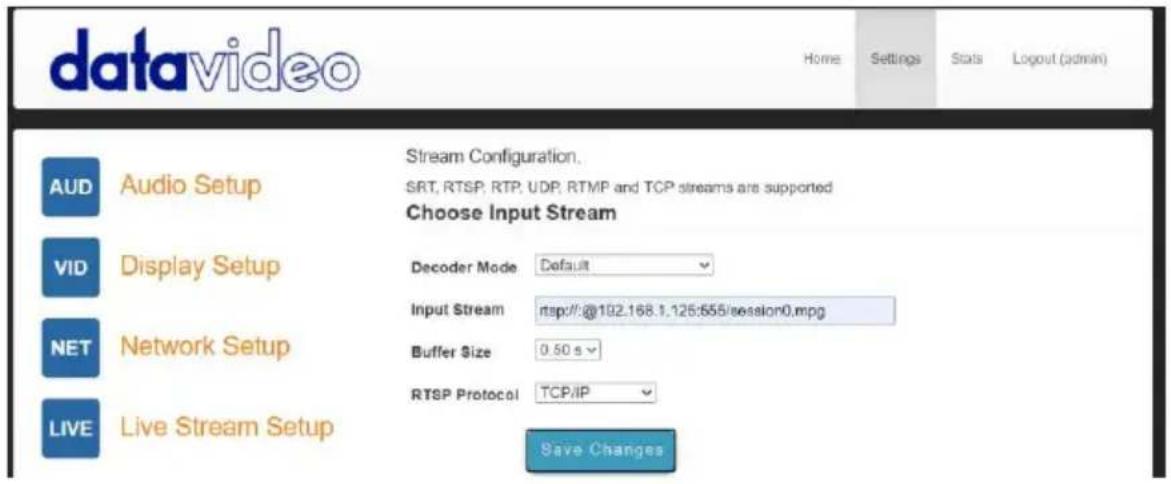
Decoder Mode
Default mode should be used for decoding standard streams from encoders such as SRT, RTSP, RTMP, HTTP etc.
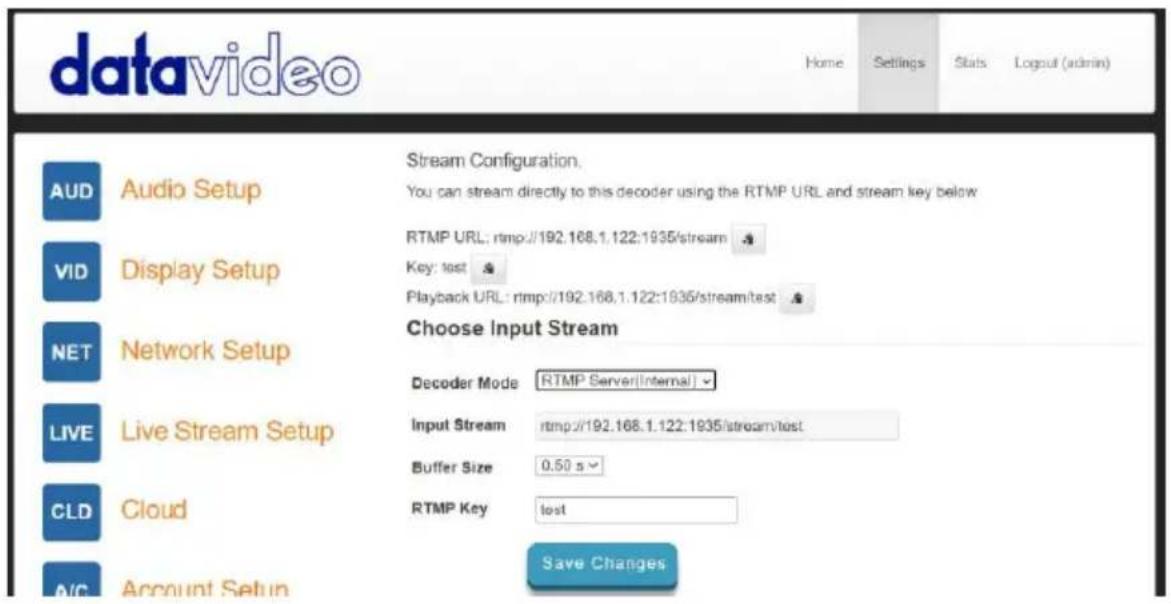
Selecting the RTMP Server (Internal) mode automatically generates an RTMP URL and a stream key which should be entered into the corresponding fields on Datavideo NVS devices or any other video streaming encoders.
The RTMP playback URL can be used to distribute the stream to multiple other decoders, the number of concurrent RTMP clients is limited only by the 100Mbps ethernet port.
Video Sharing & HLS mode should be used for decoding from supported
video sharing websites, such as:
- Dailymotion
- Livestream
- Twitch
- UStream
- YouTube Live
●
Please see the check the product page on the datavideo.info website for a full list of supported video sharing websites.
This mode also supports HLS streams, unlike Default mode you can select the resolution of the stream you wish to decode if the HLS stream contains multiple variants.
Input Stream
Enter the URL for the source stream here
Example for Default mode:
rtsp://192.168.1.50/stream1
rtmp://192.168.1.50/live/stream1
srt://192.168.1.50:9000
Example for Video Sharing & HLS mode:
https://www.youtube.com/watch?v=y60wDzZt8yg
Example for RTMP server mode:
rtmp://192.168.2.16:1935/stream/stream
Buffer Size
This determines how much video is buffered before playback starts, the default 0.3 seconds should be suitable for streaming over Ethernet but a larger buffer may be required in environments with poor network stability to achieve smooth video when streaming over the internet or WiFi. If you notice the video stuttering or the audio breaking up you should increase the buffer size.
Note: You might experience long delay if the buffer size is too big.
RTSP protocol
Only displayed if a RTSP stream is being used, the transport protocol can be manually specified.
SRT Latency
Only displayed if a SRT stream is being used. Secure Reliable Transport (SRT)
achieves high-quality, low latency streaming across unreliable Internet connections via UDP packets. If packets are lost in transit to the NVD-35 MARK II, a request to retransmit the lost packets is sent back to encoder. You can adjust the latency to improve the Quality of Service (QoS) of the stream and reduce the number of dropped packets. You can add from 20 ms to 8000 ms of latency to the SRT stream. Increasing latency gives more time to buffer packets and resend any that got lost in transit to the destination. If the latency value set for the stream is too low and there is packet loss over the network, retransmission of lost packets will not be possible, and the stream quality will suffer.
SRT Passphrase
If the SRT stream is encrypted, you must enter the passphrase here to decode the stream.
Decoding video from the NVS-33/35/40 encoder
To decode video from the NVS the NVD-35 MARK II must be on the same local network (Ethernet/WiFi) or be able to access the NVS stream over the internet.
When the NVS is in RTSP TCP/UDP mode
Simply copy the RTSP URL from the 'Live' tab of the NVS and enter it into the 'Input Stream' field on the NVD-35 MARK II. When streaming over LAN it is recommended to set the NVS in RTSP (TCP/UDP) mode.
When the NVS is in RTMP mode Local server mode
Simply copy the RTMP URL from the 'Live' tab of the NVS and enter it into the 'Input Stream' field on the NVD-35 MARK II
When the NVS-33/35/40 is in HLS mode
Simply copy the HLS URL from the 'Live' tab of the NVS and enter it into the 'Input Stream' field on the NVD-35 MARK II
Please Note: When in HLS mode, the buffer size should be set to 1.0 seconds or higher, if you notice audio artifacts you should increase the buffer size.
Decoding a RTMP push stream
To decode a RTMP push stream, first set the decoder mode to RTMP Server (Internal) which should automatically generate an RTMP URL and a stream key. Simply enter the RTMP URL and stream key into the corresponding fields
on Datavideo NVS devices or any other video streaming encoders.
Decoding other stream types
To decode other stream types such as UDP multicast or TCP, simply enter the stream URL into the 'Input Stream' field of the NVD-35 MARK II.
Listening for a Pushed UDP Stream
To listen for a pushed UDP stream, enter the following URL into the 'Input Stream' field of the NVD-35 MARK II.
udp://@:9710
Replacing 9710 with the port number of the pushed stream.
Decoding from a video sharing website
First you must set the decoder mode to 'Video Sharing', then simply copy the URL from your web browser into the 'Stream URL' field on the NVD-35 MARK II.
For example:
https://www.youtube.com/watch?v=y60wDzZt8yg
Optionally you can select the preferred stream resolution.
Preferred
HD (720p or lower)
Stream
Settings > Account Setup
The NVD-35 MARK II has one admin user account and password. This account is used to keep the NVD-35 MARK II secure and gives access to the streaming settings.
Default user name = admin
Default password = 000000 [Zero six times]
This section describes how to change the default username and password shown above to something new which is more secure.
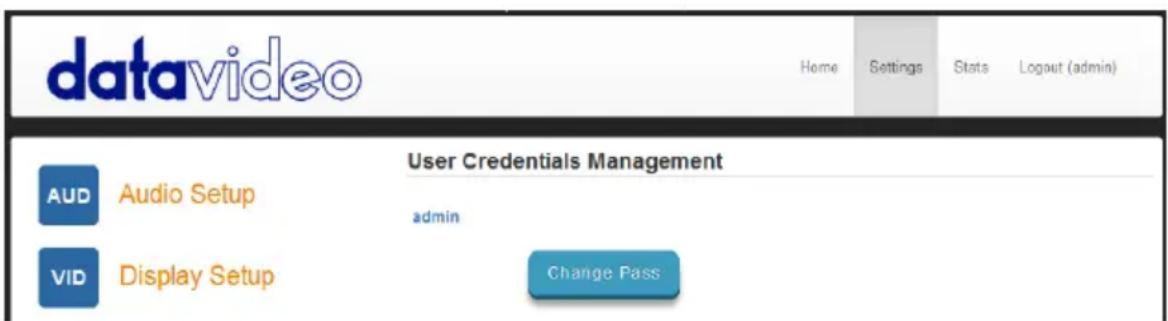
- Log in with the NVD-35 MARK II server as normal using the computer web browser.
- Click Setting
- Click Account Setup
- Click admin and then enter the new user name and password.
- Click 'Save Changes'
Please Note: Please be careful and memorize the new login details as the old or default login is deleted during this process.
Settings > STB Mode
The STB mode can only be used along with a Datavideo DVS-200 stream server or dv Cloud please visit https://www.datavideo.com/for more information on the DVS-200 and https://www.dvcloud.tv/ for more information on dv Cloud.
When enabled, the NVD-35 MARK II will connect to the DVS-200 or dv Cloud server and download a list of available live and VOD channels, these channels will be displayed on the SDI output. Channels can be selected using the supplied IR remote control.
When used with DVS-200 only HLS streams will be decoded so low latency is not possible in this mode, when used with dv Cloud SRT streams will also be available if low latency is required.

STB Mode
When enabled, the 'Live stream setup' options will be disabled, the NVD-35 MARK II will display a channel list on the SDI output and control is only using the supplied IR remote.
Please Note: STB Mode is intended for use with SDI output only.
Hostname: Enter the DVS-200 machines IP
Username: Enter the DVS-200 user accounts you wish to download channels from, you will only see channels this user account has access to.
Password: Enter the DVS-200 user accounts password
Upload background image
Here you can upload a custom background image, this image is displayed behind the on screen channel list.
Remove background image
Removes the uploaded background image and restores the default.
Once connected you will see the on screen channel list on the SDI output.
![Groups Air Sports Entertainment Religion Music Movies Channels Sports1 Sports2 Sports3 Sports1 [Live] Sports1](/content/2026/05/1042387/images/504bdcc433e4d8d040762debad1d0549a600f46ce851fa0d3054d8136990c9af.jpg)
RMC-12 IR Remote
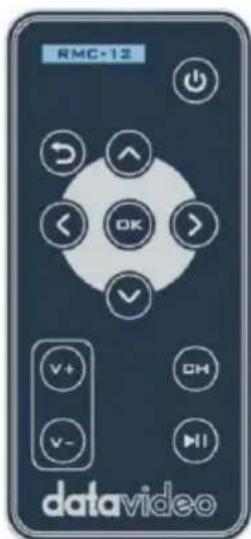
The NVD-35 MARK II comes supplied with the RMC-12 IR control. Its key definitions are as follows:
Vol + - Increases volume (only active when playing back)
Vol - - Decreases volume (only active when playing back)
CH List – Stops playback and loads the channel list
Play/Pause – Pause and resumes playback (only active when playing back)
Note: In STB mode, you can only pause for as long as the HLS playlist length on DVS-200.
OK – Plays the selected channel
Up – Used for channel list navigation
Down – Used for channel list navigation
Left – Used for channel list navigation and seeking during playback
Right - Used for channel list navigation and seeking during playback
Return - Used to close the channel list and resume playback of the last seen channel
Power – Turn NVD-35 MARK II into standby mode
Settings > Plugins
This page allows you to upload a .zip file containing the latest plugins for Video Sharing & HLS mode, this function should only be used if you are instructed to do so by a Datavideo support representative.
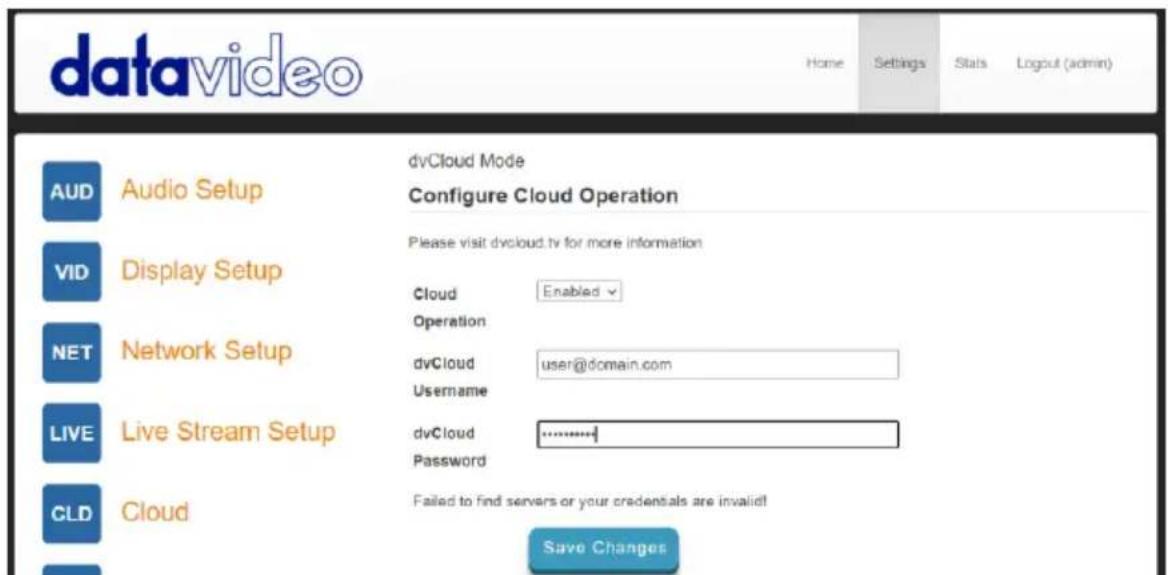
Settings > Cloud
Cloud mode allows the NVD-35 MARK II to be connected to dv Cloud (https://www.dvcloud.tv) and offers the following features:
- Control the NVD-35 MARK II settings from anywhere over the internet
• Monitor the NVD-35 MARK II from anywhere over the internet - Easily link the NVD-35 MARK II to encoders via the cloud
- Use SRT (secure reliable transport) for reliable low latency point to pint links over the internet
Connect the NVD-35 MARK II to dv Cloud
You must have a dv Cloud subscription to use this feature, please visit https://www.dvcloud.tv/ to sign up.
First enable cloud operation then enter your dv Cloud username (the email address you used when you signed up) and password and click 'Save Changes'
Next select the dv Cloud serer you wish to connect to and optionally give the decoder a name (for example "Studio One"). If you do not set a device name, NVD-35.MK2-123456 where 123456 is the decoders serial number will be used.
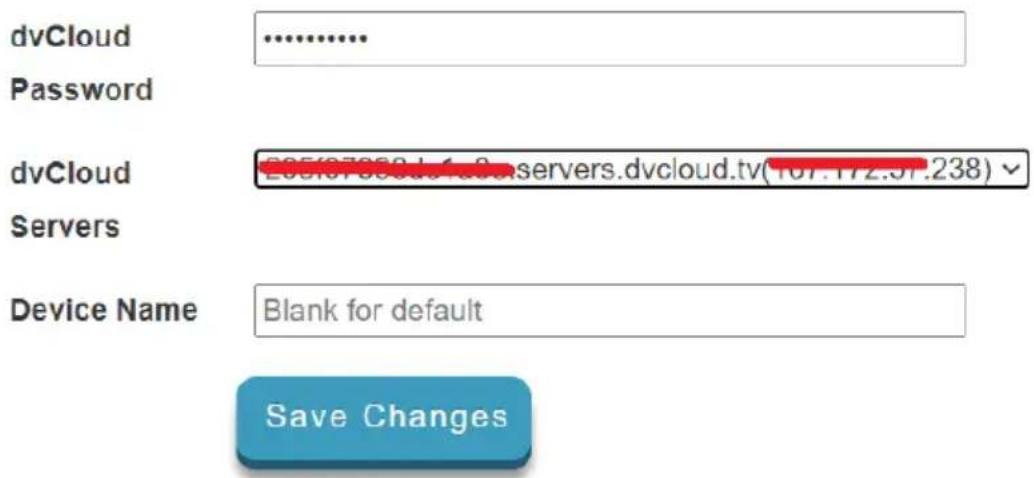
Click 'Save Changes', the NVD-35 MARK II should now be connected to dv cloud.
Control via dv Cloud
Select 'Decoders' from the 'Hardware' menu.

You will see the NVD-35 MARK II listed as shown below.
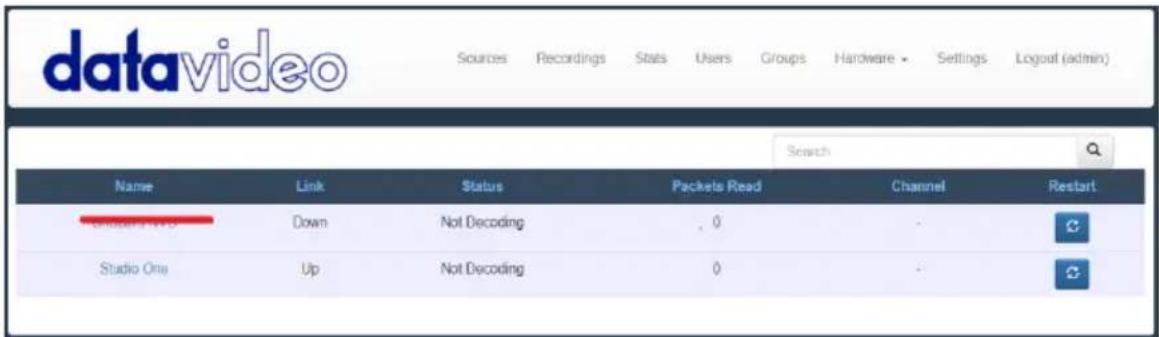
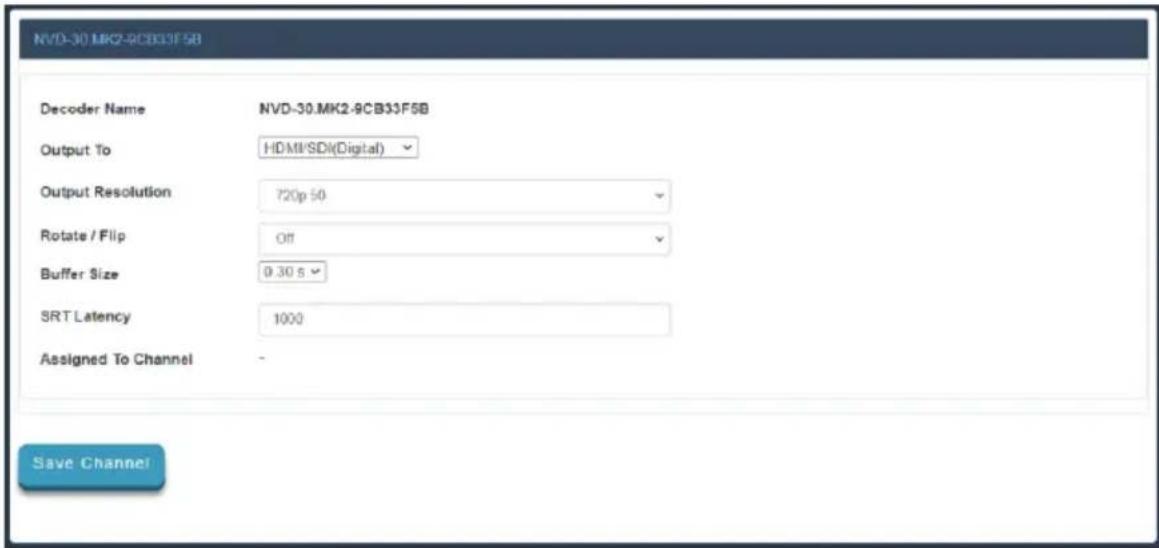
Click the decoders name to access it settings remotely.
Link to a live channel on dv Cloud
For help setting up your encoder with dv Cloud, please see the separate support material on https://www.datavideo.info/.
Click on the video source name.
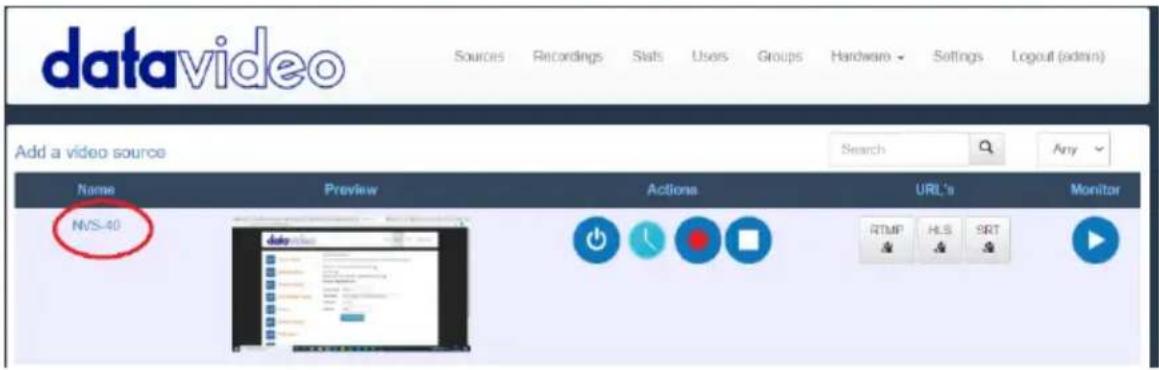
Select the 'Hardware Decoders' tab under 'Add your streaming destinations'
Add your streaming destinations
Streaming Platform
Custom RTMP
Custom SRT
Custom MPEG TS
Software Players
Hardware Decoders
Available Decoders


Studio One

Select the check box next to the decoder you wish to link and then save the settings.
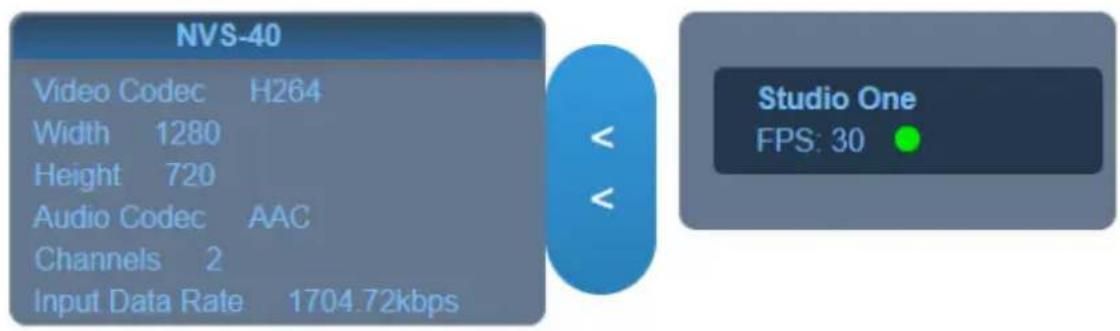
You will see the NVD-35 MARK II is now linked to the channel NVS-40 on the 'Decoders' page.
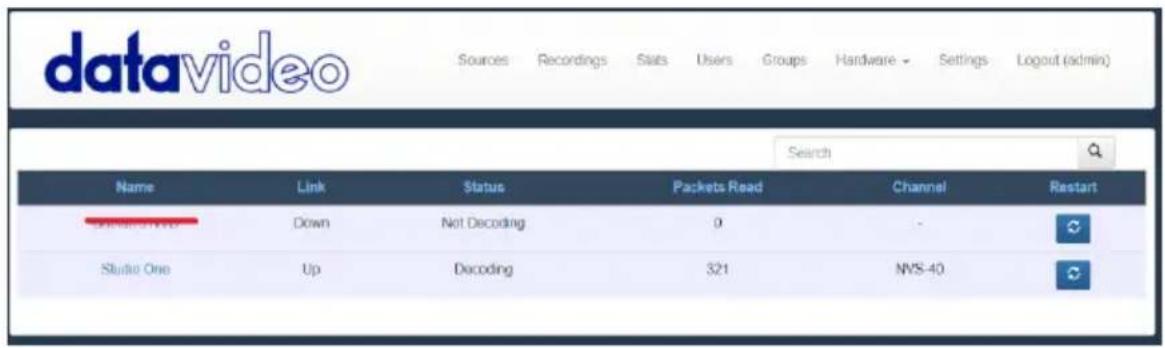
You can monitor the decoders status from the 'Stats' page.

Automatic Firmware Updates
The NVD-35 MARK II features an automatic update system to avoid the need for the user to have to manually install firmware upgrades.
The NVD-35 MARK II will automatically check for updates whenever it is connected to the internet.
You will be notified if an update is available; a message will appear at the top of the interface. Simply click the 'Initiate Update' link to start the process, you can monitor the status of the update from the 'Stats' tab.

Datavideo NVD-35 MARK II Socket Commands
Using third party applications, users can easily connect to the NVD-35 MARK II using Telnet. To establish a connection with the NVD-35 MARK II simply open a Telnet connection to the NVD units IP address on port 23.
Please Note: Socket commands are disabled by default, to enable socket commands please check the appropriate option in the 'Network Tab'.
The NVD unit has three responses to commands:
FAILED: shows that the command could not be executed successfully.
OK: shows that the command is executed without any problem.
Invalid Command: shows that the command was not recognized.
The control commands are as follows:
Load [URL] An example of this command would be
Load "rtsp://192.168.1.1/stream1" OK
On Sends CEC on command (NVD-35 MARK II Only) Off Sends CEC off command (NVD-35 MARK II Only)
Reboot Restarts the unit
Status Prints the current status (Stream URL & Display information)
Port Forwarding on your firewall / router
So that an NVS-33/35/40 video stream can be seen on the internet (beyond the default gateway) certain network related ‘ports’ should be opened on your router or firewall. Your local network administrator or I.T. support should be able to help you with this.
Enable the “port forwarding” function or open below ports within the router settings.
| Interface | |
| Audio/Video Input | RJ-45 Female (10/100M Ethernet) x 1DHCP/Static IP |
| Video Output | SDI x 1 (Digital)Composite x 1 (Analogue) |
| Audio Output | RCA (L/R) x 2SDI embedded audio |
| Indicator | Power LED x 1, LAN LED x 2 (Active, Connection) |
| GPI | Yes |
| IR Receiver | Yes |
| Reset Button | Yes |
| Standards | |
| Video Resolution | 480i 60 (NTSC)576i 50 (PAL)720 @ 50p / 60p1080 @ 50i / 60i1080 @ 24p / 25p / 30p / 50p / 60p |
| Streaming Protocol | RTSP over UDP (Unicast / Multicast)RTSP over TCPRTSP over HTTPMPEG-TS over UDPSRT CallerRTMP PullRTMP PushUDP raw (Unicast/Multicast)HLS over HTTPMPEG-TS over TCP PullSupported video sharing websites |
| Audio Sample Rate | 48 kHz |
| General | |
| Control | Web browser UI for configuration and controlTCP/IP Socket commandsRemote control via dv Cloud |
| Update | Automatic firmware upgrade |
| Power Supply | DC 12V / 0.5A |
| Operating Temperature | 0°C to 50°C (32°F to 122°F) |
| Humidity | 10% to 80% |
| Dimensions (mm) | 220 x 143.3 x 42 |
| Weight | 1.0 Kg |
Note
Service & Support
It is our goal to make your products ownership a satisfying experience. Our supporting staff is available to assist you in setting up and operating your system. Please refer to our web site www.datavideo.com for answers to common questions, support requests or contact your local office below.

Please visit our website for latest manual update.
https://www.datavideo.com/product/NVD-35%20MARK%20II
datavideo
www.datavideo.com

@DatavideoUSA @DatavideoIndia2016
@DatavideoEMEA @Datavideojapan
@DatavideoTaiwan @DatavideoLatam
@DatavideoAsia @DatavideoBrasil

@Datavideo
@Datavideo EMEA
@Datavideo Taiwan

@DatavideoUSA
@DVTWDVCN

@DatavideoUSA
@DatavideoEurope
All the trademarks are the properties of their respective owners.
Datavideo Technologies Co., Ltd. All rights reserved 2020