
43DSA316B - Television VOX - Free user manual and instructions
Find the device manual for free 43DSA316B VOX in PDF.


| Product Type | Television |
| Brand | VOX |
| Model | 43DSA316B |
| Screen Size (Diagonal) | 43 inches (109 cm) |
| Resolution | 1920 x 1080 pixels (Full HD) |
| Display Technology | LED (Direct-lit) |
| Refresh Rate | 60 Hz |
| Dimensions (without stand) | 967 x 563 x 85 mm (W x H x D) |
| Weight (without stand) | Approx. 7.5 kg |
| Power Consumption (typical) | 65 W |
| Power Supply | AC 100-240V, 50/60 Hz |
| Inputs | 2 x HDMI, 1 x USB 2.0, 1 x AV Composite, 1 x RF (antenna) |
| Outputs | 1 x Digital Audio (Optical), 1 x 3.5mm Headphone Jack |
| Built-in Tuner | DVB-T/T2/C (terrestrial and cable) |
| Smart TV Platform | No (basic LED TV) |
| Remote Control | IR remote included |
| VESA Mount Pattern | 200 x 200 mm |
| Safety Features | Child lock, auto power-off timer |
| Cleaning Instructions | Wipe with a soft, dry cloth. Do not use liquids or abrasive cleaners. |
| Spare Parts Availability | Contact VOX support for remote control, stand, or power board |
| Repairability Index | Not rated; typical for budget models |
Frequently Asked Questions - 43DSA316B VOX
User questions about 43DSA316B VOX
0 question about this device. Answer the ones you know or ask your own.
Ask a new question about this device
Download the instructions for your Television in PDF format for free! Find your manual 43DSA316B - VOX and take your electronic device back in hand. On this page are published all the documents necessary for the use of your device. 43DSA316B by VOX.
USER MANUAL 43DSA316B VOX
natural_image
Abstract circular design with diagonal white stripes on dark background (no text or symbols)VOX
ELECTRONICS
ENG
OPERATING INSTRUCTIONS
LED 32DSA316B
LED 32DSA314B
LED 32DSA314H
LED 32DSA311B
LED 32DSA311G
LED 39DSA316B
LED 43DSA316B
LED 43DSA314B
ImportantSafetyInstructionsandMaintenance
ImportantSafetyInstructions

CAUTION
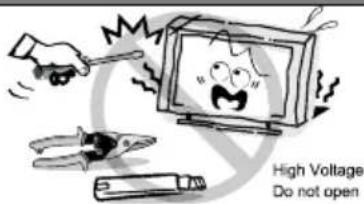
Risk of electronic shock, do not open.
Do not attempt to service this product yourself as opening or removing covers may expose you to dangerous voltage or other hazards.
Refer all servicing to qualified service personnel.
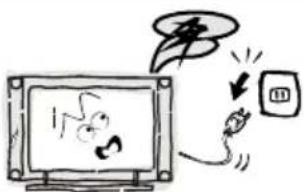
If the following problems occur:
Turn off the TV set and unplug the AC power cord immediately if any of the following problems occur. Ask your dealer or service centre to have it checked by qualified service personnel When:
- AC power cord is damaged.
- Poor fitting of AC power outlet.
- TV set is damaged by being dropped, hit or having something thrown at it.
- Any liquid or solid object falls through openings in the cabinet.
To reduce the risk of fire or electric shock, do not expose this product to rain or moisture.
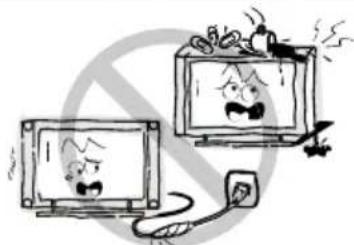
The apparatus shall not be exposed to dripping or splashing and no objects filled with liquids, such as vases, shall be placed on the apparatus.
natural_image
Cartoon illustration of two CRT monitors with angry faces and a plug, no text or symbols present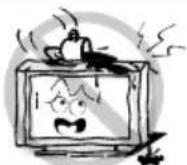
The screen and cabinet get warm when the TV is in use. This is not a malfunction. In case of smoke, strange noise or strange smell from the unit:
· Turn off the power switch immediately;
- Disconnect the power plug from the power outlet;
- Contact your dealer or service centre. Never attempt to make repairs yourself because this could be dangerous.
Never push objects of any kind into the set through the cabinet slots as they may touch dangerous voltage points or short-circuit parts that could result in a fire or electric shock. Never spill liquid of any kind on the set. Use special caution
in households where children are present. The apparatus is not suitable for children under 3-year to operate.
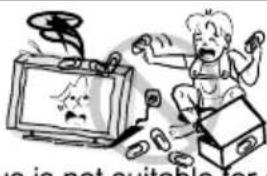
Do not overload wall outlets, extension cords or adaptors beyond their capacity, this can result in fire or electrical shock.
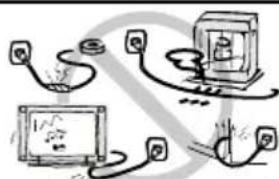
Power-supply cords should be routed so that they are not likely to be walked on or pinched by items
placed upon or against them, paying particular attention to cords at plug end, adaptors and the point where they exit from the appliance. The mains plug is used as the disconnect device. It shall remain readily accessible and should not be obstructed during intended use. Make sure to plug the power cord in until it is firmly inserted.
When removing the power cord, make sure to hold the power plug when pulling the plug from the outlet, do not pull the plug out by the wire. NEVER touch the plug or power cord with wet hands. To disconnect the apparatus from the mains power, the plug must be pulled out from the mains socket, therefore make sure the mains plug is always easily accessible.
flowchart
graph TD
    A["Switch"] --> B["Computer Monitor"]
    B --> C["Desktop Monitor"]
ImportantSafetyInstructionsandMaintenance
ImportantSafetyInstructions
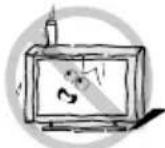
Do not push or scratch the front filter, or place any objects on top of the TV set. The image may be uneven or the screen may be damaged.
natural_image
Cartoon illustration of a hand reaching toward a computer monitor displaying a cartoon character (no text or symbols present)To avoid the fire, no naked flame source, such as lighted candles, should be placed on the apparatus.
An outside antenna system should not be located in the vicinity of overhead power lines or other electric light or power circuits, or where it can fall into such power lines or circuits. When installing an outside antenna system, extreme care should be taken to keep from touching such power lines or circuits as contact with them might be fatal. Ensuring the television is not overhanging the edge of the supporting furniture.
natural_image
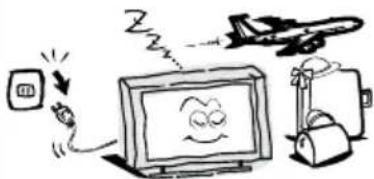
Cartoon illustration of a person using a computer with a smiling face, next to an airplane and a suitcase (no text or symbols)Whennotinuse
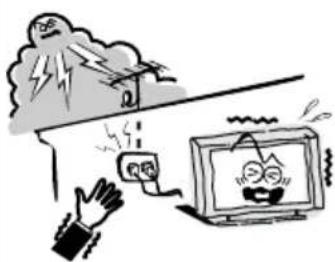
If you will not be using the TV set for several days, the TV set should be disconnected from the AC mains for environmental and safety reasons. As the TV set is not disconnected from the AC power when the TV is turned off at the standby switch, pull the plug from the AC power outlet to disconnect the TV completely. However, some TV sets may have features that require the TV set to be left in standby to function correctly. In the case of lightning, unplug the TV set from the outlet immediately. Never touch the antenna wire during lightning.
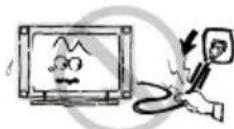
Do not pull the plug out by the wire; Never touch the plug with wet hands.

Excessive volume from earphones and headphones can cause hearing loss.
Installation
natural_image
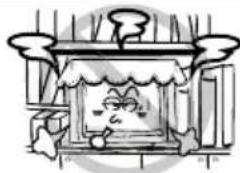
Cartoon illustration of a window with a character inside, no text or symbols presentThe ventilation should not be impeded by covering the ventilation opening with items, such as newspapers, tablecloths, curtains, etc. At least 10 cm space should be left around the apparatus for sufficient ventilation.
natural_image
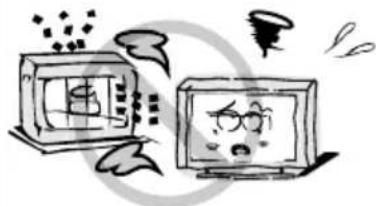
Illustration of two cartoon-style computers with expressive faces and smoke effects (no text or symbols)The product should be situated away from heat sources such as radiators, heat registers, stoves, or other products (including amplifiers) that produce heat. Place the apparatus in such a position that the screen is not exposed to direct sunlight. It is best to have soft indirect lighting while watching and avoid completely dark environments and reflection from the screen as these may cause eye fatigue. Keep the TV set away from any equipment emitting electromagnetic radiation.
ImportantSafetyInstructionsandMaintenance
Installation
natural_image
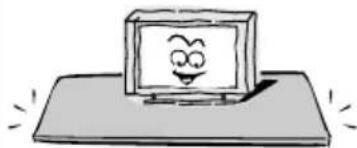
Cartoon illustration of a smiling computer monitor with eyes and a smile, resting on a flat surface (no text or symbols)Do not place the set on an unstable cart, stand, table or shelf. The set may fall, causing serious personal injury as well as damage to the product. Use only with the cart, stand, tripod, bracket, or table specified by the manufacturer, or sold with the apparatus. An appliance and cart combination should be moved with care. Quick stops, excessive force, and uneven surfaces may cause the appliance and cart combination to overturn.
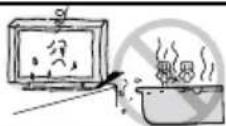
Do not place this apparatus near water, for example, near a bath tub, wash bowl, kitchen sink, or laundry tub; in a wet basement; or a swimming pool; and the like;
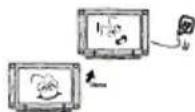
When the TV being moved in from cold place, it needs some right time for dew inside unit evaporating fully before turn on the unit;
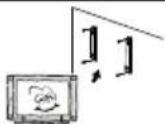
To prevent injury, this apparatus must be securely attached to the floor/wall in accordance with the installation instructions.
LED Screen
Although the LED screen is made with high precision technology and 99.99% or more of the pixels are effective, black dots may appear or bright points of light (red, blue or green) may appear constantly on the LED screen. This is a structural property of the LED screen and is not a malfunction.
If the surface of the LED panel cracks, do not touch it until you have unplugged the AC power cord. Otherwise electric shock may result.
Do not throw anything at the TV set. The LED panel may break from the impact and cause serious injury.
Precautions When Displaying a Still Image
A still image may cause permanent damage to the TV screen.
Do not display still images and partially still images on the LED panel for more than 2 hours as it can cause screen image retention. This image retention is also known as "screen burn". To avoid such image retention, reduce the degree of brightness and contrast of the screen when displaying a still image.
Watching the LED TV in 4:3 format for a long period of time may leave traces of borders displayed on the left, right and centre of the screen caused by the difference of light emission on the screen. Playing a DVD or a game console may cause a similar effect to the screen. Damages caused by the above effect are not covered by the Warranty.
Displaying still images from Video games and PC for longer than a certain period of time may produce partial after-images. To prevent this effect, reduce the 'brightness' and 'contrast' when displaying still images.
Cleaning
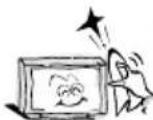
Cleaning and handling the screen surface and cabinet. Disconnect the unit from the AC outlet before cleaning. To remove dust, wipe gently with a soft, lint free cloth. If required use a slightly damp cloth
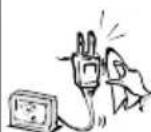
MAINSPLUG
Wipe the mains plug with a dry cloth at regular intervals. Moisture and dust may lead to fire or electrical shock.
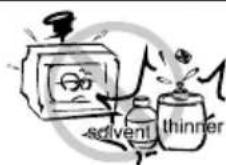
Use care not to subject the TV's surfaces to detergent. (A liquid inside the TV could lead to product failure, fire or electrical shock.) Use care not to subject surfaces to bug repellent, solvent, thinner, or other volatile substances as this may deteriorate the surface and finish of the cabinet.
Contents
General description 5
Specifications and Accessories 6
Overview 7
Remote control 8
First Time Setup 10
Menu Operation 12
Media Menu 28
External connection 33
Trouble shooting 34
Picture defects and countermeasures 36
General Description
Feature:
● Auto tuning and fine tuning
- One mYRbPr input socket
● Two/Three HDMI inputs socket(HDMI 1.4)
● One AV/mini AV input socket
- Support USB
One Coaxial output
● Wide range voltage input
Note:
- In case of any design change, a notice will not be released.
Specifications And Accessories
Specifications:
| Description | LED 32DSA316BLED 32DSA314BLED 32DSA311GLED 32DSA314H | LED 39DSA316B | LED 43DSA316BLED 43DSA314B | |
| Display Screen Type | Color active matrix LED display | |||
| Display size | 32"Diagonal(max.) | 39"Diagonal(max.) | "Diagonal(max.) | |
| The maximum resolution | 1366X768 | 1920x1080 | ||
| Power supply | 100-240V~50/60Hz | |||
| TV receive system | Digital: DVB-T/T2, DVB-C, DVB-S/S2Analog: PAL/SECAM | |||
| Frequency range | 48.25~863.25MHz | |||
| Video in | PAL/SECAM | |||
| Antenna input impedance | 75Ω | |||
| Sound output | 2x5W | 2x8W | ||
| Power supply for remote controller | DC 3V (Two AAA size batteries) | |||
| Power consumption | W | 74W65 | ||
| VGA support resolution | 640x480/800x6001366x768 | 640x480/800x6001366x768/1920x1080 | ||
| HDMI support resolution | 480P 576I/P 720I/P | 480P 576I/P 720I/P1080I/P | ||
| Operation environment temperature | 0°C-40°C | |||
Accessories
- User's manual
- Remote control
● Wall-mounted accessories(Optional)
Note: Due to TV may be used with different display screen, weight marked in this user's manual or in packaging box are subject to change without notice.
TV Terminal Connections
LED 39DSA316B/LED 43DSA316B/LED 43DSA314B
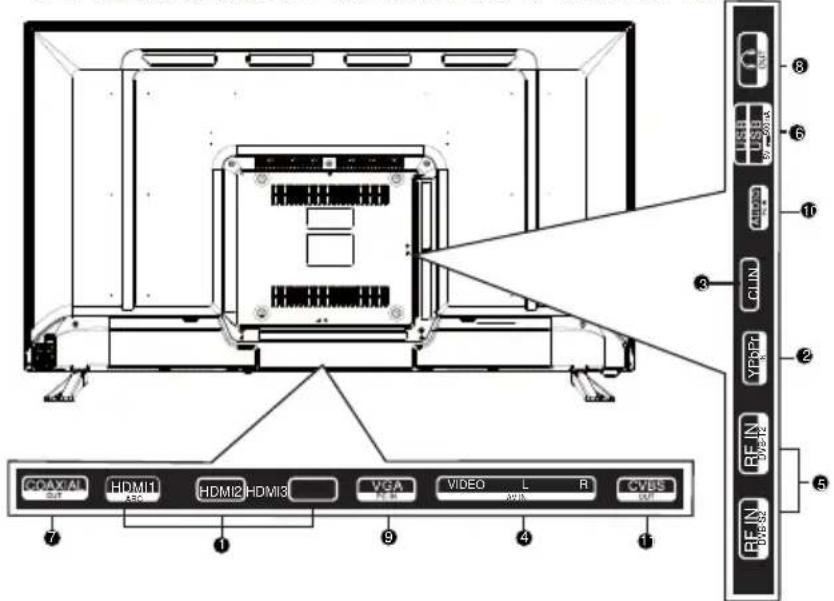
LED 32DSA316B/LED 32DSA314B
LED 32DSA311G/LED 32DSA314H

① HDMI: Connect to the HDMI jack of a device with an HDMI output.
② YPbPr: Connect Component video
③ CI: CI Input.
④ AV IN: AV Input
⑤ RF: Connect to an antenna or cable TV system.
6 USB: Connect to USB flash driver to play supported multimedia content.
⑦ COAX: Connect Coaxial out.
⑧ EARPHONE: Audio output fo external device.
⑨ VGA: Connect to the video output jack on you PC.
10 AUDIO: Connect to the audio output jack on you PC.
11 CVBS OUT: CVBS output.
1 Turn on/off TV.
② VOL-
VOL+
]VOL+/-:Adjust Volume.
3 CH-
CH+
CH+
4 MENU Into or exit from menu (Use CH+/- button select item, VOL+/- button adjust item).
5 INPUT Source Select.
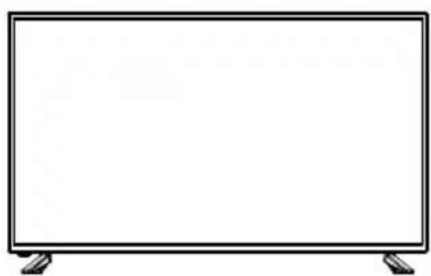
natural_image
Front view of a blank rectangular TV with side legs (no text or symbols)
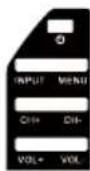
LED 39DSA316B
LED 43DSA316B
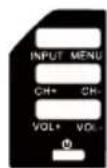
LED 43DSA314B
REMOTE CONTROL OUTLOOK & FUNCTION KEY DEFINITION
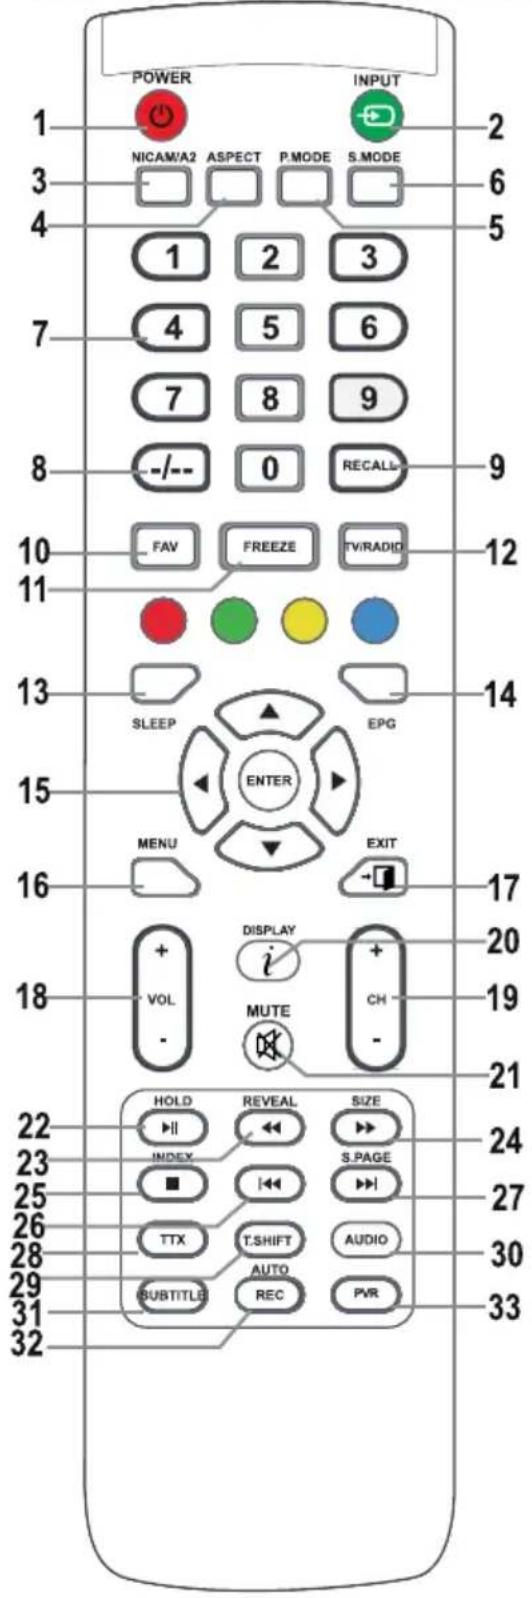
1. POWER ⏻ button
Turns the television on from the stand-by mode.
2. INPUT button
Press to select the desired input.
3. NICAM button
NICAM/A2 input or output.
4. ASPECT button
Page aspect ratio selection, e.g. 16:9, Zoom, Auto, 4:3
5. P-MODE button
Press to select a picture mode.
6. S-MODE button
Press to select a sound mode.
7. Numerical buttons 0-9
Press 0-9 to directly select a TV channel while watching the TV. In teletext mode enter the page number, etc.
8. --/- button
It is used to enter channel numbers with various digit counts, e.g. for 1 - 11 - 111.
9. RECALL button
Button for switching to the previously watched channel.
10. FAV button
Press in the TV mode to enter/exit the favourites menu.
11. FREEZE button (freeze)
Freeze the picture
12. TV/RADIO button
Switching between the television and radio modes.
13. SLEEP button
Set the automatic shut off time for the television.
14. EPG button
Press to show/hide the electronic program guide.
15. ▲/▼/◄/►/ENTER buttons
Used for navigating in a menu on the screen and for setting up the television according to your preferences.
ENTER button
It is used to enter / exit the Channel list menu. (Only DTV/ATV)
16. MENU button
In TV mode, it displays the LCD television's main menu.
17. EXIT button
Function for exiting a menu or a screen.
18. VOL+/- buttons
Press to increase/decrease the volume.
19. CH +/- buttons
Press to switch between individual channels.
20. DISPLAY button
Button for displaying the source and information about channels.
Remote Control
21. MUTE button
Press to mute the sound. Press it again to renew the sound or press VOL+.
22. HOLD/▶II button
HOLD button: hold the current display In the MEDIA mode: Playback/pause or start a time shift recording.
23. REVEAL/◄◄ button
REVEAL button: Press REVEAL to display or hide hidden teletext information (depends on the broadcast).
◀ button: fast rewind
24. SIZE/▶ button
SIZE button: Press SIZE to change the size of the screen in the MEDIA mode.
▶▶ button: fast forward.
25. INDEX/■ button
INDEX button: call up a teletext content page.
■ button: Stop recording / playback.
26. ◀◀ button
In the MEDIA mode: skip to the previous track
27. S.PAGE/▶▶I button
S.PAGE button: Press S.PAGE to enter a teletext subpage.
▶▶ button: skip to the next track.
28. TTX button
Turn teletext on or off.
Note: The teletext function is optional and the availability of buttons depends on the model. Teletext information fully depends on the operator of the channel.
29. T.SHIFT button
It is used to start recording with a time shift (i.e. time shift). Function is only available in the DTV mode.
30. AUDIO button
DTV/MEDIA mode: select a background sound, if available.
ATV mode: select a sound mode: Stereo/Dual I/II/Mono.
Other sources: select the left / right channel
31. SUBTITLE button
Button for showing / hiding subtitles in the bottom part of the screen, if they are available.
32. AUTO / REC button
AUTO button: Used for automatic configuration in the PC mode.
REC button: Press to start recording. (only in the DTV mode.)
33.PVR button
It is used to enter / exit the PVR setting menu.
Note:
Remove battery during storage or when you are not using the device for a long time.
To control the device using the remote control, point the remote control at the device and then press the button with the required function. The maximum range of the remote control is about 5 meters with a deviation of up to +/- 30° from the perpendicular direction to the reception sensor of the remote control on the front side of the device. The falling capacity of the batteries gradually reduces the remote control range. There must be no solid obstacles in the area between the remote control and the device when the remote control is being used.
During standard use the lifetime of batteries in the remote control is about 1 year.
When the effective range of the remote control is substantially reduced, or when there are problems with its use, change both the batteries in the remote control. If you will not be using the remote control for a longer period of time, take out both batteries from it – in this way you will prevent potential damage caused by their leakage.
Avoid strong impact of light (e.g. sunlight or light from strong fluorescent/saving sources) which can reduce the effectiveness and reliability of IR remote control.
Connecting a TV aerial or satellite dish to your TV
To use with a satellite dish (for Freesat or other DVB-S/S2 channels)
Connect your dish to the TVs input marked "RF S2".
To use with an aerial (for Freeview, Saorview etc. or other DVB-T2 channels)
Connect a TV Aerial to the TVs input marked "RF T2".
First Time Installation
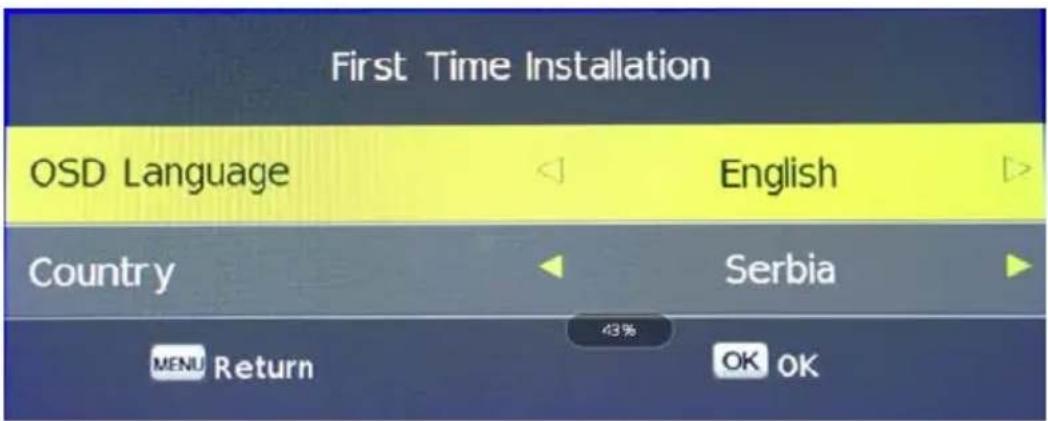
When you first turn your TV on you will see the First Time Installation screen, you can also start the first time installation procedure by pressing the menu button and using the ◀ / ▶ buttons to move to the setup menu and then use the ▼ / ▶ buttons to select "First Time Installation" and press OK.
Select Language
Press ◀ / ▶ button to select the language to be used for menus and messages.
Select Country
Press ▼ / ▲ button to highlight country menu.
Press ◀ / ▶ button to select the country you are in.
Press the OK button.
Select Connection Type
Press ▼ / ▲ button to highlight TV Connection menu.
Press ◀ / ▶ button to select the type of connection you are using.
Antenna for use with a TV antenna (Freeview, Saorview etc.)
Satellite for use with a satellite dish (Freesat or other free-to-air satellite TV)
Cable for a cable television service.
Set Tune Type to DTV
Press the OK button.
First Time Setup
To use with a satellite dish (DVB-S2 eg. Freesat.)
Load the preset channel database
On the "Satellite AutoTuning Setting" menu leave the Scan Mode set to Normal Scan and press OK Press ◀ / ▶ button to select the satellite to use, eg. ASTRA 2E,2F,2G for the UK Freesat service. Move down to Scan Mode and use the ◀ / ▶ button to select Preset.
Move down to Search and press the OK button.
When you see the message "Do you want to start Satellite Autoscan" press the left arrow button to confirm. Wait for the Database to be imported, when finished the TV enters viewing mode.
Press OK to view the channel list.
Press the GREEN button to select the satellite list, highlight the satellite you wish to view channels for and press OK
To perform a fresh auto scan or blind scan see page 7
TIP: You can press the AQT (Auto Quick Tune) button on the remote control to jump straight to the Auto Tining menu if you need to retune.
To use with an aerial (DVB-T2 eg. Freeview, Saorview etc.)
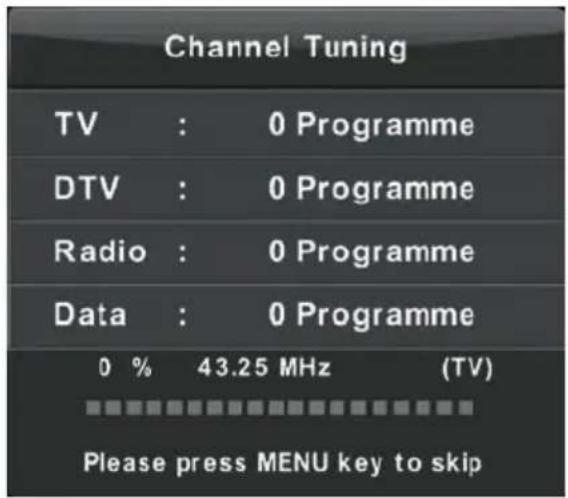
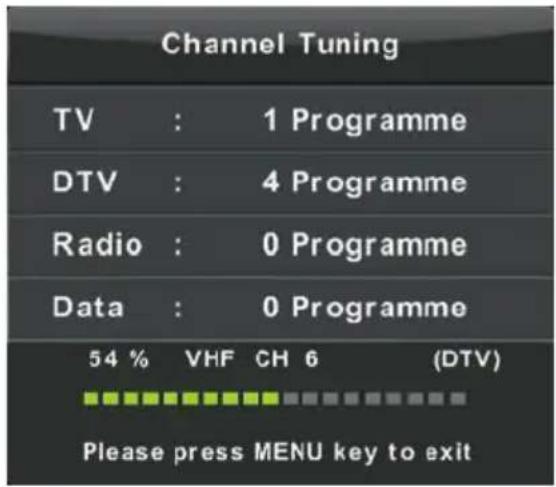
Wait for tuning to finish and then the TV enters viewing mode. Press OK to view the channel list.
| Channel Tuning | |
| TV : | 0 Programme |
| DTV : | 0 Programme |
| Radio : | 0 Programme |
| Data : | 0 Programme |
| 2 % | UHF CH 22 (DTV) |
| Please press MENU key to exit | |
TIP: You can press the AQT (Auto Quick Tune) button on the remote control to jump straight to the Auto Tining menu if you need to retune.
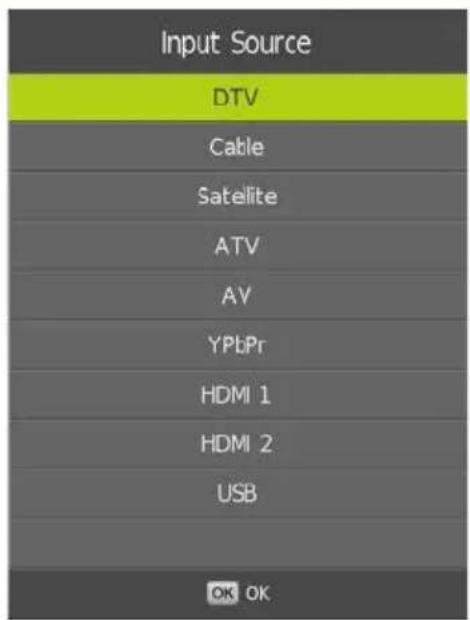
Press the SOURCE button to display the input source list,
Press ▼ / ▲ or OK button to select the input source you want,
Press OK button to enter the input source or press the EXIT button to quit.
The available inputs are:
DTV: Digital TV with an aerial (DVB-T2 eg. Freeview, Saorview etc.)
Cable: For cable TV services outside the UK
Satellite: For use with a satellite dish (DVB-S2 eg. Freesat.)
ATV: Analogue TV with an aerial.
AV: For connection of a composite video and audio signal to the Mini AV socket.
PC: For connection of a computer to the VGA socket.
YPbPr: For connection of a component video signal to the Mini Y/Pb/Pr socket.
HDMI1/HDMI2/HDMI3: For the HDMI1/HDMI2/HDMI3 sockets.
Media: For playback of media connection to the USB socket on the side of the TV.
Channel Menu
Press MENU button to display the main menu.
Press ◀ / ▶ button to select CHANNEL in the main menu.
In Antenna Source.
- Press ▼ / ▲ button to highlight the option that you want to adjust in the CHANNEL menu.
- Press OK button to select the highlighted option.
- After finishing your adjustment, Press Menu button to save and return to the previous menu.
Auto Tuning
Press ▼ / ▲ button to select Auto Tuning, then press OK button to enter. Select the correct country and press OK.
TIP: You can press the AQT (Auto Quick Tune) button on the remote control to jump straight to the Auto Tuning menu if you need to retune.
Menu Operation
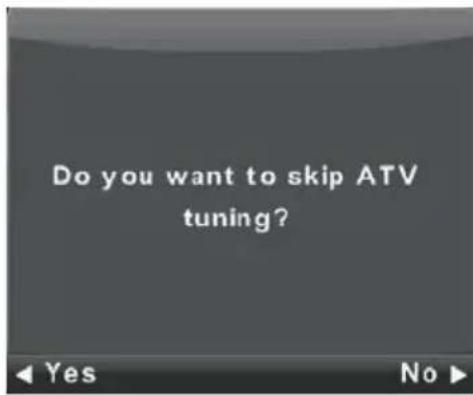
To skip ATV tuning and move straight on to DTV tuning press the MENU button followed by the left arrow.
ATV Manual Tuning

natural_image
Solid gray image with no visible content, text, or symbols.Storage to
Set the channel number.
Sound System
Select the sound system
Colour System
Select the colour system
(Available System: AUTO, PAL, SECAM)
Fine-Tune
Adjust the frequency of the channel finely.
Search
Start searching channel.
Menu Operation
DVB-T Manual Tuning
Press ▼ / ▲ button to select DVB-T Manual Tuning, then press OK button to enter sub-menu.
Press ◀ / ▶ button to select channel, then press OK button to search program.

natural_image
Solid dark gray image with no visible content, text, or symbols.Program Edit (reordering the channel list)
Press ▼ / ▲ button to select Program Edit, then press OK button to enter sub-menu.
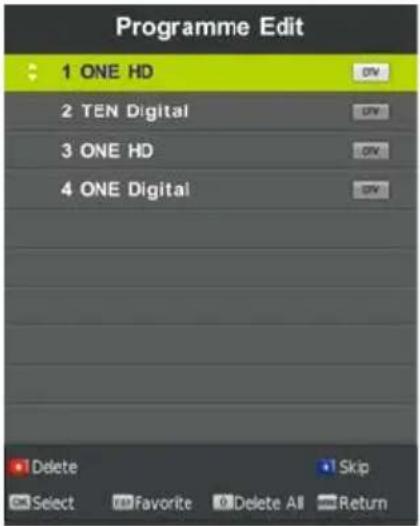
The three colored keys are shortcut keys for programming the channel.
First press ▼ / ▲ to highlight the channel you want to select, then:
Press the Red button to delete the program in the list.
Press the Yellow button to move the channel in favourite list.
Press the Blue button to skip the selected channel.
Press Fav button to add or remote the channel to your favourite list.
(Your TV set will skip between these channels automatically when using CH+/- to view the channels.)
The CHANNEL List in Satellite Source.
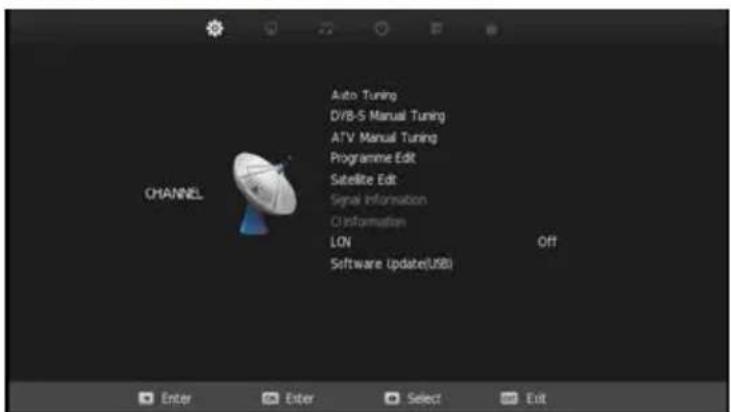
Menu Operation
Auto Tuning
Press ▼ / ▲ button to select Auto Tuning, then press OK button to enter.

natural_image
Solid gray image with no visible content, text, or symbols.Press MENU button to bring up the main menu.
Highlight "Channel" using navigation buttons and press OK.
Then highlight "Auto Tuning" and press OK to enter.
Satellite: Select an available satellite.
Channel Type: Select a channel type.
Service Type: Select a service type.
Scan Mode: Select your scan mode.
Unicable: Select Off
Select Search and press OK.
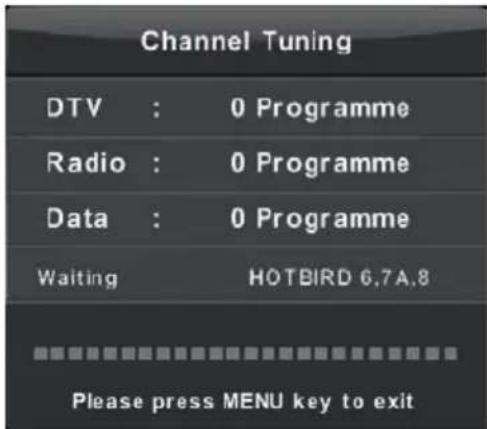
TIP: You can press the AQT (Auto Quick Tune) button on the remote control to jump straight to the Auto Tuning menu if you need to retune.
Satellite Edit
Press ▼ / ▲ button to select Satellite Edit then press OK button to enter.
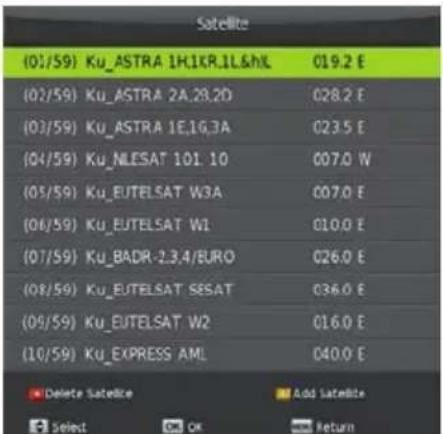
Highlight the satellite to edit and press OK.
Select the field to change and the ◀ / ▶ buttons to change the settings.

natural_image
Solid gray image with no visible content, text, or symbols.Picture Menu
Press MENU button to display the main menu.
Press ◀ / ▶ button to select PICTURE in the main menu.
- Press ▼ / ▲ button to select the option that you want to adjust in the PICTURE menu.
- Press OK button to adjust.
- After finishing your adjustment, Press MENU button to save and return back to the previous menu.
Picture Mode
Press ▼ / ▲ button to select Picture Mode, then press OK button to enter sub-menu.
Press ◀ / ▶ to cycle though the modes Standard, Dynamic, Mild and User.
Note: You can change the value of contrast, brightness, saturation, tint and sharpness manually when set to Standard mode.
Contrast/ Brightness/ Saturation/ Sharpness/Tint
Press ▼ / ▲ button to select option, then press ◀ / ▶ button to adjust.
Contrast Adjust the highlight intensity of the picture, but the shadow of the picture is invariable.
Brightness Adjust the optical fiber output of the entire picture, it will effect the dark region of the picture.
Saturation Adjust the saturation of the colour based on your own like.
Sharpness Adjust the peaking in the detail of the picture.
Tint (NTSC only) Use in compensating color changed with the transmission in the NTSC code.
TIP: In viewing mode you can press PMODE button to cycle through the picture modes quickly.
Menu Operation
Color Temp
Change the overall color cast of the picture.
Press ▼ / ▲ button to select Colour Temperature, then ◀ / ▶ to cycle through the options:
Normal No adjustment
Cold Increase the blue tone for the white.
Warm Increase the red color for the white.
Aspect Ratio
Manually change the aspect ration of the picture
Press ▼ / ▲ button to select Aspect Ratio, then ◀ / ▶ to cycle through the options:
16:9 (default), Zoom1, Zoom2, Auto, 4:3
Noise Reduction
To filter out and reduce image noise and improve picture quality.
Press ▼ / ▲ button to select Noise Reduction, then ◀ / ▶ to cycle through the options:
Off Select to turn off video noise detection.
Low Detect and reduce low video noise.
Middle Detect and reduce moderate video noise (default)
High Detect and reduce enhanced video noise.
Sound Menu
Press MENU button to display the main menu.
Press ◀ / ▶ button to select SOUND in the main menu.

natural_image
Completely blank white image with no visible content, text, or symbols.- Press ▼ / ▲ button to select the option that you want to adjust in the SOUND menu.
- Press OK button to adjust.
- After finishing your adjustment, Press Enter button to save and return to the previous menu.
Sound Mode
Press ▼ / ▲ button to select Sound Mode, then ◀ / ▶ to cycle through the options:
Standard Produces a balanced sound in all environments.
Music Preserves the original sound. Good for musical programs.
Movie Enhances treble and bass for a rich sound experience.
Sports Enhances vocals for sports.
User Select to customise sound settings.
Balance
Press ▼ / ▲ button to select option, Press ◀ / ▶ button to adjust.
Auto Volume level
This reduces the difference between channel and programme volumes automatically
Press ▼ / ▲ button to select Auto Volume Level, then press ◀ / ▶ button to select On or Off.
SPDIF Mode
Press ▼ / ▲ button to select SPDIF Mode, then press ◀ / ▶ button to select Off / PCM / Auto.
AD Switch (Audio Description)
Press ▼ / ▲ button to select AD Switch, then press ◀ / ▶ button to select On or Off.
AD Volume (Audio Description Volume)
When AD Switch is On Press ▼ / ▲ button to select AD Volume, then press ◀ / ▶ button to adjust volume of audio description.
Time Menu
Press MENU button to display the main menu.
Press ◀ / ▶ button to select TIME in the main menu.
Clock
Press ▼ / ▲ button to select Clock and then press OK to open the submenu.
Press ▼ / ▲ button to select each entry, then ◀ / ▶ to adjust the date, month, year, hour and minute.
Off Time
The TV will automatically enter standby mode at the this time.
Press ▼ / ▲ button to select Off Time and then press OK to open the submenu.
Press ▼ / ▲ button to select Off Time and then ◀ / ▶ to cycle through the options: Once, Every Day, Mon.\~Fri., Mon.\~Sat., Sat.\~Sun., Sunday.
Press ▼ / ▲ button to select Hour, then ◀ / ▶ to adjust the hours. Press ▼ / ▲ button to select Minute, then ◀ / ▶ to adjust the minutes.
On Time
The TV will automatically turn on from standby mode at the this time.
Press ▼ / ▲ button to select Off Time and then press OK to open the submenu.
Press ▼ / ▲ button to select Off Time and then ◀ / ▶ to cycle through the options: Once, Every Day, Mon.\~Fri., Mon.\~Sat., Sat.\~Sun., Sunday.
Press ▼ / ▲ button to select Hour, then ◀ / ▶ to adjust the hours. Press ▼ / ▲ button to select Minute, then ◀ / ▶ to adjust the minutes.
Press ▼ / ▲ button to select the source, then ◀ / ▶ to choose the source to turn on. Press ▼ / ▲ button to select Channel, then ◀ / ▶ to select the channel to tune to. Press ▼ / ▲ button to select Volume, then ◀ / ▶ to set the volume used when the TV is turned on.
Menu Operation
Sleep Timer
Press ▼ / ▲ button to select Sleep Timer, then ◀ / ▶ to cycle through the options:
The TV will turn off after the set time has passed.
Auto Standby
Press ▼ / ▲ button to select Auto Standby, then ◀ / ▶ to cycle through the options: Off, 3 H, 4 H, 5 H.
The TV will automatically turn off after the preset time if no remote control buttons are pressed. Pressing a button will reset the timer.
Time Zone
Press ▼ / ▲ / ◀ / ▶ button to select time zone and then Menu to return to the Time menu.
| Canary GMT | Rabat GMT | Berlin GMT+1 |
| Lisbon GMT | Amsterdam GMT+1 | Brussels GMT+1 |
| London GMT | Beograd GMT+1 | Budapest GMT+1 |
| Select Select MENU Return | ||
OSD Timer
Press ▼ / ▲ button to select OSD Timer, then ◀ / ▶ to cycle through the options: 5, 10, 15, 20, 25, 30, Always.
This controls how long the OSD (On Screen Displays) menus will stay on screen after a button is pressed. If set to Always the OSD will remain on screen until you press the Exit button.
Option Menu
Press MENU button to display the main menu.
Press ◀ / ▶ button to select SETUP in the main menu.

natural_image
Solid gray image with no visible content, text, or symbols.OSD Language
Select a language for the OSD (On Screen Display) menus. The default language is English.
Press ▼ / ▲ button to select OSD Language and then OK to open the submenu.
Press ▼ / ▲ / ◀ / ▶ button to select the language and then Menu to return to the Option menu.
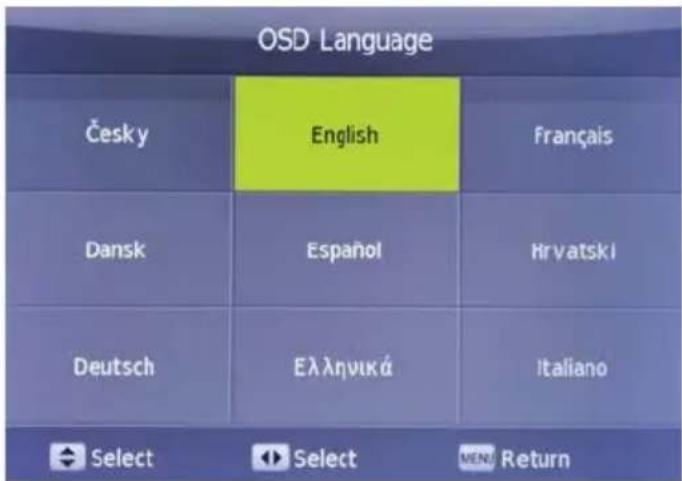
TT Language
Press ▼ / ▲ button to select TT Language, then ◀ / ▶ to cycle through the options: West, East, Russian, Arabic, Persian.
Audio Language
Press ▼ / ▲ button to select Audio Language, then press OK button to enter the sub-menu.
Press ▼ / ▲ / ◀ / ▶ buttons to select the Audio Language.
Press Menu to return to the Option menu.
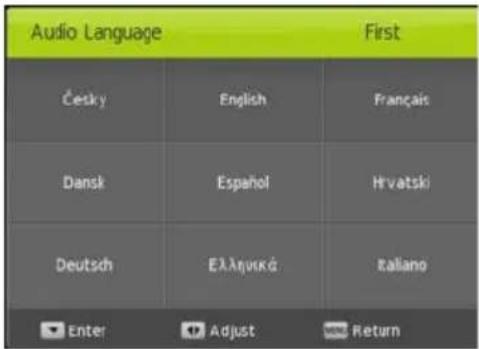
Subtitle Language
Press ▼ / ▲ button to select Subtitle Language, then press OK button to enter the sub-menu.
Press ▼ / ▲ / ◀ / ▶ buttons to select the Subtitle Language.
Press Menu to return to the Option menu.
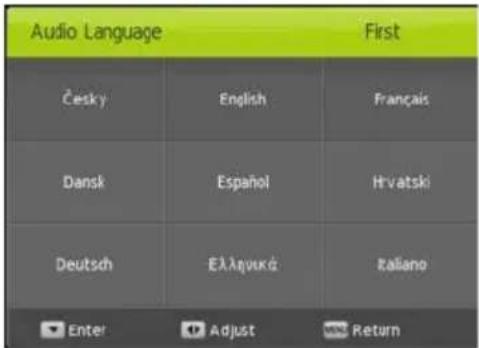
Hearing Impaired
Press ▼ / ▲ button to select Hearing Impaired, then press ◀ / ▶ to select On or Off.
PVR File System
Settings for the Personal Video Recorder (PVR) function. A USB device (USB stick/thumb drive or hard drive must be connected to the TV, maximum size 1TB formatted in FAT32 or NTFS).
Press ▼ / ▲ button to select PVR File System, then press OK button to enter sub-menu.
If you have more than one USB device connected press OK to select the disk.
Press ▼ / ▲ button to select Check PVR File System, then press OK button to enter.
This will check the USB format, speed and size.

natural_image
Solid gray image with no visible content, text, or symbols.Menu Operation
Format
Press ▼ / ▲ button to select Format, then press OK button to enter sub-menu.
This will show you the maximum recording time for SD and HD recordings and allow you to format (wipe clean) the device.
CAUTION: Formatting the device will permanently delete ALL files from the device not just TV recordings.
Time Shift Size
The Time Shift Size sets how much disk space will be allowed to be used for time shift recordings, ie. how long you can pause or rewind a live recording for.
Press ▼ / ▲ button to select Time Shift Size, then press OK button to enter sub-menu.
Press the ◀ / ▶ buttons to adjust the size between:
0 GB Time shift is disabled
512 MB SD recording time of 14 mins, HD recording time of 4 Mins
1 GB SD recording time of 28 mins, HD recording time of 8 Mins
Free Record Limit
Press ▼ / ▲ button to select Free Record Limit, then press the ◀ / ▶ buttons to adjust the time for manual recording between 1 and 6 hours.
Reset
This will reset the TV to the factory defaults.
Press ▼ / ▲ button to select Reset, then press OK button to enter sub-menu.
Press ◀ to confirm you want to reset or ▶ to cancel.
HDMI CEC
Press ▼ / ▲ button to select HDMI CEC, then press OK button to enter the sub-menu.
HDMI CEC
Press ◀ / ▶ button to turn the CEC Control on or off.
HDMI ARC
Press ◀ / ▶ button to turn the Audio Receiver Control on or off.
Auto Standby
Press ◀ / ▶ button to turn the Device Auto Standby on or off.
Auto TV On
Press ◀ / ▶ button to turn the Auto TV Power On on or off.
Device control
Press ◀ / ▶ button to turn the Device control on or off.
Device List
Press OK button to show list of device.
First Time Installation
This allows you to restart the first time installation process.
Press ▼ / ▲ button to select First time installation, then press OK button to start.
Blue Screen
When turned on the screen will be blue if there is no signal, if turned off the screen will be black.
Press ▼ / ▲ button to select Blue Screen then press the ◀ / ▶ buttons to select On or Off.
Lock Menu
Press MENU button to display the main menu.
Press ◀ / ▶ button to select Lock in the main menu.
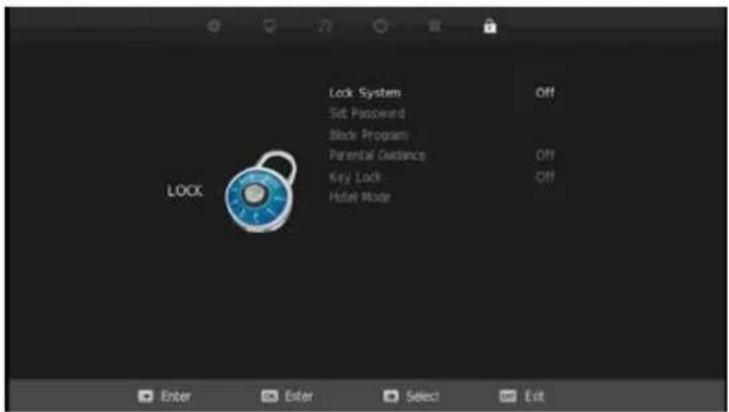
- Press ▼ / ▲ button to select the option that you want to adjust in the LOCK SYSTEM menu.
- Press OK/◄ / ► button to adjust.
- After finishing your adjustment, Press MENU button to return back to the previous menu
Lock System
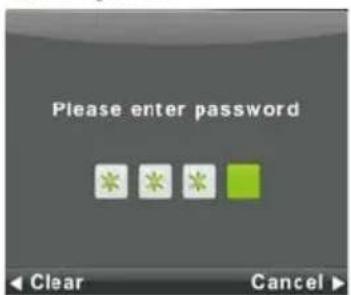
Press ▼/▲ button to select Lock System, then press OK button to make the remaining options valid.
The default password is 0000.
Set Password
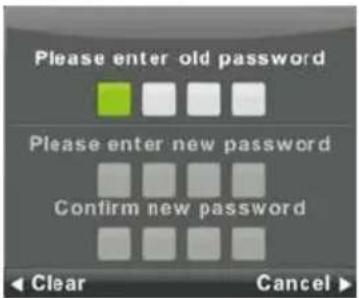
Press ▼ / ▲ button to select Set Password, then press OK button to enter sub-menu to set new password.
Channel Lock
Press ▼ / ▲ button to select Channel Lock then press OK button to enter sub-menu to select.
Press Green button to lock or unlock the channel.
Parental Guidance
Press ▼ / ▲ button to select Parental Guidance, then press the ◀ / ▶ buttons to select the a that is suitable for your children.
Key Lock
Press ▼ / ▲ button to select Key Lock, then press ◀ / ▶ button to select Off or On.
When Key Lock is turned on the buttons on the rear of the TV are disabled.
Hotel Menu
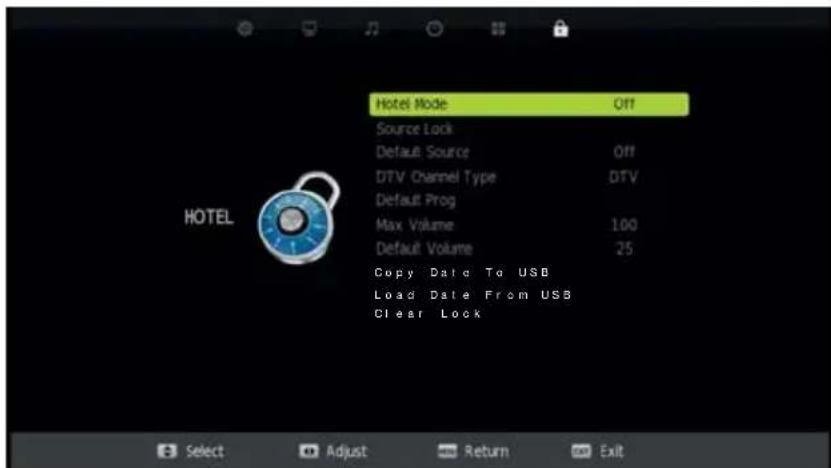
- Press ▼ / ▲ button on the remote control to select hotel mode in the Lock menu.
- Press OK button on the remote control to enter the sub-menu.
- After finishing your adjustment, Press MENU button to save and return back to the previous menu.
Hotel Mode
Press ▼ / ▲ button to select Hotel Mode, then press ◀ / ▶ button to select on or off.
Source Lock
Press ▼ / ▲ button to select Source Lock, then press OK button to enter sub-menu to select.
Default Source
Press ▼ / ▲ button to select Default Source, then press OK button to enter sub-menu to select.
Default Prog
Press ▼ / ▲ button to select Default Prog, then press ◀ / ▶ button to adjust.
It is available when the default source is TV.
Max Volume
Press ▼ / ▲ button to select Max Volume, then press ◀ / ▶ button to adjust.
Default Volume
Press ▼ / ▲ button to select Default Volume, then press ◀ / ▶ button to adjust.
Clear Lock
Press ▼ / ▲ button to select Clear Lock, then press OK button to reset the lock settings to default.
EPG
Press EPG button on remote control to enter EPG menu page.
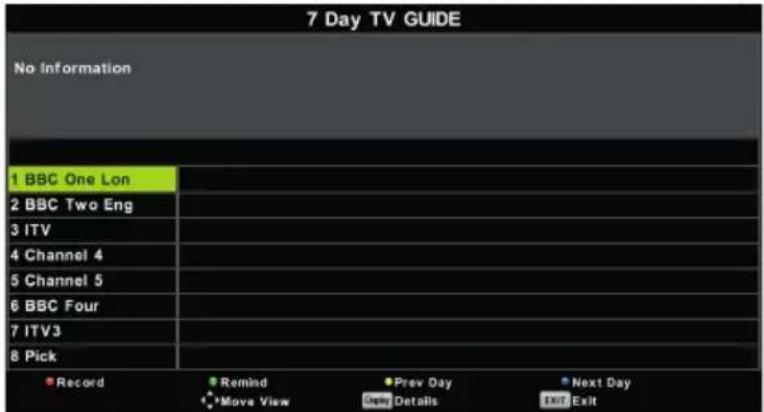
Press ▼ / ▲ navigation buttons to select preferred program.
Press ◀ / ▶ navigation buttons to switch between left column and right column.
When a program is highlighted
Press RED button to record program.
Press GREEN button display information on the highlighted program.
Press YELLOW button to recording schedule.
Press BLUE button to set a reminder.
FAVOURITE LIST
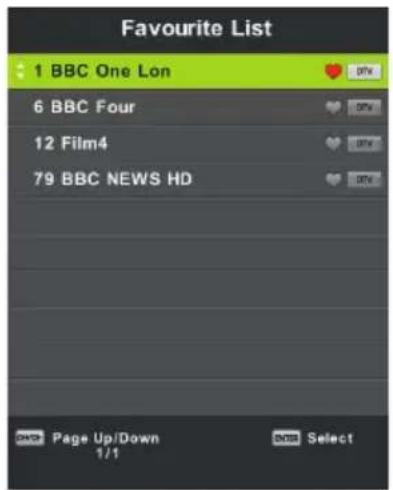
When viewing a channel, press the FAV button on the remote control to enter the Favorite List menu.
Press ▼ / ▲ navigation buttons to select your preferred channel.
Press OK button to confirm the selection.
NOTE:
To add a favourite channel, please refer to the operations of "DTV Mode > Channel > Programme Edit"
Quick select
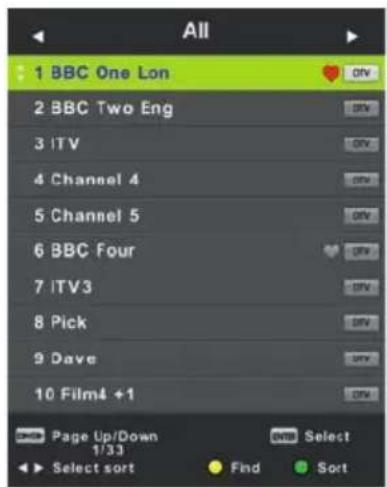
When viewing an available channel, press OK button on remote control to enter Channel List menu page.
Press UP or DOWN navigation buttons to select preferred channel.
Press LEFT/RIGHT navigation buttons to select a channel group.
Press OK button to confirm the selection.
Media Menu
USB
Note: Before operating Media menu, Plug in USB device, then press SOURCE button to set the Input Source to Media. Press ▼ / ▲ button to select Media in the Source menu, then press OK button to enter.

natural_image
Solid dark gray image with no visible content, text, or symbols.Press ◀ / ▶ button to select the option you want to adjust in the main Media menu, then press OK button to enter.
Media Menu
Photo Menu
Press ◀ / ▶ button to select PHOTO in the main menu, then press OK button to enter.
Press Exit button to return to the previous menu and exit menu to quit.

natural_image
Solid dark gray image with no visible content, text, or symbols.Press ◀ / ▶ button to select the file you want to watch in the file selecting menu, then press media button to display picture.
When highlighting the option you select, the file information will appear on the right and picture will be previewed in the center.

natural_image
Solid dark gray image with no visible content, text, or symbols.Music Menu
Press ◀ / ▶ button to select MUSIC in the main menu, then press OK button to enter.
Press Exit button to return to the previous menu and exit menu to quit.
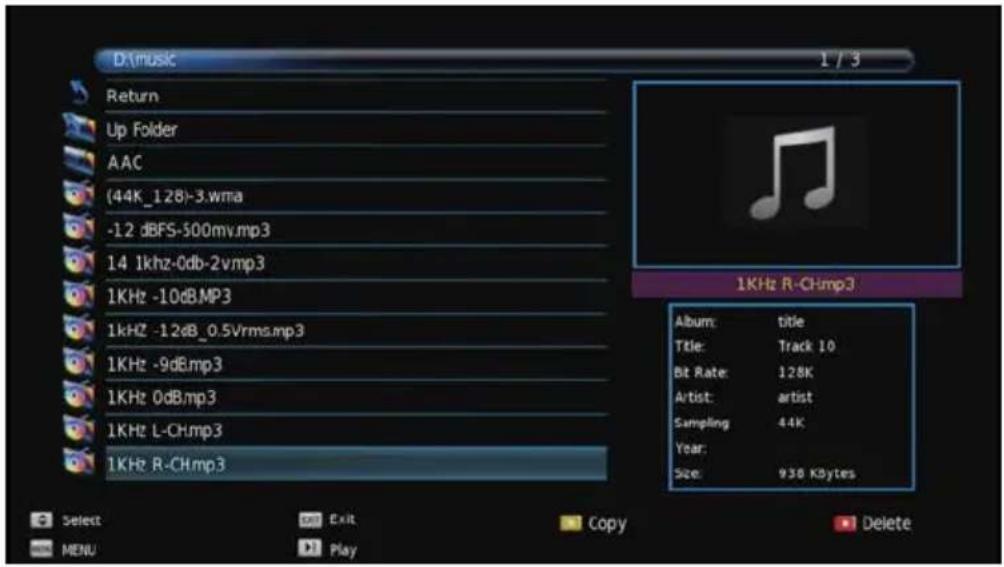
Press ◀ / ▶ button to select drive disk you want to watch, then press OK button to enter.
Press ◀ / ▶ button to select return option to the previous menu.

natural_image
Solid dark gray image with no visible content, text, or symbols.Movie Menu
Press ◀ / ▶ button to select MOVIE in the main menu, then press OK button to enter.
Press Exit button to return to the previous menu and exit menu to quit.

natural_image
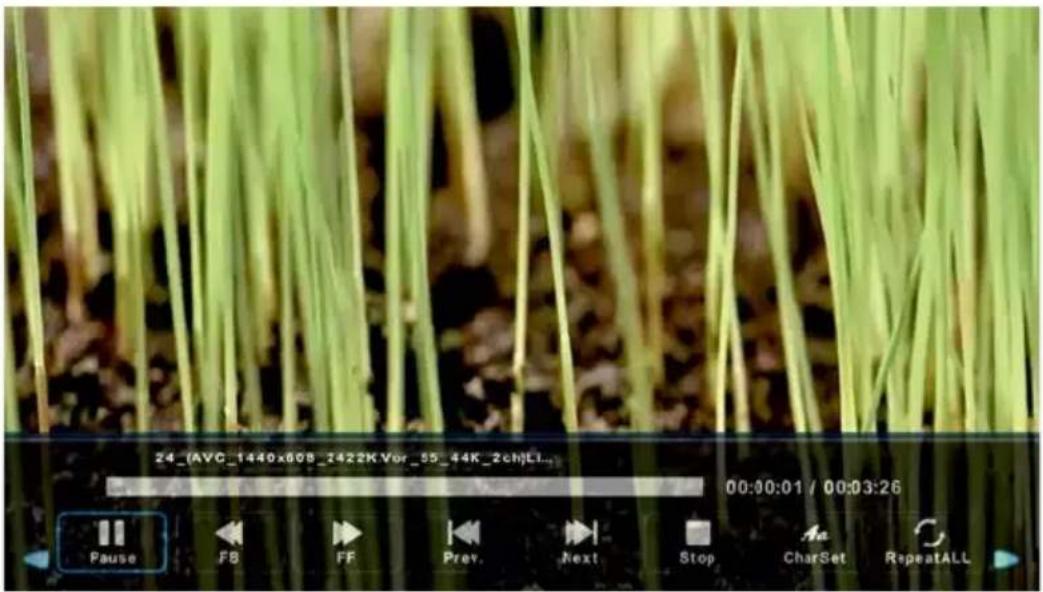
Completely blank white image with no visible content, text, or symbols.Press ◀ / ▶ button to select drive disk you want to watch, then press OK button to enter.
Press media button to play the selected movie.
Press display button to select menu in the bottom you want to run, then press OK button to operate.
Press Exit button to back to the previous menu and exit button to quit the entire menu.
Text Menu
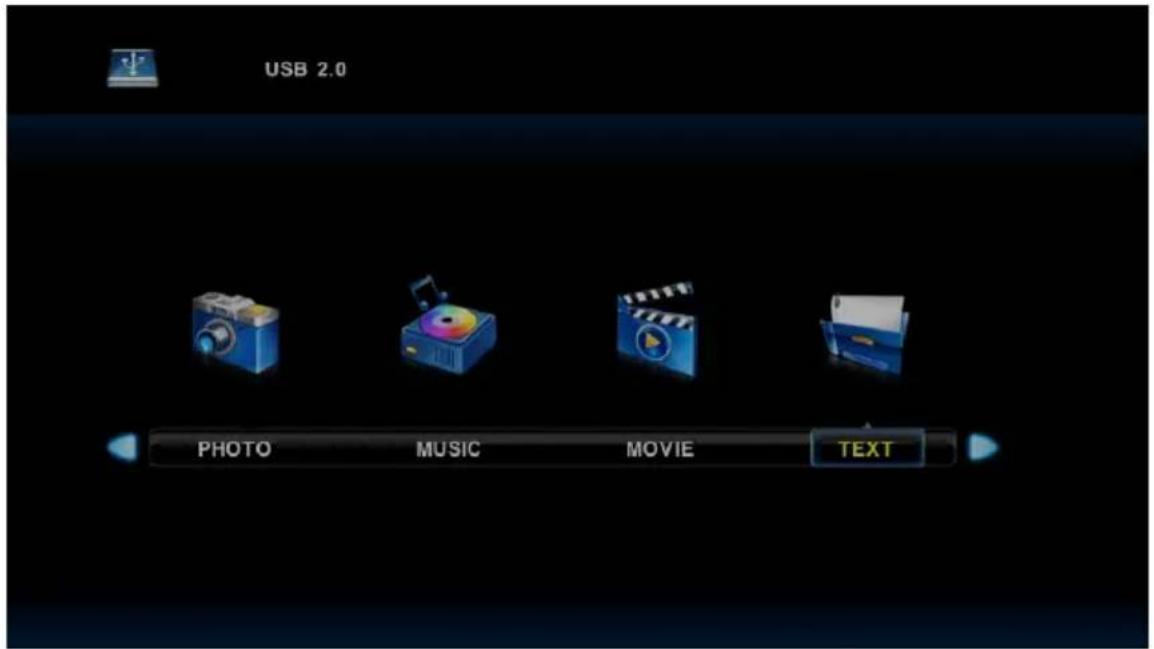
Press ◀ / ▶ button to select TEXT in the main menu, then press Enter button to enter.
Press Exit button to return to the previous menu and exit menu to quit.
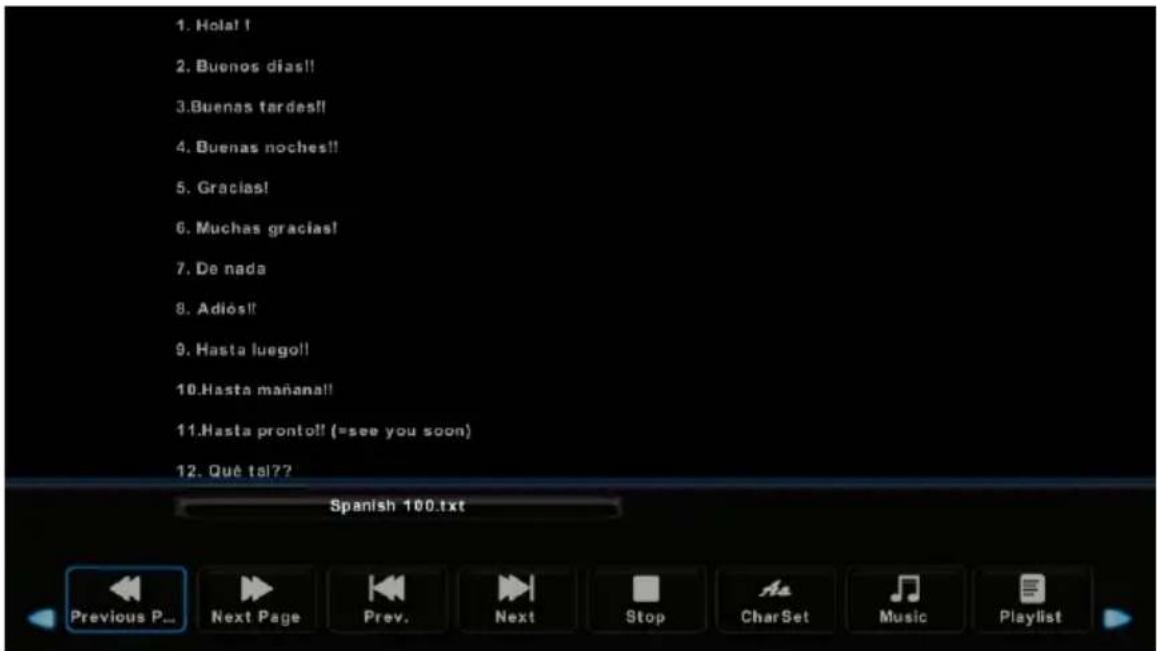
Press ◀ / ▶ button to select drive disk you want to watch, then press Enter button to enter.
Press ◀ / ▶ button to select return option to back to the previous menu.
External connection
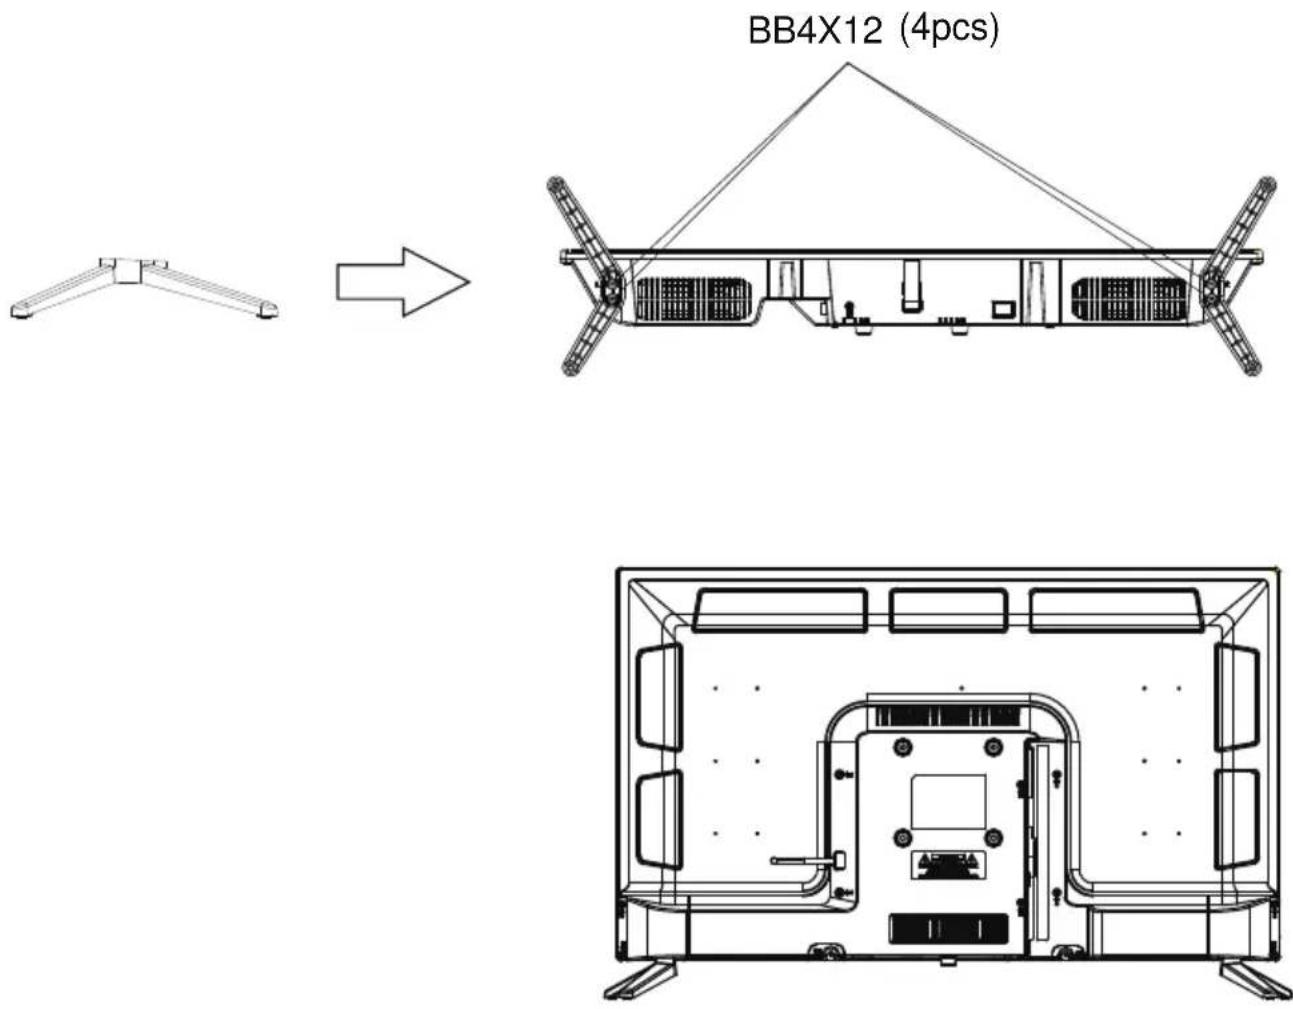
1. Assemble the stand
Before attaching/detaching the stand, make sure to turn off the TV.
-Before performing work spread cushioning over the base area to lay the LED TV on.
This will prevent it from being damaged.
Stand installation instruction
Reference
Troubleshooting
If you have any problem, check the couter measures for each symptom listed below. The following symptoms may have been caused by inappropriate adjustment rather than actual malfunction of the unit. If the trouble persists, contact the Customer Care Centre, see back page for contact details.
| Symptoms | Possible solutions |
| No power | Please check the power cord plugged in and that the power outlet works.Unplug the power cord and plug it in after 60 seconds and restart the TV. |
| No picture | Please check antenna connection.Station may be experiencing problems, please tune to another station.Please adjust the settings of contrast and brightness. |
| Good picture but no sound | Please increase the volume.Please check TV is under mute mode, press MUTE button on the remote control.Please check sound settingsIf external devices are being used, check their volumes are not set too low or turned off.If using AVI or Component inputs, please make sure cables are connected properly and not loose.If using DVI to HDMI cable, a separate audio cable is required.Make sure a headphone jack is not connected.. |
| Good sound but abnormal color or no picture | Please check antenna connection and antenna condition.If using Component input, please check Component connections, incorrect or loose connections may cause colour problems or cause the screen to be blank. |
| No response to remote control | Batteries of remote control may have exhausted, if necessary, please change the batteries.Clean the remote control lens. The distance between LED TV and remote control should be within 8m, within recommended operating angle and path is free of obstructions. |
| Full screen flickering under VGA | V-HEIGHT value may be set too big, restart computer and enter safe mode, then set monitor parameters to correct value according to adjustment description. |
| Horizontal stripes under VGA | Sample phase may be deflected, adjust phase according to picture position. |
| Colored dots may be present on the screen | Although the LED screen is made with high-precision technology and 99.99% or more of the the pixels are effective, black dots may appear or bright points of light (red, blue, or green) may appear constantly on the LED screen. This is a structural property of the LED screen and not a malfunction. |
| Picture is breaking up | Keep the TV away from noisy electrical sources such as cars, hair dryers, welders, and all optional equipment.Electrical atmospheric interference such as local or distant lightning storms may cause picture to break up.When installing optional equipment, leave some space between the optional equipment and the TV.Check the antenna and connection.Keep the antenna away from any power or input/output cables. |
Reference
Troubleshooting
| After Auto Tuning only some channels are available | Check your area is covered by Digital Video Broadcasts. Try re-tuning or manually tuning missing channels. Check that you are using the correct antenna type - please see pg.16 'Antenna connection'. |
| Channel cannot be selected | Check if the channel has been blocked in the main menu settings. |
| USB not playing | Please check connecting USB cable and power supply is connected.Hard drive has not been formatted. Please make sure USB disk is compatible and the multimedia data formats are supported. |
| Picture is distorted, macroblock, small block, dots, pixelization, etc | Compression of video contents may cause distortion especially on fast moving pictures such as sports and action movies. |
| Noise from speaker | Check cable connections, make sure a video cable is not connected to an audio input.Low signal level may cause sound distortion. |
| TV turns off automatically | Check if the Off Timer or Sleep timer is turned on. |
| TV turns on automatically | Check if the On Timer is set to On in the Setup menu. |
| Picture is not shown in full screen | First check if it is caused by the input signal. Then try to adjust Zoom in Function menu. |
Picture defects and the reason
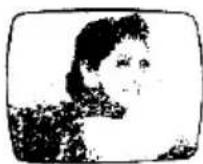
Snowy Picture
Snowy picture is usually due to weak signal. Adjust antenna or install an antenna amplifier.
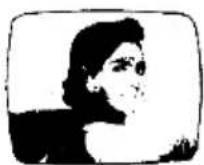
Double Image or Ghosts
Double images are usually caused by reflections from tall buildings. Adjust the direction of the antenna or raise it.
Ghosting may also occur when still pictures are displayed continuously. It may disappear after a few moments.

Radio Wave Interference
Wave patterns are moving on the screen, which are usually caused by nearby radio transmitters or short-wave receiving equipment.
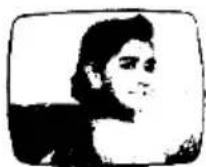
High Temperature Electrothermal Interference
Diagonal or herringbone patterns appear on the screen or part of picture is missing. This is probably caused by high temperature electrothermal equipment in a nearby hospital.
- VOX
- ELECTRONICS
- ImportantSafetyInstructionsandMaintenance
- ImportantSafetyInstructions
- CAUTION
- Whennotinuse
- Installation
- LED Screen
- MAINSPLUG
- Contents
- General Description
- Feature:
- Note:
- Specifications And Accessories
- Accessories
- TV Terminal Connections
- REMOTE CONTROL OUTLOOK & FUNCTION KEY DEFINITION
- POWER ⏻ button
- INPUT button
- NICAM button
- ASPECT button
- P-MODE button
- S-MODE button
- Numerical buttons 0-9
- --/- button
- RECALL button
- FAV button
- FREEZE button (freeze)
- TV/RADIO button
- SLEEP button
- EPG button
- ▲/▼/◄/►/ENTER buttons
- ENTER button
- MENU button
- EXIT button
- VOL+/- buttons
- CH +/- buttons
- DISPLAY button
- Remote Control
- MUTE button
- HOLD/▶II button
- REVEAL/◄◄ button
- SIZE/▶ button
- INDEX/■ button
- ◀◀ button
- S.PAGE/▶▶I button
- TTX button
- T.SHIFT button
- AUDIO button
- SUBTITLE button
- AUTO / REC button
- 33.PVR button
- Connecting a TV aerial or satellite dish to your TV
- First Time Installation
- Select Language
- Select Country
- Select Connection Type
- First Time Setup
- Load the preset channel database
- To use with an aerial (DVB-T2 eg. Freeview, Saorview etc.)
- The available inputs are:
- PC: For connection of a computer to the VGA socket.
- Channel Menu
- Auto Tuning
- Menu Operation
- DVB-T Manual Tuning
- Program Edit (reordering the channel list)
- The CHANNEL List in Satellite Source.
- Satellite Edit
- Picture Menu
- Picture Mode
- Contrast/ Brightness/ Saturation/ Sharpness/Tint
- Color Temp
- Aspect Ratio
- Noise Reduction
- Sound Menu
- Sound Mode
- Balance
- Auto Volume level
- SPDIF Mode
- AD Switch (Audio Description)
- AD Volume (Audio Description Volume)
- Time Menu
- Clock
- Off Time
- On Time
- Sleep Timer
- Auto Standby
- Time Zone
- OSD Timer
- Option Menu
- OSD Language
- TT Language
- Audio Language
- Subtitle Language
- Hearing Impaired
- PVR File System
- Format
- Time Shift Size
- Free Record Limit
- Reset
- HDMI CEC
- Blue Screen
- Lock Menu
- Lock System
- Set Password
- Channel Lock
- Parental Guidance
- Key Lock
- Hotel Menu
- Hotel Mode
- Source Lock
- Default Source
- Default Prog
- Max Volume
- Default Volume
- Clear Lock
- EPG
- When a program is highlighted
- FAVOURITE LIST
- Quick select
- Media Menu
- USB
- Photo Menu
- Music Menu
- Movie Menu
- Text Menu
- External connection
- Assemble the stand
- Reference
- Troubleshooting
- Picture defects and the reason
- Snowy Picture
- Double Image or Ghosts
- Radio Wave Interference
- High Temperature Electrothermal Interference
Brand : VOX
Model : 43DSA316B
Category : Television