
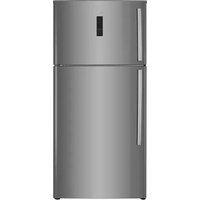
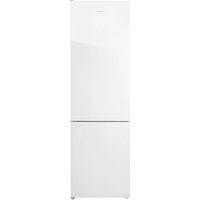
RFC-400DX NFGB - Refrigerator Hiberg - Free user manual and instructions
Find the device manual for free RFC-400DX NFGB Hiberg in PDF.


| Brand | Hiberg |
| Model | RFC-400DX NFGB |
| Product Type | Refrigerator |
| Dimensions (H x W x D) | 1800 x 600 x 650 mm |
| Net Weight | 55 kg |
| Power Supply | 220-240 V, 50 Hz |
| Energy Class | A+ |
| Annual Energy Consumption | 250 kWh |
| Climate Class | N-ST |
| Noise Level | 42 dB |
| Total Gross Capacity | 400 L |
| Refrigerator Capacity | 280 L |
| Freezer Capacity | 120 L |
| Cooling System | Static |
| Defrost Type | Automatic (refrigerator), Manual (freezer) |
| Temperature Control | Mechanical thermostat |
| Reversible Door | Yes |
| Adjustable Shelves | 3 glass shelves |
| Vegetable Crisper | 1 drawer |
| Interior Light | LED |
| Maintenance and Cleaning | Clean interior with mild detergent; defrost freezer when ice exceeds 5 mm; clean condenser coils annually |
| Safety Features | Child lock, overheating protection, stable door hinges |
| Spare Parts Availability | Contact Hiberg support or authorized service centers |
Frequently Asked Questions - RFC-400DX NFGB Hiberg
User questions about RFC-400DX NFGB Hiberg
0 question about this device. Answer the ones you know or ask your own.
Ask a new question about this device
Download the instructions for your Refrigerator in PDF format for free! Find your manual RFC-400DX NFGB - Hiberg and take your electronic device back in hand. On this page are published all the documents necessary for the use of your device. RFC-400DX NFGB by Hiberg.
USER MANUAL RFC-400DX NFGB Hiberg
SAFETY PRECAUTIONS 29
INSTALLATION AND PREPARATION FOR WORK 31
Installation and connection scheme 31
Refrigerator level adjustment 32
Re-hanging of doors 33
TECHNICAL SPECIFICATIONS 34
Table of technical specifications 34
Device scheme 35
USAGE 36
Device control and functions 36
RECOMMENDATIONS FOR USAGE 39
Cleaning and care 42
TROUBLESHOOTING 43
Disposal of the device 44
WARRANTY CONDITIONS 45
WARRANTY CARD 48
ABOUT BRAND PRODUCTS 49
www.hiberg.ru
ГАРАНТИЙНЫЙ ТАЛОН
Холодильники
Стиральные машины

Морозильные камеры

Вытяжки
CB4

Кулеры

Телевизоры

Мясорубки

Блендеры
Духовые шкафы

Вентиляторы

Мультиварки
Thank you for purchasing HIBERG appliance. If used correctly, it will serve you for many years. HIBERG products meet the requirements of the highest international quality standards, combining sophisticated design, functionality and affordable price.
HIBERG appliance will take over part of your household tasks and will be extremely useful in everyday life.
Please read this manual carefully. It contains important instructions for the safety, operation and care of the product. Take care of the safety of this operating manual. If the product is passed to another owner, be sure to pass it along with it. Please make sure that all people using this product are familiar with the manual and safety measures.
The manufacturer and importer are not responsible to the end user if for some reason he/she has not read the manual properly. If for any reason the manual has been lost or damaged, thereby preventing familiarization with it, you can always contact the help desk, or read / download the manual from the official website www.hiberg.ru. If you encounter incorrect functioning of the product, read the manual carefully again. If the information contained in it is not sufficient, contact the help desk for warranty and service issues using the federal number 8-800-700-12-25 (toll-free in Russia) to get help or call an authorized specialist.
Welcome to the world of HIBERG!
On our website www.hiberg.ru You will be able to:
- find recommendations for the use of products and maintenance information;
• find operating manuals. - get information about new products and features of HIBERG appliances.
Customer support and service
We strongly recommend to use original spare parts. When contacting the service center, you should have the following information at hand: model, product number, serial number. This information is present in the table with technical data.
SAFETY PRECAUTIONS
The following safety recommendations are intended to prevent unforeseen risks and damage caused by dangerous or improper operation of the product.

CAUTION!
To reduce the risk of fire, electric shock or injury, the following basic precautions must be taken when using the product.
Children at home
The product is not intended for use by persons (including children) with limited physical or mental abilities, diseases of the sensory organs, as well as insufficient experience and knowledge.
These categories may use the product after training only and under the supervision of a person responsible for their safety. Do not allow children to play with the product.

ATTENTION!
It is forbidden to use the refrigerator for purposes not specified in this Manual.
To avoid injury, at least two people should move the refrigerator.
When moving the refrigerator, do not tilt it more than 45° angle.
Remove the packaging, tape and stickers (except for the sticker with the technical characteristics of the refrigerator) before starting usage.
Glue residues after removing stickers and tape can be easily washed off by applying a small amount of liquid detergent for dishes and rubbing lightly. The inner walls of refrigerator can also be washed with a solution of warm soapy water with baking soda (1 teaspoon of soda per 1 liter of water). Then wipe with a damp cloth and wipe dry. Leave the refrigerator for 1 hour with the door open, letting it dry.
Do not use sharp tools, solvents, flammable liquids and metal brushes to remove glue residues, as this may damage the surface of the refrigerator.
General safety and daily operation rules
Store food in accordance with manufacturer's recommendations. Never use mechanical or other devices to accelerate the thawing process, unless otherwise approved by the manufacturer.
Do not try to repair the refrigerator yourself.
This is dangerous for you and the technical condition of the product. Any damage to the cable may result in a short circuit, fire, or electric shock.
Avoid damaging the pipes of the refrigeration circuit.
Do not place products near the cold air outlets. To ensure normal air circulation, do not exceed the permissible loading of the chamber with products.
Do not overload shelves and drawers.
Do not place hot objects near plastic parts of the product.
Do not store bottles or cans of drinks (especially carbonated ones) in the freezer.
Do not consume fruit ice or ice cubes directly from the refrigerator, as this can lead to a cold burn.
Do not re-freeze previously defrosted products.
Safety when working with electricity
Remove the packaging and inspect the product. If mechanical damage is detected, do not plug in refrigerator. Contact the store where it was pur-
chased, keeping all the packaging materials.
Before plugging in the refrigerator, it is recommended to wait about 4 hours to return the refrigerant agent back into compressor.
Before connecting the refrigerator to the power supply, make sure that the power supply parameters correspond to the parameters indicated on the technical label. It is located either on the back wall, or on the left or right inner wall of the product.
The refrigerator can only be connected to a single-phase AC 220\~240 V/50 Hz. In case of frequent voltage surges, it is recommended to use a voltage stabilizer with automatic adjustment.
The power in the outlet must correspond to the parameters of the product. The outlet must grounded. It is recommended to use a separate outlet to which other electrical appliances will not be connected. Do not use extended cord. Make sure that plug and power cord are not damaged. Otherwise, it can lead to a short circuit, electric shock, overheating and even fire.
When you turn on the refrigerator for the first time, do not fill it with food immediately. Let it reach the necessary temperature for 2-4 hours.

ATTENTION!
If it is necessary to perform any procedures with the refrigerator (moving, cleaning, etc.), first disconnect the refrigerator from the power supply. Once finished, plug in the refrigerator. When unplugging the refrigerator from the wall outlet, always hold on to the plug.
Do not pull the power cord.
If the refrigerator is disconnected from the power supply, the subsequent connection to the network should be made no earlier than 10 minutes later. Failure to comply with this rule may lead to the failure of the compressor.
Do not use the refrigerator in the absence of a lampshade/lid on the interior lighting lamp.
Any electrical component can only be replaced or repaired by a certified service representative. In this case, only original spare parts should be used.
Do not store other electrical appliances, such as ice cream machines, inside the refrigerator unless it is approved by the manufacturer.
Refrigerant and risk of fire
The refrigerator contains a small amount of refrigerant (R600a) in the refrigeration circuit.
Since the refrigerator contains R600a refrigerant, which is safe for the environment, but has a high combustibility, make sure that the refrigerant tubes are not damaged during transportation and installation. Leakage of the refrigerant can lead to a fire. If a refrigerant leak has already occurred in order to avoid fire and eye damage, remove lit candles, lamps and other objects with an open flame or high temperature away from the refrigerator and thoroughly ventilate the room. Do not store flammable items (such as sprays, aerosols, or explosives) in the refrigerator. The room area should be at least 1 m3 per each 8 g of refrigerant (R600a). The amount of refrigerant in the refrigerator is indicated on the rating label.
INSTALLATION AND PREPARATION FOR WORK
Installation and connection scheme
In order to increase the efficiency of the cooling system and conserve energy, it is necessary to ensure proper ventilation around refrigerator to deflect the heat. For this reason, there should be enough of free space around the refrigerator. Recommended distance: at least 10 cm from the back wall, at least 10 cm to the ceiling, at least 10 cm to the sides. There should be enough space in front of the refrigerator to open the door at least 145-150° angle.
Note: this refrigerator performs its functions subject to compliance with the requirements of the climate class. The compliance of the climate class with temperature conditions is shown in the table below. The climate class of your refrigerator is indicated in the technical specifications of this Manual and in the rating label on the refrigerator body.
Install the refrigerator in a dry place away from sources of high humidity.
Place the refrigerator out of direct sunlight, rain or snow, as well as heat sources such as stoves/stoves, radiators, fireplaces or heaters.
If refrigerator is installed in a corner, there should be a sufficient distance between the side wall of the refrigerator at the side of the door hinges and the wall to open freely refrigerator's door.
Installing the refrigerator on the carpet can cause it to overheat. To avoid this, it is necessary to put a rubber mat or a wooden stand on the carpet, providing a gap of 2.5 cm.
Refrigerator is not intended for use in garages or outdoor areas. Do not cover the refrigerator.


| W | D |
| 595 mm 635 mm | |
| H | A |
| 2000 mm 966 mm | |
| B | C |
| 1202 mm 125° | |
| E | F |
| 75 mm 100 mm |
| Climate class Surrounding temperature | |
| SN from +10°C to +32°C | |
| N from +16°C to +32°C | |
| ST | from +16°C to +38°C |
| T | from +16°C to +43°C |
REFRIGERATOR LEVEL ADJUSTMENT
Level adjustment is necessary to eliminate vibration. If refrigerator level is not adjusted properly during installation, the door may not close tightly. Subsequently, this can lead to problems with cooling, freezing and maintaining the humidity level.
We recommend leveling the refrigerator as follows:
- Roll the refrigerator to the installation site.
- Unscrew the adjustable legs until they come into contact with the floor.
- Tilt the refrigerator back by 10 mm or 0.5 degrees, making 1-2 additional turns of the adjustable legs. This will allow the refrigerator door to return to the closed position.
- If necessary, move the refrigerator.
Depending on the model, you may need a screwdriver.
Do not forget to twist the legs back for unhindered movement, and then repeat the above installation steps.

ATTENTION!
The wheels are not designed to move the refrigerator left or right and should only be used to move back and forth.
Depending on the refrigerator model, various plastic and glass shelves for storing food are included in the delivery set. One of the glass shelves should be installed above the vegetable container. The remaining shelves are installed at your choice.
ATTENTION!
Do not turn the refrigerator over and do not put it on its side. The maximum tilt is 45 degrees. When lifting the refrigerator, never hold the door handle, top panel or tubes, as there is a high probability of deformation and breaking off of these parts.
AFTER INSTALLATION
After installing the refrigerator, it is necessary to wipe it thoroughly before usage. Recommendations for the care of the refrigerator are listed in the chapter «Cleaning and maintenance».
Re-hanging of doors

ATTENTION!
The refrigerator must be disconnected from power supply during the re-hanging of the door.

Please note that when removing doors, excessive force is not hired, as well as exposure to the s of refrigerator with sharp and ing objects.
For the subsequent correct installation of the door make sure that it opens freely and its movement is not hindered by foreign objects, such as furniture or household appliances located in the immediate vicinity.
If necessary, you can change the sides of the door opening from the right one (according to the delivery set) to the left one.
The scheme of doors re-hanging:
-
Unscrew and remove the plastic cover from the upper door hinge.
-
Unscrew the bolts of the upper hinge and remove it.
-
Unscrew the bolts of the mounting plate of the top cover.
-
Remove the refrigerator door and put it aside.
-
Remove the central hinge by first unscrewing the screws.
-
Remove the freezer door and put it aside.
-
Pull the plug out of the hinge hole located on one side of the freezer door and insert this plug into the hole on the other side of the door.
-
Remove the refrigerator legs.
-
After unscrewing the bolts, remove the lower hinge. Flip the lower hinge and place it on the other side of the refrigerator.
-
Swap the adjustable legs and install them. Set the refrigerator by level.
-
Move the central hinge to the other side after the lower door has been installed.
-
Install the upper hinge, the upper hinge cover and the upper mounting plate after installing the upper door.
TECHNICAL SPECIFICATIONS
Table of technical specifications
| Model RFC-400DX NFGB / RFC-400DX NFGW / RFC-400DX NFGY | |
| Basic features | |
| Gross capacity, L 380 | |
| Net capacity, L 351 | |
| Type Combi | |
| Type of control system Electronic | |
| Defrosting type No Frost | |
| Voltage, V / Frequency, Hz 220-240 ~ 50/60 | |
| Rated current, A 1 | |
| Defrost power, W 170 | |
| Rated power, W 72 | |
| Climate class SN-N-ST-T | |
| Energy efficiency class A++ | |
| Energy consumption per year 251 | |
| Max noise level, dB 42 | |
| Type of refrigerant / Charge (g) | R600A/42 |
| Compressor type | Inverter |
| Compressor (brand, model) | HUAYI, HVD70MTa |
| Q-ty of compressors, pc 1 | |
| Q-ty of doors, pc | 2 |
| Control panel Touch | |
| Adjustable thermostat | Yes |
| "SMART-ECO" function | Yes |
| "Holiday" mode | Yes |
| "Fast cooling" mode | Yes |
| "Fast freezing" mode | Yes |
| "Memory" function | Yes |
| "Alarm" function | Yes |
| Child Lock | Yes |
| Fridge compartment | |
| Net capacity, L 257 | |
| Fridge compartment temperature, °C | +2 ... +8 |
| Reversible door | Yes |
| Shelves (glass), pcs | 3 |
| Door balcony (plastic), pcs | 6 |
| Drawer for vegetables and fruits, pcs | 1+1 (with humidity control) |
| Wine shelf | Yes |
| LED-light | Yes |
| LED-light power (W) | 6 |
| Eggs tray(s) / Total number of eggs | 2x7 |
| Multi airflow | Yes |
| Freezer compartment | |
| Freezer compartment star rating | **** (4 stars) |
| Net capacity, L | 94 |
| Freezer compartment temperature, °C | -16 ... -24 |
| Drawer, pcs | 3 |
| Ice cube tray(s), pcs | 1 |
| Freezing capacity, kg/24 h | 4,5 |
| Max storage time by power failure, h | 14 |
| Max storage time by power failure, h | |
| Unit dimensions, mm (W / D / H) | 595x655x2000 |
| Packing dimensions, mm (W / D / H) | 635x704x2037 |
| Net weight, kg | 73 |
| Gross weight, kg | 79 |
| Color, material | Black Glass / White Glass / Beige Glass |
The manufacturer and importer have the right to change the design, technical characteristics, functions, appearance, configuration of the product (goods), etc. without prior notice. All information provided in the instructions concerning the configuration, technical characteristics, functions, color combinations, etc. is for informational purposes only and under no circumstances is a public offer.
Device scheme
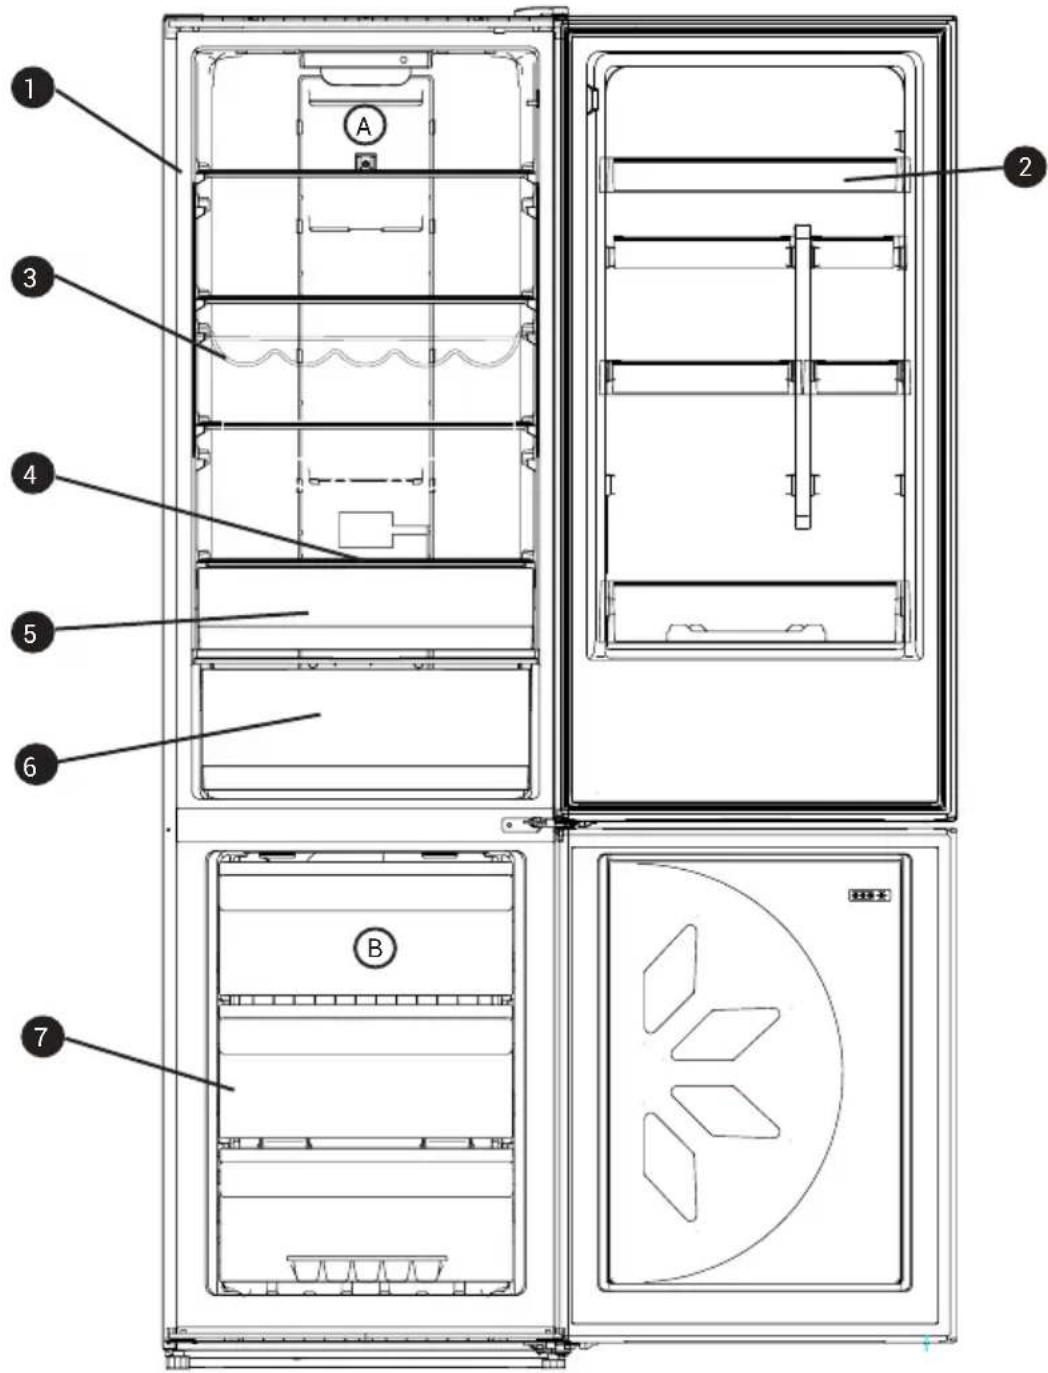
Ⓐ Refrigerator compartment
1 Tempered glass shelves
2 Door shelves
3 Bottle shelf
4 Air supply adjustment
5 Fresh food storage zone
6 Vegetables and fruits crisper with adjustable humidity level
B Freezer compartment
7 Drawers
Note: The schematic image may differ from the real view of the product.

Device control and functions
The first application
After connecting the refrigerator to the power supply, the display backlight will immediately light up, which will continue for 2 seconds. The compressor will turn on.
The Smart ECO mode is activated and the corresponding indicator lights up for a few seconds.
When the display backlight goes out, open the refrigerator door or press any button and the indicator will light up again.
Open the refrigerator door after 30 minutes. The temperature inside the refrigerator should decrease. This
indicates that the refrigerator system is working well.
Selecting the operating mode
The operation mode of the refrigerator compartment can be selected on the control panel located on the front side of refrigerator door.
ATTENTION!
The temperature of +2°C is relatively low, and +8°C is relatively high for the refrigerator compartment. The temperature is usually to be set to +4 °C.
To set the individual temperature, it is necessary:
- Press the touch button «Fridge» or «Freezer»;
- The indicator will start flickering. Each subsequent press of the button will change the temperature on the display;
- The temperature will be fixed if you do not press the button for 5 seconds.
Temperature cycle when pressing the «Fridge» button:
2 ^ ° C → 3 ^ ° C → 4 ^ ° C → 5 ^ ° C →\6 ^ ° C → 7 ^ ° C → 8 ^ ° C → OFF → 2 ^ ° C
«OFF» represents the OFF state, when fridge compartment cooling is turned off.
Temperature cycle when pressing the «Freezer» button:
- 2 4 ^ ° C → - 2 3 ^ ° C → - 2 2 ^ ° C → - 2 1 ^ ° C → - 2 0 ^ ° C → - 1 9 ^ ° C → - 1 8 ^ ° C → - 1 7 ^ ° C → - 1 6 ^ ° C → - 2 4 ^ ° C
«SMART ECO» mode
This function is recommended for continuous use as the most optimal and energy efficient
- Press the «Function» touch button several times until the corresponding indicator flashes on the display.
- While the indicator is flashing, press «OK» to confirm.
- After the indicator stops flashing, the Smart ECO mode will be activated. The temperature in the refrigerator and freezer will be +4°C and -18 °C, respectively.
ATTENTION!
The temperature cannot be regulated while the Smart ECO mode is active.
-
To disable the «Smart ECO» mode, press the «Function» touch button several times until the indicator flashes on the display.
-
While the indicator is flashing,
press «OK». The indicator will go off. The temperature will be set according to the previous settings.
«VACATION» mode
This mode is recommended for use when the refrigerator is not going to be used for a long time (for example, during a vacation). It provides economical power consumption.
ATTENTION!
Before activating the «VACATION» mode, it is necessary to remove all perishable products from the fridge compartment, while nothing needs to be removed from the freezer.
To activate this mode, press the «Function» touch button several times until the corresponding indicator Δ vacation flashes on the display.
- While the indicator is flashing, press «OK» to confirm.
- After the indicator stops flashing, the function becomes active. The temperature in the refrigerator will be fixed at +14 °C without the possibility of adjustment.
- This function can be disabled by such modes as «Smart ECO» or «Fast cooling». To turn off the function, press «Function» touch button several times until the fast cooling indicator flashes on the display.
- While the indicator is flashing, press «OK». The display will go off and the temperature will be set according to the previous settings.
«FAST COOLING» mode
This mode is intended for fast cooling of products.
-
To activate this mode, press the «Function» touch button several times until the corresponding indicator flashes on the display.
-
While the indicator is flashing, press «OK» to confirm. After the indicator stops flashing, the mode becomes active and the temperature in the refrigerator is set to +2°C.
«FAST FREEZE» mode
This mode is intended for fast freezing of products.
- To activate this mode, press the «Function» touch button several times until the corresponding indicator flashes on the display.
- While the indicator is flashing, press «OK» to confirm. After the indicator stops flashing, the function will become active and the temperature in the freezer will be set to -32°C.
ATTENTION!
This function will automatically turn off after 26 hours or when "Smart ECO" mode is activated.
To turn off the modes manually, press the «Function» touch button several times until the fast cooling indicator flashes on the display. While the indicator is flashing, press «OK» for confirmation.
The display will go off and the temperature will be set according to the previous settings.
«MEMORY» function
The refrigerator will save all settings in case of a power outage. After connecting to power supply, the device will start working with the previous settings.
«ALARM» function
When the refrigerator door remains open or is not fully closed for 3 minutes, the appliance will produce an alarm sound
To turn off the sound signal, close the refrigerator door. You can also press any button to temporarily stop the alarm.
After about 3 minutes, the device will sound the alarm again. If the temperature in the freezer is above -10 °C when the refrigerator is connected to the power supply, this temperature of the freezer will be indicated on the display.
Press any button or wait about 5 seconds and the temperature will stop flashing and the freezer compartment temperature will return to the previous setting.
Air supply adjustment (Fresh food storage zone)
Using the lever, you can increase or decrease the supply of cold air entering the fresh food storage zone.

RECOMMENDATIONS FOR USAGE
Usage of the refrigerator compartment
The refrigerator is suitable for storing and cooling vegetables and fruits.
It is recommended to store food in packages in order to avoid the appearance of smudges and odors that may affect other products.

ATTENTION!
Never close the refrigerator doors with drawers and shelves pulled out, this may damage them and the refrigerator itself.
Door shelves
The shelves are suitable for storing eggs, packaged food, beverages in cans and bottles, etc. Do not place too many heavy products on these shelves.
Vegetables and fruits crispers
Crispers for vegetables and fruits are located at the bottom of the refrigerator compartment and are designed for storing and cooling vegetables and fruits.
Glass shelves
The refrigerator compartment is equipped with glass shelves. They are designed for storing and cooling products. If necessary, they can be removed and washed.
Store food according to the manufacturer's recommendations.
Leave space around the products. This allows cold air to circulate and cool them down faster.
It is recommended to store food in packages in order to avoid the appearance of smudges and odors that may affect other products.
To store fresh food products, wrap them in plastic package or put them in an airtight container. This will help prevent the appearance of food odors in the refrigerator, as well as the mixing of different odors.
Fruits and vegetables – wash and dry, store in the refrigerator in special boxes.
Greens – remove the packaging, remove damaged and dried leaves or areas, wash in cold water and dry. Store in the refrigerator in a plastic bag or container.
Meat – store meat in its original packaging if it is sealed. If necessary, wrap the meat in plastic wrap. Boiled meat should always be stored on a shelf above raw meat to avoid bacterial transfer.
Milk bottles should have a lid and be stored on door shelves.
Recommendations for the location of products
1. Cool zone.
It is recommended to store the following products in this zone: milk, eggs, yogurt, fruit juices, hard cheeses, open cans, bottles with sauces and jams, butter, margarine, etc.
2. Cold zone from 2 to 5°C .
It is recommended to store the following products in this area: wrapped raw foods, ready-made meat dishes, pies, soft cheeses, ham, cooked salads and various desserts.
3. Freshness zone.
It is recommended to store the following products in this area: wrapped fresh salads, tomatoes, radishes and other vegetables and fruits.

ATTENTION!
Meat and fish should be wrapped in plastic package or foil and stored on the lowest shelf of the refrigerator compartment away from other products.
Usage of the freezer compartment
The freezer compartment is designed for long-term storage of frozen products, such as meat, vegetables, ice cream or for ice making.
Fast freezing can provide long-term storage of frozen food. Frozen products in your freezer can be stored for a maximum of 4 months after the date of purchase


ATTENTION!
Never close the freezer door with the pulled out drawers and ice trays. This can damage both them and the refrigerator.

ATTENTION!
Never place carbonated, fizzy drinks in the freezer compartment for a long time, as this can lead to an increase in pressure inside a container, and, as a result, the explosion of the container itself and damage to the refrigerator.
Do not store flammable liquids, various essential oils, liquid gases, glue in the freezer. Do not store medicines and reagents that require a certain storage temperature in the freezer.
To freeze fresh food, it is recommended to divide them into small portions or parts, this will allow them to freeze quickly and completely, as well as to defrost quickly in portions. Each serving should be used at a time.
Follow the recommendations for the storage of products indicated on the packaging by the manufacturer.
Store food in sealed (airtight) aluminum packaging or plastic food wrap. This will reduce the evaporation of moisture.
Do not allow fresh non-frozen foods to touch already frozen foods to avoid heating (temperature rise) of the latter.
Leave space between the stored products, as otherwise a uniform circulation of cold air will not be maintained, which will lead to a violation of the freezing process.
Place the purchased frozen product in the freezer compartment as soon as possible.
Do not re-freeze previously defrosted products. This can cause health problems such as food poisoning.
After placing fresh food in the freezer compartment, it usually takes 24 hours to freeze them.
When frozen removing ice from the freezer compartment, do not touch it, as ice can cause frostbite.
Energy saving
To save electricity, we advise you to follow the following recommendations:
- do not open the refrigerator and freezer doors often and do not keep them open for a long time;
- do not place the refrigerator near heat sources (direct sunlight, stoves, radiators, etc.);
• do not set the temperature lower (colder) than you actually need; - do not place recently cooked (warm) food into the refrigerator, as the temperature inside the refrigerator rises sharply, this leads to more intensive operation of the compressor, and, as a result, increased energy consumption;
• install the refrigerator in well-ventilated areas; - if you place drinks and liquid products make sure they are closed. Otherwise, there will be an increased level of humidity inside the refrigerator, so the operating time of the refrigerator will be increased;
- when placing food and beverages, the door should be opened at minimal angle;
- the door seal must be clean and flexible. In case of wear of the seals, it is necessary to replace them.

ATTENTION!
The refrigerator must be disconnected from the power supply before and during cleaning, otherwise there is a risk of electric shock!
For hygienic reasons, it is recommended to clean the refrigerator/freezer at least once every 2 months.
External cleaning
To maintain a good appearance of the refrigerator, it must be cleaned regularly.
- Wipe the digital display and control panel with a clean soft cloth.
- Apply water on a cloth (rag), not on the refrigerator. This will ensure an even distribution of moisture on the surface.
- Apply a mild detergent to the doors, handles and body of the refrigerator and wipe dry with a soft cloth.

ATTENTION!
Do not use sharp objects for cleaning, as they may scratch the surface of the refrigerator.
Do not use solvents, car detergents, bleach, essential oils, abrasive cleaners or organic solvents such as benzene to clean the refrigerator. They can damage the surface and/or cause a fire.
Internal cleaning
You should clean the refrigerator regularly. Wipe the refrigerator from the inside with a weak sodium bicarbonate solution and rinse with warm water using a wrung sponge or rag. Wipe all surfaces dry before placing shelves, drawers and baskets. Thoroughly wipe all the walls and removable parts.
Despite the fact that this refrigerator is equipped with an automatic defrosting function, a small layer of frost can nevertheless form on the walls of the freezer compartment after frequent or prolonged opening of the door. If the frost layer is too large, follow these steps:
- Remove all products, shelves, accessories, baskets, disconnect the refrigerator from the power supply and leave the doors open. Ventilate the room to speed up the defrosting process.
- Upon completion of defrosting, clean the freezer compartment according to the above recommendations.

ATTENTION!
Only after the inner surface of the refrigerator becomes completely dry, it can be connected to the power supply.
Cleaning of door seals
Make sure that the door seals are always clean. Sticky food and beverages touching the seal may cause the seal to stick to the refrigerator door frame and tear the seal when the door is opened. Wipe the seal with a mild detergent and warm water, then wipe dry.

ATTENTION!
Only after the refrigerator door seals are completely dry it can be connected to the power supply.
Replacement of LED lighting

ATTENTION!
The user shall not replace the LED bulb by himself! If it is damaged, please, contact the specialists for help using the toll-free hotline number.
To replace the LED light bulb, the following steps should be taken:
- Turn off the refrigerator. Remove the lid with the LED bulb by pressing up and away from yourself.
- Hold the lid with the LED bulb with one hand and press the latch with the other.
- Replace the LED bulb and fix it
ATTENTION!
Replacing the lamp by an unqualified person may result in injury or significant damage to the product.
Defrosting
This refrigerator is equipped with a No Frost automatic defrosting system. Thus, during defrosting, the formed plaque from ice and frost flows into a special tray, from which, in turn, it evaporates afterward.
TROUBLESHOOTING
ATTENTION!
Do not try to repair the refrigerator yourself. If you were unable to fix the problem by following the steps below, contact a qualified electrician, service manager or the store where the refrigerator was purchased.
| Problem Reasons/Solutions | |
| The refrigerator is not working. | ·There is no electricity.·The plug is poorly inserted into the outlet.·The socket is malfunctioning. |
| The temperature inside refrigerator compartments is too high. | ·The doors of the compartments are not tightly closed, the seals on the doors are damaged.·The thermostat is in the wrong position.·Too many products are placed inside compartments. |
| The products in the refrigerator compartment are overcooled. | ·The thermostat is in the wrong position.·The products are in contact with the back wall of refrigerator. |
| The compressor is constantly running. | ·Refrigerator doors do not close tightly and open too often.·The room temperature is too high.·The thermostat is in the wrong position. |
| The refrigerator is too noisy when working. | ·The refrigerator is not aligned.·The refrigerator touches foreign objects (for example, surrounding furniture).·The refrigerant circulating inside the cooling system may make a low noise, even if the compressor is not working. Don't worry, it is normal. |
| Condensation appeared on the surface of the refrigerator. | ·Condensation may occur due to changes in room temperature. Remove the condensate. If the problem appears all the time, contact the service center. |
| The surface of the refrigerator is heating up. | ·The compressor is not working. Turn the thermostat to the maximum cooling position and wait a few minutes. If you do not hear any noise, it means that the compressor is not working. It is necessary to contact the service center. |
Error codes on the display
In case of an error a corresponding code will appear on the display (for example, E0, E1, E2, etc.).
Please contact your local authorized service center.
An increase in the temperature of the walls of the device during operation is absolutely normal. The heating element (heat exchanger) in models with NoFrost system is built into the side walls of the refrigerator cabinet and closed with a sheet of metal. When the compressor is running, the side walls heat up – the tubes remove heat from the refrigerator compartments and heat the metal. The tubes in the walls heat up the most when the refrigerator is running at full capacity in order to reduce the temperature inside compartments as quickly as possible. There is a lot of heat coming to the tubes, and they get very hot. After the refrigerator lowers the temperature to working temperature (usually it takes several hours), the tubes will start to cool down.
DISPOSAL OF THE DEVICE
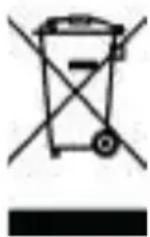
Disposal of refrigeration equipment is carried out in accordance with the rules and regulations adopted by the local administration. The main stages of disposal:
- disconnect the plug from the power supply and cut the power cord;
- the housing, doors and side parts of the equipment are subject to disposal at landfills of household and industrial waste according to
the rules and requirements established by the local administration;
- burning of the thermal insulation of the housing and side parts is strictly prohibited due to the release of toxic substances during burning;
- compressor, start-up relay, wiring, heat exchangers, aluminum profile doors and fans can be disposed of as scrap of ferrous and non-ferrous metals at metal processing plants;
- glass elements are disposed of at specialized glass recycling plants;
- lamps are disposed of at the appropriate specialized enterprises.
Proper disposal of refrigeration equipment after the end of its service life (operation) will help prevent potentially harmful effects on the environment and human health.
This product contains components made of combustible material and cannot be disposed of together with ordinary household garbage (waste). For more detailed information about the disposal of equipment, contact the city administration or the disposal service.
Dear customer!
This document in any way does not limit the rights of consumers defined by law, but supplements and clarifies the obligations stipulated by law, assuming the existence between the parties of an agreement or a contract.
Correct filling of the warranty card
Carefully read the warranty card and make sure that it is filled out correctly and has the Seller's stamp. In the absence of the Seller's stamp and the date of sale (or a cash receipt with the date of sale), the warranty period of the product is calculated from the date of its production.
It is forbidden to make any changes to the Warranty Card, as well as to erase or rewrite any data specified in it.
Appearance and completeness of the product
Carefully check the appearance of the product and its completeness. Make all claims regarding the appearance and completeness of the product to the Seller when buying the product.
Service life
The service life of HIBERG products is 7 years from the date of sale through the retail network. During this time, the manufacturer provides the consumer with the opportunity to use the goods for their intended purpose, as well as the production and supply of spare parts to commercial and repair enterprises.
Warranty
The warranty period is 2 years from the date of sale through a retail chain, but no more than 3 years from the date of production.
The month and year of manufacture are encrypted in the serial number and indicated on the technical label.
WARRANTY REPAIRS ARE NOT CARRIED OUT IN THE FOLLOWING CASES:
- if the product was used for purposes that do not correspond to its intended purpose;
- if the malfunction was caused by careless operation, improper transportation or storage conditions, as a result of which the product received mechanical damage;
- if the failure occurred as a result of natural wear of components;
- if there are damages caused by the penetration of foreign objects, liquids, etc. into the product.;
- if there is evidence of self-opening of the product or its repair outside the warranty service center;
- in case of malfunctions caused by overload, resulting in deformation or failure of internal mechanisms, as well as due to surges or mismatch of the mains voltage;
- if there has been natural wear of the outer coating, plastic and metal parts and other materials that are not involved in the direct mechanical operation of the product.
The cost of repair is paid by the buyer if:
• the warranty period has expired;
- the warranty does not apply to this type of malfunction;
- an examination is required to determine the type of breakdown, as a result of which it is proved that the warranty does not apply to this type of malfunction.
The manufacturer reserves the right to make changes to the list of authorized service centers without prior notice, including changes to addresses and existing phone numbers.
IF YOU HAVE ANY QUESTIONS ABOUT WARRANTY SERVICE OR YOU WANT TO PURCHASE SPARE PARTS OR ACCESSORIES FOR HIBERG PRODUCTS, PLEASE CONTACT ANY AUTHORIZED SERVICE CENTER OR USE A SINGLE SERVICE PHONE NUMBER:
8-800-700-12-25
When contacting the service center, please let them know the following:
- The nature of the failure (as accurately as possible)
- Model number
- Serial number
- Buyer's name, address, phone number
- Date of purchase
- A convenient date for a specialist's visit
Manufacturer: CHANGHONG MEILING CO., LTD.
Address: No.2163, Lianhua Road, Economy-Technology Development Zone,
Hefei, Anhui Province, China
Made in China
Importer: LLC "Diorit-Tekhnis"
Address: 152 Voroshilova str., Kamensk-Shakhtinsky, Rostov region, 347800, Russia
Tel: +7 (863) 203-71-01.02.03, +7 (86365) 4-05-05
e-mail: info@hiberg.ru
Certificate of Conformity N° EA3C C-CN.HA46.B.03833/22, valid from 09.06.2022 to 08.06.2027
CE

www.hiberg.ru
WARRANTY CARD
The card is valid in the presence of all stamps and marks
Model N°
Date of purchase: ____
Serial number: ____
Full name and phone number of the buyer: ____
Name and legal address of the seller's organization: ____
Seller's signature: ____
The seal of the selling organization: ____
These tear-off cards are filled in by a representative of the service center that repairs the product. After the repair, this warranty card (with the exception of the completed tear-off card) must be returned to the owner.
CARD #1
Model N°
Serial number: ____
Date of receipt of the product for repair: ____
Date of issue of the product: ____
Type of repair:
Seal
CARD #2
Model N°
Serial number: ____
Date of receipt of the product for repair: ____
Date of issue of the product: ____
Type of repair:
Seal
CARD #3
Model N°
Serial number: ____
Date of receipt of the product for repair: ____
Date of issue of the product: ____
Type of repair:
Seal
HIBERG
THE PRIME CHOICE

Refrigerators

■ Washing machines

Chest freezers
Dishwashers
Hoods

■ Microvawe ovens

Hobs

Water dispensers

TV-sets

■ Meat grinders

Stand mixers
Blenders
Ovens
■ Mist fans Multi-cookers

□



- ГАРАНТИЙНЫЙ ТАЛОН
- WELCOME TO THE WORLD OF HIBERG
- CUSTOMER SUPPORT AND SERVICE
- SAFETY PRECAUTIONS
- CAUTION
- CHILDREN AT HOME
- ATTENTION
- GENERAL SAFETY AND DAILY OPERATION RULES
- SAFETY WHEN WORKING WITH ELECTRICITY
- REFRIGERANT AND RISK OF FIRE
- INSTALLATION AND PREPARATION FOR WORK
- INSTALLATION AND CONNECTION SCHEME
- REFRIGERATOR LEVEL ADJUSTMENT
- AFTER INSTALLATION
- RE-HANGING OF DOORS
- TECHNICAL SPECIFICATIONS
- DEVICE SCHEME
- DEVICE CONTROL AND FUNCTIONS
- THE FIRST APPLICATION
- SELECTING THE OPERATING MODE
- SMART ECO» MODE
- VACATION» MODE
- FAST COOLING» MODE
- FAST FREEZE» MODE
- MEMORY» FUNCTION
- ALARM» FUNCTION
- AIR SUPPLY ADJUSTMENT (FRESH FOOD STORAGE ZONE)
- RECOMMENDATIONS FOR USAGE
- USAGE OF THE REFRIGERATOR COMPARTMENT
- DOOR SHELVES
- VEGETABLES AND FRUITS CRISPERS
- GLASS SHELVES
- RECOMMENDATIONS FOR THE LOCATION OF PRODUCTS
- COOL ZONE
- COLD ZONE FROM 2 TO 5°C
- FRESHNESS ZONE
- USAGE OF THE FREEZER COMPARTMENT
- ENERGY SAVING
- EXTERNAL CLEANING
- INTERNAL CLEANING
- CLEANING OF DOOR SEALS
- REPLACEMENT OF LED LIGHTING
- DEFROSTING
- TROUBLESHOOTING
- ERROR CODES ON THE DISPLAY
- DISPOSAL OF THE DEVICE
- DEAR CUSTOMER
- CORRECT FILLING OF THE WARRANTY CARD
- APPEARANCE AND COMPLETENESS OF THE PRODUCT
- SERVICE LIFE
- WARRANTY
- WARRANTY REPAIRS ARE NOT CARRIED OUT IN THE FOLLOWING CASES
- THE COST OF REPAIR IS PAID BY THE BUYER IF
- WHEN CONTACTING THE SERVICE CENTER, PLEASE LET THEM KNOW THE FOLLOWING
- MADE IN CHINA
- WARRANTY CARD
- CARD #1
- CARD #2
- CARD #3
- HIBERG
- THE PRIME CHOICE
Brand : Hiberg
Model : RFC-400DX NFGB
Category : Refrigerator