
UX-H350 - Radio JVC - Free user manual and instructions
Find the device manual for free UX-H350 JVC in PDF.


| Product Type | Stereo System (CD/Cassette/Radio) |
| Brand | JVC |
| Model | UX-H350 |
| Output Power | 15 W per channel RMS (4 Ω, 1 kHz, 10% THD) |
| Speaker Type | Full range, bass-reflex |
| Speaker Driver | 10 cm cone |
| Speaker Impedance | 4 Ω |
| Speaker Frequency Range | 100 Hz – 15 kHz |
| Speaker Power Handling | 15 W |
| Main Unit Dimensions (W x H x D) | 152 mm x 233 mm x 292 mm |
| Speaker Dimensions (W x H x D) | 147 mm x 233 mm x 189 mm |
| Main Unit Weight | 3.9 kg |
| Each Speaker Weight | 1.9 kg |
| Power Supply | AC 110-127 V / 220-240 V (adjustable), 50/60 Hz |
| Power Consumption (Operation) | 40 W |
| Power Consumption (Standby) | 2 W |
| FM Tuning Range | 87.50 – 108.00 MHz (50 kHz steps) or 87.5 – 108.0 MHz (100 kHz steps) |
| AM Tuning Range | 531 – 1710 kHz (9 kHz steps) or 530 – 1710 kHz (10 kHz steps) |
| Disc Playback | CD, CD-R, CD-RW (audio CD and MP3 files) |
| Cassette Playback | Type I tape, auto reverse, reverse mode |
| Recording | Cassette recording from CD, Tuner, AUX; Disc synchronized recording |
| Tuner Presets | 25 FM + 15 AM |
| Timer Functions | Daily Timer, Recording Timer, Snooze Timer, Sleep Timer |
| Audio Inputs | AUX (mini stereo jack) |
| Headphone Output | Yes (3.5 mm stereo jack) |
| Remote Control | Yes (supplied with batteries) |
| Supplied Accessories | AM loop antenna, AC plug adaptor, remote control, batteries |
Frequently Asked Questions - UX-H350 JVC
User questions about UX-H350 JVC
0 question about this device. Answer the ones you know or ask your own.
Ask a new question about this device
Download the instructions for your Radio in PDF format for free! Find your manual UX-H350 - JVC and take your electronic device back in hand. On this page are published all the documents necessary for the use of your device. UX-H350 by JVC.
USER MANUAL UX-H350 JVC
UX-H350 – Consists of CA-UXH350 and SP-UXH350


INSTRUCTIONS
CAUTION—(STANDBY/ON) button!
Disconnect the mains plug to shut the power off completely (all lamps and indications go off). The (STANDBY/ON) button in any position does not disconnect the mains line.
- When the unit is on standby, the STANDBY lamp lights red.
- When the unit is turned on, the STANDBY lamp goes off.
The power can be remote controlled.
CAUTION
To reduce the risk of electrical shocks, fire, etc.:
- Do not remove screws, covers or cabinet.
- Do not expose this appliance to rain or moisture.
CAUTION
- Do not block the ventilation openings or holes. (If the ventilation openings or holes are blocked by a newspaper or cloth, etc., the heat may not be able to get out.)
- Do not place any naked flame sources, such as lighted candles, on the apparatus.
- When discarding batteries, environmental problems must be considered and local rules or laws governing the disposal of these batteries must be followed strictly.
- Do not expose this apparatus to rain, moisture, dripping or splashing, and do not place objects filled with liquids, such as vases, on the apparatus.
IMPORTANT FOR LASER PRODUCTS
- CLASS 1 LASER PRODUCT
- CAUTION: Do not open the top cover. There are no user serviceable parts inside the unit; leave all servicing to qualified service personnel.
- CAUTION: Visible and invisible laser radiation when open and interlock failed or defeated. Avoid direct exposure to beam.
- REPRODUCTION OF LABEL: CAUTION LABEL, PLACED INSIDE THE UNIT.

CAUTION: Proper Ventilation
To avoid risk of electric shock and fire, and to prevent damage, locate the apparatus as follows:
1 Front:
No obstructions and open spacing.
2 Sides/ Top/ Back:
No obstructions should be placed in the areas shown by the dimensions below.
3 Bottom:
Place on the level surface. Maintain an adequate air path for ventilation by placing on a stand with a height of 10 cm or more.
Front view
Side view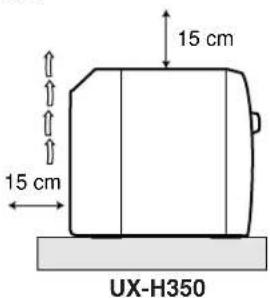
We would like to thank you for purchasing one of our JVC products. Before operating this unit, read this manual carefully and thoroughly to obtain the best possible performance from your unit, and retain this manual for future reference.
About This Manual
This manual is organized as follows:
- This manual mainly explains operations using the buttons on the remote control. You can use the buttons both on the remote control and on the unit for the same operations if they have the same or similar names (or marks), unless mentioned otherwise.
- Basic and common information that is the same for many functions is grouped in one place, and is not repeated for each procedure. For instance, we do not repeat the information about turning on/off the unit, setting the volume, changing the sound effects, and others, which are explained in the section “Common Operations” on pages 9 and 10. The following symbols are used in this manual:

Gives you warning and caution to prevent damage or risk of fire/electric shock. In addition, we put information here about conditions which will prevent getting the best possible performance from the unit.

Gives you information and hints you need to know.
Precautions
Installation
Install in a place which is level, dry and neither too hot nor too cold—between 5°C and 35°C. Install the unit in a location with adequate ventilation to prevent internal heat buildup. Leave sufficient distance between the unit and the TV. Keep the speakers away from the TV to avoid interference with TV.

DO NOT install the unit in a location near heat sources, or in a place subject to direct sunlight, excessive dust or vibration.
Power sources
When unplugging the unit from the wall outlet, always pull on the plug, not the AC power cord.

DO NOT handle the AC power cord with wet hands.
Moisture condensation
Moisture may condense on the lenses inside the unit in the following cases:
• After starting to heat the room. - In a damp room. - If the unit is brought directly from a cold to a warm place. Should this occur, the unit may malfunction. In this case, leave the unit turned on for a few hours until the moisture evaporates, unplug the AC power cord, then plug it in again.
Others
- Should any metallic object or liquid fall into the unit, unplug the AC power cord and consult your dealer before operating any further.
- If you are not going to operate the unit for an extended period of time, unplug the AC power cord from the wall outlet.
- Rating label is placed on the exterior of the bottom.

DO NOT disassemble the unit since there are no user serviceable parts inside.
If anything goes wrong, unplug the AC power cord and consult your dealer.
Location of the Buttons and Controls .... 3
Main Unit 3
Remote Control 5
Getting Started 6
Unpacking 6
Connecting AM and FM Antennas 6
Connecting Speakers 6
Connecting Other Equipment 7
Adjusting the Voltage Selector 7
Putting the Batteries into the Remote Control 8
Common Operations 9
Setting the Clock 9
Turning On the Power 9
Turning Off the Unit Automatically (Auto Standby) 9
Selecting the Source 10
Adjusting the Volume 10
Fade-Out Muting (FADE MUTING) 10
Selecting the Sound Modes 10
Reinforcing the Bass Sound 10
Checking the Clock Time During Play 10
Playing Back Discs 11
Playing Back the Entire Disc—Normal Play 11
Basic Disc Operations 12
Programming the Track Playing Order—Program Play...... 12
Repeating Tracks—Repeat Play 13
Playing at Random—Random Play 14
Displaying the Remaining Time during Playback 14
Playing Back Tapes.... 15
Playing Back a Tape 15
Listening to FM and AM Broadcasts...... 16
Setting the Tuner Interval Spacing 16
Tuning in to a Station 16
Presetting Stations 16
Tuning in to a Preset Station 17
Using an External Equipment 17
Listening to the External Equipment 17
Recording 18
Recording on a Tape 18
Recording Discs—Disc Synchronized Recording .... 19
Using the Timers 20
Using Daily Timer and Recording Timer 20
Using Snooze Timer 21
Using Sleep Timer 22
Maintenance.... 23
Troubleshooting 24
Specifications 24
Become familiar with the buttons and controls on your unit.
Main Unit
Top view
Front view

Display window
See pages in parentheses for details.
Main unit
1Disc cover (11) 2△ OPEN (disc cover open) (11) 3DAILY TIMER/SNOOZE button (21) 4 Remote sensor (5) 5STANDBY lamp (9) 6 (STANDBY/ON) button (9) 7 Source buttons
- CD ▷/■, TAPE ◁, FM/AM, AUX
Pressing one of these buttons also turns on the unit.
8 PHONES jack (10) 9 Multi control buttons
- DOWN ◀◀◀, ■, UP ▶▶▶
10 Cassette holder (15, 18, 19) 11Display window 12VOLUME + / - control (10, 16) 13AUX jack (7, 17) 14REC button (18, 19) 15 PUSH OPEN button (15, 18)
Display window
1DAILY 1/2/3 (timer number) indicators 2 (Emer) indicator 3ON/OFF (timer on-time/off-time) indicators 4REC (recording timer) indicator 5 (group folder) indicator 6 SLEEP indicator 7SNOOZE indicator 8FM mode indicators
• MONO, ST (stereo)
9MP3 indicator 10 SOUND indicator 11 BASS indicator 12REC (recording) indicator 13◀▶ (tape direction) indicator 14Repeat indicators
•, ABL, GR. (group)
15 (reverse mode) indicator 16PRGM (program) indicator 17 RANDOM indicator 18 Main display 19 Remain indicators
- TOTAL, REMAIN
20A. STANDBY indicator
21 Frequency indicators
- MHz, kHz
Remote Control
See pages in parentheses for details.

1 STANDBY/ON 6/10/ton (9, 21) 2 SLEEP button (22) 3 CLOCK/TIMER button (9, 20) 4 SET button (9, 16, 20, 21) 5 CANCEL button (20, 21) 6 Source buttons - CD ▶/Ⅱ, TAPE ◀▶, FM/AM, AUX. Pressing one of these buttons also turns on the unit. 7 RANDOM button (14) 8 PROGRAM button (12, 13) 9 Multi control buttons - PRESET GROUP UP, PRESET GROUP DOWN 10 SOUND/HBS button (10) 11 BEAT CUT button (18) 12 DISPLAY button (10) 13 A. (auto) STANDBY button (9) 14 FM MODE button (16) 15 Number buttons (12, 17) 16 OVER button (12, 17) 17 REMAIN button (14) 18 REPEAT button (13) 19 VOLUME + / - buttons (10, 21) 20 FADE MUTING button (10) 21 REV. (reverse) MODE button (15, 18, 19)


When using the remote control, point it at the remote sensor on the front panel.
Unpacking
After unpacking, check to be sure that you have all the following items.
The number in parentheses indicates the quantity of each piece supplied.
• AM loop antenna (1) - AC plug adaptor (1) - Remote control (1) - Batteries (2)
If any item is missing, consult your dealer immediately.
Connecting AM and FM Antennas

1 Connect the supplied AM loop antenna to the AM LOOP terminal.
Place the antenna away from the unit and adjust its position for the best reception.
2 Adjust the position for the FM antenna for the best reception.

For better reception of both FM and AM
- Make sure the antenna conductors do not touch any other terminals or connecting cords.
- Keep the antennas away from metallic parts of the unit, connecting cords, and the AC power cord.
Connecting Speakers
You can connect the speakers using the speaker cords.

1 Hold the clamp of the speaker terminal. 2 Insert the end of the speaker cord into the terminal.
Match the polarity of the speaker terminals: red cord to ⊕ and black cord to ⊖.
3 Release your finger from the clamp.
IMPORTANT:
- Use only speakers with the same speaker impedance as indicated by the speaker terminals on the rear of the unit.
- DO NOT connect more than one speaker to one speaker terminal.
To remove the speaker grilles
The speaker grilles are removable as the illustration below.

To remove the speaker grille, insert your fingers around the projection at the top of the speaker grille, then pull gently towards you while holding the side.
Do the same for the rest of projections one at a time.
To attach the speaker grille, put the projections of the speaker grille into the holes of the speaker.
Connecting Other Equipment
To connect an audio equipment
You can connect audio equipment—used only as a playback device.

- DO NOT connect any equipment while the power is on.
- DO NOT plug in any equipment until all connections are complete.
For playing other equipment through this unit,
connect between the audio output jacks on the other equipment and AUX jack by using audio cords with mini plugs (not supplied).
![graph LR A["AUX"] --> B["To audio output"] B --> C["OR"] C --> D["To audio output"] D --> E["To Audio equipment"]](/content/2026/05/1039914/images/4977e8d3b0db014336474901b8c63413eac0d352446a0376cc283de09eab1c11.jpg)
When the audio equipment has pin jacks for audio output: Be sure that the pin plugs of the audio cords are colored—white plugs and jacks are for left audio signals, and red ones for right audio signals.
Adjusting the Voltage Selector
Before plugging in the unit, set the correct voltage for your area with the voltage selector on the rear of the unit.

Use a screwdriver to move the voltage selector so the voltage number is the same as the voltage where you are plugging in the unit. (See the back cover page.)
Putting the Batteries into the Remote Control
Insert the batteries—AAA/UM-4/R03—into the remote control by matching the polarity (+ and −) on the batteries with the + and − marking on the battery compartment. When the remote control can no longer operate the unit, replace both batteries at the same time.
1
2
3

- DO NOT use an old battery together with a new one.
- DO NOT use different types of batteries together.
- DO NOT expose batteries to heat or flame.
- DO NOT leave the batteries in the battery compartment when you are not going to use the remote control for an extended period of time. Otherwise, the remote control will be damaged from battery leakage.
NOW you are ready to plug in the unit.
IMPORTANT:
Be sure to check that all connections have been made before plugging in the power cord.
Setting the Clock
Before operating the unit any further, first set the unit's clock.
When you plug in the power cord, "0:00" starts flashing on the display.
You can set the clock when the unit is either turned on or in standby mode.
On the remote control ONLY:
1 Press CLOCK/TIMER.
The hour indication starts flashing.


2 Press UP or DOWN to adjust the hour, then press SET.
- When you press and hold UP or DOWN, the hour indication changes continuously.
The minute indication starts flashing.

![graph TD A["IF"] --> B["COLD"] B --> C["DRAIN"] C --> D["SET"]](/content/2026/05/1039914/images/0e0f4509879f3633c06f3009347bee4ec2cdc330abcd9eeda9f275ba0a1c99e4.jpg)
- The clock is working even while setting.
3 Press UP or DOWN to adjust the minute, then press SET.
- When you press and hold UP or DOWN, the minute indication changes continuously.
The built-in clock starts.
7:30
![graph TD A["SET"] --> B["Control Signals"] B --> C["Set Input"] C --> D["Output"]](/content/2026/05/1039914/images/2e097ca55a171b3bc376c3f507f95ad053b5fae67827a9435516f282753cef3a.jpg)

- When you unplug the AC power cord or if a power failure occurs The clock is reset to "0:00." If this happens, set the clock again.
- The clock may gain or lose 1 to 2 minutes per month If this happens, reset the clock.
To adjust the clock
On the remote control ONLY:
1 Press CLOCK/TIMER repeatedly to show the current time indication. The hour indication starts flashing.

Repeat steps 2 and 3 on the left column.
Turning On the Power
To turn on the unit, press STANDBY/ON ⏻/I. The STANDBY lamp on the unit goes off.

- When you press the source button—CD ▶/II, TAPE ◀▶, FM/AM and AUX—the unit automatically turns on.
To turn off the unit (standby), press STANDBY/ON ⊕/I again.
The STANDBY lamp on the unit lights red.
- “0:00” flashes on the display until you set the built-in clock. After setting the clock, the clock time will appear on the display while the unit is in standby mode.
- A little power is always consumed even while the unit is in standby mode.
To switch off the power supply completely, unplug the AC power cord from the AC outlet.
Turning Off the Unit Automatically (Auto Standby)
Using Auto Standby, the unit automatically turns itself off (on standby) about 3 minutes after playing back a disc or a tape.
- You can also turn off the unit automatically by using the Sleep Timer. (See page 22.)
On the remote control ONLY:
To activate Auto Standby, press A.STANDBY. The A.STANDBY indicator appears on the display.

- When the playback is stopped, the A.STANDBY indicator starts flashing on the display.
To deactivate Auto Standby, press A.STANDBY again. The A.STANDBY indicator goes off.
Selecting the Source
To select the source, press CD ▶/II, TAPE ◀▶, FM/AM, or AUX.
- When you select CD as the source, playback starts automatically.
To operate the CD player, see pages 11 to 14.
To operate the tape deck, see page 15.
To operate the tuner (FM or AM), see pages 16 and 17.
To record on a tape, see pages 18 and 19.
To use an external equipment, see page 17.
Adjusting the Volume
You can adjust the volume level only while the unit is turned on. The volume level can be adjusted between “VOL MIN,” “VOL 1” – “VOL 29,” and “VOL MAX.”
- The volume level has no effect on recording.
To increase the volume, press VOLUME + (or turn VOLUME + / - control clockwise on the unit).
To decrease the volume, press VOLUME – (or turn VOLUME + / – control counterclockwise on the unit).
- When you press and hold either button, you can change the volume level continuously.


For private listening
Connect a pair of headphones to the PHONES jack. No sound comes out of the speakers. Be sure to turn down the volume before connecting or putting on the headphones.

DO NOT turn off (standby) the unit with the volume set to an extremely high level; Otherwise, the sudden blast of sound can damage your hearing, speakers and/or headphones when you turn on the unit or start playing any source. REMEMBER you cannot adjust the volume level while the unit is in standby mode.
Fade-Out Muting (FADE MUTING)
On the remote control ONLY:
Press FADE MUTING.
The volume level decreases to “VOL MIN,” and “MUTING” appears on the display.

To release muting, press FADE MUTING again. The volume level resumes to the previous level.
Selecting the Sound Modes
You can select one of the 4 sound modes.
- This function also affects the sound from headphones.
- This function only affects the playback sound, and does not affect your recording.
On the remote control ONLY:
To select the sound modes, press SOUND/HBS repeatedly.
• Each time you press the button, the sound mode changes as follows:

![graph LR A["ROCK"] --> B["POP"] B --> C["CLASSIC"] C --> D["JAZZ"] D --> E["FLAT (Canceled)"] E --> A](/content/2026/05/1039914/images/56a0ee7b45ee7b060e59ca9f1c86b8ab02cbfa6b5dc80fc7e48135cba7c6554b.jpg)
ROCK: Powerful sound emphasizing treble and bass.
POP: More presence in the vocals and midrange.
CLASSIC: Enriched sound with fine treble and ample bass.
JAZZ: Accented lower frequencies for jazz-type music.
FLAT: Equalizer effect is canceled.

When the sound mode is activated, the SOUND indicator lights up on the display.
Reinforcing the Bass Sound
You can boost the bass sound.
- This function only affects the playback sound, and does not affect your recording.
On the remote control ONLY:
Press and hold SOUND/HBS.
• Each time you press and hold the SOUND/HBS, HBS turns on and off.


When the HBS is activated, the BASS indicator lights up on the display.
Checking the Clock Time During Play
On the remote control ONLY:
Press DISPLAY.
• Each time you press the button, the display changes alternately between the clock indication and the normal indication. After changing the display to the clock indication, operating any button or control also changes the display to the normal indication.

This unit has been designed to play back the following discs—CD, CD-R, and CD-RW.
You can play back discs containing tracks in music CD format or MP3 files in ISO 9660 format.
- In this instruction, we call a disc recorded with MP3 files an “MP3 disc,” and “file” is also referred to as “track.”
When playing CD-Rs or CD-RWs
- Before playing CD-Rs or CD-RWs, read their instructions or cautions carefully.
- User-edited CD-Rs (CD-Recordable) and CD-RWs (CD-ReWritable) can be played only if they are already “finalized.”
- This unit supports “multi-session” discs (up to 5 sessions).
- This unit cannot play “packet write” discs.
- Some CD-Rs or CD-RWs may not play on this unit because of their disc characteristics, damage or stain on them, or if the player's lens is dirty.
- CD-RWs may require a longer readout time. This is because the reflectance of CD-RWs is lower than for regular discs.
Notes for MP3 files
- The player can only recognize files with “MP3” or “mp3” as the extensions, which can be in any combination of upper and lower case. The file name needs to be up to 20 characters.
- This unit recognizes files and folders on a disc in the following conditions:
- up to 640 MP3 files.
- up to 256 folders (including the root folder).
- up to 8th layers (including the root folder).
- It is recommended that you record your material at a 44.1 kHz sampling rate, using the 128 kbps data transfer rate.
- Some MP3 files or discs may not be played back because of their characteristics or recording conditions.
- MP3 discs require a longer readout time than normal discs because of the complexity of the folder/file configuration.
- MP3i and MP3 Pro are not available.
General notes
In general, you will have the best performance by keeping your discs and the mechanism clean.
- Store discs in their cases, and keep them in cabinets or on shelves.
- Keep the unit's disc cover closed when not in use.
- Continued use of irregular shape discs (heart-shape, octagonal, etc.) can damage the unit.


Playing Back the Entire Disc—Normal Play
1 Press △ OPEN on top of the unit.
The disc cover opens. - You can insert a disc while listening to another source.
2 Place a disc correctly with its label side up.

3 Close the disc cover gently.
4 Press CD ▶/II.
The unit automatically turns on and the source changes to the CD player.
After loading the disc, the first track of the disc starts playing.

When playing audio CD: Current track number Elapsed playing time
When playing MP3 disc: MP3 indicator Current track number Elapsed playing time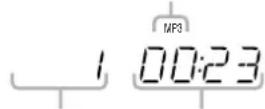
- The disc automatically stops when the last track has finished playing.

While "READING" appears on the display
You cannot make any operation until the unit finishes reading the disc.

While playing back an MP3 disc
ID3 Tag information (the name of the title, artist, and album up to 30 characters) will be shown on the display. When the name is too long to be displayed at once, it is scrolled.
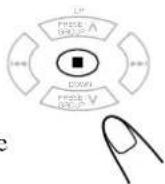
To stop playing, press ■.
The total track (or group) number and total playing time appear on the display.

When stop playing audio CD: Total track number Total playing time
When stop playing MP3 disc: Group folder indicator Total group number

- Total playing time does not appear when MP3 disc is loaded.
To remove the disc, press OPEN on the unit, then take out the disc by holding it at the edges while pressing the unit's pivot lightly.

- If the disc cannot be read correctly (because it is scratched, for example) or an unreadable CD-R or CD-RW is inserted, playback will not start.
- If no disc is inserted, "NO DISC" appears on the display.

DO NOT open the disc cover by hand as it will be damaged.
Basic Disc Operations
While playing a disc, you can do the following operations.
To stop playing for a moment
During play, press CD ▶/II. While pausing, current track number and elapsed playing time flash on the display.

To resume playing, press CD ▶/II again.
To go to another track
Before or during play, press ▶▶| or |◀◀ (or UP ▶▶| or DOWN |◀◀ on the unit) repeatedly.

- ▶▶▶1 (UP ▶▶▶1): Skips to the beginning of the next or succeeding tracks.
- |◀◀ (DOWN |◀◀): Goes back to the beginning of the current or previous tracks.
To go to another track directly using the number buttons
On the remote control ONLY:
Pressing the number button(s) before or during play allows you to start playing the track number you want.
① ② ③
Ex.: For track number 5, press 5. For track number 15, press OVER, then press 1, 5. For track number 20, press OVER,
5 6
8 9
0 OVER

then press 2, 0.
(For MP3 disc only)
For track number 20, press OVER, then press 0, 2, 0.
For track number 156, press OVER, then press 1, 5, 6.
To locate a particular point in a track
During play, press and hold ▶▶| or |◀◀ (or UP ▶▶| or DOWN |◀◀ on the unit).
•▶▶| (UP ▶▶▶):
Fast-forwards the tracks.
• |◀◀ (DOWN |◀◀):
Fast-reverses the tracks.

While playing back an MP3 disc
This function is not available.

Programming the Track Playing Order —Program Play
You can arrange the order in which tracks play before you start playing. You can program up to 40 tracks.
On the remote control ONLY:
1 Place a disc.
- If the current source is not the CD player, press CD ▶/■, then ■ before going to the next step.
2 Press PROGRAM.
The PRGM (program) indicator appears on the display.


3 Press ▶▶| or |◀◀ to select the track number, then press PROGRAM.
Track number
PRGM
Program step number

You can also use the number button(s) to select a track number.
- For the operation of the number buttons, see "To go to another track directly using the number buttons" on the left column.
1
2
3
4
5
6
7
8
9
0
O

When you are programming from an MP3 disc, pressing PRESET GROUP ∧ or PRESET GROUP ∨ selects the first track of each group.
4 Repeat step 3 to program other tracks you want.
5 Press CD ▶/II. The tracks are played in the order you have programmed.


If you try to program a 41st track
“--FULL--” will appear on the display.
To stop playing, press ■.

To check the program contents
You can check the program contents by pressing PROGRAM repeatedly before or after playback.
To modify the program
Press PROGRAM repeatedly until the program step number you want to modify appears. Then follow step 3 of the programming procedure.
- Pressing 0 deletes the selected step.
To add tracks in the program, press PROGRAM repeatedly until "0" appears as the track number. Then follow step 3 of the programming procedure.
To clear the program
Press ■ before or after playback. The PRGM indicator disappears from the display and all the memory contents will be erased (resumes to Normal Play).
- The programmed tracks are also erased in the following cases:
- Pressing OPEN to open the disc cover.
- Turning off the unit.
- Changing the source.

During Program Play
Auto Standby function does not take effect.


Repeating Tracks—Repeat Play
You can have all the tracks, the program, or the individual track currently playing repeat as many times as you like.
On the remote control ONLY:
Press REPEAT repeatedly before or during playback.
• Each time you press the button, Repeat Play changes as follows, and the following repeat indicators light up on the display:


When playing back audio CD:
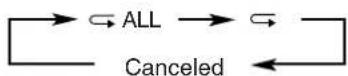
ALL: In Normal Play, repeats all the tracks. In Program Play, repeats all the tracks in the program. → : Repeats one track.
When playing back MP3 disc:

ALL: In Normal Play, repeats all the tracks. In Program Play and Random Play, repeats all the tracks in the program. GR.: In Normal Play, repeats all the tracks in a group. In Program Play and Random Play, this function is not available. → : Repeats one track. In Random Play, this function is not available.
To cancel Repeat Play, press REPEAT repeatedly until the repeat indicator goes off.

Playing at Random—Random Play
You can play the tracks at random.
On the remote control ONLY:
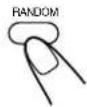
Press RANDOM.
The RANDOM indicator lights up on the display.
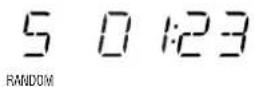
To exit from Random Play, press ■ or RANDOM.
The RANDOM indicator goes off.
- It is not possible to activate the Random Play function during Program Play.
Displaying the Remaining Time during Playback
You can display the remaining time of the current track/disc and the elapsed time of the current track/disc during playing.
On the remote control ONLY:
Press REMAIN repeatedly.

When playing back audio CD:
• Each time you press the button, the display changes as follows, and the following remain indicators light up on the display:

![graph TD A["REMAIN TOTAL REMAIN*"] --> B["(No Indication)"]](/content/2026/05/1039914/images/4d8c4c65f661394d8f403b553dbb5dd592ba68f5b69bcf8a0730106fbd439692.jpg)
REMAIN: Shows the remaining time of the current track.
TOTAL REMAIN: Shows the remaining time of the disc.
No indication: Shows the elapsed time of the current track.
* Remaining time of the disc (TOTAL REMAIN) will not be displayed in the following cases:
– During Random Play. – During Program Play.
When playing back MP3 disc:
• Each time you press the button, the display changes as follows:
![graph LR A["Normal indication"] --> B["ID3 Tag information*"] B --> C["Folder name**/file name"]](/content/2026/05/1039914/images/8549724c279ee985b1a8aab8d00fffc4152c1c0cb0049acd35ef24c6a2d5c61e.jpg)
* ID3 Tag information shows the name of the title, artist, and album in sequence. If the file does not have any information, "NO INFO" appears. ** When a file does not belong in any folder, "ROOT" appears.
Playing Back a Tape
You can play back type I tapes only.
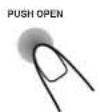
1 Press PUSH OPEN.
The cassette holder opens.

2 Put a cassette in with the exposed part of the tape down.

3 Close the cassette holder gently.
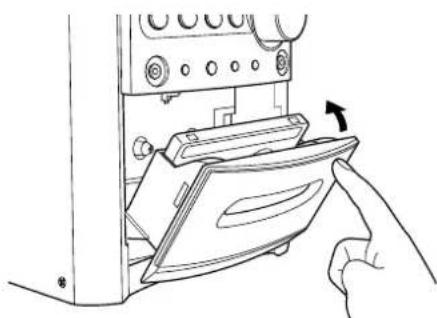
- When a tape is inside of the cassette holder, the tape direction indicator (▶) lights up on the display.
4 Press TAPE ◀ ▷.
Playback starts (if the unit has been on standby, the unit automatically turns on). The tape direction indicator (▶ or ◀) starts flashing slowly on the display.
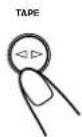
• Each time you press the button, the tape direction changes:
▶: plays the front side. ◀: plays the reverse side.
When the tape plays to the end, the deck automatically stops if the Reverse Mode is set to or . (See "To play both sides—Reverse Mode.")

If no cassette is inserted when you press TAPE ◀
"NO TAPE" appears on the display.
To stop playing, press ■.
To fast-wind to the left or to the right, press ▶▶▶ or ◀◀◀ (or UP ▶▶▶ or DOWN ◀◀◀ on the unit).
The tape direction indicator (▶ or ◀) starts flashing rapidly on the display.

To remove the cassette, press PUSH OPEN on the unit while playback is stopped.

To play both sides—Reverse Mode
You can set the deck to play just one side of a tape, both sides once, or both sides continuously.
On the remote control ONLY:
Press REV.MODE (reverse mode).
• Each time you press the button, the Reverse Mode changes as follows:


2): The deck automatically stops after playing both sides of the tape. Stops when playback in the 2 directions are finished. (二): The deck continues to play both sides of the tape 10 times, then stops playback automatically. Z: The deck automatically stops after playing one side of the tape.

- DO NOT turn off the unit while playing back or recording a tape. The cassette deck or tapes may be damaged.
- The use of C-120 or longer tape is not recommended, since characteristic deterioration may occur and this tape easily jams in the pinch rollers and the capstans.
- This unit is not compatible with type II and type IV tapes.
Setting the Tuner Interval Spacing
You can only change the FM or AM tuner interval spacing while tuning in to a FM or AM station.
On the unit ONLY:
1 Press FM/AM to select either "FM" or "AM."
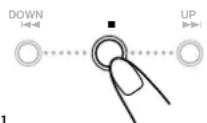
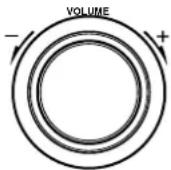
2 Turn the VOLUME + / - control while pressing and holding ■.
As you turn the VOLUME + / - control, the interval spacing for the selected band alternates as follows:
• For FM: 50 kHz* and 100 kHz • For AM: 9 kHz* and 10 kHz * Initial setting

+

When you change the setting
The preset stations for both FM and AM are erased. You will need to preset the stations again. (See the right column.)
Tuning in to a Station
1 Press FM/AM to select either "FM" or "AM."

The unit automatically turns on and tunes in to the previously received station—either FM or AM.
• Each time you press the button, the band alternates between FM and AM.
- If the station previously selected is stored in a preset number, the preset number will appear instead of "FM" or "AM."
2 Press and hold ▶▶| or |◀◀ (or UP ▶▶| or DOWN |◀◀ on the unit) for more than 1 second.

- ▶▶▶| (UP ▶▶▶): Increases the frequencies.
- |◀◀ (DOWN |◀◀): Decreases the frequencies.
The unit starts searching for stations and stops when a station of sufficient signal strength is tuned in.
- If an FM program is broadcast in stereo, the ST (stereo) indicator lights up on the display (only when the reception is good).
To stop during searching, press ▶▶| or |◀◀ (or UP ▶▶| or DOWN |◀◀ on the unit).

When you repeatedly press ▶▶| or |◀◀ (or UP ▶▶| or DOWN |◀◀ on the unit)
The frequency changes step by step.
To change the FM reception mode
On the remote control ONLY:
When an FM stereo broadcast is hard to receive or noisy, press FM MODE so that the “MONO” appears on the display. The MONO indicator also lights up. Reception will improve.
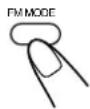
To restore the stereo effect, press FM MODE again so that “STEREO” appears on the display and the MONO indicator goes off. In stereo mode, you can hear stereo sound when a stereo program is broadcast.
The stereo effect also restores when:
- Changing the band (FM or AM).
- Changing the station frequency.
- Changing the playing source.
- Turning off (or on) the unit.
Presetting Stations
You can preset 25 FM and 15 AM stations manually.
In some cases, test frequencies have been already stored for the tuner since the factory examined the tuner preset function before shipment. This is not a malfunction. You can preset the stations you want into memory by following the presetting method.
- There is a time limit in doing the following steps. If the setting is canceled before you finish, start again from step 2.
On the remote control ONLY:
1 Tune in to the station you want to preset.
- See “Tuning in to a Station” on the left column.
2 Press SET.
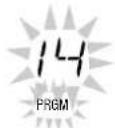
“00” starts flashing on the display.


3 Press PRESET GROUP ∧ or PRESET GROUP ∨ to select a preset number, then press SET.
The preset station is stored in memory.
• Even if you do not press SET, the station will automatically be stored on the selected preset number 5 seconds later.

87.50MHz
You can also use the number button(s) to select a preset number.
• In this case, you do not have to press SET.
Ex.: To select a preset number 5, press 5.
To select a preset number 15, press OVER, then press 1, 5.
To select a preset number 20, press OVER, then press 2, 0.
① ② ③
④ ⑤ ⑥
⑦ ⑧ ⑨
0

4 To preset more stations, repeat steps 1 to 3 above, allocating a different preset number to each station.
- Storing a new station on an already assigned number erases the previously stored one.

When you unplug the AC power cord or if a power failure occurs
The preset stations will remain in the unit.
Tuning in to a Preset Station
On the remote control ONLY:
1 Press FM/AM to select either "FM" or "AM."

The unit automatically turns on and tunes in to the previously received station—either FM or AM.
• Each time you press the button, the band alternates between FM and AM.
2 Press PRESET GROUP ∧ or PRESET GROUP ∨ repeatedly to select a preset number.

To tune in to a preset station directly using the number buttons
On the remote control ONLY:
Pressing the number button(s) allows you to select the preset number you want.
Ex.: For preset number 5, press 5. For preset number 15, press OVER, then press 1, 5. For preset number 20, press OVER, then press 2, 0.

Using an External Equipment
Listening to the External Equipment
You can listen to the external equipment such as MD recorder, cassette deck, or other auxiliary.
- First, make sure that the external equipment is properly connected to the unit. (See page 7.)
1 Set the volume level to the minimum position.
2 Press AUX.
"AUX" appears on the display.
AUX

3 Start playing the external equipment.
4 Adjust the volume level to the level you want to listen to.
To exit AUX mode, select other source.

For operation of the external equipment
Refer to its instructions.
IMPORTANT:
- It may be unlawful to record or play back copyrighted material without the consent of the copyright owner.
- The recording level is automatically set correctly, so it is not affected by the other sound settings. Thus, during recording you can adjust the sound you are actually listening to without affecting the recording level.
- If recordings you have made have excessive noise or static, the unit may be too close to a TV. Increase the distance between the TV and the unit.
- You can only use type I tape for recording.

- DO NOT turn off the unit while playing back or recording a tape. The cassette deck or tapes may be damaged.
- DO NOT use type II and type IV tapes since the unit is not compatible with such tapes.
- The use of C-120 or longer tape is not recommended, since characteristic deterioration may occur and this tape easily jams in the pinch rollers and the capstans.

At the start and end of cassette tapes
There is leader tape which cannot be recorded onto. Thus, when recording from discs, FM/AM broadcasts, or external equipment, wind the leader tape first to ensure that the recording will be made without losing any music.
To protect your recordings
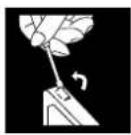
Cassettes have two small tabs on the back to protect against unexpected erasure or re-recording.
To protect your recording, remove these tabs.
To re-record on a protected tape, cover the holes with adhesive tape.

Adhesive tape
Recording on a Tape
On the unit ONLY:
1. Put a recordable cassette in with the exposed part of the tape down.
• See also page 15.
2. Close the cassette holder gently.
3. Start playing the source—FM, AM, or auxiliary equipment connected to AUX jack.
- When the source is FM or AM, tune in to the station you want to record.
- When recording from discs, see “Recording Discs—Disc Synchronized Recording” on page 19.
4. Press REC (recording).
- The REC indicator appears and ▶ indicator lights up on the display.
REC
→ FM 8 7. 5 0 ^ MHz
5. Press TAPE ◀ ▷.
▶ indicator starts flashing and the recording starts.


- If no cassette is inserted when you press REC "NO TAPE" appears on the display.
- If a protected tape is inserted when you press REC, "PROTECT" appears on the display.
To stop recording for a moment, press REC. The recording is paused. To resume recording, press TAPE ◁ ▷.
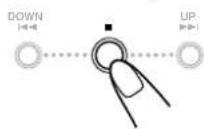
To stop recording, press ■.
The recording stops.
To remove the cassette, press PUSH OPEN while recording is stopped.

PUSH OPEN

To record on both sides—Reverse Mode
On the remote control ONLY:
Press REV.MODE (reverse mode) until 2) or (islit.

- When using the Reverse Mode for recording, lights up and start recording in the forward (▶) direction first.
To cancel the Reverse Mode, press REV.MODE repeatedly until 15 lit.
To reduce the beat—Beat Cut
On the remote control ONLY:
If the beats are heard while recording an AM broadcast, press BEAT CUT repeatedly until the beats are reduced.
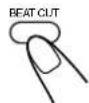
• Each time you press the button, the display alternates between "CUT-1" and "CUT-2."
Recording Discs — Disc Synchronized Recording
You can start disc play and recording at the same time.
On the unit ONLY:
1. Put a recordable cassette in with the exposed part of the tape down.
• See also page 15.
2. Close the cassette holder gently.
3. Press CD ▷/II to select the CD player as the source.
4. Press ■ to stop the disc playback.
- You can make a program (see page 12) if you want.
5. Press REC (recording). ▶ indicator lights up on the display.

6. Press TAPE ◀ ▷. "SYNC REC" appears and ▶ indicator starts flashing slowly on the display. CD playback and tape recording starts automatically.


- If no cassette is inserted when you press REC, "NO TAPE" appears on the display.
- If a protected tape is inserted when you press REC, "PROTECT" appears on the display.
To stop recording for a moment, press REC. Both the CD playback and tape recording are paused. To resume recording, press TAPE ◀ ▷.
To stop recording, press ■.
The recording stops and the CD playback is paused.


To record on both sides—Reverse Mode On the remote control ONLY:
Press REV.MODE (reverse mode) repeatedly until \(\overline{op}\) is lit.
- When using the Reverse Mode for Disc Synchronized Recording, lights up and the recording starts in the forward (▶) direction first. When the tape reaches its end, the CD playback is paused until the tape recording changes to the reverse direction, then the recording continues.
To cancel the Reverse Mode, press REV.MODE repeatedly until 25 lit.

Set enough time to allow for the disc to finish playing; otherwise, the power will go off before recording is completed.
There are four timers available—Daily Timer, Recording Timer, Snooze Timer, and Sleep Timer.
- Before using these timers, make sure the built-in clock is set correctly (see page 9).
Using Daily Timer and Recording Timer
You can set the timer whether the unit is on or off.
How the Timer actually works
When the on-time comes, the unit automatically turns on (the Ⓑ [timer] indicator flashes and continues flashing while the timer is operating). Then, when the off-time comes, the unit automatically turns off (standby). The timer setting remains in memory until you change it.
- When the Ⓞ (timer) and DAILY 1, 2, or 3 indicators are lit on the display, the timer acts as the Daily Timer. Once the timer has been set, it will be activated at the same time and automatically turns off (standby) after 60 minutes everyday until the timer is deactivated.
- When the Ⓑ (timer) and the REC indicators are lit on the display, the timer acts as the Recording Timer. After the timer-recording finishes, the details of the setting remain stored but the timer is turned off.
Before you start...
When using “TUNER” as the source to play, make sure to select the desired station before turning off the power. - There is a time limit in doing the following steps. If the setting is canceled before you finish, start again from step 1.
On the remote control ONLY:
1 Press CLOCK/TIMER repeatedly to select the timer you want to adjust and activate—Daily 1, Daily 2, Daily 3, or Rec.

The timer setting and hour indication start flashing on the display.
Each time you press the button, the display changes as follows:
![graph TD A["ON DAILY 1"] --> B["6:00"] C["ON DAILY 2"] --> D["7:00"] E["ON DAILY 3"] --> F["10:00"] G["REC ON"] --> H["12:00"] I["Clock setting"] --> J["Normal indication"]](/content/2026/05/1039914/images/dee502982c50998fef1590a704af1ebc7417e9741e9df3e0a0cdf97473fe269e.jpg)
2 Set the on-time you want the unit to turn on.
(1) Press UP or DOWN to set the hour, then press SET. (2) Press UP or DOWN to set the minute, then press SET. If you want to change the time setting, press CANCEL.
- If you are setting the Daily Timer, the source name starts flashing on the display. → Go to step 4.
- If you are setting the Recording Timer, the OFF indicator and hour indication start flashing on the display.
![graph TD A["UP"] --> B["DOWN"] B --> C["SET"]](/content/2026/05/1039914/images/df7569398815cbbab5ecc1237df45ff53ab7e85deb881df6d44e0b8df73ae426.jpg)
3 For the Recording Timer ONLY: Set the off-time you want the unit to turn off.


(1) Press UP or DOWN to set the hour, then press SET. (2) Press UP or DOWN to set the minute, then press SET. If you want to change the time setting, press CANCEL. - The Recording Timer is activated. The @timer) and REC indicators light up. The display returns to the normal indication. → Go to step 7.
4 Press UP or DOWN to select the source to play.



Each time you press the button, the source changes as follows:

- Make sure the playing source (either a cassette tape or a disc) is inside when you select “TAPE” or “CD.”
If you want to change the time setting, press CANCEL repeatedly to return step 2.
5 Press SET.
The timer and active daily timer number indications light up. The display returns to the normal indication.

6 Press VOLUME +/- to adjust the volume for the on-time.

7 Press STANDBY/ON to turn off the unit if you have set the timer with the unit turned on.

On the unit ONLY:
To activate the timer, press and hold DAILY TIMER/SNOOZE on the unit repeatedly to select the timer number you want.

To deactivate the timer, press and hold DAILY TIMER/SNOOZE.

• Each time you press and hold the button, the timer setting changes as follows:

To change the timer, repeat steps 1 to 6 on pages 20 and this page.
- To activate the Daily Timer again without changing the setting, press DAILY TIMER/SNOOZE on the unit repeatedly to select the timer number you want.

When there is no playing source (either a cassette tape or a disc) inside when you select "TAPE" or "CD"
The source to play is changed to "TUNER" when the on-time comes.

If the unit is already turned on when the timer on-time comes
The timer does not work.

When you unplug the AC power cord or if a power failure occurs
The timer setting remains. Set the built-in clock and activate the timer again.
Using Snooze Timer
The Snooze Timer turns off the unit (standby) only for 5 minutes while Daily Timer is in operation.
- You can set the Snooze Timer only while the Daily Timer is in operation.
On the unit ONLY:
Press DAILY TIMER/ SNOOZE while Daily Timer is in operation.

The unit turns off (standby) and the SNOOZE indicator appears on the display.
After 5 minutes, the unit automatically turns on with the source you selected in step 4 on the left column.

If the unit is turned on when the Snooze Timer is working
Both Snooze Timer and Daily Timer will be canceled.

If you set the Snooze Timer when there is less than 5 minutes until the Daily Timer off-time
The unit will not turn on even when 5 minutes passed.

When you unplug the AC power cord or if a power failure occurs
The timer will be canceled. You need to set the clock first, then the timer again.
Using Sleep Timer
With Sleep Timer, you can fall asleep to your favorite music or radio program.
- You can set Sleep Timer only when the unit is turned on.
- You can also turn off the unit automatically by using Auto Standby. (See page 9.)
How the Sleep Timer actually works
The unit automatically turns off after the specified length of time passes.
On the remote control ONLY:
1 Press SLEEP.
The SLEEP indicator starts flashing on the display.


• Each time you press the button, the length of time changes as follows:
![graph LR A["10 20"] --> B["30 60"] B --> C["120 ← 90"] C --> D["OFF (cancelled)"]](/content/2026/05/1039914/images/a25117084d3dde0ba7baff19abab9db4221d0c97fb2dcacfd841503cdddaef53.jpg)
2 Wait for about 5 seconds after specifying the length of time.
The SLEEP indicator remains lit on the display.
To check the remaining time until shut-off time, press SLEEP once. The remaining time until shut-off time appears for about 5 seconds.
To change the shut-off time, press SLEEP repeatedly until the length of time you want appears.
To cancel the setting, press SLEEP repeatedly until the SLEEP indicator goes off and display returns to the normal indication.
- Turning off the unit also cancels the Sleep Timer.

When you set the Sleep Timer after the Daily Timer starts playing the selected source
The unit turns off with either timer having an earlier shut-off time.

If you set the Sleep Timer while playing back or recording a tape
Do not shut the unit off with the Sleep Timer while a tape is running. If the unit turns off while playing back or recording a tape, the cassette deck or tapes may be damaged.
To get the best performance of the unit, keep your discs, tapes and mechanism clean.
General Notes
In general, you will have the best performance by keeping your discs, tapes and the mechanism clean.
- Store discs and tapes in their cases, and keep them in cabinets or on shelves.
Cleaning the unit
• Stains on the unit
Should be wiped off with a soft cloth. If the unit is heavily stained, wipe it with a cloth soaked in water-diluted neutral detergent and wrung well, then wipe clean with a dry cloth.
- Since the unit may deteriorate in quality, become damaged or have its paint peel off, be careful about the following:
- DO NOT wipe it with a rough cloth.
- DO NOT wipe it too vigorously.
- DO NOT wipe it with thinner or benzine.
- DO NOT apply any volatile substance such as an insecticide to it.
- DO NOT allow any rubber or plastic to remain in contact with it for a long time.
Handling discs

- Remove the disc from its case by holding it at the edge while pressing the center hole lightly.
- Do not touch the shiny surface of the disc, or bend the disc.
- Put the disc back in its case after use to prevent warping.
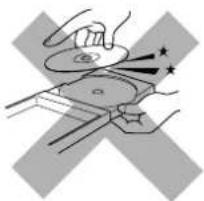
- Be careful not to scratch the surface of the disc when placing it back in its case.
- Avoid exposure to direct sunlight, temperature extremes, and moisture.

To clean the disc
Wipe the disc with a soft cloth in a straight line from center to edge.

DO NOT use any solvent—such as conventional record cleaner, spray, thinner, or benzine—to clean the disc.
Handling cassette tapes

- If the tape is loose in its cassette, take up the slack by inserting a pencil in one of the reels and rotating.
- If the tape is loose, it may get stretched, cut, or caught in the cassette.
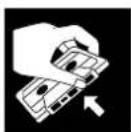
- Be careful not to touch the tape surface.

- Avoid storing tapes in any of the following places:
- In dusty places
- In direct sunlight or heat
- In moist areas
- On a TV or speaker
- Near a magnet
To keep the best recording and playback sound quality
You need to clean the heads.
- Clean the heads after every 10 hours of use with a wet-type head cleaning tape (available at electronic and audio shops). When the head becomes dirty, the following symptoms will occur:
- Sound quality is reduced.
- Sound level decreases.
- Sound drops out.
- Do not play dirty or dusty tapes.
- Do not touch the highly-polished head with any metallic or magnetic tools.

To demagnetize the head
Turn off the unit, and use a head demagnetizer (available at electronic and audio shops).
If you are having a problem with your unit, check this list for a possible solution before calling for service.
If you cannot solve the problem from the hints given here, or the unit has been physically damaged, call a qualified person, such as your dealer for service.
| Symptom | Possible Cause | Action |
| Power does not come on. | The power cord is not connected to an AC outlet. | Insert the plug into the socket. |
| No sound is heard. | Connections are incorrect or loose.A pair of headphones is connected.MP3 disc is recorded with “packet writing.” | Check all connections and make corrections. (See pages 6 and 7.)Unplug the headphones from the PHONES jack.It cannot be played. Replace the disc. |
| Hard to listen to broadcasts because of noise. | Antennas are disconnected.The AM loop antenna is too close to the unit.The FM antenna is not properly extended and positioned. | Reconnect the antenna correctly and securely.Change the position and direction of the AM loop antenna.Extend FM antenna and orient to the best reception position. |
| The disc does not play. | The disc is upside down. | Put the disc in with the label side up. |
| Impossible to record. | Small tabs on the back of the cassette are removed. | Cover the holes with adhesive tape. |
| Operations are disabled. | The built-in microprocessor has malfunctioned due to external electrical interference. | Unplug the AC power cord then plug it back in. |
| Unable to operate the unit by the remote control. | The path between the remote control and the remote sensor on the unit is blocked.The batteries are exhausted.You are using the remote control too far from the unit. | Remove the obstruction.Replace the batteries. (See page 8.)Signals cannot reach the remote sensor. Move closer to the unit. |
Specifications
Design and specifications are subject to change without notice.
Amplifier Section
Output Power:
15 W per channel, min. RMS, driven into 4 Ω at 1 kHz with no more than 10% total harmonic distortion. (IEC268-3)
Audio input sensitivity/Impedance (at 1 kHz)
AUX: 500 mV/50 kΩ
Speakers/Impedance: 4 Ω – 16 Ω
Tuner
FM tuning range:
50 kHz intervals: 87.50 MHz—108.00 MHz
100 kHz intervals: 87.5 MHz—108.0 MHz
AM tuning range:
9 kHz intervals: 531 kHz—1,710 kHz
10 kHz intervals: 530 kHz—1,710 kHz
CD player
Dynamic range: 85 dB
Signal-to-noise ratio: 85 dB
Wow and flutter: Immeasurable
Cassette deck
Frequency response:
Normal (type I): 100 Hz—10,000 Hz
Wow and flutter: 0.35% (WRMS)
General
Power requirement: AC 110 V–127 V / AC 220 V–
240 V ∼ (adjustable with the
voltage selector), 50 Hz / 60 Hz
Power consumption:
40 W (at operation)
2 W (on standby)
Dimensions (W/H/D) (approx.):
152 mm x 233 mm x 292 mm
Mass (approx.):
3.9 kg
Supplied accessories
See page 6.
Speaker Section
Type:
Full range, bass-reflex type
Speakers:
10 cm cone x 1
Power handling capacity: 15 W
Impedance:
4 Ω
Frequency range:
100 Hz—15 kHz
Dimensions (W/H/D) (approx.):
147 mm x 233 mm x 189 mm
Mass (approx.):
1.9 kg each
Mains (AC) Line Instruction (not applicable for Europe, U.S.A., Canada, Australia, and U.K.)
AC 220-240V

IMPORTANT for mains (AC) line
BEFORE PLUGGING IN, do check that your mains (AC) line voltage corresponds with the position of the voltage selector switch provided on the outside of this equipment and, if different, reset the voltage selector switch, to prevent from a damage or risk of fire/electric shock.

JVC
VICTOR COMPANY OF JAPAN, LIMITED
- UX-H350 – CONSISTS OF CA-UXH350 AND SP-UXH
- CAUTION—(STANDBY/ON) BUTTON
- CAUTION
- IMPORTANT FOR LASER PRODUCTS
- CAUTION: PROPER VENTILATION
- WE WOULD LIKE TO THANK YOU FOR PURCHASING ONE OF OUR JVC PRODUCTS. BEFORE OPERATING THIS UNIT, READ THIS MANUAL CAREFULLY AND THOROUGHLY TO OBTAIN THE BEST POSSIBLE PERFORMANCE FROM YOUR UNIT, AND RETAIN THIS MANUAL FOR FUTURE REFERENCE
- ABOUT THIS MANUAL
- PRECAUTIONS
- INSTALLATION
- POWER SOURCES
- MOISTURE CONDENSATION
- OTHERS
- LOCATION OF THE BUTTONS AND CONTROLS
- GETTING STARTED
- COMMON OPERATIONS
- PLAYING BACK DISCS
- PLAYING BACK TAPES
- LISTENING TO FM AND AM BROADCASTS
- USING AN EXTERNAL EQUIPMENT
- RECORDING
- USING THE TIMERS
- MAINTENANCE
- TROUBLESHOOTING
- SPECIFICATIONS
- MAIN UNIT
- DISPLAY WINDOW
- REMOTE CONTROL
- UNPACKING
- CONNECTING AM AND FM ANTENNAS
- FOR BETTER RECEPTION OF BOTH FM AND AM
- CONNECTING SPEAKERS
- IMPORTANT
- TO REMOVE THE SPEAKER GRILLES
- CONNECTING OTHER EQUIPMENT
- TO CONNECT AN AUDIO EQUIPMENT
- ADJUSTING THE VOLTAGE SELECTOR
- PUTTING THE BATTERIES INTO THE REMOTE CONTROL
- NOW YOU ARE READY TO PLUG IN THE UNIT
- SETTING THE CLOCK
- ON THE REMOTE CONTROL ONLY
- PRESS CLOCK/TIMER
- PRESS UP OR DOWN TO ADJUST THE HOUR, THEN PRESS SET
- PRESS UP OR DOWN TO ADJUST THE MINUTE, THEN PRESS SET
- TO ADJUST THE CLOCK
- TURNING ON THE POWER
- TURNING OFF THE UNIT AUTOMATICALLY (AUTO STANDBY)
- SELECTING THE SOURCE
- ADJUSTING THE VOLUME
- FOR PRIVATE LISTENING
- FADE-OUT MUTING (FADE MUTING)
- PRESS FADE MUTING
- SELECTING THE SOUND MODES
- REINFORCING THE BASS SOUND
- PRESS AND HOLD SOUND/HBS
- CHECKING THE CLOCK TIME DURING PLAY
- PRESS DISPLAY
- WHEN PLAYING CD-RS OR CD-RWS
- NOTES FOR MP3 FILES
- GENERAL NOTES
- PLAYING BACK THE ENTIRE DISC—NORMAL PLAY
- PRESS △ OPEN ON TOP OF THE UNIT
- PLACE A DISC CORRECTLY WITH ITS LABEL SIDE UP
- CLOSE THE DISC COVER GENTLY
- PRESS CD ▶/II
- WHILE "READING" APPEARS ON THE DISPLAY
- WHILE PLAYING BACK AN MP3 DISC
- TO STOP PLAYING, PRESS
- BASIC DISC OPERATIONS
- TO STOP PLAYING FOR A MOMENT
- TO GO TO ANOTHER TRACK
- TO GO TO ANOTHER TRACK DIRECTLY USING THE NUMBER BUTTONS
- TO LOCATE A PARTICULAR POINT IN A TRACK
- PROGRAMMING THE TRACK PLAYING ORDER —PROGRAM PLAY
- PLACE A DISC
- PRESS PROGRAM
- PRESS ▶▶| OR |◀◀ TO SELECT THE TRACK NUMBER, THEN PRESS PROGRAM
- TO CHECK THE PROGRAM CONTENTS
- TO MODIFY THE PROGRAM
- TO CLEAR THE PROGRAM
- REPEATING TRACKS—REPEAT PLAY
- PRESS REPEAT REPEATEDLY BEFORE OR DURING PLAYBACK
- WHEN PLAYING BACK AUDIO CD
- WHEN PLAYING BACK MP3 DISC
- PLAYING AT RANDOM—RANDOM PLAY
- PRESS RANDOM
- DISPLAYING THE REMAINING TIME DURING PLAYBACK
- PRESS REMAIN REPEATEDLY
- PLAYING BACK A TAPE
- PRESS PUSH OPEN
- PUT A CASSETTE IN WITH THE EXPOSED PART OF THE TAPE DOWN
- CLOSE THE CASSETTE HOLDER GENTLY
- PRESS TAPE ◀ ▷
- TO PLAY BOTH SIDES—REVERSE MODE
- PRESS REV.MODE (REVERSE MODE)
- SETTING THE TUNER INTERVAL SPACING
- ON THE UNIT ONLY
- WHEN YOU CHANGE THE SETTING
- TUNING IN TO A STATION
- TO CHANGE THE FM RECEPTION MODE
- PRESETTING STATIONS
- PRESS PRESET GROUP ∧ OR PRESET GROUP ∨ TO SELECT A PRESET NUMBER, THEN PRESS SET
- TO PRESET MORE STATIONS, REPEAT STEPS 1 TO 3 ABOVE, ALLOCATING A DIFFERENT PRESET NUMBER TO EACH STATION
- TUNING IN TO A PRESET STATION
- PRESS FM/AM TO SELECT EITHER "FM" OR "AM
- PRESS PRESET GROUP ∧ OR PRESET GROUP ∨ REPEATEDLY TO SELECT A PRESET NUMBER
- TO TUNE IN TO A PRESET STATION DIRECTLY USING THE NUMBER BUTTONS
- LISTENING TO THE EXTERNAL EQUIPMENT
- SET THE VOLUME LEVEL TO THE MINIMUM POSITION
- PRESS AUX
- START PLAYING THE EXTERNAL EQUIPMENT
- ADJUST THE VOLUME LEVEL TO THE LEVEL YOU WANT TO LISTEN TO
- AT THE START AND END OF CASSETTE TAPES
- TO PROTECT YOUR RECORDINGS
- RECORDING ON A TAPE
- TO RECORD ON BOTH SIDES—REVERSE MODE
- TO REDUCE THE BEAT—BEAT CUT
- RECORDING DISCS — DISC SYNCHRONIZED RECORDING
- TO RECORD ON BOTH SIDES—REVERSE MODE ON THE REMOTE CONTROL ONLY
- PRESS REV.MODE (REVERSE MODE) REPEATEDLY UNTIL \(\OVERLINE{OP}\) IS LIT
- USING DAILY TIMER AND RECORDING TIMER
- HOW THE TIMER ACTUALLY WORKS
- BEFORE YOU START
- PRESS CLOCK/TIMER REPEATEDLY TO SELECT THE TIMER YOU WANT TO ADJUST AND ACTIVATE—DAILY 1, DAILY 2, DAILY 3, OR REC
- SET THE ON-TIME YOU WANT THE UNIT TO TURN ON
- FOR THE RECORDING TIMER ONLY: SET THE OFF-TIME YOU WANT THE UNIT TO TURN OFF
- PRESS UP OR DOWN TO SELECT THE SOURCE TO PLAY
- PRESS SET
- PRESS VOLUME +/- TO ADJUST THE VOLUME FOR THE ON-TIME
- PRESS STANDBY/ON TO TURN OFF THE UNIT IF YOU HAVE SET THE TIMER WITH THE UNIT TURNED ON
- USING SNOOZE TIMER
- PRESS DAILY TIMER/ SNOOZE WHILE DAILY TIMER IS IN OPERATION
- USING SLEEP TIMER
- HOW THE SLEEP TIMER ACTUALLY WORKS
- PRESS SLEEP
- WAIT FOR ABOUT 5 SECONDS AFTER SPECIFYING THE LENGTH OF TIME
- CLEANING THE UNIT
- HANDLING DISCS
- TO CLEAN THE DISC
- HANDLING CASSETTE TAPES
- TO KEEP THE BEST RECORDING AND PLAYBACK SOUND QUALITY
- TO DEMAGNETIZE THE HEAD
- AMPLIFIER SECTION
- TUNER
- CD PLAYER
- CASSETTE DECK
- GENERAL
- SUPPLIED ACCESSORIES
- SPEAKER SECTION
- MAINS (AC) LINE INSTRUCTION (NOT APPLICABLE FOR EUROPE, U.S.A., CANADA, AUSTRALIA, AND U.K.)
- IMPORTANT FOR MAINS (AC) LINE
Brand : JVC
Model : UX-H350
Category : Radio