
8500 PRO HD - Gps COBRA - Free user manual and instructions
Find the device manual for free 8500 PRO HD COBRA in PDF.


| Product Type | GPS-enabled radar detector |
| Brand | Cobra |
| Model | 8500 PRO HD |
| Dimensions (H x W x D) | 1.2 x 4.5 x 2.8 inches |
| Weight | 0.6 lbs (272 g) |
| Power Source | 12V DC cigarette lighter adapter |
| Display | High-definition OLED screen |
| GPS Antenna | Built-in |
| Radar Bands Detected | X, K, Ka, Ku, Laser |
| GPS Features | Red light camera and speed trap alerts |
| Voice Alerts | Yes, selectable |
| Filter Modes | City, Highway, Auto |
| Connection | USB for updates |
| Update Method | Online via Cobra iRadar app |
| Audio Output | Built-in speaker, 3.5mm jack |
| Mounting | Windshield suction cup bracket |
| Operating Temperature | -20°C to 70°C |
| Maintenance | Clean lens with soft cloth; update database regularly |
| Safety Certifications | FCC, CE compliant |
| Spare Parts Availability | Power cords, mounts available from Cobra |
| Repairability | Serviceable by authorized centers |
Frequently Asked Questions - 8500 PRO HD COBRA
User questions about 8500 PRO HD COBRA
0 question about this device. Answer the ones you know or ask your own.
Ask a new question about this device
Download the instructions for your Gps in PDF format for free! Find your manual 8500 PRO HD - COBRA and take your electronic device back in hand. On this page are published all the documents necessary for the use of your device. 8500 PRO HD by COBRA.
USER MANUAL 8500 PRO HD COBRA
IMPORTANT SAFETY INFORMATION
Before installing and using the Cobra Navigation System, please read these general warnings and precautions.
WARNING Statements identify conditions that could result in personal injury or loss of life.
WARNINGS:
- DO NOT mount the unit over airbag panels or within airbag expansion spaces.
- DO NOT think this unit is a substitute for personal judgment. The route suggestions should never supersede any local volatile regulations or sale driving practices.
• DO NOT program this unit while driving.
- ONLY glance of the screen when necessary and sale to do so.
- DO NOT depend on this unit to locate emergency services (such as police, fire stations, hospitals and clinics).
- DO NOT position the unit in a location that obstructs the driver's view of the road, instruments, or controls to operate the vehicle.
- DO NOT drive the vehicle unless the unit is securely attached to the windshield with the supplied bracket and suction cup or is fastened by other reliable means.
- DO NOT disassemble or modify the system; Changes or modifications to the system may void its compliance with FCC rules and make it illegal to use.
- DO position the unit so the screen can be viewed with just a quick glance.
- DO set the volume of a level that will allow the hearing of outside traffic and emergency services.
- This unit is not waterproof. Do not allow liquids to splash on it.
- This unit can be operated in temperatures between 14°F and 140°F (10°C and 60°C).
- Discount the unit when parked. This will not only minimize the chance of theft but will also reduce the unit's exposure to extreme temperatures which can shorten the life of the internal components.
FCC Compliance
This device complies with Part 15 of the FOC interference limits for Class B digital devices for home or office use. These limits are designed to provide more reasonable protection against harmful interference in a residential installation and are more stringent than "outdoor" requirements.
Operation of this device is subject to the following conditions:
-
This device may not cause harmful interference.
-
This device must accept any interference received, including interference that may cause undesired operation.
User License
This document and the software and data described in it are furnished under license and may be used or copied only in accordance with such license. Except as permitted by such license, the contents of this document, software and data may not be disclosed to third parties, copied or duplicated in any form, in whole or in part, without the prior written permission of Cobro Electronics Corporation. This document, software and DATA contain proprietary and confidential information of Cobro Electronics Corporation and its licensors. Cobro grants the purchaser a limited license for use of this document, software and data incorporated in the unit for personal use, and not for resale, sublicense or commercial use. By using the unit, the purchaser agrees to be bound by the terms and conditions of this license agreement. The purchaser acknowledges that the content of this document, software and data related to the property of Cobro and its licenses cannot be protected by copyright unless of the USA and international lottices. The purchaser agrees not to modify, decompile, disassemble, reverse enginear or reduce to human readable form the software. DATA or any part thereof, nor to create derivative works based on the contents of the document, software or info, nor remove or obscure any copyright, trademark nolitics, or riskilutive legend.
The purchaser agrees not to export or to-export this document or the unit to any country in violation of the export control laws of the U.S.A. Purchaser further agrees to use the unit in compliance with all applicable federal, state and local laws, rules and regulations.
The contents of this document, software and data are for informational use only and are subject to change without notice. CoBRA and its licensors. In kind to provide their customers the most complete and accurate navigation information available at a reasonable cost from government and private data sources. However, all data sources have limitations and some have inaccuracies or are incomplete to some degree. These characteristics carry over to the unit as well. As such, COBRA AND ITS LICENSORS SHALL NOT BE LIABLE TO THE USER FOR ANY INCIDENTAL, CONSEQUENTIAL, SPECIAL INDIRECT OR EXEMPLARY DAMAGES ARISING FROM THE USE OF THIS PRODUCT.
THE COBRA NAVIGATION SYSTEM IS PROVIDED ON AN 'AS IS' AND "WITH ALL FAULTS BASIS" AND COBRA AND LICENSORS EXPRESSLY DISCLAIM ALL WARRANTIES, EXPRESS OR IMPLIED, INCLUDING BUT NOT LIMITED TO, THE IMPLIED WARRANTIES OF NONINFRINGEMENT, MERCHANTABILITY, QUALITY, ACCURACY, TITLE AND FITNESS FOR A PARTICULAR PURPOSE. NO ORAL OR WRITTEN ADVICE OR INFORMATION PROVIDED BY COBRA AND/OR ITS LICENSORS OR ANY OF THEIR AGENS, EMPLOYEES OR THIRD PARTY PROVIDERS SHALL CREATE A WARRANTY, AND USER IS NOT ENTITLED TO RELY ON ANY SUCH ADVICE OR INFORMATION. THIS DISCLAIMER OF WARRANTIES IS AN ESSENTIAL CONDITION OF THE AGREEMENT.
Cobra encourages customers to report any events found in our electronic maps by contacting technical assistance (available in English and Spanish) at product info@cobra.com (e-mail), by visiting our website: www.cobra.com, or by calling customer assistance (available in English and Spanish) of 773-869-3087 between 8:00 a.m. and 5:30 p.m. Central Time, Monday through Friday (except holidays).
IFRD user to the commercial document, then use, replication or disclosure of this commercial product and accompanying documentation may be subject to DFARS 252.227-7014(a)(1); DFARS 227.7202-1; FAR 52.227 19; DFARS 252.227 7015; FAR 52.227 14 Affiliates I, II, and III; and/or FAR 12.211 and FAR 12.212 as applicable and/or similar successor clauses in FAR, or the DOD or NASA FAR Supplement.
CONTENTS
-
Beting Started .... 1 Powering on your device.... 1 Coulon Screen .... 1 Map Screen Features - Driving Guidance Mode.... 2 Route Preview.... 3
-
Menu 4
-
Quick Tabs 4 Zoom Tab 4 Information Tab 5 Service Tab 5
-
Plan a Route....6 All search options....6 Address....7 Interactions....8 DOI....8 Favorites....11 Recent List....11 Current Location....12 Currencies....12 Multi Route....13 Mop View....13
-
Guidance while Driving....14 Lane Guidance....14 Signsoss....14 Junction View....14 Truck Beatstations....15 Aetis....16 Turn by Turn (T3T)....18 List of Turns....16 Turning off the device before journey is complete....17
-
Manage your Route....17 Create Route....18 Edit Route....19 De sulfur....19 Route Summary....20
-
Trucker Tools....20 Mileage Log....20 Trip Computer....20 BackupReactor....21 On Duty Tanker....21 My Truck....22 Duck rider....23
-
Traffic....23 Traffic Connection Status....23 Traffic On Route....24 Traffic Map....24 Traffic Now....25 Traffic Patrols....25 Traffic Last....26 Traffic Front Of Cineses....26 Traffic Springs....27 Draper Traffic ....27
-
Weather 27 On May 27 At Your Location 28 At Destination 28
- Fuel Prices 29 At Your Location 29 Along Route 29 At Other Location 29
- Settings 30 Display Settings 30 Outcome Settings 32 Language Settings 33 Routing Options 34 Home and Office 34 Traffic Settings 34 Network Settings 34
- Warranty 35
- Product Service 36
- Customer Assistance 36
- Trademark Acknowledgement 37
1. Getting Started
Powering on your device
Press and hold the power button on the top left hand corner of your device. Caution Screen
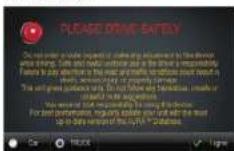
After your device starts up, you will save the other screen. You must select your vehicle type (car or truck) and agree to the safety terms and conditions in order to use the navigation device.
When selecting a truck as your vehicle type you will be automatically prompted to enter the truck parameters (if there is only one truck in your saved vehicles), or, asked your desired truck from a lot of all saved vehicles (if there is two or more trucks in your saved vehicles).
WARNING: Please note that when selecting car as vehicle type, there will be no warnings for physical or legal truck restrictions and routing will not have truck information into account.
Charging the Unit
To charge the unit, connected after the AD or DC power adopter. The battery right will illuminate and will take approximately 3 hours to charge. When the battery is fully charged, the red LED will turn off. Once fully charged the battery will last for approximately 2 hours during normal use.
GPS
The navigation application automatically loads your current position on the map by receiving GPS signals. When you first start the navigation application, there may be a small delay in finding your GPS position and showing your current location correctly on the map.
If the navigation application does not locate your position correctly on the map, there may be an external factor interfering with the GPS signal. Please see USER INFORMATION AND PRECAUTIONS section for further information on GPS.
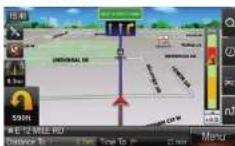
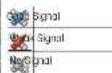
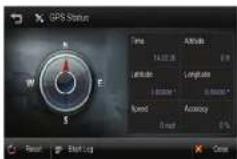
You may tap the GPS icon to an the main map to check the GPS status.
Map Screen Features - Driving Guidance Mode
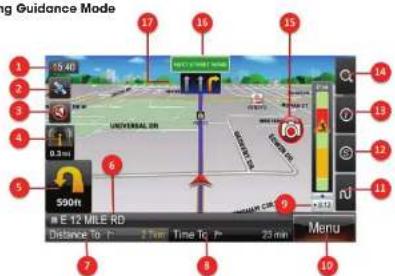
| 1 Current time 10 Menu | ||
| 2 GPS (Top to go to GPS screen). 11 Route tab (top to open route tab) | ||
| 3 Mute voice guidance 12 Services tab (top to open services tab) | ||
| 4 Second Turn-by-Turn instruction, indicates the turn direction that comes after the next turn direction | 13 Information tab (top to open information tab) | |
| 5 First Turn-by-Turn instruction: Indicates the next turn direction 14 Zoom tap (top to open zoom tab) | ||
| 6 Current street norms / Destination 15 After Display | ||
| 7 Distance To Co and Total Distance 16 Name of next street in route | ||
| 8 Estimated Time of Arrival (E1A) and Time To Co 17 Lane guidance | ||
| 9 Traffic Bar | ||
2.
Route Preview
The route preview screen will appear each time you set a new destination or enter a new route.
The route preview screen may also be accessed from the map screen via the route tab
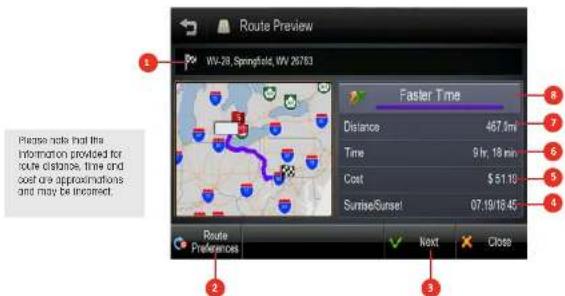
| 1 Destination address. 5 Route cost. | ||
| 2 Route Preferences. 6 Route time. | ||
| 3 When the route type has been selected, top the [NEXT] button to begin guidance using this route type. | 7 Route distance. | |
| 4 Summary/Source times at destination. 8 Toggle between letter time and shorter distance route. | ||
3.
2. Menu
The main menu can be accessed by lapping the [MENU] button on the
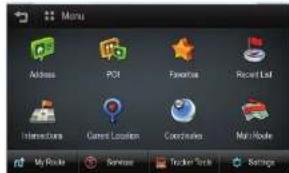
The main menu allows access to all search options as well as route management, live services (traffic, weather and fuel prices), trucker tools and settings
3. Quick Tabs
Quick lobe provide quick and easy access to many commonly used functions directly from the main map screen. The quick lobe can be accessed on the right hand side of the main map screen.
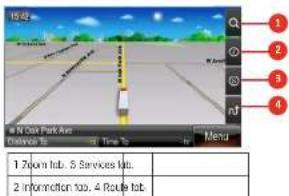
Zoom Tab
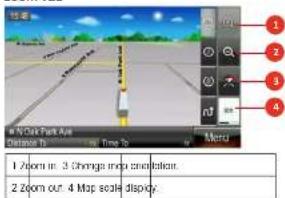
4.
Information Tab
The information lab provides access to location specific information.
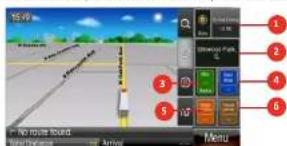
| 1 Cnury lime. 4 Search for nearest red area. |
| 2 Current location information. 5 Search for nearest weigh station. |
| 3 M in marker display. 6 Search for nearest travel center. |
Services Tab
The services (a) provides necessary to live information services.
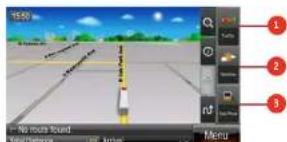
| 1 Traffic information. 3 Fact price information | |
| 2 Weather information. | |
Route Tab
The route too provides access to route specific function and inflation.
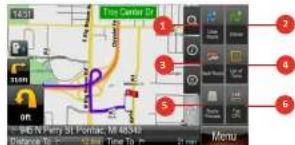
| 1. Clear current active route. 4. Display list of all turns in current active route. | |
| 2. Detour by distance or avoid part of a route. | 5. Display route preview screen. |
| 3. Wait route to move a route with multiple destinations. | 6. Display hip computer screen |
5.
4. Plan a Route
A destination may be searched for through any of the following options.

ADDRESS Search by entering on address in steps: City > Street > House number.

INTERSECTIONS Search by entering an intersection.

RECENT LIST View a list of previously searched locations.

FAVORITES Top this button to route to a location that was previously saved as a favorite (including Home/Office).

POI Search for a POI (Point Of interest), such as a restaurant or hotel

CURRENT LOCATION View details on your current location (reads a valid GPS signal)

COORDINATES Enter a destiction by coordinates

MULTI ROUTE Save and restore commonly used routes.
Address

To: the ADDRESS button on Main Menu to plan a scale by ordering
-
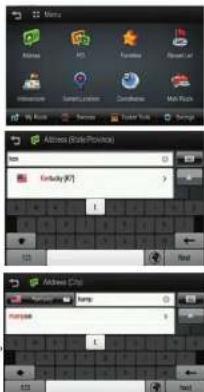
Select 'Address' on Menu screen.
-
Select State or province. The default state/province is based on your current location. For subsequent searches, the last used state/province name and city name are shown. If you would like to change state/province, tap the Shot Name button. For State/Province search, you can search by either the full name (e.g. New York), or the observation (e.g. NY).
-
Search for a city, home or up made by lysing letters. Then choose it on the result list
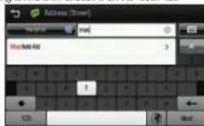
- Search for a street name by typing letters then choose it on the result list.
-
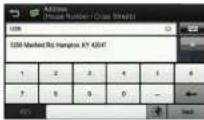
Type the House number, and top NEXT button. See below for information or hiding or showing the keyboard.
-
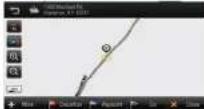
Confirm the store/province, city, and street choices on the top of the screen and refer to map of the location. Tap Go if you wish to route to this location directly
Hide / Show Keyboard: The keyboard may be hidden or shown of any time during address entry. You may wish to hide the keyboard to see all items in the result list. Simply top the keyboard icon on the top-right of the screen, or top anywhere in the visible area of the result list once.
Keyboard Language: You may change the language for your keyboard by tapping the 'world' icon to the right of the space. This will allow you to play differenties and special characters for your chosen language. e.g. n, a, a
Intersections

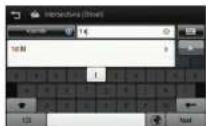
Top the INTERSECTIONS button on Main Menu to plan a route by entering an intersection.
- As per steps 2-4 In the address search above, enter the State/Province, followed by the City and then the Street.
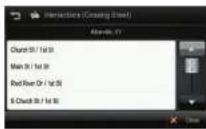
- After the street name is ordered, a list of the intersections for your cheese street is present at. You may send through this list using the control button on the right.
POI

Top the POI Icon on the Main Menu to search by POI (Point of Interest).
When you select POI from the main menu you will first need to select between Normal POIs (e.g. Hotels, Apartments, Restaurants, Banks, etc.), Truck Specific POIs (e.g. Truck Repairs, Truck Slaps, State Wing Stables, etc.) or Search for a POI using Google Search
If you select either Normal or Truck POIs, you may search for a POI using a variety of different search methods.
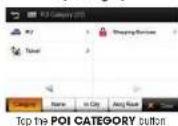
By Catagory
By POI Name
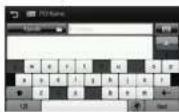
Top the POI NAME button
By City
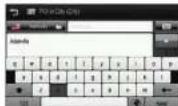
Along Route
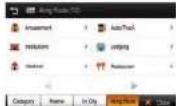
Top the POI IN CITY Button Top the ALONG ROUTE Button
Search by Category:
To the CATEGORY bullar
You can search for POIs near your current location using the POI category search. First, simply select the category you wish to use, for example 'Fuel & Auto', then select a POI from the result list. The distance and direction to the POI is displayed on the left.
You may sort the results by distance or in alphabetical order.
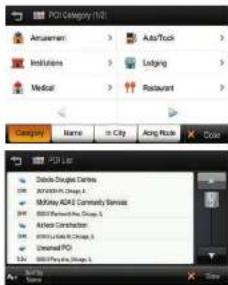
POL categories have sub-categories to help focus your search better. Simply top the sub-category you wish to search, or, alternatively choose the 'ALL...' option at the top of the list to search within all the listed sub categories.
Search by POI Name:
Top the NAME HLLAN
The previously searched state/province name and city name are initially selected. If you want to change state/province or city, you the State or City button
Type the POI Name you wish to search for them top the NEXT button. It will list POI names corresponding to the letters you've typed. Select one of the POI names that you are searching for then you will see a list POIs. Choose one, and then top NEXT button.
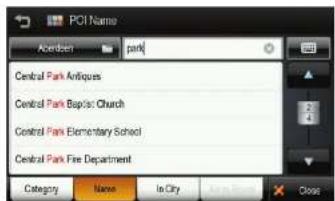
Note: The system will search for the text you entered where it forms any part of the PCI name; for example, if you search for the word 'Park', you can find all POIs with the word 'Park' in their money. Park Run Cafe, Mall Parking, Callo Park plc.
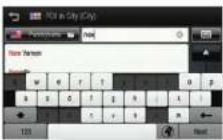
Search for POI by City
Top the IN CITY balloon
The previously searched state/province name is initially selected. If you want to change state/province, you the State button
Type the city name then selected for the list of categories. This distance grid direction is the POI is displayed on the left. You may send the results by distance or in alphabetical order.
Search for POI Along Route
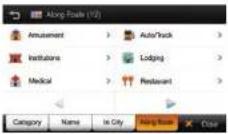
Top the ALONG ROUTE button.
You can search for POIs of a selected category that are situated on, or close by to, your current route.
When you select a PCI category to search within a list of all POIs from that category that are on your route will be displayed. The riskense and direction to each PCI from your current location is displayed on the left.
Amenity Filter
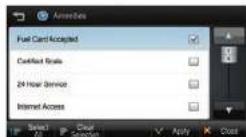
When searching for track steps you may filter your results based on the quantities available.
Top the POI button on the main menu and select TRUCK POI, top TRUCK STOPS. You may now filter the list of truck stops based on 16 different anomaly categories. Simply top AMENITIES and select the categories that you would like, when you have selected all the desired categories, top APPLY. The list of truck stops will now be filtered to display only the truck stops that have the amenities you desire.
Google™ Search
The Google Search option allows you to search for a POI by connecting to the Google search engine. Simply set POI on the main route and then set Google Search, you can then input the POI name for which you would like to search. When you have entered the name, simply top Search and a list of relevant results based on your current location will be displayed. To route to one of the POIs in the list, simply top on the POI name, a drop display will then be displayed for you to verify that the POI is in the location your wish to route to, when you are ready to begin routing to the POI simply top Go and your route will be calculated.
An active Wi-Fi connection is required to use the Google Search function.
Favorites

Tap the FAVORITES button to select or add a Favorite as your destination.
The favorites option allows you to save and route to commonly visited destinations, including home and other locations.
Sort: You can sort existing favorites by distance, alphabetical order or date created.
Add: Top the ADD button is odd if favor is to the app.
When saving a new favorite, you can give it a name by which to remember I
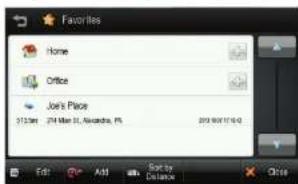
To set on address for your Home and/or Office from the favorites menu, simply top the plus sign on the right of the screen.
When the addresses have been programmed, you can then plan a route to your home or office simply by trapping the respective can on the leveries list.
Recent List

Top the RECENT LIST button to view a list of previously searched locations.
-
Top the RECENT LIST on the Menu.
-
You will see a list Recent Destinations and Recent Searches.
-
Select one of locations on the list then tap the ① button to route directly to the location.
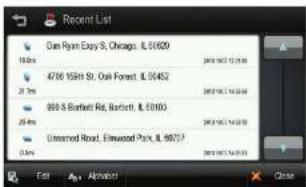
Sort: You can sort the list by the date crested or in alphabetical order.
Current Location

Top this button to find details about your current location.
You will need a valid GPS signal to get accurate and current positioning information.
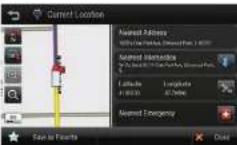
The following details are listed:
- Nacras' Achtress.
- Nearest intersection
• Latitude and Longitude
• May of your current location
You may save this location as a favorite
Top this button to send the map to your current location. Top this button to search for the nearest emergency PCs.
Select the emergency PCI category (Hospital, Fuel, Police, Auto, ATMs), a list of the names POIs for that category will then be destroyed, simply choose the desired PCI from the list and the route to the PCI will be calculated.
Coordinates

Enter coordinates to route to an exact location on the map.
There are two steps involved in entering coordinates. You must first enter the toluhate and then the Longitude. The navigation application supports several coordinate formats. Choose the format that you prefer
Step 1
Euler the latitude in one of the forms supported.
Step 2
Enter the Longitude in one of the formats supported.
The application shows a map of the location and an address. It available, at the top of the section
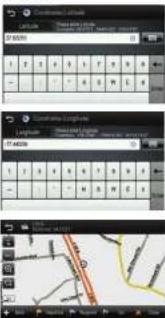
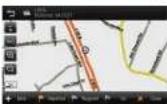
Note: See the on-screen examples to ensure the coordinate you enter is in a valid format.
Multi Route

Save and restore commonly used routes.
The Multi Route interface allows you to save and restore routes that you commonly use.
When Multi Route is opened you will see a list of only saved routes that you currently have (the first time you use the device this list will be empty).
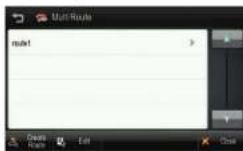
To locate a route simply select it from the list and top NEXT the route will now be calculated and you will be guided to your destination (or first waypoint in route).
To save a route to the Multi Route list top CREATE ROUTE and then top [ADD], you can then add locations to your route as required. Once you have added of the required locations to your route, top NEXT and you will be prompted to enter a name for your route, top NEXT when you have entered the name for your route, your route will then be saved to the Multi Route list. The route preview screen will then be displayed to provide an overview of your route details.
Note: If you would like to save your current active route to Multi Route you can use the SAVE function in My Route > Edit Route.
Map View
Top a point on the map to choose a location as your destination. The address of the point you choose is displayed in a gray information box directly above the point you choose.
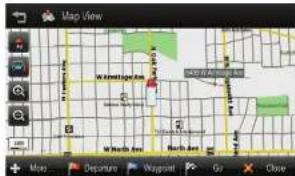
Route: Choose to add the location as a Start point, Waypoint, or destination
More: Tap the MORE button to
• Save the location as a favorite, or
• Search for a POI nearby this location.
5. Guidance while Driving
After you have set a destination, the system will calculate a route. Once you begin moving, the system will use the GPS information to update your position on the map and start to give your guidance.
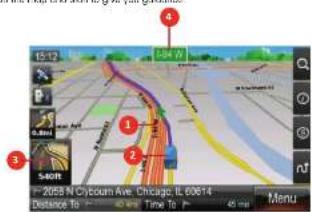
| 1 Highlighted route to follow. 3 indicates | the next turn is links. |
| 2 Your current location. 4 The name of the next sheet to turn onto. | |
See the MAP SCREEN FEATURES - DRIVING GUIDANCE MODE section for a more detailed description of all mcp objects.
Lane Guidance
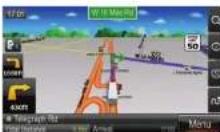
[One Guidance helps you solely prepare for your mail moreover by displaying the correct one(s) to stay in.
one Guidance appears below the New Street Lemma box. The highlighted while arrow indicates the correct lane(s) to be in. In the example below, there is one highlighted lane turning right; this is the correct lane to stay in for the upcoming moreover. The other two gray lanes are going straight.
Signposts
Signposts provide a realistic representation of actual signposts of complex highway junctions. As you approach a highway junction, the signpost displays route shields, route directions, locality, exit, and lane information.
The Signpost procedure the normal Next sheet name box of some junctions. The highlighted shield with white arrows indicates the correct lane(s) to be in. Please be aware that Signpost are available for some, but not all highway junctions.
Junction View
Junction View, like Signpeels, provides a realistic representation of the highway as you approach the junction. The Junction View displays the highway times, shields, directions, and time information in a salt mode view. Junction View may be turned on or off in the Display Settings.
Settings > Display Settings > View Mode. See DISPLAY SETTINGS for more information.
Please be aware that Lane Guidance, Signposts and Junction View are available for some, but not all junctions.
14.
Truck Restrictions
When you calculate a route, the navigation will change to find a route that does not include any roads that are restricted for your vehicle.
However, if it is not possible to find a route without using such roads, it box will be installed with the option to review any restrictions that are present on your route. When reviewing restrictions on your route, you will be presented with a screen stimler to the below; this screen allows you to view a map of the area relating to the restriction and the restriction details.
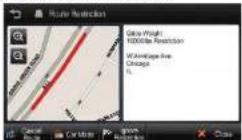
On the Route Restriction screen you can choose: 1) Ignore the restriction, 2) switch to car mode; 3) cancel the route. If you choose to [ignore Restriction], the route given in navigation will use the restricted area of road highlighted on the map. If you choose Car Mode, navigation will not have into account any truck related information with any and all truck restrictions not considered in navigation. If you choose Cancel Route, your route will be cancelled.
There may be multiple restrictions on your route, in this case each individual restriction will be presented in the manner described above.
If you devote from your active route while driving and a new route cannot be collected without using restricted roads, then a message will be displayed on the main map screen with two options: 1) Keep active route, 2) Review restrictions. By choosing Keep Active Route, your route will continue as calculated including the one of road restricted for your vehicle.
By choosing Review Restrictions, you will be prompted to pick in a state place prior to reviewing the restriction or restrictions individually in the same manner as described above using the "Route Restriction" Interface.
Alerts
Your unit will display visual alerts on the main map screen when approaching a location that requires attention. Alerts can be divided into three groups: AURA® alerts (warnings of upcoming road camera, speed camera, dangerous intersections and mobile speed tropes), general trucker alerts (warnings of locations that are of potential importance to truck drivers, such as, shade borders, time zone changes and weigh stations), restriction alerts (warnings that you are approaching a location or use case for which your vehicle is prominent).
An overview of the oral types is displayed below:
| Aura | Camera enforcement: displayed when you are approaching a location of a red light camera or speed camera. | |
| Mobile speed trap: displayed when you are approaching a location commonly used as a speed trap. | ||
| Dangerous intersection: displayed when you are approaching a dangerous intersection. | ||
| General | State border: displayed when you are approaching a state border. | |
| Time zone forward: displayed when you are approaching a change in time zone with the time going forward by on your | ||
| Time zone backward: displayed when you are approaching a change in time zone with the time going backward by on hour. | ||
| Weigh station: displayed when you are approaching a tough station. |
15.
| Truck Restrictions | PM | Hazmat restriction: deployed when you are approaching a location for which your current vehicle is prohibited due to its load type. |
| ◆ | Height restriction: displayed when you are approaching a location for which your current vehicle is prohibited due to its length. | |
| ◆ | Length restriction: displayed when you are approaching a location for which your current vehicle is prohibited due to its length. | |
| ◆ | Truck restriction: displayed when you are approaching a location that is restricted for trucks. | |
| ◆ | Trailer length restriction: displayed when you are approaching a location for which your current vehicle is prohibited due to its trailer length. | |
| ◆ | Weight restriction: displayed when you are approaching a location for which your current vehicle is prohibited due to its weight. | |
| ◆ | Width restriction: displayed when you are approaching a location for which your current vehicle is prohibited due to its width. |
It is the user's responsibility to account for the vehicle's height, width, length, HAZMAT, and other restrictions while driving. Restriction details and locations may change over time, always follow posted road signs and be created or road conditions when making driving decisions.
You can alter the lining of slot display and turn slot displays on or off in Display Settings.
Turn by Turn (TBT)
The Turn by Turn screen offers a nice simplified guidance made. To access this screen, let Menu > My Route > Turn by Turn
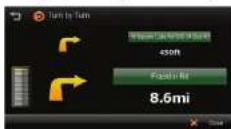
The Turn By Turn screen presents an enlarged monosur image and had to indicate the next turn.
The distance remaining to the next maneuver is indicated by the distance bar on the left.
The second transformer is deployed at the top of the screen with a smaller image and text.
List of Tums
The List of Tums presents a full list of all maneuvers for the journey. To access this screen top Menu > My Route > List of Tums, or from the main map Top Route Tab > List of Tums.
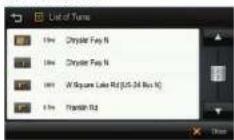
Each graphic shows 'Distance from position and the next street' ona
Turning off the device before journey is complete.
In the case turning off the device before the journey is complete, the navigation application will remind you of the last destination when restarted. If you would like to restore your previous route, select the YES button, otherwise select the NO button.
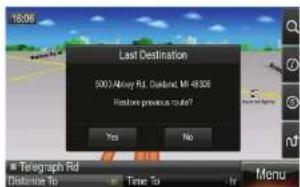
In addition to this, any waypoints that was unreached in the journey will be remembered. By going to Menu > My Route, you can check waypoints and destination points
6. Manage your Route
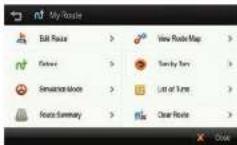
Routing Options may be used to create a new route or to call on existing route. Circle Route / Edit Route buttons will change depending on situation.
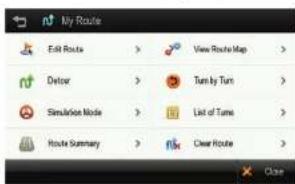
Create Route / Edit Route: Create Route is available if a route has not been set. Edit Route is available if a route has already been set. Use this option to edit your existing route
Delour: Allows you to avoid part of the route or void by distance.
Simulation Mode: Stars a driving simulation of the route.
Route Summary: Go to the route summary screen.
View Route Map: Displays an overview map of your complete route.
Turn by Turn: Displays a simplified guidance mode with no stop.
List of Turns: Displays a full list of all maneuvers on the route.
Clear Route: Deletes the current route.
Create Route
This option is available if no route has been set.
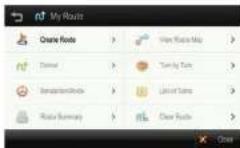
- Add a Location to your route
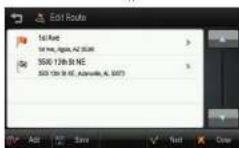
Top the ADD button to add a location to your route. For short routes, you may add up to b waypoints
- Position the location within the route
The first location you set automatically becomes the destination. You may add another location to this route by topping the ADD button.
When you add a second location, this becomes the destination and the previous location moves to the start position.
Any subsequent locations coded become the destination, and previously added locations become waypoints.
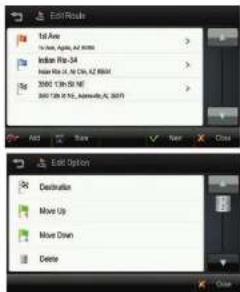
- Calculate Route
When finished, up the NEXT button to calculate the route.
Edit Route
This option is only available if a route already exists.
- Add a Location to your route
Top the ADD button to add another location to your route.
• Position the location within the route
The first location you set automatically becomes the destination. You may add another location to this route by tapping the ADD buron. When you odd a second location, this becomes the destination and the previous location moves to the start position.
Any subsequent locations added become the destination, and previously added locations become waypoints.
- Find POI nearby any location Simply select the location and choose SHOW ON MAP > MORE > FIND NEARBY POI. Also selecting the POI, it will be added to your route.
- Save Route
Top SAVE and enter a name for your route, top NEXT, the route information will now be available for later use in the Multi Route menu.
- Calculate Route
When finished modifying the route, 100 the NEXT button to calculate
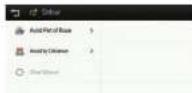
Detour
This function is for editing your route. After editing your route preferences, the navigation application will recalculate a new route automatically.
You can modify your route by using the following:
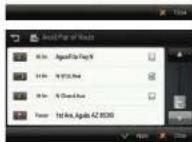
- Avoid Part of route Make a devour to avoid some
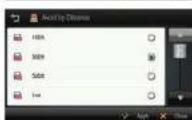
- Avoid by Distan
More a departure to avoid a set distance of your route from your current location. You can see 100ft, 360ft, 500ft, 100, 200t, or 300t as the distance to avoid. For example, if you are stuck in traffic because of a construction site or a car accident sheep of you, you can apply the relevant distance to this incident, and the navigation application will move a departure to avoid that incident.
• Recalculate Original
This button allows you to reconcute the original route by removing any detours or others changes that may have been set.
Route Summary
Route Summary is available on the 'My Route screen. In this screen, you can check route information such as 'total distance, time, etc.
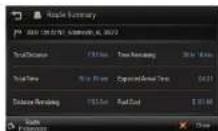
Route Preferences: Recalculate your route with different preferences, e.g. avoid toll roads, user STAa roads, etc.
Fuel cost represents an estimated cost for your Hja. Fuel prices may be adjusted by going to Menu > Settings > Guidance Settings > Fuel Cost
7. Trucker Tools
The Trucker tools menu provides a range of different functions that are particularly helpful to truck drivers, to access the Trucker tools menu, simply top TRUCKER TOOLS at the bottom of the main menu.
Mileage Log
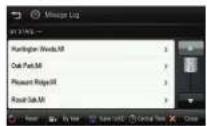
The mileage og automatically records the number of miles that you drive. These records can then be organised by state or by year. Additionally, you can save these records to a SD card for your own records.
Trip Computer
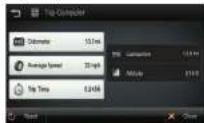
The hip computer provides an overview of totals for your current trip. The display includes on accelerometer, average speed for your trip and total hip time. Additionally, current altitude and cumulative range are provided
20.
Backup/Restore
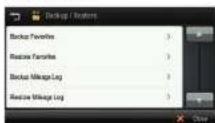
The backuprestore function allows you to save your favorites and/or mileage log entries to a SD card.
For this function to work you must have a SD card inserted into your device, in order to restore favorites/mileage og you will need to have a SD card inserted that has the required files saved into the real directory of the SD card. In order to backup favorites/mileage tag, you will need to have sufficient space on the SD card to allow the files to be saved.
On Duty Timer
The On Duty Times is a set of timers that will assist you in lifting out your hours of service log book.
When the On-Duly Timer is set to manual, your work time will be calculated depending on the selling you make in the information job on the main map (e.g. On-Duly, On-Duly Driving or Off-Duly). When the On-Duly Timer is set to auto, the timer will automatically change to On-Duly Driving after your vehicle has been in motion for 5 minutes, once the vehicle is stationary for 5 minutes, the timer will change to On-Duly
You can view and change the selling for the On Duty Timer, reset lots. change between auto and manual or manually offer the maximum time allowed and time remaining in the On Duty Timer menu.
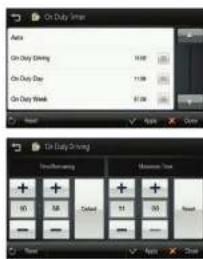
The default totals for maximum time are: On Duty Driving Day 11hrs; On Duty Day 14hrs, On Duty Waste 60hrs. To manually offer the maximum time allowed for these points, simply up the total you would like to call and you will be able to enter both the Time Remolding and the Maximum Time.
When you have finished making any other ones to On Duty Timer, tap [APPLY] and your changes will be saved.
21.
My Truck
The My Truck infarcture allows you to save several vehicle profiles for any different truck types that you may be driving.
Truck Information
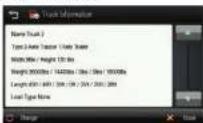
When opening My Truck, you will see a screen that displays the vehicle information of your currently selected vehicle, this includes the back name, back type and off import and track components (e.g. length, height, road type, etc.). The vehicle information displayed on this screen links to the vehicle that is currently being used in navigation. To change the currently selected vehicle, top CHANGE in the bottom left corner of the screen.
My Vehicle
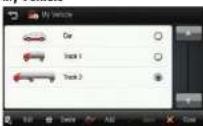
The My Vehicle screen displays all the vehicles that you have available for use. When using your devices for the first time, you will have two default vehicle profiles, one truck (Truck 1) and are car (Car).
To add a new truck to your list of vehicles, simply top ADD at the bottom of the section.
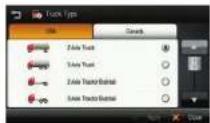
You will be provided with a list of different truck type side configurations. To switch between the efficient lists for USA and Canada, simply asked the appropriate country normal at the top of the list. When you have asked the desired truck type from the list, top APPLY and the vehicle will automatically be ordered to the end of your My Vehicle list. From the My Vehicle list you can then immediately enter the parameters of your must, simply saved the vehicle your wish to call the parameters for one top EDIT or the bottom of the screen.
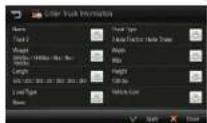
From the Enter Truck Information menu you can give the track a meaningful name, call off trucks parameters and set your choice of airline room to display you on the map. To sell any of the track parameters, simply top the icon to the right of the parameter field. A sub mean will then be displayed where you can individually order each sub category for that route parameter.
When travelling from the US to Canada at vice versa, sailing in the other country will be based on our closest match to your truck type. For best results, use US truck types in the US and then switch to a Canada truck type when driving in Canada.
22.
Vehicle Icon
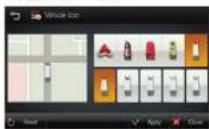
The Vehicle Icon Sub-Manu Ilceves you to say your preferred vehicle icon for your truck. You can select from five different icon styles with live different colour schemes for each icon style.
Calculator
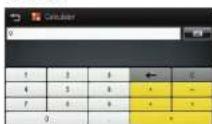
The Calculator interface provides an easy root conventional means of carrying out basic calculations using your device.
8. Traffic
Live Traffic provides up-to-date, real-time traffic information. Live Traffic includes detailed incident reports and the ability to rescue to avoid any incident.
The home service requires FM radio response to receive the hello information.
The navigation device receives traffic data from a traffic service provider and displays this information on the device. Please pay attention to changes in traffic conditions or incidents which may not be reported by this service.

Tap this button of the bottom of the Main Menu to access traffic
Traffic Connection Status
A color sodad Traffic Status icon on the main map represents the traffic connection status. Please refer to the table below for the meaning
| Traffic Status Icon | Meaning |
| The Green icon mea | is that the traffic service is not available. Please check that your smartphone has an internet connection, and that the Traffic Service is turned ON in Settings. |
| The Green icon mea | ians that you have an active traffic service connection, and there are no traffic incidents on your route. |
| The Yellow icon mea | means that you have on active traffic service connection, and there are traffic incidents on your route. |
| The left relating to aans | means that the traffic information is currently downloading. |
Traffic On Route
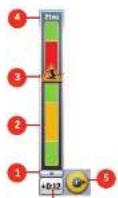
6
| 1 | Expand / Collapse the Traffic tax | 4 | Distance from current position. |
| 2 | Traffic Congestion Extent | 5 | Traffic Status Icon (Top to go to Traffic Details) |
| 3 | Traffic Incentral | 6 | Estimated Delay |
Traffic Map
The bottle crop presents a crop with bottle flow and bottle event(s). The bottle event occurs include the type of bottle event.
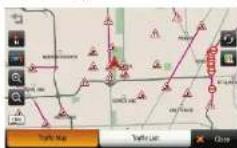
On the small scale traffic map (zoomed out), traffic flow may be seen. Traffic event occurs just at this scale to say the traffic more clearly.
On the large score maps (zoomed in), the Traffic event looks appear together with the traffic flow. You may top any traffic event look to receive more details on the event.

Top the refresh button to update the traffic information.

Top the toggle button to switch between live and predictive traffic display.

If a traffic event (on incident such as a roadblock) occurs on your route, the Traffic Status Icon on the main map will change to yellow and the Traffic Bar will appear. This number in the center of the Icon represents the number of traffic events on your route, in addition to this, a chime will sound for every new event received that effects your route.
In the example above, too (2) events show been reported for the route. If there is a delay associated with this event(s), a box will appear to be all of the Traffic Status Icon indicating the estimated delay. To get more details on these traffic events, or get the option to avoid these events, simply tap the Traffic Status Icon to see the Traffic Details screen for each event. The Traffic Box will appear for 30 seconds when an incident occurs on its updated on your route. To expand or collapse the Traffic Box, simple tap the blow rate in the time delay
24.
Traffic Flow
The tattle crop contains toxic flow information. The line dots yellow, red and black represent the speed of which toxic is moving. The purple line represents an incident's extent (i.e. the where it begins and ends) and requires that toxic is being commonly
| Color | Meaning | Speed Range |
| Fast | Normal | |
| Slow 23-40 MPII (36 km/hr.) | ||
| Heavy 0-22 MPII (1-35 km/hr.) | ||
Congestion events will appear in the Traffic List.
A triangle with these colors is placed to the left of the Tortic symbol in the list. Refer to the Tortic List section for some circles.
Traffic Details
At times, you may need to get more information on a specific traffic event. When in the Traffic map or Traffic Let screen, simply too any event for more details.
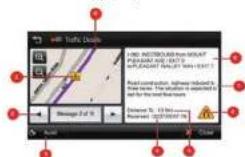
| 1 | Traffic Forward box: The man is placed at the start of the incident. | 6 | Traffic Forward box: In this example, that door means “Lane Reduction.” |
| 2 | Next and Previous. You can spot through the last of the traffic events. | 7 | Detailed description of the throttle event. |
| 3 | Avaldi/Concert Top [W0050] to measure the traffic event. Your way of my work. On “Avaldi” traffic events, the “CANADL” button will only object for events then you have asked to avoid. Top (CANADL) to remove the exercise condition for events. This means that may focus will make longer by a avoid this event. | 8 | Road, Direction, Start and End Junctions of the road. |
| 4 | Time the traffic message was recovered on updated. | 9 | The manager in this indicates the “plant” of the traffic sector. The owner has been placed of the end of the incident and indicates the traffic travel direction. |
| 5 | Distance to the throttle event |
25.
Traffic List
Traffic messages are organized into two groups
- On My Route:
Traffic events on your calculated route. You may only avoid 'On Route' traffic events.
- All Messages:
Traffic events that are within 30 miles of your vehicle's position in all directions. This list includes events on your route. The "Avoid" option is not available for events that are not on your route.
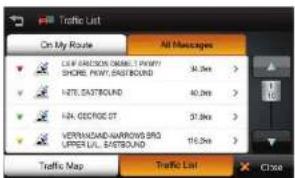
Traffic Event Classes
Traffic messages are organized into classes and each class has a name and symbol. This symbol will appear next to each event in the list, detail and map.
| Class | On Route | Off Route | Avoidant |
| Danger | |||
| Poor stability | |||
| Slopey road | |||
| Heavy vehicle | |||
| Severe weather | |||
| Accident | |||
| Road closed | |||
| Stationary traffic | |||
| Glowing traffic | |||
| Deadout | |||
| Restriction | |||
| Road construction | |||
| Information |
The traffic event icars are color coded to indicate their status.
- On Route. These "Red & Yellow" scores appear for "On Route" event only. These messages are listed in the "On Route" list.
- All note: These "Sat & White" items indicate events not on your route. These messages are listed in the "All Messages" list.
- Avoided: This symbol will appear to indicate if the event has been avoided. When selected, avoided events may be cancelled and will not be excluded from the route.
Traffic Settings
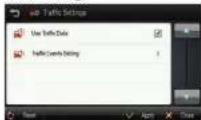
Use Traffic Data
Select to have the traffic service on or off.
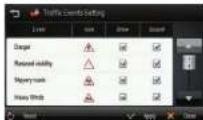
Traffic Event Settings
Traffic information may be turned on/off for certain traffic event classes. The following options are available:
• Show: Show this traffic event class on the maplist etc.
- Sound: Provide an credible diet when a message from this traffic event
class diques on my route
Predictive Traffic
You may additionally display practical logic information on the logic map. Protective logic is based on historic logic patterns and provides a general guide for roads with potential delays due to logic.
To display predictive traffic information, simply log the toggle button on the right of the traffic map screen. Predictive traffic information will now be displayed, for your convenience a legend is provided to help interrupt the predictive traffic display.
If you uncheck Show for a particular class, you will not receive any notification of events within this class. See Traffic Event Classes section for more details.
9. Weather
Your device allows you to view the weather information in a number of different ways, different weather overlays may be viewed on map, or a summary of current weather conditions may be viewed for your current location or for your destination.
An active Wi-Fi connection is required to receive live weather information.
On Map
To view weather conditions on a map, top SERVICES and then top WEATHER, you can then select from 9 different weather overlays to display on the map. These overlays portray different weather conditions.
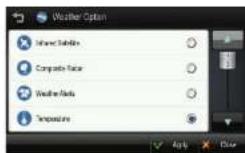
When you have selected the desired weather overlay option, you APPLY and the weather overlay will be displayed on a trap. The weather ramp lectures a legend to help you understand the meaning of the different colors and an openly control to increase or decrease the transparency of the weather overlay display.
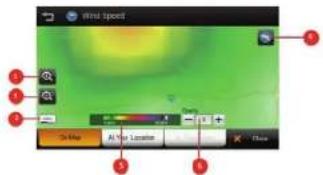
| 1 | Zoom in | 4 | Change weather overlay display |
| 2 | Zoom out | 5 | Weather overlay legend |
| 3 | Map scale | 6 | Opacity control |
At Your Location
To view a summary of weather conditions at your location, tap AT YOUR LOCATION of the bottom of the weather map screen. The At Your Location screen provides an overview of the current and upcoming weather conditions.
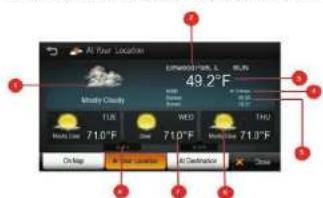
| 1 | Current weather conditions | 5 | Sunset/sunrise times for today |
| 2 | Location information | 6 | Weather conditions for upcoming days |
| 3 | Current temperature | 7 | Temperature for upcoming days |
| 4 | Current wind speed and direction | 8 | Temperature for upcoming nights |
At Destination
If you have an active route in navigation then you can also view a summary of weather conditions for your destination location. To access this summary, simply top AT DESTINATION on the bottom of weather crop.
10. Fuel Prices
The fuel price information allows you to search for live fuel price information for gas stations and travel cankes.
At Your Location
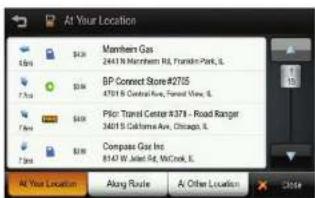
To view a list of fuel prices at gas stations or travel centers near your current location, simply top SERVICES on the main menu. A list of gas stations and their respective fuel prices are displayed. This list is sorted by distance from your current location.
Along Route
If you have an active route ordered in navigation, you can search for gas stations that are on, or situated close to your route. Simply lap ALONG ROUTE at the bottom of the fuel price screen and a list of gas stations and their respective fuel prices will be displayed (sorted by distance from your current location).
At Other Location
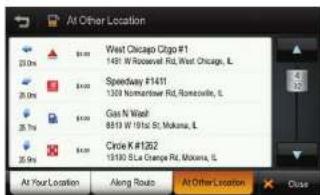
If you would like to view fuel prices of a different location, tap AT OTHER LOCATION at the balance of the fuel prices screen, then make the State/Province and City name of the location for which you would like to view fuel prices. A list of gas stations and their respective fuel prices will be displayed (sorted by distance from your current location).
An active Wi-Fi connection is required to receive live fuel price information.
11. Settings
In this screen, you can customize the settings of the Navigation application. Descriptions of each option are as follows:


Display Settings

Control the display settings of the map view.
| Display Settings | ||
| DayNight | > | Map Overlay |
| Map Colors | > | Sat Click |
| Map Mode | > | Brightness |
| View Options | > | Alert |
Day/Night: Set the color mode of map as 'DayTime', 'Nighttime', or 'Auto mode'. Auto mode will allow the navigation application to automatically choose day or night mode.
Map Colors: Change the map color.
Map Mode: Change the view mode of map as 'Trace up', 'North up', or '30 View' mode
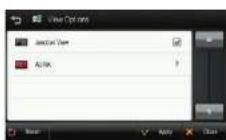
View Options: Turn Junction View mode on/off.
Map Overlay: Choose which labels on map you want to display
Set Clock: Set the time displayed on the main map screen.
Brightness: Set the brightness of the screen.
Alerts: So which alerts are displayed on the main map
Day/Night
Change the take scheme of the map as 'Oxyline', 'Nightline', at 'Auto' mode
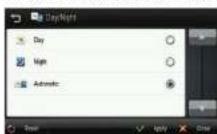
Daytime: Dayline caka scheme.
Nighttime: Nighttime color scheme.
Auto: Automatically change the map scheme
Map Colors
You can change the map color. By touching the map images, change day to right color of map screen according to your preference. Then lap the APPLY button.
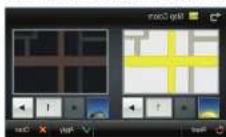
Day Color: Select day color of map screen.
Night Color: Select night color of map screen. A darker map color is used to reduce glare and eye strain while driving.
Map Mode
You can change the view mode of crop as 'Track up', 'North up', or '30 View' made
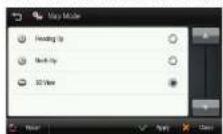
Track up: The direction of car is facing upwards
North up: The crop screen is loaded to north direction up.
3D View: 3 dimensional 'Trock up Made'.
View Options
You can turn select when fune points are displayed on the main map and turn junction view can or off.
Map Overlay
You can turn off display some labels on map. Select options that you wish to be displayed on the map screen, then top the APPLY button to apply these settings on the map screen.
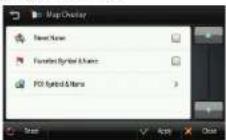
Street Name: Show or hide the steel name on the map.
Favorites Symbol & Name: Symbols and bases of registered places as your favorite.
POI Symbol & Name: Tapping this ballot will allow you to hide or display POIs based on category type. You can choose to only display your favorite POI types, for example restaurants, fuel stations etc.
Guidance Settings

Control the settings for guidance information
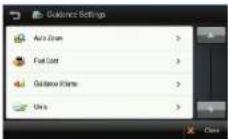
Auto Zoom: You can sell the automatic zoning of intersection at on space.
Fuel Cost: Set fuel pricing, and vehicle fuel consumption.
Guidance Volume: Control the volume of voice guidance instructions
Units: Set the distance, weight and temperature units used in guidance.
Auto Zoom
You can turn on/off automatic zooming or the intersection and automatic zooming on speed options.
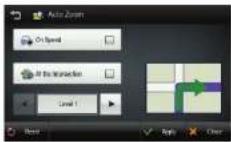
On Speed: Automatically adjust mop scale level according to the speed of car. The mop zooms out to a small scale map when you increase speed; e.g. driving test on highway. The mop zooms in to a large scale map when you decrease speed; e.g. when approaching a junction.
At the Intersection: Automatically zoom input to a certain map scale level of the next maneuver intersection.
Levels: Choose the map scale level you would like to map to auto zoom to.
32.
Fuel Cost
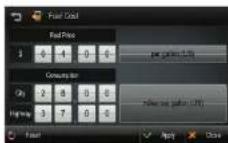
Fuel Price: Fuel prices (buckeye throughout the year. This selling allows you to adjust the fuel price according to current price. Pricing for fuel volumes can be set as either 'per gallon (US)' or 'per litre'.
Your journey's fuel cost estimate will appear on the 'Route Preview' screen.
Consumption: The consumption section allows you to sell your vehicle's fuel consumption. This fuel consumption will then be used in the cost estimate for your trip. Most modern vehicles include a fuel economy ticket which addresses the vehicle's fuel economy ratings. Alternatively, to find out your vehicle's fuel consumption, please see the Fuel Economy Guide or wave-hadecomany.gov. This guide is put by the U.S. Environmental Protection Agency (EPC) and U.S. Department of Energy (CQE). It contains an extensive listing of most vehicle makes and makes vehicle consumption is feasible as required on low fuel economy estimates.
- City: represents urban driving and driving in stop and-go rush hour traffic. City driving typically consumes more fuel than highway driving.
- Highway: exposes driving on a route of rural and recessed highway driving. Typical of larger trips in face-flowing traffic.
Please be aware that the actual fuel cost may vary according to other factors which affect the fuel consumption, for example, driver behavior, driving conditions, vehicle maintenance, fuel characteristics, and weather. The cost estimate is on approximation of face costs only. Other costs, such as toll charges are not included in the calculation.
Guidance Volume
This saying allows you to control the volume level of voice guidance.
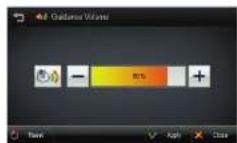
Increase Volume: press the [+] button to increase the volume of the guidance announcements.
Decrease Volume: press the [-] button to decrease the volume of the guidance announcements.
Language Settings
This setting allows you to control the volume level of voice guidance.
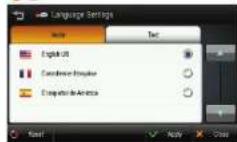
You may select from three languages for voice guidance and dispaced text: English (USA), French (Canada) and Spanish (USA).
Sorry too VOICE and/or TEXT and select the language that you want to use. When you have finished, up APPLY and any changes will be saved.
33.
Routing Options

Change routing options for the system.
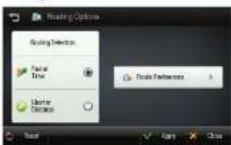
Routing Selection:
• To calculate a route for faster time, select 'Faster Time' option.
- To calculate a route for shorter distance, select 'Shorter Distance' option.
Routing Preferences: Tap the ROUTE PREFERENCES button if you wish to avoid or prefer certain features or read types (e.g. avoid U-turns, avoid series, use STM reads, etc.).
When you have finished moking changes to routing options tap APPLY and your changes will be saved for all future routes.
Home and Office
Set on access for your Home and/or Office

Set your Office address

Set your Home address
Traffic Settings

Settings for Traffic information.
Sea Tropic sector for non-ricultural
Network Settings

View available Wi-Fi connections and connect to Wi-Fi.
The network settings menu allows you to connect your device to the internet using a Wi-Fi connection.
When you open the network settings menu your current W-H status is displayed, if you are connected to a Wi-Fi network the name of the network and the signal strength is displayed on the right of the screen. If you are not currently connected to Wi-Fi networks, "Not Connected" will be displayed.
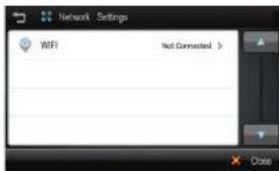
Device not connected to W-F network.
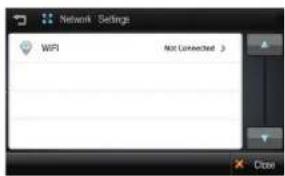
Device connected to Wi-Fi network
To view all available Wi-Fi networks lap WIFI on the network settings screen. A list of all optional networks will be displayed. To connect to a network, lap the network name to select it in the list and then lap CONNECT. You may disconnect from your current connection by loading the network name and then kupper DISCONNECT.
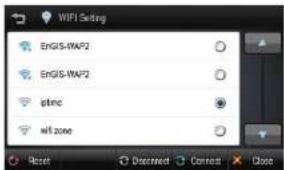
After tapping CONNECT you will be prompted for the network password (if one is required), simply enter the password and click DONE. Your device will now be connected to the internal and you can use the two data features (Live Weather, Fuel Prices and Google Security).
12. Warranty
COSKE ELECTRONICS CORPORATION Environmentals that its Canadian Navigation System, and the component parts thereof, will be a key or key in multinational and incremental for a term of one year from the date of first consumer purchase. This warranty may be enforced by the first consumer purchaser, provided that the product is used solely within the U.S.A. and is not limited to, without changes, repair or redemption of the Canadian Government's share rights. The Company is not a company for any purpose of delivery to the Canadian Safety Service Department, if it is approved by proof of the date of first consumer purchase, such as a duplicated copy of a sole reader. The consumer must pay any initial shipping charges required to ship the product for warranty servicer. Return shipping will be of Canada's expenses if the product is realized or repurchased under warranty. This warranty gives the consumer specific rights, and the Company is responsible for obtaining the rights of Canada.
NOTE: COBRA MAKES NO WARRANTY AS TO THE ACCURACY OR COMPLETENESS OF THE MAP DATA UTILIZED IN GPS NAVIGATION AND DISCLAIMS ALL EXPRESS, IMPLIED OR STATUTORY WARRANTIES, INCLUDING ANY IMPLIED OR STATUTORY WARRANTIES OF MERCHANTABILITY OR FITNESS FOR A
EXCLUSIONS - THIS LIMITED WARRANTY DOES NOT APPLY:
- In the event of misuse or abuse of the product or as a result of unauthorized actions or repairs.
S. If the serial number has been altered, defaced or removed.
At implied warranties, including warranties of merchantability and illness for a particular purpose are limited in duration to the term of this warranty. CORNA SHALL NOT BE LIABLE FOR ANY INCIDENTAL, CONSEQUENTIAL OR OTHER DAMAGES, INCLUDING WITHOUT LIMITATION. DAMAGES RESULTING FROM LOSS OF USE OR COST OF INSTALLATION. Some states do not allow limitations on the duration of an implied warranty under or not allow the excursion or limitation of incidental or consequential damages. Part or all of the above limitations may not apply to some consumers.
It is the user's responsibility to use this product prudently and responsibly. This product is intended to be used only as a travel aid and must not be used for any purpose requiring precise measurement of direction, distance, location and/or geography.
13. PRODUCT SERVICE
For any questions about operating or installing this new Cobra product, or if parts are missing...
PLEASE CALL COBRA FIRST...do not return this product to the store.
If this product should require factory service, please call Cobra first before sending the product. This will ensure the fastest turnaround time on any repair. If Cobra asks that the product be sent to its factory, the following must be furnished to have the product serviced and returned:
-
For Warranty Repair include some form of proof-of-purchase, such as a mechanical reproduction or carbon of a sales receipt. Make sure the date of purchase and product model number are clearly readable. If the originals are sent, they cannot be returned;
-
Send the entire product;
-
Enclose a description of what is happening with the product. Include a typed or clearly printed name and address of where the product is to be returned, with phone number (required for shipment).
-
Pack the product securely to prevent damage in incresil. If possible, use the original packing material;
-
Ship prepaid and insured by way of a traceable carrier such as United
Pacel Service (UPS) of Pachy Mcl to avoid loss in transit to: Cobra Factory Service, Cobra Electronics Corporation, 6500 West Corland Street, Chicago, Illinois 50707 U.S.A.:
- If the product is in warranty, upon receipt of the product, it will either be repaired or exchanged depending on the model. Please allow approximately 3. 4 weeks before contacting Cobra for status. If the product is out of warranty, a letter will automatically be sent with information as to the repair charge or replacement charge. For any questions, please call 773-859-3057 for assistance.
14. Customer Assistance
Should there be any problems with this product, or its many features not be understood, please refer to this quick screen guide. For further assistance offer reading the manual, Dooro Electronics offers the following customer assistance services:
FOR ASSISTANCE IN THE U.S.A.
- Automated Help Desk (English only) 24 hours a day, 7 days a week at 773-889-3087 (phons).
- Customer Assistance Operators (English and Spanish) 8:00 a.m. to 5:30 p.m. Central Time, Man. through Fri. (except holidays) at 773 889 3087 (phans).
• Questions (English and Spanish) Fases can be received at 773-622-2269 (fox).
• Technical Assistance (English only) www.sobro.com (on-line: Frequently Asked Questions).
• Technical Assistance (English and Spanish) productinfo@eabra.com (e-mail).
FOR ASSISTANCE OUTSIDE THE U.S.A.
- Contact the local dealer
15. Trademark Acknowledements
Cobro ^25 , Nothing Gomes Close to a Cobro ^36 , AJRA ^47 , and the smoke design or registered trademarks of Cobro Electronics Corporation, USA.
Windows ^2 is a registered trademark of Microsoft Corporation.
82-2006-2013 Title Atlas. This relates is proprietary and the subject of copyright protection and other intellectual property rights owned or licensed to Tele Atlas. Title Atlas is an authoritative user of selected Statistics Canada computer files and distributor of derived information products under Agreements number 6776. The product is sourced in port from Statistics Canada computer files. Including 2009 Broad Network File (SNF), 92-500-KWBAW and 2006 Census Population and Dwelling Court Highlight Tables, 97-550-KWZE0800C2. The product includes information copied with permission from Canadian authorities. Including @ Canada Post Corporation, GeoBosef, and Department of Natural Resources Canada. All rights reserved.
©2004-2013 ProMiles Software Development Corporation. Truck Attribute Data and Live Fuel Price Data are proprietary and the subject of copyright protection and other Intellectual property rights owned by or licensed to ProMiles Software Development Corporation. All rights reserved.
©1997-2013 TruckDown Info International, Inc.. Truck Points-of-Interest (PO) Date
©2013 EnGIS Technologies, Inc.. Navigation software is proprietary and the subject of copyright protection and other intellectual property rights owned by or licensed to EnGIS Technologies, Inc.. All rights reserved.
© Total Traffic Network Data Distribution Services*. Total Traffic Network* are registered trademarks of Clear Channel®. All rights reserved.
© 2013 Velocity Weather®. Live weather data is proprietary and the subject of copyright protection and other intellectual property rights owned by or licensed to Baron Services, Inc.. All rights reserved.
© 2013 Text-In-Speech technology provided under license by DIOTEK, SACK TTS. All rights reserved.
The use of this product and its date is subject to the terms of a license agreement. You will be held liable for any unauthorized copying or disclosure of this material. Google ^™ is a trademark of Google, Inc. Use of this trademark is subject to Google permission.
NOTES
- IMPORTANT SAFETY INFORMATION
- WARNINGS:
- FCC Compliance
- Operation of this device is subject to the following conditions:
- User License
- CONTENTS
- Getting Started
- Powering on your device
- Charging the Unit
- GPS
- Route Preview
- Menu
- Quick Tabs
- Information Tab
- Route Tab
- Plan a Route
- Address
- Intersections
- POI
- Search by Category:
- Search by POI Name:
- Search for POI by City
- Search for POI Along Route
- Amenity Filter
- Google™ Search
- Favorites
- Recent List
- Current Location
- Coordinates
- Step 1
- Step 2
- Multi Route
- Map View
- Guidance while Driving
- Lane Guidance
- Signposts
- Junction View
- Truck Restrictions
- Alerts
- Turn by Turn (TBT)
- List of Tums
- Turning off the device before journey is complete.
- Manage your Route
- Create Route
- - Add a Location to your route
- - Position the location within the route
- - Calculate Route
- Edit Route
- • Position the location within the route
- - Save Route
- Detour
- • Recalculate Original
- Route Summary
- Trucker Tools
- Backup/Restore
- On Duty Timer
- My Truck
- Vehicle Icon
- Traffic
- Traffic List
- - On My Route:
- - All Messages:
- Traffic Event Classes
- Traffic Settings
- Use Traffic Data
- Traffic Event Settings
- Predictive Traffic
- Weather
- On Map
- At Your Location
- At Destination
- Fuel Prices
- Along Route
- At Other Location
- Settings
- Display Settings
- Day/Night
- Map Colors
- Map Mode
- View Options
- Map Overlay
- Guidance Settings
- Auto Zoom
- Fuel Cost
- Guidance Volume
- Language Settings
- Routing Options
- Routing Selection:
- Home and Office
- Network Settings
- Warranty
- EXCLUSIONS - THIS LIMITED WARRANTY DOES NOT APPLY:
- PRODUCT SERVICE
- Pacel Service (UPS) of Pachy Mcl to avoid loss in transit to: Cobra Factory Service, Cobra Electronics Corporation, 6500 West Corland Street, Chicago, Illinois 50707 U.S.A.:
- Customer Assistance
- FOR ASSISTANCE OUTSIDE THE U.S.A.
- Trademark Acknowledements
- NOTES
Brand : COBRA
Model : 8500 PRO HD
Category : Gps