Verso - Drone Dromida - Free user manual and instructions
Find the device manual for free Verso Dromida in PDF.

| Product Type | Quadcopter Drone |
| Model | Verso by Dromida |
| Dimensions | 200mm diagonal (motor shaft to motor shaft) |
| Weight | 90g (including battery) |
| Battery | LiPo 3.7V 500mAh |
| Flight Time | Approximately 8-10 minutes |
| Charging Time | Approximately 60 minutes |
| Control Range | Up to 100 meters |
| Camera | 720p HD camera with wide-angle lens |
| Flight Modes | Altitude hold, headless mode, 3D flips, one-key return |
| Remote Controller | 2.4GHz transmitter with throttle trim and LED indicators |
| Propeller Size | 76mm diameter (3 inches) |
| Spare Parts | Replacement propellers, motors, battery, and landing gear available |
| Safety Features | Propeller guards, low battery warning, emergency stop |
| Durability | Lightweight plastic frame designed for crash resistance |
| Cleaning & Maintenance | Clean with soft cloth; avoid water. Lubricate motors periodically. |
| Storage | Store in a cool, dry place with battery partially charged (50%) |
| Age Recommendation | 14 years and up |
Frequently Asked Questions - Verso Dromida
User questions about Verso Dromida
0 question about this device. Answer the ones you know or ask your own.
Ask a new question about this device
Download the instructions for your Drone in PDF format for free! Find your manual Verso - Dromida and take your electronic device back in hand. On this page are published all the documents necessary for the use of your device. Verso by Dromida.
USER MANUAL Verso Dromida
and go to www.knowbeforeyoufly.org

Verso
Radio Controlled Quadcopter

TO PREVENT MOTOR DAMAGE ALWAYS BE SURE THE THROTTLE IS OFF WHEN THE BLADES ARE OBSTRUCTED OR CONTROL IS LOST.
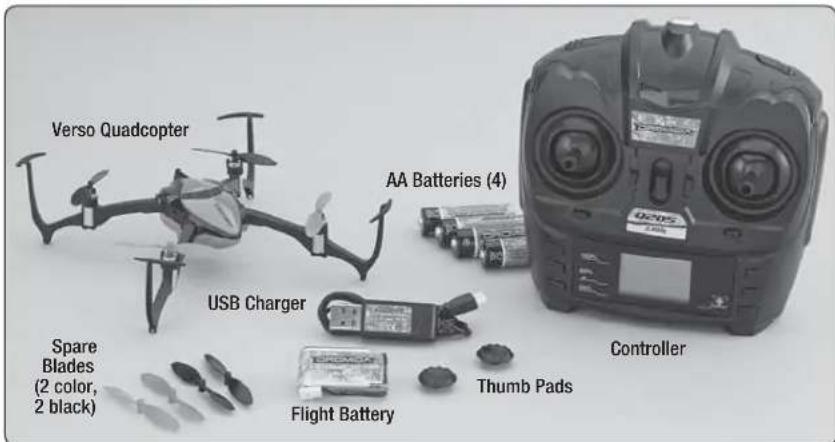
CHARGING
natural_image
Close-up of a small electronic device with wires and a small label, placed on a grid mat (no visible text or symbols)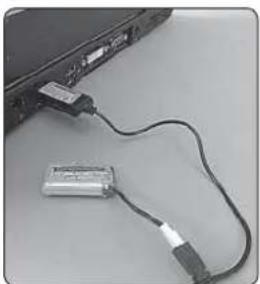
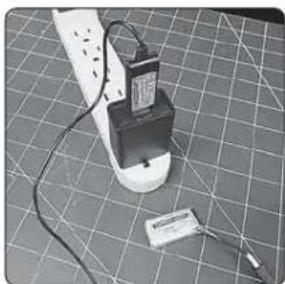
natural_image
Close-up of a laptop connected to a USB cable with a battery (no visible text or symbols)Plug the charger into any USB port on a computer or to a USB to AC adapter (not included, use part DIDP1125 as an optional accessory). The LED on the charger will illuminate solid red while the battery is charging. The red LED will go out when charging is complete.
- NEVER leave the battery unattended while charging.
● DO NOTallow the USB port to power down while the charger is connected to the battery.
● ALWAYS unplug the charger from the USB port and the battery when charging is complete.
● NEVER charge a puffed or damaged battery.
CONTROLLER SETUP
natural_image
Two electronic components: a gray battery pack and a small rectangular component with four batteries (no visible text or symbols)Remove the battery cover to insert the included (4) AA batteries. Reinstall the battery cover.
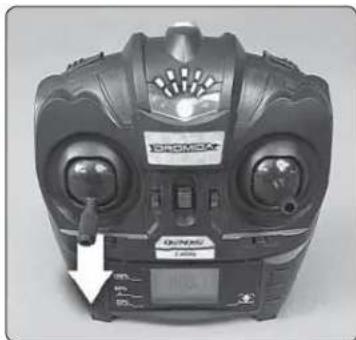
LINKING
natural_image
Black and white photo of a Dromax 3D controller device with visible branding and control panel (no readable text or symbols)- Turn on the controller with the left stick at its lowest position. The LED on the controller will flash, indicating it is waiting for the arming sequence.
natural_image
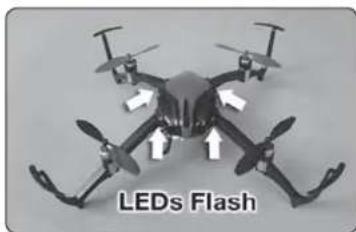
Drone with four propellers and directional arrows, labeled 'LEDs Flash' at bottom (no other text or symbols)- Slide the flight battery into the slot on the underside of the Verso. Connect the flight battery to the Verso and
place it upright on a level surface. The LEDs on the quad will flash rapidly while the quad is linking to the controller. Then they will blink slowly while it waits for the arming routine.
- In order to arm the Verso you must move the throttle stick to full throttle and then back down to the lowest position. The LEDs on the quad will go solid. The Verso is now armed and ready to fly.
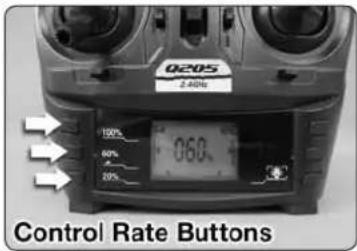
CONTROL RATES
The responsiveness of the Verso to the control sticks is adjustable using the rate buttons on the controller. Beginner pilots will want the Verso less responsive and should choose the 20% rate button. As your piloting skills improve, the higher rates can be used for more aggressive fl ying. Be sure to have more fl ying space when using the 60% and 100% control rates.
When the control rate is changed, you will see the selected control rate momentarily displayed on the controller LCD screen.
FLYING BASICS
If this is your fi rst time piloting a multi-rotor craft, you will fi nd that the controls are intuitive and you will have a feel for basic fl ight by the end of your fi rst battery. Mastering fl ying, however, takes some practice and patience. We recommend that you always fly in control and within your piloting ability.
-
Place the Verso on the ground at least 6 feet away with the tail facing you. Make sure the control rate is set to 20%.
-
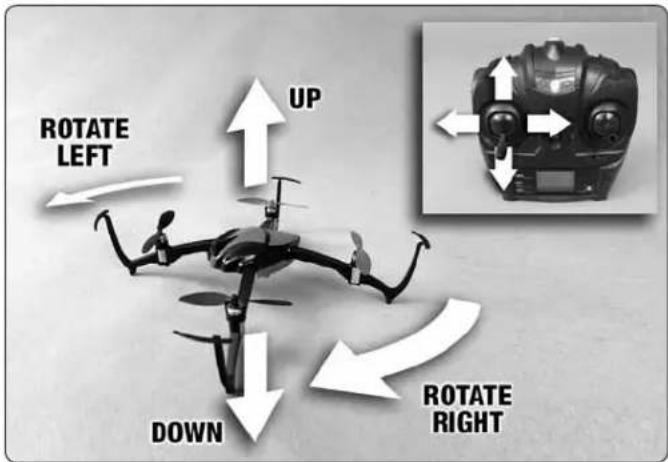
Take off by "slowly" advancing the left stick until the quad takes off. Change the altitude using small movements.
-
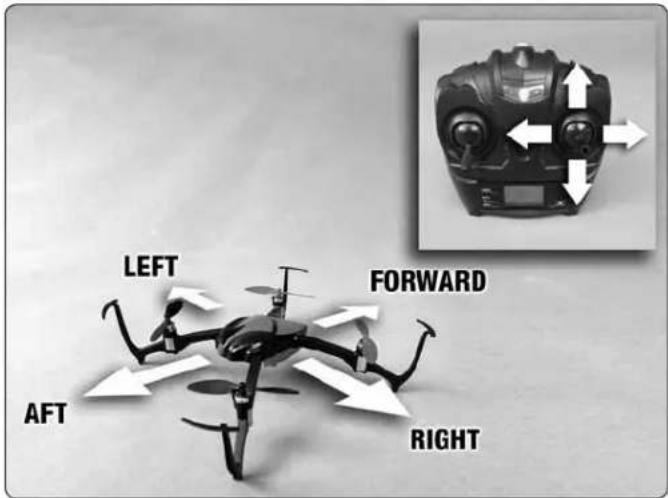
Use the right stick to make the Verso move left, right, forward or backward. Keep in mind that when the nose is facing you, the right stick controls will appear to be operating in opposite directions, i.e., moving the right stick to the right will now move the quad left from the pilot's perspective.
-
Moving the left stick to the left or right will rotate the nose of the Verso left or right.
-
Always use small stick movements to control the Verso until you are familiar with the how the model responds to the controls.
-
Always unplug the Verso's battery and turn off the controller when you're done fl ying.
INVERTED FLIGHT
natural_image
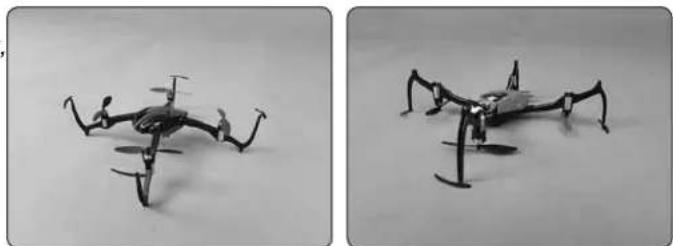
Two black-and-white photos of a small mechanical drone with extended wings, shown from different angles (no text or symbols visible)Unlike your typical multi-rotor craft, the Verso is capable of taking off upside-down or fl ipping itself inverted during fl ight with the press of a button and then continuing to fly normally. Sensors on the Verso automatically detect which side of the quad is facing up and will adjust the rotation of the motors accordingly. Because of this feature, there is some functionality that is unique to the Verso:
- When the Verso is flipped 180^ using the flip button in the direction of front-to-back, the forward and reverse controls are automatically swapped so your perception of what is forward has not changed. This means that if the colored props were considered the front of the quad before you fl ipped front-to-back, they will now be the rear of the quad.
- When the Verso is flipped 180^ left-to-right, the controls do not change.
- Whenever the throttle is moved to the lowest position, the direction control always defaults to the colored props being the front of the quad. It does not matter which side of the quad is facing up.
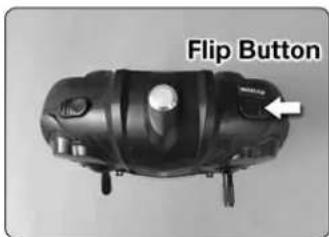
The default setting for the fl ip function is 180°. To change the fl ip function to 360°, press and hold the fl ip button for at least two seconds. The transmitter beeps once for 180° mode and beeps twice for 360° mode.
LOW BATTERY INDICATORS
Total fl ight time with a fully charged battery will be approximately 7 minutes if the Verso is fl own until the automatic cutoff shuts down the motors. When the battery voltage approaches the cutoff voltage, then the LEDs on the Verso will fl ash. At this point the fl ip function will be disabled. We recommend you land the Verso and charge the fl ight battery.
When the controller batteries become depleted, the battery symbol on the controller LCD screen will fl ash and you will hear an audible warning.
ROTOR BLADE REPLACEMENT
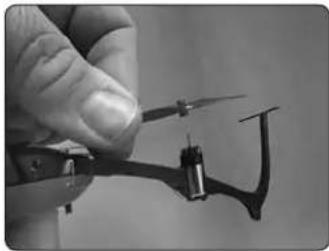
natural_image
Close-up of a hand holding a small electronic device with a metallic connector (no visible text or symbols)If a rotor blade needs replacement, use the prop removal tool or a thin, fl at bladed screwdriver to pry off the damaged rotor blade. The new blade can be pressed onto the motor shaft with just fi nger pressure. Take care not to bend the replacement rotor blade when installing.
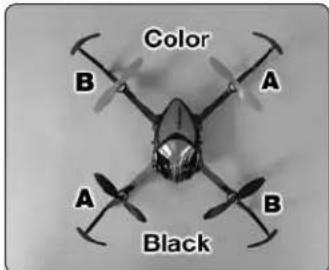
The replacement blades are labeled A and B. Use this diagram to ensure you are installing the blade in the correct location. Colored blades always go in the front.
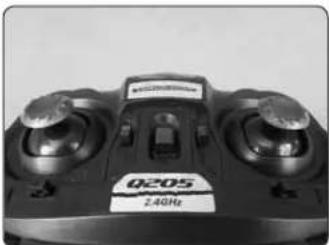
CONTROLLER THUMB PADS
natural_image
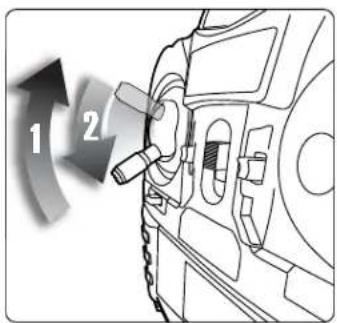
Close-up of a black Q205 remote control device with dual dials and a 2.4GHz label (no readable text beyond branding)Optional thumb pads are included with the Verso to be installed onto the controller stick ends. The pads may reduce the chance of your thumbs slipping from the ends of the controller sticks. Their use is a matter of preference and they can be
easily removed again if you decide you would rather fly without them. Twist and pull off the controller stick tips and press on the thumb pads. You can also install them onto the ends of the stick tips.
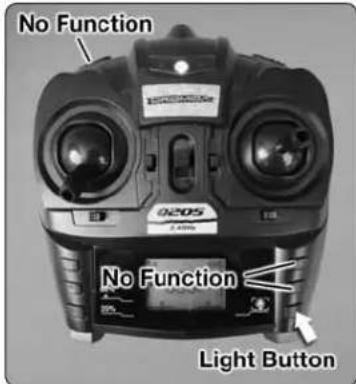
LED LIGHTS
The LED lights which can be seen at the base of each arm can be toggled off and on using the light button on the controller. When the LEDs are turned off you will see a lightbulb icon appear on the controller LCD screen.
Note: There are other buttons on the controller which do not have any function with the Verso. These are shown in the picture.
TROUBLESHOOTING
PROBLEM: The Verso will not respond to the controller.
SOLUTION: (1) Turn off the controller and disconnect the battery for the Verso. Re-link the quadcopter and the controller.
(2) Ensure that you are arming the Verso.
(3) Charge or change the battery on the quadcopter.
PROBLEM: Unable to fl ip.
SOLUTION: Battery voltage is too low.
PROBLEM: Quadcopter is shaking.
SOLUTION: Check the props for damage.
PROBLEM: The props spin but the quadcopter will not take off.
SOLUTION: (1) Rotor blades are incorrectly installed. See the Rotor Blade Replacement section.
(2) Recharge the flight battery.
90-DAY LIMITED WARRANTY
PLEASE DO NOT RETURN YOUR PRODUCT TO THE
STORE. Dromida will repair or replace factory defects for 90 days from the date of purchase. This warranty specifi cally does not cover crash damage, misuse or abuse. To make a warranty claim, please contact our product support team at
1-217-398-8970 option 6 or e-mail us at helihotline@greatplanes.com. If requested by Product Support, please send defective product to:
Hobby Services
3002 N Apollo Dr., Suite #1
Champaign, IL 61822
In the European Union, send it postpaid and insured to:
Please include a note about the problem, your contact information, and a copy of the receipt.
This warranty applies only if the product is operated in compliance with the instructions and warnings provided with each model. Dromida assumes no liability except fo the exclusive remedy or repair of parts as specifi ed above. Dromida shall not be liable for consequential or incidental damages. Some states do not allow the exclusion of
consequential or incidental damages so the above exclusion may not apply to you. This warranty gives you specific legal rights and you may also have other rights which vary from state to state.
FCC REQUIREMENT
This device complies with Part 15 of the FCC rules. Operation is subject to the following two conditions.
(1) This device may not cause harmful interference.
(2) This device must accept any interference received, including interference that may cause undesired operation.
NOTE: THE MANUFACTURER IS NOT RESPONSIBLE FOR ANY RADIO OR TV INTERFERENCE CAUSED BY UNAUTHORIZED MODIFICATIONS TO THIS EQUIPMENT. SUCH MODIFICATIONS COULD VOID THE USER'S AUTHORITY TO OPERATE THE EQUIPMENT.
This equipment must be installed and operated in accordance with provided instructions and the antenna(s) used for this controller must be installed to provide a separation distance of at least 20 cm from all persons and must not be co-located or operating in conjunction with any other antenna or controller. End-users and installers must be provided with antenna installation instructions and controller operating conditions for satisfying RF exposure compliance.
CE COMPLIANCE INFORMATION FOR THE EUROPEAN UNION
INSTRUCTIONS FOR DISPOSAL OF WASTE EQUIPMENT BY PRIVATE USERS IN THE EUROPEAN UNION:
This symbol on the product or its packaging indicates this product must not be disposed of with other household waste. Instead, it is CE

the user's responsibility to dispose of their waste equipment by handing it over to a designated collection point for the recycling of waste electrical and electronic equipment. The separate collection and recycling of your waste equipment at the time of disposal will help to conserve natural resources and ensure that it is recycled in a manner that protects human health and the environment. For more information about where you can drop off your waste equipment for recycling, please contact your local city office, your household waste disposal service or location where you purchased the product.
DECLARATION OF CONFORMITY
Product: Dromida 2.4GHz 4-Channel Tx Rx
FCC ID: IYFQ205
Item number: DIDJ1102
Equipment class: 1
Q205 transmitter: The objects of the declaration described here are in conformity with the requirements of the specifications listed below, following the provisions of the European 2006/95/EC Low Voltage Directive:
EN 60950-1:2006 Safety
The objects of the declaration described here are in conformity with the requirements of the specifications listed below, following the provisions of the European R&TTE directive 1995/5/EC:
EN300 328 V1.8.1.
Technical requirements for radio equipment
ETSI EN 301 489-1 V1.8.1, 301 489-17 V1.3.2
General EMC requirements for radio equipment
Hobbico, Inc.
2904 Research Road
Champaign, IL USA 61826
Revell Germany
Distributed in Europe by Revell GmbH
D-32257 Bünde Germany
DIDE1520 Canopy Green
DIDE1521 Canopy Red
DIDE1522 Canopy Blue
DIDE1523 Canopy Yellow
DIDE1530 Prop Set Green
DIDE1531 Prop Set Red
DIDE1532 Prop Set Blue
DIDE1533 Prop Set Yellow
DIDE1534 Belly Pan Green
DIDE1535 Belly Pan Red
DIDE1536 Belly Pan Blue
DIDE1537 Belly Pan Yellow
DIDE1540 Main Frame
DIDE1541 Motor CW L/F R/R
DIDE1542 Motor CCW R/F L/R
DIDE1543 E-Board
DIDE1544 USB 1S LiPo Charger
DIDE1545 Prop Removal Tool
DIDE1546 LiPo 1S 3.7V 350mAh Batt

TO PREVENT MOTOR DAMAGE ALWAYS BE SURE THE THROTTLE
IS OFF WHEN THE BLADES ARE OBSTRUCTED OR CONTROL IS LOST.