
Voice Tracer VTR6600 - Dictaphone PHILIPS - Free user manual and instructions
Find the device manual for free Voice Tracer VTR6600 PHILIPS in PDF.


| Product Type | Digital Voice Recorder (Dictaphone) |
| Dimensions (H x W x D) | 115 x 45 x 15 mm (estimated) |
| Weight | 60 g (including batteries) |
| Power Supply | 2 x AAA batteries (alkaline or rechargeable) |
| Recording Format | MP3 (stereo) / PCM (WAV) selectable |
| Internal Memory | 4 GB flash (approximately 70 hours at high quality) |
| Expandable Memory | microSD card slot (up to 32 GB) |
| Recording Time (max) | Up to 2700 hours in lowest quality mode |
| Battery Life (recording) | Up to 20 hours (alkaline) / 15 hours (rechargeable NiMH) |
| Voice Activation (VOX) | Yes, adjustable sensitivity |
| Playback Speed Control | Variable speed from 50% to 200% without pitch distortion |
| File Management | Folder structure, file delete, protect, and move functions |
| Connectivity | USB 2.0 (micro USB) for data transfer and charging; 3.5 mm headphone jack |
| Display | Backlit LCD showing recording time, battery level, file info |
| Microphone | Built-in stereo electret condenser microphone |
| Speaker | Built-in dynamic speaker (mono) |
| Recording Modes | HQ (High Quality), SP (Standard Play), LP (Long Play) |
| Auto Gain Control | Yes, for optimal recording levels |
| Cleaning & Maintenance | Wipe with a soft, dry cloth. Do not use solvents. Keep away from liquids. |
| Spare Parts & Repairability | Battery compartment accessible; other internal parts not user-serviceable. Authorized service center recommended. |
| Safety Precautions | Avoid extreme temperatures, moisture, and strong magnetic fields. Do not disassemble. |
Frequently Asked Questions - Voice Tracer VTR6600 PHILIPS
User questions about Voice Tracer VTR6600 PHILIPS
0 question about this device. Answer the ones you know or ask your own.
Ask a new question about this device
Download the instructions for your Dictaphone in PDF format for free! Find your manual Voice Tracer VTR6600 - PHILIPS and take your electronic device back in hand. On this page are published all the documents necessary for the use of your device. Voice Tracer VTR6600 by PHILIPS.
USER MANUAL Voice Tracer VTR6600 PHILIPS
www.philips.com/dictation
注册您的产品并获得技术支持

VTR6600 使用手册
VOICE TRACER
VTR6600
PHILIPS
目录
natural_image
Illustration of a handheld electronic device with labeled buttons and accessories (no text or symbols present)概览:
I Welcome 27
2 Important 28
3 Your Voice Tracer digital recorder 29
4 Start to use 30
4.1 Power On/Off 30
4.2 Recharge 31
4.3 Keypad Lock (HOLD Function) 31
4.4 PC Connection 31
5 Recording 33
6 Voice Mode 35
6.1 Voice Playback 35
6.2 Playing Modes 35
6.2.1 Repeat Modes 36
6.2.2 A-B Replay 36
6.2.3 Replay times 36
6.2.4 Replay gap 36
6.3 Play speed 36
6.4 Delete Files 37
6.5 Record Settings 37
7 Music Mode 40
7.1 Playing Mode 40
7.1.1 Repeat 40
7.1.2 Equalizer 41
7.1.3 A-B Replay 41
7.1.4 Replay times 41
7.1.5 Replay gap 42
7.2 Playing Mode 42
7.3 Delete Files 42
7.4 The lyrics displayed 42
8 Radio Mode 44
9 Setting Mode 45
9.1 Backlight Time 45
9.2 Auto off 45
9.3 Language 45
9.4 Key tone 45
9.5 System Time Setting 46
9.6 Record timer setting 46
9.7 Memory info 47
9.8 Firmware Version 47
9.9 Clear memory 47
9.10 Reset default setting 47
10 Frequently Asked Questions 48
10.1 Cannot switch on the device: 48
10.2 Cannot record with the device: 48
10.3 The device cannot play recorded audio: 48
II Technical Parameters 49
II.1 Storage 49
II.2 Dimensions and Weight 49
II.3 System requirement 49
11.4 Recording 49
11.5 Operating conditions 49
I Welcome
Welcome to the world of Philips! We are honored by your choice and purchase of the products from Philips. You can have comprehensive technical supports from Philips at our website, e.g. user's manuals, software, warranty information etc.
www.philips.com
Product Features
- Instant One-touch Recording: Just slide the recording switch upward to start recording, turn off to save file.
- Luminous capacitive touch buttons: Touch the button icon on the touch panel can achieve the corresponding key functions.
- Digital Noise Reduction: Effectively filter the ambient noise in the recording environment, to enable crystal clear recording. (This feature should only be used in noisy environment and it can not applied to Stereo record and SLP record modes.)
• Record in common MP3 format.
• USB 2.0 high speed data access.
• Voice-activated recording.
• USB mass storage, ensuring maximum compatibility.
2 Important
Safety
- To avoid a short circuit, do not expose the product to rain or water.
- Do not expose the device to excessive heat caused by heating equipment or direct sunlight.
- Protect the cables from being pinched, particularly at plugs.
Attention! Before using the device please read this User's Manual carefully. The company shall not be liable for any data loss due to erroneous operation or causes of a force majeure. Special attention should be given to correct operations and files back up.
Hearing safety
Observe the following guidelines when using your headphones:
- Adjust to suitable volume; do not use the earphone for a long time.
- Please remember that do not turn the volume up beyond your tolerance.
- Do not turn up the volume so high that you can't hear what's
around you.
- When in dangerous environment, please carefully use the earphones or stop using.
- Do not use the earphones when driving, cycling, and skateboarding to avoid traffic accident and violating laws and regulations.
3 Your Voice Tracer digital recorder
What's in the box?
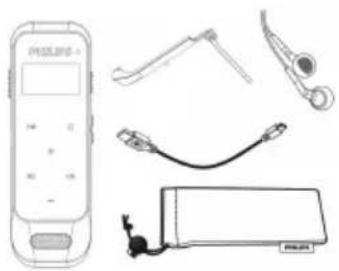
natural_image
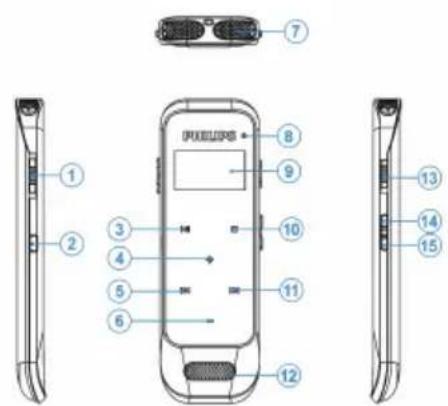
Illustration of a handheld electronic device with attached cables and accessories (no text or symbols)Overview:
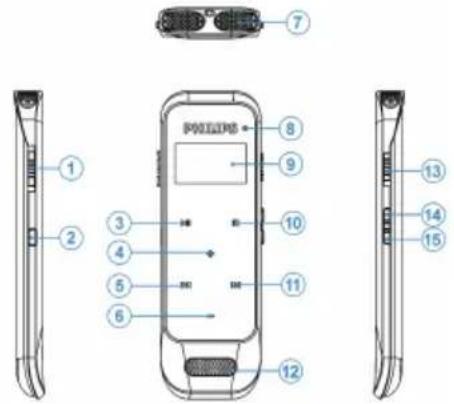
I Power On, Power Off, HOLD
2 USB Port, Earphone Jack
3 Play/Pause
4 Volume Up, Menu Selection Buttons
5 Previous Track, Fast Backward, Menu Selection Buttons
6 Volume Down, Menu Selection Buttons
7 Built-in Microphone
8 Record/Play Indicator
9 Display
10 Stop Button, File Folder Switch Button
11 Next Track, Fast Forward, Menu Selection Buttons
12 Speaker
13 Record Button
14 Play Speed Button
15 Menu Button
4 Start to Use
4.1 Power On/Off

Note
- please recharge the device for three hours before using it for the first time!
Slide and hold POWER button for 2 seconds, the device starts automatically and then displays "PHILIPS", as shown below.

Then the device displays the play-stop interface:
Press MENU button for 2 to 3 seconds to return to the main interface. The main interface includes four modes. The following four pictures show the modes respectively: Voice, Music, Radio and Setting Mode.
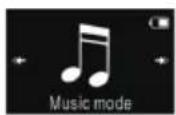
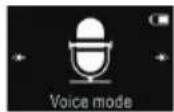
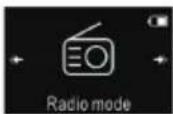


Note
- When not taking voice recording, on any other interface, users can press MENU button for 2 to 3 seconds to return to main interface. After the screen backlight off, the touch buttons will not work, Touch buttons can be available while slide the power button for 1 or 2 seconds.

Note
- If the device cannot work normally, please make sure the device is not out of power.
- When the battery indicator " □" is displayed, please charge the device promptly.
Switch off: When in the power-on state, Slide and hold POWER button until the "ByeBye" is displayed, and then the device is switched off.
4.2 Recharge
- Connect the device with PC through USB cable, as follows.
- Use the exclusive charger to charge the device, as follows.
When using the above methods to recharge, the device will be in the state of recharging. The battery indicator shows a battery icon turning from empty to full repeatedly, indicating that the device is recharging. Under normal circumstance, the device can be fully recharged in around 3 hours. When the device is fully recharged, the battery icon is full and the orange indicator light turns off.


Note
- while the device is connected to a computer, it cannot be operated manually.
4.3 Keypad Lock (HOLD Function)
- Slide the POWER button to the Lock position to lock all the buttons on the device, except the slide switch of recording. Then "Hold" is displayed for a while and then disappears.
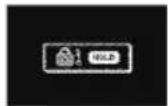
- To unlock buttons, please slide the POWER button down to OFF.
4.4 PC Connection
The device can be used as a USB mass storage to conveniently store, back up and move files. Link the device to a computer with a USB cable. The voice recorder can automatically be recognized as a mass storage device without the need to install any software.


Note
- When moving files into or out of the device, please do not disconnect the device from the computer.
- While the device is connected to a computer, it cannot be operated manually.
5 Recording
Before using the device, please read carefully the following instructions.
- In the stop state of voice mode, press "STOP" button to select the folder you prefer.
- Slide the recording switch to "REC" to start recording; the "Record/Play" indicator blinking red; please place the built-in microphone towards the source of sound.
- Press "PLAY" button to pause recording, then the "Record / Play" indicator red light is off, and the display shows "Pause".
- Press "PLAY" button again to resume recording.
- Slide the recording switch to "STOP" to end recording, the device returns to the play-stop interface of current recorded file.
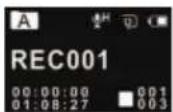
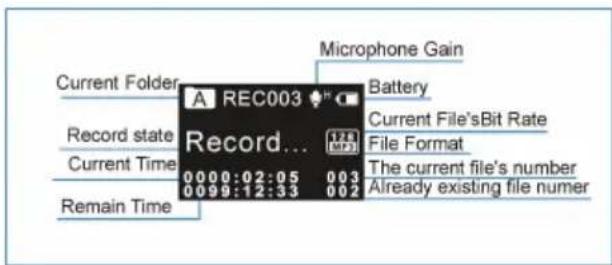
Recording Interface Reference:
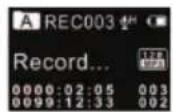
Illustration of Recording Interface:

Note
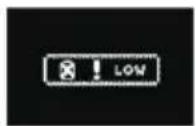
- When the low battery icon occurs, it means the battery is nearly empty and the system will automatically shut down. If the device is recording, the system will automatically save the recorded file then shut down. If the device has low battery, please recharge promptly. When the device is to shut down due to low battery, the following icon will display.

Note
- Prior to recording, please preset the record type you need. When in the Stop state, press STOP button to switch among folders A, B, C, D and MUSIC. The recorded file can be stored in any of the A, B, C, D folder; each folder can store up to 99 audio files. If one folder is full with 99 files, the system automatically stores the subsequent files in the next folder. In the case that all four folders are full, please delete some unwanted files to enable recording.
- Make a test recording to make sure that the Voice Tracer settings are correct.
• Each folder can store 99 files at most, totally 396 files (99 files × 4 folders) - If the recording time exceeds the usable storage of the device or the number of files reaches the limit of 396, the recording stops. Please delete part of recording or move it to a computer.
- When recording, please do not cut off power, otherwise loss or damage of recorded file may be resulted.
- If need to record for a long time, please charge the device before recording.
- A fully charged battery will allow you to record for 23 hours.
- The use of the external microphone come with the device enables better sound quality.
6 Voice Mode
Onthemaininterfaceyoucanselectthevoicemodewith
“◀◀” or “▶◀◀” buttons, and then shortly press the menu button to enter. Please refer to the Voice Stop interface below:
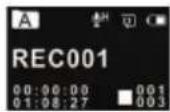
Voice Playback Interface Specification:
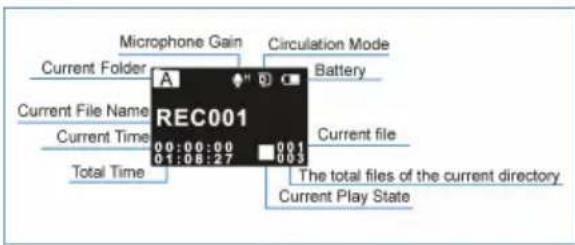

Note
- When in Stop state, press STOP button to switch between folders A, B, C, D and MUSIC.
6.1 Voice Playback
- In the Stop Mode of recorded file, press STOP button to select the folder you prefer.
- Press "◀◀" or "▶◀" to select a file to play.
- Press Play button to start playing, "Record/Play" indicator blinking green.
- Press "+" and "-" to adjust volume.
- Press STOP to stop playing. When the playing is stopped, press the MENU button for about 2 seconds to return to the main interface.
- When playing, press PLAY to pause, "Record/Play" indicator green light is off, press PLAY again to continue playing.
- When playing, press "◀◀" or "▶◀" for a few seconds to fast forward or backward.

Note
• If the earphone is plugged in, the speaker is disabled.
6.2 Playing Modes
After the audio file is selected, press the PLAY button shortly to
play. When playing, press shortly the MENU button to pop up the following playing modes: Repeat, A-B Replay, Replay times, and Replay gap. See the below interface reference:

6.2.1 Repeat Modes
Select Repeat shows in above picture, then press MENU button to enter repeat modes selection menu. You can choose the repeat mode from the menu as shown in the following picture:
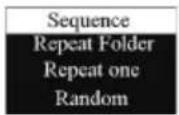
Repeat one: repeat continuously the current track.
Sequence: Play tracks sequentially in selected folder. After playing all the tracks in the current folder, the playing stops automatically.
Repeat Folder: Repeat tracks on a playlist.
Random: Play randomly tracks in selected folder.
6.2.2 A-B Replay
Choose "A-B Replay" from the Playing Modes, then press MENU button to enter A-B Replay. For operations of A-B Replay please refer to A-B Replay section in "Music playback".
6.2.3 Replay times
For operations of Replay Times please refer to Replay Times section in "Music playback".
6.2.4 Replay gap
For operations of Replay interval please refer to Replay gap section in "Music playback".
6.3 Play speed
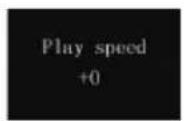
When playing, short press SPEED to enter the Play Speed setting interface. With screen displaying a value of play speed, press "+" or "-" to turn up or turn down the play speed. See the
below related reference pictures:
6.4 Delete Files
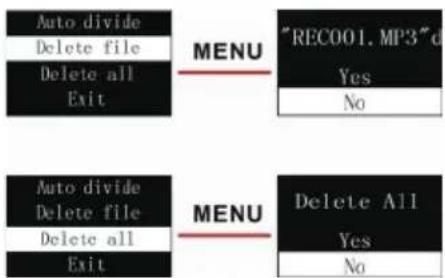
On the play-stop music interface, press the MENU shortly to pop up the following menu list: MIC gain, Record type, Record lamp, VA Control, Listen In, Auto divide, Delete file, Delete all and Exit. Below are the pictures of the deletion operations:
flowchart
graph LR
    A["Auto divide Delete file Delete all Exit"] --> B["MENU"]
    B --> C[""RECO01.MP3" of Yes No"]
    D["Auto divide Delete file Delete all Exit"] --> E["MENU"]
    E --> F["Delete All Yes No"]
On the left side of the interface, press "+" or "-" button to select individual or all files; on the right side of the interface, press "+" and "-" to choose "YES" to confirm deletion, "NO" to keep file; press MENU button to execute.
6.5 Record Settings
You can change settings according to your preference.
- On the play-stop interface, shortly press the MENU button to pop up Functions Menu, the functions include: MIC gain, Record type, Record lamp, VA Control, Listen In, Auto divide, Delete file, Delete all. See the below related reference pictures:

- MIC gain
From the Functions Menu select "MIC gain", then press MENU button to enter MIC gain Menu, in which there are three MIC gain to select: High, Middle, Low. Choose a different microphone gain can achieve different record effects.

3. Record type
From the Functions Menu select "Record type", then press MENU button to enter Record type Menu, in which there are five Record types to select: PCM REC&NOISE CUT, PCM REC, HP REC and SLP REC. If select the PCM recording type, after PCM recording up to one hour, the device save the record file automatically, then next recording. See the below related reference pictures:
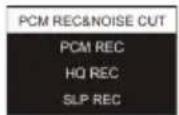
PCM REC&NOISE CUT: WAV format, high sound quality, bit rate: 384kbps.
PCM REC: WAV format, high sound quality, bit rate: 768kbps.
Stereo REC: MP3 format, high sound quality, bit rate: 128kbps.
Long REC: MP3 format, ordinary sound quality, bit rate: 8kbps.
4. Record lamp
From the Functions Menu select "Record lamp", then press MENU button to enter Record lamp Menu. If recording indicator select Off, Record lamp won't work anymore. See the following picture:

5. Voice-activated Recording
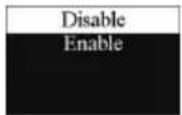
This is a practical function of recording, no button operation is needed. When the function is enabled, in the course of recording, if no voice is detected, the device will automatically pause recording after 3 seconds; if voice is detected again, the device resumes recording. See the below related reference picture:
6. The Listen In function
After activating the Listen In function, you can connect an earphone to listen if there's any sound output. See the Listen in function setting interface picture as follows:

7. Auto divide feature recording
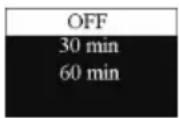
During the course of recording, the auto divide feature recording enables recordings to be saved automatically into a new file every 30 or 60 minutes. The auto divide feature recording interface is as follows:
7 Music mode
Fromthemaininterface,youcanchoosemusicmodewith
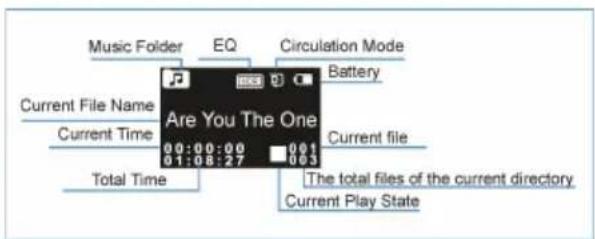
"◀◀" or "▶◀" buttons, and then shortly press the MENU button to enter; or in the voice mode, use the switch buttons to switch to the music folder. Music playback interface is as follows:


Note
- music files can only be played when they are in "MUSIC" folder.
music files can only be played when they are in "MUSIC" folder.
7.1 Playing Mode
You can select the track you want by pressing "◀◀" and "▶◀", then press PLAY to play. When playing, shortly press the MENU button, the below menu pops up with modes of: Repeat, Equalizer, A-B Replay, Replay times, and Replay gap. See the interface as follows:

7.1.1 Repeat
As illustrated, "Repeat" is selected, then press MENU button to enter the Repeat Selection Menu. You can choose the preferred repeat as follows:

Repeat one: repeat continuously the selected track.
Sequence: Play sequentially tracks in selected folder. After playing all the tracks in the current folder, the playing stops automatically.
Repeat folder: Repeat tracks on the selected playlist. Random: Play randomly tracks in selected folder.
7.1.2 Equalizer
From the Playing Menu select "Equalizer", press MENU button to enter. The Equalizer includes: Normal, Rock, Pop, Classic, Soft, Jazz, and DBB. Refer the below pictures:


In the Equalizer Mode, you can choose mode with "+" and "-" buttons, press MENU button to confirm.
7.1.3 A-B Replay
From the Playing Menu select the "A-B Replay", press MENU button to enter.
- Set A-B Repeat
- Set the start mark: When playing, shortly press MENU button to enter Playing Menu, then shortly press "+" or "-" to select "A-B Replay" mode, then press MENU button to return to
Playing Menu. The "A" in "A-B" on LCD display blinking, if you need to confirm the start point A, shortly press "▶▶" to make confirmation.
- Set the finish mark: After setting mark A, the "B" in "A-B" on LCD display blinking, shortly press "→" to set the finish mark. The "A-B" is displayed on the LCD. As the replay marks are fixed on "A-B", the section between mark A and B will be replayed for specified times. After playing specified times, the "A" in "A-B" blinking to wait for setting mark A, and the system resumes normal playing. If A-B Replay is not needed, use any of the following methods to cancel the A-B Replay mode.
- Cancellation: Shortly press "PLAY" button to cancel the AB marks and pause playing.
- Shortly press "STOP" button to cancel the AB marks and stop playing.
- Shortly press "MENU" button to cancel the AB marks and continue playing.
7.1.4 Replay times
From the Playing Menu select the "Replay times", then press MENU button to enter Replay times setting. Use "+" and "-" to adjust times setting. See the below interface picture:

7.1.5 Replay gap
Replay gap means the time gap between two repeats. You can choose the "Replay gap" from the Playing Menu then press MENU button to enter Replay gap setting. Use "+" and "-" to adjust Replay gap setting.
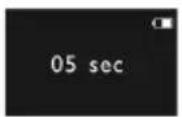
7.2 Playing Mode
When playing, short press SPEED to enter the Play Speed setting interface. With screen displaying a value of play speed, press "+" or "-" to turn up or turn down the play speed. See the below related reference pictures:

7.3 Delete Files
On the play-stop interface, shortly press the MENU button, the below menu pops up with modes: Delete file, Delete All and Exit. See the below interface picture:

flowchart
graph LR
    A["Delete File\nDelete All\nExit"] --> B["MENU"]
    B --> C["Are you…" delete\nYes\nNo"]
    D["Delete File\nDelete All\nExit"] --> E["MENU"]
    E --> F["delete all\nYes\nNo"]
7.4 The lyrics displayed
This product supports "*.Irc" lyrics files, realizing the synchronous broadcasting of songs and lyrics.

Note
Lyrics file's name and the name of the song files need to be consistent.
2 If the current song file matches with lyrics file, the music
mode icon in the top of the screen will appear, as follows; if no lyrics match, then no sign will be displayed as shown below.
3 If the lyrics match, long press the "menu" button to enter the lyrics interface, lyrics display will appear. To exit, short press "menu" button to return to the Music Mode.
8 Radio Mode
From the main menu select Radio Mode, press MENU button to enter. See the below picture of Radio Mode:


Note
- Please plug in the earphones. They allow radio reception. Sound can only be heard in the earphones.
In the Radio Mode, press "◀◀" or "▶◀" button to choose radio frequency; press MENU button to display the following menu, including: Auto search, Save Channel, FM record, Delete, Delete All.
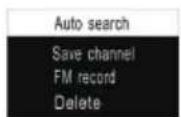

After Auto Search is selected, the system automatically searches radio channels. When a radio channel is found, the channel will be saved automatically into radio channel list. When the automatically channel search is completed, it shows the interface as below:

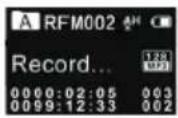
You can choose Save Channel to save it. Choose Delete to delete a current saved channel or Delete all saved channels. The device can store 40 radio channels at most. After more than one radio channel is stored, short press "PLAY" or "STOP" to switch among saved radio channels in sequence. If you choose FM record, the system starts recording the radio, see the interface picture below:
9 Setting Mode
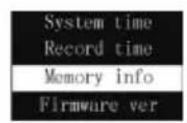
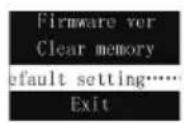
From the main menu select Setting mode, press MENU button to enter. The Setting mode interface includes Backlight, Auto off, Language, Key tone, System time, Record time, memory info, Firmware Version and Clear memory, Reset default setting.

9.1 Backlight Time
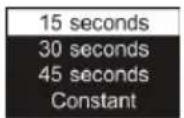
The backlight time function can be set at: 15, 30, 45 and Constant. If there's no operation on the device for the set time, the backlight turns off automatically. If you select Constant, the backlight is to be always. See the below picture of Backlight Time setting:
9.2 Auto off
If there's no operation on the device for a set time, the system automatically shuts down. If the time is set at 0, the system will not automatically shut down. See the below auto off picture:

9.3 Language
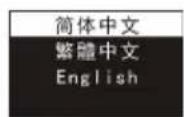
From the Language menu you can choose a language as system language. See the following interface picture:
9.4 Key tone
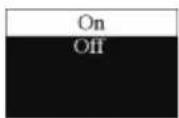
From the Key Tone settings menu, you can choose to open or close the key tone. After closing key tone, the key tone will not work in any key operation. See the following picture:
9.5 System Time Setting
See the System Time setting interface as follows:

On this interface, you can set the current system time and display format. Press STOP return to the previous level submenu.
For example: select "Time Format" to show the following menu:

There are 2 time formats to choose, namely 12-hour format and 24-hour format. The system default is 24-hour format.
Choose "Set data", the following interface will pop up:
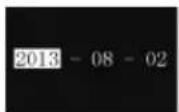
Choose "Set time", the following interface will pop up:

On this interface, press "◀◀" or "▶◀" and "+" or "-" to set the time. Press "◀◀" or "▶◀" button to select year, month, day, hour, minute and second; press "+" or "-" to change the relevant numbers.
9.6 Record timer setting
Record timer setting: as system time turns to the pre-set time, the device automatically starts recording. On the functions menu, choose the "Record timer", then press the MENU button to enter "Record timer" setting. See the below reference picture:
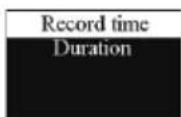
The first function is to set the time to start recording. For setting please refer to the below picture:
On this interface, you can set a start time for automatic recording. For setting time please refer to "System Time Setting". The second function is the recording duration. You can set the recording duration to 30, 60, 120 minutes or infinite. The recording duration setting as follows:

9.7 Memory info
You can check the memory capability and the remaining memory of this device by using this function. See the following picture:
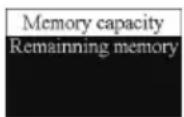
9.8 Firmware Version
You can check the device's firmware version by using this function.
9.9 Clear memory
You can format the device's internal storage by using this function. See the below picture:

9.10 Reset default setting
You can restore to default settings by using this function. See the below picture:
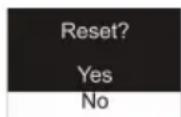
10 Frequently Asked Questions
Answers to the frequently asked questions are listed here to solve simple problems that may occur with the device. If the problem cannot be solved, please contact the dealer or visit our official website: www.philips.com/support
10.1 Cannot switch on the device:
The battery is empty, please recharge promptly.
10.2 Cannot record with the device:
The maximum file number is exceeded or the device's memory is full. Please delete some recordings or move them to other storage devices.
10.3 The device cannot play recorded audio:
- The device may be in lock mode (HOLD). Slide the HOLD switch to OFF position.
- The battery is empty, please recharge.
II Technical Parameters
II.1 Storage
Internal storage
Estimated recording time (8GB): approximately 2160 hours with
Long Recording mode, 136 hours with High Quality Recording mode, 46 hours PCM REC&NOISE CUT Recording mode, 23
hours with PCM Recording mode.
Type of internal storage: NAND Flash
Portable storage (PC): Yes
Recording time with fully charged battery: approx. 23 hours.
11.2 Dimensions and Weight
Wide × Long × High: 33.4×102.0×8.8(mm)
Weight (with battery): 60g
11.3 System requirement
Operating System: Windows 8/Windows 7/Vista/XP/2000, Mac
OS X, Linux
Port: USB
Firmware ver: 2014-02-12-V1.0
11.4 Recording
PCM REC&NOISE CUT REC ( PCM REC&NOISE CUT):bit rate: 384kbps, format :WAV
PCM REC ( PCM ):bit rate: 768kbps,format :WAV
Stereo REC(HQ) : bit rate: 128kbps, format: MP3
Long REC(SLP) : bit rate: 8kbps, format: MP3
11.5 Operating conditions
Temperature: 5°–45°C Humidity: 10% – 90%, no condensation
Warranty card

质保书
year warranty
一年质保
Type: VTR6600
Serial nr:
Date of purchase
购买日期
Dealer's name, address and signature
销售商名称、地址及签字
www.philips.com/welcome
This document is printed on chlorine free produced paper Data subject to change without notice
This product was brought to the market by Speech Processing Solutions GmbH or one of its affiliates, further referred to in this document as SPS, which is the manufacturer of the product. SPS is the warrantor in relation to the product with which this booklet was packaged.
For China only
只限中国地区
Printed in China


© 2014 Speech Processing Solutions GmbH.


- 目录
- I Welcome
- Product Features
- Important
- Safety
- Hearing safety
- Your Voice Tracer digital recorder
- Start to Use
- Power On/Off
- Note
- Recharge
- Keypad Lock (HOLD Function)
- PC Connection
- Recording
- Recording Interface Reference:
- Illustration of Recording Interface:
- Voice Mode
- Voice Playback
- Playing Modes
- Repeat Modes
- A-B Replay
- Replay times
- Replay gap
- Play speed
- Delete Files
- Record Settings
- Record type
- Record lamp
- Voice-activated Recording
- The Listen In function
- Auto divide feature recording
- Music mode
- Playing Mode
- Repeat
- Equalizer
- A-B Replay
- Replay times
- Replay gap
- Playing Mode
- Delete Files
- The lyrics displayed
- Radio Mode
- Setting Mode
- Backlight Time
- Auto off
- Language
- Key tone
- System Time Setting
- Record timer setting
- Memory info
- Firmware Version
- Clear memory
- Reset default setting
- Frequently Asked Questions
- Cannot switch on the device:
- Cannot record with the device:
- The device cannot play recorded audio:
- II Technical Parameters
- II.1 Storage
- Dimensions and Weight
- System requirement
- Recording
- Operating conditions
- Warranty card
- 质保书
- www.philips.com/welcome
Brand : PHILIPS
Model : Voice Tracer VTR6600
Category : Dictaphone