
ACT-5020TW - Camcorder DENVER - Free user manual and instructions
Find the device manual for free ACT-5020TW DENVER in PDF.


| Product Type | Camcorder |
| Model | ACT-5020TW |
| Brand | Denver |
| Dimensions (approx.) | 120 x 60 x 50 mm |
| Weight (approx.) | 250 g |
| Power Supply | Rechargeable lithium-ion battery (3.7V, 1200 mAh) |
| Charging | Via USB cable (5V, 1A) |
| Recording Media | SD/SDHC card (up to 32 GB) |
| Video Resolution | Full HD 1080p (1920x1080) at 30 fps |
| Photo Resolution | 12 MP (interpolated) |
| Lens | Fixed focus, f/2.8, 3.6 mm |
| Display | 2.7-inch TFT LCD screen |
| Digital Zoom | 8x |
| Night Vision | Yes, infrared LEDs |
| Microphone | Built-in |
| Interface | USB 2.0, HDMI mini, AV output |
| Image Stabilization | Electronic |
| Maintenance | Clean lens with soft cloth; avoid moisture |
| Safety | Not for children under 3 years; keep away from heat sources |
| Spare Parts & Repairability | Contact Denver support for replacement parts; not user-serviceable |
| General Information | Comes with USB cable, user manual, and carrying pouch |
Frequently Asked Questions - ACT-5020TW DENVER
User questions about ACT-5020TW DENVER
0 question about this device. Answer the ones you know or ask your own.
Ask a new question about this device
Download the instructions for your Camcorder in PDF format for free! Find your manual ACT-5020TW - DENVER and take your electronic device back in hand. On this page are published all the documents necessary for the use of your device. ACT-5020TW by DENVER.
USER MANUAL ACT-5020TW DENVER
Turn on the Wi-Fi camera, the LCD will display the following status:
Photo mode
- Photo mode;
- Battery state;
- Self-timer mode;
- Photo resolution;
- Photo quality;
- Available shooting count;
recording mode
- Recording mode;
- Video quality;
- Video framerate
- Video resolution;
- Available time to record;
- Battery state;
vehicle-mounted mode
- Recording mode;
- Video quality;
- Video framerate
- Video resolution;
- Available time to record;
- Battery state;
Playback mode
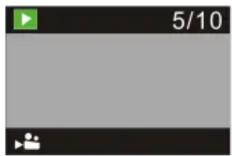
Turn on the camera, you can touch the mode key to enter playback mode. and you can touch the Up/Down key to choose CAR/VIDEO/JPG, then press the shutter key to enter preview.
Touch Mode key to enter playback mode to browse photo/video, play the video recorded by this camera.
Press Up/Down key to access to previous or next photo/video.
Play movie: Press the shutter key to start/pause play video, touch the Up/Down key to Retreat quickly /fast forward playback, press the power key to stop play video

Using your camera:
1) When you use the camera for the first time, please:
Insert a micro SD or micro SDHC card (not included), as shown in the following picture.
A Class 10 Micro SD Card is required for this camera.
Turn off the camera before inserting or removing the card.

natural_image
Diagram showing a device with a black card inserted into a folder, indicated by an arrow (no text or symbols present)Menu Setting Mode
In photo, recording, vehicle-mounted and playback mode, press Power key to open the menu, and then press Up/Down key to select menu, press the Shutter key to enter submenu. When selecting menu, the selected menu will be displayed with blue background.
Recording/vehicle-mounted menu mode:

ACT-5020TW Quick Start Guide
Photo menu mode:


System mode menu setting
After opening the menu by pressing Power key, press mode key to switch over to setting main menu, press Up/Down key to select menu, and after that to press Shutter key for confirming to enter the submenu. In the submenu, press Up or Down key to select menu, and press Shutter to confirm. After returning to the main menu, press Power key to exit from the menu.
System menu mode:
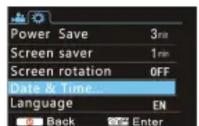
Press Power key to open the menu, press Mode key to switch to setting menu, and then press Shutter key to confirm. Press Down key to select “Date and time” in menu item, and then press Shutter key to enter setting window.
In setting window, press Mode key to select items (date, time) to be adjusted, and then press Up key or Down key to make adjustment, press Shutter key for conformation at completion of adjustment, or press Power key to cancel setting and exit. Finally, press Power key to exit from setting mode.


Setting date and time:
Press Power key to open the menu, press Mode key to switch to setting menu, and then press Shutter key to confirm. Press Down key to select “Date and time” in menu item, and then press Shutter key to enter setting window.
In setting window, press Mode key to select items (date, time) to be adjusted, and then press Up key or Down key to make adjustment, press Shutter key for conformation at completion of adjustment, or press Power key to cancel setting and exit. Finally, press Power key to exit from setting mode.

Playback mode menu setting
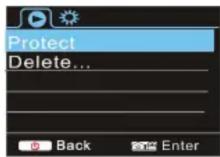
In playback mode press power key to open playback main menu, press Up or Down key to select menu, press Shutter key to enter submenu. In the submenu, press Up or Down key for selection, and press Shutter key to confirm. After returning to the main menu, press Mode key to exit from the menu.
Startup/Startdown
1 Startup: press the POWERkey for 3 second, the camera will show startup screen and enters intoPOWERONstate;
2 Shutdown: press the POWER key for 3 second when the camera is under idle mode to shutdown;
3 Auto shutdown: the camerawill be shut down automatically when the camera is under idle mode for acertain time to save power. The default time for auto shutdown is 3 min.
4 Shutdown under low power: when the battery is under low power, the LCD will indicate “☑”. Please charge the battery timely. When the i con turns red and flashes, the camera will be shut down automatically
Battery Charging:
The camera is equipped with built-in 3.7V lithium battery. Please ensure power available for the camera and timely charge it in case of low battery.
Connect the camera to computer for charging under shutdown status. The charging indicator will be on when charging, and will be off when the battery is fully charged. Generally, the battery can be fully charged after about 4 hours.
Pair the Camera to Your Smartphone or Pad.
APP (Support Android and ISO)
Download and install the app “ismart DV”
from Appstore ( (for iOS) or Google Play (for Android OS).
Insert the TF card and turn on the DV, When you want to turn on the wifi, you can press the shutter key about 3 seconds, the LCD Screen display "Waiting for WiFi connection" and the wifi indicator will flash.
Enable Wi-Fi on smartphone or tablet and search for wireless AP signal “ACT-5020TW”, then connect it to DV, until the system displays "Connected successfully". After it Connects successfully, the LCD Screen will turn off after about 15 seconds, and the wifi indicator will not flash.
Kindly note: The first time connecting to DV, you need to enter password “1234567890”.
when you press shutter key to turn on the LCD Screen, the LCD Screen display "WiFi Connection Ready" and will turn off the WIFI immediately.
Kindly note: “If you use LCD display, the Wifi connection will be lost and vice versa”
Technical parameters
| Image sensor 5.0 mega-pixel CMOS image sensor | |
| Function mode Recording, Driving | recorder, photo, playback |
| LCD screen 1.5" HD LCD | |
| Picture resolution 12M (4000 x 3000), 10M (3648 × 2736), 8M (3264 x 2448), 5M (2592 x 1944), | |
| Video resolution | FHD (1920x1080 30fps), HD (1280X720 30fps), HD (1280X720 60fps) |
| Storage medium | TF card (Maximum supporting 32GB) |
| File format | JPEG, H.264 |
| Driver Mode | 2 sec./10 sec. |
| USB port | USB 2.0/3.0 |
| Power supply | Built-in 3.7V rechargeable lithium battery |
| Power Save | 1 min. / 3 min./5 min./OFF |
| Operating system requirements | Windows XP/Vista/7/8, Mac 10.8 |
| Dimensions | 60X38X28mm |
Warning
• Lithium battery inside!
- Do not try to open the product!
- Do not expose to heat, water, moisture, direct sunlight!

CAUTION!
ALL RIGHTS RESERVED, COPYRIGHT
DENVER ELECTRONICS A/S
DENVER®
www.denver-electronics.com

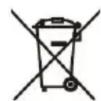

Electric and electronic equipment and included batteries contains materials, components and substances that can be hazardous to your health and the environment, if the waste material (discarded electric and electronic equipment and batteries) is not handled correctly.
Electric and electronic equipment and batteries is marked with the crossed out trash can symbol, seen below. This symbol signifies that electric and electronic equipment and batteries should not be disposed of with other household waste, but should be disposed of separately.
As the end user it is important that you submit your used batteries to the appropriate and designated facility. In this manner you make sure that the batteries are recycled in accordance with legislature and will not harm the environment.
All cities have established collection points, where electric and electronic equipment and batteries can either be submitted free of charge at recycling stations and other collection sites, or be collected from the households. Additional information is available at the technical department of your city.
ACT-5020TW Quick Start Guide
Hereby, Inter Sales A/S, declares that this product (FILL IN MODEL NO.) is in compliance with the essential requirements and other relevant provisions of Directive 1999/5/EC. A copy of the Declaration of conformity may be obtained at:
Inter Sales A/S
Stavneagervej 22,
DK-8250 Egaa
Denmark
Imported by:
DENVER ELECTRONICS A/S
Stavneagervej 22
DK-8250 Egaa
Denmark
www.facebook.com/denverelectronics
Brand : DENVER
Model : ACT-5020TW
Category : Camcorder