Cirrus CL 24/18 MWE - Projection screen Avers - Free user manual and instructions
Find the device manual for free Cirrus CL 24/18 MWE Avers in PDF.

| Product Type | Manual Pull-Down Projection Screen |
| Brand | Avers |
| Model | Cirrus CL 24/18 MWE |
| Category | Projection Screen |
| Diagonal Size | 24 inches (61 cm) |
| Aspect Ratio | 4:3 |
| Screen Material | Matte white fabric |
| Operation | Manual pull-down with retractable mechanism |
| Mounting | Wall or ceiling mountable (brackets included) |
| Dimensions (WxH) | 19.2 x 14.4 inches (48.8 x 36.6 cm) |
| Casing Dimensions | 22 x 3 x 3 inches (approx.) |
| Weight | 2.5 kg (5.5 lbs) |
| Power Supply | None (manual) |
| Included Accessories | Wall mounting brackets, screws, pull rod |
| Care Instructions | Clean with soft dry cloth; avoid solvents |
| Safety | Keep out of reach of children; do not pull forcefully |
| Spare Parts | Screen fabric replacement available; contact Avers support |
Frequently Asked Questions - Cirrus CL 24/18 MWE Avers
User questions about Cirrus CL 24/18 MWE Avers
0 question about this device. Answer the ones you know or ask your own.
Ask a new question about this device
Download the instructions for your Projection screen in PDF format for free! Find your manual Cirrus CL 24/18 MWE - Avers and take your electronic device back in hand. On this page are published all the documents necessary for the use of your device. Cirrus CL 24/18 MWE by Avers.
USER MANUAL Cirrus CL 24/18 MWE Avers
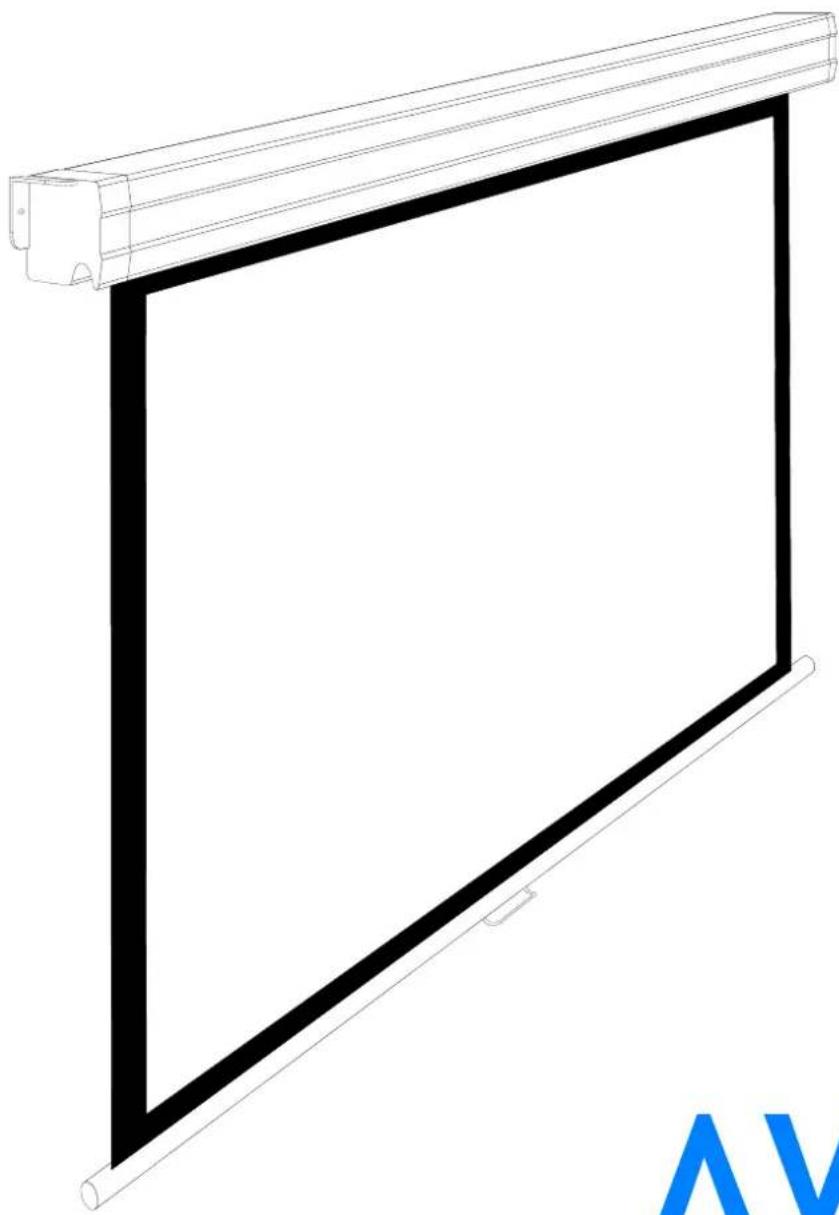
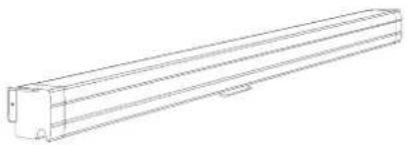
Manually operated projection screen Avers Cirrus CL
natural_image
Pure technical line drawing of a rectangular panel with a roller roller, no text or symbols presentAVERS SCREENS
User's manual
CE
Read these instructions carefully before operating the screen.
Dear Customer,
Thank you very much for the purchase of our product. The manual booklet contains all operation information you may require to install properly and operate the screen. We hope it will help you to get the most performance and enjoyment of yournew screen. Enjoytime with the AversScreens product.
SAFETY INFORMATION
NOTICE: Important safety information.
Follow the instructions described in the operating manual for safety reasons. After reading the manual, please store it in a safe place just in case you need it in the future.
Table of contents:
- Safety rules
1.1. Declaration of Conformity CE
- Product specification
2.1. Contents of package
2.2. Technical data
- Screen installation
3.1. Installation directions
3.2. Ceiling installation
3.3. Wall installation
- Screen operation
4.1 Manual operation
4.2 Screen maintenance
4.3 Before asking for service
- Warranty conditions
1. SAFETY RULES
SAFETY INFORMATION
NOTICE: Important safety information. It is important for the safety of persons to follow these instructions. After reading the manual, please save it just in case of need in the future
- Frequently examine the screen installation for imbalance and signs of wear or damage to cables.
Do not use if repair or adjustment is necessary.
- Do not attach any objects to the screen's bottom bar. Screen damage and/or person injury danger.
• All installation work should be carried out by the qualified technician.
• Improper installation of the screen can cause device damage or health breakdown.
- Ceiling/wall installation can be done with the originally supplied mounting brackets dedicated for this model only.
• Always follow the instructions described in the operating manual.
1.1. Declaration of Conformity CE
AVERS SCREENS
Manufacturer's Declaration of ConformityCE
AVERS Screens Sp. z o.o. Under it's own responsibility declares:
All screens and accessories mentioned below are manufactured in Poland according to the essential safety requirements of Council Directive 98/79/WE
Projection screens: Stratus, AkuStratus, Focus, Cumulus X, Solar, Solaris, Contour, Altus, Cirrus CL, Cirrus X, Cirrus X crank Projector mount brackets: Alumount, Promount, SimpleMount, Prolift
The above mentioned products are in conformity with the European Directives and especially with the norms:
PN-EN 55014-1:2007(U) PN-EN 50082-1:1997 PN-EN 60335-1:2004 PN-EN 61000-3-2:2007 PN-EN 61000-3-3:1997 IEC 60335-2-97:2007
CE

natural_image
World map silhouette with horizontal striped lines indicating latitude and longitude (no text or labels)2. Product specification
Manually operated projection screens with spring rolling mechanism designed for fixed installation at projection systems for business presentations and/or home cinema applications. Best picture quality can be reached when the selection of the projection surface type and size will be optimal for the, projection device (projector) and projection conditions at the planed installation.
2.1. Contents of packaging
Please, check carefully if any physical damage of the screen has not happen during transportation. Inspect the package for all accessories presented below:
 Screen x 1 Operation manual x 1 Screen x 1 Operation manual x 1 |  |
2.2. Technical Data
Projection fabrics characteristics:
- Matt White E (MWE) - a special screen dedicated polyester fabric double side covered with vinyl, black back surface and white front (projection) surface, recommended for application with DLP and LCD multimedia projectors. Neutral color of the surface enables projection from any directions. Gain: 1.0, viewing angle: 150 degrees, thickness: 0.35 mm.
- Matt Grey E (MGE) - a special screen dedicated polyester fabric double side covered with vinyl, black back surface and grey front (projection) surface, recommended for application with high brightness DLP and LCD multimedia projectors. The surface offers deeper level of black and more realistic rich dark colors recognized as a feeling of higher image contrast. Recommended for home cinema applications. Gain: 0,8. Viewing angle: 150 degrees, thickness: 0,35 mm.
Dimensions of projection screens.
| Screen width [cm] | Viewing area size [cm] | Screen aspect ratio | Screen case size W x H x D [cm] | Projection fabrics max. length [cm] | Top belt width [cm] | Version*) | Net weigth**) |
| 180 | 170 x 95,6 16:9 141 | 197 x 9,2 x 9,2 | 35 | BT | 7,7 | ||
| 170 x 127,5 | 4:3 | 153 | 8 | BB | 7,8 | ||
| 170 x 95,6 | 16:9 | 123,5 | 8 | BB | 7,5 | ||
| 180 x 118,2 | 16:9 | 123,5 | - | - | 7,5 | ||
| 180 x 135 | 4:3 | 150 | - | - | 7,8 | ||
| 180 x 180 | 1:1 | 190 | - | - | 8,0 | ||
| 210 | 200 x 112,5 | 16:9 | 227 x 9,2 x 9,2 | 158 | 35 | BT | 9,7 |
| 200 x 150 | 4:3 | 168 | 8 | BB | 9,8 | ||
| 200 x 112,5 | 16:9 | 130,5 | 8 | BB | 9,5 | ||
| 210 x 118,2 | 16:9 | 130,5 | - | - | 9,5 | ||
| 210 x 157,5 | 4:3 | 168 | - | - | 9,8 | ||
| 210 x 210 | 1:1 | 220 | - | - | 10,0 | ||
| 240 | 230 x 129,5 | 16:9 | 257 x 9,2 x 9,2 | 174,5 | 35 | BT | 11,5 |
| 230 x 172,5 | 4:3 | 190 | 8 | BB | 11,7 | ||
| 230 x 129,5 | 16:9 | 147 | 8 | BB | 11,3 | ||
| 240 x 135 | 16:9 | 147 | - | - | 11,3 | ||
| 240 x 180 | 4:3 | 190 | - | - | 11,7 | ||
| 240 x 240 | 1:1 | 250 | - | - | 12,0 |
^* - BT and BB versions are available with MWE or MGE fabrics
Version BB - 5 black widther surrounding the viewing area
Version BT - 5 cm width black border surrounding the viewing area and additional black top 30 cm above the top black border.
“approximate value for the screen with Matt White E fabrics
3. Screen installation
3.1. Installation precautions
- Installation work should be carried out by a qualified technician in accordance with the instructions described below.
- Fixed installation of the screen should be done with use of the screws and anchors suitable for the walls/ceilings materials at the installation place and the genuine installation brackets delivered with the screen.
- Check carefully after installation if the screen is perfectly leveled. Do not roll out the screen not installed in horizontal position. In case the screen leveling is not perfect correct the installation.
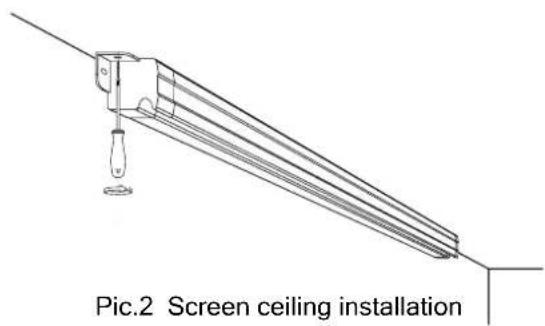
3.2. Ceiling installation
- Appoint the location of the ceiling mount brackets fixing points.
- Drill holes for anchors fixing the screen brackets to the ceiling.
The mounting screws diameter should be not smaller than ∅8 mm. In case of the cardboard-plaster ceiling installation, use cardboard-plaster dedicated steel anchors with ∅11mm diameter screws.
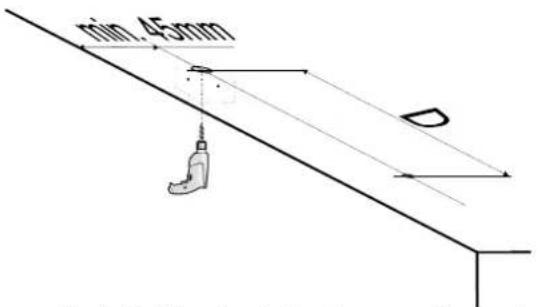
Pic.1 Drilling the holes for mounting anchors
D distance depends on the screen width: 194,8cm for Focus 18xxx 224,8cm for Focus 21xxx 254,8cm for Focus 24xxx
- Fix the screen to the ceiling with anchors and screws.
Check the screen case leveling before first unrolling the screen. Do not use the screen if it is not properly installed(leveled).
3.3. Wall installation
- Appoint the location of the ceiling mount brackets fixing points.
- Drill holes for anchors fixing the screen brackets to the ceiling.
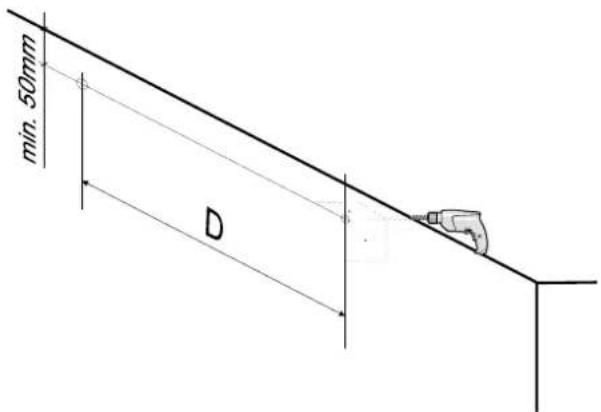
Pic.3 Drilling the holes for mounting anchors.
natural_image
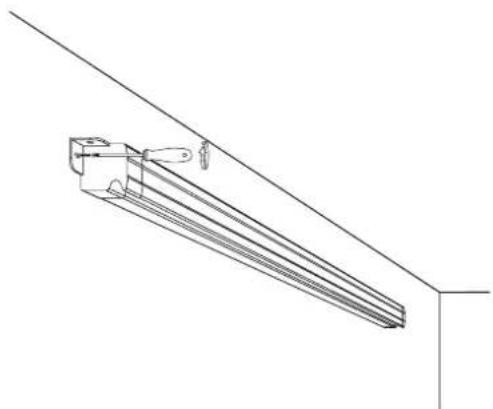
Technical line drawing of a mechanical assembly or bracket with no visible text or symbolsPic.4 Screen wall installation
The mounting screws diameter should be not smaller than ∅8 mm. In case of the cardboard-plaster ceiling installation, use cardboard-plaster dedicated steel anchors with ∅11mm diameter screws.
D distance depends on the screen width: 194,8cm for Focus 18xxx 224,8cm for Focus 21xxx 254,8cm for Focus 24xxx
- Fix the screen to the wall with anchors and screws.
Check the screen case leveling before first unrolling the screen. Do not use the screen if it is not properly installed(leveled).
4. Screen operation
The screen is operated manually.
4.1 Manual operation
Rolling the screen down:
- Pull down the handle located at the screen lower. Keep moving down slowly to roll out the screen.
- Roll down the screen until the "STOP" sign will appear.
- Release the screen handle to block the screen at the position
Rolling the screen up:
- Pull down the handle at the lower bar to release the rolling break mechanism.
- Limit the pulling strength to let the spring mechanism to roll up the screen fabrics. Do not release the handle free.
- Release the handle just before the fabrics is rolled up completely.
!!! CAUTION !!! Do not roll down the screen behind the "STOP" mark to avoid rolling mechanism blockade. Fast uncontrolled rolling up the screen can damage the mechanism or destroy the screen fabrics.
4.2. Screen maintenance
Pojection screen Avers do not require periodical service maintenance. Clean dust from the screen case and fabrics with dry soft cloths. If needed use moisturized cloth with soft detergent to remove stains. After stain removal dry the cleaned surface with cloth carefully.
4.3. Before calling the service
| ReasonsSymptoms | Remedy | |
| the screen fabrics does not roll down smoothly | The screen was not installed properly in horizontal position. | Check if the screen case is properly leveled. Reinstall the screen correctly. |
At other cases please contact service.
5. Warranty conditions
1) Avers screens warranty period is 24 months from the date of purchase confirmed with the original purchase invoice.
2) Surety commits to fix free of charge any failures (component or production defects) of the product which appear during warranty period.
3) Warranty exclusions :
a) the failures caused by the usage of the screen against the rules described in operation manual,
b) the failures caused by improper storage or transportation,
c) mechanical defects of the screen other than mentioned at point 3),
d) damages caused with overvoltage at power network,
e) deinstallation and reinstallation of the screen.
4) Avers Screens Service department will remove all defects within 21 days after receiving the demaged product.
5) Warranty claims should be passed to the screen supplier (dealer).