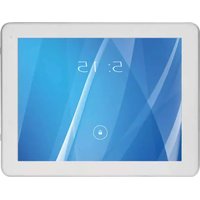
TP9.7-1200QC-Ultra - Tablet i-onik - Free user manual and instructions
Find the device manual for free TP9.7-1200QC-Ultra i-onik in PDF.


| Product Type | Tablet |
| Brand | i-onik |
| Model | TP9.7-1200QC-Ultra |
| Display Size | 9.7 inches |
| Display Resolution | 1024 x 768 pixels |
| Processor | Quad-core 1.3 GHz |
| RAM | 2 GB |
| Internal Storage | 32 GB |
| Operating System | Android |
| Battery Capacity | 6000 mAh |
| Dimensions (W x D x H) | 240 x 170 x 8 mm |
| Weight | 500 g |
| Rear Camera | 5 MP |
| Front Camera | 2 MP |
| Connectivity | Wi-Fi 802.11 b/g/n, Bluetooth 4.0, Micro USB, 3.5 mm audio |
| Sensors | G-sensor |
| Power Supply | DC 5V 2A via Micro USB |
| Main Functions | Web browsing, video playback, gaming, e-reading, apps |
| Care and Cleaning | Wipe with soft dry cloth; avoid liquids |
| Safety | Do not expose to heat or water; use only provided charger |
| Spare Parts and Repair | Contact manufacturer or authorized service center |
| General Information | User manual available on notice-facile.com |
Frequently Asked Questions - TP9.7-1200QC-Ultra i-onik
User questions about TP9.7-1200QC-Ultra i-onik
0 question about this device. Answer the ones you know or ask your own.
Ask a new question about this device
Download the instructions for your Tablet in PDF format for free! Find your manual TP9.7-1200QC-Ultra - i-onik and take your electronic device back in hand. On this page are published all the documents necessary for the use of your device. TP9.7-1200QC-Ultra by i-onik.
USER MANUAL TP9.7-1200QC-Ultra i-onik
*Kostenfrei aus allen deutschen Netzen / Free from all German telephone networks
25012
i. onik
mobile
Deutsch
All trademarks, registered trademarks and logos are the property of their respective owners. We do not guarantee any data with respect to their content, completeness or up-to-dateness
Vorsichtsmaßnahmen
Bemerkungen:


- Hauptbildschirm

Widgets hinzufügen

Internet
1.1 Wi-Fi

Software Management
2. Software Installation

English
Dear Customer,
Thank you for purchasing this product!
Please read the instructions carefully before using this product.
This manual is intended to introduce you to the basic characteristics of this product, so you can get the best out of your experience using the MID (Mobile Internet Device). The product's features are described and detailed information is given. Furthermore you receive tips and hints to fully understand the technical capability of the tablet.
The warranty, which is included, will explain you our additional services. Please read the terms of warranty carefully, to avoid unnecessary problems.
Attention:
All the information in this manual is correct at the time of publication. However, as we continue to update and improve the product, the software may be slightly different in appearance and functionality than described in this manual.
We reserve the right to improve the product, specification and design without prior notice!
Content
Important Safety Precautions 22
Technical Specification 22
Tablet (MID) Overview 23
-
Tablet Introduction....23
-
TF Card .... 23
- Charging .... 24
Finding your Way 24
-
Turning on the MID 24
-
Switching off the MID 25
-
Lock-screen and Power-saving Mode....26
-
Main Interface....26
-
Custom Screen....27
-
Custom Screen....27
-
Changing your Wallpaper....28
-
Connection of USB Cable 29
System Settings 29
Internet....30
-
Network Settings 30
-
Internet 30
Software Management 31
-
Explorer 31
-
Software Installation 32
Applications 32
-
Playing Music 32
-
Browsing Pictures .... 33
-
E-Mail 34
-
Camera and Video ....34
-
Apk Installer 34
We do not assume any liability for lost or destroyed data or for any other devices. Keep away from children. Danger of choking on or swallowing small parts. All data without guaranty.
Important Safety Precautions
- Do not disassemble the product; do not use alcohol, solvent or benzene to clean the surface of the product. Please contact us if you experience any problems.
• This product should be charged for more than 12 hours when charging it the first three times. - Do not store the product in high temperature, humidity or dust; do not put the product in a vehicle with closed windows especially not during summer.
- Avoid dropping or strong impact to the product, do not shake it violently, otherwise it may cause damage to the touch screen or display.
- Please select the appropriate volume; the volume should not be too high when using headphones; if you feel signs of tinnitus, please turn down the volume or stop using the product.
- Please charge the product when:
a. The battery icon shows low power.
b. The system is automatically shut down. (The system will shut down automatically when the battery is low.)
c. There is no response when clicking buttons.
Note: Please only use the adapter delivered with the product to charge the MID. No other chargers can be used - risk of fire! - Please do not disconnect the machine when it is formatting or uploading/downloading, otherwise a program error may occur.
- When improperly being shut down, the machine will scan and repair the disk on reboot. This process may take a few minutes.
- The company is not responsible for memory loss caused by damaging or repairing the product or other reasons stated. Please follow the instructions of this manual when using the MID.
- Do not use the product in places where the use of electronic devices is prohibited; e.g. an aircraft
- Please do not use the product when driving or walking. It may cause an accident.
- USB is for data transmission only, do not use it for charging the product.
• This machine is not water resistant.
Technical specifications
| Main Body | Material Plastic + Aluminium | |
| Dimensions ca. 240 x 188 x 9,9 mm | ||
| Weight ca. 635 g | ||
| Configuration | Operating System Android | 4.1 |
| CPU Allwinner A31, Cortex | A7 Quad Core, 1,2 GHz | |
| Flash Memory 16 GB NAND | Flash | |
| RAM 2 GB DDR3 | ||
| Expansion slot Micro SD/SDHC (TF) card slot, up to 32 GB | ||
| Display | Screen 9.7" G+G capacitive | IPS 10-Point touch screen, display ratio: 4:3 |
| Resolution 2048 x 1536 Pixels | ||
| Connection | Network access Wi-Fi 802,11 b/g/n | |
| Wireless access Bluetooth | ||
| Sound | Speaker | 1x 1 W/80 Hmx |
| Ports | USB interface | Micro USB |
| HDMI interface | Mini HDMI interface | |
| Earphone | 3.5 mm | |
| Camera | Front: 0,3 MP, Back: 2 MP | |
| Battery | Battery | Li-Polymer rechargebale battery 7000 mAh 3.7 V |
| System operation conditions | Voltage | DC 5 V/3 A |
| Working temperature | -10 °C - +55 °C | |
| Entertainment | Music formats OGG, APE, MP3, FLAC, AAC, WAV, WMA | |
| Video formats AVI, MKV, FLV, MPG, 3GP, MPEG, WMV, RMVB AVI, RM, MOV | ||
| Picture formats | JPEG, BMP, PNG | |
| Maps | Google maps, navigation map | |
| E-Mail, Gmail (optional) | ||
Tablet (MID) Overview
1. Tablet Introduction
This chapter describes the appearance of the MID, including its buttons and ports; it will guide you to understand the features and accessories.

(1) Touch screen
(5) Volume control
(9) HDMI port
(2) Earphone plug
(6) Camera
(10) Micro USB port
(3) DC port
(7) Speaker
(4) Power switch
(8) TF-Cardslot
Note:
1) Clicking and dragging are performed using the LCD touch screen. Please do not use pens, pencils or other sharp objects to click on the screen to avoid scratching.
2) Please keep the speakers clean to avoid them being blocked by dirt and affecting the sound quality.
3) The antenna and the type label are located at the back of the MID. Please do not cover the back with metal objects to avoid poor signal strength.
2. TF Card
Follow the instructions of the icon displayed on the MID when inserting a TF card. Please pay attention to the direction in which the TF card has to be inserted.
(Press the card with your thumb and then release it to remove the card. The card will be ejected automatically.)

Note:
1) Keep the card slot free of dust or other objects. (To prevent damage to the card due to dust or moisture, please put the card back into its box or package when not in use).
2) Be sure that the MID is switched off when removing a TF card.
3) Avoid accidental removal of the TF card when the MID is switched on.
3. Charging
This product uses a standard 5V/3A power supply. Please use the supplied power charger. Other chargers may cause failure and risk of fire. Do not use the charger in a humid environment. If your hands and feet are wet, please do not touch the charger. When using the charger or charging the product, please maintain good ventilation. Do not cover the machine with paper or other objects. This could result in a reduced cooling effect.
Finding your way
The MID can achieve a variety of operating modes:
(1) Clicking. (2) Holding. (3) Sliding. (4) Dragging. (5) Rotating.
Key action definition: (1) Short press: press less than 1.2 seconds. (2) Long press: press and hold for more than 3 seconds. All operations in this manual are performed by a short press unless stated otherwise.
360 degree rotation: Rotate the MID to switch between horizontal and vertical view.
1. Turning on the MID
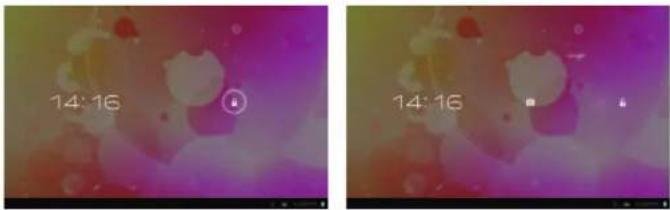
1.1 Press the power switch at the side of the MID (long press) and the machine will be booted. The booting screen and animations will be shown on the LCD screen for a few seconds, before you will enter the lock screen as shown in the screenshots below.

1.2 Press and hold the unlock button and a circle will appear around the lock. Drag to the right to unlock. The hold and drag function prevents the accidental booting of the MID.
2. Switching off the MID
Press the power switch key (long press) and the system will display the shutdown screen.
Three options will be displayed: "Power off", "Airplane mode" and "Silent mode". Select "Power off" to enter the next screen.
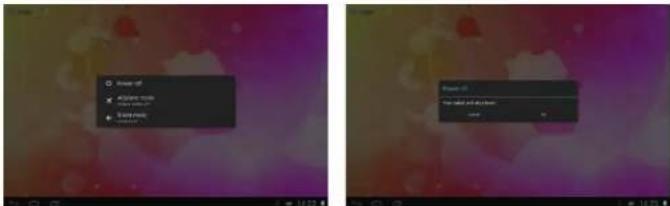
Receiving incoming signals will be disabled when selecting "Airplane mode".

Select "Silent mode" and the MID is muted.

When the battery level is down to 15 %, the system will prompt to connect the charger. When the battery is running low, the system will automatically shut down.
3. Lock-Screen and Power-Saving Mode
If the screen is inactive for a certain time, or when pressing the power switch, the MID will enter the screen-off/lock screen status to save power. Programs are still running, but the screen is blank. Pressing the power switch again will open the unlock screen. Hold and drag the unlock button to the right and the MID will resume working status.


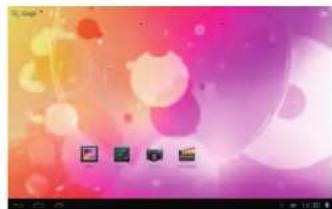
- Main Interface

| Voice search Icon | When connected to a network, click to enter the voice search menu. Speak a keyword directly into the MIC. |
| APPS Icon Click to enter the applications menu. | |
| Shortcut Icon Shortcut icon add/delete (will be covered later) | |
| Widgets Widgets add/delete (will be covered later) | |
| Back Key Press in pop-up menu to cancel an operation.In other menus, press to return to parent menu. | |
| Home Key Press in any menu to return to main interface. | |
| Apps having been opened | Click to display all APPS that have been opened. Click each of the applications to enter the relevant menu. |
| Notice/Fast Setting Column | Click to display more information: USB, Wi-Fi, Date etc. Click on any item to enter its settings menu. |
| Text search Icon When connected to a network, click to enter the Text search menu. Type in a key word and search. | |
The main interface features 5 different menu pages. Switch between pages by sliding the screen left and right. You can add/delete icons in each of the pages of the main menu.
5. Custom Screen
Add Shortcut
Click the button in the main interface to open the Application Program menu. Pressing and holding the icon will open the add shortcut interface. Move the icon to the place where you want to place the shortcut and it will be added to the main interface.
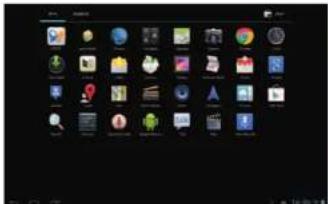

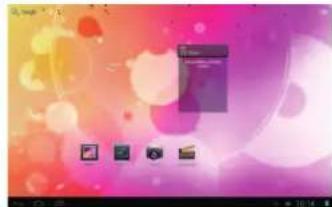
Add Widgets
Click the button in the main interface to open the Application Program menu. Press the "WIDGETS" option. This will open the widget interface. Pressing and holding the icon will open the add widget interface. Move the icon to the place where you want to place the widget and it will added to the main interface.


Delete Shortcut/Widgets
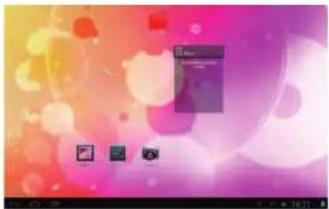
Press and hold a shortcut icon or widget icon in the main interface until on the top of the screen appears the icon. Then drag the shortcut/widget to the icon. The icon will turn red. The shortcut or widget will be deleted after releasing the button.
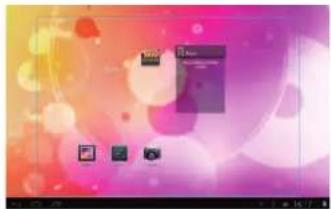
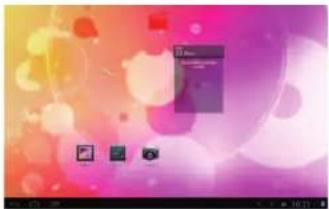
Click and drag any shortcut or widget icon to customize your main interface.
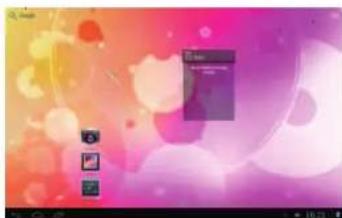
6. Changing your Wallpaper
In order to personalize the main interface users can set their favorite pictures or photos as wallpaper of the main interface.
6.1 Click the touch screen in the main interface to open the "Choose wallpaper" dialog box.
6.2 Click "Wallpaper" to enter the selection menu of pictures.


6.3 Select a picture. Click "Wallpaper" for more options.
6.4 Slide the screen, browse and select the picture. Click return to the settings interface. The wallpaper is now set.
7. Connection of USB Cable
When connecting the MID to a computer with a USB cable, the icon will be displayed in the Notice/Fast settings column of the main interface
Click ☐, and the following interface is displayed.

Click 📄️, it will enable the synchronized operation between the MID and the computer. Files on the TF card and the memory of the MID will be displayed on the computer; you can copy and transfer data.
System Settings
The settings interface allows a variety of custom settings and you can overview relevant information of all the installed software. Click ■ in the Application Program menu to enter the settings menu.
"APPS"
In the apps settings interface, users can see all installed applications. If you open one application, the relevant information is displayed. If you do not wish to use an application any longer, select "Delete" to remove the application.
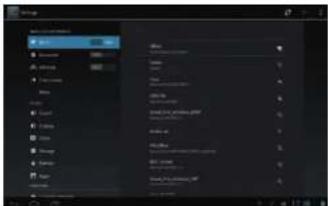

Internet
1. Network Settings
The MID features a built-in WI-FI module. Click ■, the settings menu will be displayed on the MID.

1.1 Wi-Fi
1.1.1 Slide the "Wi-Fi" switch button to ON to enable Wi-Fi.
1.1.2 Click "Wi-Fi" to enter the Wi-Fi settings menu.
1.1.3 The system will automatically search for available networks and display the name of the network.
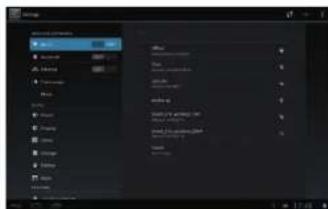
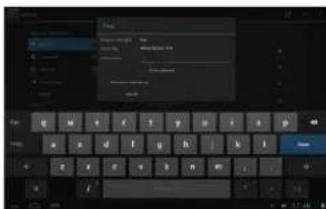
Click on a wireless network and the MID will open the message screen. Click space to open the keyboard, enter the password and click Command.
If the connection is successful, the network icon ■ will be displayed in the Notice/Fast settings column of the main interface.
Please note:
The MID will save connected routers automatically. When searching for a network,
the MID will automatically connect to the saved router.
When the network icon is displayed in the main interface, the MID has connected to the Wi-Fi network successfully.
1.1.4 Bluetooth
- Click Settings and then select the Bluetooth menu. Open Bluetooth, the system will search for nearby Bluetooth devices.
- Select the Bluetooth connection settings and click on the device with which you want to connect.
2. Internet
2.1 When successfully connected to a network, click In the main interface to enter the Google browser.
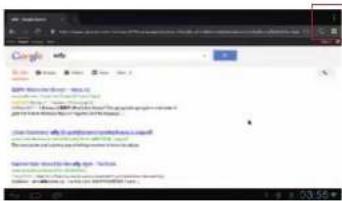
2.2 Click the input box. The keyboard will pop-up. Type in a new search and open the website.
2.3 Click the icon (red border) and a dropdown menu with more operational functions is displayed.

Software Management
The product supports third-party applications on an Android platform. Most applications can be obtained and downloaded from the Internet.
1. Explorer
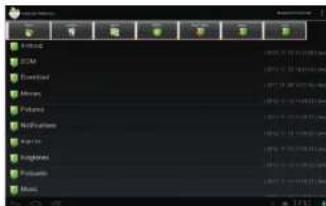
Click in the Application Program Interface to enter the explorer. You can browse, copy, delete, move, edit and rename programs saved on the MID or a TF card.


2. Software Installation
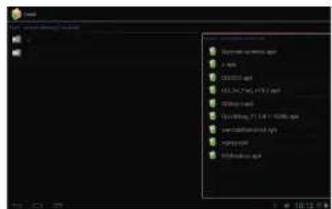
2.1 Click the software to be installed in the explorer. The MID will open the installation menu.

2.2 Click "Install". The MID will show the progress. After installation, it will display "Application installed successfully".
2.3 Click "Finish" to exit. The application shortcut will be added to the "Application function key menu".
2.4 Click the icon to open the software.
Special note:
You can also download chats, like QQ, MSN, etc.
Applications
1. Playing Music
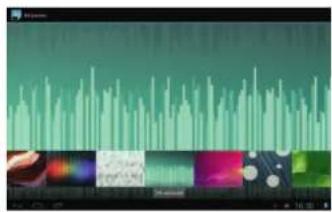
1.1 Click In the Application Program Interface to enter the playlist.
1.2 Click a music file to open and play it.

1.3 Background play
When playing music, click to open the main interface. The MID will play the music in the background.
1.3.1 Click in the main interface to display the music player menu.

1.3.2 Select the music player to return to the player menu.
2. Browsing Pictures
2.1Click in the Application Program Interface to browse pictures. Here you find all pictures and videos saved on the MID or a TF card.
2.2 Select to open a picture.

2.3 Select to play a video.

3. E-mail
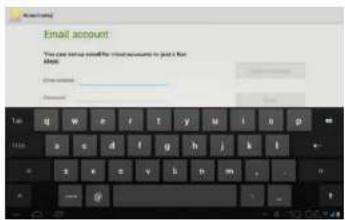
Click In the Application Program Interface to open the E-mail settings. Enter the email address and password to send and receive email messages.
4. Camera and Video
Click ■ in the Application Program Interface to open the camera manual.

5. Apk Installer
Click "Apk Installer", select "Install". Then click "Internal Memory" to install new software.


Click "Manage" to launch, export, uninstall or cancel.


Garantiekarte
Modell:
SerienNr.


- DEUTSCH
- VORSICHTSMASSNAHMEN
- BEMERKUNGEN
- WIDGETS HINZUFÜGEN
- INTERNET
- SOFTWARE MANAGEMENT
- SOFTWARE INSTALLATION
- ENGLISH
- DEAR CUSTOMER
- ATTENTION
- CONTENT
- IMPORTANT SAFETY PRECAUTIONS
- TABLET (MID) OVERVIEW
- TABLET INTRODUCTION
- NOTE
- TF CARD
- CHARGING
- FINDING YOUR WAY
- TURNING ON THE MID
- SWITCHING OFF THE MID
- LOCK-SCREEN AND POWER-SAVING MODE
- CUSTOM SCREEN
- ADD SHORTCUT
- ADD WIDGETS
- DELETE SHORTCUT/WIDGETS
- CHANGING YOUR WALLPAPER
- CONNECTION OF USB CABLE
- SYSTEM SETTINGS
- APPS
- NETWORK SETTINGS
- PLEASE NOTE
- EXPLORER
- SPECIAL NOTE
- APPLICATIONS
- PLAYING MUSIC
- BROWSING PICTURES
- CAMERA AND VIDEO
- APK INSTALLER
- GARANTIEKARTE
Brand : i-onik
Model : TP9.7-1200QC-Ultra
Category : Tablet