
PRJHD198 - Projector Pyle - Free user manual and instructions
Find the device manual for free PRJHD198 Pyle in PDF.


| Product Type | Video Projector |
| Brand | Pyle |
| Model | PRJHD198 |
| Display Technology | LCD |
| Native Resolution | 1920 x 1080 (Full HD) |
| Brightness | 4500 Lux |
| Contrast Ratio | 2000:1 |
| Lamp Life | Up to 60,000 hours (LED) |
| Projection Size | 32 to 200 inches |
| Aspect Ratio | 16:9 / 4:3 |
| Keystone Correction | ±15° Vertical |
| Inputs | HDMI, VGA, USB, AV, SD Card |
| Built-in Speaker | 2 x 5W |
| Power Supply | AC 100-240V, 50/60Hz |
| Power Consumption | 85W |
| Dimensions (W x D x H) | 9.4 x 7.5 x 3.1 inches |
| Weight | 3.3 lbs |
| Fan Noise | < 35 dB |
| Remote Control | Included |
| Maintenance | Clean air filter every 100 hours; wipe lens with soft cloth |
| Safety Features | Overheat auto shutdown, Kensington lock slot |
| Spare Parts | LED light source not user-replaceable; contact Pyle support |
| Repairability | Refer to service manual; warranty void if opened by unauthorized personnel |
| General Information | Home theater projector, supports 1080p input, 4K compatible via HDMI |
Frequently Asked Questions - PRJHD198 Pyle
User questions about PRJHD198 Pyle
0 question about this device. Answer the ones you know or ask your own.
Ask a new question about this device
Download the instructions for your Projector in PDF format for free! Find your manual PRJHD198 - Pyle and take your electronic device back in hand. On this page are published all the documents necessary for the use of your device. PRJHD198 by Pyle.
USER MANUAL PRJHD198 Pyle
Multimedia projector
PYLE®
www.PyleAudio.com

natural_image
Exterior view of a white projector with ventilation grilles and control buttons (no visible text or symbols)Model:PRJHD198
User's Manual
CONTEINTS
Warning
safty precautions 2
Cautions 3
Installation of projector 4
Full setting 4
standard setting(front projection)·5
installation method 6
Input port instruction-7
Remote control instruction 9....
Panel keystone instruction·10……
Open/Close·H
Open operation·1·1……
Close operation·1·1……
Image Adjustment·12……
Focus adjustment....12
Trapeziod adjustment....12
Menu setting....13
sources switch method....13
Menu setting method....13
- Image menu·13······
2.Volume menu·14······
3.Function menu.... 14
- System menu.... 14
program setting.... 17
USB/SD 18
Multimedia play.... 18
operation.... 18
entertainment game....18
Maintenance....19
Filter clearance....19
Replacement lamp....20
Trouble shooting.... 22
Specification 24
Accessory.... 25
Accessory and purchasable parts
When you open the carton of projector, please check the full accessories
Accessory list :
Projector 1 unit
remote control ----1 pc
power cable 1 pc
AV signal cable----1 pc
VGA signal cable----1 pc
warranty card----1pc
manual 1 pc
spare fuse 1 pc
clear paper 1 pc
Purchasable accessory:
1, projector screen
2, projector ceiling mount
3, spare lamps
Specification
WARNING
| LCD | Model | 5"TFT |
| Input signal | video | component video(Ypbpr), VGA,HDMIUSB,SD,DVB-T, analog TV |
| audio | stereo | |
| output signal | audio | 5W Z speaker(select) |
| LCD | native resolution 800*600 support 720P 1080p)contrast ratio 800 l | |
| Lens | aperture 3.8Focus 160mm | |
| Lamp | Power 150WColor-Temperature 9300KLife 6000-8000 hoursworking time < 24 hours | |
| Image | size 72-150inchBrightness >1800 Lumcnskeystone 20 degree | |
| Power | Voltage 220±10 VAC 50Hz 110 10 VAC 60Hz ,power consumption < 200W | |
| Working condition | temperature 0°C70 °Chumidity 10%~ % | |
| store condition | temperature -20°C70 °Chumidity 10%~ % | |
| Remote control | Frequency 38KHz | |
| machine | size 298×10 120mmweight 6Kg | |
(If all parameter changed, donot note again)
warning:
Please remember the model Number and series number if you need.
And please check all accessories when you drop the carton package.
MODEL NUMBER:
SERIES NUMBER:
When you use this projector, please read this manual carefully
Warning:

Donot see the light from the lens, it is high bright lamp. It will damage your eye .specially for children.
Warning: Donot place the projector in the wet condition, avoid to getting an electric shock
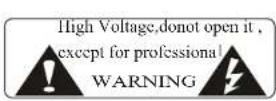
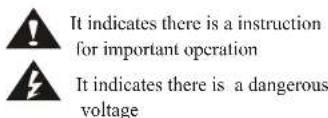
Warning:
when close the projector, the fans will continue to turn 90 seconds. Before pull out the power cable, please be sure the fans stop to turn. Or it will damage the projector lamp.
About the remote control battery:
The remote control battery should be fixed correctly,
Or it will damage the remote control.
Make sure the remote control out of children reach.
Safety precautions
Trouble shooting
Warning:
when use this projector, please read this manual carefully.
If wrong operation, it will cause electric shock or fire. so when use and repair this projector, please comply with the following points.
1, Read manual
Before use this projector, please read full manual carefully and operate according to this manual instruction
2.Clear
when clear this projector, please pull out the power cable. Use the wet cloth to clear, not the cleanser
3. Accessory
please use our recommended accessory. Or it will damage the projector.
4, Use environment
Donot place the projector in wet environment 5, installation and fix please place this projector in stable table.
6, Ventilation
the ventilation in the projector are best for projector work stably. Donot let the dust wall up the filter. Or it will cause the projector high-temperature protected. So please use the water to clear the filter per month.
7, Power
please make sure the power same as your projector inquiry specification. (220 V or 110V)
8, Earthing wire
this projector has earthing wire. It is three pin plug.
9, protect the power cable
Please confirm the power cable are perfect when connect the projector.
10, Thunder
when the thunder happen or long time no use, please pull the power cable out of projector.
11, Repairment
As the high voltage inside ,please donot open or try to repair the projector by yourself. . Please ask a professional technician to repair the projector.
12, Far away Heat device please make sure this projector far away other heat device. It will damage the projector service life
TROUBLE SHOOTING
Please refer to this chapter when you encounter a problem list prior to contacting your dealer.
Problem:
Possible solution(s):
Projector turns off automatically
1, Dust cover the filter, Please wash this filter by water.
- Some of fans are broken, donot turn again. It is high temperature protected system. Please replace the broken fans quickly.
Lamp doesn't work.
- Power supplier are wrong. Please confirm your Projector power specification. 220V or 110V.
2, Lamp are broken or out of service life. Please replace the lamp and test it again
- Check the ignitor. It is broken, please change a New ignitor.
Trouble Shooting
Caution
TROUBLE SHOOTING
Please refer to this chapter when you encounter a problem list prior to contacting your dealer.
Problem:
Possible solution(s):
| No power | 1, The projector donot connect the power cable2, Donot open the projector.3, Fuse broken |
| Remote doesn't operate | 1, Projector turned on to quickly after last turn off (needs 5 minutes).2, Batteries defect.3, Aim remote correctly at IR receiver. |
| No image | 1, Please remove the len cap at first2, Projector turned off.3, Selected the wrong input signal.4, the mainboard are broken . Please Replace this mainboard. |
About the installation
- In order to improve the projector service life,● About Open and close the projector It should not place in a wet and ventilation condition.
- when open the projector ,connect
- Donot put the projector under the sunshine directly.
- Projector working temperature: 0℃70 ℃.
- Projector store temperature : -20℃70 ℃.
- Donot block the ventilation-window of projector
If the projector interior temperature are too hot, the machine will be shut off automatically. This is hot - protected system.
So please clean the filter of projector per month. It is very important.
Donot let the dust cover the filter. - when open the projector, connect the power cable and press the "power" key on the panel. The projector will work, but the lamp will be bright more and more. After 5 minutes, the lamp wor normally
- when close the projector, press the power key again. And then the lamp shut off. But the fans still work until 5 minutes lat. When close the projector, donot pull out the power cable directly. After 5 minutes the projector will shut off automatically.
Warning:
Fans will adjust the temperature. It is controlled by system when the projector work, the fans turn slowly or quickly so the fans noise are different But it is normal when the projector work, donot pull out the pwer cable. If the fans stop to work, it will cause the projector interior temperature very high, so it may damage the projector.
Installation
Maintenance
PROJECTOR INSTALLATION
Please use the setup instruction below:
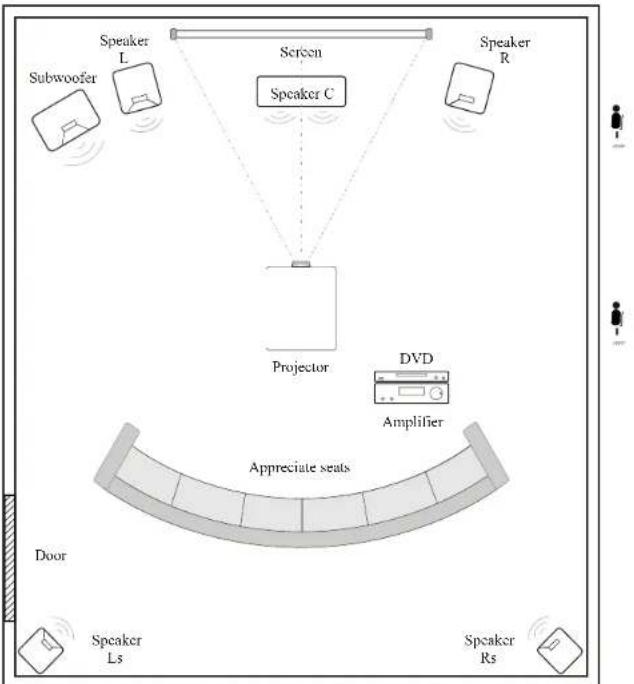
flowchart
graph TD
    A["Speaker L"] --> B["Speaker C"]
    C["Speaker R"] --> D["Speaker C"]
    E["Subwoofer"] --> F["Speaker L"]
    G["Projector"] --> H["DVD Amplifier"]
    I["Speaker Ls"] --> J["Speaker Rs"]
    K["Speaker C"] --> L["Screen"]
    M["Speaker R"] --> N["Speaker C"]
    O["Speaker L"] --> P["Speaker C"]
    Q["Speaker R"] --> R["Speaker C"]
    S["Speaker Ls"] --> T["Speaker C"]
    U["Speaker Rs"] --> V["Speaker C"]
    W["Speaker Ls"] --> X["Speaker C"]
    Y["Speaker Rs"] --> Z["Speaker C"]
In order to get good image quality, donot let the sunlight shine the screen directly. If you use the projector in the day time,
- Take away the panel like the picture 2.

natural_image
Close-up of a device's internal components with arrows indicating motion (no text or symbols visible)2
- Use a small screwdriver to push out the lamp as the picture 3

natural_image
Interior view of a white appliance with open lid and internal compartments (no visible text or symbols)3
★Before replacing the lamp, make sure the lamp are cold.
★Before open the lamp cover board, pull out the power cable
★When replacing the lamp, donot drop some dirty goods inside the projector.
Maintenance
Projector Installation
Replace the projector lamp
Our projector lamp warranty 6 months In different use environment, after 6000 hours the lamp brightness will reduce the image will become dark. Therefore, please replace the lamp according to the following steps.
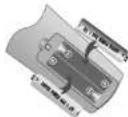
1, use the tool to remove the screw, like the picture 1 show

natural_image
Close-up of a mechanical component with a metallic tool inserted, no visible text or symbols1
20
Standard setting Front projection
Please refer to the following sheet, adjust your picture size and distance (from the lens to screen)
| Taille D'écran | 4:3 16:9 | |
| 50" | 1.9m | 2.0m |
| 72" | 2.5m | 2.7m |
| 100" | 3.37m | 3.8m |
The data maybe have 3% error, due to the image size according to the distance between projector and screen. If the distance is less 2m or over 5m, the image maybe not clear.
warning:
Please check the following picture to show the trapezoid adjustment
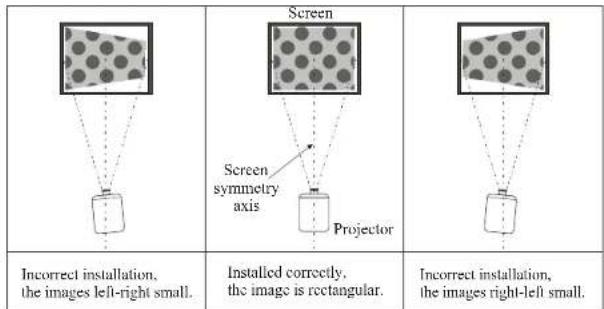
5
Projector installation
Maintenance
Installation method:
Contact a professional service man to mount this projector to a ceiling.
Follow the instructions below for the correct projector positions:


Warning:
1) This projector might damage beyond repair when it is incorrectly mounted on a ceiling or when its incorrectly installed on a surface or installed on a incorrect surface. It may also inflict damage to persons within close vicinity.
2) This projector can only be used in an environment with a temperature not exceeding the range of 0-35 degree. The projector may malfunction if temperatures vary outside the normal operating range.
3 The sharpness of the screen might be interrupted when the
projector is being used in a dusty, wet, moist or smoke filled environment. The projector might malfunction in a moist or wet environment.
4 Take care of sufficient ventilation around the projector.
Otherwise this projector might overheat and cause life threatening situations
Maintenance filter
The filter should be cleaned at least once a month (more often in dusty environments), or the projector will overheat. the step as follow:
- Remove the grille like indicated below.

natural_image
White projector with control panel and ventilation grille, no visible text or symbols- clear the dusty on the filter Dry the filter sufficiently never install a moist filter in this projector, and complete the installation.
USB/SD PLAY
Projector installation
Multimedia play
Enter "DTV/CARD" mode, insert USB or SD/MMC card, It can recognize the file in format of Mp3 JPEG MPEG-4 AVI VOB.DAT.
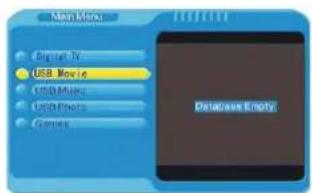
- Press “▲/▼” choose what you need to play ;
- Press "▶" enter the submenu then press to "choose which file you need to play,
- If you want to return to main menu to play other media, press "◀":
- Press RETURN to back previous menu :
- Choose the file and then press OK begin to play in full screen
Play Operation
- Play USB Movie press the bottom key on the remote control, it can pause, stop-forward back next previous and image zoom funti
- Play USB Music press the bottom key on the remote control, it can pause, stop, forward back next previous and image zoom function
- Play USB Photo press "display the picture or reverse the picture, press "SIZE → to magnify or shrink the picture Under the image zoom function, press " ▲/▼/◀/▶ to" remove the picture to center ;
- Under play mode, press RETURN back to main menu
Entertainment games
Choose Games to enter the games main menu Box Man Tetris Hit Rat. Press OK to enter the games use, the number and "to play the game ↓
Input port instruction
This projector can support HDMI, USB, SD, component video signal, s-video signal, VGA signal and TV signal, the audio in and audio out function.

natural_image
Three views of a projector with labeled components (no text or symbols on the device itself)- Indicator light on stay situation, the light is red, on working situation, the light is green.
- Panel key use panel key to adjust parameter, lead the introduce of the panel key
- Remote control receiver when use the remote control, please point this receiver directly.
- Lens adjust the lens focus to improve the image quality.
- Trapezoid correction turn the knob on the projector left or right. Adjust the image become square, can adjust +/-15
- HDMI signal input, max support 1080i signal.
- Signal wire connect connect projector signal source, read the signal port introduce )
-
Power switch when use, you need connect the power wire with projector and the power jacc.
-
Fuse
if open the power switch, the indicator light does not work, it may be the fuse broken 5A220V) - Power switch
open and shut off this switch.
when you want to open the projector
it must open this switch at frist - ventilation
this ventilation window is very important
donot block this window otherwise
it will burn the projector - ventilation
two side of the projector have the ventilation, when use you must ensure do not block it
13.USB port
14,SD card port
15, Digital TV and analog TV port
Projector install
Digital TV Use
Connect main equipment

flowchart
graph TD
    A["Connecting video equipment Without S-video output terminal"] --> B["VIDEO"]
    C["Connect DVD or have composite equipment output terminal"] --> D["VGA, IN"]
    B --> E["Y—Pb/Cb—Pr/Cr"]
    D --> F["L—AUDIO IN—R—TV"]
    E --> G["Connect PC or DVD equipment VGA output terminal"]
    F --> H["Connect the DVD or game player equipment."]
    G --> I["Connecting on audio TV or digital TV video?"]


- Search Channel according the different area recently it support following country : germany UK italy France spain holland Taiwan China Norway sweden finland ;
- Manual search need to set up the scan frequency and bandwidth, please set up according to your local DVB Parameter;
- Auto search, when the search finish, it will skip the search menu, and it will play the program which you search in the right screen.
Program instruction menu
If you want to learn the next or future program, please press the EPG key on the remote control and enter the program instruction menu windows:

-
Title:
-
Display time list;
- Display particular time list;
- Program list press “▲o/▼move the cursor on the different program press “◀/▶o”switch the cursor left/right ;
- Display the time period and information of recent program press to move the cursor;
- Display particular program information which the cursor correspond.
Digital TV use
If your country have the DVB TV signal, when you use this projector digital tv function first times, please switch to "DTV/CARD" mode, Then it will appear following menu.
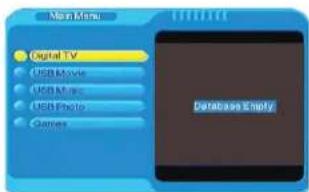
If you have used the projector digital tv function ,switch to"DTV/CARD'mode it,will display the last time program which you received so you should press the DVB menu key,it can display the above menu .
Under the full screen display :
press display key (on the remote) to display the recent program information ; press CH+- key(on the remote),you can change the TV channel ; press menu key (on the remote) to entre the menu to change the language or audio press SIZE +/- key(on the remote) to zoom the picture size under the zoom mode you can press "▲/▼/▲/ key to move the picture.
Digital TV setting:
Under the digital tv menu press OK key"(on the remote) to enter the setting menu As following:

Move the cursor to Installation press OK key on the remote it will display the dialogue "password", the default password "0000", then you can enter the "search" menu. Picture as following:
Remote control instruction
Remote panel instruction

Precautions:
I, you need to dry the remote control with a dry cloth immediately when it gets wet.
2, when the battery hasn't been used for a long time we advise you to remove it from the remote .be sure that children can't reach the removed button cell .swallowing a of harm and is very dangerous
Panel keystoke instruction
Menu setting
Panel keystoke sketch map

- Indicator light
AV/TV Key
This key can choose the mode (switch from AV/HDMI/TV/PC)
② Power key
It can open or close the projector its function same as the "power" in the remote control
- Menu,direction Key
It can adjust the menu by UP/Down ,left/right
5. PIP INTERFACE

NOTE: only Under HDMI and Pc mode support PIP function when PIP function donor close the singal just switch between HDMI and PC
6. GEOMETRY INTERFACE

7. TV-CHANNEL INTERFACE
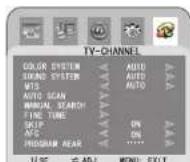
This menu is for analog TV function. You can search the analog tv channel.
Menu setting
Open/close
2. SOUND INTERFACE
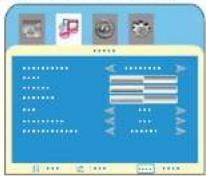
the audio output have three types:normal ,line,speaker;
when you choose the normal mode, the projector internal speaker and audio output function both work
when you choose the line mode, the projector internal speaker donot work, only audio output function work.
When you choose the speak mode, only the projector internal speaker work, the audio output function donot work ( no sound output)
This menu for adjusting the sound. You can choose different sound mode which you prefer.
3. ADVANCE INTERFACE

When you watch the TTX, you can choose the language and time by this menu.
4. SYSTEM INTERFACE

OSD language: our projector support English, Chinese French, German, Spanish;
Scale : 4:3/16:9 /letter box , there are three choice. Only under AV mode, you can switch the 4:3/16:9 /letter box But under HDMI/VGA/component mode,you only can see 4:3 . It cannot display 16:9 sale screen.
Hzoom and Vzoom: it only work if you choose the scale:letterbox
If the projector is the new one please read projector install "chapter placed the projector connect the powerwire and the signalwire, the operation as follow:
Open operation
- Before use the remoter. Put in two 7 size battery in it

- Open the power switch on the the power light begin to flash.


- press the power key on the remote control or panel, the indicator light turn light.


-
After 2 second the projector lamp begin work, began appear unclear white light on the screen, after 2 minute the projector begin work.
-
For the new projector. When the first time to use, maybe will appear image unclear or trapezoid distortion, please read image adjustment chapter
-
After the image is clear, then you can watch program during watching, you also can setup the system parameter, please read menu setting chapter

Close operation
-
During use the projector press power key "can let the projector switch to stay situation."
-
After inter into stay situation, the projector under auto protect auto release hot the indicator light is flase situation but here the projector is under auto protect situation not accept any order if need to startup again must wait for finished the release hot.
Image adjustment
Menu setting
The new projector using it first time commonly will appear image faintness and the image is trapezoid, it is course that not adjust well of the lens focus and the trapezoid. please follow the step the correction:
Focus adjustment
•turn the lens into the projector then turn it out slowly
at the same time looking at the resolution point carefully
when the image is very clearly (take the middle area of the image), it is the best situation of the lens


NOTE: When you replace the projector from a cold to a warm environment water vapour might occur. Don't turn the projector on when this occurs but wait until the vapour has disappeared.
KEYSTONE
If a projected picture has keystone distortion, correct image with Keystone adjustment. The image becomes trapezoid shape when the screen or project is not level. Please reposition the projector to improve its angle to the screen. However, the circumference of the image may not be focussed.

If not able to use the Keystone correction function to correct the trapezoid distortion.
Menu setting method
-
Using the projector, press "menu" key, the picture display on screen to adjust the menu(picture one);
-
press "____" key, the menu in turn circle into "image" > "volume" > "function" > "system" > "setting" > "image" adjust interface;
-
Elect the adjust interface, use " " key elect the item that need to adjust(picture two) ;
-
use " " key to adjust the elect item paremeter;
-
Finished the elect item parameter, press the "menu" key again, exit the page:
-
Repeat operate the 2\~5step, till finished all the parameter's enactment, press "exit" key, exit the menu page, otherwise, the menu page will auto exit after a period time.
1. Image menu adjustment
a. Press "menu" key, untile display the above picture of the menu;
b. Press “▲/▼” key, elect the option that need to adjust;
c. Press “◀/▶” key, adjust parallelism elect parameter.
d. Press the "menu" key again exit
the menu page parameter adjust station.

(One)

(Two)

note:

indicate fixed option;
indicate submenu option;
indicate continue adjust
parameter, as adjust parameter
will appear adjustment interface;

- Multimedia projector
- PYLE®
- CONTEINTS
- Accessory and purchasable parts
- Purchasable accessory:
- Specification
- WARNING
- Safety precautions
- Trouble shooting
- Warning:
- 1, Read manual
- 2.Clear
- Accessory
- 4, Use environment
- 6, Ventilation
- 7, Power
- 8, Earthing wire
- 9, protect the power cable
- 10, Thunder
- 11, Repairment
- Problem:
- Possible solution(s):
- Projector turns off automatically
- Lamp doesn't work.
- Caution
- About the installation
- Installation
- Maintenance
- PROJECTOR INSTALLATION
- Replace the projector lamp
- Standard setting Front projection
- Maintenance filter
- USB/SD PLAY
- Multimedia play
- Play Operation
- Entertainment games
- Input port instruction
- Projector install
- Digital TV Use
- Program instruction menu
- Remote control instruction
- Remote panel instruction
- Precautions:
- Panel keystoke instruction
- Menu setting
- PIP INTERFACE
- GEOMETRY INTERFACE
- TV-CHANNEL INTERFACE
- Open/close
- SOUND INTERFACE
- ADVANCE INTERFACE
- SYSTEM INTERFACE
- Open operation
- Close operation
- Image adjustment
- Focus adjustment
- KEYSTONE
- Menu setting method
- Image menu adjustment
Brand : Pyle
Model : PRJHD198
Category : Projector