
Optima 147 - Camera AGFAPHOTO - Free user manual and instructions
Find the device manual for free Optima 147 AGFAPHOTO in PDF.


| Product Type | Digital Camera |
| Model Name | Optima 147 |
| Image Sensor | 1/2.3" CCD |
| Effective Pixels | 14.14 Megapixels |
| Lens Focal Length | 5.9mm (Wide) – 41.3mm (Tele) (35mm equivalent: 32.9mm – 230.3mm) |
| Optical Zoom | 7x |
| Digital Zoom | 6x (Combined: 42x) |
| Focusing Range | Normal: 60cm – ∞ (Wide), 80cm – ∞ (Tele); Macro: 5cm – ∞ (Wide only) |
| LCD Screen | 3.0-inch (230k pixels) |
| Shutter Speed | 1/2000 – 4 sec (Manual: up to 30 sec) |
| ISO Sensitivity | Auto, 64, 100, 200, 400, 800, 1600 |
| White Balance | Auto, Daylight, Cloudy, Fluorescent, Fluorescent CWF, Incandescent, Manual |
| Flash Modes | Auto, Red-Eye Reduction, Forced Flash, No Flash, Slow Synchro, Red-Eye+Slow Synchro |
| Shooting Modes | Auto, Manual, ASCN, Portrait, Landscape, Night Portrait, Scene (20 types), Panorama, Stabilization, Movie |
| Video Resolution | 720p (30fps/15fps), VGA, QVGA (Motion JPEG) |
| Storage | Internal memory approx. 50 MB; SD/SDHC card up to 32 GB |
| Power Source | Rechargeable Li-ion battery SKL-50 (3.7V, 880mAh) with in-camera charging |
| Dimensions (W x H x D) | Approx. 101.5mm x 56.9mm x 24.0mm |
| Weight (Body only) | Approx. 129g |
| Supplied Accessories | Rechargeable Li-ion battery, AC adapter, USB extension cable, wrist strap, CD-ROM, quick start guide, warranty card |
| Care and Cleaning | Wipe with a slightly damp soft cloth; do not use abrasive or solvent-based cleaners. |
| Safety Precautions | Do not expose to rain, humidity, or extreme temperatures; remove battery and memory card for long-term storage. |
| Spare Parts / Repairability | Battery model SKL-50; contact RedDot Imaging for service and repair. |
Frequently Asked Questions - Optima 147 AGFAPHOTO
User questions about Optima 147 AGFAPHOTO
0 question about this device. Answer the ones you know or ask your own.
Ask a new question about this device
Download the instructions for your Camera in PDF format for free! Find your manual Optima 147 - AGFAPHOTO and take your electronic device back in hand. On this page are published all the documents necessary for the use of your device. Optima 147 by AGFAPHOTO.
USER MANUAL Optima 147 AGFAPHOTO
natural_image
Sylight with people relaxing on a boat under a lake, featuring a large digital camera and mountain backdrop (no text or symbols visible)WARNING
Do not expose the camera battery pack or other accessories to rain or humidity to prevent fire hazard or electric shock.
For customers in the U.S.A.
Tested To Comply With FCC Standards FOR HOME OR OFFICE USE
FCC Statement
This device complies with part 15 of the FCC Rules. Operation is subject to the following two conditions:
[1] This device may not cause harmful interference, and [2] this device must accept any interference received, including interference that may cause undesired operation.
For customers in Europe

"CE" mark indicates that this product complies with the European requirements for safety,
health, environment and customer protection. "CE" marked cameras are intended for sales in Europe.

This symbol [crossed-out wheeled bin WEEE Annex IV] indicates separate collection of waste electrical and electronic equipment in the European countries. Please do not throw the equipment into the domestic refuse. Please use the return and collection systems available in your country for the disposal of this product.
Declaration of Conformity
Model Name: OPTIMA 147
Trade Name: AgfaPhoto
Responsible Party: RedDot Imaging
Address: RedDot Imaging, 2275 NW 84thAve, Doral, FL 33122.
Customer Care Hotline:
Service & Repair Hotline (USA):
1-855-243-2937 (from a landline only)
Service & Repair (UK):
+44 1908 488676
Online Service / International contact:
customersupport@reddotimaging.com
For repair and service in all other countries, please refer to the warranty pamphlet for additional information.
SAFETY PRECAUTIONS
Camera notes:
Do not store or use the camera in the following types of locations:
• In the rain, very humid and dusty places.
- In a place where the camera can be exposed directly to the sunlight or subject to high temperature, e.g. Inside a closed car in summer.
- In a place where the camera is subject to a high magnetic field, e.g. near motors, transformers or magnets.
! Do not place the camera on a wet surface or places where dripping water or sand may come in contact with the camera, which may cause irrepairable faults.
! If the camera will not be used for a long period of time, we suggest you remove the battery and the memory card from the camera and keep them in dry environment.
! If you carry the camera suddenly from a cold location to a warm place, moisture may condense inside the camera. We suggest you wait for a while before turing on the camera.
No compensation for loss of recordings. Loss of recordings cannot be compensated for if a malfunction of your camera or recording media, etc, makes the playback of recordings not possible.
Battery notes:
! Incorrect use of the batteries may cause them to leak, become hot, ignite or burst. Always observe the precautions given below.
- Do not expose the batteries to water, and take particular care to keep the terminals dry.
- Do not heat the batteries or throw them into a fire.
- Do not attempt to deform, disassemble or modify the batteries.
! Keep the batteries out of reach of babies and small children.
In cold locations, battery performance deteriorates and the time for which they can be used shortens markedly.
Memory card notes:
When using a new memory card, or a memory card has been initialized by a PC, be sure to format the card with your digital camera before using it.
To edit image data, copy the image data to the PC's hard disk first.
Do not change or delete the folder names or file names in the memory card from your PC, as this may make it impossible to recognize or misinterpret the original folder or file in your camera.
! The photos taken by this camera are stored in the auto-generated folder in SD card. Please do not store photos that are not taken by this model of camera, as this may make it impossible to recognize the picture when the camera is in playback mode. Please do not expose the camera to harsh environments such as moisture or extreme temperatures, which may shorten the life of your camera or damage the batteries.
BEFORE YOU START
Preface
Thank you for purchasing this AgfaPhoto digital camera. Please read this manual carefully and keep it in a safe place for future reference.
Copyright
© Copyright 2011 RedDot Imaging All rights reserved. No part of this publication may be reproduced, transmitted, transcribed, stored in a retrieval system, or translated into any language or computer language, in any form, by any means, without the prior written permission of RedDot Imaging
Trademarks
All trademarks mentioned in this manual are used for identification purposes only and are properties of their respective owners.
Safety information
Please read the following important information carefully before using the product.
- Do not take apart or attempt to service the camera yourself.
- Do not drop or knock the camera. Improper handling may damage the product.
- Turn off the camera before inserting or removing the battery and memory card.
- Use only the type of battery that come with the camera. Using other types of batteries may damage the camera and invalidate the warranty.
- Do not touch the camera lens.
- Please not expose the camera to harsh environments such as moisture, or extreme temperatures, which may shorten the life of your camera or damage the batteries.
- Do not use or store the camera in dusty, dirty, or sandy areas, as its components may be damaged.
AgfaPhoto OPTIMA 147
- Do not expose the lens to direct sunlight for extended periods.
- Download all pictures and remove the batteries from the camera if you are going to store the camera for long periods of time.
- Do not use abrasive cleansers, alcohol-based, or solvent-based cleaners to clean the camera. To clean, wipe the camera with a slightly damp soft cloth.
About this manual
This manual provides you with instructions on how to use your AgfaPhoto digital camera. Every effort has been made to ensure that the contents of this manual are accurate, however RedDot Imaging reserves the right to make changes without notice.
Symbols used in this manual
Throughout this manual, the following symbols are used to help you locate information quickly and easily:

Indicates the useful information to know.

Indicates precautions to be taken while operating the camera.
CONTENTS
WARNING ......i
SAFETY PRECAUTIONS ......ii
BEFORE YOU START ....1
Preface 1
Copyright 1
Trademarks 1
Safety information ....1
About this manual 2
Symbols used in this manual 2
CONTENTS 3
GETTING READY 7
Unpacking 7
Camera Views 8
Charging the Battery 10
Insert the Battery and SD/SDHC Card (Not included) 11
Turning On and Off 13
Mode Button Operation 14
Setting Date/Time and Language.... 15
Setting the Language 15
Setting the Date and Time 16
About the LCD Screen 17
BASIC OPERATION 18
Shooting in Auto Mode 18
Using the Zoom Function 18
Flash 19
Self-timer 19
Macro Mode 20
i button function 20
Face Detection 21
Smile Detection 21
Blink Detection 22
Advanced Functions Menu.... 23
WB [White Balance] 24
ISO....24
Quality 25
Size 25
Color 26
AgfaPhoto OPTIMA 147
Exposure Compensation 26
USING THE MODES 30
LCD Screen Display 27
Still Picture Mode Display 27
Video Shooting Mode Display 29
Playback Mode Display 30
ASCN mode 31
Landscape 31
Portrait 31
Night Portrait 32
Backlit Portrait 32
Night Landscape 32
Macro 32
Auto 32
Panorama mode 32
Scene mode 33
Sport 34
Indoor 34
Snow 34
Fireworks 34
Museum 34
Night Landscape 34
Children 34
Leaf 35
Sunset 35
Glass 35
Landscape 35
Night Portrait 35
Beach 35
Text 35
Gathering 35
ID 35
Fish eye 35
Travel shooting 35
Photo frame 35
Sketch 35
Stabilization mode 36
PLAYBACK 37
Viewing Photos and Videos 37
Thumbnail View 38
i button playback function 39
Using Zoom on Playback (for still pictures only) ..... 41
Using the Delete Button 42
USING THE MENUS 43
Still Picture Menu 43
AF Mode [Auto-Focus mode] 44
AF-assist Beam 44
Continuous AF 45
Expo Metering (Exposure Metering) 45
Continuous Shot 46
Date Imprint 46
Quick Review 47
Digital Zoom 47
Slow Shutter 48
Movie Menu 48
Continuous AF 49
Expo Metering (Exposure Metering) .. 50
DIS 50
Playback Menu 51
Protect 51
Delete 52
DPOF (Digital Print Order Format) 53
Trim 54
HDR-High Dynamic Range 54
Resize 55
Rotate 55
Red-eye Reduction 56
Display Setup 56
Slideshow 57
Wallpaper Settings 57
Setup Menu 60
Beep 61
LCD Brightness 61
Power Saver 62
Zone 62
AgfaPhoto OPTIMA 147
Date/Time 63
Language 63
File and Software 63
File Numbering 64
Copy to Card (Copy internal memory to memory card) 64
Reset Settings 65
FW Version (Firmware version) 65
Transmission 66
Connecting to a PC 66
Setting the USB Mode 66
Transferring Files to your PC 66
Connecting to a PictBridge Compatible Printer 68
Setting the USB Mode 68
Connecting the Camera and Printer 69
Using the PictBridge Menu 70
Print with Date 70
Print without Date 71
Print Index 72
Print DPOF 73
Exit 73
APPENDICES 74
Specifications 74
Error Messages 78
Troubleshooting 80
Customer Care 82
GETTING READY
Unpacking
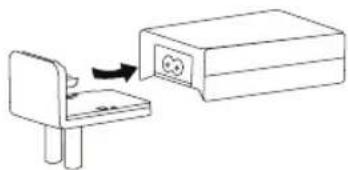
Your package should contain the camera model you purchased along with the following items. If anything is missing or appears to be damaged, please contact your vendor.
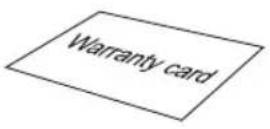
Warranty Card

CD-ROM
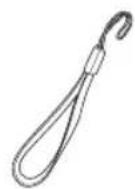
Wrist Strap

USB Extension Cable

Rechargeable lithium-ion battery
natural_image
Simple line drawing of a device with an arrow pointing to a box (no text or symbols)AC adapter
AgfaPhoto OPTIMA 147
Camera Views
Front View Back View


Right View
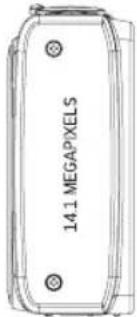
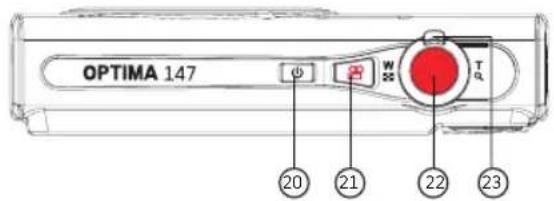
Top View
Bottom View

Left View
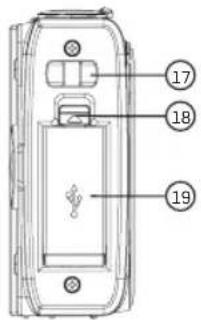
| 1 Flash Lamp 142 AF Assist/Timer Indicator 15 Macro/Left3 Lens 16 Function/OK Button4 Speaker 17 Wrist Strap Mount5 Microphone 18 USB interface switch6 LCD Screen 19 USB interface7 i Function Button8 Mode Button 21 Movie Button9 Status Indicator 22 Shutter Button10 Playback Button 23 Zoom Wheel11 Menu Button 24 Tripod Socket12 Disp/Up Button 25 Card Slot/Battery Compartment13 Flash Mode/Right Button 26 Memory card/Battery slot switch | Button20 Power Button | Delete Button/Self-timer Button/Down Button |
AgfaPhoto OPTIMA 147
Charging the Battery
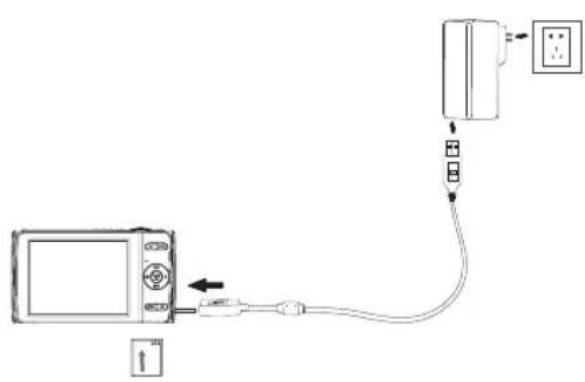
- Put the battery into the camera.
- Use USB cable to connect the camera with power adapter.
- Insert power adapter to power socket.
natural_image
Diagram showing connection between a device and a wall-mounted device via cable (no text or symbols)When charging, if the camera indicator is red the camera is still charging. When the camera completes charging, the light will turn green. To optimize battery life, please charge the battery for at least 4 hours before using it for the first time.
The charger is for indoor use only.
Insert the Battery and SD/SDHC Card (Not included)
- Open the battery compartment.

natural_image
Technical line drawing of a device rear panel with no visible text or symbols
natural_image
Diagram of an AGFAPHOTO digital camera with internal components and a circular lens (no text or symbols)- Insert the battery into the battery slot in the correct position as shown in the following diagram.

AgfaPhoto OPTIMA 147
card slot as shown.
- Close the battery compartment.3. Insert an SD/SDHC card (not inc


natural_image
Line drawing of a ASFAPHOTO digital camera module with no visible text or symbols on the body itself

Optional SD/SDHC cards are not included. The use of 64 MB to 32 GB memory cards from recognized manufacturers such as SanDisk, Panasonic and Toshiba is recommended for reliable data storage.

To remove the SD/SDHC card, open the battery compartment and gently push the card to release it. Pull the card out carefully.

When selecting Full size (1280X720) to record video, please use High Speed Card (above Class 4).

When taking video, if "Memory card accessing is slow" on the LCD screen, please select High Speed Card or format this card, then take video
Turning On and Off
Press the Power button to turn the camera on. To turn off the camera, press the Power button again.

When the camera is turned on, it will be at the same shooting mode based on the last use. You can turn the Mode Dial on the top to select. When using the camera for the first-time, the language setting page will appear.
Mode Button Operation
The AgfaPhoto camera features a convenient mode button that allows for easy mode selection. All available modes are listed as follows:
| Mode Name Icon Description | ||
| Auto mode |  | Switch to take still pictures in automatic mode. |
| Manual mode |  | Many of the camera settings can be configured manually in this mode. |
| Panorama mode | [K84G] | In this mode, up to 3 frames can be stitched together to create panoramic photo. |
| Stabilization mode |  | Switch to take still pictures by reducing the blurs caused by hand shake, under low luminance, or slow shutter speed. |
| Scene mode | SCN | Choose from 20 different scene types and effects for your photos. |
| Movie mode | [WC3K] | Switch to record videos. |
| ASCN mode |  | Switch to have the camera automatically select the best scene type for still pictures. |
| Portrait | [K266] | Switch to take portrait pictures under normal condition. |
Setting Date/Time and Language

The Date/Time and Language setup will automatically appear when the camera is turned on the first time.
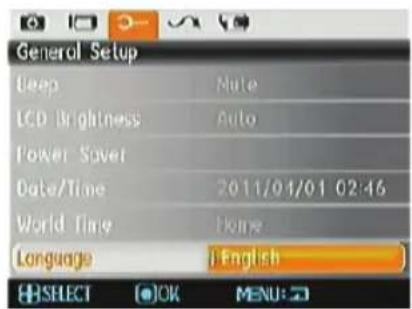
To set the display language, date, and time, go to the following setup options in the General Setup menu.
- Language
- Date / Time
To access the Setup menu, do the following:
- Press Power to turn the camera on.
- Press the MENU button, navigate through the camera menus by using the Left/Right button to select the General Setup menu.
Setting the Language
- Select language with the Down button, press right button to enter setting.
- Use the Up/Down/Left/Right buttons to select the desired language.
- Press the FUNC OK button to confirm the setting.

About the LCD Screen
When you turn the camera on, various icons are shown on the LCD screen to indicate the current camera settings and status. To learn more about the displayed icons, see "LCD Screen display" on page 27.LCD Screen notes:
Extremely high-precision technology had been used to manufacture the LCD screen so that most of the pixels are operational for use. However, there may be some minute points (black, white, red, blue or green) that constantly appear on the LCD screen. These points are normal in the manufacturing process and the recording is not affected in any way.  Avoid exposing the LCD screen to water; please remove any moisture on the LCD screen with dry and soft cleaning cloth.  If the LCD monitor is damaged, take particular care with the liquid crystal in the monitor. If any of the following situations arise, take the recommended immediate action indicated below: - If liquid crystal comes in contact with your skin, wipe the area with a cloth and then wash thoroughly with soap and running water. - If liquid crystal flows into the eyes inadvertently, please rinse with water immediately and seek medical assistance. - If liquid crystal is swallowed, flush your mouth thoroughly with water. Drink large quantities of water and induce vomiting. Then seek medical assistance immediately.BASIC OPERATION
Shooting in Auto Mode AUTO
Auto mode is the easiest mode to take photos. While operating in this mode, the camera automatically optimizes your photos for best results. To start shooting, do the following: 1. Press Power to turn the camera on. 2. Press the Mode button to select Automatic mode [ ] . 3. Compose your picture on the LCD screen and press the Shutter button halfway to focus on the subject. 4. The LCD screen will show green focus frame after the subject is in focus. 5. Press Shutter fully to capture the image.Using the Zoom Function
There are two built-in zoom functions: optical zoom and digital zoom. When taking photos, you can zoom in or out on an object using the zoom wheel.   Zoom indicator (See "Digital Zoom" on page 47) Optical zoom is initially used until it reaches the maximal threshold. Thereafter, it will switch over from optical to digital zoom. After adjusting, the zoom axis display will be hidden, only 🔒 will be displayed to indicate the current zoom status.Flash
Press Right/Flash button to enter the flash interface, then press Left/Right button to switch among six different flash modes:  Flash: Forced off Flash is turned off.  Flash: Forced flash Make forced flash at the moment of shooting.  Flash: Slow Synchro This allows you to take pictures of people at night that clearly show both your subjects and the night time backdrop.  Flash:Red-Eye+Slow Synchro Using this mode for slow synchro shots with red-eye reduction.  Flash: Red-eye reduction The camera exposes a brief flash before the picture is taken to reduce red-eye effects.  Flash: Auto Camera flash goes on automatically based on existing light conditions.Self-timer
To enable self-timer function, press Down/Self-timer button to enter the self-timer selection interface, press Left/Right button to switch among three self-timer modes:  Self-timer : Off Disable the self-timer.  Self-timer : 2 Sec A single picture is taken 2 seconds after the Shutter button is pressed.  Self-timer : 10 Sec A single picture is taken 10 seconds after the Shutter button is pressed.AgfaPhoto OPTIMA 147
Macro Mode
Press the Left/Macro button to enter the close-up photo selection interface, press the Left/Right button to switch between two close-up shooting modes:  Macro : On Select this to focus on subjects 5cm from the lens.  Macro : Off Select this option to disable Macro.i button function
In Shooting mode, pressing key can select the functions of face detection and smile shooting. 1. Press ⓘ key to enter function menu.  2. Press Left/Right button to select the function that you need to set. 3. Press ⓘ button to enable this function and quit the menu.  For face and smile detection, only one option can be activated at a time.Face Detection
This function automatically detects facial features and directs the camera to focus on them. In face detection mode, when you slightly hold the shutter button halfway, the camera will automatically detect faces and display a rectangular focus frame around them. The focus frame will turn green to indicate that the face or faces are in focus. Press the shutter button the rest of the way to take the picture. natural_image
Two smiling people outdoors, one with a camera interface overlay (no readable text or symbols)Smile Detection
When this feature is activated, the camera will automatically detect smiling faces and capture them. After enabling the Smile Detection mode press the shutter button all the way down and the following icons will appear: natural_image
Close-up portrait of two smiling women outdoors, no visible text or symbolsBlink Detection
The blink detection feature is on by default. After taking each photo, if a face is detected with their eyes closed, the blink detected icon ( [ ] will display on the screen. natural_image
Close-up of a smiling baby with curly hair and red dress, hands clasped (no text or symbols visible)Advanced Functions Menu
The Advanced Functions menu of the camera includes image size, image quality, white balance, image color, ISO and EV value. These customized settings will allow you to capture pictures and videos with optimal results. Set the advanced functions with the following steps: 1. Pull up the Advanced Function Menus by pressing button.   2. Press the Down button to enter the advanced functions selection screen, press Left/Right button to select the function that you want to set. 3. Press the Up button to enter the advanced functions setting interface.  4. Use the Left/Right buttons to change the settings and then press FUNC OK to confirm the new settings and close this Advanced Function Menu.AgfaPhoto OPTIMA 147
WB [White Balance]
The White Balance allows you to adjust the color temperature under different light source to ensure correct color reproduction. (The WB setting is only available when the camera is in the M Manual mode). natural_image
Close-up photo of two women's faces with camera app interface overlay (no readable text or symbols on the faces themselves)ISO
The ISO function allows you to set the sensitivity of the camera sensor based on the brightness of the scene. To improve the performance in darker environments, a higher ISO value is required. On the other hand, a lower ISO value is needed when in bright conditions. (The ISO setting is only available when the camera is in the manual mode). Pictures at higher ISO will naturally have more noise than those at lower ISO.  The options of ISO include automatic, 64, 100, 200, 400, 800 and 1600.Quality
The quality setting adjusts the compression ratio of the images. Higher quality settings give better photos, but will take up more memory space.  The picture quality of image has three options: • Quality : Best • Quality : Fine • Quality : NormalSize
The size setting refers to the image resolution in pixels. A higher image resolution allows you to print that image in larger sizes without degrading the image quality.   The larger the number of pixels, the better the image quality. However, it will take up more space. The opposite will be true also.AgfaPhoto OPTIMA 147
Color
The color setting allows you to add artistic effects directly when taking pictures. You can try different color tones to alter the mood of your pictures. (The Color setting is only available when the camera is in the M Manual mode).  The color options include: • OFF Color : Auto • VI Color : Vivid • BW Color : Black & White • SE Color : SepiaExposure Compensation
The exposure compensation allows you to adjust the light exposure value to optimize photo.  The adjustable range of exposure value is from EV -2.0 to EV+2.0.USING THE MODES
LCD Screen Display
Still Picture Mode Display  1 Shooting Mode Icons  Auto mode  ASCN mode  Stabilization mode  Panorama mode 2 AF Mode  Single-AF  Multi-AF 3 Expo Metering  Spot  Center  AiAE 4 Image Size 5 Image Quality  Manual mode  Scene mode  PortraitAgfaPhoto OPTIMA 147
6 Remaining number of pictures 7 Memory card/built-in memory 8 Battery Status 9 WT Ratio (Displayed only when zoom is activated) 10 Zoom 11 Exposure 12 ISO Value (Adjustable only in M Manual Mode) 13 Histogram 14 Focus Frame 15 Continuous Shot 16 Face Detection 17 Picture Color (Adjustable only in M Manual Mode) 18 White Balance (Adjustable only in M Manual Mode) 19 Macro Mode 20 Self-timer  Self-time : 2-sec  Self-time : 10-sec 21 Flash Mode  Flash : Forced off  Flash : Forced flash  Flash : Slow Synchro  Flash : Red-Eye + Slow Synchro  Flash : Red-eye reduction  Flash : AutoVideo Shooting Mode Display
Mode :
 1 Video Mode icon 2 Continuous AF 3 Metering  Spot  Center  AiAE 4 Video Quality 5 Macro Mode 6 Self-timer  Self-time : 10-sec 7 Remaining Time for Video Recording 8 Memory Card/Built-in Memory 9 Battery Status 10 WT Ratio (Displayed only when zoom is activated) 11 Zoom 12 Exposure 13 Recording Status Icon  Recording standby  Recording  For optimal video shooting, it is recommended that an SD card be used. Recording videos with the internal memory jitter and noise may appear on the image.  HD recording time limited to below 29min.  During video recording the 7x optical zoom and 6x digital zoom are available.AgfaPhoto OPTIMA 147
Playback mode display
Mode: ▶
 1 Play Mode icon 2 Picture File 3 File protection 4 Picture Number 5 Memory Card/Built-in Memory 6 Battery Status 7 Image Zoom 8 Zoom Magnification Area Indicator 9 Total Image Area 10 Memory Space (this picture/Total number of pictures) 11 Recording Date and Time 12 OK:PLAY 13 DPOF fileASCN mode
In the "ASCN" mode, different recording conditions are detected automatically and the most suitable settings will be selected. With "ASCN" you can always take good pictures easily. To use "ASCN": 1. Press mode selection button to select ASCN mode, press FUNC OK button to enter ASCN mode, LCD screen will display the detection scene icon shown as following figure: natural_image
Two smiling women outdoors, one with camera icons on face (no text or symbols visible)| Icon | Mode name Icon Mode name | ||
 | Landscape Mode | Night Landscape Mode | |
 | Portrait Mode Macro Mode | ||
 | Night Portrait Auto Mode | ||
 | Backlit Portrait | ||
Landscape Mode
For landscapes, ASCN will automatically adjust the exposure to match the background.Portrait Mode
For portraits, ASCN will automatically adjust the exposure and skin tones to give clear pictures.AgfaPhoto OPTIMA 147
Night Portrait
When you shoot portraits at night, or in low light conditions, ASCN will automatically adjust the exposure for people and night scenes.Backlit Portrait
When the sun or any other light source is behind you, ASCN will automatically adjust the foreground exposure to produce good pictures.Night Landscape Mode
For night scenes, ASCN will automatically increase the ISO value to compensate for low light.Macro Mode
To capture object detail for close-ups, ASCN will automatically adjust the focus.Auto Mode
The camera will automatically adjusts the exposure and focus to ensure good pictures.Panorama mode
Panorama Mode allows you to create a panoramic picture. The camera will automatically compose a panoramic picture using the individual shots that you take. Follow these steps to create a panoramic picture: 1. Press Mode button, use Left/Right button to select Panorama mode, then press FUNC OK button to enter Panorama mode for shooting. 2. Use Left/Right button to select the direction for starting to shoot, press (FUNC OR) button to enter Shooting mode; if no selection is made after 2 seconds, the camera will default to left to right. 3. After the first shot is taken, two target icons will appear on the left and right side of the LCD screen. Pan the camera and the circle icon on the screen will move towards the square frame icon. When the circle icon and square frame connects, it will turn green and the camera will take the picture automatically. Repeat the same step for the third picture to finish the stitching. natural_image
Scenic landscape with a river and distant wind turbines under cloudy sky (no text or symbols visible)natural_image
Scenic view of a Dutch windmill beside a calm river under a cloudy sky (no text or symbols visible)Scene mode
In Manual Scene mode, you can select from a total of 20 scene types to match your needs. The camera will adjust the optimal settings for that scene type. Press Mode button, use Left/Right button to enter Scene Selection mode menu, press 📂 button to enter Scene Selection mode, the following figure will display on LCD screen: AgfaPhoto OPTIMA 147
Select a scene using the Up/Down/Left/Right button and press the FUNC OK button.| Icon Mode Name Icon Mode | Name | ||
 | Sport Indoor |  | |
 | Snow Fireworks |  | |
 | Museum Night Landsc |  | |
 | Children Leaf/Foilage |  | |
 | Sunset Glass |  | |
 | Landscape Night Port |  | |
 | Beach Text |  | |
 | Gathering ID |  | |
 | Fish eye Travel shooti |  | |
 | Photo frame Sketch |  | |
Sport
For shooting fast-moving objects. Bring lively pictures to life.Indoor
For shooting people indoors. Clearly show background and atmosphere.Snow
Suitable for snowy landscape. Camera automatically adjusts and corrects exposure value (EV).Fireworks
For shooting at night and fireworks. Shutterspeed is slower than normal. (Use of tripod is recommended)Museum
For shooting in museums or places where flash is not allowed.Night landscape
For shooting night scenes. Use of tripod is recommended.Children
Suitable for photographing children and pets. The flash shuts off automatically in order not to disturb the subject being photographed.Leaf/Foilage
For shooting plants. Vivid reproduction of green.Sunset
For shooting sunsets. Vivid reproduction of red and yellow.Glass
Suitable for photographing objects behind glass or window.Landscape
For shooting landscapes. Vivid reproduction of green and blue.Night portrait
For shooting portraits with night scenes as background.Beach
For taking pictures in areas with strong sunlight.Text
For taking pictures of text, documents or white boards.Gathering
For taking pictures of large groups or in areas with uneven lighting.ID
For shooting ID size photos.Fish eye
Creates a fish-eye effect, by distorting the center of the image.Travel shooting
Produces background image blur that emphasizes the motion of the main subject.Photo frame
For adding interesting frame effects to the photo.Sketch
For taking photos with pencil sketch effect.AgfaPhoto OPTIMA 147
natural_image
Two smiling women outdoors, one with camera lens overlay (no readable text or symbols)Stabilization mode
This mode can help reduce photo blur caused by hand shake, low light and slow shutter speed   Use stabilization mode in dark environments or when in slow shutter speed.  Shooting in a windy or unstable environment (such as a moving vehicle) may cause blurred images.PLAYBACK
Viewing Photos and Videos
To view the captured photos and video clips on the LCD screen: 1. Press ▶ button to go to the Playback mode. The last recorded photo or video clip is displayed. 2. Use the Left/Right navigation buttons to scroll through the photos or video clips stored in the internal memory or memory card. 3. To play a selected video clip, press the 📄 button to enter the movie playback mode. During video playback, the operating instructions will appear on the screen. Press the Left/Right button, and press the ☐ button for confirmation. natural_image
Two children playing in a beach with colorful bubbles and inflatable rafts, viewed from video frame (no text or symbols on subjects)natural_image
Two children playing on a beach with colorful bubbles and inflatable rafts, viewed at 00:07:09 (no text or symbols on the main subjects)AgfaPhoto OPTIMA 147
When playing a stored video, press the Up/Down arrow button to adjust the playback volume minute the volume natural_image
Two children playing with colorful inflatable balls and ribbons on a beach (no text or symbols visible)Thumbnail View
In the playback mode, slide the zoom lever to photos and video thumbnails will display on the screen. 1. Slide the zoom lever to switch between 3x3 and 4x4 thumbnails. natural_image
Two black-and-white photos showing people with different expressions and images, no visible text or symbols.i button playback function
In the playback mode, press the button for full screen playback or date folder selection. 1. Press ⓘ key to enter function menu.  2. Press Up/Down button to select from the following two functions: •Full Screen Playback - Date Folder View 3. Press the FUNC OK button to enter the corresponding function menu.Full Screen Playback
After entering the Full Screen Playback menu, press the Left/Right button to display the next photo.Date Folder View
4. Select the Date Folder View, press the button to enter the following screen:  5. Press the Up/Down to select Date Folder. 6. Press the TUNC OK button to enter the Date Folder, press the Left/Right button to select the photos in the date folder.AgfaPhoto OPTIMA 147
When selecting a date in the date folder, sliding the zoom lever to TQ will zoom in on the picture; sliding the zoom lever to W will first zoom out on the picture then enter into the date folder index. Press the 📄 button to return to the original scale. natural_image
Sunflower field with blurred background, no visible text or symbols on the flower or backgroundUsing Zoom Playback (for still pictures only)
In playback mode, the zoom wheel can be used to zoom in 2x to 8x. 1. Press ▶ button to go to the Playback mode. 2. Use the Left/Right navigation buttons to select a photo to magnify. 3. Slide the zoom wheel to TO to on zoom in on the picture. 4. While zooming, the zoom indicator and photo frame icon will display on screen. natural_image
Close-up selfie of two smiling young women outdoors (no visible text or symbols)AgfaPhoto OPTIMA 147
Using the Delete Button
In Playback mode, press Down/Delete/Self-timer button to delete photos and movies. To delete pictures or videos: 1. Press ▶ button to go to the Playback Mode. 2. Select a picture or video clip you want to delete with the Left/Right button. 3. Press the Down/Delete button and the delete screen appears.  4. Select Yes or Cancel with Up/Down button and press the Ⓤ️ button for confirmation.  Erased photos/video clips cannot be recovered.  Please refer to page 52 for instructions on the Delete Menu options.USING THE MENUS
Still Menu
Mode:
  ASCN SCN    In any of the above Still Picture Modes, press the MENU button to go to the Still Picture menu. To adjust each setting: 1. In the Still Picture Menu, press Left/Right buttons to switch between different Photo and Camera Setup pages.  2. Press the Up/Down buttons to select the function. 3. Press 📄 or Right button to enter the submenu.  Two options are available: - Single-AF: The focus frame appears on the center of the LCD screen to focus on the subject. - Multi-AF: The camera shall focus correctly for multiple parts of the object.AF-assist Beam
This option can turn the AF assist lamp on or off. In dark conditions, the AF assist lamp can strengthen the focus on the image. Expo Metering (Exposure Metering)
Use this setting to select an area for the exposure to be obtained.  There are five available options: • OFF: Turn off Continuous Shot function. - Unlimited: Press and hold the shutter to shoot continuously until you release the shutter or when the memory card has run out of space. • 3 shot: Capture up to 3 consecutive pictures. - 3 shots (Last): Capture pictures continuously until the Shutter button is released but only the last 3 shots are recorded. - Time-Lapse: Automatically capture pictures in a predefined interval.  The flash is designed not to work in this mode in order to enable quick succession of shots.Date Imprint
Include a Date/Time stamp in the photo image.  Four options are available: - Off .1 sec .2 sec .3 secDigital Zoom
Use this setting to enable or disable the digital zoom function. When disabled, only the optical zoom is enabled. AgfaPhoto OPTIMA 147
Slow Shutter ("B" or Bulb Mode)
In Slow Shutter (B) mode, the shutter will remain open as long as the Shutter button is pressed. This gives you complete control over the duration of the exposure. (The slow shutter mode is available only in M manual mode.)  \- Manual: To set a long exposure time between 2\~30 sec.  The use of tripod is recommended for prolonged exposure.Movie Menu
Mode :
  ASCN SCN     In the Movie Mode, press the button to access the Movie Setup menu. To configure each setting: 1. In the Menu screen, switch between the Movie Setup or different Camera Setup pages using the Left/Right button, select the page with the function you want to adjust and press the Down button.  2. Press the to enter the selection.  3. Press Up/Down button to select an option, or press Left button to return to the menu. 4. Press 📄 button to confirm the setting and return to the previous layer. Refer to the following pages for more details about each setting.Continuous AF
After Continuous AF is turned on, the camera will adjust focus automatically in response to any camera or subject movement. AgfaPhoto OPTIMA 147
Expo Metering (Exposure Metering)
Set metering mode for various lighting conditions.  Three options are available: - Spot • Center • AiAE (Artificial Intelligence AE)DIS
Using this function can ensure the maximum stability of the screen when recording video. Playback Menu
Mode : ▶
In Playback mode, press the button to enter the Playback menu.  Please refer to the following sections for detailed instructions on the various menu options.Protect
To prevent any pictures or videos from being accidentally erased, use this setting to lock one or all of the files.  To protect/unprotect pictures or videos, press the MENU button while in playback. 1. Use Up/Down arrow button to select Protection, press or Right button to enter the submenu.AgfaPhoto OPTIMA 147
2. Use the Up/Down button to select One picture/video to protect or select ALL to protect all photos and movies stored on the active memory (memory card or internal memory - when memory card is inserted, the memory card is the active memory. Without the memory card, the internal memory is the active memory). Press button to confirm and enter photo/movie protection interface. 3. Press the 📄 button to select Yes to lock. For locked picture/video, use Unlock option to unlock it. 4. A key [ ] icon will appear on the top of the screen to indicate that the picture/video is protected.  If you Reset the Settings in the menu option, all protection settings on pictures/videos will be cancelled.Delete
There are three ways to delete files.  - Delete One: 1. In the Delete Option, select One and then press button.  2. Press the Left/Right button to locate the photo or video to be deleted. Press the Up/Down button to select item (Yes: to delete the file, Back: to return to previous menu) and then press (FUNC OK) to confirm.- Delete All:
1. In the Delete option, select All and then press button. 2. Use Up/Down button to select Yes to delete all files, or select Back to return to the menu.- Delete Date Folder:
1. In the Delete Folder, press or button after selecting date folder. 2. Use the Up/Down button to select Date Folder to be deleted, press FUNC OK to confirm, press the Up/Down button to select item (Yes: to delete the file, Back: to return to the menu) and then press FUNC OK to confirm.  The "○" indicator means a file is protected. File protection must be removed first before a file can be deleted.  Deleting files will cause DPOF settings to be reset.DPOF (Digital Print Order Format)
DPOF allows you to record your selection of pictures that you would like to print, and will save your selection in the memory card, so that you can simply hand your memory card to a photo kiosk without having to tell them in person which photos you would like to print. AgfaPhoto OPTIMA 147
Trim
The Trim setting allows you select an area of the photo you want to keep and then save it as a new photo. To trim a picture: 1. Select the Trlm setting from the ▶ menu. 2. Using the Left/Right buttons, locate the photo that you want to crop and have it displayed on the LCD. 3. Select "Yes" to confirm cutting, use the zoom lever and direction key to select the part to be cut, then cut the photo you need. natural_image
Close-up of a yellow sunflower against a blue sky, no text or symbols visibleHDR-High Dynamic Range
With the HDR function, pictures that may be overexposed may be corrected to optimize the highlights and lowlights captured to more accurately represent the real scene. 1. Select HDR setting in ▶ menu by pressing Menu while in Playback. 2. Press Left and Right button to find picture you want to optimize and then select Confirm to perform HDR optimization or select Return to go back to Playback menu.  3. After HDR optimizing, the image will be saved as another file with the icon appearing as a prompt, the original file still remains in the memory.Resize
This setting allows you to resize a picture to a specified resolution, and saves it as a new picture. 1. Select the Resize setting from the Playback menu as described previously.  2. Use the Left/Right navigation buttons to select a picture to resize. 3. Use the Up/Down navigation buttons to select a resolution (1024X768 or 640X480) to resize the image or Back to cancel and return to the Playback menu. 4. Press the FUNC OK button to confirm the setting.  Resizing an image creates a new file that contains the image in the size you select. The file with the original image also remains in memory.Rotate
You can use this setting to change the picture orientation of the picture. 1. Select the Rotate setting from the Playback menu as described previously. 2. Use the Left/Right navigation buttons to select a picture to rotate. 3. Use the Up/Down navigation buttons to select the direction for rotation or Back to cancel and return to the Playback menu.  4. Press the button to confirm the setting.  The panorama picture and video cannot be rotated.  Revolved file will replace the original one.AgfaPhoto OPTIMA 147
Red-eye Reduction
Use this setting to remove red-eyes in your photos. 1. Select the Red-eye Reduction in Playback menu as described previously. 2. Use the Left/Right button to select the picture from which the red-eye needs to be removed. 3. Use the Up/Down navigation buttons to select Yes to fix the selected image or Back to cancel and return to the Playback menu.  4. Press the button to confirm the setting.  For best results, the face of the subject should be relatively large on the LCD screen, the subject should be facing the camera as front on as possible, and the red eyes should be as large as possible.  If there is no red eyes in the image, press 📂 button after selecting "Yes", such prompt will appear on the screen: red eye is not detected!Display Setup
Mode:
Press button in Playback mode to enter Display Setup menu.  Refer to the following sections for details of every setting.Slideshow
This setting allows you to view all the stored pictures as a slideshow. 1. Select Slide Show menu, press 📄 or Right button to enter the slide show setup interface. 2. Press Up/Down button to select effect, interval, repeat or music, and press FUNC OK or Right button to enter and adjust settings. Press FUNC OK button to confirm settings.  3. Use the Up/Down navigation buttons to select Start to run the slideshow or Cancel to return to the Playback menu. 4. Press the FUNC OK button to confirm the setting.Wallpaper Settings
Use this setting to select your favorite picture to use as a background on the LCD screen. 1. Press Down button to select the Wallpaper Setting menu.  2. Press the or Right button to enter the background setup interface. AgfaPhoto OPTIMA 147
Menu Wallpaper:
Use Up/Down button to select the Menu Wallpaper option, press FUNC OK button to confirm or press Left button to return to last page, and press MENU to exit the menu.  - User - AgfaPhoto - SparklingStartup Screen:
Use Up/Down button to select the Startup Screen option, press FUNC OK to confirm or press Left button to return to last page, and press MENU to exit the menu.  - Yes • NoSetup Menu
Mode :
         The Setup menu for the camera is available in all modes. Each menu page can be selected by pressing the MENU button and switching between menus with the Left/Right button.  To adjust the settings: 1. Select the menu page with the function you want to adjust and press the Down button. 2. Switch between different functions with the Up/Down button. 3. Press the FLNC OK or the Right button to enter the submenu.  After selecting a function option, you can press the Up button to return to the menu for other Camera Setup pages. Or you can press the Down button to switch to the next menu page. Refer to the following pages for more details about each setting.Beep
Use this setting to adjust the volume of beep when buttons are pressed and change the tones for Shutter button, self-timer, and power-on/power-off. To change this setting: 1. Select the Beep setting from the Setup menu as described previously. 2. Use the Up/Down navigation buttons to switch between volume, shutter, key, self-timer, and power fields.  3. Press the or the Right button to enter, and Press the Up/Down button to adjust volume and change various sounds, then Press the function button to confirm the setting.LCD Brightness
Use this setting to adjust the brightness of your LCD screen. 1. Select the LCD Brightness setting from the Setup menu as described previously. 2. Select auto or adjust the brightness level using the Left/Right button, and press the ✕️ button to confirm the setting. AgfaPhoto OPTIMA 147
Power Saver
This setting allows you to save power and get the maximum possible running time for your battery. Follow the steps below to turn off the LCD screen and camera automatically after a period of inactivity. 1. Select the Power Save setting from the Setup menu as described previously. 2. Press the Up/Down button to select screen power and camera power, then Press the RUN OK or the Right button to enter.  3. Press the Up/Down button to adjust the selected item. Both items have the following options: - LCD Off: ON, 30 sec, 1 min, 2 min. - Camera Off: ON, 3 min, 5 min, 10 min. 4. Press the ⏚ function button to confirm.Zone
The Zone setting is a useful function on your overseas trips. This feature enables you to display the local time on the LCD screen while you are overseas. 1. Select the Zone setting from the Setup menu as described previously. The world time screen appears. 2. Use the Up/Down navigation buttons to switch between the hometown [ ] and travel destination [ ] fields. 3. Use the Left/Right navigation buttons to select a city close to the desired time zone. Then press the button to confirm. Date/Time
See "Setting the Date and Time" section on page 16.Language
See "Setting the Language" section on page 15.File and Software
Format Memory
Please note: formatting enables you to delete all contents in the memory card and built-in memory, including protected photo and movie files. To use this setting: 1. Select the Format in File and Software menu. 2. Use the Up/Down navigation buttons to select Yes or No. Then press the FUNC OK button to confirm.  3. Select Yes, the camera will format the selected media. 4. Please note that when you perform the Format Memory function, it only formats the active memory. If a memory card is inserted, the memory card is active and will be formatted. If there is no memory card, the internal memory is active and the internal memory will be formatted. Formatting the memory card will not automatically format the internal memory.AgfaPhoto OPTIMA 147
File Numbering
After you take a picture or video clip, the camera will save it in a sequential number. You can use this to reset the file numbering to 1. (When more than 999 images are on the memory card, the use of this features will have no effect.) 1. Select the File Name in File and Software menu. 2. Select the option with the Up/Down button and press the ⏚ button for confirmation. Copy to Card (Copy internal memory to memory card)
Use this setting to copy the files stored in the internal memory to the memory card. 1. Select the Copy to memory card in File and Software menu. 2. Use the Up/Down navigation buttons to select Yes or No. Then press the FUNC OK button to confirm. Reset Settings
Use this setting to restore the camera to its default settings. 1. Select the Reset setting in File and Software menu. 2. Use the Up/Down navigation buttons to select Yes or No. Then press the FUNC OK button to confirm. FW Version (Firmware Version)
Use this setting to view and update the current camera firmware version. 1. Select the FW Version in File and Software menu. 2. The screen will show the current firmware version. If there is a memory card with a firmware file, the camera will detect it and ask if you want to update the firmware.   To update to the latest firmware version, you can go to the following website: www.reddotimaging.com and look under Support.Transmission
Connecting to a PC
You can connect to the PC by using the USB interface on the camera or the USB cable. Once connected you can manually transfer the files or use software such as Arcsoft (included on disc).Setting the USB mode
Since the camera's USB port can be set to connect with either a PC or a Printer, the following steps will allow you to ensure that the camera is correctly configured to connect with a PC. 1. Enter the camera setup menu and select USB Mode with the UP/Down button, then press the 📋 or the Right button to enter. 2. Use the Up/Down navigation buttons to select PC. 3. Press the 📄 button to confirm the setting.  4. Please unplug USB after transmitting.If USB connection item is set as [Computer]:
First remove the camera from the system as indicated below, then turn off and remove USB.If USB connection item is set as [Computer (PTP)]:
Please operate according to the following steps: remove the camera from the system firstly, then turn off and remove USB. Windows operating system (Windows 2000, Windows XP, Windows Vista, Windows 7.) Click [Remove hardware safely] icon in the taskbar, and remove USB according to the displayed menu.  Macintosh Drag the untitled icon to the Trash. ("Untitled") Connecting to a PictBridge Compatible Printer
 PictBridge allows printing images from a memory card in a digital camera directly to a printer, regardless of brand. To find out if a printer is PictBridge compatible, simply look for the PictBridge logo on the packaging or check the manual for specifications. With the PictBridge function on your camera, you can print the captured photos directly with a PictBridge compatible printer using the supplied USB cable, without the need for a PC.Setting the USB mode
Since the camera's USB port can be set to connect with either a PC or a Printer, the following steps will ensure that the camera is correctly configured to connect with a Printer. 1. Enter the camera setup menu and select USB cable with the Up/Down button, then press the PUNC OR or Right button to enter. 2. Use the Up/Down button to select Printer. 3. Press the Ⓗ button to confirm the setting.  After the camera is reset, it will switch to PC mode automatically from USB mode.Connecting the camera and printer.
1. Make sure both the camera and printer are turned on. 2. Connect one end of the supplied USB cable to the USB port on your camera. 3. Connect the other end of the cable to the USB port on the printer. natural_image
Diagram showing a camera connected to a device via cable, with an inset close-up of the device (no text or symbols present)Using the PictBridge Menu
After setting the USB mode to Printer, the PictBridge menu will appear:  Press the Up/Down button to select a menu item, then Press the FUNC OK or Right button to enter this item. Refer to the following sections for more detailed information on each setting.Print with date
If you have set the date and time of your camera, the date and time will be recorded and saved with each photo you take. 1. Select Print with date from the PictBridge menu. The following screen will appear: natural_image
Close-up photo of a dog's tongue with tongue out, no visible text or symbolsPrint without date
Use this setting to print the photos without dates on them. 1. Select Print without date from the PictBridge menu. The following screen will appear: natural_image
Close-up photo of a dog with tongue out, wearing a white coat (no visible text or symbols)AgfaPhoto OPTIMA 147
 5. Select Yes to confirm the printing, or Cancel. Then press the button.  2. Select Yes to confirm the printing, or Cancel. Then press the 📄 button.Print index
You can use this setting to print all indexes to show all the photos currently in your camera. 1. Select Print index from the PictBridge menu. The following screen will appear:Print DPOF (Digital Print Order Format)
To use DPOF printing, you must select the photos for printing using the DPOF settings before hand. see the "DPOF" section on page 53. 1. Select Print DPOF from the PictBridge menu. The following screen will appear:  2. Select Yes to confirm the printing, or Cancel. Then press the TUND OK button.Exit
To exit the PictBridge menu, select Exit. The "Remove USB cable" message will be displayed.  Disconnect the USB cable from the camera and printer.APPENDICES
Specifications
 Design and specifications are subject to change without notice.| Model name OPTIMA 147 | ||
| Active Image Sensor Pixels 14.14 Megapixels | ||
| Total Image Sensor Pixels 14.48 Megapixels [1/2.3"CCD] | ||
| Lens | Focal Length 5.9mm (Wide) — 41.3mm (Tele) | |
| [35mm film equivalent] [32.9mm (Wide) — 230.3mm (Tele)] | ||
| F number F3.4 (Wide) — F5.7 (Tele) | ||
| Lens Construction 7 groups 9 elements | ||
| Optical Zoom 7x | ||
| Focusing Range | Normal: (Wide) 60cm ~ ∞, (Tele) 80cm ~ ∞Macro: 5cm ~ ∞ (Wide Only) | |
| Anti-Handshake Digital Image Stabilization | ||
| Digital Zoom 6x Digital Zoom (Combined Zoom: 42x) | ||
| Number of Recording Pixels | Still Image | 14MP: 4320x3240, [3:2]12MP: 4320x2880, [16:9]10MP: 4320x2432, 8MP: 3264x2448, 5MP: 2592x1944, 3MP: 2048x1536, 0.3MP: 640x480 |
| Movie 720p30, 720p15, VGA | QVGA | |
| Image Compression Best, Fine, Normal | ||
| DCF, DPOF (Ver1.1) Support Yes | ||
| File Format | Still Image Exif 2.2 (JPEG) | |
| Movie Movie Format: MOV (Motion JPEG), Audio: G.711 [Monaural] | ||
| Shooting Modes | Auto, Manual, Image Stabilization, Panorama, Movie, ASCN, Portrait, Scene [Sport, Landscape, Children, Indoor, Leaf, Beach, Text, Party, ID, Fisheye, Panning Shot, Photo Frame, Sketch, Snow, Sunset, Fireworks, Glass, Museum, Night Landscape, Night Portrait] | |
| Detection Features Face, Smile, Blink | ||
| Red-Eye Removal Yes | ||
| HDR Yes (Post-Processing) | ||
| Panorama Capture | Still Image Yes (Horizontal) | |
| View Angle 0° ~ 135° | ||
| Model name OPTIMA 147 | |
| LCD Display 3.0inch (230k Pixels) | |
| ISO Sensitivity Auto, ISO64/100/200/400/800/1600 | |
| AF Method Single AF, Multi-AF (TTL 9-point), Face-Detection, AF Assist Light (On/Off) | |
| Exposure Metering Method | Artificial Intelligence AE (AiAE), Center-Weighted Average, Spot (Fixed to Center of Frame), Face AE |
| Exposure Control Method Program AE (AE-Lock Available) | |
| Exposure Compensation ±2EV in 1/3 Step Increments | |
| Shutter Speed 1/2000 ~ 4 Seconds (Manual: 30 Seconds) | |
| Continuous Shooting Yes | |
| Playback Modes | Single Photo, Index (9/16 Thumbnails), Slide Show, Movie, Date Zoom (Approx. 2x ~ 8x), Histogram Display |
| White Balance Control | Auto (AWB), Daylight, Cloudy, Fluorescent, Fluorescent CWF, Incandescent, Manual |
| Model name OPTIMA 147 | ||
| Internal Flash | Flash Modes | Auto, Red-Eye Reduction, Forced Flash, No Flash, Slow Synchro, Red-Eye Reduction + Slow Synchro |
| Shooting Range | (Wide) Approx. 0.6 ~ 4.0m (ISO 800)(Tele) Approx. 0.8 ~ 2.5m (ISO 800) | |
| Recording Media | Internal Memory: Approx. 50 MB | |
| SD/SDHC Card (Up to 32GB Support) [Nonsupport MMC Card] | ||
| Other Features PictBridge, ExifPrint Support, Multi-Language Support (26 Languages) | ||
| Jacks USB Arm | ||
| Power Rechargeable Li-ion Battery SKL-50, 3.7V 880mAh, In-Camera Charging | ||
| Shooting Capability (Battery Performance) Approx. 280 Shots (Based on CIPA Standards) | ||
| Operation Environment Temperature: 0~40 | °C, Humidity: 0~90% | |
| Dimensions (W x H x D) Approx. 101.5 x 56.9 x 24.0mm (Based on CIPA Standards) | ||
| Weight Approx. 129g (Body only) | ||
| Supplied Accessories | Rechargeable Li-ion Battery, AC adapter, USB Extension CableWrist Strap, CD-ROMQuick Start Guide, Warranty Card | |
Error messages
| Messages Explanation | |
| Card error • | The memory card is not formatted. |
| Card full • The memory card is full and cannot store any new images. | |
| Picture error | • The picture was not captured correctly.• The picture is damaged. |
| No picture • There are no images in the memory card or in the internal memory. | |
| Lens error • The lens is probably stuck and the camera will power off automatically. | |
| System error • Unexpected error encountered. | |
| Write protect • The write protection switch in the memory card is set to the “LOCK” position. | |
| Out of the range | • When pictures were taken in Panorama mode, the direction of movement was incorrect or the angle was outside the range of the internal settings. |
| Card is not formatted, format? • Confirm whether the memory card should be formatted. | |
| This image cannot be deleted • The picture or video you are trying to delete is protected. | |
| Warning!! Camera recording, please wait. | • No other actions allowed to perform during video/audio recording. |
| Warning!! Battery exhausted. • The battery is out of charge. | |
| This file cannot be played back • The picture format cannot be recognized by the camera. | |
| No connection • The camera is not connected to the printer correctly. | |
| Print error • There is a problem with camera or printer. | |
| Cannot print | • Check that the printer is out of paper or out of ink.• Check if the printer has a paper jam. |
| Problem Possible causes Solution | ||
| Camera does not turn on. | The battery has run out.The battery is not inserted correctly. | Replace with a fully charged battery. |
| Camera turns off suddenly during operation. | The battery has run out. | Replace with a fully charged battery. |
| The picture is blurred. | The lens is dirty,[IMAGE] appears when taking pictures. | Use a soft cloth to clean the lens on your cameraUse the Image Stabilization mode. |
| Images and video files cannot be saved. | The memory card is full. | Replace the memory card with a new one.Delete unwanted images from the memory card.Unlock the memory card. |
| No picture is taken when pressing the Shutter button. | The memory card is full.There is no available space to store the files.The mode dial is in Playback mode. | Replace the memory card with a new one or clean off current memory card.Delete unwanted images.The memory card is locked.Change to Shooting mode. |
| Images cannot print from the connected printer. | The camera is not connected to the printer correctly.The printer is not PictBridge compatible.The printer is out of paper or out of ink.The paper is jammed. | Check the connection between the camera and printer.Use a PictBridge compatible printer.Load some paper in the printer.Replace the ink cartridge in the printer.Remove the jammed paper. |
| Write to memory card is slow • M | ovie recording is set in an HD format setting, but memory card is either not an HD capable memory card or not formatted properly. | Ensure the memory card is an SDHC type card and ensure it has been formatted by this camera. |
| Cannot write to the memory card • | Memory card is in write-protection state.When shooting or recording, writeprotection interruption phenomenon in the memory card (such as due to too slow storage etc.) leads that you can not continue to shoot or record. | Please replace a memory card.Please shoot again. |
| Too many movies to process • | The number of pictures or binders in the memory card exceeded the specifications, so the playback of data folder can not be displayed. | Delete needless files.Transfer the files in the memory card to other area. |
| Exceed maximum folder number in the memory card | “Yes” is selected for “File No” menu in the Menu (see P64 for detailed instructions).. | Transfer the files in the memory card to other area.Set “No” for “File No”. |
Customer Care
More information on the complete AgfaPhoto digital camera product range can be found at www.reddotimaging.com. / www.agfaphoto.com.Service & Repair Hotline (USA):
1-855-243-2937 (from a landline only)Service & Repair (UK):
+44 1908 488676Online Service / International contact:
customersupport@reddotimaging.com For repair and service in all other countries, please refer to the warranty pamphlet for additional information.Manufactured by
RedDot Imaging, 2275 NW 84thAve, Doral, FL 33122. AgfaPhoto is used under license of Agfa-Gevaert NV & Co. KG or Agfa-Gevaert NV. Neither Agfa-Gevaert NV & Co KG nor Agfa-Gevaert NV manufacture this product or provide any product warranty or support. For service, support and warranty information, contact the distributor or manufacturer. All other brands and product names are registered trademarks of their respective owners. Product design and technical features can be changed without notice. Contact: AgfaPhoto Holding GmbH, www.agfaphoto.com natural_image
Black digital camera displaying a beach photo of a smiling child and adults (no text or symbols visible)natural_image
Close-up of a black OPTIMA 147 digital camera with control buttons (no readable text beyond branding)


- WARNING
- For customers in the U.S.A.
- Tested To Comply With FCC Standards FOR HOME OR OFFICE USE
- FCC Statement
- For customers in Europe
- Declaration of Conformity
- SAFETY PRECAUTIONS
- Camera notes:
- Battery notes:
- Memory card notes:
- BEFORE YOU START
- Preface
- Copyright
- Trademarks
- Safety information
- AgfaPhoto OPTIMA 147
- About this manual
- Symbols used in this manual
- CONTENTS
- USING THE MODES 30
- PLAYBACK 37
- USING THE MENUS 43
- Transmission 66
- APPENDICES 74
- GETTING READY
- Unpacking
- Camera Views
- Charging the Battery
- Insert the Battery and SD/SDHC Card (Not included)
- Turning On and Off
- Mode Button Operation
- Setting Date/Time and Language
- Setting the Language
- Setting the Date and Time
- About the LCD Screen
- LCD Screen notes:
- BASIC OPERATION
- Shooting in Auto Mode AUTO
- Using the Zoom Function
- Flash
- Self-timer
- Macro Mode
- i button function
- Face Detection
- Smile Detection
- Blink Detection
- Advanced Functions Menu
- WB [White Balance]
- ISO
- Quality
- Size
- Color
- Exposure Compensation
- USING THE MODES
- LCD Screen Display
- Video Shooting Mode Display
- Mode :
- Playback mode display
- Mode: ▶
- ASCN mode
- Landscape Mode
- Portrait Mode
- Night Portrait
- Backlit Portrait
- Night Landscape Mode
- Auto Mode
- Panorama mode
- Scene mode
- Sport
- Indoor
- Snow
- Fireworks
- Museum
- Night landscape
- Children
- Leaf/Foilage
- Sunset
- Glass
- Landscape
- Beach
- Text
- Gathering
- ID
- Fish eye
- Travel shooting
- Photo frame
- Sketch
- Stabilization mode
- PLAYBACK
- Viewing Photos and Videos
- Thumbnail View
- i button playback function
- Full Screen Playback
- Date Folder View
- Using Zoom Playback (for still pictures only)
- Using the Delete Button
- USING THE MENUS
- Still Menu
- Mode:
- AF Mode (Auto-Focus mode)
- AF-assist Beam
- Continuous AF
- Expo Metering (Exposure Metering)
- Continuous Shot
- Date Imprint
- Quick Review
- Digital Zoom
- Slow Shutter ("B" or Bulb Mode)
- Movie Menu
- DIS
- Playback Menu
- Mode : ▶
- Protect
- Delete
- - Delete All:
- - Delete Date Folder:
- DPOF (Digital Print Order Format)
- Trim
- HDR-High Dynamic Range
- Resize
- Rotate
- Red-eye Reduction
- Display Setup
- Slideshow
- Wallpaper Settings
- Menu Wallpaper:
- Startup Screen:
- Set back to default:
- Setup Menu
- Beep
- LCD Brightness
- Power Saver
- Zone
- Date/Time
- Language
- File and Software
- Format Memory
- File Numbering
- Copy to Card (Copy internal memory to memory card)
- Reset Settings
- FW Version (Firmware Version)
- Transmission
- Connecting to a PC
- Setting the USB mode
- Transferring files to your PC
- If USB connection item is set as [Computer]:
- If USB connection item is set as [Computer (PTP)]:
- Connecting to a PictBridge Compatible Printer
- Connecting the camera and printer.
- Using the PictBridge Menu
- Print with date
- Print without date
- Print index
- Print DPOF (Digital Print Order Format)
- Exit
- APPENDICES
- Specifications
- Error messages
- Customer Care
- Service & Repair Hotline (USA):
- Service & Repair (UK):
- Online Service / International contact:
- Manufactured by
Brand : AGFAPHOTO
Model : Optima 147
Category : Camera