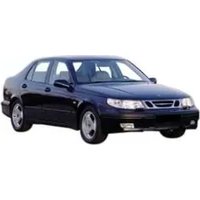
9-5 (2009) - Automobile SAAB - Free user manual and instructions
Find the device manual for free 9-5 (2009) SAAB in PDF.


| Manufacturer | Saab |
| Model | 9-5 (2009) |
| Category | Mid-size executive car |
| Body Style | Sedan |
| Engine Options | 2.0L Turbo I4 (210 hp) or 2.8L Turbo V6 (300 hp) |
| Fuel Type | Petrol (Gasoline) |
| Transmission | 5-speed automatic or 5-speed manual |
| Drivetrain | Front-wheel drive |
| Length | 200.4 in (5090 mm) |
| Width | 70.5 in (1791 mm) |
| Height | 57.2 in (1453 mm) |
| Wheelbase | 114.9 in (2918 mm) |
| Curb Weight | Approx. 3,500 - 3,800 lbs (1,588 - 1,724 kg) |
| Seating Capacity | 5 |
| Fuel Economy (Combined) | 20 - 22 mpg |
| Fuel Tank Capacity | 18.5 gallons (70 L) |
| Safety Features | ABS, airbags (front, side, curtain), stability control, traction control, active head restraints |
| Maintenance | Oil change every 7,500 miles; timing belt replacement at 60,000 miles |
| Notable Options | Turbocharged engines, ventilated seats, navigation system, xenon headlights |
| Warranty | 4-year/50,000-mile basic, 6-year/100,000-mile rust |
Frequently Asked Questions - 9-5 (2009) SAAB
User questions about 9-5 (2009) SAAB
0 question about this device. Answer the ones you know or ask your own.
Ask a new question about this device
Download the instructions for your Automobile in PDF format for free! Find your manual 9-5 (2009) - SAAB and take your electronic device back in hand. On this page are published all the documents necessary for the use of your device. 9-5 (2009) by SAAB.
USER MANUAL 9-5 (2009) SAAB
95 US Isafety MY09.fm Page 1 Tuesday, April 29, 2008 10:12 AM
1
Owner's Manual
Saab 9-5, Model Year 2009
Safety 11
Security 43
Instruments and controls 57
Saab 9-5 Audio System 89
Interior equipment and trunk 113
Starting and driving 139
Car care and technical information 187
Customer Assistance and Information 251
Specifications 257
Index 267


95 US MY09.book Page 2 Tuesday, April 15, 2008 11:03 AM
2
Introduction
This manual provides practical guidance on driving and caring for your Saab.
Although this manual describes the most important differences between model variants, it does not include precise specifications of the different variants. Some differences also occur to meet special legal requirements in different countries.
Importation and distribution of Saab automobiles, spare parts and accessories are handled exclusively by General Motors of Canada Limited in Canada and by Saab Cars USA, Inc. in the U.S.A.
We recommend that you read through the manual before taking the car out for the first time and that you keep it in the car for future reference.
To find a specific item, use the overviews given at the start of the manual. A list of contents is given at the beginning of each section of the manual, and there is also a comprehensive index at the back of the book.
Supplied with the car is a Warranty and Service Record booklet and a tire warranty folder which specifies the regular maintenance to be carried out. The book also contains important warranty conditions.

WARNING
WARNING texts warn against the danger of injury if the specified instructions are not followed.
NOTICE
NOTICE texts warn of potential damage to the car if the recommendations are not followed.
Since the policy at Saab is one of continual improvement, we retain the right to incorporate modifications and to alter specifications during production without prior notice.
* Asterisk means: equipment not fitted in all cars (can depend on model variant, engine variant, market specification, options or accessories).
If you have any questions concerning your car, its equipment, the warranty conditions or the like, your Saab dealer will be pleased to help.
Best wishes,
Saab Automobile AB
Saab Automobile AB does not accept liability for any damage caused by the fitting of spare parts, exchange parts or accessories that are not approved by Saab Automobile AB.
The specifications, design particulars and illustrations included in the manual are not binding.


4
Exterior
| Moonroof * | 123 |
| Washing the car | 242 |
| Waxing and polishing | 243 |
| Touching up the paint | 243 |
| Anti-corrosion treatment | 246 |
| Headlights | 73 |
| Rear light cluster, 9-5 Sedan | 206 |
| Rear lights clusters,9-5 SportCombi | 208 |
| Changing bulbs | 202 |
| Towing a trailer * | 174 |
| Towing the car | 181 |
| Rear towing eye | 182 |
| Trunk | 129 |
| Folding the rear seat, 9-5 Sedan | 129 |
| Folding the rear seat, 9-5 SportCombi | 132 |
| Trunk Release Handle | 138 |
| Driving with a spare wheel fitted | 181 |
| Compact spare tire | 235 |
| Driving with a roof rack load | 179 |
| Maximum roof load | 258 |
| Rearview mirror | 118 |

natural_image
Side view diagram of a sedan car with visible headlights and grille (no text or symbols)| Fuel gauge | 65 |
| Refueling | 146 |
| Economical motoring | 170 |
| Fuel | 260 |
| Hood | 188 |
| Engine compartment: washing | 243 |
| Headlights | 73 |
| High/low beam | 73 |
| Tum signal and lane change indicators | 75 |
| Headlight washers | 77 |
| Changing bulbs | 202 |
| Central locking | 44 |
| Trunk lid lock, 9-5 Sedan | 47 |
| Tailgate, 9-5 SportCombi | 48 |
| Child safety locks | 47 |
| Car alarm * | 50 |
| Fuel gauge | 65 |
| Refueling | 146 |
| Economical motoring | 170 |
| Fuel | 260 |
| Tires pressure | 263 |
| Wheels and tires | 261 |
| Braking | 160 |
| Driving in cold weather | 172 |
| Compact spare tire | 235 |
| Changing a wheel | 237 |


6
Engine compartment
Warning labels 7 V+N number 264
V.I.N. number 264 Engine number 264
Gearbox number ____ 264
Color code 264
Tire and Loading Information Label 229
Power steering fluid 196
Ignition switch 140
Drive belts 199
Spark plugs 260 Catalytic converter 145
Catalytic converter 145
Important considerations for driving 144
Turbo unit 189
Engine, technical data 260
Engine 192
Checking the oil level 192
Engine oil, specification ____ 260
Braking 160
ABS brakes 161
Brake and clutch fluid 194
Brake system 260
Brake pads 260
Fuses 214
Changing a fuse 216
Relays 218
Table of fuses 214
Temperature gauge ____ 66
Driving in hot weather 173
Driving in cold weather 172
Coolant 193
Coolant capacity 260
Wipers and washers 77
Washers 201
Washer jets 201
Manual transmission * ____ 150
Automatic transmission * 151
Jump starting 184
Battery 197 Charging/replacing the battery 107
Charging/replacing the battery____ 197


95 US MY09.book Page 7 Tuesday, April 15, 2008 11:03 AM


7

A/C system
Refrigerant at high pressure.
Do not loosen or remove the A/C system fittings before discharging the A/C system. Improper service methods may cause personal injury. System to be serviced by authorized personnel only. For instructions consult workshop manual.
The A/C system complies with SAE J639.
Charge: 650 g of R134a.
Compressor oil: PAG oil SP-10 all.
Saab oil 4759106
Oil amount: See workshop manual.

Coolant
Never open when engine hot!
Battery
• No sparks, naked flames or smoking
• Always shield eyes. Explosive gases can cause blindness or injury
- Keep the battery out of reach of children
• The battery contains sulfuric acid which could cause blindness or serious burn
• See the Owner's Manual for further information
• Explosive gas may be present in the vicinity of the battery.





95 US MY09.book Page 9 Tuesday, April 15, 2008 11:03 AM
9
Examples of symbols that can be found in your car


No sparks, flames or smoking.

Use protective
goggles

Battery acid

Refer to the

Dikko

Risk of


Buckle up

Airbag

Never place a tear-facing

child seat in

2、本次股东大会决议的有效期
Electric windows
Windows

Central
locking, lock

Central
lucking, unlock

Trunk lid@nilanta
opening

Headlights

Direction
Indicators

Parking lights

Hazard

Front fan

Rear fog
light

Windshield
Wipers

Windshield
washers


Rear window
healing

Ventilation fan

Coolant
temperature

Battery
charging

Foot brake

Coolant level

Engine oil
pressure

Radiator fan

Fuel

ESP®

Automatic tire
pressure monitoring
monitoring system


95 US Isafety MY09.fm Page 11 Tuesday, April 29, 2008 10:15 AM
11 Safety
Safety

Safety belts 12
Seats
18
Head restraint 21
Child safety 22
Airbag 29
* Asterisk means: equipment not fitted in all cars (can depend on model variant, engine variant, market specification, options or accessories).


95 US MY09.book Page 12 Tuesday, April 15, 2008 11.03 AM
12 Safety
Safety belts

WARNING
- Buckle up and adjust your safety belt before driving off so that you can pay full attention to the traffic.
- Safety belts must be worn at all times by all car occupants.
• Child safety, see page 22. - Check that the locking tongue is properly locked in the belt lock.
- In the event of a crash, the rear-seat passengers not wearing a seatbelt will be thrown forward against the front-seat backrests. The stresses imposed on the front seat passengers and belts are multiplied and can result in needless injury or even death for all car occupants.
Three-point inertia-reel safety belts are provided for all seats.
The results of studies show that it is equally important to wear safety belts in the rear seat as in the front seats.
Bear in mind that in certain states/provinces it is a legal requirement for all occupants of the car to wear a safety belt.
Safety belt reminder
When the ignition is switched on, the "FAS-TEN BELTS" reminder will light up until the driver fastens the safety belt.
The reminder for the driver has an additional audible signal which sounds for 6 seconds, or until the driver fastens his belt.
The following applies to the both front seats: If the belt is not fastened before the car starts to move there will be an additional reminder when the speed exceeds 15 mph (25 km/h). The text Use your seatbelts. is lit on the Saab Information Display (SID) and the symbol will flash.
If the belt is not fastened then an audible signal will come on after 30 seconds.
The text in the SID can be turned off by the CLR-button on the steering wheel.


95 US MY09.book Page 13 Tuesday, April 15, 2008 11.03 AM
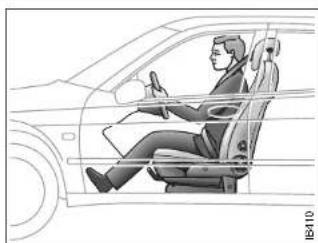
Correct position for safety belt

WARNING
Proper positioning of the safety belt is extremely important.
- An out of position safety belt can result in the occupant sliding underneath the belt in a crash (submarining) and injury can result from the lap portion cutting into the abdomen.
- Never fasten the safety belt with the shoulder belt behind the body or pull the belt off the shoulder and under the arm.
-
If two people share a belt, they risk injury by being crushed together in the event of a crash.
-
Position the lap strap snugly and low across the hips so that it just touches the thighs. The shoulder strap must be as far in on the shoulder as possible.
- Check to ensure that the belt is not twisted or rubbing against any sharp edges.
- There should not be any slack in the belt. Pull the belt tight – particularly important when thick outer clothing is worn. It is advisable to remove thick items of clothing.
- Refrain from tilting the backrest more than necessary, as the safety belt provides better protection when the seat is in a more upright position.
• Only one person per safety belt! - For most of the time a safety belt is worn, the retractor will allow the wearer freedom of movement. The retractor locks up automatically if the belt is jerked or withdrawn sharply, the car tilts, the brakes are applied hard or a crash occurs.
• Children up to 6 years of age must always be seated in a child seat. Saab recommends the use of a child seat for children up to the age of 10. - Children who have grown out of a child seat should be restrained by the car's standard three-point belts. Make sure that the shoulder belt is not in contact with the neck or throat. If it is, a booster seat/cushion may be necessary.
natural_image
Line drawing of a person seated in a car, viewed from the side (no text or symbols)Correctly positioned safety belt
13Safety


95 US MY09.book Page 14 Tuesday, April 15, 2008 11.03 AM
14 Safety
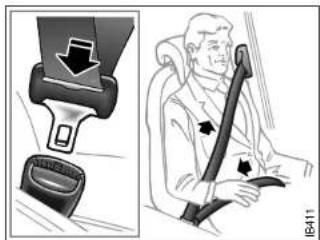
To fasten the belt

natural_image
Illustration showing a car seatbelt being lifted by an arrow, and a person seated in the seat with a hand resting on it (no text or symbols)Press the red button to release the belt
Front safety belts
Fasten the belt by pulling the belt and inserting the tongue in the buckle. Check that it is securely fastened.
Grasp the shoulder belt close to the buckle and pull the belt towards the shoulder to tighten the lap belt part.
Then grip the belt at the shoulder, pull it out and, without letting go, allow the slack to be taken up by the reel. Make sure that the belt is well in on the shoulder.
Because the lower belt-anchorage points are on the seat, the belt buckle follows the movement of the seat during seat adjustment.
Belt height adjustment
The front safety belts and the outside belts in the rear (9-5 Sedan) are equipped with automatic height adjustment.
After fastening the belt, grasp it at chest height, pull it out and, without letting go, allow the slack to be taken up by the reel. Make sure that the belt is well in on the shoulder.
To release the belt, press the red button on the belt buckle, as illustrated.
See page 240 for the checking of belt function, cleaning, etc.

Grasp the shoulder belt close to the buckle and pull the belt towards the shoulder to tighten the lap belt part.
Then grip the belt at the shoulder, pull it out and, without letting go, allow the slack to be taken up by the reel. Make sure that the belt is well in on the shoulder.
Because the lower belt-anchorage points are on the seat, the belt buckle follows the movement of the seat during seat adjustment.


95 US MY09.book Page 15 Tuesday, April 15, 2008 11.03 AM
15Safety
natural_image
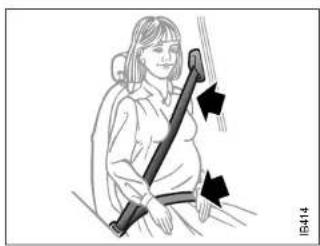
Illustration of a person holding a long object, possibly a musical instrument or tool, with arrows indicating motion direction (no text or symbols)Safety belt use during pregnancy
Pregnant women must always wear a safety belt to protect both themselves and the unborn child.
The lap belt should be placed low, across the hips and over the upper thighs.
Safety belt pretensioners
The belts of the front seats are fitted with automatic pretensioners and force limiters. These are activated in the event of a severe frontal or rear-end crash and a side-on collision, provided that the safety belts are being worn.
The pretensioners serve to reduce the forward movement of the body by tensioning the belt. The force limiters reduce belt loads on the body by "loosening" the safety belt to absorb the body's kinetic energy as gradually as possible.
The safety belt pretensioners are not activated by vehicle rollover.

WARNING
If the car is involved in a crash, the safety belts, belt pretensioners and other components must be Inspected by an authorized Saab dealer and replaced as necessary.
Never make any alterations or repairs to the safety belt yourself. Visit an authorized Saab dealer for any necessary repairs.
Safety belt, rear seat

WARNING
• Make sure that the belt does not become trapped when the backrest is folded down or raised (see page 129).
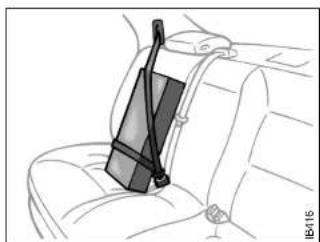
- If cargo has to be placed on a seat, it must be properly secured with the safety belt. This reduces the risk of the cargo being thrown about during hard braking or a crash, which could cause personal injury.
- Check that the belt is not twisted or lying against sharp edges.
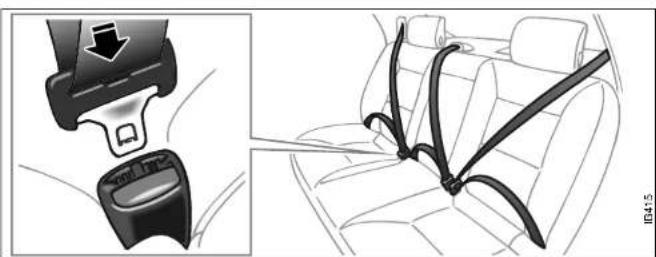
• Make sure you use the correct safety belt buckle. The buckles for the center and left-hand rear seats are close together.


95 US MY09.book Page 16 Tuesday, April 15, 2008 11.03 AM
16 Safety
Three-point safety belts are provided for all three rear seat passengers.
Fasten the belt by pulling out the strap carefully and inserting the tongue in the lock.
Check that it is securely fastened.
Then grip the diagonal part of the strap near the lock and pull the belt upwards towards the shoulder to tighten the lap strap. The lap strap should lie low over the hips.
The diagonal part should lie as far in on the shoulder as possible.
To release the belt, press the red button on the belt lock.
See page 240 for the checking of belt function, cleaning, etc.
natural_image
Diagram showing car seatbelt buckle and seatbelt buckle assembly (no text or symbols)Safety belt, rear seat
Securing an item on the rear seat
natural_image
Line drawing of a car seatbelt buckle with a strap, no text or symbols present

natural_image
Technical illustration of a car seatbelt device with a magnified view showing the internal components (no text or symbols)
natural_image
Technical illustration of a car seatbelt device with a magnified view showing the internal components (no text or symbols)
natural_image
Technical illustration of a car seatbelt device with a magnified view showing the internal components (no text or symbols)
natural_image
Technical illustration of a car seatbelt device with a magnified view showing the internal components (no text or symbols)
natural_image
Technical illustration of a car seatbelt device with a magnified view showing the internal components (no text or symbols)

[NO TEXT]


一
[Non-Text]


[Non-Text]





95 US MY09.book Page 17 Tuesday, April 15, 2008 11.03 AM
17Safety

WARNING
- Safety belts are designed to bear upon the bony structure of the body, and should be worn low across the front of the pelvis or the pelvis, chest and shoulders, as applicable; wearing the lap section of the belt across the abdominal area must be avoided.
- Safety belts should be adjusted as firmly as possible, consistent with comfort, to provide the protection for which they have been designed. A loose belt will greatly reduce the protection afforded to the wearer.
- Care should be taken to avoid contamination of the webbing with polishes, oils and chemicals, and particularly battery acid. Cleaning may safely be carried out using mild soap and water. The belt should be replaced if webbing becomes frayed, contaminated or damaged.
- It is essential to replace the entire assembly after it has been worn in a severe impact even if damage to the assembly is not obvious.
- Belts should not be worn with straps twisted.
• Each belt assembly must only be used by one occupant; it is dangerous to put a belt around a child being carried on the occupant's lap.
- No modifications or additions should be made by the user which will either prevent the safety belt adjusting device from operating to remove slack, or prevent the safety belt assembly from being adjusted to remove slack.


95 US MY09.book Page 18 Tuesday, April 15, 2008 11.03 AM
18 Safety
Seats

WARNING
The seats are actuated by powerful motors. Bear this in mind when adjusting the seat, and make sure that nothing gets caught and damaged. Ensure that nothing can be trapped when adjusting the seat.
Bear in mind that children can be injured if they play with the electrically-operated seats.
Always remove the ignition key when you leave the car. This prevents personal injury caused by the electrically adjustable seats, for example, due to children playing.
Both front seats are electrically operated. On certain models the driver's seat is equipped with a memory function.
To facilitate getting into the car, both seats can be adjusted when either of the front doors is open.
For safety reasons, If the door is closed, the seat can only be adjusted when the ignition is ON.
Note, however, that both seats can be adjusted for 30 seconds after both doors have been closed.
The following seat adjustments can be made to achieve a comfortable driving position:
- height
• legroom
- backrest rake angle
- lumbar support *
• head-restraint height
We recommend that adjustments to the driver's seat be performed in the following order:
1 h e l g h t
2 legroom
3 seat tilt angle
4 backrest rake angle
Lastly, adjust the steering wheel (see page 114).

WARNING
Never adjust the driver's seat except when the car is stationary.
Side airbags
(see page 36).
Head restraint
(see page 21).

natural_image
Diagram of a car seat assembly with directional arrows indicating movement (no text or symbols)Height
To raise the seat, lift the lower control straight up.
To lower the seat, press the lower control down.
The same control can be used to adjust the height of the front and rear edges of the seat independently.


95 US MY09.book Page 19 Tuesday, April 15, 2008 11.03 AM
19Safety
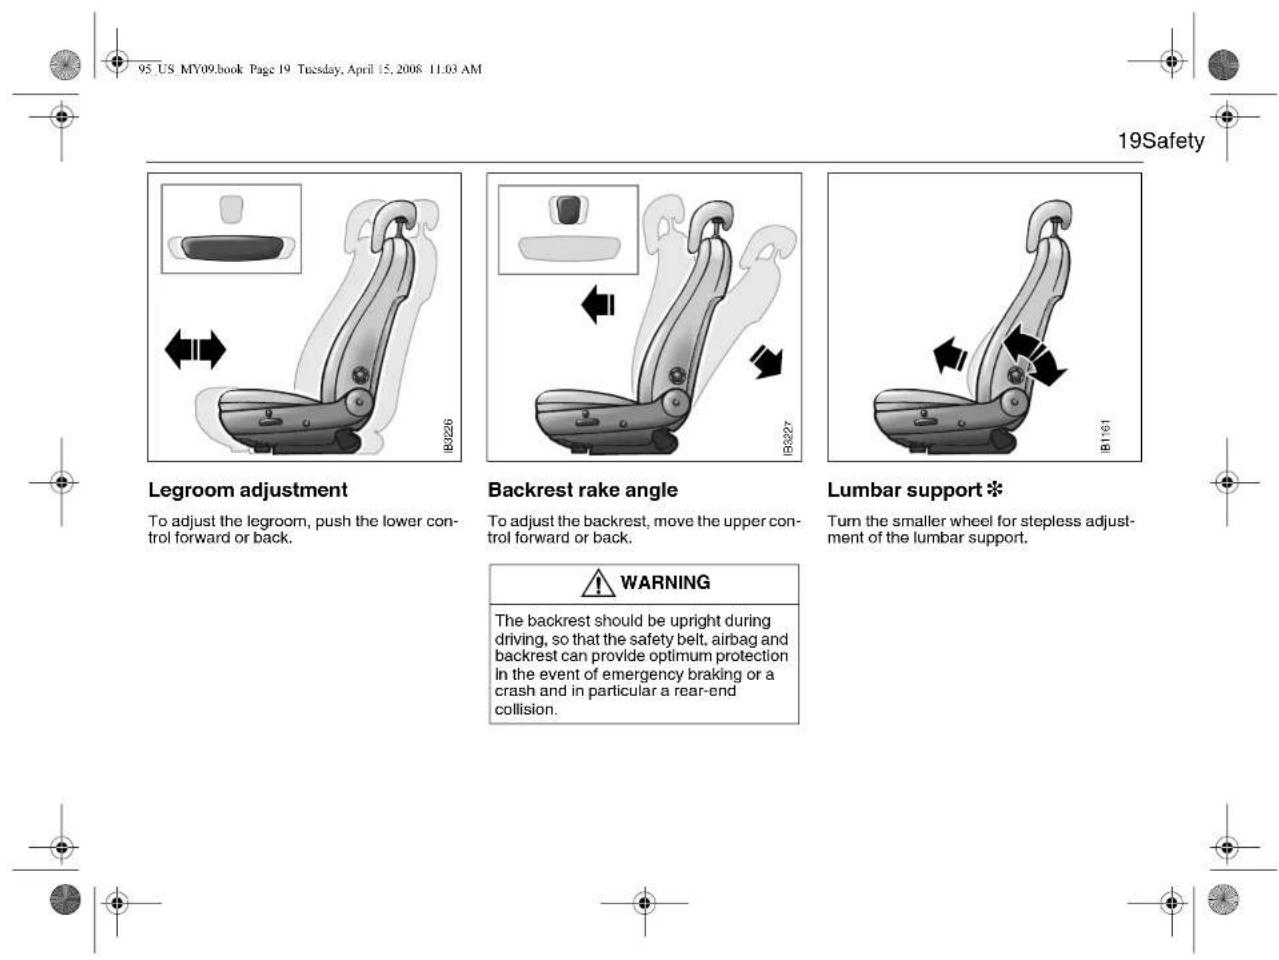
To adjust the legroom, push the lower control forward or back.
To adjust the backrest, move the upper control forward or back.
Turn the smaller wheel for stepless adjustment of the lumbar support.
WARNING
The backrest should be upright during driving, so that the safety belt, airbag and backrest can provide optimum protection in the event of emergency braking or a crash and in particular a rear-end collision.
95 US MY09.book Page 20 Tuesday, April 15, 2008 11.03 AM
20 Safety
Memory driver's seat \*
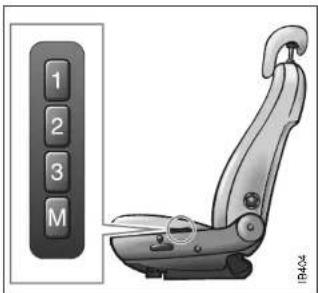
In certain models the driver's seat is equipped with a programmable memory function. This function also includes the door mirrors.
Adjust the seat and door mirrors.
To save the settings, press and hold the M button and, at the same time, press one of the preselect buttons (1, 2 or 3). The Saab Information Display (SID) will chime to confirm that the settings have been saved.
To recall the programmed settings, press and hold the appropriate preset button, whereupon the seat and mirrors will be adjusted automatically.
To change the settings stored in a preset button, adjust the seat and mirrors as before and save the new settings by pressing M and the appropriate preset button.
To facilitate reversing, the passenger side door mirror can be tilted down automatically, e.g. to show the curb. To do this, select reverse and press the small grey button adjacent to the door-mirror control. When you deselect reverse, the mirror will automatically return to its original setting (see page 116).


95 US MY09.book Page 21 Tuesday, April 15, 2008 11.03 AM
Head restraint

WARNING
- Adjust the head restraint so that your head is optimally supported and the center of the head restraint is at ear height, thus reducing the likelihood of neck injury in a crash.
- Raise the head restraints in the seat that are occupied.
The front seats in the Saab 9-5 are equipped with Saab Active Head Restraints (SAHRs). These reduce the risk of whiplash injury if the car is hit from behind.
In the event of a rear-end crash, the body is forced back against the backrest. This, in turn, causes the mechanism to press the head restraint forward and upward, thus limiting the backward movement of the head.
The SAHR is a mechanical system, actuated by body weight. The mechanism is built into the top of the backrest, where it is connected to the head restraint.
Therefore, the SAHR does not need to be replaced after a minor rear-end crash.

The head restraint can be raised or lowered and is adjustable in various positions.
- Raising: grasp the head restraint on both sides and pull it straight up.
- Lowering: press the catch on the left-hand side of the attaching point and press down the head restraint.

natural_image
Diagram of a car seatbelt with directional arrows indicating movement (no text or symbols)Rear-seat head restraints
9-5 Sedan: The rear head restraints have three adjustment positions for passenger comfort.
They can also be folded down to increase the driver's rearward vision when the seat is unoccupied.
9-5 SportCombi: The height of the rear head restraints can be adjusted by depressing the catch on the left-hand collar in the same way as the front head restraints.


22 Safety
Child safety

WARNING

•Children can be killed or seriously injured by the airbag
•The BACK SEAT is the T place for children 12 and r shorter than 55 inches
• ALWAYS use SAFETY BELTS and CHILD RESTRAINTS
• NEVER put a rear-facing child seat in the front
- Sit as far back as possible from the airbag
Car safety tips

WARNING
- Never leave children unattended in a car, even for a short time.
- Children can suffer heat stroke – perhaps die – in a matter of minutes.
- Children can put the car into gear and hurt themselves or others.
- At gas stations, take the keys from the car while filling the tank.
- Never allow children to climb on top of – or under cars.
• Always look for children before backing your car out of a garage or driveway.
• To avoid carbon monoxide poisoning, never let a car idle in an enclosed garage.
• Supervise young children around buckets of water while washing your car. Small children can drown in a short time in less than an inch of water.

WARNING
Protect children from getting trapped in the trunk of a car
- Teach children not to play in or around cars.
- Watch children when loading or unloading the car so they don't get locked in by mistake.
- Always lock the doors and trunk of your car, and keep the keys out of children's sight and reach.
- Keep the rear fold-down seats closed to help prevent kids from getting into the trunk from inside the car.
For Trunk Release Handle information see page 48 and 138.


95 US MY09.book Page 23 Tuesday, April 15, 2008 11.03 AM
23Safety
General information on child safety
The same attention must be given to child safety in the car as is given to adults.
Children travel most safely when properly restrained. However, the type of restraint must be appropriate for the size of the child. We recommend that you always consult your Saab dealer before fitting a child seat, child restraint or booster cushion.
The backseat is the safest place for children.
Make sure you are acquainted with the legal requirements for seating children in the car.
When fitting child restraints in cars you must always read the instructions supplied by the child restraint manufacturer.
Make sure that it is possible to fit a child restraint in accordance with the manufacturer's child restraint instructions.
Saab recommends the use of a rear-facing child seat for as long as this is possible - for all children under 18 kg (40 lbs.) as a minimum. Use a child seat approved for the weight of the child.
Saab recommends the use of a booster seat for children up to the length of 140 cm (55 in.) or the weight of 36 kg (80 lbs.).
LATCH
LATCH (Lower Anchorages & Top tethers for CHildren) is a US/Canadian safety standard for a uniform method of fitting child restraints without using the standard safety belts. Only certain child restraints are equipped to utilize the LATCH system.
The LATCH system is installed in the car to facilitate proper fitting of child restraints designed for and equipped with LATCH attachments.
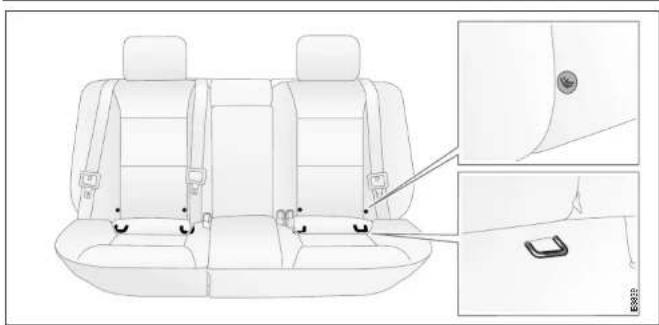
The LATCH system consists of top tether and lower anchorages. In this vehicle, LATCH is installed at the two outboard seating positions in the rear seat, and there is a top tether on the rear center position (not Convertible).
The top tethers are located and on the cargo floor by the rear seat backrest's lower part (SportCombi), see page 25 and on top of the parcel shelf (9-5 Sedan), see page 26.
The lower anchorages are located where the seat cushion and seat back come together. There is a label above the anchorages, see picture on next page. Label consists of a symbol of a child restrained in a seat inside a circle.
When fitting child restraints in cars you must always read the instructions supplied by the child restraint manufacturer.
If you have any questions regarding LATCH please contact your Saab dealer.
WARNING
If a LATCH-type child restraint is not attached to its anchor points, the restraint will not be able to protect the child correctly. In a crash, the child could be seriously injured or killed. Make sure that a LATCH-type child restraint is properly installed using the anchor points, or use the vehicle's safety belts to secure the restraint, following the instructions that came with that restraint, and also the instructions in this manual.
WARNING
Child top tether anchorages are designed to withstand only those loads imposed by correctly fitted child restraints.
Under no circumstances are they to be used for adult safety belts.

natural_image
Pure geometric diagram with crosshair and circular shapes, no text or symbols present95 US MY09.book Page 24 Tuesday, April 15, 2008 11.03 AM
24 Safety
natural_image
Technical line drawing of a car rear seat assembly with side-mounted buttons and mounting bracket (no text or symbols)Location of lower anchors
Rigid 2-point lower attachment with top tether

natural_image
Diagram of a vehicle rear view with two circular icons on the back panel (no text or symbols)Lower anchor and top tether anchor locations.

natural_image
Illustration of a car seat assembly with a close-up inset showing the side view (no text or symbols)Semi-rigid 2-point lower attachment with top tether

natural_image
Illustration of a car seat assembly with an inset showing a hand holding the seat (no text or symbols present)


95 US MY09.book Page 25 Tuesday, April 15, 2008 11.03 AM
Securing a Child Restraint Designed for the LATCH System

9-5 SportCombi:
Before installation, please read through these instructions and the child restraint installation instructions.
1 The top tether anchor is located on the cargo floor by the rear seat backrest's lower part (see picture). To access the top tether anchor, unlock the rear seat backrest (see page 132 for detailed instructions), and fold it slightly forward. Note! Backrest only, not the seat cushion.
2 The top tether anchor is originally rotated downwards. To use it, it has to be rotated upwards (see arrow in picture). Use the top tether anchor right behind the seating position you want to use.
3 Raise the vehicle head restraint to its highest position (see page 21 for detailed instructions).
4 Put the child restraint on the seat.
5 If you are using a single top tether, route the top tether under the vehicle head restraint, and attach the top tether hook to the top tether anchor. If you are using a dual top tether, route the top tether
around the vehicle head restraint, and attach the top tether hook to the top tether anchor. The child restraint Instructions will show you how.
6 Reposition the rear seat backrest, and make sure it locks properly. Check the indicator on top of the backrest that it is locked.
7 Find the lower anchors for the seating position you want to use. The lower anchors are located where the bottom of the seatback meets the back of the seat cushion. Above each lower anchor, there is a label indicating its location (see picture on page 24).
8 Attach and tighten the lower anchor attachments on the child restraint to the vehicle lower anchors. If your child restraint does not have the lower attachments, you will be using the lap-shoulder belt to secure the child restraint. The child restraint instructions will show you how.
9 Tighten the top tether strap according to the child restraint instructions.
10 Push and pull the child restraint in different directions to be sure it is secured at the lower anchors/safety belt and the top tether anchor. The child restraint shall be firmly attached to the vehicle.

natural_image
Diagram showing car interior components including steering wheel, seatbelt, and foot switch (no text or labels)Child top tether anchorages, Saab 9-5 SportCombi
WARNING
Make sure the child restraint anchorages are folded all the way up or down otherwise it can obstruct locking the rear seat backrest.
WARNING
If a cargo net is fitted, do not pull the top tether strap through the cargo net in such a way that there is slack in the strap to the child seat.


95 US MY09.book Page 26 Tuesday, April 15, 2008 11.03 AM
26 Safety
Securing a Child Restraint Designed for the LATCH System

9-5 Sedan:
Before installation, please read through these instructions and the child restraint installation instructions.
1 Find the lower anchors for the seating position you want to use. The lower anchors are located where the bottom of the seatback meets the back of the seat cushion. Above each lower anchor, there is a label indicating its location (see picture).
2 Put the child restraint on the seat.
3 Attach and tighten the lower anchor attachments on the child restraint to the vehicle lower anchors. If your child restraint does not have the lower attachments, you will be using the lap-shoulder belt to secure the child restraint. The child restraint instructions will show you how.
4 The top tether anchor is located on top of the parcel shelf. Use the top tether anchor right behind the seating position you want to use. Open the top tether anchor trim cover to expose the anchor. Snap the cover to lock in open position.
4 The top tether anchor is located on top of the parcel shelf. Use the top tether anchor right behind the seating position you want to use. Open the top tether anchor trim cover to expose the anchor. Snap the cover to lock in open position.
4 The top tether anchor is located on top of the parcel shelf. Use the top tether anchor right behind the seating position you want to use. Open the top tether anchor trim cover to expose the anchor. Snap the cover to lock in open position.
4 The top tether anchor is located on top of the parcel shelf. Use the top tether anchor right behind the seating position you want to use. Open the top tether anchor trim cover to expose the anchor. Snap the cover to lock in open position.
4 The top tether anchor is located on top of the parcel shelf. Use the top tether anchor right behind the seating position you want to use. Open the top tether anchor trim cover to expose the anchor. Snap the cover to lock in open position.
4 The top tether anchor is located on top of the parcel shelf. Use the top tether anchor right behind the seating position you want to use. Open the top tether anchor trim cover to expose the anchor. Snap the cover to lock in open position.
4 The top tether anchor is located on top of the parcel shelf. Use the top tether anchor right behind the seating position you want to use. Open the top tether anchor trim cover to expose the anchor. Snap the cover to lock in open position.
4 The top tether anchor is located on top of the parcel shelf. Use the top tether anchor right behind the seating position you want to use. Open the top tether anchor trim cover to expose the anchor. Snap the cover to lock in open position.
4 The top tether anchor is located on top of the parcel shelf. Use the top tether anchor right behind the seating position you want to use. Open the top tether anchor trim cover to expose the anchor. Snap the cover to lock in open position.
4 The top tether anchor is located on top of the parcel shelf. Use the top tether anchor right behind the seating position you want to use. Open the top tether anchor trim cover to expose the anchor. Snap the cover to lock in open position.
5 Raise the vehicle head restraint to its highest position (see page 21 for detailed instructions).
6 If you are using a single top tether, route the top tether under the vehicle head restraint, and attach the top tether hook to the top tether anchor. If you are using a dual top tether, route the top tether around the vehicle head restraint, and attach the top tether hook to the top tether anchor. Tighten the top tether strap. The child restraint instructions will show you how.
7 Push and pull the child restraint in different directions to be sure it is secured at the lower anchors/safety belt and the top tether anchor. The child restraint shall be firmly attached to the vehicle.

natural_image
Technical illustration of a device component with three views: top view, side view showing internal components, and bottom view with a labeled button (no text or symbols present)Child top tether anchorages in parcel shelf, Saab 9-5 Sedan



natural_image
Pure geometric crosshair symbol without any text or labels


95 US MY09.book Page 27 Tuesday, April 15, 2008 11.03 AM
27Safety
Lockable latch plate
In fitting a child seat that is intended to be secured in position by the lap portion of the safety belt, make use of the locking function of the latch plate. This function is available on all seats in the second row.
Locking the lap portion of the belt lessens the risk that the seat will work loose while the car is in motion.
The button for the locking function is located on the back of the latch plate.
1 Put the child restraint on the rear seat.
2 Pick up the latch plate, and run the lap and shoulder portions of the vehicle's safety belt through or around the restraint. The child restraint Instructions will show you how.
3 Buckle the belt. Make sure the release button is positioned so you would be able to unbuckle the safety belt quickly if you ever had to.
4 Tighten the safety belt. You may find it helpful to use your knee to push down on the child restraint as you tighten the belt.
5 While holding the safety belt tight, activate the locking function of the latch plate by moving the button from position 2 (unlocked) to position 1 (locked).
6 Push and pull the child restraint in different directions to be sure it is secure. The child restraint shall be firmly attached to the vehicle.

Locking the lap belt 1 Locked 2 Unlocked
To deactivate the locking function, move the button to position 2.




95 US MY09.book Page 28 Tuesday, April 15, 2008 11.03 AM
28 Safety
Installation of rear facing child restraints
Child restraints that are approved for rear facing installation in the rear seat can be positioned in any of the three rear seating positions.

WARNING
Failure to follow all the manufacturer's instructions on the use of this child restraint system can cause your child to strike the vehicle's interior during a sudden stop or crash.

WARNING
A special accessory is available for locking the center armrest so that a child seat can be installed in the middle seat. See your Saab dealer for details.
When a rear-facing child seat is fitted in the center position of the rear seat in the Saab 9-5 Sedan the center armrest must be secured in place with this strap. If this is not done, the center armrest could swing down in the event of a frontal crash and cause injury to the child.

natural_image
Interior view of a car seatbelt with a side panel inset showing the same seat (no text or symbols)Fitting the locking strap on the center arm-rest, Saab 9-5 Sedan (not needed on SportCombi).


95 US MY09.book Page 29 Tuesday, April 15, 2008 11.03 AM
Airbag

WARNING
To reduce risk of injury:
• Always wear your safety belt.
• Always adjust your seat so that you are as far back as possible but still able to operate the pedals and reach the steering wheel and controls comfortably.
• Children 12 and under or shorter than 59 inches (150 cm) should always travel in the rear seat as the car is fitted with a passenger airbag.
- Never fit a child seat in front of the passenger airbag.
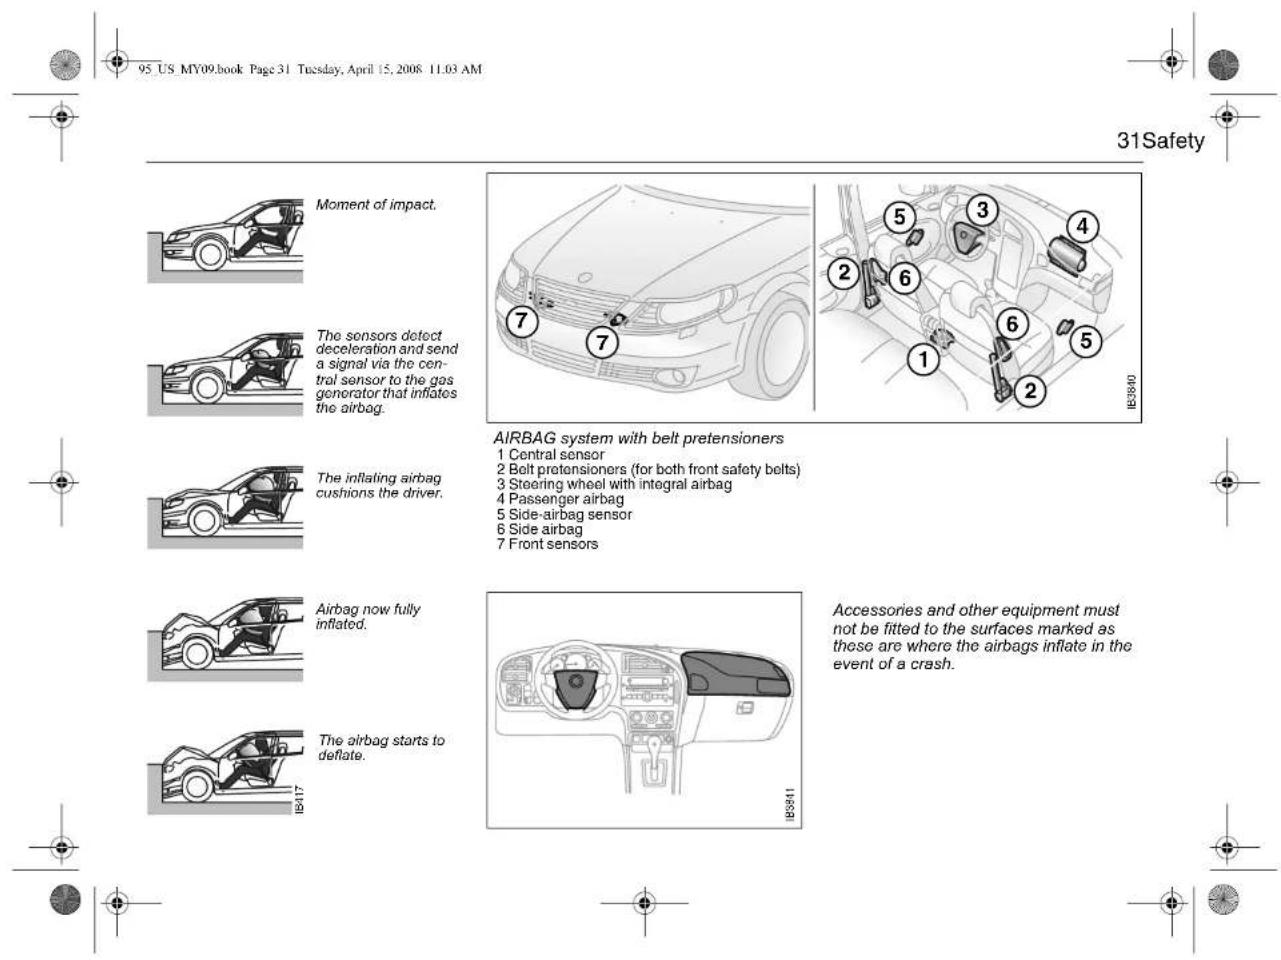
The AIRBAG system comprises an airbag in the steering wheel, a front passenger airbag and side airbags in the front seats.
The system supplements the protection provided by the safety belts to further enhance the safety of the occupants.
If a fault is detected in the AIRBAG, the AIR BAG warning light on the main instrument panel will come on (see pages 61 and 37).

natural_image
Illustration of a person inside a car seat, showing the wheel and seatbelt (no text or symbols)Inflated airbag (driver side) Inflation and deflation together take less than 0.1 second.
When the system is triggered by impact of a frontal crash, the airbags in the steering wheel and passenger side of the dash board are inflated, after which they deflate through vents in the back of the bags.
The entire process takes less than 0.1 second – literally, faster than the blinking of an eye.
The driver and passenger airbags are referred to as 'smart' airbags. This means that the system compensates for factors such as the force of the collision.
Note:
The sensor reacts differently depending on whether or not the front seatbelts on the driver's and passenger sides are used. Situations can therefore arise where only one of the airbags inflates.
It is also possible for only the seatbelt pretensioners to be activated and for the airbags to remain uninflated.
These airbags are triggered only by moderate to severe frontal or near-frontal crashes. They will not be activated by minor front-end impacts, rear-end or side impacts, or by the car rolling over.


95 US MY09.book Page 30 Tuesday, April 15, 2008 11.03 AM
30 Safety

natural_image
Diagram of two car seats with handles, showing front and side views (no text or symbols)Passenger airbag and driver's airbag both inflated

WARNING
• Even if the car is equipped with AIR-BAG, safety belts must still always be worn by all occupants.
• Note that because an airbag inflates and deflates extremely rapidly, it will not provide protection against a second impact occurring in the same incident. Always use your safety belt.
• Always sit with the whole of your back in contact with the backrest of the seat, and with your seat as far back as is practical. Otherwise you will be thrown back against the backrest when the airbag inflates which could cause you injury or death. The airbag needs room in which to inflate.
- Never attach anything to the steering wheel or passenger side of the instrument panel, as this could result in injury if the airbag should inflate. The same applies to anything you might have in your mouth, such as a pipe, for instance.
- Some components of the airbag will be warm for a short time. In some circumstances the airbag can cause minor burns or abrasions to the body when the airbag inflates/deflates.
• To reduce the risk of head injuries in the event of a crash, the headliner and pillar trims incorporate energy absorbing material. These areas must not be modified in any way. Work on these areas must only be carried out by an authorized Saab dealer.
- Fumes are generated by the chemical reaction that inflates the airbag. Because the dust/fumes can, in certain cases, cause irritation to the skin, the following measures should be taken:
Skin surfaces that show signs of irritation should be washed with clean water and a mild soap as soon as possible.
In the event of eye irritation, flush the eyes thoroughly with clean water for at least 20 minutes.
In case of persistent irritation, consult a doctor. - Never rest your hands or forearms on the steering-wheel center padding.
- If the AIR BAG warning light does not extinguish after the car has been started, or comes on or flashes while driving, have the car checked immediately by a workshop. We recommend that you contact an authorized Saab dealer. The warning light could signify that the airbags may not inflate in a crash, or they could even inflate without a crash. See page 61.


©


95 US MY09.book Page 32 Tuesday, April 15, 2008 11.03 AM
32 Safety
Front passenger seat

WARNING
Never secure a rear-facing child seat in the right front seat of a car equipped with a passenger airbag. Inflation of the airbag in the event of a crash could seriously injure or kill a child.
The airbags are interconnected and have a common warning light. The passenger airbag module is housed in the fascia above the glove compartment and is marked AIRBAG
Both airbags will be inflated in the event of a moderate to severe frontal, or near-frontal crash, even if the passenger seat is unoccupied.
WARNING

- Children can be killed or seriously injured by the airbag - The BACK SEAT is the SAFEST place for children 12 and under or shorter than 55 inches (140 cm)
• ALWAYS use SAFETY BELTS and CHILD RESTRAINTS
- NEVER put a rear-facing child seat in the front
- Sit as far back as possible from the airbag.
- Never allow a child to stand in front of the seat or to sit on the lap of a front-seat passenger. Serious injury or death could result if the airbag is inflated in a crash.
• The glove compartment must be closed while travelling. An open glove compartment door could cause leg injuries in the event of a crash.
- Never place anything on the dash or in front of the seat as, in addition to being a hazard to passengers, this could interfere with the function of the airbag in the event of a crash. The same applies to the mounting of accessories on the dash.
- Keep feet on the floor – never put feet up on the fascia, on the seat or out of the window.
- Do not carry anything in your lap.



95 US MY09.book Page 33 Tuesday, April 15, 2008 11.03 AM
33Safety
Passenger Sensing System
Vehicles with a passenger sensing system have indicator LEDs on the fascia. The indicators will be lit during the system check when you turn your ignition key to ST or ON. When the system check is complete, either the ON or the OFF LED, will be lit. See AIRBAG warning light on page 61.
The passenger sensing system will turn off the right front passenger's frontal airbag and side airbag under certain conditions.
The driver's airbags is not part of the passenger sensing system.
The passenger sensing system works with sensors that are part of the right front passenger's seat and safety belt. The sensors are designed to detect the presence of a properly-seated occupant and determine if the passenger's frontal airbag should be enabled (may inflate) or not.
Accident statistics show that children are safer if they are restrained in the rear rather than the front seat.

Passenger Airbag Status Indicator. USA

Passenger Airbag Status Indicator, Canada
Saab recommends that child restraints be secured in a rear seat, including an infant riding in a rear-facing infant seat, a child riding in a forward-facing child seat and an older child riding in a booster seat.
Your vehicle has a rear seat that will accommodate a rear-facing child restraint. A label on your sun visor says, "Never put a rear-facing child seat in the front." This is because the risk to the rear-facing child is so great, if the airbag deploys.


95 US MY09.book Page 34 Tuesday, April 15, 2008 11.03 AM
34 Safety

WARNING
A child in a rear-facing child restraint can be seriously injured or killed if the right front passenger's airbag inflates. This is because the back of the rear-facing child restraint would be very close to the inflating airbag.
Even though the passenger sensing system is designed to turn off the passenger's frontal airbag if the system detects a rear-facing child restraint, no system is fail-safe, and no one can guarantee that an airbag will not deploy under some unusual circumstance, even though it is turned off. Saab recommends that rear-facing child restraints be secured in the rear seat, even if the airbag is off.
The passenger sensing system is designed to turn off the right front passenger's frontal airbag if:
- the right front passenger seat is unoccupied
• the system determines that an infant is present in a rear-facing infant seat
- the system determines that a small child is present in a forward-facing child restraint
- the system determines that a small child is present in a booster seat
- a right front passenger takes his/her weight off of the seat for a period of time
• the right front passenger seat is occupied by a smaller person, such as a child who has outgrown child restraints
• or if there is a critical problem with the airbag system or the passenger sensing system.
When the passenger sensing system has turned off the passenger's frontal air bag, the off indicator will light and stay lit to remind you that the airbag is off.
If a child restraint has been installed (Saab recommends that child restraints be secured in the rear seat) and the on indicator is lit, turn the vehicle off. Remove the child restraint from the vehicle and reinstall the child restraint following the child restraint manufacturer's directions and refer to Installation of rear facing child restraints on page 28.
If after reinstalling the child restraint and restarting the vehicle, the on indicator is still lit, check to make sure that the vehicle's seatback is not pressing the child restraint into the seat cushion. If this happens, slightly recline the vehicle's seatback and adjust the seat cushion if possible. Also make sure the child restraint is not trapped under the vehicle head restraint. If this happens, adjust the head restraint.


95 US MY09.book Page 35 Tuesday, April 15, 2008 11.03 AM
35Safety
If the on indicator is still lit, secure the child in the child restraint in a rear seat position in the vehicle and check with your dealer.
The passenger sensing system is designed to enable (may inflate) the right front passenger's frontal airbag anytime the system senses that a person of adult size is sitting properly in the right front passenger's seat. When the passenger sensing system has allowed the airbag to be enabled, the on indicator will light and stay lit to remind you that the airbag is active.
For some children who have outgrown child restraints and for very small adults, the passenger sensing system may or may not turn off the right front passenger's frontal airbag, depending upon the person's seating posture and body build. Everyone in your vehicle who has outgrown child restraints should wear a safety belt properly — whether or not there is an airbag for that person.
If a person of adult-size is sitting in the right front passenger's seat, but the off indicator is lit, it could be because that person is not sitting properly in the seat. If this happens, turn the vehicle off and ask the person to place the seatback in the fully upright position, then sit upright in the seat, centered on the seat cushion, with the person's legs comfortably extended. Restart the vehicle and have the person remain in this position for about two minutes. This will allow the system to detect that person and then enable the passenger's airbag.

WARNING
If the airbag readiness light in the instrument panel cluster ever comes on and stays on, it means that something may be wrong with the airbag system. If this ever happens, have the vehicle serviced promptly, because an adult-size person sitting in the right front passenger's seat may not have the protection of the frontal airbag. See Airbag warning light on page 61 for more on this, including important safety information.
Aftermarket equipment, such as seat covers, can affect how well the passenger sensing system operates. You may want to consider not using seat covers or other aftermarket equipment if your vehicle has the passenger sensing system. See Adding Equipment to Your Airbag-Equipped Vehicle on page 41 for more information about modifications that can affect how the system operates.

WARNING
Stowing of articles under the passenger's seat or between the passenger's seat cushion and seatback may interfere with the proper operation of the passenger sensing system.


95 US MY09.book Page 36 Tuesday, April 15, 2008 11.03 AM
36 Safety
Side airbags


WARNING
- This car is equipped with side airbags and no extra interior trim should be fitted. Failure to observe this warning could result in the side airbags not inflating as intended and thus not providing the intended protection either.
- Never place any object in the area that would be occupied by the inflated air bag.
-
For optimum protection, sit upright in the seat, with your safety belt correctly fastened.
• The sensors for the side airbags are fitted in the front doors. We advise against doing any work on the doors that could affect the moisture barrier in the door or the airbag sensors. It is essential that the moisture barrier (thick plastic film) in the front door is not damaged in any way. -
Improvement of the anticorrosion treatment of the doors should only be carried out by a workshop. We recommend that you contact an authorized Saab dealer. Otherwise there is a risk that the side impact sensor and the moisture barrier in the front door could be damaged.
- The side airbags will inflate only in the event of a side impact; not in the event of a front or rear-end crash or of the car's rolling over.
- Damage or wear to the seat cover, or the seat seam, in the area of the side airbag must immediately be repaired. We recommend that you contact an authorized Saab dealer.
- Do not modify the speaker installation in the front doors or install speakers other than those specifically approved by Saab.
The side airbags, which help protect the upper body are integrated in the outside edges of the front seat backrests.
In a side impact, only the airbag on that side will be activated, and only then if certain predetermined conditions are met such as the force and angle of the impact, the speed of the car on impact, and at which point on the car's side the impact occurs.
The sensors, which are fitted in the front doors, sense the rise in pressure caused by the door panel being pressed in during an impact condition. The side airbag trigger will be commanded based on the characteristics of this pressure rise.


95 US MY09.book Page 37 Tuesday, April 15, 2008 11.03 AM


37Safety

natural_image
Illustration of a person inside a vehicle, holding a large cylindrical object (no text or symbols visible)Side airbag inflated

Side airbag components
1 Side airbag
2 Sensor
3 Moisture barrier
4 Text on seat
AIRBAG warning light

WARNING
- If the airbag readiness light stays on after you start your vehicle, it means the airbag system may not be working properly. See page 61. The airbags in your vehicle may not inflate in a crash, or they could even inflate without a crash.
• To help avoid injury to yourself or others, have your vehicle serviced right away if the airbag readiness light stays on after you start your vehicle.











































95 US MY09.book Page 38 Tuesday, April 15, 2008 11.03 AM
38 Safety
What Will You See After an Airbag Inflates?
After an airbag inflates, it quickly deflates, so quickly that some people may not even realize the airbag inflated. Some components of the airbag module - the steering wheel hub for the driver's frontal airbag, the instrument panel for the right front passenger's frontal airbag or the ceiling of your vehicle near the side windows - will be hot for a short time. The parts of the bag that come into contact with you may be warm, but not too hot to touch. There will be some smoke and dust coming from the vents in the deflated airbags. airbag inflation does not prevent the driver from seeing or being able to steer the vehicle, nor does it stop people from leaving the vehicle.
WARNING
When an airbag inflates, there is dust in the air. This dust could cause breathing problems for people with a history of asthma or other breathing trouble. To avoid this, everyone in the vehicle should get out as soon as it is safe to do so. If you have breathing problems but cannot get out of the vehicle after an airbag inflates, then get fresh air by opening a window or a door. If you experience breathing problems following an airbag deployment, you should seek medical attention.
In many crashes severe enough to inflate an airbag, windshields are broken by vehicle deformation. Additional windshield breakage may also occur from the right front passenger airbag.
- Airbags are designed to inflate only once. After an airbag inflates, you will need some new parts for your airbag system. If you do not get them, the airbag system will not be there to help protect you in another crash. A new system will include airbag modules and possibly other parts. The service manual for your vehicle covers the need to replace other parts.
- Your vehicle is equipped with a crash sensing and diagnostic module which records Information after a crash. See Vehicle Data Collection and Event Data Recorders on page 255.
- Let only qualified technicians work on your airbag system. Improper service can mean that your airbag system will not work properly. See your dealer for service.
- Airbags are designed to inflate only once. After an airbag inflates, you will need some new parts for your airbag system. If you do not get them, the airbag system will not be there to help protect you in another crash. A new system will include airbag modules and possibly other parts. The service manual for your vehicle covers the need to replace other parts.
- Your vehicle is equipped with a crash sensing and diagnostic module which records Information after a crash. See Vehicle Data Collection and Event Data Recorders on page 255.
- Let only qualified technicians work on your airbag system. Improper service can mean that your airbag system will not work properly. See your dealer for service.

natural_image
Pure geometric diagram with crosshair and circular shapes, no text or symbols present

95 US MY09.book Page 39 Tuesday, April 15, 2008 11.03 AM
39Safety

WARNING
If you damage the covering for the driver's or the right front passenger's airbag, or the side impact airbag covering on the ceiling near the side windows, the bag may not work properly. You may have to replace the airbag module in the steering wheel, both the airbag module and the instrument panel for the right front passenger's airbag, or side impact airbag module and ceiling covering for the roof-mounted side impact airbag. Do not open or break the airbag coverings.
AIRBAG servicing
The airbag must be inspected as part of the normal service program but otherwise may be regarded as maintenance-free.
Scrapping or working on airbags and belt pretensioners

WARNING
- Under no circumstances should any modifications be made that affect the steering wheel or the airbag's electrical circuitry.
- Before starting any welding work on the car, always disconnect the negative (−) battery lead and cover the conductor.
-
Airbags and belt pretensioners must be deployed under controlled conditions before the car is scrapped or any of the system's components are removed. Airbags or belt pretensioners that have been deployed as a result of a crash must be replaced by new ones.
• Airbag-system components must never be transferred for use in another vehicle. -
All work involving the scrapping or replacement of airbags or belt pretensioners must only be carried out by knowledgeable personnel.
• The headlining and roof pillar trim must not be modified in any way. Work on these areas must only be carried out at a Saab dealer.


95 US MY09.book Page 40 Tuesday, April 15, 2008 11.03 AM
40 Safety
Frequently asked questions on function of airbags
Do you still need to wear a safety belt if airbags are fitted?
Yes, always! The airbag merely supplements the car's normal safety system. Moreover, the airbag will only be actuated in a moderate to severe frontal, or near-frontal crash, which means, of course, that it provides no protection in minor frontal crashes, major rear-end or side-on crashes or if the car rolls over.
The safety belts help reduce the chance of the car occupants from being thrown around and injured or killed inside the car.
But they also ensure that, if a crash occurs in which the airbags are inflated, the airbag will make the optimum contact with the occupant, i.e. square on from the front. If the occupant meets the airbag in an offset position, the protection afforded will be reduced. In addition, airbags provide no protection against a secondary impact occurring in the same incident. So there is no doubt about the benefit of wearing safety belts at all times.
Do not sit too close to the airbag: it needs room to inflate.
The airbag inflates very quickly and powerfully in order to protect an adult person, before they are thrown forward, in a serious frontal crash.
How do I position the seat to leave room for the airbag to inflate?
Don't have your seat too far forward.
Recline the seat back to increase the distance between you and the airbag. For short drivers, special accessory pedal extensions are available through your Saab dealer.
Airbags Inflate extremely rapidly and with great force – to be fast enough to protect an adult in the seat.
When do the front airbags inflate?
The airbag will only be inflated under certain predetermined conditions in a moderate to severe frontal, or near-frontal crash, depending on such factors as the force and angle of the impact, the speed of the car on impact, and the resistance to deformation of the impacting object.
The airbag can only be activated once in the same incident.
Do not attempt to drive the car after an airbag has been inflated, even if it is possible.
What won't trigger the front airbags?
The airbag will not be activated in all front-end crashes. For instance, if the car has hit something relatively soft and yielding (e.g. a snow drift or a hedge) or a solid
object at a low impact speed, the airbag will not necessarily be triggered.
How loud is the inflation?
The noise of the inflation is certainly loud, but it is very short-lived and will not damage your hearing. For a short time afterwards you could experience a buzzing noise in your ears.
Most people who have experienced it cannot remember the noise of the inflation at all – all they remember is the noise of the crash.
Can you still use a child seat in the front if a passenger airbag is installed?
Definitely not!
• Children can be killed or seriously injured by the airbag
• The BACK SEAT is the SAFEST place for children 12 and under or shorter than 55 inches (140 cm)
• ALWAYS use SAFETY BELTS and CHILD RESTRAINTS
- NEVER put a rear-facing child seat in the front
- Sit as far back as possible from the airbag
Do not sit too close to the airbag: it needs room to inflate.
The airbag inflates very quickly and powerfully in order to protect an adult person, before they are thrown forward, in a serious frontal crash.


95 US MY09.book Page 41 Tuesday, April 15, 2008 11.03 AM
41Safety
Are the smoke and fumes given off when the airbag operates at all harmful?
Most people who have remained in a car with little or no ventilation for several minutes complained only of minor irritation of the throat and eyes. Avoid as far as possible getting dust on your skin as there is a risk of skin irritation.
If you suffer from asthma, the incident may bring on an attack, in which case you should follow the normal procedure advised by your doctor. It is advisable to consult a doctor afterwards.
What should I do if the AIRBAG warning light comes on?
If the warning light is on, it means that a fault has been detected in the system. The airbag cannot be relied on to operate as intended and it might even be activated erroneously. You should therefore take the car to an authorized Saab dealer as soon as possible.
Adding Equipment to Your Airbag-Equipped Vehicle
Is there anything I might add to the front or sides of the vehicle that could keep the airbags from working properly?
Yes. If you add things that change your vehicle's frame, bumper system, front end or side sheet metal or height, they may keep the airbag system from working properly. Also, the airbag system may not work properly if you relocate any of the airbag sensors. If you have any questions about this, you should contact Saab Customer Assistance before you modify your vehicle. The phone numbers and addresses for Customer Assistance can be found on page 253.
Because I have a disability, I have to get my vehicle modified. How can I find out whether this will affect my advanced airbag system?
Changing or moving any parts of the front seats, safety belts, the airbag sensing and diagnostic module or the inside rearview mirror can affect the operation of the advanced airbag system. If you have questions, call Customer Assistance. The phone numbers and addresses for Customer Assistance can be found on page 253.


What should I do if the AIRBAG warning light comes on?





95 US MY09.book Page 44 Tuesday, April 15, 2008 11.03 AM
44 Security
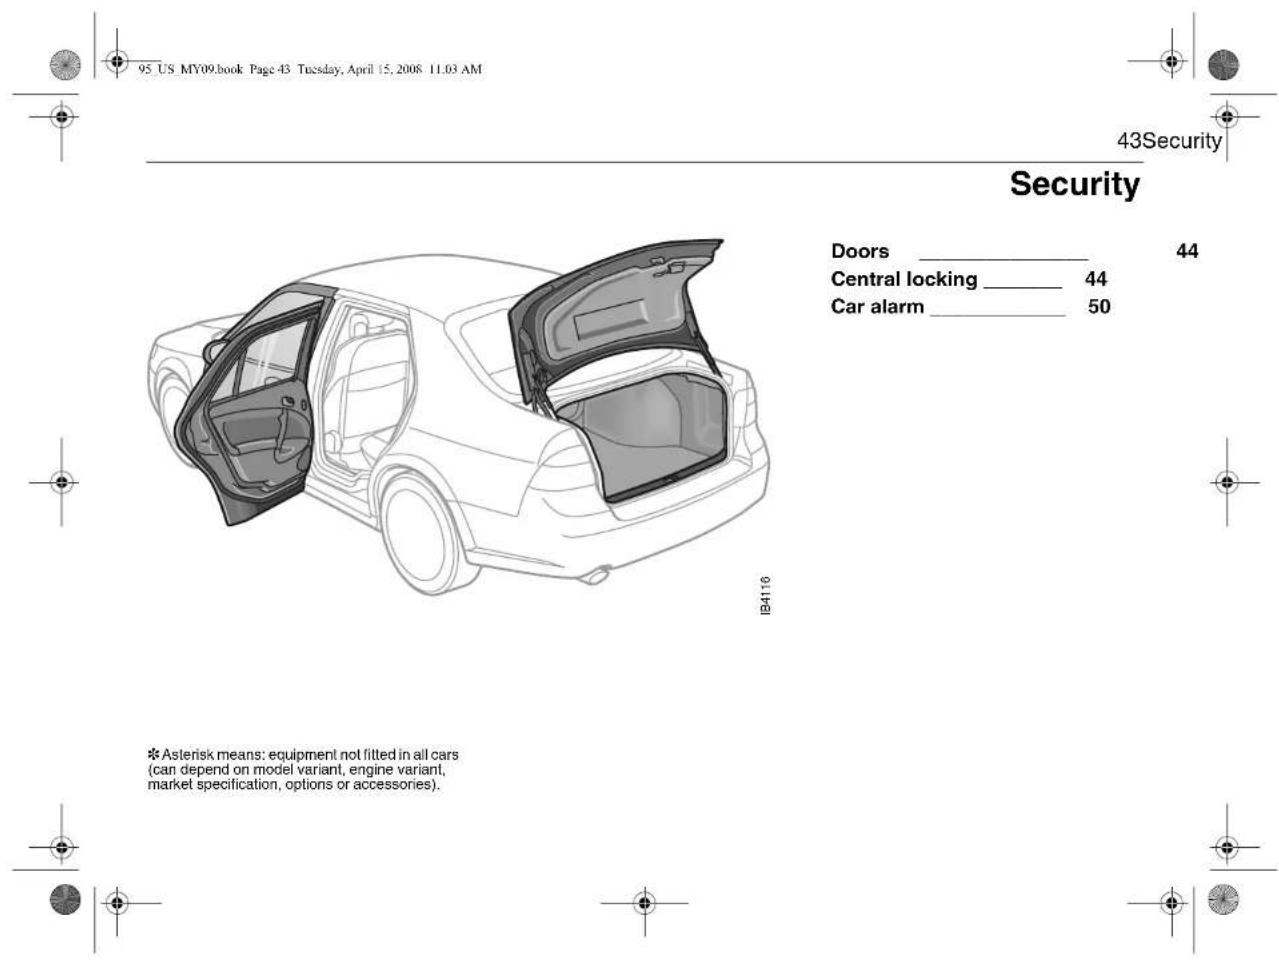
Doors
Door handles
Pull the handle to open the door.
If the door is stuck (e.g. If frozen), hold the handle from above to secure a better grip.
Central locking
WARNING
Leaving children or pets unattended in a locked car is dangerous. It is also dangerous to leave children in a vehicle with the ignition key. A child or others could be badly injured or even killed.
Key / Remote control
The key unit consists of a mechanical key with integrated remote control.
The mechanical key is used for manual locking and unlocking.
The remote control is used for remote locking and unlocking.
The key fits all the car's locks.
The key supplied with the car has a code number on a black plastic tag that needs to be quoted for ordering additional keys. You should therefore make a careful note of the number.
The key contains a unique electronic code for your car. When the key is inserted in the ignition, the code is checked. If it matches, the car can be started.
Your car is supplied with two keys. It is possible to have up to four keys for a car at one time. If you loose one key you should have this replaced as soon as possible by contacting your Saab dealer. When the new key is programmed into the system, the missing key is automatically erased.
NOTE: For this reason, we strongly advise you to take two keys with you on long journeys and to keep them separate. If all keys are lost, it will be necessary to replace costly electronic components as well as the keys. This loss and replacement cost is not covered by the new car warranty.
If an additional key is to be added, all of the original keys must be brought to the dealer so that the control module can "learn" to recognize the new components.
NOTICE
The key contains delicate electronics.
- Do not expose it to water.
- Avoid rough handling.
- Do not place the key where it may be subjected to high temperatures, e.g. on the instrument panel.
• The key may malfunction if it becomes very cold. Warm it in your hands for a couple of minutes. - Never open the key. For changing the battery, see page 49.
To check the number of keys that are programmed for the car; see page 54.




95 US MY09.book Page 45 Tuesday, April 15, 2008 11.03 AM
45Security

Key / Remote control
1 To loc
2 To unlock
3 Opening the trunk (9-5 Sedan)
Unlocking the tailgate (9-5 SportCombi)
Locking/unlocking the car
When the car is locked and unlocked the theft alarm is also affected.
Remote locking
Press 📄 be on the control: all doors locked.
The hazard warning lights will flash once.
The trunk/tailgate release switch on the driver's door will not work when all doors are locked.
It is now not possible to unlock the doors
from within using the 🔒 on the center console.
Remote unlocking
Press 📋 on the control: the driver's door is unlocked. Press a second time to unlock the rest of the doors but not the trunk/tailgate.
The hazard warning lights will flash twice.

Switch for operation of central locking
The central locking can also be operated from inside the car by means of the switch on the center console.
This switch is inoperative when the car is locked from the outside using the remote control.
The interior locking buttons on each door affect only the respective door.
If the car is left with the doors open, the interior lighting and the courtesy lights in the doors will be switched off automatically after 20 minutes, to prevent a drain on the battery. In such cases the electrically operated seats will not function.




95 US MY09.book Page 46 Tuesday, April 15, 2008 11.03 AM
46 Security

WARNING
The remote control also works from inside the car. Therefore, hold the key in such a way that the buttons are not unintentionally pressed when the key is turned, or inserted or removed from the ignition switch.
Otherwise, the doors may be unintentionally locked or the tailgate unlocked. On Sedan models, the trunk may even be opened.
Having the doors locked when you are driving will reduce the likelihood of:
• Passengers, especially children, opening doors and falling out of the car.
- Intruders entering the car when it is moving slowly or at a standstill.
However, you must also remember that locked doors can hamper rescuers in the event of a crash.
If remote unlocking should fall to work
Unlock the front door with the key. To silence the alarm, insert the key into the ignition switch and turn it to the ON position.
The car can now be started. Contact a workshop to have the system checked and repaired. We recommend that you contact an authorized Saab dealer.
Locking by key (1)
When the car is locked and unlocked the theft alarm is also affected.
Turn the key clockwise: all doors locked.
The trunk/tallgate release/unlock switch on the driver's door will not work when all doors are locked. Nor will the switch on the center console.
Unlocking by key (2)
Turn the key counterclockwise once: the driver's door will unlock.
Turn the key counterclockwise twice: all doors, but not tailgate, unlocked. Switch in driver's door and switch in center console enabled.
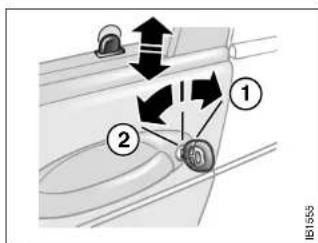
Locking/unlocking by key
1 To lock 2 To unlock


95 US MY09.book Page 47 Tuesday, April 15, 2008 11.03 AM

Child safety locks
The rear doors are equipped with child safety locks that are operated by means of a catch adjacent to the door lock.
Insert a key and turn the catch 45° clockwise or counterclockwise as indicated by the label on the door.
When the child safety catch is in the locked position, the door cannot be opened from the inside.

WARNING
If small children ride in the rear seats, the safety locks on rear doors should be activated to prevent unintentional opening from the inside.
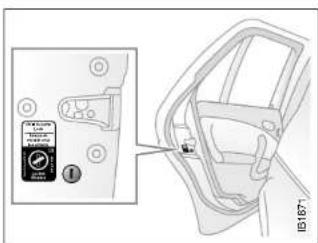
Child safety lock on rear doors Trunk lid switch
natural_image
Diagram of a car interior showing a highlighted car component (no text or symbols present)Trunk lid lock, 9-5 Sedan
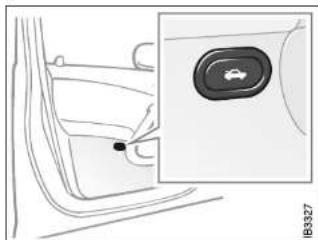
The trunk lid lock is independent of the central-locking system. The trunk lid release switch on the driver's door is inoperative when the car is locked from the outside or moving at a speed greater than 2.7 mph (4 km/h).


95 US MY09.book Page 48 Tuesday, April 15, 2008 11.03 AM
48 Security
Unlocking
The trunk lid is slightly opened/unlocked using:
• The question on the key
- The trunk lid switch on the inside of the driver's door (if the car is unlocked and at a standstill)
Remote unlocking is confirmed by the direction indicators flashing three times.
The trunk lid switch on the driver's door is inoperative when the car is locked.
Locking
The trunk lid release is locked automatically when closed.

Trunk Release Handle
Trunk Release Handle
There is a glow-in-the-dark trunk release handle located inside the trunk on the latch. This handle will glow following exposure to light. Pull the release handle down to open the trunk from the inside.
NOTICE
The trunk release handle was not designed to be used to tie down the trunk lid or as a anchor point when securing items in the trunk. Improper use of the trunk release could damage it.
Tailgate, 9-5 SportCombi
The tailgate is not unlocked when the other car doors are unlocked. The tailgate button on the driver's door is inoperative when the car is locked from outside or moving at a speed greater than 2.7 mph (4 km/h).
Unlocking
The tailgate is unlocked using:
• The ▼on on the key
- The tailgate switch on the inside of the driver's door (if the car is unlocked and at a standstill)
Unlocking is confirmed by the direction indicators flashing three times.


95 US MY09.book Page 49 Tuesday, April 15, 2008 11.03 AM

natural_image
Top-down line drawing of a car's rear window with a black arrow pointing to the door panel (no text or symbols)Grab handle

NOTICE
Use the grab handle to assist in closing the tailgate.
Avoid the following, due to the risk of lock mechanism damage when the tailgate is closed.
- Never grasp the lock mechanism as this can lock the mechanism.
- Never close the lock mechanism manually.
Locking
The tailgate is locked using:
• The 🔒 on on the key
• The ☐ on on the center console
• The key in the driver's door.
- When vehicle speed exceeds 2.7 mph (4 km/h).
Electronic starting interlock (immobilizer)
Each time the key is removed from the ignition, the electronic starting interlock is activated and the car is thus immobilized, see also page 51.
Reprogramming lock system functions
Certain lock system functions can be reprogrammed by your authorized Saab dealer; see page 265.
Changing the key battery
When the battery voltage in the key falls below a predetermined level the Saab Information Display (SID) will issue the following message:
"Remote control battery low. Replace battery."
Press the CLR button on the SID to acknowledge this message. You must then replace the battery without delay to avoid malfunctions. The life of the battery is normally 4 years. Contact a Saab dealer to have the battery replaced.










95 US MY09.book Page 50 Tuesday, April 15, 2008 11:03 AM
50 Security
Car alarm

WARNING
Leaving children or pets unattended in a locked car is dangerous. It is also dangerous to leave children in a vehicle with the ignition key. A child or others could be badly injured or even killed.
The car alarm (anti-theft system) is activated/deactivated when the car is locked/unlocked by the remote control or by the key, see page 45.
The antenna for the alarm system is located in the center console.
All the doors plus trunk lid/tailgate and hood are monitored by microswitches.

Remote control
1 Activate/lock
2 Deactivate/unlock
3 Unlock trunk/tailgate
Unlocking the tailgate (9-5 SportCombi)
Your Saab 9-5 is equipped with an Electronic starting interlock (immobilizer), see page 51 for details.
The car alarm is armed 10 seconds after the car has been locked by the remote control. During this ten-second delay period, the doors, trunk lid/tailgate and hood may still be opened without the alarm being triggered.
The LED indicator on the instrument panel fascia will be on continuously during this period, at the end of which it will start to flash (once every other second).
If a door or the trunk lid/tailgate or hood has been left open when the car is locked, the LED on the fascia will flash (three times per second) for ten seconds to indicate this.





95 US MY09.book Page 51 Tuesday, April 15, 2008 11.03 AM

Check to ensure that all the doors, plus trunk lid/tailgate and hood, are closed properly.
If the fault persists (LED flashing when another attempt is made to activate the car alarm by remote control), lock the car using the key instead. The car alarm will not have been activated and you should contact an authorized Saab dealer.
To avoid inconvenience caused by the alarm being triggered inadvertently, make sure that anyone else using the car is familiar with how both the car alarm and the locking system work.
If the alarm is tripped (the direction indicators are flashing and the horn is on) it can be turned off by unlocking the car using the
button.
Activating the car alarm
The car alarm cannot be activated if the driver's door is open or if the ignition switch is in ON position.
If one of the other doors or the trunk or hood is open or opened and not closed again during the 10-second delay period, it will be excluded from the alarm function.
If it is then closed, a new delay period of ten seconds will start, and the door (or trunk or hood) will once again be secured by the alarm system.
As usual, the LED will be on continuously during the new delay period and will start to flash once every other second after the 10-second period has elapsed.
Electronic starting interlock (immobilizer)
When the key is inserted in the ignition, a signal is sent to the receiver. If the signal is verified, the engine can be started.
Each time the key is removed from the ignition, the electronic immobilizer is activated. This means that the car cannot be started without the correct key inserted in the ignition and the immobilizer thus deactivated.
If a fault is detected (e.g. in the transmitter) "Key not accepted. Contact service."
will appear on the Saab Information Display (SID).
In this case, you can still start the car if you turn the ignition key to ON and press one of the buttons on the key (providing that the receiver gets the right signal from the key).
Take the car to an authorized Saab dealer to have the system checked.
The LED double-flashes when the car is immobilized.


95 US MY09.book Page 52 Tuesday, April 15, 2008 11.03 AM
52 Security
Alarm signals
When the car alarm is armed, it will be triggered if any door, or the trunk lid or hood, is opened.
The alarm will also be triggered if an attempt is made to bypass or short-circuit the ignition switch, or to disconnect the battery.
If the alarm is triggered, the following alarm signals will be set off:
- Flashing of hazard warning lights for five minutes.
• Horn wailing for 30 seconds.
The alarm signals will stop if the alarm is deactivated (car unlocked) during the alarm period.
Panic-function
In the car alarm system there is a feature called "Panic-function".
To activate panic function:
- Push and hold one of the buttons on the key for 2 seconds. Or, if you are sitting inside the car, push the LOCK-switch on the center console for 2 seconds.
These actions will trigger the alarm (hazard warning lights and hom).
To deactivate panic function:
- Push one of the buttons on the key, push the LOCK-switch in the center console, turn the key in the driver's door or turn the ignition to ON.
When the panic-function is activated the car will be locked/unlocked depending upon which button was pushed.
When the ignition is ON the panic-function cannot be activated.


95 US MY09.book Page 53 Tuesday, April 15, 2008 11.03 AM
Overview of functions
| Locking/activation | Hazard warning lights flash once.The LED will come on for 10 seconds. |
| Unlocking/deactivation | Hazard warning lights flash twice.The LED will come on for two seconds. |
| Unlocking/deactivation of trunk lid/tailgate alarm | Hazard warning lights flash three times.The LED will flash three times per second for 10 seconds. |
| Alarm triggered | Hazard warning lights flash for 5 min.Horn wails for 30 seconds.To switch off the alarm, deactivate the system in the normal way (unlocking). |
| Key The range of the key is normally 5–10 yds. (5–10 metres), although it can be substantially more than this in ideal conditions (range can vary greatly depending on the position of the car and its surroundings).If the key is not working, it may be because the code signal has not been synchronized with that in the control module for the car alarm. To rectify this, press the unlock button on the key at least four times In quick succession. When it is recognized, the door locks will cycle.If a key is lost, the new one will have to be programmed (all keys must be present) to match the car's unique security code. We recommend that you contact an authorized Saab dealer. | |
| Battery for key The battery for the key will normally have a life of 4 years. When the battery needs changing, "Remote control battery low. Replace battery."will appear on the Saab Information Display (SID).We recommend that you contact an authorized Saab dealer. | |
| Car-battery voltage | If the battery is disconnected while the alarm is active (car is locked), for example during an attempt to steal the car, the alarm will be triggered. |
Alarm signals may differ between model variants for different countries.
Some of the car-alarm functions can be reprogrammed – consult your Saab dealer for further details (see page 265).
53Security


95 US MY09.book Page 54 Tuesday, April 15, 2008 11.03 AM
54 Security
Overview of LED signals and SID messages
| Status LED signal | |
| Activation (during 10-second delay). | Comes on for 10 seconds. |
| Alarm activated (after delay). Flashes | once every other second. |
| Deactivation. Comes on for 2 seconds. | |
| Alarm not activated. Off. | |
| Door, trunk lid/tailgate or hood open or opened during delay period. | Flashes three times per sec-ond for 10 seconds. |
| Unlocking the trunk lid/tailgate. Flashes | three times per sec-ond for 10 seconds. |
| Closing of door, trunk lid/tailgate or hood after delay period. | Comes on for 10 seconds. |
| Car immobilized but not locked.Car alarm not activated. | Flashes twice at three sec-onds intervals. |
| Fault in a switch serving doors, hood or trunk lid. | Flashing (instead of being on continuously) during delay period. |
Some signals may differ between model variants for different countries.
| SID message Reason/action | |
| Theft protection failure. Contact service. | Probably a fault in one of the sensors or the horn.Have the car checked by a workshop.We recommend that you contact an authorized Saab dealer. |
| Key not accepted. Contact service. | Fault in key transmitter or in ignition-switch receiver.Turn ignition switch to ON and press the unlock button on the key. Start the engine.Have the car checked by a workshop.We recommend that you contact an authorized Saab dealer. |
| Remote control battery low. Replace battery. | Fit a new battery in the key. We recommend that you contact an authorized Saab dealer. |
| • REMOTE KEY • TRANSPONDR | Turn the ignition key to position ON and then press the button for opening the trunk lid. Saab Information Display (SID) displays the number of keys and transmitters (transponders) coded to the car. |

natural_image
Pure geometric diagram with crosshair and circular shapes, no text or symbols present
95 US MY09.book Page 55 Tuesday, April 15, 2008 11.03 AM
55Security
This device complies with Part 15 of the FCC Rules. Operation is subject to the following two conditions: (1) this device may not cause harmful interference, and (2) must accept any interference received, including interference that may cause undesired operation.
Changes or modifications not expressly approved by the manufacturer could void the user's authority to operate the equipment.
Canada only:

This device complies with RSS-210 of Industry Canada. Operation is subject to the following two conditions: (1) this device may not cause interference, and (2) this device must accept any interference, including interference that may cause undesired operation of the device.





Instruments and controls

| Indicator and warning lights | 58 |
| Instruments | 64 |
| Saab Information Display (SID) | 68 |
| Switches | 73 |
| Automatic climate control (ACC) | 79 |
* Asterisk means: equipment not fitted in all cars (can depend on model variant, engine variant, market specification, options or accessories).


95 US MY09.book Page 58 Tuesday, April 15, 2008 11.03 AM
58 Instruments and controls

U.S. shown, Canada similar
Main instrument panel
1 Tachometer
2 Indicator and warning lights
3 Speedometer
4 Indicator and warning lights
5 Pressure gauge *
6 Fuel gauge
7 Engine temperature gauge
8 Odometer and trip meter
9 Trip meter reset button
Indicator and warning lights
A number of indicator and warning lights will come on when the ignition is switched on prior to starting. Under normal conditions, these should go out a few seconds after the engine has started (see page 64).

Service Engine Light also known as CHECK ENGINE

WARNING
An illuminated "Service Engine Light also known as CHECK ENGINE" indicator light indicates an engine-related problem. While your car may be able to be driven with the "Service Engine Light also known as CHECK ENGINE" indicator light illuminated (Limp-home mode), you are advised to have your car serviced at an authorized Saab dealer as soon as possible.
Continued driving without this problem being corrected might cause serious further damage to your car and create unsafe driving conditions. The driver should be prepared to take action if such unsafe conditions arise (e.g.brake smoothly, engage neutral, stop in a suitable place, switch off the engine, etc.).


95 US MY09.book Page 59 Tuesday, April 15, 2008 11.03 AM

59Instruments and controls
This light indicates a malfunction in the fuel-injection or ignition system.
Did you recently put fuel into your vehicle?
If so, reinstall the fuel cap, making sure to fully install the cap. See Fuel cap on page 147. The diagnostic system can determine if the fuel cap has been left off or improperly installed. A loose or missing fuel cap will allow fuel to evaporate into the atmosphere. A few driving trips with the cap properly installed should turn the light off.
The car may still be driven with care and with somewhat diminished performance (see page 144).
NOTICE
The car should be checked immediately at a workshop to prevent more serious faults from arising. We recommend that you contact an authorized Saab dealer.
NOTICE
Under no circumstances must the car be driven when this warning light is on. Low oil pressure can result in serious engine damage.

Warning, charging
This light will come on if the battery is discharging. If it comes on while you are driving, stop the car as soon as possible and switch off the engine.
Check the alternator drive belt (see page 199). If the belt has broken:
• the engine may overheat (cooling system will not function properly)
• the battery will not be charged
• the A/C compressor will not run and
• power assistance for the steering will be lost.

Brake warning light
This light will come on if there is insufficient brake fluid in the reservoir (see pages 194).
If the ABS warning light is on at the same time, the ABS system may be inoperative because of a fault (see "Anti-lock brake warning", page 60).

WARNING
- Never drive the car when this warning lights is on. Danger of brake failure!
- If the level of brake fluid in the reservoir is below the MIN mark, the car should be towed to a workshop. We recommend that you contact an authorized Saab workshop.
- Have the brake system checked at once by a workshop. We recommend that you contact an authorized Saab dealer.


Warning, oil pressure (engine oil)
This light will come on if the engine oil pressure is dangerously low. If the light flashes or comes on while you are driving, stop the car, switch off the engine and check the engine oil level (see page 192).


95 US MY09.book Page 60 Tuesday, April 15, 2008 11.03 AM
60 Instruments and controls

Parking brake warning light
This light will show when the parking brake is on (see page 165).
The parking brake is mechanical and operates on the rear wheels.

WARNING
• Always apply the parking brake when parking, see page 165.
• Always apply the parking brake before removing the ignition key.
- Do not apply the parking brake while the car is moving.

Anti-lock brake warning
This light will come on if a fault has occurred in the ABS system.
On certain variants 📄 and 🐃 can indicate up to indicate a fault in the electronic brake force distribution system (distribution of the brake pressure between the front and rear wheels).
Conventional braking without the ABS function will still be available.
For safety reasons, stop the car and check the level of the brake fluid (see page 194).
If the level is normal, depress the brake pedal firmly two or three times. Now check the level again. If the level is still normal, you may drive the car, with considerable caution, to the nearest authorized Saab dealer to have the brake system checked.

WARNING
- If the ABS is inoperative, there is a danger of the rear wheels locking up on hard braking.
- If the level of brake fluid in the reservoir is below the MIN mark, the car should be towed to an authorized Saab dealer.

Headlight and parking light indicator
This light indicates that the headlights or the parking lights are on.


95 US MY09.book Page 61 Tuesday, April 15, 2008 11.03 AM
61 Instruments and controls

Airbag warning light
This light will come on if a potentially serious fault has occurred in the airbag system.

WARNING
- If the airbag readiness light stays on after you start your vehicle, it means the airbag system may not be working properly.
• To help avoid injury to yourself or others, have your vehicle serviced right away if the airbag readiness light stays on after you start your vehicle.
The light will come on for about three seconds when the ignition switch is turned to the Start or Drive position. It should go out after the engine has started.

Indicator, fuel
This light comes on when there is less than about 2.5 gallons (10 liters) of fuel left in the tank.
NOTICE
If the car runs out of fuel, air can be drawn in with the fuel, which, in turn, can cause the catalytic converter to be damaged by overheating.

Xenon headlight fault indicator \*
This light indicates that there is a fault in the Xenon headlight system, which consists of xenon headlights and an automatic levelling system.
If a fault arises in the Xenon headlight system, the headlights will be angled down to avoid impairing the vision of drivers in oncoming traffic. Adjust your speed accordingly as visibility will be reduced.
NOTICE
If the Xenon headlight fault indicator lights up, have your car checked as soon as possible a workshop. We recommend that you contact an authorized Saab dealer.
If you do not rectify the problem, nighttime visibility will be poor since the range of the headlights is reduced.


95 US MY09.book Page 62 Tuesday, April 15, 2008 11:03 AM
62 Instruments and controls

Indicator, cruise control
This light shows when the cruise-control system is active (see page 159).

Indicator, high beam
This light shows when the headlights are on high beam (see page 73).

Indicator, rear fog light
This light shows when the rear fog light is on (see page 74).
The rear fog light is switched off automatically when the engine is switched off. When the fog light is next needed, it will have to be switched on manually again.
The rear fog light consists of one light so it should not be mistaken for brake lights.

Indicator, open door
If a door has not been closed properly, the pictogram will indicate the door concerned (or tailgate).

Indicator, SPORT-mode automatic transmission \*
This light will come on in cars with automatic transmission when the S (SPORT) button on the selector lever has been pressed (position N or D) see page 158.
In this mode, the gear changes occur later, at higher engine revs, giving the engine and transmission a sportier feel.
To cancel the SPORT mode, press the S button on the selector lever again. The mode is also deselected automatically when the selector lever is moved to P, R, M or L, or when the ignition is switched off.

Automatic transmission ^* , fault indicator
On a car with an automatic transmission, this warning symbol is illuminated if a fault has been detected in the transmission.
Switch the ignition off and on again to check if the fault persists.
Even if the fault persists, it is still possible in most cases to drive the car (see page 154).
Have the automatic transmission checked by an authorized Saab dealer as soon as possible.
NOTICE
If the control module has actuated the Limp-home function for the automatic transmission, the car will remain in 5th gear when D is selected, making it very sluggish. To overcome this, select position L to prevent unnecessary wear on the transmission. The transmission then starts in 2nd gear. When the car is moving you can select position D.
When the indicator light is on, the car must not be driven with a trailer attached



95 US MY09.book Page 63 Tuesday, April 15, 2008 11:03 AM

63Instruments and controls

ESP® system, indicator
The ESP® indicator light is located in the tachometer and will be illuminated when the ESP® regulation is occurring, i.e. when there is insufficient traction between the tires and the road surface to provide the grip required for the acceleration called for. The driver can also sense that the engine is not responding normally to the accelerator.
Operation of the ESP ^® indicates reduced traction between the tires and the road, and that extra care should be taken by the driver.
In normal driving, the ESP® system will help to improve both ride comfort and safety, but must not be regarded as a system to enable the driver to drive at or maintain a higher rate of speed. The same precautions for safe cornering and driving on slippery roads must still be applied (see page 163).

ESP® system, OFF-indicator
The indicator light goes on when the system is switched off with the ESP® button.
IMPORTANT: the system is automatically engaged every time the engine is started (see page 163).
The indicator light also goes on when there is a fault in the system. In this case the light cannot be turned off by means of the ESP® button. If a fault is indicated, have the system checked by an authorized Saab dealer.
See also Electronic Stability Program (ESP®) on page 163.

Warning, tire pressure
The lamp illuminates if the tire pressure in one or more tires is too low or if a fault has arisen in the system, see page 232.
Below is an example of the message simultaneously shown on the SID:

Low tire pressure front left. Make a safe stop.


95 US MY09.book Page 64 Tuesday, April 15, 2008 11.03 AM
64 Instruments and controls


184469
1 Cars with automatic transmission
Autochecking of lights, main instrument panel
The above warning and indicator lights should come on when the ignition is switched on prior to starting. They should go out after about 3 seconds.
The following lights light up until the engine is started, presuming that no fault exists:
- Oil pressure warning light

- Warning, charging


Instruments
Tachometer
The tachometer indicates the engine speed in thousands of revolutions per minute. The needle may be allowed to enter the broken red zone on the dial only for an instant.
A safety cut-out function (in the fuel system) prevents the engine speed from exceeding approximately 6,000 rpm.
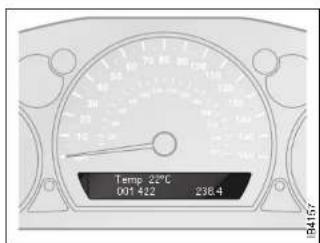
Odometer and trip meter
The odometer records the distance traveled in miles on U.S. vehicles and on Canadian vehicles the distance indicated is in kilometres, and the trip meter in miles and tenths (kilometres and tenths of kilometres on Canadian vehicles).
Reset button
The reset button has two functions, determined by whether the ignition is ON or OFF.
- When the ignition is ON, pressing the button will reset the trip meter.
- When the ignition is OFF, the display lights up enabling you to read the odometer and trip meter. Pressing the button a second time will reset the trip meter.


95 US MY09.book Page 65 Tuesday, April 15, 2008 11.03 AM

Speedometer
(U.S. speedometer shown)
The speedometer receives signals from the wheel sensors in the ABS system.
Cars sold in U.S.: The speedometer displays the speed of the car in miles per hour (mph).
Cars sold in Canada: The speedometer displays the speed of the car in kilometres per hour (km/h).
Fuel gauge
Fuel-tank capacity, 18.5 US gal. (70 liters). The fuel gauge shows the amount of fuel left in the tank. When this is down to about 2.5 gal. (10 liters), a warning light on the main Instrument panel will come on (see page 61).
Because of the fuel remaining in the tank, the amount of fuel required to fill the tank may be less than the specified tank capacity. Use the Saab Information display (SID) to check the approximate distance that can be traveled on the remaining fuel (see page 68).

65Instruments and controls







(1) AD = BD = 1
(1) AD = BD = 1
(No text)
(No text)
(No text)
95 US MY09.book Page 66 Tuesday, April 15, 2008 11.03 AM
66 Instruments and controls
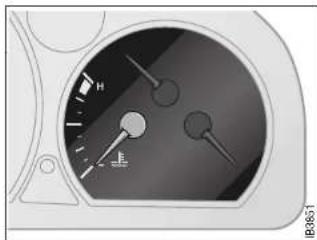
natural_image
Close-up of a car dashboard with visible speedometer and gauge (no text or symbols)Temperature gauge
The temperature gauge shows the temperature of the coolant. The needle should be in the middle of the scale when the engine is at normal operating temperature.
If the needle approaches the red zone, which can occur in very hot weather or when the engine is under a heavy load, drive in the highest gear possible, keep the engine revs low and avoid shifting down.
NOTICE
If the needle, despite the above action, enters the red zone, stop the car immediately, let the engine idle.
If the needle stays in the red zone, stop the engine.
Check fuse 1 (radiator fan) in the fuse panel under the hood, see page 218.
If the needle repeatedly enters the red zone, stop the car as soon as it is safe to do so and check the coolant level by looking at the level visible through the plastic tank – do not remove the cap.
If the coolant level falls below the MIN mark, the Saab Information Display (SID) will display the message
"Coolant level low. Refill."
WARNING
Never open the cap of the expansion tank completely when the engine is hot, open with care. The pressure in the cooling-system can cause hot coolant and steam to be released. Failure to heed this warning may result in personal injury.


95 US MY09.book Page 67 Tuesday, April 15, 2008 11.03 AM

67Instruments and controls

When the speed of the car exceeds 130 mph (210 km/h) acceleration is limited by a reduction in boost pressure. The turbo gauge will move to the middle field, indicating a drop in engine output and consequently a reduction in vehicle speed.


Pressure gauge
The turbo gauge indicates the air volume for combustion, which is equivalent to the engine load.
Under certain barometric conditions, the needle may enter the first part of the red zone without necessarily indicating that a fault has arisen.
If the needle repeatedly enters the red zone and the engine at the same time loses power because the monitoring system is limiting boost pressure, you should contact a workshop immediately. We recommend that you contact an authorized Saab workshop.
Selector lever indication \*
The display below the speedometer indicates the position of the selector lever. If manual mode is selected, the current gear is displayed. When the sport function is selected, SPORT is displayed.


95 US MY09.book Page 68 Tuesday, April 15, 2008 11.03 AM
68 Instruments and controls
Saab Information Display (SID)

WARNING
It is strongly recommended that the SID settings be changed only when the car is stationary. The driver's attention can otherwise easily be distracted from the road.
The Saab Information Display (SID) shows CHECK messages and incorporates eight trip-computer functions.
Use the i/SET button to browse the functions.
SID provides the following function:
Temp. Outside temperature
D.T.E. Estimated range (distance to empty fuel tank)
Fuel ∅ Average fuel consumption since function last reset
Dist. Distance to destination/Trip meter
Speed ∅ Average speed since function last reset
Alarm Alarm function
Speed W. Speed warning
Outdoor temperature
(Frost warning)
Regardless of which function has been selected, except Night Panel Mode, SID will automatically display the outdoor temperature when it is between 26° and 38°F (-3° and +3°C). This also applies if the temperature has moved outside the range of 21° to 43°F (-6° to +6°C) but is again between 26° and 38°F (-3° and +3°C).
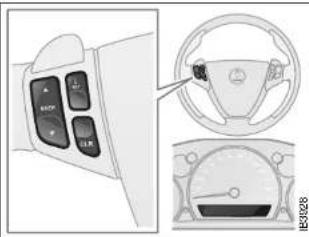
SID, buttons and display

WARNING
Remember that roads can be icy even at temperatures of above 38^ F ( +3^ C), especially on bridges and stretches of road that are sheltered from the sun.


95 US MY09.book Page 69 Tuesday, April 15, 2008 11.03 AM
69Instruments and controls
Entering values for the functions
Dist.
1 Select Dist. using the i/SET button.
2 Hold i/SET depressed until a chime sounds and the selected function is marked.
3 Set the distance using
4 End with a brief press on the I/SET button. The calculated arrival time will then appear next to the distance.
SID calculates arrival time using the set distance and average vehicle speed.
The values are updated during the trip. If you take a break, this time is added to the previously calculated arrival time.
After the distance to destination has decreased to zero, Dist. will function as a trip meter (see "Using Dist. as a trip meter"). The starting value for the trip meter will be the last distance set for the Dist. function.
Example: 100 miles is set for the Dist. function. Once the countdown has reached 0 mile, the Dist. function will act as a trip meter, beginning at 100 miles.
Alarm
1 Select Alarm with the i/SET button.
2 Hold i/SET depressed until a chime sounds. Briefly press the i/SET button if you do not wish to change the alarm time.
If you wish to change the alarm time,
press ▲ or . End with a brief press on the i/SET button.
ON appears to the right of the alarm time to indicate that the alarm will go off at the set time.
When the alarm sounds, it can be deactivated with CLR.
Activating speed warning
1 Select Speed W. with the i/SET button.
2 Hold i/SET depressed until a chime sounds. Briefly press the i/SET button if you do not wish to change speed.
If you wish to change speed, press or

End with a brief press on the I/SET button.
ON appears to the right of the speed if a warning will sound when vehicle speed exceeds the set speed.
Disengaging speed warning
1 Select Speed W. with the i/SETbutton. 2 Briefly press the CLR button.


95 US MY09.book Page 70 Tuesday, April 15, 2008 11.03 AM
70 Instruments and controls
Using Dist. as a trip meter
If no value is programmed in Dist., it functions as a trip meter. This is indicated by an arrow to the right in the display.
Reset the trip meter by briefly pressing the CLR button.
Calculating the arrival time if a specified average speed is maintained:
1 Select Dist.
2 Set the distance.
3 Select Speed 0.
4 Set the average speed you intend to drive at.
5 SID switches to Dist. automatically. The calculated arrival time is now displayed to the right.
The Speed 0 function will show actual values once you start driving.
Average fuel consumption, Fuel ∅
The average fuel consumption is calculated using the values for fuel consumed and distance driven since last reset. This value is stored in the car's trip computer even when the engine is switched off.
To reset the value, hold CLR depressed until a chime sounds. The text Cleared is displayed.
Resetting values
To reset the value, hold CLR depressed until a chime sounds. The text Cleared is displayed.
The following functions will be reset simultaneously:
• D.T.E. (the value is reset to the distance that can be reached with the amount of remaining fuel)
• Fuel0
• Speed ∅ (average speed)
Values programmed in Dist., Alarm and Speed W. are not reset. See respective function



95 US MY09.book Page 71 Tuesday, April 15, 2008 11.03 AM
CHECK messages
When the engine is started, CHECKING will appear on the display for about 4 seconds while the SID CHECK functions are being performed.
When a CHECK message is activated while driving, a chime sounds and the message appears in SID. The number of possible CHECK messages varies depending on the car's specifications.
If more than one CHECK message has been generated, the + symbol will appear to the left of the text on the display. The messages appear in order of priority.
If a new fault occurs whilst another message is being displayed, the message relating to the new one will appear for 10 seconds, after which the display will return to the earlier one.
Briefly press the CLR button to acknowledge a message from the display. After acknowledgement, the message is displayed each time the ignition is re-started until remedied.
The following messages may be displayed:
| Message | See |
| Use your seatbelts. 12 | |
| Front light failure. 202 | |
| Rear light failure. 206 | |
| Fog light failure. 203 | |
| Brake light failure.*) 206 | |
| Washer fluid level low. Refill. 201 | |
| Coolant level low. Refill. 193 | |
| Remote control battery low. Replace battery. 49 | |
| Key not accepted. Contact service. 54 | |
| Theft protection failure. Contact service. 54 | |
| Gearbox too hot. Make a safe stop. 154 | |
| Tire pressure low, front left. Check tires. 232 | |
| Tire pressure low, front right. Check tires. | 232 |
| Tire pressure low, rear left. Check tires. | 232 |
| Tire pressure low, rear right. Check tires. | 232 |
| Low tire pressure front left. Make a safe stop. | 232 |
| Low tire pressure front right. Make a safe stop. | 232 |
| Low tire pressure, rear left. Make a safe stop. | 232 |
| Low tire pressure, rear right. Make a safe stop. | 232 |
| Tire pressure system failure. Contact service. | 232 |
| Time for service.1) | 252 |
1) This message will be displayed approximately 600 miles (1,000 km) before the next scheduled service is due, or when 365 days have elapsed since the last service. The message should be cleared at the time of that service (see the Saab Warranties & Service Record Booklet).
This message can also be deleted by pressing the CLR button for at least eight seconds until a chime sounds. The message can only be deleted when it is shown on the SID.
*) 9-5 SportCombi: the high-mounted stop light is not included in the autocheck of lights.
71 Instruments and controls


72 Instruments and controls
NIGHT PANEL
To improve night-driving conditions inside the car, the Night Panel mode can be selected. In this mode, the amount of information displayed is reduced, and only the most important Instruments and displays will be illuminated.
When the NIGHT PANEL button is pressed, only the speedometer will be illuminated, all the other instruments illumination being extinguished and their needles moved to zero. The SID display will be extinguished and the backlighting for switches and other controls will be dimmed. Note: All indicator and warning lights, together with the display of CHECK messages, will operate as normal, except "Outdoor temperature", see page 68.
The following conditions will wake up the respective displays in the Night-Panel mode:
- Setting of the Audio system or, SID (display comes on for ten seconds).
- CHECK message generated in the SID.
• High engine revs cause the rev counter to be illuminated until the engine speed has fallen again. - If the quantity of fuel remaining falls below 4 gallons (15 liters), the fuel gauge will be illuminated.
- If the engine temperature rises above normal, the temperature gauge will be illuminated.
- In cars with automatic transmission, if the selector lever is moved from D to position M or L, the selector indication on the main instrument panel will be illuminated.
To restore the displays and lighting to the normal mode, press the NIGHT PANEL button.
Units and language versions
The SID has four sets of units:
| METRIC | US GB | IMPERIAL | |
| km | miles | miles | miles |
| km/h | mph | mph | mph |
| liters | US gal gallon | gallon | |
| °C | °F | °C | °F |
| 24-hour | 12-hour | 12-hour | 12-hour |
CHECK messages can be displayed in six language options: English, Swedish, German, French, Italian and Spanish.
Selecting units and language
1 Switch off the engine.
2 Briefly press i/SETbutton. Repeat this until LANGUAGE/UNITS is displayed.
3 Hold I/SET depressed until a chime sounds. Then select language using or 📋.
4 Briefly press the I/SET button. Then select the units using 📄.
5 Briefly press the I/SET button.

natural_image
Pure geometric diagram with crosshair and circular shapes, no text or symbols present95 US MY09.book Page 73 Tuesday, April 15, 2008 11.03 AM
73Instruments and controls
Switches

Daytime running lights
The parking lights and daytime running lights come on automatically when the ignition switch is ON.
Note to owners in the U.S.: If you do not want Daytime Running Lights, this feature can be disconnected: switch off the engine and remove fuse No. 35 (see page 216).
Note to owners in Canada: Daytime Running Lights must not be disconnected as they are a Canadian Federal legal requirement.

Light switches
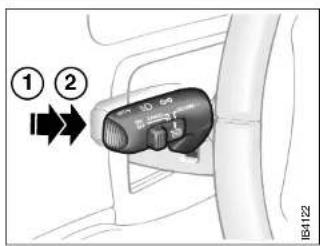
1 High beam signal
2 High/low beam switching

Parking lights
The parking lights can be switched on regardless of the position of the ignition switch. Do not use parking lights when driving.
If the parking lights are on and the driver's door is opened, a reminder to turn them off will sound.
Note: The lighting switch must be in parking light or headlight position (low beam position only) to operate the fog lights (see page 76).

Headlights
The headlights come on automatically when the ignition is ON and go off when the ignition switch is turned to the LOCK position. The parking lights, however, can be on when the ignition switch is in the LOCK position.
In cold and damp weather, the inside of the headlamp lens may temporarily mist up. This misting does not affect the function or service life of the light fitting. When the lamps are on, the mist will eventually disappear.
High/low beam
To switch between high and low beam, pull the control stalk fully towards you (position 2). When the high beam is on, the indicator on the main instrument panel will be illuminated.
High beam flasher
The headlights come on to high beam when the stalk is pulled to the first spring-loaded position (position 1) and remain on until the stalk is released.


95 US MY09.book Page 74 Tuesday, April 15, 2008 11.03 AM
74 Instruments and controls
Courtesy Headlight Feature
A delay function allows the headlights to remain on low beam for about 30 seconds after the driver's door has been closed.
To activate this function,
- Switch off the ignition and remove the key
- Open the driver's door
- Pull the high/low beam control stalk towards the steering wheel like you are flashing the high beam, see page 73. The low beam headlights will now come on immediately after the driver's door has been closed (within 30 seconds) and will remain on for about 30 seconds.
The length of time for this function can be adjusted by your authorized Saab dealer.

Rear fog light

WARNING
In poor visibility, avoid following the tail lights of the vehicle in front of you. If the vehicle stops suddenly, you may be unable to avoid a crash and therefore risk injury to yourself and others.

The length of time for this function can be adjusted by your authorized Saab dealer.
Rear fog light
Press the button to switch on the rear fog light, which will only come on if the headlights are on.
The rear fog light will go off automatically when the engine is switched off. When the fog light is next needed, it will have to be switched on manually again.
The rear fog light consists of one light so it is not be mistaken for brake lights.
Make sure you are familiar with the applicable provincial/state law regarding the use of rear fog lights.


95 US MY09.book Page 75 Tuesday, April 15, 2008 11.03 AM
75Instruments and controls

Instrument illumination
Turn signal and lane change indicators
To switch on the turn signals/lane change indicators, move the stalk up or down.
The stalk has fixed positions for indicating a right or left turn, and the indicators are cancelled automatically (stalk returns to off position).
The stalk also has an intermediate, spring-loaded position that is useful for signalling when changing lanes or passing.
The respective indicator lights on the instrument panel flash at the same frequency as the direction indicators.

Turn signal and lane change indicators
1 Right indicators
2 Left indicators
Instrument illumination
The brightness of the instrument illumination can be varied by means of the dimmer switch adjacent to the headlight switch. (See also Night panel on page 72).
In daylight or other equally bright light, the instrument and switch illumination is automatically extinguished.


95 US MY09.book Page 76 Tuesday, April 15, 2008 11.03 AM
76 Instruments and controls


Hazard warning lights
Front fog lights \*
The front fog lights can be activated in both low beam headlight and parking light positions. Fog lights should only be used in poor visibility conditions.
Make sure you are familiar with the applicable provincial/state law regarding the use of fog lights.
Hazard warning lights
When this button is pressed, all the turn signal indicators and a symbol in the button flash simultaneously. If the ignition is on, both indicator lights on the instrument panel will also flash.
If the hazard warning lights are left on for some time, the flasher frequency will be reduced to save the battery.
Hazard warning lights should only be used if the car constitutes a hazard to other road users.
WARNING
Switch on the hazard flashers if the car has to be left at the roadside on account of a crash, engine trouble or a puncture.
If you carry a warning triangle or flares, they should be set up along the side of the road 300 ft. (100 m) behind your vehicle. If the car is not clearly visible (e.g. over the brow of a hill or bridge), place the triangle/flare even further back.
Reversing lights
The reversing lights come on automatically when reverse gear is engaged or selected with the ignition switched on.

95 US MY09.book Page 77 Tuesday, April 15, 2008 11:03 AM
Wipers and washers
There are three intermittent wiper positions.
Moving the control stalk to the
spring-loaded position between 0 and 2 will produce a single sweep of the wipers.
The wipers are designed for optimal cleaning at all driving speeds. At higher speeds, it may be possible to detect a slight "sweeping" sound. This may be due to the increased air pressure on the blades at higher speeds.
Headlight washers \*
If low beam is on, the headlights are washed every fifth time the windshield washers are used or if 2 minutes have elapsed since the windshield was last washed. The headlight washers cannot be activated separately.
The headlight washers are of the high-pressure type, which means that other parts of the car may become wet if you activate the washers while the car is stationary.

0 OFF
1 Intermittent operation
2 Low speed
3 High speed
4 Washers
Rain sensing wipers \*
WARNING
Turn the rain sensor off if the ignition is ON when clearing snow and ice from the windshield, to avoid personal injury.
NOTICE
To avoid damaging the windshield wlpers, turn the rain sensor off before washing the car in an automatic carwash.

Control for setting wiper delay
1 Long delay
2 Short delay
The rain sensor automatically controls the windshield wipers. The sensor is located on the windshield beside the rearview mirror.
The system varies between single sweeps of the windshield and continuous wiping depending on how much water or snow there is on the windshield.
Activate the system by lifting the control stalk to position 1. The wipers make one sweep for reference to see how much water and snow is on the windshield. In future, the sensor compares the amount of water and snow on the windshield with this reference value.



77Instruments and controls
95 US MY09.book Page 78 Tuesday, April 15, 2008 11.03 AM
78 Instruments and controls
When the engine has been switched off, the control stalk must be moved to position 0 and back to position 1 to reactivate the sensor.
Set the sensitivity using the control on the wiper stalk (the same control as used for wiper delay on cars not fitted with a rain sensor). The sensor has three sensitivity settings. It is most sensitive when in the uppermost position (1). When a higher degree of sensitivity is selected, the wipers make one sweep of the windshield for reference.
The rain sensor has a daylight and a night time mode. The sensor measures the amount of available light and automatically selects the appropriate mode. The sensor is more sensitive at night. The function of the rain sensor is impaired by dry snow.
Rear-window wiper (SportCombi) \*
The rear-window wiper and washer are operated with the same stalk switch as used for washing and wiping the windshield and headlights.
This stalk has two additional switches, ON/OFF and 📋
The ON position provides intermittent wiping.
The position provides washing and wiping. After a few sweeps the wiper stops or reverts to intermittent wiping, if this has been chosen. About 15 seconds after completion of the washing/wiping of the rear window, the wiper makes a single sweep to wipe away any remaining washer fluid.
A spring-loaded position between the OFF and ON positions allows for a single sweep of the rear-window wiper.
Intermittent wiping of the rear window occurs when reverse gear is engaged if the windshield wipers are in position 1, 2 or 3, see page 77.

Rear-window wiper 1 Intermittent wiping 2 Washers

natural_image
Pure geometric diagram with crosshair and circular shapes, no text or symbols present95 US MY09.book Page 79 Tuesday, April 15, 2008 11.03 AM
Automatic climate control (ACC)
The ACC system automatically works to maintain the desired temperature inside the car.
The system will achieve the desired temperature in the quickest possible way. Note that selecting a higher or lower temperature than that desired will not speed up the process.
For the ACC system to be most effective, all windows (and moonroof *) should be closed.
Fresh air for the cabin is drawn in through an inlet grille adjacent to the bottom edge of the windshield. The air flows through a filter upstream of the ACC system before delivery to the cabin. Cabin air is evacuated via openings in the rear parcel shelf and then through outlets on either side of the car behind the rear bumper.

ACC panel
1 Temperature setting: LH side
2 AUTO: All settings selected automatically
3 Manual setting of fan speed
4 Manual setting of air distribution
5 Temperature setting: RH side
The incoming air is treated in three stages: first it passes through a filter; it is then dehumidified and cooled and, finally, if required, heated.
The filter is a combined particle and charcoal filter. It is so efficient that levels of noxious substances such as benzene and toluene are also reduced.
6 Recirculation: ON/OFF
7 Rear-window heating: ON/OFF
8 A/C compressor: ON/OFF
9 Ventilated front seats *
0 Heated front seats *
To reduce the likelihood of misting on the insides of the windows, the glass should be cleaned with a quality window cleaner. How often this will need to be done depends on how clean the air is – if there are smokers in the car, cleaning will need to be done more frequently.




natural_image
Pure geometric diagram with a circle, crosshairs, and dots (no text or symbols)
natural_image
Pure geometric diagram with a circle, crosshairs, and dots (no text or symbols)
natural_image
Pure geometric diagram with a circle, crosshairs, and dots (no text or symbols)
natural_image
Pure geometric diagram with a circle, crosshairs, and dots (no text or symbols)
natural_image
Pure geometric diagram with a circle, crosshairs, and dots (no text or symbols)[Non-Text]
[Non-Text]
[Non-Text]
[Non-Text]
[Non-Text]
[Non-Text]
[Non-Text]
[Non-Text]
[Non-Text]
95 US MY09.book Page 80 Tuesday, April 15, 2008 11.03 AM
80 Instruments and controls

1 Interior-temperature sensor 2 Sun sensor
The system has five sensors:
• Outdoor temperature sensor
- Interior temperature sensor
• Sun sensor (mounted on top of the fascia)
- Two blended-air temperature sensors (mounted inside the front floor vents)
Note: If anything is placed over the sun sensor, the ACC system will not function properly.

natural_image
Interior view of a car air conditioner unit showing airflow direction and component placement (no text or symbols)Panel vent
Panel vents
The panel vents swivel in all directions so that air can be directed as desired. In winter, for instance, the outer vents can be directed onto the door windows for enhanced demisting.
The flow of air through the panel vents can be controlled individually for each vent by means of the adjacent control. The climate control system works best if the panel vents are open. If you find the air cold or that it is drafty, start by directing the air away from the body. If the center vent is aimed up, it will cool the interior temperature sensor and you may need to adjust ACC up or down, depending upon temperature desired.


95 US MY09.book Page 81 Tuesday, April 15, 2008 11.03 AM

natural_image
Close-up of a wall-mounted device with a curved bracket and a black button (no visible text or symbols)
natural_image
Close-up of an air vent at a rear side window, showing no text or symbols on the device itself.Temperature control
The cabin is divided into two temperature zones:
• The driver's zone
• The passenger zone (front and rear seats)
The desired temperature can be set between 60 and 80°F.
The displayed temperature is not the absolute temperature but corresponds to the comfort level normally experienced at that temperature after allowance has been made for the air flow, relative humidity, solar radiation, etc., currently prevailing inside the car.
- The most usual temperature setting is 64–76°F, depending on personal preference and what clothing is worn.
- To allow the system time to adjust, changes in the temperature setting shall only be made in steps of 2^ .
Once the desired climate has been achieved, the rear center vents can be closed to prevent warm air being distributed at face height.
When the ignition is switched off, only the temperature control affects the system the next time the engine is started. The system will warm up/cool down to the temperature to which the control is set.
MAX heat, red Indication
The MAX heat setting is obtained by turning the temperature control to the first position past 80 (to the red LED). The driver's side selection regulates air distribution and recirculation status. Temperature, however, can be adjusted on the passenger side.
Settings when MAX heat is selected:
• Maximum heat
• Air distribution to windshield and floor
- Recirculation OFF (even if manually selected before)
- Fan: high speed
MAX cooling, blue indicator
The MAX cooling setting is obtained by turning the temperature control to the first position past 60 (to the blue LED). The driver's side selection regulates air distribution and recirculation status. Temperature, however, can be adjusted on the passenger side.
Settings when MAX cooling is selected:
- Maximum cooling (A/C compressor will run even if AC OFF manually selected before)
• Air distribution through panel vents
• Fan: maximum speed - Recirculation ON


81 Instruments and controls

95 US MY09.book Page 82 Tuesday, April 15, 2008 11.03 AM
82 Instruments and controls
Functions
Pressing AUTO will cancel all manual settings.
If a manual function is selected, it will be locked in but other functions will be controlled automatically.
The selected temperature is always maintained automatically.

Temperature, air distribution, fan speed and recirculation will be controlled automatically.
Pressing AUTO once will cancel all previous manual selections.
The ACC system is in AUTO mode when the engine is started.
AC OFF
A/C compressor OFF.
No cooling of inlet air. Temperature, air distribution and fan speed still under automatic control.

Turn the fan control anticlockwise until "OFF" lights up.
ACC system OFF.
Fan OFF
A/C compressor OFF.
Air distribution selections locked in current settings. Recirculation can be selected manually.
Heating * and ventilation * of the front seats is deactivated.
Pressing the AUTO button will put the system into automatic mode.
Reactivation by turning the fan control clockwise one click causes the system to resume any manual selections.

The rear window and door mirror heating is controlled manually.
Deactivate the heating as soon as the rear window is clear of ice and misting to avoid imposing a heavy load on the battery longer than necessary. Note, however, that heating will deactivate automatically after a set time, depending on the outside temperature.
The ACC system can be programmed to activate heating automatically when outside temperature is below +5 °C and the temperature inside the car is below +10 °C. See page 85.

Turn the fan control to increase fan speed. If fan speed 0 is selected, the A/C compressor will be disengaged and the indicator on the AC OFF button will illuminate.

Recirculation is controlled automatically to optimize cooling although it can also be switched on and off manually.
Recirculation does not appreciably change the air quality but it can be useful to switch it on to avoid unpleasant smells from entering the cabin.


95 US MY09.book Page 83 Tuesday, April 15, 2008 11.03 AM

83Instruments and controls
Air distribution


natural_image
Diagram of a car dashboard with directional arrows indicating traffic flow (no text or symbols)One press: When the defroster is chosen manually, all the windows (except the rear side windows, where the air flow is off) are demisted by:
- Fan: high speed.
• The air is directed to the defroster vents.
• Temperature increases somewhat. - Recirculation OFF.
- Activation of rear window/door mirror heating.
The defroster function remains active until another selection is made. Note, however, that rear window/door mirror heating will deactivate automatically after a set time, depending on the outside temperature.
Two presses: Air is directed to the windscreen without the fan speed being increase or the rear window heating being switched on.
To revert to a previous setting, press the AUTO button.

Defroster and floor vents
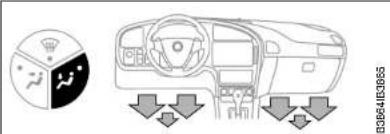
Floor vents and rear side windows
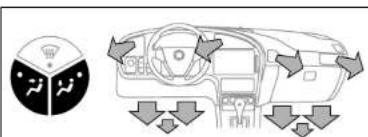
Floor and panel vents


95 US MY09.book Page 84 Tuesday, April 15, 2008 11.03 AM


84 Instruments and controls
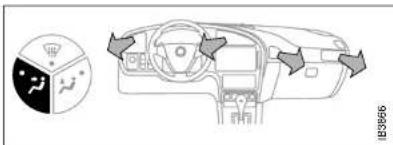
Panel (and center rear vent)
Starting in cold weather
To start with, the system will automatically select the defroster setting, maximum heat and low fan speed.
As the engine warms up, air will also be distributed through the floor vents and the fan speed will be increased.
As the temperature inside the car nears the selected value, both the fan speed and the heat will be decreased to a level determined by the system.
Starting in hot weather
The system will automatically distribute air through the panel vents at high fan speed and will switch on the A/C compressor (unless the AC OFF switch has been pressed).
If the outdoor temperature is above 77^ F ( 25^ C), the system might select recirculation after 0-15 seconds if this is required in order to reach the desired temperature.
As the temperature inside the car nears the selected value, the fan speed will be decreased to a value determined by the system.


95 US MY09.book Page 85 Tuesday, April 15, 2008 11.03 AM
Adaptation of ACC
It is also possible to customize the ACC system, e.g. to adapt to driving and weather conditions.
| Function | Operation In AUTO mode after adaptation | Factory setting |
| The rear window heating will come on after the engine has started if the outside temperature is below +5 °C.- This function helps to prevent ice or mist forming on the rear window in cold, damp weather. Fuel consumption may increase slightly. | Heating is selected manually. | |
| Seat heating comes on if the system determines that heating is necessary based on the temperature in the seat and the outside temperature. | There are two settings for heating. Repeatedly pressing the button switches between low output, high output and off. |
Adaptation and restoration of factory settings is done by holding the respective button depressed approx. 2 seconds until a chime sounds.
Make sure the ignition is ON.
| Function Display text in SID during adaptation | Display text in SID when factory settings are restored | |
| ACC:AUTO RDEFR CTRL | ACC:MANUAL RDEFR CTRL | |
| ACC:AUTO SEAT HEATING | ACC:MANUAL SEAT HEATING | |
Example: If you want the ACC system to handle activation and deactivation of rear window/door mirror heating, hold the button depressed approx. 2 seconds until a chime sounds. The display shows:
ACC:AUTO RDEFR CTRL
When "Adaptation of ACC" is done, it will apply until factory settings are restored.




95 US MY09.book Page 86 Tuesday, April 15, 2008 11.03 AM
86 Instruments and controls
Calibration
Calibration is carried out automatically after a certain number of starts if the ignition has been switched off for more than 2 hours.
If the battery has been disconnected or has run flat, the system will need to be recalibrated.
Calibration is started manually as follows:
1 Start the engine.
2 Press
time

When manual calibration starts,
"ACC:CALIBR.
STARTED
appears in SID.
Calibration takes approx. 30 seconds.
Useful tips
(before taking the car to a workshop. We recommend that you contact an authorized Saab workshop.)
- If the battery has been disconnected or has run flat, the system will need to be recalibrated. See "Calibration" above.
- If front seat heating and/or rear window heating do not function satisfactorily, see "Adaptation of ACC" on page 85.
Condensation water
When the A/C system is running, the intake air is dehumidified, and the resultant condensation is drained off through two outlets underneath the floor of the car, in the vicinity of the front doors.
It is therefore perfectly normal for water to be seen dripping from these outlets when the car is parked. The warmer the ambient air and the higher the humidity, the more condensation water will form.
Formation of ice and mist in extreme weather conditions
It is only in the most extreme conditions that icing and misting of window glass are likely to be a problem, e.g. in torrential rain or severe cold coupled with high relative humidity, or when passengers are perspiring heavily or wearing wet clothes.
The following measures are recommended if such problems should occur:
1 Select AUTO and 21 °C for both temperature zones.
2 Select Defroster.
If this is not enough...
3 Increase the fan speed. If this is not enough...
4 Select a higher temperature.
The following measures are recommended if the occupants feel that it is cold and draughty in the car:
1 Make sure that all the air vents are fully open, including the center rear vent. If this is not enough...
2 Direct the air flow away from the body. If this is not enough...
3 Raise the temperature setting a degree or two. If this is not enough...
4 Lower the fan speed.
Troubleshooting and care, see page 244.






95 US MY09.book Page 87 Tuesday, April 15, 2008 11.03 AM

87Instruments and controls

Heated front seats \*
The heating of the seat cushion and back-rest of both front seats is adjustable and thermostat-controlled.
The heating is adjustable in two stages.

Ventilated front seats \*
Ventilated front seats, that enhance seating comfort in hot weather, are available as an option on cars equipped with leather-upholstered and electrically adjustable seats.
Ventilated seats are equipped with two fans that extract the moist air from between the seat and the body.
The fans have two speeds.

natural_image
Line drawing of a washing machine with a hand tool inserted, showing no text or symbols on the device itself.Heated rear seat cushion \*
Electrically heated seat cushions for the two outer seats in the back are available as an option.
The ON/OFF control button for the cushion heating is located on the back of the center console.
How long the cushions are heated for depends on the outside temperature. The heating can also be turned off with the button.
The button has an integral indicator that is illuminated when the heating is on.




Saab 9-5 Audio System

Radio 93
CD player 99
CD changer *____ 100
MP3 player 102
Portable player *____ 104
General functions ____ 105
Sound system 107
Technical data 108
Antennas 109
Error codes 112
Security lock 112
* Asterisk means: equipment not fitted in all cars (can depend on model variant, engine variant, market specification, options or accessories).

95 US MY09.book Page 90 Tuesday, April 15, 2008 11.03 AM
90 Saab 9-5 Audio System
Saab 9-5 Audio System ✱
To get the best out of your Saab 9-5 Audio System, we recommend that you read through this entire section.
The Saab 9-5 Audio System consists of a head unit with radio, CD player/CD changer * for CD and MP3 discs and CD changer * in the luggage compartment.
The audio system is operated using the steering wheel controls * or the control panel buttons.

WARNING
Safety first!
Cut off power immediately and contact your Saab dealer if the system begins to emit smoke or smells strange.
All work on the audio system must be carried out by a workshop. We recommend that you contact an authorized Saab dealer.
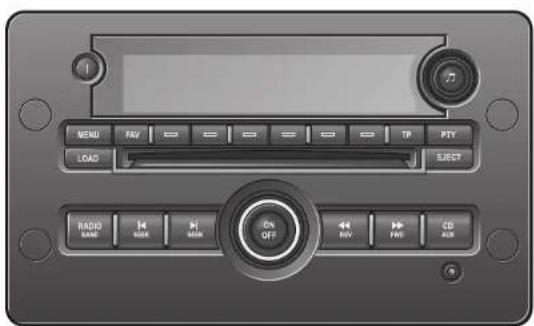
198782

Audio system activation/deactivation. Volume adjust.

The tone control is used to adjust tone and speaker settings, change CD track or MP3 file and manual adjust radio frequency.

Information on artist, album and song title. Display of radio text.

Setup menu.


95 US MY09.book Page 91 Tuesday, April 15, 2008 11.03 AM


91Saab 9-5 Audio System
| Scroll among preset pages. | Activate radio and change frequency band (AM,FM and XM^TM ★). | ||
| The menu option in the display is selected with the corresponding pushbutton directly underneath. | Auto tuning down and change track/file going back in order of play on CD or MP3 disc. | ||
| No function on U.S./CA cars. | Auto tuning up and change track/file forward in order of play on CD or MP3 disc. | ||
| Select XM^TM ★ program type when the radio is in the XM^TM ★ mode. | Manual tuning and rapid play back for a track/file on a CD or MP3 disc. | ||
| Cars with CD changer *. insert CD or MP3 disc or discs. | Manual tuning and rapid play forward for a track/file on a CD or MP3 disc. | ||
| Cars without CD-changer *. set time and date. | Activate CD media or portable player. | ||
| Eject CD or MP3 disc. |
Steering wheel controls *
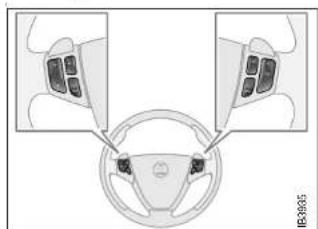
natural_image
Top-down view of a car steering wheel and dashboard with two side-view diagrams (no text or symbols)
"arrow up"/"arrow down": change preset for radio stations, change track on CD or MP3 player.

"Seek UP": auto tuning up, select next track on CD or MP3 disc. Activate radio station scan

SRC: press to switch between AM, FM, XM™ *, CD, MP3, CD changer or portable player.


95 US MY09.book Page 92 Tuesday, April 15, 2008 11.03 AM
92 Saab 9-5 Audio System
Switching the audio system On/Off
The audio system will come on:
- When the ignition is switched ON and/or the ON/OFF control is pressed.

ON/OFF control
The audio system will be switched off:
- When the ON/OFF control is pressed.
- When the ignition key is removed.
• One hour after the ignition was switched OFF, if the ignition key has not been removed. - 1 hour after the audio system has been switched on if the key is not in the ignition switch.
Audio settings
Volume
Turn the ON/OFF control until the desired volume is obtained.
Tone controls

Tone and speaker settings
Manual tone and speaker settings
1 Press the tone control to open the menu for tone and speaker settings.
2 Press the pushbutton under the desired tone/speaker setting.
3 Adjust the selected setting by turning the tone control. The selected settings can also be adjusted by pressing the SEEK, FWD or REV button.
Centering tone and speaker settings
Hold the tone control depressed until a chime sounds to center all tone and speaker settings.
Automatic tone setting
You can choose to automatically adapt tone setting, Auto EQ (Equalizer), to the tuned station or disc being played.
1 Press the tone control to open the menu for tone settings.
2 Press the pushbutton under the menu option Auto EQ label.
3 Press the pushbutton under the desired tone setting.
4 The tone settings menu automatically returns to the previous menu within 5 seconds.
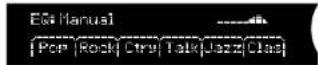
Auto EQ menu

natural_image
Pure geometric diagram with crosshair and circular shapes, no text or symbols present95 US MY09.book Page 93 Tuesday, April 15, 2008 11.03 AM
93Saab 9-5 Audio System
Radio
Press the RADIO BAND button to return to radio mode if another audio source is in use.
Selecting a radio station
Selecting a frequency band
Press the RADIO BAND button to change frequency band. The selected frequency band appears on the display.
Selecting a preset station
Scroll to the desired preset page by pressing the FAV button and then pressing the pushbutton (1-6) under the desired preset station.
You can also press or on the steering wheel to select another preset station.
Tuning a station
Fine tuning
Turn the tone control one increment or press the REV or FWD button to fine-tune the frequency in increments of 0.2 MHz.
Automatic tuning
Press one of the SEEK buttons or the button on the steering wheel for automatic seek tuning. The radio then searches upward in the frequency band for the nearest strong station and stops at that frequency.
Manual tuning
Turn the tone control or hold the REV or FWD button depressed to seek a frequency manually. Release the control/button to stop at the desired frequency.
Scanning radio stations
Hold one of the SEEK buttons or the button on the steering wheel depressed until a chime sounds for a 5 second sampling of each station accessible on the frequency band. Scanning... appears on the display.
Press one of the SEEK buttons or the button on the steering wheel again to cancel the scan and select the radio station being played at that instant.
Storing presets
You can store up to 36 radio stations as presets by using the 6 pushbuttons under the display and the FAV button. Press the FAV button to scroll through up to 6 pages with 6 presets per page. Each page can contain a combination of AM, FM and XM ^TM * stations.
Storing the current station as a preset
To store the current station as a preset:
1 Press the FAV button until you come to the preset page (1-6) at which the station is to be stored.
2 Hold the pushbutton depressed under the spot (1-36) at which the station is to be stored. A chime will sound once the station is stored.

Preset stations


95 US MY09.book Page 94 Tuesday, April 15, 2008 11.03 AM
94 Saab 9-5 Audio System
Number of pages with preset stations
To display the number of pages (1-6) with preset stations:
1 Hold the FAV button depressed or press the MENU button and then press the pushbutton under the menu option FAV 1-6.

Setup menu
2 Select the number of preset pages to be displayed by pressing the pushbutton under the menu option with the desired number of preset pages (1-6).

Number of preset pages
Radio Data System (RDS)
The audio system has a Radio Data System (RDS). RDS features are available for use only on FM stations that broadcast RDS information. With RDS, the radio can do the following:
- Display radio station name.
• Display messages from radio stations.
- This system relies on receiving specific information from these stations and will only work when the information is available. In rare cases, a radio station may broadcast incorrect information that will cause the radio features to work improperly. If this happens, contact the radio station.
The RDS system is always on. When information is broadcast from the FM station you are listening to, the station name or call letters will be displayed on the display.

RDS menu
NOTICE
The menu options AF and REG have no function on US/CA cars.
Rolling advertisements
Some radio stations present rolling advertisements in the display.
• To block rolling advertisements, mark PS-Freeze by pressing the pushbutton directly underneath.
• To allow rolling advertisements, deselect PS-Freeze by pressing the pushbutton directly underneath.
Press the pushbutton under the arrow symbol or wait until the system automatically returns to the previous menu.
Radio text
Press the I button to show text messages sent by certain radio stations in the display. If there are no text messages, No Info appears on the display.


XM™ \* Satellite Radio Service
XM ^TM is a satellite radio service based in the 48 contiguous United States and Canada. XM ^TM offers a large variety of coast-to-coast channels including commercial free music, news, sports, talk, traffic/weather (U.S. subscribers), and children's programming.
XM ^TM provides digital quality audio and text information that includes song title and artist name.
A service fee is required in order to receive the XM ^TM service. For more information, contact XM ^TM ;
In the US. at www.xmradio.com or call 1-800-852-XMXM (9696).
In Canada at www.xmradio.ca or call 1-877-GET-XMSR (438-9677).
When XM ^TM is active, the channel name, and number, song title and artist can be displayed.
Finding a XM™ \* station
The PTY button is used to find XM ^TM stations when the radio is in the XM ^TM mode. To find XM ^TM channels within a desired category, perform the following
1 Press the RADIO BAND button until the XM™ frequency is displayed. Press the PTY button to display the category labels on the radio display. Continue pressing the PTY button until the desired category name is displayed.
2 Press either of the two pushbuttons below the desired category label to immediately tune to the first XM ^TM station associated with that category.
3 Turn the tone control, press the buttons below the right or left arrows displayed, or press the right or left SEEK buttons to go to the next or previous XM ^TM station within the selected category.
4 To exit the category search mode, press the FAV button to display your favorites again.
Remove an XM™\* category
Undesired XM ^TM categories can be removed through the Setup menu. To remove an undesired category, perform the following:
1 Press the MENU button to display the radio Setup menu.
2 Press the pushbutton under the menu option XM CAT.
3 Turn the tone control to display the category you wish to remove.
4 Press the pushbutton under the menu option Remove until the category name along with the word Removed appears on the display.
5 Repeat the steps to remove more categories.
NOTICE
The menu option XM CAT can only be accessed when the vehicle is stationary.


95 US MY09.book Page 96 Tuesday, April 15, 2008 11.03 AM
96 Saab 9-5 Audio System
Restore removed XM™\* categories
Removed categories can be restored by pressing the pushbutton under the menu option Add when a removed category is displayed or by pressing the pushbutton under the menu option Restore All.
The XM Categories
Decades
Country
Hits
Christian
Rock
Urban
Jazz & Blues
Dance
Latin
World
Classical
Kids
News
Sports
Comedy
Talk & Variety
Premium



95 US MY09.book Page 97 Tuesday, April 15, 2008 11.03 AM


97Saab 9-5 Audio System
XM™ * Radio Messages
| Radio Display Message Condition Action Required | ||
| XM Updating | Updating encryption code | The encryption code in the receiver is being updated an no action is required. This process should take no longer than 30 seconds. |
| No XM signal | Loss of signal | The system is functioning correctly, but the vehicle is in a location that is blocking the XM^TM signal. When you move into an open area, the signal should return. |
| Loading XM Acquiring channel audio(after four second delay) | The audio system is acquiring and processing audio and text data. No action is needed. This message should disappear shortly. | |
| Channel Off Air | Channel not in service | This channel is not currently in service. Tune in to another channel. |
| Channel Unavail Channel | no longer available | This previously assigned channel is no longer assigned. Tune to another station. If this station was one of the presets, choose another station for that preset button. |
| No Artist Info Artist Name/Feature not available | No artist information is available at this time on this channel. The system is working properly. | |
| No Title Info Song/Program Title not available | No song title information is available at this time on this channel. The system is working properly. | |
| No CAT Info Category Name not available | No category information is available at this time on this channel. The system is working properly. | |






95 US MY09.book Page 98 Tuesday, April 15, 2008 11.03 AM
98 Saab 9-5 Audio System
| Radio Display Message Condition Action Required | ||
| Not Found No channel available for the chosen category | There are no channels available for the selected category. The system is working properly. | |
| No Information No Text/Informational message available | No text or informational messages are available at this time on this channel. The system is working properly. | |
| XM Theftlocked Theft lock active | The XM^TM receiver in the vehicle may have previously been in another vehicle. For security purposes, XM^TM receivers cannot be swapped between vehicles. If this message is received after having your vehicle serviced, check with your Saab dealer. | |
| XM Radion ID Radio ID label (channel 0) | If tuned to channel 0, this message will alternate with the XM^TM Radio eight digit radio ID label. This label is needed to activate the service. | |
| Unknown Radio ID not known (should only be if hardware failure) | If this message is received when tuned to channel 0, there may be a receiver fault. Consult with your Saab dealer. | |
| Check XM Receiver | Hardware failure | If this message does not clear within a short period of time, the receiver may have a fault. Consult with your Saab dealer. |



[NO TEXT]
[NO TEXT]
[NO TEXT]
[NO TEXT]
[NO TEXT]
95 US MY09.book Page 99 Tuesday, April 15, 2008 11.03 AM
99Saab 9-5 Audio System
CD player
NOTICE
Do not use CDs with labels or stickers. These labels could detach and cause the audio system to malfunction.
Activate the CD player by inserting a disc or by pressing the CD AUX button if a CD is already loaded.

CD player menu
Loading CDs
Insert the disc in the slot with the text side up until the mechanism loads the disc. The first track is played. If the disc is wrong-side-up, it will be ejected automatically.
Once all the tracks have been played, the CD player will restart from track 1.
The CD player is turned off by pressing ON/OFF to turn off the audio system or by selecting another audio source.
Removing CDs
Press the EJECT button to eject the CD. If you press EJECT without removing the ejected disc, the player will reload the disc after 10 seconds for reasons of safety.
Selecting and changing tracks
Turn the tone control or press the SEEK buttons to select or change to the preceding or next track. The track number appears in the display.
If the current track has played for at least 10 seconds, you can start the track from the beginning by pressing SEEK (arrow left).
If you press SEEK (arrow right) while the last track of the disc is playing, the first track will play.
If you press SEEK (arrow left) while the first track of the disc is playing, the last track will play.
The same function applies to and on the steering wheel.
Rapid playing tracks
To rapid play the current track, hold REV or FWD depressed. Release the button to stop rapid play and return to normal playback.
Random playback
You can allow the CD player to choose tracks randomly, i.e. not to play the tracks in numerical order.
- To play tracks randomly, press the push-button under the menu option RDM.
- To resume playing tracks in numerical order, press the pushbutton under the menu option RDM again.

Random playback


95 US MY09.book Page 100 Tuesday, April 15, 2008 11:03 AM
100 Saab 9-5 Audio System
CD changer \*
NOTICE
Do not use CD or CD-R discs with labels or stickers. These labels could detach and cause the audio system to malfunction.
Activate the CD changer by inserting one or more CD/MP3 discs or by pressing the CD AUX button if one or more discs is already loaded.
Loading CDs
Loading a CD
1 Press the LOAD button. The following appears on the display: Please Wait
2 Wait until the loading mechanism is ready for the disc. The following appears on the display: Insert CD
3 Insert the disc in the slot with the text side up until the mechanism loads the disc. The following appears on the display: Loading
If the disc is wrong-side-up, it will be ejected automatically.
Loading several CDs
The CD changer can be loaded with up to 6 discs. To load several discs in the CD changer:
1 Hold LOAD depressed for 2 seconds. A chime sounds and the following appears on the display: Please Wait
2 Follow the instructions on the display to load the discs.
3 If you do not wish to load more CDs, press LOAD to cancel.
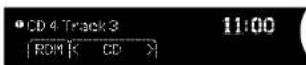
CD changer menu
The CD changer is turned off by pressing ON/OFF to turn off the audio system or by selecting another audio source.
Removing CDs
Removing a CD
1 Press EJECT to eject the disc. A chime sounds and the following appears on the display: Ejecting
2 Remove the ejected disc when the following appears on the display:
Remove CD
If you press EJECT without removing the ejected disc, the player will reload the disc after 10 seconds for reasons of safety.
Removing several CDs
Hold EJECT depressed for 2 seconds to remove all discs from the CD changer. A chime sounds and the following appears on the display: Ejecting All



95 US MY09.book Page 101 Tuesday, April 15, 2008 11:03 AM
101Saab 9-5 Audio System
Selecting and changing tracks
Turn the tone control or press the SEEK buttons to select or change to the preceding or next track. The track number appears in the display.
If the current track has played for at least 10 seconds, you can start the track from the beginning by pressing SEEK (arrow left). If you press SEEK (arrow right) while the last track of the disc is playing, the first track will play.
If you press SEEK (arrow left) while the first track of the disc is playing, the last track will play.
The same function applies to and on the steering wheel.
For selecting/changing MP3 files, see page 102.
Selecting/changing CD
Press the pushbuttons under the menu option CD in the display to change CDs. For selecting/changing MP3 folder, see page 103.

Selecting/changing CD
Rapid playing tracks
To rapid play the current track, hold REV or FWD depressed. Release the button to stop rapid play and return to normal playback.
For rapid playing an MP3 file, see page 103.
Random playback
You can allow the CD changer to choose tracks randomly from all CDs, i.e. not to play the tracks in numerical order.
• To play tracks randomly, press the push-button under the menu option RDM.
- To resume playing tracks in numerical order, press the pushbutton under the menu option RDM again.
For random playback of MP3 files, see page 103.

Random playback from all CDs


95 US MY09.book Page 102 Tuesday, April 15, 2008 11:03 AM
102 Saab 9-5 Audio System
MP3 player
NOTICE
Do not use CD-R discs with labels or stickers. These labels could detach and cause the audio system to malfunction.
The audio system can play MP3 files recorded on an CD-R disc with the following bit speed: 32 - 320 kbps. Sound quality may vary depending on the quality of the CD-R disc, recording method and quality of the recorded music.
The audio system can read and play a maximum of 50 MP3 files, 50 playlists, 10 sessions and 255 MP3 files. Discs containing several folders, playlists, sessions and files can be played up to the max. limit. Anything over the max. limit will be ignored.
Activating the MP3 player
Activate the MP3 player by inserting a CD-R disc with MP3 files into the slot or by pressing the CD AUX button if a disc with MP3 files is already loaded.
The first file in the first playlist on the disc is played and the following appears on the display:

MP3 player
Loading MP3 discs
To load an MP3 disc, insert the disc in the slot with the text side up until the mechanism loads the disc. The first MP3 file in the first playlist of the disc will then be played. If the disc is wrong-side-up, it will be ejected automatically.
For loading one or more MP3 discs in the CD changer, see page 100.
Removing MP3 discs
Press the EJECT button to eject the MP3 disc. If you press EJECT without removing the ejected disc, the player will reload the disc after 10 seconds for reasons of safety.
For removing one or more MP3 discs from the CD changer, see page 100.
Selecting/changing MP3 file
Turn the tone control or press the SEEK buttons to select or change to the preceding or next MP3 file in the current MP3 folder or playlist. The MP3 file number appears in the display.
If the current MP3 file has played for at least 10 seconds, you can start the MP3 file from the beginning by pressing SEEK (arrow left).
If you press SEEK (arrow right) while the last MP3 file in a folder or playlist is playing, the first MP3 file of the folder or playlist will play.
If you press SEEK (arrow left) while the first MP3 file in a folder or playlist is playing, the last MP3 file of the folder or playlist will play.
The same function applies to the steering wheel.




95 US MY09.book Page 103 Tuesday, April 15, 2008 11:03 AM
103Saab 9-5 Audio System
Selecting/changing MP3 folder
- Press the left pushbutton under the Folder symbol to play the first MP3 file in the preceding MP3 folder on the disc.
- Press the right pushbutton under the Folder symbol to play the first MP3 file of the next MP3 folder on the disc.
Rapid playing an MP3 file
To rapid play the current MP3 file, hold REV or FWD depressed. Release the button to stop rapid play and return to normal play-back.
Random playback of MP3 files
You can allow the MP3 player to randomly select MP3 files, i.e. not to play the files in numerical order.
- For random playback of MP3 files, press the pushbutton under the menu option RDM.
• To resume playing MP3 files in numerical order, press the pushbutton under the menu option RDM again.

Random playback of MP3 files
Playback order
Files on a CD-R disc will be played in the following order:
• The first MP3 file in the first playlist will be played, followed by all files in each playlist. When the last MP3 file in the last playlist has been played, playback starts from the beginning with the first MP3 file in the first playlist.
- The first MP3 file in the first MP3 folder will be played, followed by all files in each folder. When the last MP3 file in the last folder has been played, playback starts from the beginning with the first MP3 file in the first folder.
Sorting music
To play MP3 files sorted by artist or album, press the pushbutton under the magnifying glass in the display.
The CD player searches through the disc and sorts files by artist and album. This could take several minutes depending on the number of MP3 files on the disc.
Once the sort is complete, select sort order by pressing the pushbutton under the menu option Sort.
- To sort and play MP3 files by artist, press the pushbutton under the menu option Artist.
• To sort and play MP3 files by album, press the pushbutton under the menu option Album.


95 US MY09.book Page 104 Tuesday, April 15, 2008 11:03 AM
104 Saab 9-5 Audio System
Song title, artist name, etc.
If a disc has been recorded with ID3 data (version 1 & 2), the song title, artist name, album title and MP3 folder name can be shown in the display.
1 Press the I button.
2 Press the pushbutton under the desired menu option. The song title, artist name, album title or MP3 folder name appears in the display.
3 Press the pushbutton under the arrow symbol to return to the previous menu.
File names with more than 32 characters or four pages will be shortened.

MP3/WMA
For discs that contain both CDA tracks and MP3/WMA(Windows Media Audio) files, the player will first play the CDA tracks.
To play MP3/WMA files on the disc:
1 Press the PTY button.
2 Press the menu selection button directly underneath MP3/WMA.
To return to playing CDA tracks:
1 Press the PTY button.
2 Press the menu selection button directly underneath CD-DA.
Portable player
WARNING
Place the portable player where it cannot be thrown around and cause personal injury in the event of a collision.
AUX input \*
The AUX input is located at the bottom right of the audio system. It can be used to connect a portable unit, such as an MP3 player, to the audio system.
Adjust the sound settings using the control panel or the steering wheel controls. To change tracks, fast forward, etc., use the controls on the portable player.
Information menu


95 US MY09.book Page 105 Tuesday, April 15, 2008 11:03 AM
105Saab 9-5 Audio System

AUX input at the bottom right of the audio system
Connecting and activating a portable player
1 Connect the unit to the audio system via the AUX input.
2 Press the CD AUX button to activate the portable player.
General functions
WARNING
Adjustments should be made when the car is stationary so that attention to traffic is not reduced, increasing the likelihood of an accident.
Setting time and date
Cars without CD changer
1 Press the Clock button.
2 Press the pushbutton under the menu option you wish to change.
3 Press the pushbutton again to increase time or date one increment at a time. You can also adjust time and date by pressing the SEEK, FWD or REV button.
Cars with CD changer
1 Press the MENU button.
2 Press the pushbutton under the clock symbol in the display.
3 Press the pushbutton under the menu option you wish to change.
4 Press the pushbutton again to increase time or date one increment at a time. You can also adjust time and date by pressing the SEEK, FWD or REV button.

Setting time and date



95 US MY09.book Page 106 Tuesday, April 15, 2008 11:03 AM
106 Saab 9-5 Audio System
Time and date display
1 In the clock menu, press the pushbutton under the arrow symbol in the display.
2 Specify whether time should be displayed with the 12-hour or 24-hour system and in which order date is to be indicated by pressing the pushbutton under the desired menu option.

Time and date display
NOTICE
The menu option RDS
Speed dependent volume compensation
As vehicle speed increases, ambient noise also increases. If you do not wish to continually adjust the volume, the audio system can automatically adjust volume based on an increase or decrease in vehicle speed.
Select one of four settings:
- Off (no compensation)
- Low (low compensation)
• Med (medium compensation)
• High (maximum compensation)
1 Press the MENU button.
2 Press the pushbutton under the menu option AUTO VOLUME.
3 Press the pushbutton under the desired speed compensation.
Speed Compensated Volume


Speed dependent volume compensation


95 US MY09.book Page 107 Tuesday, April 15, 2008 11:03 AM
107Saab 9-5 Audio System
Sound system
The sound system is called harman/kardon® Sound System. Loudness is controlled automatically by the audio system, boosting the highest and lowest frequency ranges to enhance the sound image when the volume is set to a low level. Sound reproduction is therefore excellent whatever the volume setting.
The 9-5 SportCombi has 8 speakers as there is only one subwoofer in the luggage compartment.
harman/kardon® Sound System
The harman/kardon® Sound System system has 9 speakers: three mounted in the instrument panel fascia (the center speaker further enhances the sound image), one in each door and two subwoofers in the parcel shaft. The subwoofers enhance reproduction of the lowest bass notes.

natural_image
Top-down line drawing of a car showing rear, front, and side views with no text or symbols


[Non-Text]
[Non-Text]
[Non-Text]
[Non-Text]
[Non-Text]


95 US MY09.book Page 108 Tuesday, April 15, 2008 11:03 AM
108 Saab 9-5 Audio System
Technical data
Tone controls
Bass ±8 dB at 100 Hz
Treble ±8 dB at 16 kHz
Power output
harman/kardon®
Sound System 200 W
150 W at 1% THD
and 13.5 V
Radio module
Radio system ____ PLL frequency syn-
thesizer tuner.
Number of presets
FM/AM/XM ^TM *6×6
Frequency range
FM 87.7 - 107.9 MHz
AM 530 - 1710 kHz
Tuning steps
Automatic tuning _ FM 200 kHz
AM 10 kHz
Manual tuning ____ FM 200 kHz
AM 10 kHz
Frequency range 40 – 11000 Hz
(FM) ±1 dB
Distortion (FM) < 0.5%
CD player and CD changer
1-bit system and 8 x
oversampling
Frequency range 20 - 20000 Hz
±1 dB
Distortion <0.005%
Dynamics >85 dB
CD changer capacity 6 discs
Specifications in accordance with EIA Interim Standard.
THD = Total Harmonic Distortion





95 US MY09.book Page 109 Tuesday, April 15, 2008 11:03 AM


109Saab 9-5 Audio System
Antennas
The audio system has two antennas incorporated in the rear window: one for FM and one for AM.
The XM ^TM Satellite Radio antenna * is located on the roof of the vehicle. Keep this antenna clear of snow and ice build up for clear radio reception.
- Roof loads can negatively affect telecommunication, GPS reception and the performance of the XM ^TM system *.
- If sun film is fitted to the rear window, it must be a pure-plastic variety to maintain good radio reception. Ensure that the film does not contain any metal.
NOTICE
Refrain from placing hard or sharp objects on the rear parcel shelf, to avoid damaging the antenna leads.
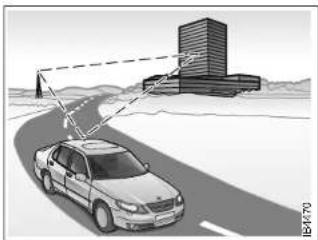
natural_image
Illustration of a car driving on a curved road with a building and sensor array (no text or symbols)Multipath propagation
Multipath propagation occurs when radio waves from an FM transmitter are reflected by a large building, or the like, causing them to arrive slightly later than the direct waves. This can create interference to radio reception. See also "Diversity antenna".

natural_image
Line drawing of a car's rear window with grille and door (no text or symbols)Diversity antenna \*
To improve radio reception when the topography is a problem, a second FM antenna, known as a diversity antenna, can be fitted in the rear window. Consult a Saab dealer for further information.


95 US MY09.book Page 110 Tuesday, April 15, 2008 11:03 AM
110 Saab 9-5 Audio System
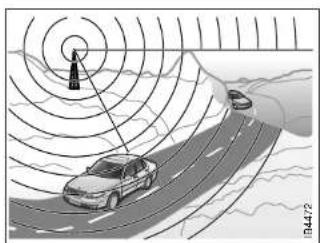

natural_image
Diagram of a car driving on a curved road with signal towers and mountainous terrain in the background (no text or symbols)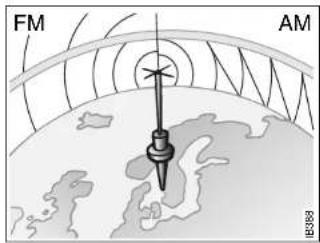
Shadow effect
Because FM radio waves travel in straight lines from the transmitter, a shadow effect can occur when tall buildings or hills obstruct the propagation path from the transmitter to the car.
Cross modulation
If the radio is tuned to a weak transmitter in the vicinity of a stronger one, the car's antennas will receive signals from both. Such interference is apparent when the unwanted broadcast can be heard faintly in the background.
Radio waves, FM/AM
FM radio waves radiate in straight lines from the transmitter. Because such waves do not follow the curvature of the Earth, their strength becomes weaker the further they travel. That is why a large number of transmitters is needed to provide good reception.
AM waves, on the other hand, are reflected off the lonosphere, thus greatly extending their range.




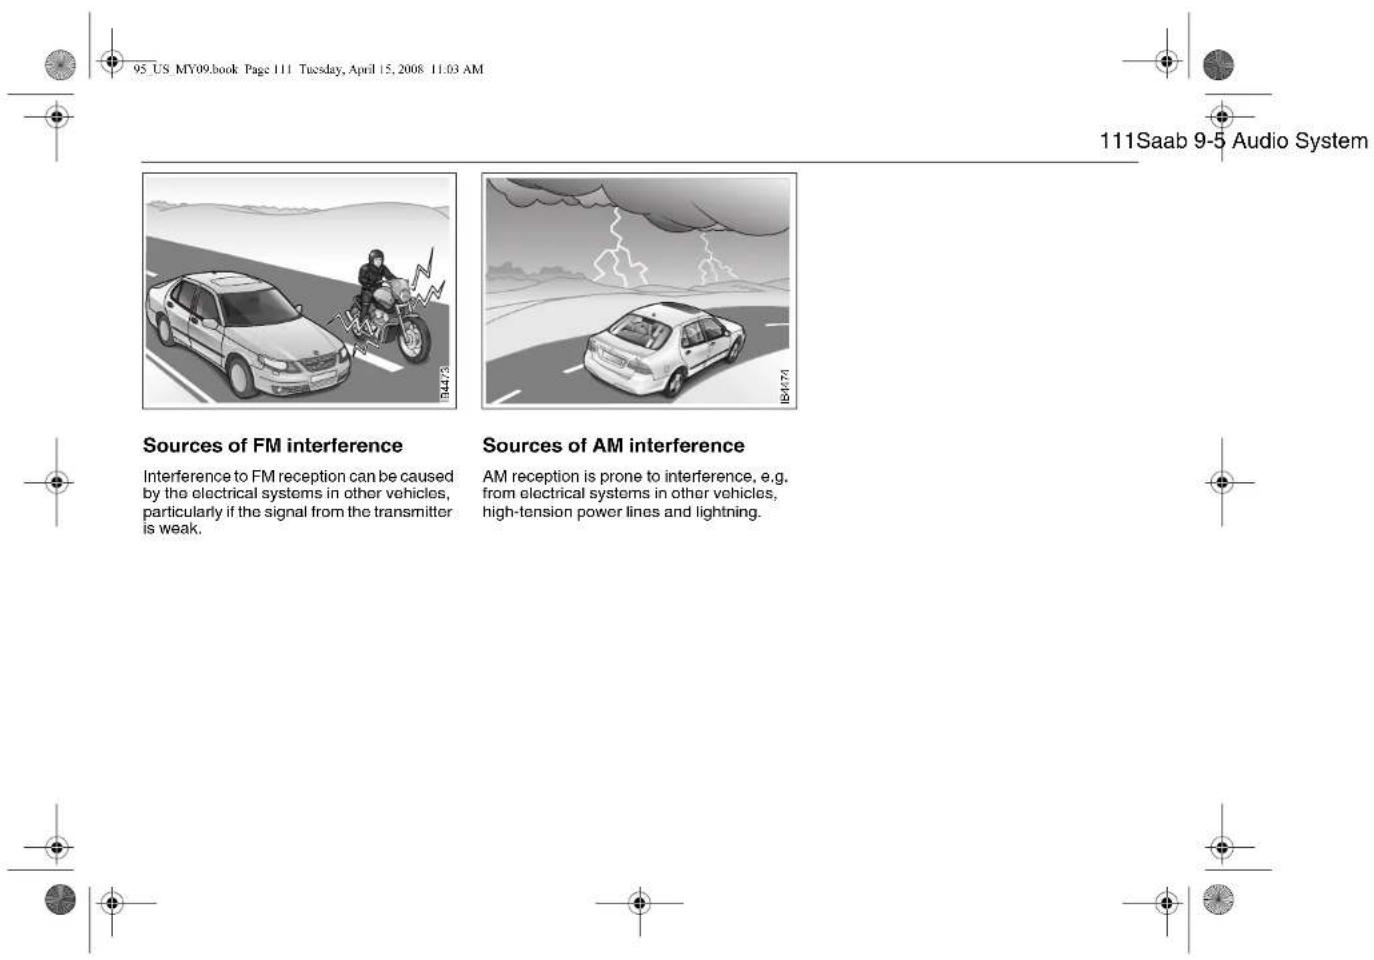
95 US MY09.book Page 111 Tuesday, April 15, 2008 11:03 AM
111Saab 9-5 Audio System
Sources of FM interference
Interference to FM reception can be caused by the electrical systems in other vehicles, particularly if the signal from the transmitter is weak.
Sources of AM interference
AM reception is prone to interference, e.g. from electrical systems in other vehicles, high-tension power lines and lightning.
95 US MY09.book Page 112 Tuesday, April 15, 2008 11:03 AM
112 Saab 9-5 Audio System
Error codes
NOTICE
Proceed with care if rectifying a fault. If in doubt, contact a workshop. We recommend that you contact an authorized Saab dealer.
The audio system has a built-in diagnostics function. If a fault is detected, a error code is generated to help workshop technicians to diagnose the fault. Below are the codes for some faults that you might be able to rectify yourself.
| Error code Possible cause | |
| Check CD • CD is | dirty, scratched, loaded wrong-side-up or defective.The CD may be improperly burned. |

WARNING
The CD player/CD changer is classified as Class 1 laser equipment.
• Service and repair work must only be carried out by authorized technicians.
- If the casing is damaged, hazardous laser radiation can occur.
NOTICE
All work on the audio system must be carried out by a workshop. We recommend that you contact an authorized Saab dealer.
Security lock
The audio system is equipped with an electronic security lock. The special code is unique to the car in which the audio system is fitted.
Each time the audio system is switched on, a check is made to ensure that the code is correct. If not, the following will appear on the display: Locked
If the audio system is to be transferred to another car (Saab 9-5), a Saab dealer must be contacted to provide the right code for the audio system.


113Interior equipment and trunk
Interior equipment and trunk

natural_image
Technical line drawing of a car interior showing four seats with leather trim and seat compartments (no text or symbols)| Steering wheel adjustment | 114 |
| Electric windows | 115 |
| Rearview mirrors | 116 |
| Moonroof * | 123 |
| Interior lighting | 124 |
| Sun visors | 125 |
| Power Outlet * | 126 |
| Glove compartment | 126 |
| Cup holders | 128 |
| Trunk | 129 |
* Asterisk means: equipment not fitted in all cars (can depend on model variant, engine variant, market specification, options or accessories).
IB394


95 US MY09.book Page 114 Tuesday, April 15, 2008 11:03 AM
114 Interior equipment and trunk
Steering wheel adjustment

WARNING
Never adjust the steering wheel unless the car is stationary.
Fore-and-aft and tilt adjustment of the steering wheel is possible.
Pull down the lever fully until you hear a click. Move the steering wheel to the desired position and then raise the lever. The lever should lock with a click.
Make sure that the lever is fully locked before driving off.

natural_image
Diagram of a car steering wheel with a sensor attached, showing no text or symbols
natural_image
Top-down view of a car steering wheel with no visible text or symbolsHorn
The horn is sounded by pressing the central part of the steering wheel. Press closest to the steering wheel rim.
To adjust the steering wheel


95 US MY09.book Page 115 Tuesday, April 15, 2008 11:03 AM


115Interior equipment and trunk
Electric windows

WARNING
Bear in mind the pinch hazard when the side windows are being wound up.
• Always remove the ignition key when you leave the car. This prevents personal injury caused by the electric windows, for example, due to children playing.
- The person operating the electric windows is responsible for ensuring that no one, especially children, has their head, hands or fingers in the window openings, before raising the windows. Raising the windows could otherwise cause serious or fatal injuries.
- Do not extend your arm, head etc. out of an open window while driving.
The electric motors of the front windows are equipped with overload protection (integrated thermal protection). This protection operates when the windows are wound down automatically (switch pressed fully down).

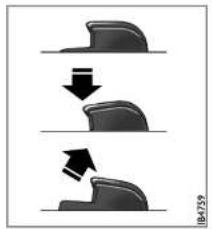
natural_image
Three-step diagram showing a mechanical component being reduced, with arrows indicating the process (no text or symbols)1 Window switches 2 Switch for rendering rear door window switches inoperative
To open:
Front windows: press the front of the switch
Rear windows: Press the back of the switch.
The switches for the front windows have a third position for automatic opening of the window. Press the switch fully down to lower the window completely.
To cancel automatic lowering of the window, lift the switch briefly.
To close:
Front windows: Lift the front of the switch.
Rear windows: Lift the back of the switch.
The actuating motor will be switched off automatically when the window is fully closed or when the switch is released.


95 US MY09.book Page 116 Tuesday, April 15, 2008 11:03 AM
116 Interior equipment and trunk
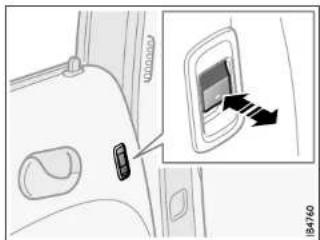
natural_image
Interior view of a car showing a door panel with a small device and an inset close-up of the screen (no text or symbols visible)Switch for rear side window Adjusting the doo
Rearview mirrors
Door mirrors
The door mirrors may have an auto dimming function and the passenger side door mirror is of the wide-angle "aspheric" type.
The adjusting switch is on the driver's door. If the car is equipped with a programmable driver's seat, the settings of the door mirrors can also be stored in the preset buttons for the seat (see page 20).
The mirrors mirrors are designed to fold back if knocked. They can also be fully retracted for parking in tight spaces, such as on the car deck of a ferry. Remember to fold them out again before driving off.

1 Select mirror
2 Use touch pad to adjust mirror
Child safety: rear windows (ON/OFF)
The window switches on the rear doors can be rendered inoperative by the ON/OFF switch in the panel on the center console. When the switch is ON, the rear side windows can be operated by the switch on each rear door. The switch's back lighting will be activated.
When the switch is OFF, the rear side windows can only be operated from the panel on the center console. When off, the switch's back lighting will also be switched off.
NOTICE
The door mirrors should be fully retracted before the car enters an automatic car wash.


95 US MY09.book Page 117 Tuesday, April 15, 2008 11:03 AM


117Interior equipment and trunk
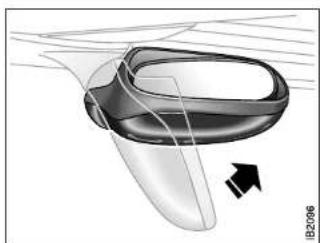
natural_image
3D rendered diagram of a mechanical component with an arrow indicating direction (no text or symbols)Door mirror folded in


natural_image
Close-up of a remote control panel with a black arrow pointing to it, no visible text or symbolsButton for angling passenger's mirror down when reversing

Electrically retractable door mirrors \*
Retract and unfold the door mirrors with the
button on the instrument panel to the left of the steering wheel. The ignition key must be in the ON position. Allow the mirrors finish moving before repressing the button.
If the mirrors have been moved manually, it may require several presses of the button to return the mirrors to their normal positions.
If you retract the mirrors by hand and later press the mirror button on the instrument panel, you will hear a distinct click as the motors reach their end positions. When the mirrors are unfolded electrically, they will return to their normal positions.
NOTICE
The door mirrors should be fully retracted before the car enters an automatic car wash.
Cars equipped with a programmable driver's seat * also have the ability to angle the passenger's mirror down when reversing, e.g. for a better view of the curb.
1 Select reverse.
2 Press the tiny button adjacent to the doormirror switch to tilt the mirror. The mirror will be reset automatically when reverse gear is deselected.
The mirror glass can also be adjusted manually by gently pressing the glass in the desired direction.
The mirrors are heated, and the heating comes on and goes off with the rear-window heater.


95 US MY09.book Page 118 Tuesday, April 15, 2008 11:03 AM
118 Interior equipment and trunk
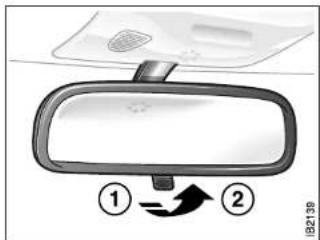
Rearview mirror 1 Day position 2 Night position
Rearview mirror
The rearview mirror has day/night positions that can be selected by means of a knob beneath the mirror. Adjust the mirror in day position.
Interior rearview auto-dimming mirror with garage door opener, and digital compass \*
WARNING
Make sure that people and objects are out of the way of a moving door or gate to prevent potential harm or damage.
When programming the garage opener, you may be operating a garage door or gate operator. Therefore it is advised to park outside of the garage.
Do not use the garage opener with any garage door opener that lacks the safety stop and reverse feature as required by federal safety standards. (This includes any garage door opener model manufactured before April 1, 1982.). A garage door opener which cannot detect an object, signalling the door to stop and reverse, does not meet current federal safety standards. Using a garage door opener without these features increases risk of serious injury or death.

Buttons for garage opener and compass
1-3 Garage opener
4 LED
5 Compass/auto dimming ON/OFF
6 Compass bearing
Retain your original garage door transmitter for future programming procedures (i.e., new vehicle purchase). It is also suggested that upon the sale of the vehicle, the programmed garage opener buttons be erased for security purposes.



95 US MY09.book Page 119 Tuesday, April 15, 2008 11:03 AM
Preparations for first-time programming
Before programming the garage opener for the first time, you must delete any factory codes.
Press and hold the two outer buttons until the indicator light begins to flash-after
20 seconds. Release both buttons. Do not hold for longer that 30 seconds. The garage opener is now in the train (or learning) mode and can be programmed at any time beginning with "Programming" - step 2.
Programming
The garage opener can record and store the frequencies of three different remote controls.
The battery in the remote control should be fairly new for programming to work well.
Do not repeat "Programming" - step two to train additional devices to a second or third button. Begin with "Programming" - step three.
1 Turn the ignition ON.
2 Press and hold the two outer buttons (buttons one and three) - releasing only when the indicator light begins to flash (after 20 seconds). Do not hold the buttons for longer than 30 seconds and do not repeat step two to program a second and/or third hand-held transmitter to the remaining two buttons.
3 Position the end of your hand-held transmitter 1-3 inches (5-14 cm) away from
the button you wish to program while keeping the indicator light in view. The transmitter should face the mirror from below or left side of the mirror.
4 Simultaneously press and hold both the chosen and hand-held transmitter buttons. Do not release the buttons until step 5 has been completed.
Note: Some gate operators and garage door openers may require you to replace this Programming Step 4 with procedures noted in the "Gate Operator / Canadian Programming" section.
5 After the indicator light changes from a slow to a rapidly blinking light, release both the mirror and hand-held transmitter buttons.
6 Press and hold the just-trained button and observe the indicator light. If the indicator light stays on constantly, programming is complete and your device should activate when the button is pressed and released.
Note: To program the remaining two buttons, begin with "Programming" - step three. Do not repeat step two.
If the indicator light blinks rapidly for two seconds and then turns to a constant light continue with "Programming" steps 7-9 to complete the programming of a rolling code equipped device (most commonly a garage door opener).
119Interior equipment and trunk
7 At the garage door opener receiver (motor-head unit) in the garage, locate the "leam" or "smart" button. This can usually be found where the hanging antenna wire is attached to the motor-head unit.
8 Firmly press and release the "learn" or "smart" button. (The name and color of the button may vary by manufacturer.)
Note: There are 30 seconds in which to initiate step nine.
9 Return to the vehicle and firmly press, hold for two seconds and release the programmed button. Repeat the "press/hold/release" sequence a second time, and, depending on the brand of the garage door opener (or other rolling code equipped device), repeat this sequence a third time to complete the programming process. The garage opener should now activate your rolling code equipped device.
Note: To program the remaining two buttons, begin with "Programming" - step three. Do not repeat step two.

95 US MY09.book Page 120 Tuesday, April 15, 2008 11:03 AM
120 Interior equipment and trunk
Gate Operator / Canadian Programming
Canadian radio-frequency laws require transmitter signals to "time-out" (or quit) after several seconds of transmission - which may not be long enough for the garage opener to pick up the signal during programming. Similar to this Canadian law, some U.S. gate operators are designed to "time-out" in the same manner.
If you live in Canada or you are having difficulties programming a gate operator by using the "Programming" procedures (regardless of where you live), replace
"Programming " step 4 with the following:
Note: If programming a garage door opener or gate operator, it is advised to unplug the device during the "cycling" process to prevent possible overheating.
Continue to press and hold the button while you press and release - every two seconds ("cycle") your hand-held transmitter until the frequency signal has successfully been accepted by the garage opener. (The indicator light will flash slowly and then rapidly.)
Proceed with "Programming" step five to complete.
NOTICE
Switch off the power supply to the garage door or gate (or park the car beyond the range of the remote control) while programming using the "cycling" method to prevent damaging the electrical motor.
Reprogramming a single button
To program a device to the garage opener using a button previously trained, follow these steps:
1 Press and hold the desired button. DO NOT release the button.
2 The indicator light will begin to flash after 20 seconds. Without releasing the button, proceed with "Programming" - step 3.
Erasing the three buttons
To erase programming from the three buttons (individual buttons cannot be erased but can be "reprogrammed" as outlined below), follow the step noted:
- Press and hold the two outer buttons until the indicator light begins to flash-after 20 seconds. Release both buttons. Do not hold for longer that 30 seconds. The garage opener is now in the train (or learning) mode and can be programmed at any time beginning with "Programming" - step 3.


95 US MY09.book Page 121 Tuesday, April 15, 2008 11:03 AM
Opening a garage door
To operate, simply press and release the programmed button. Activation will now occur for the trained device (i.e. garage door opener, gate operator, security system, entry door lock, home/office lighting, etc.). For convenience, the hand-held transmitter of the device may also be used at any time.
NOTICE
Switch off the power supply to the garage door or gate (or park the car beyond the range of the remote control) while programming using the "cycling" method to prevent damaging the electrical motor.
This device complies with Part 15 of the FCC Rules. Operation is subject to the following two conditions: (1) this device may not cause harmful interference, and (2) must accept any interference received, including interference that may cause undesired operation.
Changes or modifications not expressly approved by the manufacturer could void the user's authority to operate the equipment.
Canada only:
This device complies with RSS-210 of Industry Canada. Operation is subject to the following two conditions: (1) this device may not cause interference, and (2) this device must accept any interference, including interference that may cause undesired operation of this device.
Rearview auto-dimming mirrors \*
The autodimming is activated and deactivated with a short push on button 2.
If the mirror is equipped with Garage Door Opener (option) the letter 1 is displayed on compass bearing display briefly when auto dimming is activated. When deactivating the letter 0 is displayed.
The interior rearview mirror has two sensors, one forward-facing and one rear-facing. They also activate and deactivate the auto dimming feature on door mirrors.
The system is activated when the forward-facing sensor detects that it is dark outside and the rear-facing sensor detects. For example, if the car following has not dimmed its headlights. The rearview mirrors are then darkened to prevent the strong light source from dazzling the driver. This darkening is stepless.
The mirrors return to their normal states when the strong light source diminishes.
The auto dimming function can be turned OFF with the switch on the lower edge of the rear-view mirror.
NOTE
Towing a trailer can cause the system to malfunction, as the rear-facing sensor may sense light from the trailer.
121Interior equipment and trunk

1 Forward-facing sensor
2 ON/OFF switch, auto dimming function
3 Rear-facing sensor

natural_image
Pure geometric diagram with crosshair and circular shapes, no text or symbols present95 US MY09.book Page 122 Tuesday, April 15, 2008 11:03 AM
122 Interior equipment and trunk
Compass
The compass is integrated in the rearview mirror. The compass bearing is displayed in the top right-hand corner of the mirror and is updated every other second. The compass displays the car's direction of travel: N, NE, E, etc.
Switch the compass display on and off by pressing button 5 for 3 seconds.


Compass zones in USCompass zones in Canada
Changing zones
The earth's magnetic fields vary depending on one's position on the globe. If you drive your car from one magnetic zone to another the compass setting will need to be changed to ensure a correct bearing.
1 Study the illustrations to determine the correct zone.
2 Press and hold button 5 until "ZONE" is shown in the display on the mirror (6 seconds). The zone number setting now is also shown.
3 Press button 5 repeatedly to change the zone number. There are 15 zones from which to choose. Once the correct zone is selected, release the button and wait 4 seconds. The compass will now display the bearing.
Calibration
Calibration is performed automatically during travel. If an accessory, such as a mobile phone, is fitted and it can be assumed that the compass is affected, the compass may need to be calibrated manually.
1 Press and hold button 5 until "CAL" and the compass bearing are displayed (approx. 9 seconds).
2 Drive in circles (max. 5 mph/8 km/h) or drive as normal until "CAL" is no longer displayed.


95 US MY09.book Page 123 Tuesday, April 15, 2008 11:03 AM


123Interior equipment and trunk
Moonroof \*

WARNING
Bear in mind the pinch hazard when closing the moonroof.
• Always remove the ignition key when you leave the car. This prevents personal injury caused by the electric moonroof, for example, due to children playing.
• The person operating the electric moonroof is responsible for ensuring that no one, especially children, has their head, hands or fingers in the opening, before closing the moonroof. Operating the moonroof could otherwise cause serious or fatal injuries.
- Do not extend your arm, head etc. out of an open moonroof while driving.
The moonroof is operated by the switch on the overhead panel above the rearview mirror. The moonroof can be opened partially or fully.
To open:
- Slide the control towards the rear to open the moonroof to the comfort position. To open it fully, slide the control back a second time. Press the control to stop it earlier.
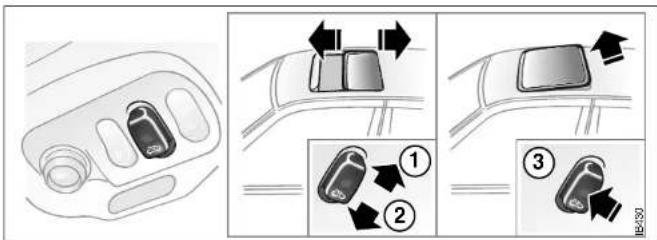
Moonroof control 1 To open 2 To close 3 Ventilation positio
To close:
- Slide the control forwards until the moon-roof is closed.
Ventilation position
- Press the middle of the control (when moonroof closed).
• To close: slide the control forwards.
To fully open the moonroof from the ventilation position, slide the control back.
The moonroof incorporates an interior, manual, sliding sun blind.
If the car is newly waxed, the moonroof may creak when opened to the ventilation position or when driving with the moonroof
closed. The sound comes from the area where the front edge of the moonroof meets the metal roof. Open the moonroof fully and, using washer fluid, clean the seal on the leading edge of the moonroof and the painted surface against which this seals when the moonroof is closed.


95 US MY09.book Page 124 Tuesday, April 15, 2008 11:03 AM
124 Interior equipment and trunk
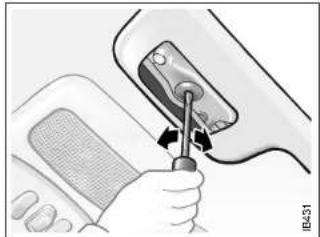
natural_image
Close-up of a hand using a screwdriver to adjust or install a car's internal components (no text or symbols visible)Manual operation of moonroof


natural_image
Illustration of a car interior with a speaker grille and control panel (no text or symbols)1 Interior lighting on continuously
2 Lighting comes on when a door is opened
3 Lighting always off
Emergency operation of moonroof
In an emergency (e.g. if there is an electrical failure) the moonroof can be operated by a screwdriver. Remove the cover at the front of the moonroof opening, insert a screwdriver in the groove, and rotate.
Rotate counterclockwise to close moonroof.
Interior lighting
The interior lighting consists of one dome light in the front and one in the back, a map-reading light in the front, two reading lights in the back, floor courtesy lights in the front (in some model variants) and door courtesy lights on all doors.
The courtesy lights come on automatically when the respective door is opened. Each reading light has its own switch adjacent to the lamp.
The switch for the dome lights is on the front overhead panel. When the switch is in the mid-position (door-activated), the interior lighting will come on:
- When the car is unlocked from the outside.
- When any door is opened.
- When the ignition key is withdrawn from the ignition switch.
Lighting goes out 30 seconds after the doors have been closed or: - when the ignition is switched ON, provided that the cabin lighting control is in the center position
- when the car is locked with the remote control.


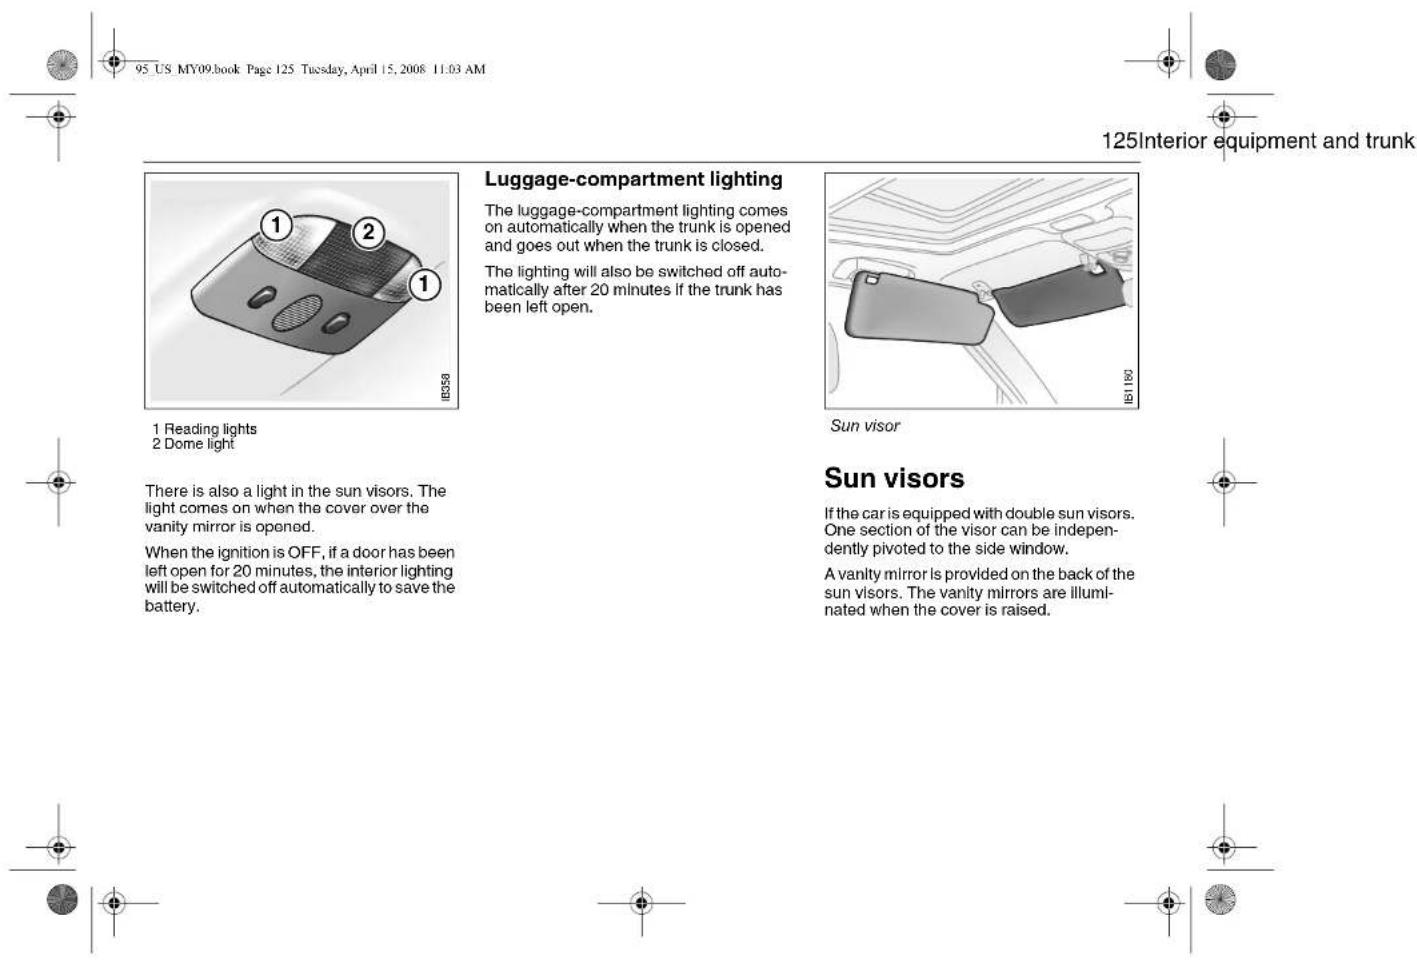

95 US MY09.book Page 125 Tuesday, April 15, 2008 11:03 AM

125Interior equipment and trunk

Luggage-compartment lighting
The luggage-compartment lighting comes on automatically when the trunk is opened and goes out when the trunk is closed.
The lighting will also be switched off automatically after 20 minutes if the trunk has been left open.
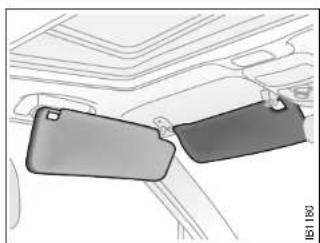
natural_image
Diagram of two gray rectangular objects on a vehicle interior, no text or symbols present
Sun visors
If the car is equipped with double sun visors. One section of the visor can be independently pivoted to the side window.
A vanity mirror is provided on the back of the sun visors. The vanity mirrors are illuminated when the cover is raised.







natural_image
Simple geometric diagram with a circle, crosshair, and dot (no text or symbols)
natural_image
Simple geometric diagram with a circle, crosshair, and dot (no text or symbols)
natural_image
Simple geometric diagram with a circle, crosshair, and dot (no text or symbols)
natural_image
Simple geometric diagram with a circle, crosshair, and dot (no text or symbols)
natural_image
Simple geometric diagram with a circle, crosshair, and dot (no text or symbols)The image contains no text. The visible element is a graphical symbol or icon, not standard alphanumeric characters. According to the correction guidelines, non-text figures/diagrams are to be ignored. Therefore, the correct OCR output is an empty string.
(No text to output)
natural_image
Simple geometric diagram with a circle, crosshair, and dot (no text or symbols)
natural_image
Simple geometric diagram with a circle, crosshair, and dot (no text or symbols)
natural_image
Simple geometric diagram with a circle, crosshair, and dot (no text or symbols)
natural_image
Simple geometric diagram with a circle, crosshair, and dot (no text or symbols)
natural_image
Simple geometric diagram with a circle, crosshair, and dot (no text or symbols)
natural_image
Simple geometric diagram with a circle, crosshair, and dot (no text or symbols)
natural_image
Simple geometric diagram with a circle, crosshair, and dot (no text or symbols)
natural_image
Simple geometric diagram with a circle, crosshair, and dot (no text or symbols)



natural_image
Pure geometric lines and shapes without any text, numbers, or symbols
natural_image
Pure geometric lines and shapes without any text, numbers, or symbols
natural_image
Pure geometric lines and shapes without any text, numbers, or symbols
natural_image
Pure geometric lines and shapes without any text, numbers, or symbols95 US 5interior MY09.fm Page 126 Tuesday, April 15, 2008 11:51 AM
126 Interior equipment and trunk
Power Outlet \*

WARNING
The maximum combined load for the two power outlets is 240 W (20 A).
You can use the electrical socket to charge a mobile phone, for example.
Glove compartment

WARNING
The glove compartment must be closed while travelling. An open glove compartment door could cause leg injuries in the event of a crash.
The glove compartment can be cooled by the air conditioning (ACC) system. Cold air can be directed to the glove compartment for keeping drinks cool, etc.
Slide the cover to open/close the air inlet.
Storage facilities
Additional storage facilities are provided (see next page).

natural_image
Diagram showing a device with gear and sensor icons, no readable text or symbols presentSliding cover in glove compartment to admit cold air


95 US MY09.book Page 127 Tuesday, April 15, 2008 11:03 AM
127Interior equipment and trunk
95 US MY09.book Page 128 Tuesday, April 15, 2008 11:03 AM
128 Interior equipment and trunk

Cup holder in fascia 1 Press symbol to open 2 Lift bottom to close
WARNING
• The cup holder should not be used to hold cups made of china, glass or hard plastic as these can cause injury in the event of a crash.
- Use only for paper cups or aluminium cans.
- Avoid spillage, particularly of hot drinks.
- Avoid putting oversized cups in the cup holder.

natural_image
Diagram of a car interior showing a lift device with a directional arrow indicating motion (no text or symbols present)Cup holder in rear armrest * Press the edge to open/close.
Cup holders
Cup holders are provided in the instrument panel fascia, in the center console compartment between the front seats, and in the rear-seat armrest (certain variants only).
To access the cup holder in the instrument panel, press the symbol and release.
To access the cup holder in the rear seat armrest, lower the armrest and press the front edge of the holder. Close in the same way.
The number of cup holders provided may vary between models.
NOTICE
Take care not to spill any liquid on the audio system, ignition switch or the like when using the cup holders. Soft drinks in particular can cause malfunction.
Cup holder in center console *
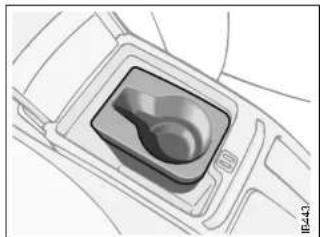
natural_image
Diagram of a car interior showing a central tray with a handle and a curved panel (no text or symbols)


95 US MY09.book Page 129 Tuesday, April 15, 2008 11:03 AM
129Interior equipment and trunk
Trunk
Folding the rear seat, 9-5 Sedan
The rear seat is split and the two sections can be folded independently. Folding down of the rear seat is easier if the front seats are not all the way back, and the rear head restraints are folded down.
1 Raise the rear seat cushions by pulling the loop located between the cushion and the backrest.
2 Tip the seat cushion forward.
3 Press the button adjacent to the respective backrest to release it.
4 Fold down the backrest.


WARNING
- Never leave a child or animal unattended in the car. During sunny weather the temperature in the passenger and luggage compartments can climb to 158–176°F (70–80°C). Small children are very susceptible to heat stroke.
- Rear-seat passengers should always ensure that the head restraint is raised and in proper position for the seats to be occupied.
- Keep hands well clear of all moving parts.
- Never place heavy objects on the rear window shelf. There is always a danger of loose objects flying about and causing injury if the car should brake suddenly or be involved in a crash.
- Before folding up the backrest, hang the outer safety belts onto the hook on the respective courtesy handle to prevent them from becoming trapped.
- Check that the seatbelt locks do not get trapped under the seat cushions when these are raised back up.
- Make sure that the backrest is locked when it is restored to an upright position. Check that the back rest release button (3) is flush with the surround before entering the rear seat. This indicates that the backrest is locked.





95 US MY09.book Page 130 Tuesday, April 15, 2008 11:03 AM
130 Interior equipment and trunk

WARNING
- Place heavy items closest to the backrest and stow smaller and lighter items on top.
- Never overload the cargo net *. If the elastic breaks this may cause personal injury. Do not use a cargo net that shows signs of wear.
- Secure heavy and bulky items using the tie down points provided in the trunk. This will avert the danger of luggage flying around if the car should brake suddenly or be involved in a crash (see page 131).
- Secure small items if the backrest is folded down or the load-through hatch is open. Small items can also be thrown around inside the car and cause personal injury.
- Do not exceed the load capacity of the car, as this will alter its handling characteristics (see page 258).
- Make sure that the seat cushions and backrests are properly secured when folding them back to their normal position. Check that the button (item 3 on page 129) is flush with the surround before entering the back seat.
The tail pipe of the exhaust system can become very hot during driving. Bear this in mind when loading and unloading the car so that children, for example, do not burn themselves.

natural_image
Interior view of a car showing a black seatbelt buckle and seatbelt (no text or symbols visible)Outer safety belt hooked onto courtesy handle

natural_image
Diagram showing a car interior with a mesh net and two close-up views of the cable (no text or symbols)


95 US MY09.book Page 131 Tuesday, April 15, 2008 11:03 AM


131 Interior equipment and trunk
Trunk pass-through hatch
A trunk pass-through hatch is incorporated in the rear seat backrest to enable long, narrow items to be carried inside the car.
Items should not weigh more than 33 lbs. (15 kg) nor be more than 2 yards (2 metres) in length. See the label on the hatch.
1 Fold down the armrest.
2 Raise the hatch by lifting the handle.
Before loading or unloading long items, switch off the engine and apply the parkingbrake. This averts the danger of the car moving off suddenly if a long item were to knock the gear or selector lever into gear.

natural_image
Diagram showing a door seat with arrows indicating movement, no text or symbols present

WARNING
- Anchor the load securely (e.g. using middle safety belt) to avoid danger of injury resulting from displacement of load on hard braking.
- Do not exceed the load capacity of the car, as this will alter its handling characteristics (see page 258).
Tie Downs
The tie downs for securing the load are fitted inside the trunk. Place the load as far in as possible.

natural_image
Top-down line drawing of a car trunk with four arrows indicating directional flow or movement (no text or symbols)


95 US MY09.book Page 132 Tuesday, April 15, 2008 11:03 AM
132 Interior equipment and trunk
Folding the rear seat, 9-5 SportCombi
Both the narrow and wide sections of the rear seat can be folded separately. Folding is facilitated if the front seats are not located too far back. The wide section cannot be folded separately if a cargo net (accessory) is mounted on the rear of the backrest.
1 Make sure that the head restraint is in the down position. For height adjustment refer to page 21.
2 Put the safety belts for the outer seat places in their respective belt clips, which are located near the backrest (see illustration).
3 Raise the rear seat cushions by pulling the loop located between the cushion and the backrest.
4 Fold the narrow section (right) of the backrest forward by raising the opening handle on the right-hand side.
5 Fold the wide section of the backrest forward in the corresponding manner.
6 Adjust the front seats for optimal driving/passenger comfort.
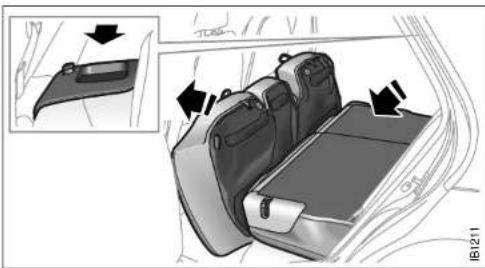
natural_image
Interior view of a car showing two compartments with arrows indicating movement or change, no text or symbols present.NOTICE
The safety belts for the outer seating positions should be put in their respective belt clips near the backrest to prevent them from being pinched when the rear seat is raised to the upright position.
Safety belt located in its belt clip

natural_image
Diagram of a car seatbelt mechanism with an inset showing a mechanical component (no text or symbols present)


95 US MY09.book Page 133 Tuesday, April 15, 2008 11:03 AM


133Interior equipment and trunk

WARNING
- Do not travel in the back seat without ensuring that the head restraint is set at a suitable height for the seats to be occupied.
- Never allow anyone to sit on a folded backrest.
• Always be aware of the risk of pinching when handling moving parts of the seating. - Never place heavy objects on the parcel shelf. There is always a danger of loose objects flying about and causing injury if the car should brake suddenly or be involved in a crash.
- Make sure that the backrests are locked when they are folded back upright. Check that the two red warning-indication flags are fully down. This indicates that the backrests are locked.
- Check that the safety belt lock is not trapped under the seat cushions when these are raised back up.
- Never leave a child or animal unattended in the car. During sunny weather the temperature in the passenger and luggage compartments can climb to 158–176°F (70–80°C). Small children are very susceptible to heat stroke.
The tail pipe of the exhaust system can become very hot during driving. Bear this in mind when loading and unloading the car so that children, for example, do not burn themselves.
Parcel shelf, 9-5 SportCombi
Fold the parcel shelf as follows:
1 Press the rear edge of the shelf downwards and forwards.
2 Continue pressing the folded section forward until it is folded over the front section.
Extend the parcel shelf as follows:
1 Hold the rear edge of the shelf and pull it back.
2 The shelf rests on a track located beneath the rear side windows. Make sure that the rear corner fits in the recess. Otherwise it will not lie flat.
Alternative location of the parcel shelf If this is removed:
- Folded up on the floor at the rear of the luggage compartment.
- On its end on the floor behind the front seat backrest.




95 US MY09.book Page 134 Tuesday, April 15, 2008 11:03 AM
134 Interior equipment and trunk
Folding the narrow section of the backrest
The folding is facilitated if the front seat is not too far back.
1 Make sure that the head restraint is in the down position. For height adjustment refer to page 21.
2 Put the safety belt in the belt clip near the backrest.
3 Raise the rear seat cushion by pulling the loop located at the rear of the cushion.
4 Fold the narrow section (right) of the backrest forward by raising the opening handle.
5 Adjust the front seat for optimal passenger comfort.
NOTICE
The safety belts for the outer seating positions should be put in their respective belt clips near the back rest to prevent them being pinched when the rear seat is raised to the upright position, see illustration page 132.
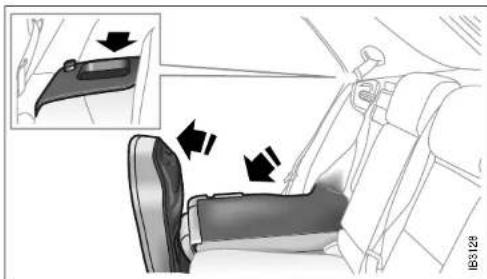
natural_image
Interior view of a car seat with hand placement arrows indicating movement (no text or symbols)


95 US MY09.book Page 135 Tuesday, April 15, 2008 11:03 AM


135Interior equipment and trunk
Load anchoring

WARNING
- Put heavy loads as low down and as far forward as possible in the luggage compartment, i.e. against the back of the rear seat.
- Never overload the cargo net *. If the elastic breaks this may cause personal injury. Do not use a cargo net that shows signs of wear.
- Never stack cargo so high that any part of the cargo lies above the edge of the backrest, if a cargo guard is not being used.
• Always tie down the cargo so that it cannot be thrown forward during heavy braking or in the event of a crash. - Unsecured and heavy cargo can increase the risk of injury during hard braking, sudden avoidance maneuvers and in the event of a crash.
- For the best load anchoring, use the special cargo tie down eye and load straps *.
-
Load the cargo tie down eyes evenly. Never attach more than one strap to each tie down eye.
-
Provide protection on sharp edges to prevent damage to the load straps.
- Never use the elastic floor net and elastic side net (accessory) when the rear seat is folded down. These nets are only intended to keep light objects tidy, not for the anchoring of loads.
- If possible, avoid having the rear seat folded down when driving with a heavy load because the anchoring possibilities are restricted when the rear seat is in this position. That the rear seat is in the upright position is a basic requirement for protection against cargo displacement in the event of a crash.
- Cargo can intrude into the passenger compartment during a sudden stop or front crash if the outer safety belts are not fastened. Check that the two red warning-indication flags are fully down. This shows that the backrests are locked.

WARNING
- Match the speed and driving style according to how the car is loaded. The driving characteristics of the car can be affected because the center of gravity is altered when there is a cargo in the luggage compartment.
- An object weighing 55 lbs. (25 kg) corresponds to a weight of 2200 lbs. (1000 kg) in a head on crash at 32 mph (50 km/h).
- Adjust the car's load (passengers and luggage) so that the gross vehicle weight or the axle weight is not exceeded, see page 258.
Driving with the trunk lid/tallgate open, see page 181.


95 US MY09.book Page 136 Tuesday, April 15, 2008 11:03 AM
136 Interior equipment and trunk

natural_image
Illustration of a hand using a spring scale to lift a ring, with an inset showing the same mechanical component (no text or symbols present)Cargo tie down eye * mounted on the longitudinal rails *
On the floor of the luggage compartment there may be two longitudinal aluminium rails (CargoTracks™) where accessory cargo tie down eye can be mounted.
Fitting a lashing eye:
1 Hold It between your forefinger and middle finger with the ring up.
2 Press down the spring center section with your thumb.
3 Insert the center section into one of the holes and move the lashing eye forward or back slightly to fit it into the middle of the recess in the rail.
4 Release it.
5 Check that the lashing eye is firmly fitted by pulling on it.

natural_image
Line drawing of a car rear view showing internal components including a box and gear assembly (no text or symbols)Example of cargo anchoring
Items for load anchoring:
- Cargo tie down eye *.
- Special load straps *.
Items to keep light objects tidy *:
- Elastic floor cargo net *.
- Elastic side cargo net for the right-hand side of the luggage compartment *.
The elastic nets may only be used to keep light objects tidy, not for anchoring.
The floor net should be attached to the cargo tie down eye that are mounted on the CargoTracks™. Place the tie down eyes as far forward and as far back as possible on the CargoTracks™.
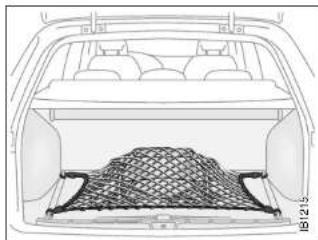
natural_image
Top-down line drawing of a car backrest with a mesh-covered canopy (no text or symbols)Elastic cargo net for lighter objects.
The side netting should be attached to the two tie down eyes which are included in the accessory kit and to two of the eyes mounted on the right-hand CargoTrack™ on the floor.
The cargo tie down eyes, load straps and elastic nets are stored in the two floor lockers on the right- and left-hand side of the luggage compartment. The lockers are opened by lifting the respective fabric loop.
NOTICE
Do not place any objects so that the demisting and antenna elements on the inside of the window could be damaged.


95 US MY09.book Page 137 Tuesday, April 15, 2008 11:03 AM


137Interior equipment and trunk
Cargo net \*

WARNING
The cargo in the luggage compartment must be anchored properly, even if the cargo net is correctly in position. The only purpose of the net is to prevent light objects from being thrown about in the cabin during heavy braking or in the event of a crash.
Install the net behind the rear seat backrest.
1 Remove the rearmost covers from the roof.
2 Fasten the attachments at the top of the net to the two attachment points in the roof.
3 Secure a lashing eye furthest forward on each of the CargoTracks (see previous page). Attach the hooks on the net to these eyes. Tension the straps.

natural_image
Diagram of a car interior showing steering wheel and dashboard, with an inset highlighting the steering wheel (no text or symbols present)Cover over the fixing point for the cargo net
You can also install the cargo net directly behind the front seats when the rear seats are folded.
1 Remove the front covers from the roof.
2 Fasten the attachments at the top of the net to the two attachment points in the roof.
3 Wrap each strap around the tube running under the rear edge of each front seat and attach the hook to the eye on the strap.

natural_image
Diagram of a mechanical component with arrows indicating motion or force direction (no text or symbols)Attaching the cargo net to the roof

Hook attached to a lashing eye

natural_image
Technical illustration of a mechanical assembly with no visible text or symbols


95 US MY09.book Page 138 Tuesday, April 15, 2008 11:03 AM
138 Interior equipment and trunk
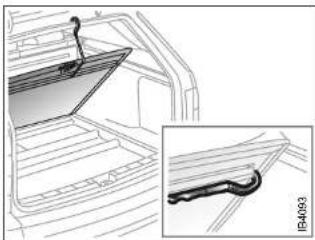
natural_image
Technical diagram showing a mechanical component inside a vehicle cab, with an inset close-up of the component (no text or symbols present)Trunk Release Handle
There is a glow-in-the-dark trunk release handle located inside the trunk on the latch. This handle will glow following exposure to light. Pull the release handle down to open the trunk from the Inside.
NOTICE
The trunk release handle was not designed to be used to tie down the trunk lid or as a anchor point when securing items in the trunk. Improper use of the trunk release could damage it.
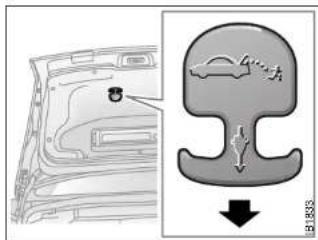
Trunk Release Handle
Storage tray \* under luggage compartment floor, 9-5 SportCombi
Secure the luggage compartment floor in the open position using the hook on the underside of the floor. The storage tray must be located under the luggage compartment floor. The cargo net can be stored here when not in use for example.
Maximum recommended weight on the storage tray is 22 lbs. (10 kg).


natural_image
Illustration of a sedan parked on a road with trees and hills in the background (no text or symbols)Starting and driving
| Ignition switch____ | 140 | Economical motoring____ | 170 |
| Starting the engine____ | 141 | Driving in cold weather____ | 172 |
| Important considerationsfor driving____ | 144 | Driving in hot weather____ | 173 |
| Towing a trailer *____ | 174 | ||
| Refueling____ | 146 Driving with a roof rackload____ | 179 | |
| Engine Break-In Period____ | 150 | ||
| Gear changing____ | 150 | Driving with a load____ | 179 |
| Cruise control____ | 159 | Driving with a sparewheel fitted____ | 181 |
| Braking____ | 160 | ||
| Electronic StabilityProgram (ESP®)____ | 163 | Driving with the trunklid/tailgate open____ | 181 |
| Parking brake____ | 165 | Driving in deep water____ | 181 |
| Parking____ | 165 | Towing the car____ | 181 |
| Saab ParkingAssistance *____ | 168 | Jump starting____ | 184 |
* Asterisk means: equipment not fitted in all cars (can depend on model variant, engine variant, market specification, options or accessories).


95 US MY09.book Page 140 Tuesday, April 15, 2008 11:03 AM
140 Starting and driving
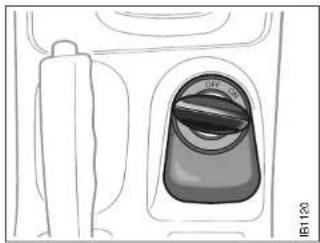
natural_image
Diagram of a car air intake system showing fan, valve, and handle (no text or labels)Ignition switch
The combined ignition switch and gear-lever lock is located in the center console between the front seats. The ignition key can only be removed when reverse is engaged (automatic transmission: selector in "P" position).
The key fits all the locks on the car. The key number is specified on the small plastic strap that comes with the keys when the car is delivered. Keep a note of the key number in a safe place, as you will need to quote it if ordering a replacement key.
See also page 44.
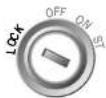
LOCK position
Engage reverse and turn the key to LOCK.
Automatic transmission: select "P".
The gear lever is locked. This is the only position in which the key can be removed.
The parking lights, hazard warning lights and interior lighting all work.
OFF position
Gear lever no longer locked. Certain electrical circuits operational.
ON position
All electrical circuits working.
Do not leave the key In the ON position when the engine is not running.
Turn the key to OFF to switch off the electrical circuits. In the ON position certain warning and indicator lights come on as a check, and they normally are extinguished after about 3 seconds.
ST (starter) position
The starter operates when the key is turned to this position. When released, the key will spring back to the ON position.
If the engine fails to start, the key must first be turned back to the position between OFF and LOCK before the starter can be operated again.
When the starter motor is running, several electrical circuits are disconnected to facilitate starting.





95 US MY09.book Page 141 Tuesday, April 15, 2008 11:03 AM


141 Starting and driving
NOTICE
Take care not to spill drinks or to drop crumbs over the ignition switch. If dirt or liquid gets into it, the switch may not operate properly.

WARNING
• Always remove the key before leaving the car.
• Always apply the parking brake before removing the ignition key.
If the car does not start
If the text
"Key not accepted.
Contact service.
Is shown on the SID, after a failed start attempt, the cause could be a fault in the transmitter in the key, or in the receiver in the ignition lock. The following should be done:
- Turn the key back to the LOCK position.
- Turn the key to ON.
- Press one of the buttons on the remote control (the LED stops blinking).
- Start the engine.
Try another key. If this works, then the fault is in the first key.
We recommend that you contact an authorized Saab dealer for checking and rectification.
Note:
Certain electronic items, such as cellular phones, may affect the starting produc- dure. Be sure that all devices are clear of the key/Ignition switch area.
Starting the engine

WARNING
- When starting the engine:
- Sit down in the driver's seat.
- Depress the clutch pedal fully. If the gear lever is not in the neutral position, the clutch pedal must be fully depressed or the car will jump forwards or backwards, which may cause a crash.
- Never start the car from outside the vehicle, e.g. through a wound down window. This could lead to serious personal injury.
- Engage reverse (R) (position P for automatic transmission) to remove the ignition key. The key can only be removed in this gear position.
- Carbon monoxide (CO) is a colorless, odorless, poisonous gas. Be alert to the danger of CO – always open the garage doors before starting the engine in the garage.
- There is also a danger of CO poisoning if the exhaust system is leaking.


95 US MY09.book Page 142 Tuesday, April 15, 2008 11:03 AM
142 Starting and driving
• The tail pipe of the exhaust system can become very hot during driving. Bear this in mind when loading and unloading the car.
- Do not rest or sleep in the car when parked with the engine running. There is a risk of depressing the accelerator which could lead to engine damage. There is also the risk that exhaust gases may enter the cabin.
It is possible for air to enter the lubricating system in conjunction with an oil or oil-filter change, or if the car has been stored for some time. This air can cause the hydraulic cam followers to emit a ticking noise, which can persist for up to 15 minutes after starting. Although this is quite normal and does not indicate any malfunction, it is advisable not to exceed 3,000 rpm before the noise has disappeared.
The hydraulic cam lifters are completely service free; the valve clearance is set up at the factory and will not need any subsequent adjustment.
Starting the engine
Avoid racing the engine or putting a heavy load on it before it has warmed up. Drive away as soon as the oil warning light has been extinguished to enable the engine to attain its normal temperature as quickly as possible.
The engine has an automatic choke and should be started as follows:
Cars with manual transmission
To start the engine the clutch pedal must be fully depressed.
1 Depress the clutch pedal fully but do not touch the accelerator.
2 Start the engine. Let the ignition key spring back as soon as the engine has started and is running smoothly – at very low temperatures, you may need to run the starter for up to 25 seconds. Wait 20–30 seconds before running the starter again, to give the battery time to recover.
Note:
On cars with manual transmission, if the starter fails to engage when the ignition key is turned to the start position, make sure the clutch pedal is full depressed. Mispositioned floor mats or other obstructions under the clutch pedal may affect starting.
Let the engine idle for about 10 seconds. Do not open the throttle wide for at least 2–3 minutes after starting.
Cars with automatic transmission \*
1 The selector lever must be in the P or N position.
2 Keep your foot on the brake pedal.
3 Start the engine. Let the ignition key spring back as soon as the engine has started and is running smoothly – at very low temperatures, you may need to run the starter for up to 25 seconds. Wait 20–30 seconds before running the starter again, to give the battery time to recover.
Let the engine idle for about 10 seconds. Do not open the throttle wide for at least 2–3 minutes after starting.


95 US MY09.book Page 143 Tuesday, April 15, 2008 11:03 AM
143Starting and driving
Useful tips on cold climate starting
If the engine has failed to start after several attempts in very cold weather, press and hold the accelerator down to the floor and run the starter for 5–10 seconds. This will prevent the engine being flooded (excessively rich fuel-air mixture).
Now start the engine in the normal way – do not touch the accelerator.
If the engine stalls immediately after starting (e.g. if the clutch was released too quickly), do not touch the accelerator when restarting the engine.
Limp-home mode
The engine management system has a diagnostic feature that continually checks a number of internal functions.
If, for example, a fault is detected in the throttle valve, the engine management system will go into Limp-home mode. This limits:
- idling control,
- disables the cruise-control system and - limits the capacity of the A/C compresso
If the limp-home mode is in operation ("Service Engine Light also known as CHECK ENGINE" light on, see below) and the outside temperature is close to or below freezing, you may need to use some throttle on starting (some pressure on the accelerator). If the diagnostic system has detected a fault in the engine-management system, the "Service Engine Light also known as CHECK ENGINE" light ☐ the main instrument panel will come on (see page 58), indicating that you should have the car checked as soon as possible by a workshop. We recommend that you contact an authorized Saab dealer.
NOTICE
If the CHECK ENGINE warning light starts to flash, ease off the accelerator slightly. If the light does not cease to flash within 5 seconds, stop the car in a suitable place as soon as possible and turn off the engine. The car must be towed to a workshop. We recommend that you contact an authorized Saab dealer.
If the CHECK ENGINE warning light flashes, it indicates that the engine is mis-firing which can result in damage to the catalytic converter.

natural_image
Pure geometric diagram with crosshair and circular shapes, no text or symbols present95 US MY09.book Page 144 Tuesday, April 15, 2008 11:03 AM
144 Starting and driving
Important considerations for driving
The engine-management system in the Saab 9-5 is called Saab Trionic T7. The system manages the ignition, fuel injection and turbo boost pressure.
The Trionic T7 system developed by Saab is an intelligent engine-management system designed to achieve optimum drivability under differing driving conditions. The system makes adjustments automatically, for instance, if the car is being driven at altitude (oxygen-deficient air), for different grades of fuel (AON 87–93) and for different load conditions.
1 Starting and driving
- Refrain from using full throttle before the engine has warmed up (before needle in mid-range on temperature gauge).
- A safety function prevents the engine from revving faster than 6,000 rpm by limiting the induction air.
2 Stopping the engine
- Do not rev the engine immediately before switching it off – stop the engine when it is idling.
3 Regulating the boost pressure
- One of the advantages of boost pressure regulation is that the engine can also be run safely on gasoline with a lower octane rating, although not lower than AON 87. However, engine performance will fall slightly and heavy loading and laboring should be avoided. For optimum performance, use the recommended grade of fuel.
• The maximum boost pressure is adjusted automatically to the knocking or pinging tendency of the engine. Occasional, short-lived knocking when the engine is under a heavy load is perfectly normal; the extent will depend on the grade of fuel in the tank.
- Isolated instances of knocking are more likely to occur with low-octane fuel. This controlled form of knocking, followed by a reduction in the boost pressure, is a sign that the wastegate is functioning and is perfectly safe for the engine.
NOTICE
- If the engine sounds strange there is a fault in the system. Have the car checked without delay by a workshop. We recommend that you contact an authorized Saab dealer.
- The use of fuel with too low an octane rating can cause serious engine damage.
WARNING
If the engine is being run with the car on a rolling road or dynamometer, longer than for a standard state emission inspection, to ensure adequate cooling, air must be blown into the engine compartment and under the car at a rate equivalent to the ram-air effect that would be obtained at the corresponding road speed.


95 US MY09.book Page 145 Tuesday, April 15, 2008 11:03 AM
Important considerations with catalytic converters
NOTICE
Use only unleaded gasoline. Leaded gasoline is detrimental to the catalyst and oxygen sensor and will seriously impair the function of the catalytic converter.
The catalytic converter is an emission-control device incorporated in the car's exhaust system. It consists of a metal canister with a honeycomb insert, the cells of which have walls coated in a catalytic layer (mixture of precious metals).
To ensure that the catalytic converter continues to function properly, and also to avoid damage to the converter and its associated components, the following points must be observed:
- Have the car serviced regularly in accordance with the service program. The fuel and ignition systems are particularly important in this context.
• Always be alert to any misfiring of the engine (not running on all cylinders) and any loss of power or performance. At the first sign of a malfunction, reduce speed and take the car to a workshop as soon as possible. We recommend that you contact an authorized Saab dealer.

Oxygen-sensor-controlled injection system
1 Engine control module
2 Oxygen sensor (lambda probe)
3 Catalytic converters
- If the engine fails to start (in very cold weather or if the battery is flat), the car can be push started (manual gearbox only) or started using jumper cables to a donor battery. However, as soon as you have started the engine, it is important that it runs on all cylinders. If it is misfiring, allow it to idle for up to five minutes to give it time to settle and run smoothly. If, after this time, the engine still fails to run properly, turn off the engine and get in touch with a workshop for advice. We recommend that you contact an authorized Saab dealer.
- Never park the car on dry grass or other combustible material. The catalytic converter gets very hot and could therefore start a fire.
- Never drive off if the engine is misfiring.
- If you jump start the car when the engine is already up to normal temperature, the engine must start to run on all cylinders. Stop jump-starting if the engine fails to start immediately.
NOTICE
If the car runs out of fuel, it is possible for air to get into the fuel system. If this happens, the catalytic converter may overheat and be damaged.
Failure to follow these directions could result in the catalytic converter and associated components being damaged, and could represent a breach of the warranty conditions.
145Starting and driving

95 US MY09.book Page 146 Tuesday, April 15, 2008 11:03 AM
146 Starting and driving
Refueling

WARNING
If you spill fuel and then something ignites it, you could be badly burned. Fuel can spray out on you if you open the fuel cap too quickly. This spray can happen if your tank is nearly full, and is more likely in hot weather. Open the fuel cap slowly and wait for any "hiss" noise to stop. Then unscrew the cap all the way.
Gasoline fumes are highly explosive. Therefore:
• never smoke while refueling
- never use gasoline for any purpose other than as engine fuel
• gasoline is extremely flammable and can cause severe burns. No open or exposed flames near gasoline
- do not use a mobile phone at the same time as refueling.
NOTICE
- Do not overfill. Fuel should not come right up the filler pipe as room for expansion is needed for when the temperature rises.
• The use of fuel with too low an octane rating can cause serious engine damage. - Clean fuel from painted surfaces as soon as possible.
- Do not use additives with E85-fuel.
NOTICE
The engine control module (ECM) monitoring the engine parameters also stores fault codes.
Under certain circumstances, this may cause constant illumination of the "Service Engine Light also known as CHECK
ENGINE" indicator light , thus cating a fault that must be checked by your Saab dealer, see page 58.
NOTE: always observe the following two measures:
- Make sure that the fuel filler cap is screwed on correctly before the engine is started. Screw on the fuel filler cap until you hear 3 clicks.
- Avoid driving with the fuel low level indicator illuminated. The symbol illuminates when less than approximately 2 gallons (8 litres) of fuel remains in the tank.
indi-


95 US MY09.book Page 147 Tuesday, April 15, 2008 11:03 AM
147Starting and driving
Refueling

WARNING
If a fire starts while you are refueling, do not remove the nozzle. Shut off the flow of fuel by shutting off the pump or by notifying the station attendant. Leave the area immediately.
1 Switch off the engine.
2 Open the fuel cap, located in the right-hand rear fender.
3 Insert the fuel pump nozzle beyond the flange on the filler pipe and let the first mark (a ring, a pimple or the first spring-coil) rest on the flange. Do not withdraw the nozzle while filling is in progress.
4 Cease refueling the first time the pump stops, and wait a few seconds after you've finished pumping before you remove the nozzle.
NOTICE
Do not overfill. Fuel should not come right up the filler pipe as expansion room is needed when the temperature rises.
- Fill to maximum filling capacity.
- Stop filling after the first time that the nozzle trips to shut off the flow of fuel.
- Filling capacity can differ between different fuel stations and outside temperature. Fuel tank volume when nozzle trips to shut off, may vary by 0.5 gal. (2 liters).
- Do not fill fuel all the way up the filler pipe. The gasoline must be allowed room for expansion especially during hot weather.
Fuel cap
To remove the fuel cap, turn it slowly to the left (counterclockwise). The fuel cap has a spring in it; if you let go of the cap too soon, it will spring back to the right.
When you put the fuel cap back on, turn it to the right (clockwise) until you hear 3 clicks. Make sure you fully install the cap.
The diagnostic system can determine if the fuel cap has been left off or is improperly installed. See Service Engine Light also known as CHECK ENGINE Indicator light on page 58.

natural_image
Technical illustration of a mechanical assembly with two views (top and side), no visible text or symbolsWhen refueling, hang the fuel cap inside the fuel door
The most effective way to prevent condensation forming in the tank (and thus avoid possible running problems) is to keep the tank well filled.
Before the onset of freezing temperatures in winter, it may be advisable to add gasoline anti-freeze to the fuel a few times to dispel any condensation in the system.
The fuel door has a built in filler cap holder slot located on the fuel door. Slide the white ring on the cap into the slot.
Notice: If you need a new fuel cap, be sure to get the right type. Your dealer can get one for you. If you get the wrong type, it may not fit properly



95 US MY09.book Page 148 Tuesday, April 15, 2008 11:03 AM
148 Starting and driving
Filling a portable fuel container Fuel (Gasoline Engine)

WARNING
Never fill a portable fuel container while it is in your vehicle. Static electricity discharge from the container can ignite the gasoline vapor. You can be badly burned and your vehicle damaged if this occurs. To help avoid injury to you and others:
- Dispense gasoline only into approved containers.
- Do not fill a container while it is inside a vehicle, in a vehicle's trunk, pickup bed or on any surface other than the ground.
- Bring the fill nozzle in contact with the inside of the fill opening before operating the nozzle. Contact should be maintained until the filling is complete.
- Do not smoke while pumping gasoline.
Fuel
Use of the recommended fuel is an important part of the proper maintenance of your vehicle.
Gasoline Octane
Use regular unleaded gasoline with a posted octane of 87 or higher.
If the octane is less than 87, you may get a heavy knocking noise when you drive. If this occurs, use a gasoline rated at 87 octane or higher as soon as possible. Otherwise, you might damage your engine. A little pinging noise when you accelerate or drive uphill is considered normal. This does not indicate a problem exists or that a higher-octane fuel is necessary. If you are using 87 octane or higher-octane fuel and hear heavy knocking, your engine needs service. Although not required, use higher octane fuel for optimum performance - 93 octane.
Gasoline Specifications
It is recommended that gasoline meet specifications which were developed by automobile manufacturers around the world and contained in the World-Wide Fuel Charter which is available from the Alliance of Automobile Manufacturers at www.autoalliance.org/fuel_charter.htm. Gasoline meeting these specifications could provide improved driveability and emission control system performance compared to other gasoline.
NOTICE
Gasolines containing oxygenates, such as ethers and ethanol, and reformulated gasolines may be available in your area. We recommend that you use these gaso-lines, if they comply with the specifications described earlier. However, E85 (85% ethanol) and other fuels containing more than 10% ethanol must not be used in vehicles that were not designed for those fuels.
California Fuel
If your vehicle is certified to meet California Emission Standards (see the underhood emission control label), it is designed to operate on fuels that meet California specifications. If this fuel is not available in states adopting California emissions standards, your vehicle will operate satisfactorily on fuels meeting federal specifications, but emission control system performance may be affected. The malfunction indicator lamp may turn on and your vehicle may fail a smog-check test. See Service Engine Light also known as CHECK ENGINE Indicator light on page 58. If this occurs, return to your authorized Saab dealer for diagnosis. If it is determined that the condition is caused by the type of fuel used, repairs may not be covered by your warranty.



The image contains no text.
The image contains no text.
The image contains no text.
The image contains no text.
The image contains no text.
95 US MY09.book Page 149 Tuesday, April 15, 2008 11:03 AM
149Starting and driving
Additives
To provide cleaner air, all gasolines in the United States are now required to contain additives that will help prevent engine and fuel system deposits from forming, allowing your emission control system to work properly. You should not have to add anything to your fuel. However, some gasolines contain only the minimum amount of additive required to meet U.S. Environmental Protection Agency regulations. Saab recommends that you buy gasolines that are advertised to help keep fuel injectors and intake valves clean. If your vehicle experiences problems due to dirty injectors or valves, try a different brand of gasoline.
Gasolines containing oxygenates, such as ethers and ethanol, and reformulated gaso-lines may be available in your area to contribute to clean air. Saab recommends that you use these gasolines, particularly if they comply with the specifications described earlier.
Notice: Your vehicle was not designed for fuel that contains methanol. Do not use fuel containing methanol. It can corrode metal parts in your fuel system and also damage the plastic and rubber parts. That damage would not be covered under your warranty.
Some gasolines that are not reformulated for low emissions may contain an octane-enhancing additive called methylcyclopentadienyl manganese tricarbonyl (MMT); ask the attendant where you buy gasoline whether the fuel contains MMT. Saab does not recommend the use of such gasolines.
Fuels containing MMT can reduce the life of spark plugs and the performance of the emission control system may be affected. The malfunction indicator lamp may turn on. If this occurs, return to your authorized Saab dealer for service.
Fuels In Foreign Countries
If you plan on driving in another country outside the United States or Canada, the proper fuel may be hard to find. Never use leaded gasoline or any other fuel not recommended in the previous text on fuel. Costly repairs caused by use of improper fuel would not be covered by your warranty.
To check the fuel availability, ask an auto club, or contact a major oil company that does business in the country where you will be driving.


95 US MY09.book Page 150 Tuesday, April 15, 2008 11:03 AM
150 Starting and driving
Engine Break-In Period
Pistons, bores and bearings need time to obtain uniform, wear-resistant surfaces.
If a new engine is driven too hard, this gradual process of bedding-in will not be possible and the life of the engine will be shortened.
During the first 1,200 miles (2,000 km), do not exceed 5,000 rpm.
In addition, refrain from driving the car at full throttle, other than for brief instances, during the first 1,800 miles (3,000 km).
Wearing in new brake pads
New brake pads take time to bed in, about 90 miles (150 km) if the car is driven largely under stop-and-go conditions or about 300 miles (500 km) of highway driving.
To extend the useful life of the pads, avoid hard braking as much as possible during this period.
Gear changing
Manual transmission \*
To start the engine the clutch pedal must be fully depressed.
The gear positions are marked on the gear lever. Before reverse (R) can be engaged, you must lift the ring underneath the gear-lever knob.
To change gear, fully depress the clutch pedal and then release it smoothly. It is inadvisable to drive with your hand resting on the gear lever, as this can increase the wear on the transmission.
When changing down from 5th to 4th gear, ease the gear lever straight back, without applying any lateral pressure. This will prevent 2nd gear being engaged by mistake, which can result in overreving and possible damage to the engine.
Before engaging reverse, wait till the car is at a standstill, release the accelerator and fully depress the clutch. From neutral, press the gear lever firmly to the right before easing it back into reverse.


95 US MY09.book Page 151 Tuesday, April 15, 2008 11:03 AM

natural_image
Interior view of a car gear shift lever with a close-up inset showing the number 3/4/5 (no text or symbols on the gear itself)NOTICE
When the reverse gear is to be engaged the car must be at a standstill with the accelerator fully released. Lift the reverse lock-out collar and push the gear lever firmly to the right in neutral before easing it into reverse.
Towing
Towing of cars with manual transmission, see page 181.
Automatic transmission \*

WARNING
- Make it a habit to keep your foot on the brake when selecting a drive position, to prevent the car from creeping forward (or backward if reverse is selected).
- The car must be at a standstill before P, R or N is selected. You have to have your foot on the brake pedal to move the lever out of P. If the car is still moving when a drive position is subsequently selected, this could cause a crash or damage the automatic transmission.
- Never park the car with the selector lever in a drive position, even if the parking brake is on.
- If you want to leave the car with the engine running, move the selector lever to P or N and apply the parking brake.
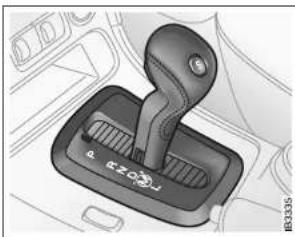
natural_image
Mechanical gear shift lever component (no text or symbols visible)Selector lever
The electronic control module for the automatic transmission receives information on engine torque and road speed, and also controls the hydraulic pressure in the transmission to ensure that gear changing is as smooth as possible.
The position of the selector lever is shown by the symbols adjacent to the lever and also by a symbol on the main instrument panel. If manual mode (M) is selected, the current gear is also displayed on the main instrument panel.
The ignition key can only be removed when the selector lever is in the P position.
151Starting and driving


95 US MY09.book Page 152 Tuesday, April 15, 2008 11:03 AM
152 Starting and driving

Selector-lever indicator on main instrument panel
When the car is stationary, the engine must be at idling speed when the selector lever is moved.
You must have your foot on the brake pedal to move the lever out of park.
If the accelerator is depressed while the lever is moved, this will result in abnormal wear in the transmission.
NOTICE
After selecting a drive position, pause briefly to allow the gear to engage (the car starts to pull a little) before you accelerate.
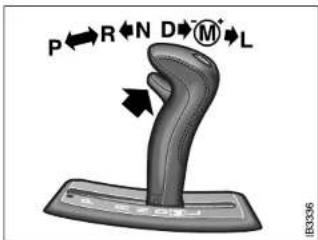
Detent positions for selector movement
The detent button on the selector lever has to be pressed before the selector can be moved between certain positions.
Three modes for the automatic transmission can be selected: Normal, Manual and Sport.
Normal mode
The Normal mode, which provides the best fuel economy, is the default setting when the engine is started.
Manual mode (Sentronic): see page 156.
Sport mode
When the Sport mode is selected, the transmission changes up later than in Normal mode to provide higher performance. In this mode, the SPORT indicator will appear on the main instrument panel (see page 158).
Adaptive gear-change pattern
Adaptive gear-change pattern is a transmission function in the Normal and Sport modes which matches gear changing to current driving conditions. The transmission control module senses the load on the engine and temperature of the transmission. A suitable gear change pattern is then selected automatically to avoid unnecessary gear changes and undesired temperature increases in the transmission.











WH be mo Yo pe If the lev we N Ab ste
WH be mo Yo pe If the lev we N Ab ste
WH be mo Yo pe If the lev we N Ab ste
WH be mo Yo pe If the lev we N Ab ste
WH be mo Yo pe If the lev we N Ab ste
95 US MY09.book Page 153 Tuesday, April 15, 2008 11:03 AM
Lock-up function
The automatic transmission has a lock-up function, which can render the torque converter inoperative in 3rd, 4th and 5th gears, thus reducing the engine speed and fuel consumption.
When the lock-up function comes into operation, it may give the impression of an overdrive being engaged.
Kick-down
When the accelerator is pressed down hard, a change-down to the next gear will be effected to provide maximum acceleration, e.g. for overtaking.
Following this, the next higher gear will be selected at the optimum engine speed for acceleration or, if you ease off the accelerator, before reaching this.
Park Brake Shift Lock
The transmission has a security function known as Park Brake Shift Lock. To move the gear selector out of the P position, the brake pedal must be depressed at the same time as the gear selector catch (detent) is pressed in.
Shift Lock override
NOTICE
Due to electrical problems it may not be possible to move the selector out of the park position, even if the ignition is ON. If for some reason the selector has to be moved out of the park position (i.e. to tow the car a short distance) do as described below.
Check fuse No. 1 (see page 216). If the problem was cured by changing the fuse or battery, you do not have to contact a workshop.
If the fuse blows again as soon as the Shift Lock feature is activated you should contact a workshop. We recommend that you contact an authorized Saab dealer.
153Starting and driving

natural_image
Mechanical gear shift lever inside a vehicle (no text or symbols visible)If the fuse is OK, check the battery regarding the voltage.
1 Apply the parking brake
2 Make sure the key is in position ON
3 Use a small tool such as a screwdriver and push the lever (see picture) downwards so that the detent button can be pressed approx. 10 mm
4 Move the selector out of position P to N
5 Remove the tool
6 Release the parking brake if the car is to be moved immediately; otherwise keep it applied.


95 US MY09.book Page 154 Tuesday, April 15, 2008 11:03 AM
154 Starting and driving

Automatic transmission * , fault indicator
If "Automatic transmission*, fault indicator" light appears on the main instrument panel, the system has detected a fault in the automatic transmission or its control module (see page 62).
This also means that the Limp-home mode has been selected, to guard against further damage being done to the transmission. In this mode, the automatic transmission starts in 5th gear, and gear changes (if necessary) will have to be made manually.
Stop the car in a safe place. Switch off then restart the engine. If the fault is intermittent, the transmission will operate as normal despite the fault indicator being on. Have the car checked at a workshop. We recommend that you contact an authorized Saab dealer.
It is not possible to select the SPORT or Sentronic mode when the Limp-home mode is active.
Gear changes must be made manually.
The following gears will be engaged in the respective selector positions when the automatic transmission is in Limp-home mode:
| Position | R | D | M | L |
| Gear | Reverse | 5th | 5th | 2nd |
NOTICE
If the control module has actuated the Limp-home function for the automatic transmission, the car will remain in 5th gear when D is selected, making it very sluggish.
Select position L to prevent unnecessary wear on the transmission. The transmission then starts in 2nd gear. Once the car is moving you can select position D.
When the indicator light is on, the car must not be driven with a caravan or trailer attached.
Overheated transmission fluid
If the automatic-transmission fluid should overheat, the following message will appear on the SID:
"Gearbox too hot.
Make a safe stop."
In this event, stop the car in a suitable place, switch off the engine and open the hood.
Wait for several minutes then turn on the ignition to check that the message has gone out. When driving subsequent to the transmission fluid overheating, select a gear in which the engine speed is about 3,000 rpm.
Overheating of the automatic-transmission fluid can occur when the car is towing a heavy load, such as a camping trailer in hilly country. High ambient temperatures can also increase the temperature of the transmission fluid or the oil cooler may be faulty. Contact a workshop. We recommend that you contact an authorized Saab dealer (see also page 174).


natural_image
Pure geometric diagram with crosshair and circular target shapes without any text or symbols95 US MY09.book Page 155 Tuesday, April 15, 2008 11:03 AM
155Starting and driving
Driving on hilly roads with a heavy load
The transmission fluid can overheat when the gearbox is strained, for example, when driving with a trailer on hilly roads. To avoid the transmission fluid overheating, always drive in Normal mode. The adaptive gear change patterns are then active.
High air temperatures or a faulty oil cooler can also cause the transmission fluid to overheat. Overheating reduces the service life of the fluid. Contact an authorized Saab dealer (see also page 174).
Towing
Towing of cars with automatic transmission, see page 181.
Descending hills
WARNING
Remember to use engine-braking (selector position D or L) to spare the brakes when you are driving on a long or steep downhill slope.
Brake failure can result from overheated brakes!
If the speed of the car increases while descending a steep hill, despite the accelerator being released, the control module will change down a gear when you brake. If you desire more powerful engine braking, manually select a lower gear.


95 US MY09.book Page 156 Tuesday, April 15, 2008 11:03 AM
156 Starting and driving
Sentronic, manual mode \*
Move the selector lever to the M position. Select a higher gear by pushing the
right-hand paddle the steering wheel. Select a lower gear by pushing the left-hand paddle the steering wheel.
An example of when you may wish to make manual gear changes is when overtaking, to enable you to remain in a low gear for an extended period of time.
Changes from 3rd to 4th and from 4th to 5th can be made when the engine speed is above roughly 2,000 rpm.
If you select a gear that is judged too high by the system, the selected gear position will be shown briefly on the main instrument panel and then the gear that is actually engaged.

natural_image
Diagram of a car steering wheel with two side views showing dashboard and steering wheel (no text or symbols)Paddles on the steering wheel for changing gear manually
If the road surface is slippery, you may wish to pull off in 2nd or 3rd to reduce the risk of wheel spin.
When descending hills you should select a low gear to increase the braking effect of the engine and thus spare the brakes.
Manual gear selections are shown on the main instrument panel. The selector position and the current gear are displayed.
When the selector lever is in the M position, as opposed to the D position, engines are much more responsive to changes in accelerator position. The accelerator has a different feel.
When in manual mode, kick-down operates for 4th and 5th gears (below 2,000 rpm). Kick-down cannot be activated in 1st, 2nd or 3rd gears.
For optimum performance, gear changes should be made before reaching 6,000 rpm.
To avoid damaging the engine and transmission, the transmission will shift up a gear if the engine is in danger of overrevving. You may feel a slight jolt before this gear change is effected.


95 US MY09.book Page 157 Tuesday, April 15, 2008 11:03 AM
157Starting and driving
Selector positions

P To shift out of the P position you must depress the brake pedal and the ignition must be ON.
The parking position (P) must only be selected when the car is at a complete standstill. The selector lever is locked and the transmission is mechanically immobilized. Always apply the parking brake after parking the car. The engine can be started. The key can be removed.
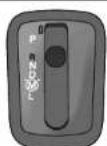
R The reverse (R) position must only be selected when the car is at a complete standstill. The detent-release button must be pressed before the selector lever can be moved to R. Wait until reverse gear has engaged (car starts to creep) before touching the accelerator.

N In the Neutral position (N), the transmission is disengaged from the engine. The engine can be started, but first ensure that the parking brake is on, to prevent the car from moving off unexpectedly. To prevent the engine and transmission from becoming hotter than necessary, select N for stops other than brief ones, e.g. if stuck in a traffic jam. The normal drive position (D) is recommended for waiting at traffic lights.
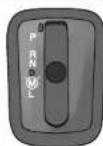
D The Drive position (D) is the position for normal motoring. Gear changes between 1st and 5th will take place automatically, the timing of which is determined by the throttle (accelerator) position and the speed of the car. After moving the selector lever to D, pause to give the gear time to engage (car starts to pull).

M Move the selector lever from position D to M to allow you to change gear manually. Refer to page 156.

L Select position L if you wish to drive in 1st gear. No upchanges will be made if you pull off in position L. If you move the selector lever from position D or M to L at a high vehicle speed, the transmission will automatically shift down through 4th, 3rd and 2nd gears to 1st gear, depending on the car's speed. Use this position for descending steep hills if the car is heavily loaded to spare the brakes.


95 US MY09.book Page 158 Tuesday, April 15, 2008 11:03 AM
158 Starting and driving
If you move the selector lever from D to L, down shifts will follow a set pattern to avoid damaging the engine or transmission.
Manual gear-changing is not recommended on slippery roads.
If one of the drive wheels spins excessively, the engine torque will be reduced to avoid damaging the transmission.
Adaptive gear-change patterns
Adaptive gear-change patterns are selected automatically depending on the engine load and the present temperature of the transmission. The function is available in Normal and Sport modes.
The changes occur at a higher engine speed and the car remains in the same gear for longer, if the transmission control module senses that the load has not decreased. These gear-change patterns prevent unnecessary changing up and down, when for example driving up or down long slopes with a trailer or caravan, and to prevent overheating the transmission oil. The adaptive gear-change function is also selected automatically when the transmission oil becomes too hot, to protect the transmission itself from damage and to lower the oil temperature.
The adaptive gear-change pattern function is deselected when:
• The engine is switched off.
- The load is reduced so much that the function is no longer required.
- "Automatic transmission *, fault indicator" appears on main instrument panel, see page 154.
SPORT modes

To select Sport mode, press the "S" button on the selector lever when the selector lever is in position N or D.
In this mode, gear changes will take place at higher engine speeds than in Normal mode, in other words, the transmission will change up later and change down earlier for the same throttle (accelerator) position.
The Sport mode will be deselected if:
• The SPORT button is pressed.
• The selector lever is moved to position P, R, M or L.
• The engine is switched off.
• "Automatic transmission *, fault indicator"
① appears on main instrument panel, see page 154.




95 US MY09.book Page 159 Tuesday, April 15, 2008 11:03 AM
159Starting and driving
Cruise control
WARNING
- Do not use the Cruise control system on wet or icy roads, in dense traffic or on winding roads.
- Set the control to OFF when you do not want to use the system, to prevent the system being activated inadvertently.
For safety reasons (brake system function) the brakes must be applied once, when the engine has started, before the cruise control system can be activated.
The system is operated by means of the controls on the stalk switch:
- ON/OFF (switch on/off).
- RESUME/– (Resume preset speed).
- SET/+ (to set the desired speed).
- CANCEL (Cancel operation of system, e.g. to reduce speed temporarily).
When the system is ON, the CRUISE indicator light will appear on the main instrument panel and will be extinguished when the system is switched OFF. If CANCEL is selected, CRUISE will flash once.

Cruise-control switches
To set the desired speed
Move the switch to ON. Accelerate to the desired speed (minimum speed: 25 mph (40 km/h)) and press SET/+.
To increase the preset speed
Accelerate to the desired speed and press SET/+.
You can also increase the speed of the car using the SET/+ button. Press it once to increase the speed by 1 mph (1.6 km/h) or hold it in and release when the desired speed is reached.
Temporary increase in speed
Press the accelerator to override the preset speed, e.g. for overtaking.
When you release the accelerator, the system will revert to the preset speed.
To cancel temporarily
Move the control stalk to CANCEL (spring-loaded position before OFF position). This will disengage the system but the preset speed will be retained in the system memory. (The memory is deleted when the engine is switched off.)
To re-engage the system
To revert to the preset speed, slide the switch to RESUME/-. This will only operate when the car's speed is above 25 mph (40 km/h).


95 US MY09.book Page 160 Tuesday, April 15, 2008 11:03 AM
160 Starting and driving
To reduce the preset speed
The cruise control system will always disengage automatically the moment that either the brake pedal or the clutch pedal is depressed.
It is also possible to reduce the speed by means of the RESUME/- button. Sliding the button to RESUME/- once will reduce the speed by 1 mph (1.6 km/h). Holding the button in the RESUME/- position will effect a gradual reduction in speed until the button is released.
Disengaging the system
The system will be disengaged:
- When the brake or clutch pedal is depressed.
- When the switch is moved to CANCEL.
- When the switch is moved to OFF.
- When the engine is switched off.
- When the selector lever is moved to position N (cars with automatic transmission).
- When the ESP ^® system is operative for more than 1 second.
Braking
To avoid the brakes becoming overheated, (e.g. when negotiating long descents with a drop of several hundred feet), select a low gear to use the braking effect of the engine. If the car has automatic transmission, move the selector lever to position D or L.
When driving fast, you can help to prolong the life of the brakes by thinking ahead and braking harder for short periods, rather than braking more moderately over long stretches.
Brake pad wear indicators
The outboard brake pads on the front wheels incorporate pad-wear indicators. When the lining is down to 3 mm, the pad will produce a screeching, squealing or scraping noise when the brakes are applied. New pads should be fitted without delay.
Brake pads should only be replaced by a workshop. We recommend that you contact an authorized Saab dealer.



95 US MY09.book Page 161 Tuesday, April 15, 2008 11:03 AM


161Starting and driving

WARNING
- It is prudent to try your brakes from time to time, especially when driving in heavy rain, through water collected on the road, in snow, on a wet road surface or in salty slush. In such conditions, the brakes may take longer than normal to take effect. To rectify this, touch the brake pedal periodically to dry the brakes out.
• The same applies after the car has been washed or when the weather is very humid. - Avoid parking the car with wet brakes. Before parking, and if the traffic conditions allow, brake quite heavily so that the brake discs and pads warm up and dry.
- The brakes are power assisted and it should be kept in mind that the servo unit only provides the power assistance when the engine is running.
- The brake pressure required when the engine is off, (e.g. when the car is being towed) is roughly four times the normal pedal force required. The pedal also feels hard and unresponsive.
ABS brakes

WARNING
• The additional safety afforded by the ABS system is not designed to allow drivers to drive faster but to make normal driving safer.
• To stop as quickly as possible, without loss of directional stability, whether the road surface is dry, wet or slippery, press the brake pedal down hard-without letting up (do not pump the pedal), declutching simultaneously, and steer the car to safety.
ABS (antilock braking system) modulates the brake pressure to the respective wheels. Wheel sensors detect if a wheel is about to lock, and the control module reduces the pressure to that wheel and then increases it once more until the tendency is detected again.
The brake system is equipped with an Electronic Brake-force Distribution device (EBD), which distributes the brake pressure between the front and rear wheels, in such a way as to achieve optimum braking performance irrespective of the car's speed and load.


95 US MY09.book Page 162 Tuesday, April 15, 2008 11:03 AM
162 Starting and driving
The ABS system has a built-in diagnostic function which will switch on the Anti-lock brake warning light if a fault is detected in the system (see page 60).
The ABS system will not reduce the braking distance on loose gravel or on snow or ice but, because the wheels cannot lock up, some steering control is retained.
When the ABS system is working, i.e. modulation of the brake pressure is in progress, the brake pedal will pulsate and a ticking noise will be heard. All this is perfectly normal.
Press the pedal down hard (you cannot press too hard) and steer the car to safety.

Braking with ABS brakes. When the system is operating, the brake pedal will pulsate gently and the system will make a ticking noise.

natural_image
Illustration of a deer facing a car on a road with trees and a road marked '183983' (no text or symbols on the diagram itself)Braking with ABS - evasive steering
Do not release the brake pedal before the car has come to a halt or the danger has passed!
If the road is slippery, the ABS system will operate even when only light pressure is applied to the pedal. This means that you can brake gently to test the condition of the road and adapt your driving accordingly.
It is well worth practicing the use of ABS brakes on a skid pad or other suitable facility.


95 US MY09.book Page 163 Tuesday, April 15, 2008 11:03 AM
163Starting and driving
Electronic Stability Program (ESP®)

WARNING
When driving normally, the ESP ^® system will help to improve the stability of the car. This does not mean that car can be driven faster. The same care and prudence as normally applied should be displayed on cornering and when driving on slippery roads.
The system employs both the antilock braking system (ABS) and the traction control system (TCS). It is a system that helps the driver to stabilize the car in unusual circumstances that would otherwise be more difficult to handle.
How the ESP® system works
The system can help to prevent the car from skidding by braking one or several wheels independently of the driver. The engine output is then also reduced to prevent the driving wheels from spinning. The car has sensors that measure wheel speed, yaw acceleration, lateral acceleration, steering wheel position and braking pressure. The values provided by these sensors are used to calculate the actual direction of the car. If this direction does not agree with that intended by the driver, calculated from the steering wheel position; the ESP® is engaged.
The ESP® system improves the driver's chances of retaining control over the car in critical situations.
To ensure that the system works as designed, the dimensions of all four tires must be the same.

natural_image
Diagram of four cars on a curved road with directional arrows indicating motion (no text or symbols)The illustration shows how the system brakes one or more wheels (and with varying braking force for each wheel) in order to increase the car's chances of following the direction in which the driver wants to drive.


95 US MY09.book Page 164 Tuesday, April 15, 2008 11:03 AM
164 Starting and driving
The ESP® indicator light
The A indicator light on the main instrument comes on for a short period of time when the ESP ^ system is operative.
Operation of the ESP ^® system indicates reduced cohesion between the tires and the road, and that extra care should be taken by the driver.
The ESP® OFF-indicator light
The 📄 on the main instrument comes on if:
- A fault has been detected and the system has therefore been switched off.
- The system has been switched off manually.
When the ignition key is turned to the ON position, the lamp is lit for about four seconds while the system undergoes a self-test.
Temporarily turning the ESP® system off
The system can be turned off manually with the ESP® button, whereupon the 1 on the main instrument panel will come on. The ESP® system cannot be switched off if the car is travelling faster than 35 mph (60 km/h).
The ESP ^® system is always operative during braking, even if it has been switched off manually.
NOTICE
Suspension modifications, such as changing the type of wheels, dampers or springs, can affect the function of the ESP® system.
Always consult a workshop before changing any suspension components. We recommend that you contact an authorized Saab dealer.

ESP ^® button

natural_image
Pure geometric diagram with crosshair and circular shapes, no text or symbols present95 US MY09.book Page 165 Tuesday, April 15, 2008 11:03 AM
165Starting and driving
Parking brake

WARNING
• Always apply the parking brake when you park the car.
• Always apply the parking brake before removing the ignition key.
- Do not use the parking brake while driving.
The parking brake is situated between the front seats and acts on the rear wheels.
When the parking brake is on, the indicator light (P) the main instrument panel will be on. To release the parking brake, lift the lever slightly, press the release button and release the lever by pushing down on it.

natural_image
Diagram of a car's seatbelt mechanism with a black arrow indicating direction (no text or symbols)Parking

WARNING
- Do not leave children or pets unattended in the car. In warm, sunny weather, the temperature inside the car can reach 160–180°F (70–80°C).
- Park where the vehicle will not create an obstruction or a hazard to other road users.
- Do not park on dry grass or other combustible material. The catalytic converter gets very hot and could start a fire.
- Apply the parking brake.
- Shift to Reverse for manual transmission (automatic transmission: move selector lever to P (Park)), and remove the ignition key. Lock the car.


95 US MY09.book Page 166 Tuesday, April 15, 2008 11:03 AM
166 Starting and driving
NOTICE
Empty the car yourself and bear in mind:
- Never leave a mobile phone, camera, computer or similar object visible in your car.
• Clothing, packages and bags attract thieves. - Do not leave small objects such as CDs, sunglasses and coins visible.
- If possible, park in a well-lit, conspicuous parking space.
• Thieves strike whenever and wherever they are given the opportunity.
Parking on a hill
When parking on a steep hill, turn the front wheels so that they will be blocked by the curb if the car should move.

1 Pointing downhill and against the curb
- Turn the wheels into the curb and edge the car forward until the wheels touch the curb.
- Turn the wheels away from the curb and edge the car back until the wheels touch the curb.
- Turn the wheels towards the edge of the road. If the car should start rolling, it will not run into the road.
2 Pointing uphill and against the curb
3 Pointing uphill or downhill – no curb

natural_image
Pure geometric diagram with crosshair and circular shapes, no text or symbols present

95 US MY09.book Page 167 Tuesday, April 15, 2008 11:03 AM


167Starting and driving
Long-term parking
If the car is not going to be used for some time, e.g. 3–4 months, the following steps are recommended:
- Run the engine to normal temperature before long-term parking.
- Drain the washer-fluid reservoir and hoses.
-
Wash and wax the car. Clean the rubber seals on the hood, luggage compartment lid and doors, and lubricate them with glycerol (glycerin).
• After washing the car, dry the brake discs by taking the car out on the road and applying the brakes a few times.
• After washing the car, dry the brake discs by taking the car out on the road and applying the brakes a few times. -
Fill the fuel tank with fuel to prevent condensation forming in it.
- Top up the coolant and check the anti-freeze before the onset of winter.
- Park the car in a dry, covered and well-ventilated building. Leave the parking brake OFF!
- Disconnect the negative (−) battery lead. If frost is likely to occur during the long-term parking, remove the battery and store it away from the frost.
- Ideally, the car should be put up on blocks, with the wheels off the ground. If this is not possible, inflate the tires to about 43 psi (300 kPa).
- Leave all the windows open a crack and cover the car with a fabric tarpaulin – not one made of plastic.




95 US MY09.book Page 168 Tuesday, April 15, 2008 11:03 AM
168 Starting and driving
Saab Parking Assistance \*

WARNING
Responsibility always lies with the driver when reversing.
• Saab Parking Assistance can facilitate reversing at low speeds, such as when reverse parking.
- Bear in mind that small and/or narrow objects cannot always be detected by the system.
The parking aid system facilitates parking and reversing. There are four sensors in the rear bumper that detect objects up to 6 feet (1.8 metres) behind the car.

natural_image
Line drawing of a car with a curved object extending from its side, labeled 'IR1299' on the right (no text or symbols on the car itself)Area monitored by the sensors seen from the side
The system uses four sensors in the rear bumper. These emit ultrasound signals that bounce back to the sensors off any objects behind the car. The system, however, cannot always detect small or narrow objects or objects that do not reflect ultrasound back towards the car, such as pipes, or the corner of a house or rectangular post.

natural_image
Diagram of a hand holding a cup, showing mechanical components (no text or symbols)Area monitored by the sensors seen from above
The system is activated automatically when reverse is engaged or selected. When the sensors detect an object within the monitored area, the SID will display the text
"PARK ASSIST" and pulses of sound (----) will be heard. The frequency of the pulses increases as the car comes closer to the object.
When the distance to the object is less than 12 in. (30 cm), a continuous tone will be heard.


95 US MY09.book Page 169 Tuesday, April 15, 2008 11:03 AM


169Starting and driving

NOTICE
Reverse slowly so that you have time to stop the car when the continuous tone is heard at approx. 12 in. (30 cm).
When an object is approximately 3 feet (90 cm) from the car, the sound pulses change character markedly. A distance of about 3 feet (90 cm) is suitable if you wish to load or unload the luggage compartment
If the distance between an object and the corner sensors does not change for three seconds, e.g. If you are reversing alongside a wall, the system will switch to monitoring straight back. The system indicates if the distance to the wall decreases again.
The system can be disengaged for when driving with a trailer. Press and hold the CLR button on the steering wheel when the display shows "PARK ASSIST", until the display shows "PARK ASSIST OFF". The system is re-engaged in the same way. The system is also always activated when the ignition key is turned to ON.
Pressing a steering wheel button briefly will not disengage the system, the display will simply show the previously selected function.
NOTICE
To function well, the sensors must be kept clean. Ice snow and dirt can affect their sensitivity.
Do not spray the sensors or closer than 8 in. (20 cm) to the sensors with a pressure washer, as this could damage them.
Ice, snow and dirt can affect the sensitivity of the sensors. In such cases a continuous tone will sound warning the driver that the system cannot measure the distance to an object. You can turn the system off by pressing and holding the CLR button for
1.5 seconds.
If the text "PARK ASSIST FAILURE" is displayed on the SID, have the system checked by a workshop. We recommend that you contact an authorized Saab dealer.


95 US MY09.book Page 170 Tuesday, April 15, 2008 11:03 AM
170 Starting and driving
Economical motoring
Factors affecting fuel consumption
Fuel consumption is greatly affected by the general driving conditions, the way in which the car is driven and at what speeds, the weather, the state of the road, the condition of the car, etc.
Breaking-in
Fuel consumption may be somewhat higher during the break-in period (the first 3,000–4,000 miles (5,000–7,000 km) than stated.
Weather conditions
Fuel consumption can be as much as 10% lower in summer than in winter. The higher consumption in cold weather is explained by the longer time it takes for the engine to reach normal operating temperature, and for the transmission and wheel bearings to warm up. Fuel economy is also affected by the distance driven: short journeys of 3–5 miles (5–8 km) do not give the engine enough time to reach normal temperature. Strong winds can also affect fuel consumption.
How to read the graph above:
If fuel consumption with the engine at normal temperature is 28 mpg (10l/100 km), the actual fuel consumption 3 miles (5 km) after the engine has started from cold will be:
- 23.5 mpg (12l/100 km) at outside temp. of 68°F (20°C) (Increase of 20 %).
- 17.7 mpg (16l/100 km) at outside temp. of 32°F (0°C) (increase of 60 %).
- 14 mpg (20l/100 km)) at outside temp. of -4°F (-20°C) (increase of 100 %).
As can be seen, both the distance travelled by the car and the outside temperature have a major impact on fuel consumption after the engine has started from cold. Thus, if the car is mainly used for short journeys of 3–5 miles (5–8 km), the fuel consumption will be 60–80 % higher than normal.

line
| Temperature | Thickness (cm) | Percentage (%) | | :--- | :--- | :--- | | -25°C (-4°F) | 0 | 200 | | -25°C (-4°F) | 2 | 180 | | -25°C (-4°F) | 4 | 150 | | -25°C (-4°F) | 6 | 120 | | -25°C (-4°F) | 8 | 90 | | -25°C (-4°F) | 10 | 70 | | -25°C (-4°F) | 12 | 50 | | -25°C (-4°F) | 14 | 30 | | -25°C (-4°F) | 16 | 10 | | 0°C (3°F) | 0 | 200 | | 0°C (3°F) | 2 | 160 | | 0°C (3°F) | 4 | 120 | | 0°C (3°F) | 6 | 90 | | 0°C (3°F) | 8 | 70 | | 0°C (3°F) | 10 | 50 | | 0°C (3°F) | 12 | 30 | | 0°C (3°F) | 14 | 15 | | 0°C (3°F) | 16 | 5 | | +25°C (65°F) | 0 | 200 | | +25°C (65°F) | 2 | 180 | | +25°C (65°F) | 4 | 150 | | +25°C (65°F) | 6 | 120 | | +25°C (65°F) | 8 | 90 | | +25°C (65°F) | 10 | 70 | | +25°C (65°F) | 12 | 50 | | +25°C (65°F) | 14 | 30 | | +25°C (65°F) | 16 | 10 |Percentage increase in fuel consumption of engine starting from cold compared to engine at normal temperature

natural_image
Pure geometric diagram with crosshair and circular shapes, no text or symbols present

95 US MY09.book Page 171 Tuesday, April 15, 2008 11:03 AM


171Starting and driving
Driving technique
• To obtain the best running economy, not only regarding fuel consumption but general wear also, regular service is required.
• High speed, unnecessary acceleration, heavy braking and much low gear work all gives rise to higher fuel consumption.
- Frequent gear changing in traffic, starting in cold weather, the use of studded tires and roof racks, and towing a trailer all increase fuel consumption.
- Do not run the engine when the car is stationary.
If idling, it will take much longer before the engine becomes hot. Engine wear is greatest during this warming-up phase.
Therefore drive away as soon as possible after the engine is started and avoid high revving.
- Driving in a low gear results in higher fuel consumption than in a high gear because of the higher engine speed for a given road speed. Always change up to a higher gear as soon as traffic conditions allow and use the highest gear as much as possible.
- Check the air pressure in the tires once a month. Incorrect pressures increase tire wear. It is better to have slightly higher pressure than lower.
- Check fuel consumption regularly. Increased consumption can indicate that something is wrong and that the car needs to be checked by a workshop. We recommend that you contact an authorized Saab dealer.
Practical trials on the roads have demonstrated that substantial savings in fuel consumption can be made if the above advice is heeded.
Road conditions
Wet roads increase fuel consumption, as do unpaved roads and driving in hilly country (the amount of fuel saved driving downhill is less than the additional amount required to climb the hill).

WARNING
Never switch the engine off while driving as the effect of the brakes and power steering will be greatly reduced.


95 US MY09.book Page 172 Tuesday, April 15, 2008 11:03 AM
172 Starting and driving
Engine block heater \*
The following are just some of the benefits to the car and the environment of using an engine block heater:
- Lower fuel consumption.
- Exhaust emissions substantially reduced over short runs.
- Reduced wear on the engine.
• Inside of car warms up faster.
The engine heater is effective at outside temperatures up to 58–68°F (+15–20°C). The warmer it is outside, the shorter the time the engine heater needs to be connected. Longer than 1.5 hours is unnecessary.
If the car is equipped with a removable, electrical cabin heater that is not in use, this should be stored in the luggage compartment.
Driving in cold weather
Before starting a journey in cold weather you should check the following:
- That the wiper blades have not become frozen to the windshield/glass.
- Brush any snow away from the air intake for the heater system (opening between hood and windshield).
- It may be advisable to lubricate the door-lock cylinder (use molybdenum disulphide, MoS_2 ) to prevent its freezing. If the lock has frozen, take care not to break the key (or use the remote control) - heat it first or spray it with de-icer.
-
Periodically during the winter, add gasoline anti-freeze to the fuel to dispel any condensation in the fuel tank which could freeze and cause problems in the system. Keep the tank well filled to reduce the risk of condensation forming. If the car is parked outside in freezing weather, fuel additives (gasoline anti-freeze) will not do any good as it cannot remove water that has already frozen. Park the car in a warm place so that any ice that may have built up melts, then add gasoline anti-freeze when filling up the tank. Condensation is caused by changes in the outdoor temperature or by the car being parked alternately in a garage and outside.
-
It is particularly important when the roads are slippery that the brakes and tires be in good condition.
- Check the anti-freeze in the engine coolant, see page 193.
The car's trip computer will warn you when there is a risk of slippery conditions. For further information on this function, see page 68.
The car is equipped with tires designed to provide optimum grip on both wet and dry roads, although this has been achieved at the expense of somewhat reduced grip on snow and ice. For regular driving on snow and ice, we therefore recommend that winter (snow) tires be fitted.
Winter (snow) tires, particularly studded tires (where use is legally permitted), generally make driving safer on snow and ice.
Acquaint yourself with the legal provisions governing the use of different types of winter tires and snow chains. Studded tires are not allowed in some countries.





95 US MY09.book Page 173 Tuesday, April 15, 2008 11:03 AM
If winter tires are fitted, the same type must be fitted on all wheels. Your Saab dealer will be pleased to advise you on the best tires for your car.
Remember that tires age. It may therefore be necessary to change them before they reach the legal wear limit, as they gradually lose their friction properties.
The best response if the car gets into a front-wheel skid is to freewheel (manual gearbox only), i.e. disengage the clutch (so that the wheels are neither driven or retarded by the engine.
If the car has automatic transmission, ease up on the accelerator and steer carefully in the desired direction.
In a rear-wheel skid, steer in the same direction that the rear of the car is moving.
Tire chains ✱
If you want to fit tire chains (where legally permitted) they should only be fitted to the tires recommended under "Specifications" (see page 261).
Consult your Saab dealer for details of approved tire chains.
WARNING
- Do not exceed 30 mph (50 km/h) when tire chains are fitted.
- Tire chains can reduce the directional stability of the car.
- Tire chains must not be used on the rear wheels.
NOTICE
- Check the links frequently for wear.
- Check that the chains do not contact the wheel-arch liner at full lock.
• See section "Specifications", page 261, for information on allowable wheel dimensions for the fitting of tire chains.
173Starting and driving
Driving in hot weather
Always check the coolant level before starting a journey. When the engine is cold, the coolant shall lie on or just above the KALT/COLD mark on the expansion tank..
At the end of a journey, if the engine has worked hard, allow it to idle for two or three minutes before switching it off.
If the needle on the temperature gauge enters the red zone:
1 Bring the car to a standstill but leave the engine running. Do not remove the cap on the expansion tank even if the tank is empty. If the needle on the temperature gauge continues to rise while the engine is idling, switch off the engine.

natural_image
Pure geometric diagram with crosshair and circular shapes, no text or symbols present95 US MY09.book Page 174 Tuesday, April 15, 2008 11:03 AM
174 Starting and driving
2 Wait until the needle has dropped back to indicate normal temperature (roughly midway, in the white zone) before stopping the engine. If the coolant needs topping up, unscrew the cap on expansion tank carefully. Top up, as necessary, ideally with a 50/50 mixture of Saab-approved coolant and water. If only water is available, use that, but remember to have the coolant mixture checked as soon as possible.
WARNING
- Exercise care when opening the hood if the engine is overheated. Never remove the expansion tank cap completely when the engine is hot. - The cooling system is pressurized - hot coolant and vapor can escape. These can cause injury to your eyes and bums. Open the cap slowly to release the pressure before removing it.
3 As soon as possible, have the cooling system checked by a workshop. We recommend that you contact an authorized Saab dealer.
Towing a trailer \*
WARNING
- When towing a trailer, do not attempt to negotiate a hill having a gradient in excess of 15% . The weight distribution over the front wheels of the car will be insufficient to prevent wheelspin, making further progress impossible. - In addition, the parking brake may not always be able to hold the car and trailer securely, with the result that the wheels can start to slide downhill. - Always apply the trailer's parking-brake when unhitching it. There is otherwise a risk of personal injury or damage to the bumper should the trailer start to roll.
Trailer hitch attachment \*
Trailer hitch attachments are available as accessories. These are designed for a maximum trailer weight of 3500 lbs. (1588 kg), see also page 259.
Use only the electrical trailer hitch socket provided in the trailer hitch kit. * Saab recommends:
- Use a Saab original hitch kit attachment which is designed and tested by Saab.
- Consult your Saab dealer regarding the appropriate hitch kit for your car.
If the car has a 13-pin genuine Saab electrical socket, the trailer/caravan can be equipped with rear fog lamp and reversing lamps.
The caravan can also have interior and exterior lighting when the car's ignition is off. Do not put a load on the battery for so long that it becomes discharged and the car cannot be started.
There is also access to power in the caravan during a journey, the caravan battery can be charged for example.
NOTICE
Only use a towbar that has been approved for your car. We recommend that you entrust towbar installation to an authorized Saab workshop, which can also provide important information such as trailer weight. Your authorized Saab workshop has information on how the towbar is to be installed and whether other measures must be undertaken that could affect the cooling system or other equipment.
We recommend that you consult an authorized Saab dealer for guidance on how to connect the trailer hitch electrical system.

natural_image
Pure geometric diagram with crosshair and circular shapes, no text or symbols present95 US MY09.book Page 175 Tuesday, April 15, 2008 11:03 AM
175Starting and driving
Trailer weight
Maximum recommended trailer weights for different gradients, with a view to comfort and drivability for manual and automatic cars, are shown on the drawing.
Make sure you are familiar with the law regarding speed limits for towing, maximum trailer weights, trailer-braking requirements, and also any special driving-license provisions (see also page 259).
The specified trailer weights and gradients assume that the journey starts at the hill and therefore apply only to short periods.
Maximum recommended trailer weights for different gradients

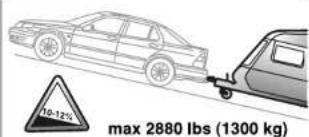

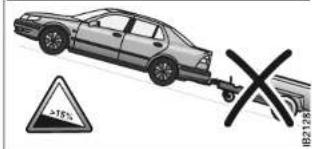
Recommendations for driving in hilly terrain
The following time limits are based on the capacity of the cooling system in warm weather, i.e. approximately 86°F (30°C).
| Gradient of hill, % | Maximum trailer weight, lbs. (kg) | Maximum duration, minutes |
| 6-7 3300 | (1500) unlimited | |
| 8-9 3300 | (1500) 15 max | |
| 10-15 1870 | (850) 15 max |
The following time limits are based on the capacity of the cooling system in hot weather, i.e. approximately 104°F (40°C).
| Gradient of hill, % | Maximum trailer weight, lbs. (kg) | Maximum duration, minutes |
| 6–7 2000 | (900) unlimited | |
| 8–9 2000 | (900) 15 max | |
| 10–15 1000 | (450) 15 max. |


95 US MY09.book Page 176 Tuesday, April 15, 2008 11:03 AM
176 Starting and driving
When negotiating long hills, bear the following important considerations in mind:
- Use Normal mode when driving with a caravan or trailer on hilly roads. The adaptive gear change pattern function will prevent the transmission overheating.
- Rises in coolant temperature are indicated by the temperature gauge in the main instrument panel.
Recommendations for cars with automatic transmission
Rises in coolant temperature are indicated by the temperature gauge in the main instrument panel.
The following steps are taken in order as the temperature of the engine increases:
• Gear change pattern is altered.
• A/C compressor is switched off.
• Engine torque is reduced.
The following message will be displayed on the SID if the transmission fluid becomes too hot:
"Gearbox too hot. Make a safe stop."
If this message appears, stop the car as soon as it is safe to do so and allow the engine to idle until the message has gone out. The selector lever should be in position P.
When continuing your journey, select manual mode and a gear in which the engine speed is about 3,000 rpm until the incline eases (see page 157).

WARNING
Remember to use the braking effect of the engine (position D or L) when you are descending long or steep hills to spare the brakes.
Brake failure can result from overheated brakes!


95 US MY09.book Page 177 Tuesday, April 15, 2008 11:03 AM
Recommendations for cars with manual gearbox
Rises in coolant temperature are indicated by the temperature gauge in the main instrument panel.
The following steps are taken in order as the temperature of the engine increases:
• A/C compressor is switched off.
• engine torque is reduced.
When continuing your journey, select a gear in which the engine speed is about 3,000 rpm until the incline eases.
WARNING
Utilize the braking effect of the engine (1st, 2nd or 3rd gear) when you are descending long or steep hills to spare the brakes.
Brake failure can result from overheated brakes!
Driving considerations
Always take extra care when towing a trailer, as the car's handling will be different and its braking effect reduced. The trailer's braking system and suspension also have a considerable effect on these characteristics, see also "Driving with a load" page 179. If the car has automatic transmission, select position D when ascending steep hills. This ensures that the adaptive gear change patterns are operational, see page 158. Use position D or L for steep descents.
NOTICE
If the "Automatic transmission *, fault indicator" indicator ☐ nes on, cease towing until the problem has been rectified.
Checks before driving
Make sure that the car and camper or trailer are in good working order. This is essential since towing a camper or trailer increases the strain on the car.
- Check and if necessary adjust the tire pressure of the car and camper or trailer.
- Make sure all wheel bolts are properly tightened.
- Make sure that the equipment joining the car and camper or trailer is properly secured and adjusted.
177Starting and driving
- Make sure the camper or trailer's electrical cable is properly connected and is not so long that it drags along the ground. Also, make sure the cable is not too short and risks breaking when turning a corner.
- Check all bulbs.
- Check the car and camper or trailer brakes.
• Make sure that all items on or in the caravan or trailer are properly secured.
• Make sure that the camper or trailer's jockey wheel is raised and locked. - Check the distribution of the load so that the car and camper or trailer are well balanced.
- Check that the rearview mirrors provide the best possible rearward vision.
- Make sure the camper or trailer's safety cable is correctly attached.



95 US MY09.book Page 178 Tuesday, April 15, 2008 11:03 AM


178 Starting and driving
Trailer hitch load
The weight distribution on the trailer makes a lot of difference to the handling properties of the car and trailer combination. As regards single-axle trailers, whenever possible, concentrate the load over the wheels and keep it as low as possible.
The trailer should be loaded so that the maximum load on the towbar ball is 5% to 7% of the trailer weight with a maximum permissible tongue weight of 110–165 lbs. (50–75 kg).
Note that this load must be added to the total load for the car. If this now exceeds the specified load capacity, the load in the luggage compartment will have to be reduced by a corresponding amount.
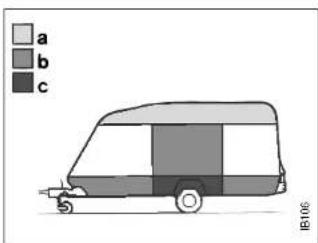
Distribution of load in trailer
a Light
b Moderate
c Heavy

natural_image
Technical diagram showing mechanical components with arrows indicating motion or force direction (no text or symbols)Attach the safety chains to the holes as illustrated


WARNING
When you connect the trailer be sure to attach its safety chains to the holes as illustrated.





95 US MY09.book Page 179 Tuesday, April 15, 2008 11:03 AM
179Starting and driving
Driving with a roof rack load
WARNING
- A roof load will affect the car's center of gravity and aerodynamics. Be aware of this when cornering and driving in crosswinds.
- Suit your speed to the prevailing conditions.
- Due to higher aerodynamic drag, fuel economy may suffer when driving with a roof rack.
The maximum permissible roof load is 220 lbs. (100 kg).
Note that the roof load is included in the car's maximum permissible load (see page 258).
Strong, sturdy roof carriers * designed specially for the car are available from your Saab dealer. Always secure the roof load safely.
Driving with a load
The driving characteristics of the car are affected by the way it is loaded.
- Place heavy loads as far forward and as low as possible in the trunk.
- Secure the load to the tie downs, see page 131.
- The load should be such that the car's total weight or axle weight are not exceeded, see page 258.
- Heavy loads mean that the car's center of gravity is further back. As a result, the car will sway more during evasive steering.
- Never exceed the permissible load in the roof box *, even if there is room for more.
- Ensure that the tire pressure is correct – slight overinflation is preferable to under-inflation.
• The braking distance of a loaded car is always greater. Keep your distance from the vehicle in front. - Roof loads can negatively affect telecommunication.
Tire pressure, see page 263.
Additional Information on tires, see page 220.




95 US MY09.book Page 180 Tuesday, April 15, 2008 11:03 AM
180 Starting and driving
Tires

WARNING
Check the tire pressure at least once a month and before long journeys. Under-inflation can result in:
- Punctures
- Separation of the tire and tread
• Damage to the sidewalls
• Damage to the rims on poor roads
• Poor handling characteristics - Premature tire wear
- Increased fuel consumption.
The tire pressure should match the current load and speed of the car; for cars sold in U.S. see page 229; for cars sold in Canada see page 263.
The tire pressures given apply to cold tires, that is tires that are the same temperature as the outside air temperature.
The tire pressure increases as the tires become warm (e.g. during highway driving) with approximately 0.3 bar (4 psi). When the temperature of the tires changes by 50° (10°C), the tire pressure will change 0.1 bar (2 psi).
Never reduce the pressure of a hot tire. If the tires are hot when you check them, only increase the pressure, if necessary.
Underinflated tires wear more quickly than slightly overinflated tires.
If a valve is leaking, simply unscrew it and fit a new one.
Important! Remember to adjust the tire pressures if you change the load in the car or intend to drive at substantially lower or higher speeds than normal.


95 US MY09.book Page 181 Tuesday, April 15, 2008 11:03 AM
181 Starting and driving
Driving with a spare wheel fitted
See page 236.
Driving with the trunk lid/tailgate open
Avoid driving with the trunk lid/tailgate partly or fully open, since exhaust fumes can be drawn into the cabin.
If you must drive with the trunk lid/tallgate open, all windows and the moonroof must be closed and the cabin fan on at its highest speed setting.
Driving in deep water Towing the car
NOTICE
Do not drive in water deeper than 12 inches (30 cm) and do not drive faster than 3–4 mph. Water can otherwise be sucked into the engine. The engine will be seriously damaged if water enters the intake system.

WARNING
- Remember that the brake servo does not operate when the engine is off. Much greater pressure than normal will therefore be required to operate the brake pedal.
- Nor does the steering servo operate when the engine is off. The steering will therefore be much heavier than usual.
• The towing vehicle should always be heavier than the vehicle on tow. - Never allow passengers to ride in the car being towed.
• Always seek professional help if the car needs to be towed.



95 US MY09.book Page 182 Tuesday, April 15, 2008 11:03 AM
182 Starting and driving
Front towing eye

WARNING
• Make sure that the towing eye at the front is screwed in tightly.
- The towing eye is only designed for use when the car is being towed on the road. It must not be used to pull the car out of a ditch, for example.
• Make sure that all bystanders keep a suitable distance, in case the towing eye or tow rope should break. The towing eye or tow rope could catapult off and cause serious injury.
NOTICE
- Do not drive the car with the front towing eye in position. If it catches the curb, for example, the engine subframe could be damaged.
- Refit the plastic plug in the hole when the towing eye has been removed, to keep dirt and moisture out of the threads.

natural_image
Line drawing of a car's front and side view showing a close-up of the engine compartment with a key inserted (no text or symbols)Front towing eye
The front towing eye is stored with the spare wheel.
The attachment point (tapped hole) for the towing eye is midway along the engine subframe at the front of the car.
Remove the plastic plug and screw in the towing eye securely.
To ensure that the towing eye is in far enough, insert the handle of the wheel wrench through the eye for additional leverage.

natural_image
Side view of a car with a close-up inset showing a small mechanical component (no text or symbols visible)Rear towing eye
Rear towing eye
The car has a permanently mounted towing eye at the back. If the car is equipped with a trailer hitch, this can be used instead of the towing eye.


95 US MY09.book Page 183 Tuesday, April 15, 2008 11:03 AM
183Starting and driving
Towing the car
NOTICE
- Never use the towing eyes to pull the car unstuck.
Gear lever in neutral (in cars with automatic transmission: selector lever at N (neutral)) Turn on the parking lights.
Drive carefully and do not exceed the speed limit for vehicles being towed.
Always try to keep the towrope taut by gently applying the brake, as necessary. This will avoid the towrope being jerked violently.
The local regulations on towing speeds must be followed.
The highest permissible towing speed is 30 mph (50 km/h), unless the legal limit is lower. The longest permissible towing distance is 30 miles (50 km). If the car has to be transported farther than that, summon a tow truck. A flat bed tow truck is the preferred method to tow.
Failure to follow these guidelines can result in damage.

Never use the towing eyes to pull the car unstuck
Cars with automatic transmission
NOTICE
• The car must be towed front first.
- If the car is to be towed with the front wheels off the ground, make sure the parking brake is off, as this acts on the rear wheels.
The car cannot be push started. In an emergency, it is possible to start the engine using jump leads (see the section, "Jump starting" on page 184).
Transporting the car
NOTICE
If a car with a sport (lowered) chassis is transported, for example on a flat bed truck, take extra care not to damage the spoiler and/or underbody.


95 US MY09.book Page 184 Tuesday, April 15, 2008 11:03 AM
184 Starting and driving
Jump starting

WARNING
- When working on the battery, highly explosive gas can build up. A spark could ignite this gas that collects around the battery. Therefore, always avoid sparks and open flames in the vicinity of the battery.
• The battery contains corrosive sulfuric acid. Always wear a face mask or goggles when working on the battery. - If battery acid gets into the eyes or splashes onto skin or clothing, wash the affected area liberally with water. If acid gets into the eyes or a large quantity makes contact with the skin, seek medical help.
- Battery posts, terminals and related accessories contain lead and lead compounds. Wash your hands after handling.
If your battery has run down, you may want to use another vehicle and some jumper cables to start your Saab. Follow the steps below to do it safely.

NOTICE
Ignoring these steps could result in costly damage to your vehicle that would not be covered by your warranty.
Trying to start your car by pushing or pulling it could damage your vehicle, even if you have a manual transmission. If you have an automatic transmission, your vehicle cannot be started by pushing or pulling it.
To jump start your vehicle:
1 Check the other vehicle. It must have a 12-volt battery with a negative ground system.
NOTICE
If the other system is not a 12-volt system with a negative ground, both vehicles can be damaged.
2 Get the vehicles close enough so the jumper cables can reach, but be sure the vehicles are not touching each other. If a poor connection on the negative jumper cable should exist, it is possible for damage to be caused to electrical systems/components of either vehicle should inadvertent contact be made. You would not be able to start your car and bad grounding could damage electrical systems.

WARNING
You could be injured if the vehicles roll. Set the parking brake firmly on each vehicle. Put an automatic transmission in P (Park) or a manual transmission in Neutral.
3 Turn off the ignition on both vehicles. Turn off all lights that are not needed, and radios. This will avoid sparks and


95 US MY09.book Page 185 Tuesday, April 15, 2008 11:03 AM


185Starting and driving
help save both batteries and it could save your radio.
NOTICE
If you leave your radio on, it could be badly damaged. The repairs would not be covered by your warranty.
4 Open the hood and locate the battery.
Find the positive (+) and negative (−) terminals on the battery.

WARNING
An electric fan can start up even when the engine is not running and can injure you. Keep hands, clothing and tools away from any underhood electric fan.

WARNING
Using a match or flame of any kind near a battery can cause battery gas to explode. You can suffer burns or be blinded. Use a flashlight if you need more light.
Be sure the battery has enough water. The battery installed in your new Saab has filler caps. Be sure the right amount of water is there. Add distilled or boiled water if the level is too low. If you don't, explosive gas could be present.
Be sure the electrolyte in the battery is not frozen. Discharged batteries will freeze. When connecting jumper cables to a frozen battery, gas from the chemical reaction inside the battery can build up under the ice and cause an explosion.
Battery fluid contains acid that can burn you. Do not get it on you. If you accidentally get it in your eyes or on your skin, flush the area with water and get medical help immediately.
5 Check that the jumper cables do not have loose or missing insulation. If they do, you could get a shock and also the vehicles could be damaged.
Before you connect the cables, here are some basic things you should know. Positive (+) will go to positive (+) and negative (−) will go to a major metal engine part with a good ground. Do not connect (+) to (−) or you will get a short that could injure you or would damage the battery and maybe other parts as well.
6 Connect the red positive (+) cable to the positive (+) terminal of the vehicle with the discharged battery.
7 Do not let the other end touch metal. Connect it to the positive (+) terminal of the good battery. Use a remote positive (+) terminal if the vehicle has one.
8 Now connect the black negative (−) cable to the good battery's negative terminal.


95 US MY09.book Page 186 Tuesday, April 15, 2008 11:03 AM
186 Starting and driving

WARNING
Do not let the other end touch anything until the next step. The other end of the negative cable does not go to the dead battery. It goes to a major metal part with a good ground on the engine of the vehicle with the discharged battery.
Charging the battery/Jump starting
To avoid damaging the car's electrical system and electronics, the following rules must be followed when charging the battery or jump starting the car.
- If the charger * or starter unit * can be set to different voltages (6V/12V/18V/24V), 12V must be selected.
9 Attach the cable at least 18 inches (45 cm) away from the discharged battery, but not near engine parts that move. To avoid an arc which could detonate the hydrogen gas around the battery, the final connection must be at least 18" from the battery.
10 Start the vehicle with the good battery and run the engine for a while.
11 Try to start the vehicle with the discharged battery. If it does not start after a few tries, it probably needs service.
12 Remove the cables in reverse order to prevent electrical shorting. Take care that they do not touch each other or any other metal.
- Follow the manufacturer's instructions supplied with the charger or starter unit.
- Nothing that is plugged into an electrical outlet should be connected to the car during charging or jump starting.
- The charger or starter unit must under no conditions produce a voltage greater than:
- 16V continuous
- 18V for 60 min.
- If you are unsure about the charge rating of the unit, disconnect the battery clamp from the positive terminal before connecting the unit to the battery.


95 US MY09.book Page 187 Tuesday, April 15, 2008 11:03 AM
187Car care and technical inform
Car care and technical information

natural_image
Illustration of a person cleaning a sedan (no text or symbols visible)| Hood | |
| Engine compartment | 189 |
| Emission control systems | |
| Engine | |
| Engine oil | 192 |
| Transmission fluid | 193 |
| Coolant | |
| Brake and clutch fluid | 194 |
| Power steering fluid | 196 |
| Air filter | 196 |
| Battery | |
| Drive belts | 199 |
| Wipers and washers | 200 |
| Changing bulbs | 202 |
| Fuses | |
| 188 | Tires____ | 220 |
| Automatic tire pressure monitoring system____ | 232 | |
| Compact spare tire____ | 235 | |
| 190 | Safety belts____ | 240 |
| 192 | Upholstery and trim____ | 241 |
| Textile carpeting____ | 241 | |
| 93 | Washing the car____ | 242 |
| Waxing and polishing____ | 243 | |
| Engine compartment____ | 243 | |
| Touching up the paint____ | 243 | |
| 197 | Air conditioning (ACC)____ | 244 |
| Anti-corrosion treatment____ | 246 | |
| For long trips____ | 247 | |
| Recovery and/or recycling of automotive materials____ | 248 | |
| 214 | Headlight aiming____ | 248 |
* Asterisk means: equipment not fitted in all cars (can depend on model variant, engine variant, market specification, options or accessories).


95 US MY09.book Page 188 Tuesday, April 15, 2008 11:03 AM
188 Car care and technical information
Hood
The hood release handle is located underneath the instrument panel. To open the hood:
1 Pull the release handle.
2 The front of the hood will now spring up, providing access to the secondary safety catch.
3 Push the catch upwards, pushing the hood downward a little bit at the same time. The hood can now be lifted right up.
To close the hood, release it from a height of about 8 - 16 in (20-40 cm). Do not press down on it.

natural_image
Diagram of a car dashboard and steering wheel (no text or symbols)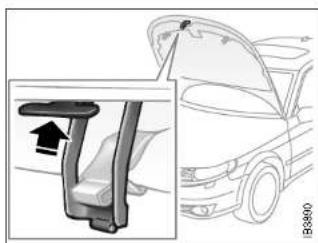
natural_image
Diagram showing a car seatbelt mechanism with an inset view of the seatbelt (no text or symbols present)Hood release handle Hood secondary safety catch
WARNING
Never hold your fingers between the hood and safety catch if lowering but not closing the hood.
Check that the hood is now closed securely.


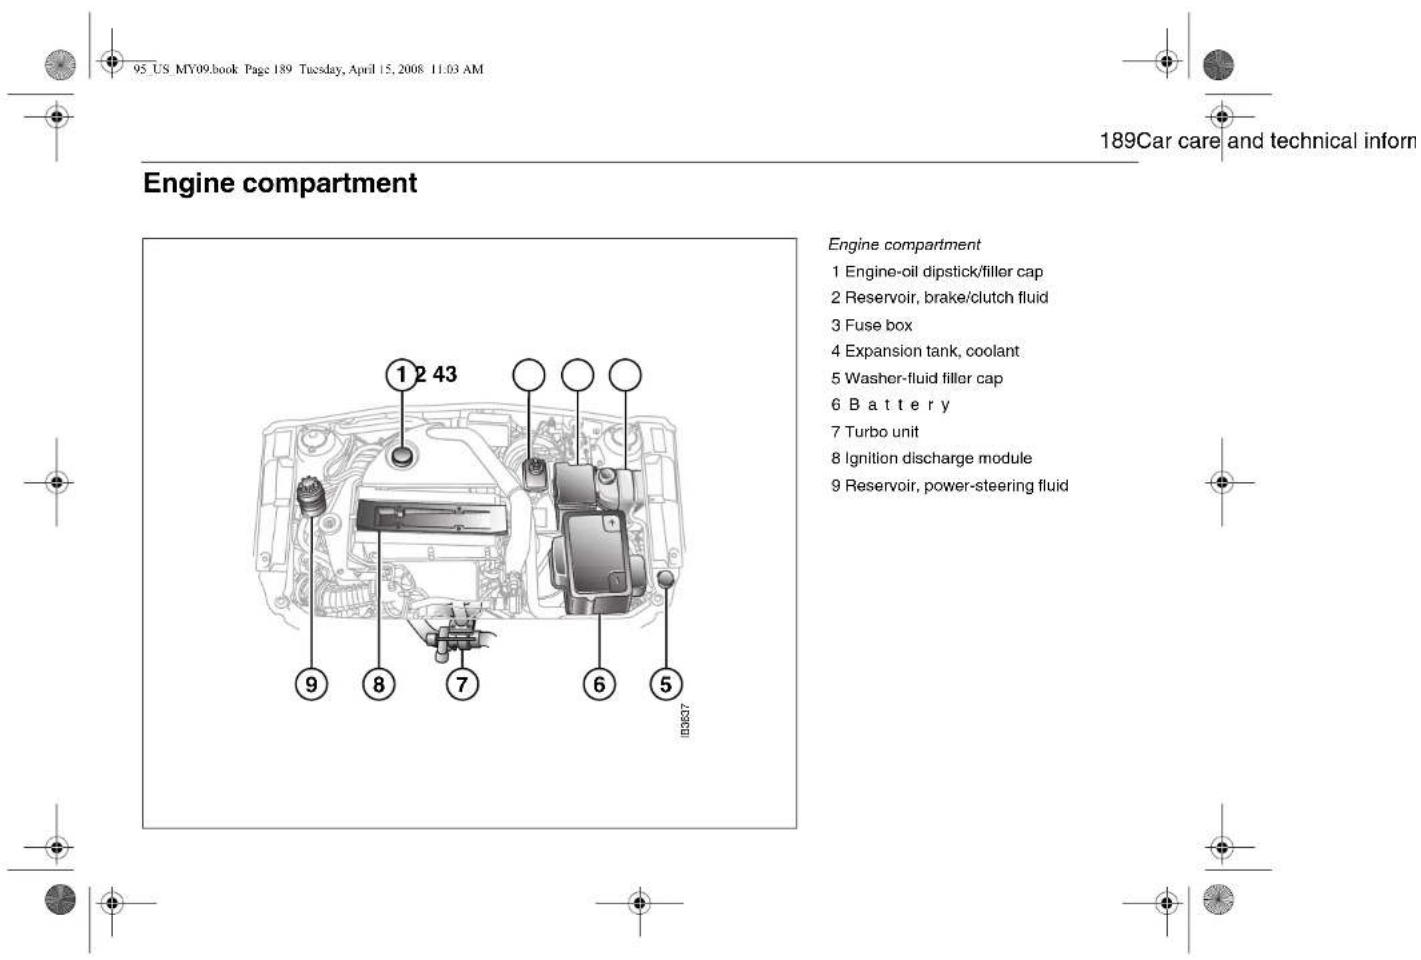


95 US MY09.book Page 189 Tuesday, April 15, 2008 11:03 AM


189Car care and technical inform

Engine compartment
1 Engine-oil dipstick/filler cap
2 Reservoir, brake/clutch fluid
3 Fuse box
4 Expansion tank, coolant
5 Washer-fluid filler cap
6 Battery
7 Turbo unit
8 Ignition discharge module
9 Reservoir, power-steering fluid


95 US MY09.book Page 190 Tuesday, April 15, 2008 11:03 AM
190 Car care and technical information
Engine families
Saab cars imported into the United States and Canada meet all applicable emission control standards. The engine family and appropriate tune-up specifications are identified on a label affixed to the left front Inner fender.
These engine families meet applicable EPA Federal Standards, California State Standards and Canadian Federal Standards and are equipped with the following systems:
- Sequential multiport fuel injection system
• Three way catalytic converter
• Crankcase emissions control system
• Evaporative emission control system - On-Board diagnostic (OBD II) system.
Emission control systems
The systems for controlling emissions to the atmosphere require regular checking and adjustment at the intervals specified in the service program.
In addition to meeting the exhaust emission regulations and thereby helping to keep the environment clean, a correctly tuned engine will also give maximum fuel economy.
WARNING
Engine exhaust, some of its constituents, and certain vehicle components contain or emit chemicals known to the State of CA to cause cancer and birth defects and reproductive harm. In addition, certain fluids contained in vehicles and certain products of component wear contain or emit chemicals known to the State of California to cause cancer and birth defects or other reproductive harm.


95 US MY09.book Page 191 Tuesday, April 15, 2008 11:03 AM
191Car care and technical inform
Saab Trionic engine management system
The Saab Trionic engine management system is a unique Saab development that combines sequential multiport fuel injection, electronic distributorless ignition and turbocharger boost pressure control into one system.
The Trionic engine control module (ECM) monitors many different engine parameters such as:
- Intake manifold pressure
- Intake air temperature
- Crankshaft position
• Engine coolant temperature - Throttle position and
• The oxygen content of the exhaust gases.
The ECM receives information regarding engine knocking from a sophisticated feedback function in the ignition discharge unit.
By processing all of this information, the Trionic system can control fuel injector opening duration, ignition timing and turbocharger boost pressure to provide excellent engine performance while maintaining low emissions and fuel consumption.
NOTICE
The Trionic engine management system continuously monitors the operation of these systems and has on-board diagnostic capabilities (OBD II).
If the "Service Engine Light also known as CHECK ENGINE" lamp ☐ the main instrument illuminates, this indicates that the Trionic ECM has detected a problem. The car will continue to operate, but performance may be diminished. You should have your car checked by a Saab dealer as soon as possible.
ORVR (Onboard Refueling Vapor Recovery)
Hydrocarbon vapors formed when refueling will be recovered by the car and not released into the atmosphere. The hydrocarbons are absorbed in a evaporative emission canister. When the engine is subsequently started, the evaporative emission canister is gradually purged as air is sucked into it through a shut-off valve. The hydrocarbon/air mixture passes through the evap canister purge valve and into the engine where it is burned.
When refueling, make sure you screw the filler cap on and keep turning until it has clicked at least 3 times. Otherwise, it is possible for the CHECK ENGINE light to illuminate.
Refueling, see page 146.



95 US MY09.book Page 192 Tuesday, April 15, 2008 11:03 AM
192 Car care and technical information
Engine
The 2.3-liter model is a transverse, 4-cylinder in-line engine with twin overhead camshafts and 4 valves per cylinder.
This engine is equipped with balance shafts that reduce engine vibration to a minimum.
The balance shafts are chain driven and rotate at twice the speed of the crankshaft.
They produce forces and torques that are opposed to those generated by the pistons and connecting rods, an effect that occurs twice for each revolution of the engine. Engine noise is also reduced as the counter-rotating shafts counteract the vibration from the moving parts of the engine.
The transmission, located on the right (viewed from the front), is integrated with the engine. All models have front-wheel drive.
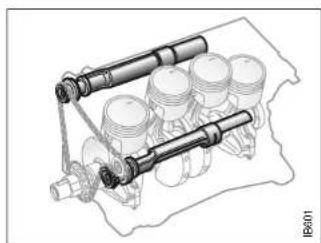
natural_image
Technical line drawing of an engine cylinder assembly (no text or labels)Balance shafts
Engine oil
Checking the oil level
Check the engine-oil level regularly. This should be done after the engine has been run to normal temperature and then allowed to cool for 2–5 minutes, with the car standing on level ground. Remove the dipstick and wipe it clean before checking the level.
The oil level must not be allowed to drop below the MIN mark on the dipstick, nor should oil be filled beyond the MAX mark, as this can lead to excessive oil consumption.
The distance between the MIN and MAX marks on the dipstick corresponds to a volume of approximately 1.05 qts (1 liter). When necessary, add oil of the recommended grade via the dipstick tube.
Recommended oil grade, see page 260.
NOTICE
- Do not operate the engine with a low oil level.
- Change engine oil and oil filter as prescribed in the service programme.
- Only use the recommended oil type. Follow the three points listed above to avoid severe engine damage.
More frequent oil changes are recommended if your vehicle is operated under certain conditions, see page 252.

natural_image
Pure geometric diagram with crosshair and circular shapes, no text or symbols present95 US MY09.book Page 193 Tuesday, April 15, 2008 11:03 AM
193Car care and technical inform
Transmission fluid
Manual transmission
Check and top up the fluid in accordance with the service program.
Automatic transmission
Check and top up the fluid in accordance with the service program.
Coolant
WARNING
- Proceed with caution if the radiator is boiling when you open the hood. Never remove the expansion-tank filler cap when the radiator is boiling.
- The cooling system is pressurized – hot coolant and vapor can escape when the filler cap is released. These can cause injury to your eyes and burns. Loosen the cap carefully, and let the engine cool before removing the cap.
• Exercise care when adding coolant. Coolant on hot surfaces constitutes a fire risk.

natural_image
Mechanical component diagram showing a valve or pump assembly with an arrow indicating direction (no text or symbols present)Coolant expansion tank
There is an overpressure in the cooling system. Coolant temperatures can sometimes exceed 212°F (100 °C).
The expansion tank is transparent to facilitate checking of the coolant level.
When the engine is cold, the coolant shall lie on or just above the KALT/COLD mark on the expansion tank.
If the message
"Coolant level low. Refill."
is displayed on the SID, check the level of fluid in the expansion tank.
Top up, as necessary, with equal parts of clean water and Saab-approved coolant.
Coolants of a different brand could damage the engine or cooling system. We therefore recommend strict use of coolants that have been approved by Saab.
If the expansion tank is empty when coolant is added, run the engine to normal temperature and top up again, as necessary.


95 US MY09.book Page 194 Tuesday, April 15, 2008 11:03 AM
194 Car care and technical information
The cooling system is charged at the factory with coolant containing a 45% concentration of a combined antifreeze and corrosion inhibitor. A weaker mixture will result in reduced anticorrosion protection. For protection against freezing in very cold weather, a stronger concentration will be needed.
A 60 % concentration of antifreeze will provide protection at temperatures down to -58^ F ( -50^ C).
The coolant does not normally have to be changed during the service life of the car. The type of coolant used has a reddish color and should not be mixed with other types of coolant. Saab Original coolant should be used all year round. Only use coolant approved by Saab.
Note:
If incorrect coolant is used or added, the life-time properties will be affected. Even if the coolant is flushed from the system and replaced with life-time coolant, life-time properties are no longer retained and the coolant must then be drained and replaced at regular intervals.
NOTICE
Always mix the antifreeze with the appropriate volume of water before adding it to the cooling system.
If pure antifreeze is added, the engine could still freeze and be damaged. This is because the antifreeze will not mix properly with the coolant before the thermostat has opened to allow full circulation.
Brake and clutch fluid
WARNING
Brake fluid deteriorates as it becomes old. Because it is hygroscopic, it absorbs water from the air and, in time, could allow vapor to form in the brake system, thus reducing its performance. It is therefore important that brake fluid be changed regularly, as specified in the service program.
Checking the fluid level
The combined brake and clutch-fluid reservoir is transparent to facilitate checking of the fluid level.
The level should be between the MAX and MIN marks. Top up, as necessary, with DOT 4 fluid. Do not use DOT 5 brake fluid.

natural_image
Pure geometric diagram with crosshair and circular shapes, no text or symbols present

95 US MY09.book Page 195 Tuesday, April 15, 2008 11:03 AM


195Car care and technical inform

Use only new brake fluid from a sealed container.
Check that there are no leaks in the brake system.
The brake fluid level will fall somewhat as the brake pads wear. The MAX level in the reservoir corresponds to the amount of brake fluid required with new brake pads. If the fall in fluid level is moderate, due to normal brake pad wear, topping up is not necessary.
Changing of the brake fluid should be carried out by a workshop. We recommend that you contact an authorized Saab dealer.
The vehicle's regular braking system is adjusted automatically, but the parking brake has to be adjusted manually. This work, involving adjustment of the parking brake cables and brake pads, must only be carried out by a workshop. We recommend that you contact an authorized Saab dealer.

Brake and clutch-fluid reservoir
It is not possible to detect, through abnormal pedal or parking brake-lever travel, whether brake pads are worn and need replacing. It is therefore essential that brake pads be checked regularly, as specified in the service program.
NOTICE
Avoid spilling brake fluid onto paintwork, since it can cause the paint to bubble and lift. If any brake fluid is spilled, the area should be flushed with large quantities of water as quickly as possible.
Brake pad wear indicators
The outboard brake pads on the front wheels incorporate pad-wear indicators. When the lining is down to 0.11 in (3 mm), the pad will produce a screeching, squealing or scraping noise when the brakes are applied. New pads should be fitted without delay.
Brake pads should only be changed by a workshop. We recommend that you contact an authorized Saab dealer.

[Non-Text]


95 US MY09.book Page 196 Tuesday, April 15, 2008 11:03 AM
196 Car care and technical information
Power steering fluid

WARNING
- Do not fill the power steering fluid to above the MAX mark. Too much fluid can result in leakage.
• Power steering fluid on hot engine components constitutes a fire risk.
Check the level of the power steering fluid in the reservoir regularly, in accordance with the service program.
The wheels should point forward during the check.
Clean around the cap before it is unscrewed. Clean the dipstick. Screw in the cap completely again before checking the level.
The oil should lie between the MAX and MIN marks when the oil temperature is about 70^ F (+20°C). If the oil is colder the level can be lower, and in higher temperatures the level can be higher, both of which are acceptable.
Top up with "Power Steering Fluid CHF 11S or CHF 202".
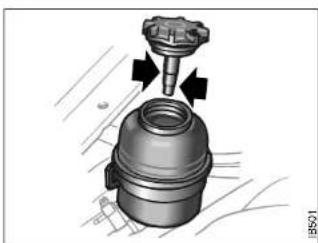
natural_image
Mechanical assembly diagram showing a valve inserted into a cylindrical component with directional arrows indicating motion (no text or symbols present)Power steering fluid reservoir
Air filter

WARNING
- For Service and Repair, parts equivalent to those used by Saab should be used.
- Be aware that some non standard replacement parts may put you in an unsafe condition, even if they might fit.



95 US MY09.book Page 197 Tuesday, April 15, 2008 11:03 AM


197Car care and technical inform
Battery

WARNING
• Work on the battery may entail an explosion hazard, since the battery gives off hydrogen which forms an explosive mixture with the oxygen in the air.
For this reason, always avoid sparks or open flames when working near the battery.
• The battery contains corrosive sulfuric acid. Always wear a face mask or goggles when working on the battery.
- If battery acid gets into the eyes or splashes the skin or clothing, wash the affected area liberally with water. If acid gets into the eyes or a large quantity makes contact with the skin, seek medical help.
- Battery posts, terminals and related accessories contain lead and lead compounds. Wash your hands after handling.
The battery is provided with a cover to protect it from radiated heat. If the battery is exposed to high temperatures, its life will be shortened. To remove the cover, release the two clips along its long sides.
The cover fits the standard battery installed in the car. If a new battery is to be fitted, make sure that its dimensions are the same as the standard one.
The battery is maintenance free.
NOTICE
A discharged battery can freeze and fracture. Batteries should therefore always be stored away from frost.
If frequent short journeys are made, the battery may need to be given a booster charge. This can be done either using a battery charger or by taking the car for a long run.
A car with a standard equipment specification and a fully charged battery can be left for up to 40 days and still have a sufficient charge for starting. If extra equipment is fitted, such as a car phone, the charge may only be sufficient for about 15 days.
Charging/replacing the battery
NOTICE
To avert the danger of short-circuiting between the positive (+) terminal on the battery and the inlet manifold on the engine, always disconnect the negative (−) battery lead first and reconnect it last
Connect the positive lead to the positive (+) battery terminal (red), and the negative lead to a good ground point, e.g. the lifting lug at the front of the engine.
To remove the battery, always disconnect the negative (black) lead first and reconnect it last when fitting the new battery.
The battery size must comply with DIN 53735 MFI 230/2.16.


95 US MY09.book Page 198 Tuesday, April 15, 2008 11:03 AM
198 Car care and technical information
NOTICE
- If boost charging never use anything but a 12-volt charger, see page 186.
- Never reverse the polarity of the battery by connecting the leads to the wrong terminals. The red, positive lead connects to the positive (+) terminal, and the black, negative lead to the negative (−) terminal.
- Serious damage can occur to the car's electrical system if a battery or alternator lead is disconnected while the engine is running.
- The nut on the battery clamp should be tightened to a torque of 10 Nm.

natural_image
Technical line drawing of an automotive battery pack assembly (no text or symbols)Battery

natural_image
Mechanical assembly diagram showing a tool inserted into a battery and a close-up of a bolted joint (no text or symbols present)Correct position for battery clamp





95 US MY09.book Page 199 Tuesday, April 15, 2008 11:03 AM


199Car care and technical inform
Drive belts

WARNING
- Keep hands and clothing clear of drive belts when engine is running.
• Always stop the engine before inspecting drive belt.
• The radiator fan is electric and can start even when the engine is switched off.
The alternator is situated on the right-hand side of the engine, adjacent to the bulkhead. It is driven via a Poly-V-belt from the crank-shaft pulley.
The Poly-V-belt also drives the water pump, the A/C compressor and the steering servo pump.
The belt tension is critical and is adjusted automatically by the belt tensioner.
See also page 59, "Warning, charging".

NOTICE
Serious damage can be done to the car's electrical system if an alternator lead is disconnected while the engine is running.


95 US MY09.book Page 200 Tuesday, April 15, 2008 11:03 AM
200 Car care and technical information
Wipers and washers
Check and clean all wiper blades regularly. If poor wiper performance is experienced, clean the windshield with a quality glass cleaner. This is particularly important if the car has been through an automatic car wash, as these sometimes leave a wax coating on the windshield.
If wiper performance is still unsatisfactory, fit new blades.


natural_image
Illustration of two train tracks with overhead structures and a speedometer (no text or symbols)Changing the windshield wiper blades
1 Hold the wiper arm and push the two catches off the arm.
2 Move the blade along the extension of the arm.
Fitting the wiper blade
1 Slide the new blade onto the arm until it locks in position. Make sure that the end of the wiper arm is within the blade bracket.
2 Check that the blade is seated correctly.
Rear window, SportCombi
1 Detach the blade from the arm by pressing the blade's mounting from underneath.
2 Install a new blade by pressing the shaft of the blade in the arm's mounting.
The washer jet, which is located next to the high-mounted brake light, is not adjustable.





[NO TEXT]


95 US MY09.book Page 201 Tuesday, April 15, 2008 11:03 AM


201Car care and technical inform

natural_image
Diagram of a car's window with a computer mouse and three bow tieps, showing no text or symbols
natural_image
Technical illustration of a mechanical component with a magnified inset showing a close-up view (no text or symbols)
natural_image
Diagram of a vehicle's rearview mirror and steering wheel assembly (no text or labels)
Washer jets
The washer jets can be adjusted and, if necessary, unclogged by means of a pin.
Washers
The washer-fluid reservoir holds 6.4 quarts (6 liters). When
"Washer fluid level low. Refill."
comes up on the SID, the reservoir is down to about 1 quart (1 liter) of fluid. Add at least 50 % of washer- fluid to water to prevent freezing and for effective cleaning.

WARNING
Take care not to spill washer fluid concentrate onto hot surfaces. Washer fluid concentrate contains flammable ingredients such as alcohol.


95 US MY09.book Page 202 Tuesday, April 15, 2008 11:03 AM
202 Car care and technical information
Changing bulbs

WARNING
Before changing a bulb in the engine bay, switch off the engine to avoid danger of fingers and hands being injured by moving parts.
The radiator fan can start up even when the engine is switched off.
Xenon headlights * are high voltage and must therefore be changed at a workshop. We recommend that you contact an authorized Saab workshop. Work Involving high-voltage components is potentially lethal.
NOTICE
- Since the headlight lenses are made of plastic, rinse dried-on dirt with water and allow it time to soften up before cleaning the lenses. Avoid rubbing the lenses when dry and never use solvents.
- Use de-icer spray instead of scraping the ice off.
Check that the new bulb is working when finished.
Use only "Long Life" bulbs.
Headlight aiming, see page 248.
NOTICE
- Do not fit bulbs with a higher rating than 55 W, since the headlight reflector and the wiring of the car are not designed for a higher wattage.
- Switch off the ignition before changing a bulb, to avoid possible short-circuiting.
- Do not touch the glass of the bulbs with your fingers. The oil on your skin can shorten the life of the bulb.
Xenon headlight \*
Xenon headlights produce roughly twice as much light as halogen bulbs and have a significantly longer service life.
The lamp units consist of a gas discharge lamp containing xenon. When the lights are switched on a very high voltage activates the xenon gas. The lamps soon reach full intensity.
Cars with xenon headlights have automatic levelling. The levelling system comprises two sensors, one on the front axle, one on the rear axle and a control unit under each of the two headlight housings. Headlight alignment is regulated automatically to prevent dazzling oncoming traffic. Alignment is also adjusted during braking.



95 US MY09.book Page 203 Tuesday, April 15, 2008 11:03 AM


203Car care and technical inform


natural_image
Technical diagram of a mechanical assembly with no visible text or symbols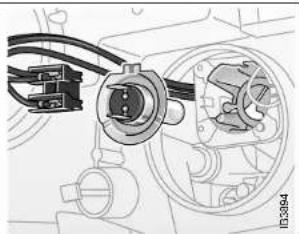
natural_image
Mechanical assembly diagram showing components like gears and motors (no text or labels)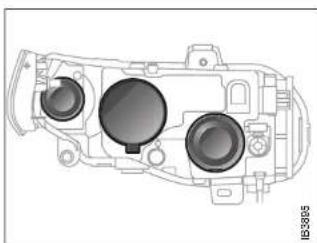
natural_image
Technical line drawing of a mechanical component with three circular features (no text or symbols)
Headlight bulb for high beam (Halogen)
On cars equipped with Xenon lamps the Halogen lamps are used only for high beam flasher if the daytime running lights are deactivated and the headlight switch is in the off position (otherwise Xenon lamp is utilized):
1 Remove the cover from the back of the lamp unit. To improve accessibility to the right-hand side, hold back the induction air hose. To improve accessibility to the left-hand side, remove the battery cover. Release the two clips along the long sides of the cover.
2 Hold the connector and move the bulb up and down slightly while pulling it out.
3 Detach the connector from the bulb.
4 Fit the new bulb in the connector without touching the lens with fingers.
5 Align and fit the bulb in its guide in the reflector by moving it up and down slightly while pushing it forward.
6 Fit the cover.
The three covers of the headlight.
The left-hand cover is for the direction indicator. Replacement of this bulb should be carried out by a workshop. We recommend that you contact an authorized Saab workshop.




95 US MY09.book Page 204 Tuesday, April 15, 2008 11:03 AM
204 Car care and technical information

natural_image
Technical diagram showing a mechanical component with a close-up view of its internal structure (no text or symbols)Low beam bulb \*
On certain variants the low beam bulb is fitted in the same way as the high beam bulb, without spring clips, see previous page.
Headlight bulb for low beam (Halogen)
1 Take off the cover from the back of the lamp unit. To improve accessibility to the right-hand headlight, hold aside the induction air hose. To improve accessibility to the left-hand headlight, remove the battery cover. Release the two clips along the long sides of the cover.
2 Unplug the connector.
3 To remove the spring clip, push it in and then move it to the right. 4 Remove the bulb.
5 Without touching the glass with your fingers, insert the new bulb.
6 Line up the bulb with the guide in the reflector and secure it with the spring clip.
7 Plug in the connector.
8 Fit the cover.
Contact an authorized Saab workshop if a Xenon headlight requires replacement
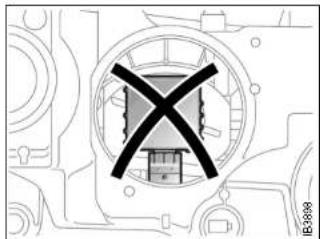
natural_image
Pure electrical circuit lines without any symbols


95 US MY09.book Page 205 Tuesday, April 15, 2008 11:03 AM


205Car care and technical inform

natural_image
Mechanical assembly diagram showing a component being inserted into a housing, with an inset close-up of its internal structure (no text or symbols visible)Parking-light bulb
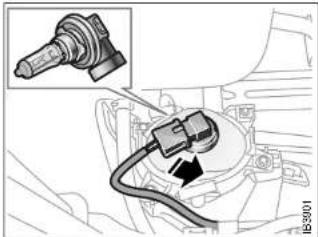
natural_image
Technical diagram of a mechanical component with an inset showing a cylindrical component (no text or symbols present)Front fog lights
Front direction indicator
Direction indicator bulb replacement should be carried out by a workshop.
We recommend that you contact an authorized Saab dealer.
Parking-light bulb
The parking light bulb is situated in the lower edge of the lamp housing.
The bulb holder has been extended to facilitate replacement.
1 Pull the extended bulb holder straight out.
2 Change the bulb.
3 Make sure that the O-ring is correctly positioned so as to seal against the lamp housing.
When the bulb holder is slid in, it does not matter which direction the bulb holder grip is held.
Front fog lights \*

WARNING
Never crawl under a car that is supported only by a jack. Always use axle stands. Refer to the information on jacks on page 237.
1 From under the front bumper, grip the bulb holder and twist counterclockwise.
2 Unplug the connector.
3 Change the bulb.
Refit in the reverse order.


95 US MY09.book Page 206 Tuesday, April 15, 2008 11:03 AM
206 Car care and technical information

natural_image
Diagram of a car interior showing internal components and a close-up view of a mechanical device (no text or symbols present)Rear light cluster, 9-5 Sedan
The bulbs for the lamps in the rear light cluster are accessed from the luggage compartment.
1 Lower the flap (secured with catches).
2 Squeeze the plastic lugs and remove the bulb holder.
3 The bulb has a bayonet fitting. Press in the bulb and twist it counterclockwise.
4 Change the bulb.
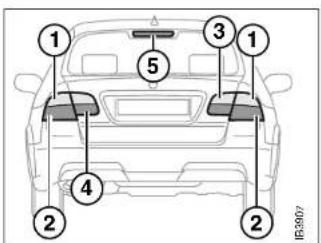
Rear light clusters, 9-5 Sedan
1 Direction indicators
2 Stop lights and taillights
3 Reversing lights
4 Rear fog light
5 High-mounted brake light
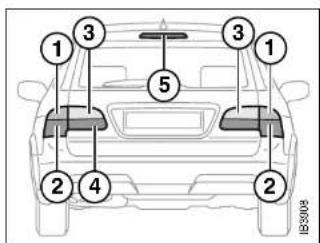
Rear light clusters, 9-5 SportCombi
1 Direction indicators
2 Stop lights and taillights
3 Reversing lights
4 Rear fog light
5 High-mounted brake light





95 US MY09.book Page 207 Tuesday, April 15, 2008 11:03 AM
207Car care and technical inform
Trunk lid light and taillights, 9-5 Sedan
Before changing bulbs in the trunk, you must first release the trim at the foot of the trunk. This involves removing the handle and the three trim fasteners (studs).
1 Unscrew the handle on the inside of the tailgate.
2 Using the peg in the top of the screw-driver handle, push in the button in the center of the studs.
3 Remove the studs.

Changing bulbs
1 Squeeze together the silver plastic lug and the electrical connection and withdraw the lamp holder.
2 The bulb has a bayonet fitting. Press in the bulb and twist it counterclockwise.
3 Change the bulb.

natural_image
Diagram of a car rear door with two inset views showing internal components (no text or symbols)Refitting the trim
1 Reset the studs by pushing back the center buttons so that they protrude by 0.2 inch (5 mm).
2 Insert the studs through the trim and tail-gate panel. Press the center buttons in, flush with the collar.
3 Screw the handle back onto the trunk.


95 US MY09.book Page 208 Tuesday, April 15, 2008 11:03 AM
208 Car care and technical information
High-mounted stop lights, 9-5 Sedan
The bulbs can be accessed after the panel in the rear headlining has been removed.
1 Remove the panel by carefully pushing in the two clips, one at the time.
2 Release the bulb holder, which is retained by a clip at either end.
3 Withdraw the bulb gently straight back.
4 Push in the new bulb.
5 Refit the bulb holder.
6 Replace the panel by carefully pushing the panel towards the headlining so that the two clips engage their respective slot.

High-mounted stop lights
1 Panel
2 Retaining clips
3 Bulbs

natural_image
Technical diagram of a mechanical component with two arrows indicating direction (no text or symbols present)Rear lights clusters, 9-5 SportCombi
1 Open the tailgate.
2 Remove the two screws securing the light cluster to the body.


95 US MY09.book Page 209 Tuesday, April 15, 2008 11:03 AM


209Car care and technical inform


natural_image
Technical line drawing of a mechanical component with a cable inserted into a housing (no text or symbols)3 Remove the two screws securing the light cluster to the body.
4 Pull the light cluster rearwards and angle it outwards (it is seated quite firmly).
5 Release the fastener from the body. Reinsert the fastener into the groove in the light cluster. Press in the fastener until you hear a click.
6 Take out the bulb holder.
7 Press in the bulb and twist it counterclockwise.
8 Change the bulb.
9 Check that the new bulb works.

natural_image
Technical illustration of a car interior with mechanical components and directional arrows (no text or symbols)Reassembly
1 Align the fastener with the hole in the body.
2 Press the lamp unit home into the body until you hear a click.
3 Fit the screws.



95 US MY09.book Page 210 Tuesday, April 15, 2008 11:03 AM
210 Car care and technical information
Tailgate bulbs, 9-5 SportCombi
1 Turn the lock a quarter turn (90°) with a screwdriver or the ignition key.
2 Open and remove the cover.
3 Remove the bulb holder by pressing the plastic lug to the side.
4 Press in the bulb and twist it counterclockwise.
5 Change the bulb.
6 Check that the new bulb is working.


natural_image
Mechanical assembly diagram showing a component being inserted into a housing, with an inset close-up of the internal part (no text or symbols visible)Reassembly
1 Place the two "hinges" in the recess in the tailgate.
2 Then push the "hinges" into the recess and close the cover.
3 Turn the lock a quarter turn.



95 US MY09.book Page 211 Tuesday, April 15, 2008 11:03 AM
211Car care and technical inform
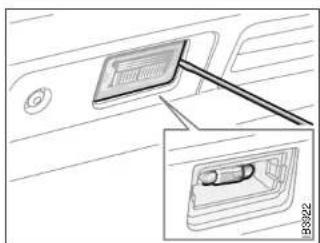
natural_image
Diagram showing a device with a cable inserted into a housing panel, no text or symbols present
natural_image
Diagram of a mechanical device with exploded view and internal components (no text or symbols)
natural_image
Mechanical device with attached cable and two cylindrical components (no visible text or symbols)License-plate light
The lens is not screwed in place. It is held in place with snaps.
1 One of the short sides of the lens contains a recess for a small screwdriver. Insert a screwdriver and prise out the lens.
2 Fit the new bulb.
3 When refitting the lens, the short side without the screwdriver recess should be inserted first.
Side direction indicators
1 Slide the lamp fitting forward and pull out the back.
2 Remove the bulb.
3 Change the bulb.
On refitting, make sure that the spring in the lamp fitting engages the edge of the opening in the body panel.
Courtesy lights (front doors and floor) and luggage-compartment lighting
1 Insert a screwdriver carefully into the slot in the end of the lamp fitting. Ease the fitting off to gain access to the bulb.
2 Bend out one of the contacts and remove the bulb.
3 Change the bulb.
On refitting, insert the connector-end of the lamp fitting first.

95 US MY09.book Page 212 Tuesday, April 15, 2008 11:03 AM
212 Car care and technical information

natural_image
Diagram of a car interior showing a door panel, seatbelt, and side-mounted device (no text or symbols)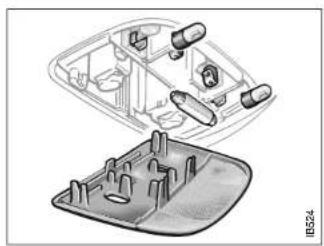
natural_image
Technical illustration of a vehicle's internal components, showing housing and gear assembly (no text or symbols)
natural_image
Diagram showing a door handle and a mechanical device with a spring-loaded lever (no text or symbols)Dome light, front
1 Ease the leading edge of the glass out of the overhead panel.
2 Release one of the contacts and remove the bulb.
3 Fit the new bulb.
Dome light, rear
1 Remove the entire overhead panel: ease out the trailing end first, and then both front edges.
2 Fit the new bulb.
Glove-compartment illumination
1 Insert a small screwdriver in the slot in the end of the lamp fitting and ease it out to gain access to the bulb.
2 Bend out one of the contacts and remove the bulb.
3 Fit the new bulb.
On refitting, insert the connector-end of the lamp fitting first.
Other bulbs
If any other bulbs need changing, you are advised to take the car to a workshop. We recommend that you contact an authorized Saab dealer.

95 US 7carecare MY09.fm Page 213 Tuesday, April 15, 2008 11:45 AM
213Car care and technical inform
1 | 6 | |
2 | 7 | |
3 | 8 | |
4 | 9 | |
5 | 10 |
Bulb table
| # | Cap | Wattage | |
| 1 | H7 | 55 | Headlight |
| 2 | H8 | 35 | Fog light |
| 3 | P21W 21 | Reversing lamp; rear fog lamp; rear direc-tion indicator | |
| 4 | P21/5W 21 | 1/5 Stop/tail lamp | |
| 5 | R10W 10 | Dome light; courtesy lights; glove com-partment; luggage compartment | |
| 6 | R5W 5 Safety belt reminder; license-plate lighting | ||
| 7 | Xenon w9U | 6 Reading light, overhead panel | |
| 8 | T4W 4 | Reading light, rear | |
| 9 | WY5W/W5W | 5 Side Indicators (yellow);/ high-mounted stop light (9-5 Sedan); parking lights | |
| 10 | W2W | 1.2 | Switches |
NOTICE
| Only fit lamps of the specified rating. Lamps of the wrong wattage could damage the wiring harness and electronics. |
A special kit containing spare bulbs and fuses is available as an accessory from your Saab dealer. A storage space for this is provided adjacent to the toolkit and jack, under the panel in the luggage compartment.


95 US MY09.book Page 214 Tuesday, April 15, 2008 11:03 AM
214 Car care and technical information
Fuses

WARNING
To avoid the risk of short-circuiting and/or fire breaking out in the electrical system, the following advice should be heeded:
• Always consult a workshop before modifying or adding any electrical equipment. We recommend that you contact an authorized Saab dealer. Failure to do so can result in the electrical system being damaged.
- Never replace a fuse with one having a higher/lower rating than specified (see page 216). The color of the fuse indicates its amperage.
- If the same fuse blows repeatedly, have the electrical system checked by a workshop. We recommend that you contact an authorized Saab dealer.
- If a MAXI fuse blows, it means that there is a major fault in the electrical system. Have the car checked by a workshop. We recommend that you contact an authorized Saab dealer.

natural_image
Two identical 3D model of a dual-pin electronic component with mounting holes and internal circuitry (no text or symbols visible)Sound fuse / Blown fuse
The fuses are housed in two fuse panels: one at the end of the instrument panel on the driver's side, and one under the hood.
To check if a fuse has blown, first remove it from the panel (see below). If the filament is broken, the fuse has blown.
A special tool for removing fuses is provided at the bottom of the fuse panel at the end of the instrument panel. Simply push the tool onto the fuse, squeeze and remove the fuse.
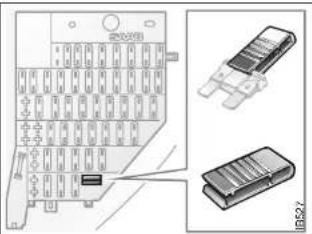
Fuse panel in instrument panel
Fuse box under the hood

natural_image
Illustration of a closed mechanical device with a black arrow pointing to a component, placed on a bed (no text or symbols visible)







95 US MY09.book Page 215 Tuesday, April 15, 2008 11:03 AM

Maxi fuses under the hood
Maxi fuses
The Maxi fuses are housed in the fuse box under the hood. These fuses can be checked in the same way as the other fuses.
The Maxi fuses are designed to protect the car's electrical system from being damaged. Each Maxi fuse protects a number of electrical circuits and functions and therefore has a higher rating (amperage) than the standard fuses. No spare Maxi fuses are supplied with the car.
NOTICE
If a Maxi fuse blows, it means that there is a major fault in the electrical system. Have the car checked without delay by a workshop. We recommend that you contact an authorized Saab dealer.
DICE / TWICE
DICE = Dashboard Integrated Central Electronics
TWICE = Theft-Warning Central Electronics DICE and TWICE are electronic control modules that monitor and control a variety of functions:
DICE controls (among other things):
- Front lights and interior lighting
• Instrument illumination - Intermittent wiper operation
• Electric heating of rear window and door mirrors - Cooling fans
TWICE controls (among other things):
- Central locking.
• Car alarm (Anti-theft system)
• Engine immobilizer
• Autochecking of lights.
• Electric heating of rear seat - Safety belt reminder
• Electrically adjustable passenger seat
The DICE and TWICE control modules are linked to a data bus, which is basically an information carrier that allows information to be exchanged between all the control modules and components connected to the bus.
If a fault occurs in any of these components, diagnostic faults codes are set in the relevant control module, which facilitates fault diagnosis. We recommend that you contact an authorized Saab dealer.
The scan tool connector for fault diagnosis is located under the instrument panel on the drivers side.
215Car care and technical inform


95 US MY09.book Page 216 Tuesday, April 15, 2008 11:03 AM
216 Car care and technical information
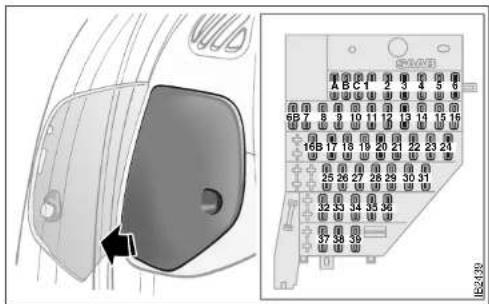
Fuse panel in instrument panel
| # | Amp | Function |
| A | 30 | Trailer lights |
| B | 10 | Automatic transmission |
| C | 7.5 Electric door mirrors; DICE: manual beam length adjustment * | |
| 1 | 15 Brake lights; Park Brake Shift Lock (cars with automatic transmission) | |
| 2 | 15 Reversing lights | |
| 3 | 10 Parking lights and taillights, left | |
| 4 | 10 Parking lights and taillights, right | |
| 5 | 7.5 DICE / TWICE | |
| 6 | 30 Electric windows, right; trailer charging | |
| 6B 7.5 Brake lights, trailer |
| 7 10 Engine injectors |
| 8 15 Trunk lighting; trunk lock; door lighting; parking assistant *; SID |
| 9 15 Audio System; CD changer * |
| 10 15 Heating, rear seat *; moonroof *, remote control receiver |
| 11 30 Electrically adjusted passenger seat * |
| 12 7.5 Automatic transmission * |
| 13 20 Audio System, amplifier |
| 14 30 Ignition system, engine |
| 15 20 Fuel pump |
| 16 20 DICE (direction indicators) |
| 16B - OnStar * |
| 17 20 Engine-management system; main instrument;DICE/TWICE |
| 18 40 Door-mirror heating; rear-window heating |
| 19 10 OnStar *; Telematics * |
| 20 15 ACC; interior lighting; rear fog light; high beam flasher |
| 21 10 Audio System; rear-view mirror; load angle sensor *; navigation *; Cruise Control * |
| 22 40 Interior fan |
| 23 15 Central locking; navigation *; door mirror memory * |
| 24 20 Main light switch |
| 25 30 Electrically adjustable driver's seat |


95 US MY09.book Page 217 Tuesday, April 15, 2008 11:03 AM


217Car care and technical inform

| 26 | 7,5 | Driver seat memory *, mirrors memory *, moonroof *, parking assistant *, seatbelt reminder; ACC |
| 27 | 10 | Engine-management system; SID; main instrument |
| 28 | 7.5 | Airbag |
| 29 | 7.5 | ABS/ESP® |
| 30 | 7.5 | Starter motor; transmission control module (cars with automatic transmission) |
| 31 | 7.5 | Cruise control *, water valve; fog lights, front *, rain sensor * |
| 32 | -- | |
| 33 | 7.5 | Direction-indicator switch |
| 34 | 30 | 12-volt socket (cigarette lighter) front/rear |
| 35 | 15 | Daytime running light |
| 36 | 30 | Electric windows, left |
| 37 | 30 | Windshield wipers |
| 38 | 30 | Electric heating, front seats * |
| 39 | 20 | Limp-horne solenoid |
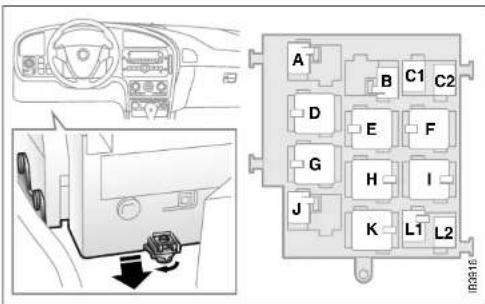
Relay panel under instrument panel
| # | Function |
| A | - |
| B | Electric heating of rear seat |
| C1 | - |
| C2 | - |
| D | - |
| E | Main relay (engine management system) |
| F | - |
| G | F u e l p u m p |
| H | Ignition switch |
| I | Rear-window / door mirrors heating |


95 US MY09.book Page 218 Tuesday, April 15, 2008 11:03 AM
218 Car care and technical information
| J | - | |||||||||||
| K | S | t | a | r | t | e | r | r | e | l | a | y |
| L1 Limp-home function | ||||||||||||
| L2 | - | |||||||||||

Fuse box under hood
Fuses
| # Amp Function | |||||||||
| 1 40 Radiator fan, high speed | |||||||||
| 2 | 40 | ABS/ESP® | |||||||
| 3 | 30 | ABS/ESP® | |||||||
| 4 7.5 Load angle sensor (cars with xenon headlights) | |||||||||
| 5 | 1 | 5 | H | e | a | t | e | r | |
| 6 10 A/C; car alarm siren | |||||||||
| 7 | 1 | 5 | B | u | l | b | t | e | s |
| 8 | - | - | |||||||
| 9 20 Headlight washers | |||||||||


[Non-Text]
[Non-Text]
[Non-Text]
[Non-Text]
[Non-Text]


95 US MY09.book Page 219 Tuesday, April 15, 2008 11:03 AM


219Car care and technical inform
| 10 15 High beam headlight, left |
| 11 15 Low beam headlight left |
| 12 15 High beam headlight, right |
| 13 15 Low beam headlight, right |
| 14 30 Radiator fan, high speed |
| 15 15 Fog lights (front spoiler) |
| 16 20 Wiper, rear |
| 17 15 Horn |
| 18 -- |
Relays
| # | Function |
| 1 | Bulb test; head light; high beam flasher |
| 2 | Headlight washer |
| 3 | Front fog lights |
| 4 | Wiper, rear (9-5 SportCombl) |
| 5 | - |
| 6 | - |
| 7 | Rain sensor |
| 8 | Radiator fan, low speed |
| 9 | Radiator fan, high speed |
| 10 | A/C-compressor |
| 11 | Radiator fan, high speed, right fan |
| 12 | Horn |
| 13 | Extra lights (accessory) |
| 14 | High beam headlight |
| 15 | Low beam headlight |
| 16 | - |
| 17 | Windshield wipers |



95 US MY09.book Page 220 Tuesday, April 15, 2008 11:03 AM
220 Car care and technical information
Tires
Your new vehicle comes with high-quality tires made by a leading tire manufacturer. If you ever have questions about your tire warranty and where to obtain service, see your Saab Warranty and Service Record Booklet for details.
WARNING
Poorly maintained and improperly used tires are dangerous.
• Overloading your tires can cause overheating as a result of too much friction. You could have an blow-out and a serious accident. See "Loading Your Vehicle" on page 229.
- Underinflated tires pose the same danger as overloaded tires. The resulting accident could cause serious injury. Check all tires frequently to maintain the recommended pressure. Tire pressure should be checked when your tires are cold.
• Overinflated tires are more likely to be cut, punctured or broken by a sudden impact – such as when you hit a pot-hole. Keep tires at the recommended pressure.
- Wom, old tires can cause accidents. If your tread is badly worn, or if your tires have been damaged, replace them.
Inflation - Tire Pressure
The Tire-Loading Information label shows the correct inflation pressures for your tires when they're cold. "Cold" means your vehicle has been sitting for at least three hours or driven no more than 1 mile (1.6 km).
Notice: Don't let anyone tell you that underinflation or overinflation is all right. It's not. If your tires don't have enough air (underinflation), you can get the following:
- Too much flexing
- Too much heat
- Tire overloading
- Bad wear
- Bad handling
- Bad fuel economy
If your tires have too much air (overinflation), you can get the following:
- Unusual wear
- Bad handling
- Rough ride
Needless damage from road hazards
Adjust the tire pressure to match the current load and speed of the car (see page 263). The stated tire pressures apply to cold tires, i.e. tires that are the same temperature as the outside air temperature. Tire pressure increases as the tires become warm (e.g. during highway driving) by approximately 0.3 bar (4 psi). When the temperature of the tires changes by 50°F (10°C), the tire pressure will change 0.1 bar (2 psi).
Never reduce the pressure of a hot tire. If the tires are hot when you check them, only increase the pressure, if necessary.


95 US MY09.book Page 221 Tuesday, April 15, 2008 11:03 AM
221Car care and technical inform
High speed operation When to check

WARNING
Driving at high speeds, 100 mph (160 km/h) or higher, puts an additional strain on tires.
Sustained high-speed driving causes excessive heat build up and can cause sudden tire failure. You could have a crash and you or others could be killed. Some high-speed rated tires require inflation pressure adjustment for high speed operation. When speed limits and road conditions are such that a vehicle can be driven at high speeds, make sure the tires are rated for high speed operation, in excellent condition, and set to the correct cold tire inflation pressure for the vehicle load.
Check your tires once a month or more. Don't forget your compact spare tire. It should be at 60 psi (420 kPa).
How to Check
Use a good quality pocket-type gauge to check tire pressure. You can't tell if your tires are properly inflated simply by looking at them. Radial tires may look properly inflated even when they're underinflated.
Be sure to put the valve caps back on the valve stems. They help prevent leaks by keeping out dirt and moisture.
Tire Inspection and Rotation
Tires should be rotated every 10,000 miles (16 000 km).
Any time you notice unusual wear, rotate your tires as soon as possible and check wheel alignment. Also check for damaged tires or wheels. See "When It Is Time for New Tires" on page 222 and "Wheel Replacement" on page 225 for more information.
The purpose of regular rotation is to achieve more uniform wear for all tires on the vehicle. The first rotation is the most important.
When rotating your tires, always use the correct rotation pattern. Left front tire to left rear. Left rear tire to right front. Right front to right rear. Right rear to left front.
Don't include the compact spare tire in your tire rotation.
After the tires have been rotated, adjust the front and rear inflation pressures as shown on the Tire-Loading Information label. Make certain that all wheel nuts are properly tightened. See page 239.

WARNING
Rust or dirt on a wheel, or on the parts to which it is fastened, can make wheel nuts become loose after a time. The wheel could come off and cause an accident. When you change a wheel, remove any rust or dirt from places where the wheel attaches to the vehicle. In an emergency, you can use a cloth or a paper towel to do this; but be sure to use a scraper or wire brush later, if you need to, to get all the rust or dirt off. See "Changing a wheel" on page 237.


95 US MY09.book Page 222 Tuesday, April 15, 2008 11:03 AM
222 Car care and technical information
Flat spotting
All tires get hot, especially on long journeys or when the car is driven hard. After the car has been parked with hot tires and the tires have cooled down, a flat spot can form in the tire, where it is in contact with the ground. The same can occur if the car has not been moved for a long time.
Flat spots can cause vibration that can be felt through the steering wheel, similar to that experienced when the wheels need balancing.
Flat spots of this type disappear once the tires get hot again, usually after 10–15 miles (20–25 km) of driving at cruising speed.
When It Is Time for New Tires
One way to tell when it's time for new tires is to check the treadwear indicators, which will appear when your tires have only 1/16 inch (1.6 mm) or less of tread remaining.
You need a new tire if any of the following statements are true:
- You can see the indicators at three or more places around the tire.
- You can see cord or fabric showing through the tire's rubber.
- The tread or sidewall is cracked, cut or snagged deep enough to show cord or fabric.
• The tire has a bump, bulge or split. - The tire has a puncture, cut or other damage that can't be repaired well because of the size or location of the damage.
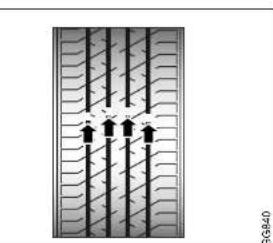
natural_image
Diagram showing parallel wavy lines with three upward-pointing arrows inside a rectangular boundary (no text or symbols)Wear indicators
Treadwear indicators
The tires incorporate wear indicators in the form of smooth, treadless strips across the width, which become visible when only 2/32" (1.6 mm) of tread remains. As soon as the indicators become visible, new tires should be fitted without delay.
Make sure you are familiar with the legal limit for minimum tread depth in your country and also any regulations governing the use of winter (snow) tires.

natural_image
Pure geometric diagram with crosshair and circular shapes, no text or symbols present

95 US MY09.book Page 223 Tuesday, April 15, 2008 11:03 AM


223Car care and technical inform
Buying New Tires
To find out what kind and size of tires you need, look at the Tire-Loading Information label.
Before changing to wheels/tires of another size, we recommend that you contact an authorized Saab workshop regarding acceptable options. See also page 261
Wheels/tires combinations that are not approved by the vehicle manufacturer can negatively affect the car's directional stability, steering and braking in both wet and dry conditions.
The wheels and tires have been carefully matched to the characteristics of the car and play a key role in its outstanding roadholding and handling.
Do not take it for granted that a wheel/tire combination will work in the best possible way, just because it can be fitted to the car.
To ensure that the speedometer is as accurate as possible it should be reprogrammed if wheels of a different dimension are fitted. Contact a Saab dealer.
Because of front wheel drive, the front tires tend to wear faster than the rear ones. New tires should always be fitted in pairs, so that tires on the same axle have the same amount of tread.
Store wheels lying flat or hanging – never standing upright.
NOTICE
Wide wheels and tires with sidewalls that are too low can:
• be damaged in potholes etc.
- cause springs, shock absorbers and wheel bearings and body mountings can be overloaded.
- cause the wheels to come into contact with chassis and body components.
- can affect the function of the Electronic Stability Program (ESP®).
The speed and load limits for the tires must not be exceeded; see page 228. Wheels larger than 17" must not be fitted. The maximum permissible offset is 49 mm.

WARNING
Mixing tires could cause you to lose control while driving. If you mix tires of different sizes or types (radial and bias-belted tires), the vehicle may not handle properly, and you could have a crash. Using tires of different sizes may also cause damage to your vehicle. Be sure to use the same size and type tires on all wheels. It's all right to drive with your compact spare temporarily, it was developed for use on your vehicle. See "Compact spare tire" on page 235.

WARNING
If you use bias-ply tires on your vehicle, the wheel rim flanges could develop cracks after many miles of driving. A tire and/or wheel could fall suddenly, causing a crash. Use only radial-ply tires with the wheels on your vehicle.


95 US MY09.book Page 224 Tuesday, April 15, 2008 11:03 AM
224 Car care and technical information
Uniform Tire Quality Grading
Quality grades can be found where applicable on the tire sidewall between tread shoulder and maximum section width. For example:
Treadwear 200 Traction AA Temperature A
The following information relates to the system developed by the United States National Highway Traffic Safety Administration, which grades tires by treadwear, traction and temperature performance. (This applies only to vehicles sold in the United States.) The grades are molded on the sidewalls of most passenger car tires. The Uniform Tire Quality Grading system does not apply to deep tread, winter-type snow tires, space-saver or temporary use spare tires, tires with nominal rim diameters of 10 to 12 inches (25 to 30 cm), or to some limited-production tires.
While the tires available on General Motors passenger cars and light trucks may vary with respect to these grades, they must also conform to federal safety requirements and additional General Motors Tire Performance Criteria (TPC) standards.
Treadwear
The treadwear grade is a comparative rating based on the wear rate of the tire when tested under controlled conditions on a specified government test course. For example, a tire graded 150 would wear one and a half (1.5) times as well on the government course as a tire graded 100. The relative performance of tires depends upon the actual conditions of their use, however, and may depart significantly from the norm due to variations in driving habits, service practices and differences in road characteristics and climate.
Traction-AA,A,B,C
The traction grades, from highest to lowest, are AA, A, B, and C. Those grades represent the tire's ability to stop on wet pavement as measured under controlled conditions on specified government test surfaces of asphalt and concrete. A tire marked C may have poor traction performance. Warning: The traction grade assigned to this tire is based on straight-ahead braking traction tests, and does not include acceleration, cornering, hydroplaning, or peak traction characteristics.
Temperature - A, B, C
The temperature grades are A (the highest), B, and C, representing the tire's resistance to the generation of heat and its ability to dissipate heat when tested under controlled conditions on a specified indoor laboratory test wheel. Sustained high temperature can cause the material of the tire to degenerate and reduce tire life, and excessive temperature can lead to sudden tire failure. The grade C corresponds to a level of performance which all passenger car tires must meet under the Federal Motor Vehicle Safety Standard No. 109. Grades B and A represent higher levels of performance on the laboratory test wheel than the minimum required by law.
Warning: The temperature grade for this tire is established for a tire that is properly inflated and not overloaded. Excessive speed, underinflation, or excessive loading, either separately or in combination, can cause heat bulldup and possible tire failure.





95 US MY09.book Page 225 Tuesday, April 15, 2008 11:03 AM


225Car care and technical inform
Wheel Alignment and Tire Balance
The wheels on your vehicle were aligned and balanced carefully at the factory to give you the longest tire life and best overall performance.
Scheduled wheel alignment and wheel balancing are not needed. However, if you notice unusual tire wear or your vehicle pulling one way or the other, the alignment may need to be reset. If you notice your vehicle vibrating when driving on a smooth road, your wheels may need to be rebalanced.
Wheel Replacement
Replace any wheel that is bent, cracked or badly rusted or corroded. If wheel nuts keep coming loose, the wheel, wheel bolts and wheel nuts should be replaced. If the wheel leaks air, replace it (except some aluminum wheels, which can sometimes be repaired). See your dealer if any of these conditions exist.
Your dealer will know the kind of wheel you need.
Each new wheel should have the same load-carrying capacity, diameter, width, offset and be mounted the same way as the one it replaces.
If you need to replace any of your wheels, wheel bolts or wheel nuts, replace them only with new Saab original equipment parts. This way, you will be sure to have the right wheel, wheel bolts and wheel nuts for your vehicle.

WARNING
Using the wrong replacement wheels, wheel bolts or wheel nuts on your vehicle can be dangerous. It could affect the braking and handling of your vehicle, make your tires lose air and make you lose control. You could have a collision in which you or others could be injured. Always use the correct wheel, wheel bolts and wheel nuts for replacement.
Notice: The wrong wheel can also cause problems with bearing life, brake cooling, speedometer or odometer calibration, headlamp aim, bumper height, vehicle ground clearance and tire or tire chain clearance to the body and chassis. See "Changing a wheel" on page 237.

WARNING
When fitting just one new pair of tires, these should be fitted to the rear wheels, as these are more critical to the directional stability of the car (e.g. on braking or in a skid). The existing rear wheels should therefore be moved to the front.
Used Replacement Wheels

WARNING
Putting a used wheel on your vehicle is dangerous. You can't know how it's been used or how far it's been driven. It could fall suddenly and cause a crash. If you have to replace a wheel, use a new GM original equipment wheel.



Your dealer will know the kind of wheel you need.
Each new wheel should have the same load-carrying capacity, diameter, width, offset and be mounted the same way as the one it replaces.
If you need to replace any of your wheels, wheel bolts or wheel nuts, replace them only with new Saab original equipment parts. This way, you will be sure to have the right wheel, wheel bolts and wheel nuts for your vehicle.


95 US MY09.book Page 226 Tuesday, April 15, 2008 11:03 AM
226 Car care and technical information
Tire Chains
WARNING
If your vehicle has 225/45 R17 alt. 235/45 R17 size tires, don't use tire chains, there's not enough clearance.
Tire chains used on a vehicle without the proper amount of clearance can cause damage to the brakes, suspension or other vehicle parts. The area damaged by the tire chains could cause you to lose control of your vehicle and you or others may be injured in a crash.
Use another type of traction device only if its manufacturer recommends it for use on your vehicle and tire size combination and road conditions. Follow that manufacturer's instructions. To help avoid damage to your vehicle, drive slowly, readjust or remove the device if it's contacting your vehicle, and don't spin your wheels.
If you do find traction devices that will fit, install them on the front tires.
Notice: If your vehicle does not have 225/45R17 alt. 235/45 R17 size tires, use tire chains only where legal and only when you must. Contact your Saab dealer regarding suitable snow chains. Install them on the front tires and tighten them as tightly as possible with the ends securely fastened. Drive slowly and follow the chain manufacturer's instructions. If you can hear the chains contacting your vehicle, stop and retighten them. If the contact continues, slow down until it stops. Driving too fast or spinning the wheels with chains on will damage your vehicle.
If a Tire Goes Flat
It's unusual for a tire to "blow-out" while you're driving, especially if you maintain your tires properly. If air goes out of a tire, it's much more likely to leak out slowly. But if you should ever have a "blow-out", here are a few tips about what to expect and what to do:
If a front tire fails, the flat tire will create a drag that pulls the vehicle toward that side. Take your foot off the accelerator pedal and grip the steering wheel firmly. Steer to maintain lane position, and then gently brake to a stop well out of the traffic lane.
A rear blow-out, particularly on a curve, acts much like a skid and may require the same correction you'd use in a skid. In any rear blowout, remove your foot from the accelerator pedal. Get the vehicle under control by steering the way you want the vehicle to go. It may be very bumpy and noisy, but you can still steer. Gently brake to a stop – well off the road if possible.
If a tire goes flat, the next part shows how to use your jacking equipment to change a flat tire safely.


95 US MY09.book Page 227 Tuesday, April 15, 2008 11:03 AM


227Car care and technical inform
Tire Sidewall Labeling
Useful information about a tire is molded into it's sidewall.
Tire size: The tire size is a combination of letters and numbers used to define a particular tire's width, height, aspect ratio, construction type and service description.
Department of Transportation (DOT):
The Department of Transportation (DOT) code indicates that the tire is in compliance with the U.S. Department of Transportation Motor Vehicle Safety standards.
Tire Identification Number (TIN): The letters and numbers following DOT code are the Tire Identification Number (TIN). The TIN shows the manufacturer and plant code, tire size, and date the tire was manufactured. The TIN is molded onto both sides of the tire.
Tire Ply Material: The type of cord and number of plies in the sidewall and under the tread.
Uniform Tire Quality Grading (UTQG): Tire manufacturers are required to degrade tires based on performance factors: tread wear, traction and temperature resistance. For more information see "Uniform Tire Quality Grading" on page 224.
Maximum Cold Inflation Load Limit: Maximum load that can be carried and the maximum pressure needed to support that load. For information on recommended tire pressure see "Lowest recommended tire pressure, cold tires" on page 263 and "Loading Your Vehicle" on page 229.
Tire Size
The following illustration shows an example of a typical passenger car tire size.

a Tire Width
b Aspect Ratio
c Belt Rating
d Rim diameter
e Load range
f Speed rating
Tire Width: The three-digit number indicates the tire section width in millimeters from sidewall to sidewall.


95 US MY09.book Page 228 Tuesday, April 15, 2008 11:03 AM
228 Car care and technical information
Aspect ratio: A two-digit number that indicates the tire height-to-width measurements. For example, if the tire size aspect ratio is "55", as shown in item "C" of the illustration, it would mean that the tire's sidewall is 55% as high as it is wide.
Belt Rating: A letter code is used to indicate the type of ply construction in the tire. The letter "R" means radial ply construction; the letter "D" means diagonal or bias ply construction; and the letter "B" means belted-bias ply construction.
Rim Diameter: Diameter of the wheel in inches.
Load range: The load range represents the load carry capacity a tire is certified to carry.
Speed Rating: The maximum speed that a tire is certified to carry a load. Speed ratings range from "A" to "Z".
Tire markings
An example of the meaning of the different markings in a tire size is given below for a tire size of:
215/55 R16 93 V
215 Tire section width, mm
Aspect ratio, i.e. the section height 55 is 55 % of the section width
R Radial ply
Wheel rim diameter 16 in at bead 16 seats
93 Tire load code
V Speed marking
Tire load index
Tire approved for max. 1355 lbs. 91 (615 kg)
93 Max. 1433 lbs (650 kg)
94 Max. 1477 lbs (670 kg)
Speed ratings
Tire approved for speeds up to Q 100 mph (160 km/h)
S Max. 112 mph (180 km/h)
T Max. 118 mph (190 km/h)
H Max. 130 mph (210 km/h)
V Max. 150 mph (240 km/h)
W Max. 167 mph (270 km/h)
Y Max. 186 mph (300 km/h)

flowchart
graph TD
    A["DOT"] --> B["a"]
    A --> C["b"]
    A --> D["c"]
    A --> E["d"]
    B --> F["XXXX"]
    C --> F
    D --> F
    E --> F
TIN-code
a Manufacturer's Identification Mark
b Tire Size
c Tire Type Code
d Date of Manufacture



95 US MY09.book Page 229 Tuesday, April 15, 2008 11:03 AM
229Car care and technical inform
Loading Your Vehicle

This label can only be found on vehicles sold in the U.S.
Vehicles sold in Canada have the tire information label in the glovebox, see page 264.
This is an example of what your vehicle's Tire-Loading Information/Certification label might look like. It is located on the B-pillar and shows how much weight your vehicle may properly carry. The label tells you the proper size, and recommended inflation pressures for the tires on your vehicle. It also gives you important information about the number of people that can be in your vehicle and the total weight that you can carry. This weight is called the Vehicle Capacity Weight, and includes the weight of all occupants, cargo and all nonfactory-installed options.
Tire Terminology and Definitions
Air Pressure: The amount of air inside the tire pressing outward on each square inch of the tire. Air pressure is expressed in pounds per square inch (psi) or kilopascal (kPa).
Accessory Weight: This means the combined weight of optional accessories, for example, automatic transmission, power steering, power brakes, power windows, power seats, radio and air conditioning.
Aspect Ratio: The relationship of a tire's height to its width.
Belt: A rubber coated layer of cords that is located between the plies and the tread. Cords may be made from steel or other reinforcing materials.
Bias Ply Tire: A pneumatic tire in which the ply cords that extend to the beads are laid at alternate angles substantially less than 90 degrees to the centerline of the tread.
Cold Inflation Pressure: The amount of air pressure in a tire, measured in pounds per square inch (psi) or kilopascal (kPa), before a tire have built up heat from driving. See "Inflation - Tire Pressure" on page 220.
Curb weight: This means the weight of a motor vehicle with standard and optional equipment including the maximum capacity of fuel, oil and coolant, without passengers and cargo.
DOT Markings: A code molded into the sidewall of a tire signifying that the tire is in compliance with the U.S. Department of Transportation motor vehicle safety standards. The DOT code includes the Tire Identification Number (TIN), an alphanumeric designator which can also identify the tire manufacturer, production plant, brand and date of production.
GVWR: Gross Vehicle Weight Rating see page 258.
GAWR FRT: Gross Axle Weight Rating for the front axle, see page 258.
GAWR RR: Gross Axle Weight Rating for the rear axle, see page 258.
Intended Outboard Sidewall: The side of an asymmetrical tire that must always face outward when mounted on a vehicle.
Kilopascal (kPa): The metric unit for air pressure. There are 6.9 kPa to one psi.
Light Truck (LT-Metric) Tire: A tire used on light duty trucks and some multipurpose passenger vehicles.
Load Index: An assigned number ranging from 1 to 279 that corresponds to the load carrying capacity of a tire.


95 US MY09.book Page 230 Tuesday, April 15, 2008 11:03 AM
230 Car care and technical information
Maximum Load rating: The load rating for a tire at the maximum permissible inflation pressure for that tire.
Maximum Loaded Vehicle Weight: The sum of curb weight; accessory weight; vehicle capacity weight; and production options weight.
Maximum Permissible Inflation Pressure: The maximum cold inflation pressure to which a tire may be inflated.
Normal occupant weight: The number of occupants a vehicle is designed to seat multiplied by 150 pounds (68 kg). See "Loading Your Vehicle" on page 229.
Occupant Distribution: Designated seating positions.
Outward Facing Sidewall: The side of a asymmetrical tire that has a particular side that faces outward when mounted on a vehicle. The side of the tire that contains a whitewall bears white lettering or bears manufacturer, brand and or model name molding on the other sidewall of the tire.
Passenger (P-Metric) Tire: A tire used on passenger cars and some light duty trucks and multipurpose vehicles.
Recommended Inflation Pressure: Vehicle manufacturer's recommended tire inflation pressure shown on the tire label, see "Inflation - Tire Pressure" on page 220 and "Loading Your Vehicle" on page 229.
Radial Ply Tire: A pneumatic tire in which the ply cords that extend to the beads are laid at substantially 90 degrees to the centerline of the tread.
Rim: A metal support for a tire or a tire and tube assembly upon which the tire beads are seated.
Sidewall: The portion of a tire between the tread and the bead.
Speed rating: An alphanumeric code assigned to a tire indicating the maximum speed at which a tire can operate.
Traction: The friction between the tire and the road surface. The amount of grip provided.
Treadwear Indicators: Narrow bands, sometimes called "wear bars", that show across the tread of a tire when only 2/32 inch of tread remains. See "When It Is Time for New Tires" on page 222.
Tread Width: The width of the tire's tread.
UTQGS: Uniform Tire Quality Grade Standards, a tire information system that provides consumers with ratings for a tire's traction, temperature and treadwear. Ratings are determined by tire manufacturers using government testing procedures. The rating are molded into the sidewall of the tire. See "Uniform Tire Quality Grading" on page 224.
Vehicle Capacity Weight: Is the number of designated seating positions multiplied by 150 pounds (68 kg) plus the rated cargo load. See "Loading Your Vehicle" on page 229.
Vehicle Maximum Load on the Tire: Load on an individual tire due to curb weight, accessory weight, occupant weight and cargo weight.
Vehicle label: A label permanently attached to a vehicle showing original equipment tire size and the recommended cold inflation pressure. See "Loading Your Vehicle" on page 229.


95 US MY09.book Page 231 Tuesday, April 15, 2008 11:03 AM
231Car care and technical inform
Steps for Determining Correct Load Limit
1 Locate the statement "The combined weight of occupants and cargo should never exceed XXX pounds" on your vehicle's label.
2 Determine the combined weight of the driver and passengers that will be riding in your vehicle.
3 Subtract the combined weight of the driver and passengers from XXX kilograms or XXX pounds.
4 The resulting figure equals the available amount of cargo and luggage load capacity. For example, if the "XXX" amount equals 1400 lbs. and there will be five 150 lb. passengers in your vehicle, the amount of available cargo and luggage load capacity is 650 lbs. (1400–750 (5x150) = 650 lbs.).
5 Determine the combined weight of luggage and cargo being loaded on the vehicle. That weight may not safely exceed the available cargo and luggage load capacity calculated in Step 4.
6 If your vehicle will be towing a trailer, load from your trailer will be transferred to your vehicle. Consult this manual to determine how this reduces the available cargo and luggage load capacity of your vehicle.
Winter tires
Winter (snow) tires are recommended for winter climates where the majority of your driving will be done on snow and ice. Winter tires should be fitted to all four wheels to maintain a proper balance. Your Saab dealer can advise you of to the correct size tire for your car (if different from the original size) and also supply Saab approved winter tires pre-mounted on steel or alloy rims.
Winter tires normally use a different speed rating compared to summer/all season tires. Make sure not to exceed the stated speed rating on the tires you use.
Make sure that wheels with sensors for tire pressure monitoring are fitted during replacement if the car has automatic tire pressure monitoring.
Tire date code
Tires should be regarded as perishable goods. As the tires age, the rubber becomes progressively harder, and the roadholding ability of the tires diminishes. This is particularly true on winter tires.
Tires now have a date-code marking for the year of manufacture. The first two digits denote the week number and the two last digits the year followed by a filled triangle.
Tire direction of rotation
The direction of rotation is important for the majority of tires. These tires have a marking on the side of the tire. The marking may state "Tire rotation" together with an arrow or the text "Facing out". The tire must rotate in the same direction for its entire service life.


95 US MY09.book Page 232 Tuesday, April 15, 2008 11:03 AM
232 Car care and technical information
Automatic tire pressure monitoring system

WARNING
The system is an aid to the driver. The driver always has the responsibility that the tires have the correct air pressure.
For optimum safety, economy and comfort tire pressures should be checked regularly even if the automatic tire pressure monitoring has not alarmed.
The system consists of a sensor in each wheel and a common receiver. The sensors are located inside the tire in direct connection with the air pressure valves.
Make sure that wheels with sensors for tire pressure monitoring are fitted during replacement if the car has automatic tire pressure monitoring.
NOTICE
Tire replacement must take place with great care to avoid damaging the sensors that are built together with the valves.
- Remove the rear side first.
- Start to remove the tire opposite the valve.
- During removal the tire machine must not come closer than ± 10^ from the valve.
- During fitting, start 20^ after the valve and finish 20^ before the valve.
- Do not inflate the tire with pressure higher than 102 psi (700 kPa).
Tire pressure information is transmitted wirelessly to the receiver.
The system checks the tire pressures when speed exceeds 19 mph (30 km/h).
The system is self-programming which means that the wheels can be shifted around without any need for adjustment. The spare wheel has no sensor.
The sensor batteries last for 10 years or around 160 000 km. The battery cannot be replaced. The whole sensor must be replaced.

natural_image
Technical line drawing of a mechanical component or assembly (no text or symbols visible)Valve with sensor
The system does not warn if the tire pressure is too high.


95 US MY09.book Page 233 Tuesday, April 15, 2008 11:03 AM

natural_image
Technical line drawing of a mechanical component or tool inside a car wheel (no text or symbols)Valve without sensor
If the tire pressure decreases
If the tire pressure decreases to 0.4 bar (6 psi) below the recommended pressure then a warning is shown on the SID as to which tires are affected.
If the tire pressure continues to decrease then an alarm is shown on the SID when the pressure has decreased to 23 psi (159 kPa) which is the lowest permitted pressure for the tire.
An alarm is also received when leakage is greater than 3 psi/min. (20 kPa/min.).

Low tire pressure front right. Make a safe stop.
Reduce speed (avoid heavy braking and significant steering wheel movement) and stop the car as soon as possible at a suitable location. Replace the defective wheel. The fault message can remain for up to 10 minutes after restarting the car. Then it disappears if the tire pressure is correct.
Check/adjust the pressure in the other tires when a fault message is shown.
Note that the tire pressure can decrease without a puncture. The pressure could decrease around 3 psi (20 kPa) during a three month period.
The outside temperature could also affect tire pressure.
The specified tyre pressures are valid for cold tyres. The increased tyre pressure resulting from extensive driving must not be reduced. Tyre pressure table, see page 263.
If the system has triggered a low pressure warning or alarm then the tire pressure must be adjusted to the recommended pressure in order to put out the warning or alarm.
For further Information on tire air pressure, see page 220.
Allow 10 minutes for the system to recognise the wheel/sensors positions after fitting a new set of tires. During this period no low pressure warning or alarm can be triggered.

Adjust the pressure as soon as possible.


233Car care and technical inform
95 US MY09.book Page 234 Tuesday, April 15, 2008 11:03 AM
234 Car care and technical information
Malfunctions

Tire pressure system failure. Contact service.
The above message is shown on the SID if:
- a wheel without pressure sensor has been fitted (e.g. spare wheel)
• one or more pressure sensors are broken or missing
• a fault has arisen in the receiver - a system error has arisen.


Removing a tire
Remove the tire with a tire machine. It is important to follow the instructions for the tire machine as well.
- Do not fit the tire tool in an area ± 10^ from Start to fit about 20^ after the valve.
the valve. - Start removing opposite the valve.
- Remove the rear side first.
→ Start to fit about 20° after the valve. - Finish fitting before an area 20^ from the valve.
Fitting a tire
Fit the tire with a tire machine. It is important to follow the instructions for the tire machine as well.
- Do not inflate the tire to a pressure higher than 102 psi (700 kPa).


95 US MY09.book Page 235 Tuesday, April 15, 2008 11:03 AM


235Car care and technical inform
Compact spare tire

WARNING
Stow all tools carefully away after use, so that they cannot get loose and cause injury in the event of a crash.
The spare tire, together with the jack, front towrope attachment eye and toolkit, is stowed away underneath the luggage-compartment floor.
The compact spare is light and easy to handle when changing the tire. Its use is only permitted when a standard tire has sustained a puncture. The maximum life of the tire is only 2000 miles (3,500 km).
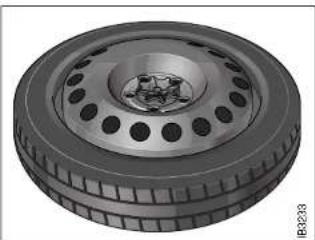
natural_image
3D rendering of a car tire with perforated rim and central hub (no text or symbols)Spare wheel (under panel in luggage compartment)
NOTICE
To avoid damaging a punctured alloy wheel it can be placed outside up in the spare-wheel well but only while driving to the closest dealer.
A general rule is that all heavy loads must be well secured in the luggage compartment, see page 131 and 135.

Do not exceed 50 mph (80 km/h) with the compact spare fitted.
The compact spare should be inflated to 60 psi (420 kPa). Carry the punctured tire in the spare-wheel well under the luggage-compartment floor.
Have the standard tire repaired and refitted as soon as possible.


95 US MY09.book Page 236 Tuesday, April 15, 2008 11:03 AM
236 Car care and technical information
Driving considerations with compact spare wheel/tire fitted
WARNING
- Do not exceed 50 mph (80 km/h) as the tire can overheat and adversely affect the handling of the car.
• Tire pressure: refer to page 263. - The spare wheel or punctured tire must be stowed under the trunk floor, and secured in place with the retaining nut.
The following should be observed when the compact spare wheel (T115/70 R16) is fitted:
- The compact spare is light and easy to handle when changing the wheel.
- Do not drive further than necessary with the compact spare fitted – the maximum life of the wheel is only just over 2000 miles (3,500 km).
- Refit the standard tire as soon as possible.
- Fitting a spare tire/wheel without pressure sensor will trigger a malfunction message, see page 234.
Important considerations when driving with a compact spare tire:
• The car's ground clearance is reduced.
• The car must not be driven with more than one compact tire at a time.
- Avoid driving against a curb.
- Do not use snow chains.
- Do not fit the wheel cover - this would conceal the warning text.

natural_image
Technical diagram of a mechanical component with an inset showing a detail view (no text or symbols present)Hanging up the cover, 9-5 SportCombi

natural_image
Pure geometric diagram with crosshair and circular shapes, no text or symbols present

95 US MY09.book Page 237 Tuesday, April 15, 2008 11:03 AM


237Car care and technical inform
Changing a wheel

WARNING
Lifting a vehicle and getting under it to do maintenance or repairs is dangerous without the appropriate safety equipment and training. The jack provided with your vehicle is designed only for changing a flat tire. If it is used for anything else, you or others could be badly injured or killed if the vehicle slips off the jack. Use the jack provided with your vehicle only for changing a flat tire.
Changing a tire can be dangerous. The vehicle can slip off the jack and roll over or fall on you or other people. You and they could be badly injured or even killed. Find a level place to change your tire. To help prevent the vehicle from moving:
1 Set the parking brake firmly.
2 If you have an automatic transmission, put the shift lever in PARK (P). For a manual transmission, leave the car in gear (1st or REVERSE (R)).
3 Turn off the engine and do not restart while the vehicle is raised.
4 Do not allow passengers to remain in the vehicle.
To be even more certain the vehicle won't move, you should put blocks at the front and rear of the tire farthest away from the one being changed. That would be the tire, on the other side, at the opposite end of the vehicle.
• The car jack is designed solely for use in changing a wheel or fitting snow chains. It must not be used to support the car during repair work or servicing.
- Never crawl under a car that is supported only by a jack.
- Raising your vehicle too high or with the jack improperly positioned can damage the vehicle and even make the vehicle fall. To help avoid personal injury and vehicle damage, be sure to fit the jack lift head into the proper location before raising the vehicle, and raise the vehicle only far enough off the ground so there is enough room for the spare tire to fit (no more than 25 mm or 1 inch clearance between the ground and the bottom of the tire).
- Switch on the hazard warning lights if the car is on a road.
- The jack should be stored correctly under the carpeting in the trunk. If it lies loose in the car, it could thrown forward and cause personal injury in the event of a crash or if the car rolls over.
- Grift, salt and rust can clog the inner threads of the wheel bolts if the car has been driven for several years exclusively with alloy wheels. If steel wheels are being installed, the bolt hole threads in the brake hubs should be cleaned before the thinner steel wheels are fitted. It may otherwise not be possible to achieve the correct clamping force, despite tightening the wheel bolts to the correct torque.


95 US MY09.book Page 238 Tuesday, April 15, 2008 11:03 AM
238 Car care and technical information

natural_image
Diagram of a car showing top and side views with arrows indicating motion or movement (no text or symbols)Jacking points for a floor jack

natural_image
Mechanical assembly diagram showing a lever and guide mechanism (no text or labels)Position for jack
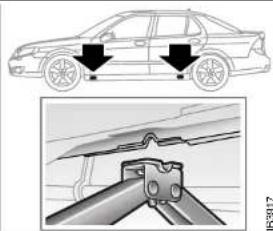
natural_image
Technical illustration of a car showing front and side views with arrows indicating motion (no text or symbols)163917
To jack up the car, apply the jack to one of the special jacking points under the sills.
If a floor jack is used, it can be applied to the standard jacking points used by the dealer.
A floor jack can lift both front wheels or both rear wheels off the ground simultaneously. A jack stand must then be applied underneath the front of the engine subframe (at the fixing point for the towrope-attachment eye) or to the rear towrope-attachment eye (or under the trailer hitch, if fitted).
NOTICE
Apply the jack only to the jacking points indicated on the body.
1 Put the car in 1st gear (automatic transmission: move selector to the P position) and apply the parking brake.
2 Wind the jack up to a suitable height before placing it under the recess in the sill.
Make sure that the jack fully engages the recess in the sill and that the base of the jack is steady and flat on the ground.
3 Remove the wheel cover (where applicable).
Remove the wheel bolt caps and loosen the wheel bolts by half a turn.
4 Wind the jack to raise the wheel clear of the ground. Remove the wheel bolts and lift off the wheel.
广力云智慧零售收银系统


95 US MY09.book Page 239 Tuesday, April 15, 2008 11:03 AM


239Car care and technical inform

natural_image
Technical diagram showing a mechanical component with a close-up inset highlighting a curved feature (no text or symbols present)Removing the plastic wheel bolt caps

natural_image
Technical line drawing of a brake assembly with a circular component and mounting bracket (no text or symbols)Clean any rust or dirt from the contact surfaces between the wheel and brake disc

natural_image
Technical line drawing of a brake assembly with a highlighted component (no text or symbols)Do not wipe away the grease in the hub.

5 Clean any rust or dirt from the contact surfaces between the wheel and brake disc. Do not wipe away the grease in the hub.
6 Fit the wheel and screw in the bolts in the sequence shown (opposite pairs) - see page 240.
Tighten the bolts enough for the bolts and wheel to be seated correctly.
7 Lower the car and tighten the wheel bolts to the correct torque in the sequence shown (opposite pairs). Replace the wheel bolt caps. Tightening torque Light-alloy wheels: 80 ft.lbs. (110 Nm) Steel wheels: 80 ft.lbs. (110 Nm). Lubricate the wheel stud head with a small amount of petroleum jelly or similar and reinstall the plastic covers on the wheel studs. The petroleum jelly facilitates removal.
NOTICE
- When refitting wheel covers (where applicable), make sure that the valve protrudes through the marked hole in the wheel cover.
- Do not overlighten the bolts using an impact wrench: not only can this damage the wheels but it can also make it impossible to undo the bolts using the wheel wrench in the car's toolkit.





95 US MY09.book Page 240 Tuesday, April 15, 2008 11:03 AM
240 Car care and technical information
8 Check-tighten the wheel bolts after a few miles.
Tightening torque
Light-alloy wheels: 80 ft.lbs. (110 Nm) Steel wheels: 80 ft.lbs. (110 Nm)

Tightening sequence, wheel bolts
Safety belts
WARNING
If the car is involved in a crash, the safety belts, belt pretensioners and other components must be inspected by a workshop. We recommend that you contact an authorized Saab dealer.
Never make any alterations or repairs to the safety belt yourself.
Regularly check the function of the safety belts as follows:
- Hold the diagonal strap and pull it sharply. The safety belt should lock and it should not be possible to withdraw it further.
Check the anchorage points in the floor. They must not have suffered rust damage.
There must be no frayed threads in the web-bing.
Safety belts must not come into contact with substances such as polishes, oils or other chemicals. If the straps are dirty, wash them with warm water and a detergent or have them replaced.
Removing the wheel cover

natural_image
Diagram of a car wheel with mesh pattern and directional arrow, no text or symbols present




95 US MY09.book Page 241 Tuesday, April 15, 2008 11:03 AM


241Car care and technical inform
Upholstery and trim
To remove lint or hairs from the seat upholstery or headlining, use a moist, lint-free cloth or a special lint remover (brush or roller). Remove any dirty marks using a cloth moistened with lukewarm soapy water.
When using a stain remover, always work from the outside towards the center to avoid leaving a ring. If a soiled ring or spot should remain, it can usually be removed using lukewarm soapy water or water alone.
Wet patches left by spilled soft drinks or thin oil must be wiped off immediately using an absorbent material, such as a paper towel, and treated with stain remover.
Alcohol is recommended for removing grease or oil stains, and a semi-stiff brush may also be used.
Cleaning and caring for leather upholstery
The principal reason for treating leather upholstery is to maintain its elegant appearance and to provide it with a protective film. Discoloration caused by dust and wear mainly affects the lighter shades, although this is not detrimental to the leather – Indeed, the patina resulting from use is often considered desirable in leather. But if the leather is allowed to become too grubby, it can start to look shabby. Regularly vacuum the leather with a soft brush to remove loose dirt and dust.
It is a good idea to clean and recondition the leather twice a year – in conjunction with a general spring-cleaning of the car – after the winter and in the autumn, for instance. In hot, dry climates, the leather will need to be treated more frequently. Use conventional leather care products. Follow the instructions on the packaging.
Do not use harsh polishing agents, cleaning agents, sprays, coarse soap or hot water. Semi-aniline leather only has a thin protective finish and is therefore more sensitive than other leathers and therefore need more care to keep the protection and ageing properties.
Textile carpeting
Vacuum clean the carpeting regularly. Carpets can also be cleaned using a brush, or carpet shampoo applied with a sponge. Do not use vacuum cleaners outdoors unless they are properly grounded.


95 US MY09.book Page 242 Tuesday, April 15, 2008 11:03 AM
242 Car care and technical information
Washing the car
Wash your car frequently. To facilitate cleaning, a suitable detergent can be added to the water, which should be lukewarm. Saab offers a full line of car care products, including car wash, for the care of your vehicle. See your dealer for available products or visit www.saabcatalog.com (U.S. residents only).
Do not use a pressure washer at close range on stone chip damage, scratches or other damage to the paintwork. The paint can otherwise start to flake.
Remove any bird droppings without delay, as these can discolor the paintwork and prove difficult to polish out.
Use a soft cloth moistened with methyl alcohol to remove splashes of tar or asphalt. Do not use strong cleaners, as these can dry out the paintwork.
The underside of the car also needs washing regularly, and this should be done extra thoroughly at the end of winter. Clean the underside of the car by hand if the car is usually washed in an automatic car wash without special facilities for underbody cleaning.
Never wash or leave the car to dry in the sun, but wipe it dry with a chamois leather immediately after washing to avoid smears and streaks.
Clean the window glass inside and out using a high quality window cleaner. This is particularly important when the car is new, as upholstery and trim have a tendency to sweat a little at first.
Keep the glass well cleaned, as this helps to prevent misting.
NOTICE
• The door mirrors must be fully retracted before the car enters an automatic car wash.
- Remove fixed antennas, e.g. for mobile phone, before putting car through an automatic car wash.
- Try your brakes on leaving a car wash. Wet brake discs may reduce the performance of the brakes.
• Cars with Saab Parking Assistance: Do not spray the sensors or closer than 8 in. (20 cm) to the sensors with a pressure washer, as this can damage them.
NOTICE
Only use liquid detergent when cleaning the plastic lenses of the front and rear lights. Do not use mechanical cleaning. Rinse off the detergent immediately, otherwise cracks may form in the plastic lenses.

natural_image
Pure geometric diagram with crosshair and circular shapes, no text or symbols present95 US MY09.book Page 243 Tuesday, April 15, 2008 11:03 AM
243Car care and technical inform
Waxing and polishing
Other than in exceptional cases, do not use abrasive polishes containing a cutting agent on a new car. Always wash the car thoroughly before waxing or polishing.
Engine compartment
Clean the engine compartment using an engine detergent and rinse with hot water. Cover the headlights. Do not use high-pressure washer. Avoid spraying the hood liner, as this can become heavy and hang down and touch the engine when the hood is closed.
Do not use gasoline as a cleaning agent or solvent when carrying out repairs or maintenance. Saab recommends the use of environmentally safe degreasing agents.
Touching up the paint
Damaged paintwork should be treated as soon as it is discovered: the longer it is left, the greater the risk of corrosion. The anti-perforation warranty does not cover corrosion resulting from untreated defects.
Paintwork damage sustained in a crash is usually extensive and can only be properly restored by professionals.
However, you can repair small scratches and stone-chip damage yourself. The necessary tools and materials, such as primer, touch-up paint and brushes, are available from your Saab dealer.
In the case of minor flaws in the paintwork, where the metal has not been exposed and an undamaged layer of paint remains, touch-up paint can usually be applied directly, after any dirt has been scraped away using a pointed knife.
If corrosion has already set in, e.g. as a result of stone-chip damage, use a pointed knife to scrape off all surface rust. If possible, the damaged area should be taken back to the bare metal. The metal should then be primed with two thin coats of primer applied by brush.
After the primer has dried, apply several thin layers of topcoat enamel until the surface of the repaired area is flush with the surrounding paintwork.
Stir both primer and touch-up enamel thoroughly before use and allow each coat to dry before applying the next.

95 US MY09.book Page 244 Tuesday, April 15, 2008 11:03 AM
244 Car care and technical information
Two-coat enamel
As the name implies, two-coat enamel is applied in two operations. The first coat, the base color, contains the pigment, metal flakes and binder. The second coat consists of a clear enamel, which provides the final gloss for the paintwork and protects the base from moisture and environmental contaminants.
Touch-up stone-chip damage as follows:
1 Thoroughly clean the damaged area
2 Apply the primer, base color and finally, the enamel. To achieve the best finish, apply two or three coats of primer.

Surface-treatment composition
1 Body panel
2 Zinc (certain panel sections only) 7.5 μm
3 Phosphate coating
4 Cathodic ED 23 μm
5 Intermediate coat 35 μm
6 Metallic base 15 μm
7 Clear enamel /solid enamel 40 μm
Air conditioning (ACC)

WARNING
- All repairs and adjustments on the A/C system must be carried out by a work shop authorized for this kind of work.
- The A/C system is pressurized. Do not break any connections or undo A/C system components.
- Escaping refrigerant gas can cause visual impairment or other injury.
NOTICE
• The A/C system is designed for use with R134a refrigerant.
• Refrigerant handling requires special equipment and special procedures for charging and draining the system.
- Never mix R134a and R12 refrigerants.


95 US MY09.book Page 245 Tuesday, April 15, 2008 11:03 AM


245Car care and technical inform
Fault diagnosis
If a fault occurs in the A/C system, there are a number of checks you can perform yourself. If the fault persists, however, have the system checked by a workshop. We recommend that you contact an authorized Saab dealer.
Important!
When the A/C system is running, the intake air is dehumidified, and the resultant condensation is drained off through two outlets underneath the floor of the car in the vicinity of the front doors. It is therefore perfectly normal for water to be seen dripping from these outlets when the car is parked. The warmer the ambient air and the higher the humidity, the greater will be the amount of condensation formed.
Inadequate cooling:
a Check that the condenser (forward of the radiator) has not become clogged with dirt and insects.
b Make sure that the drive belt for the compressor is not slipping.
c Check the fuses for the ventilation fans and compressor.
Maintenance
• The drive belt for the compressor should be inspected under the regular service program.
- Clean dirt and insects away from the condenser and radiator to prevent clogging. When washing the car, use the hose to spray the radiator and condenser (located forward of the radiator) from both sides (both from the front of the car and from inside the engine bay). Do not use a pressure washer.
Caution: Do not use the hose when the engine is hot.
Other than in extremely cold weather, do not screen the radiator, e.g. with netting, as this will greatly diminish its cooling capacity.
Note: The A/C system will only operate when the outdoor temperature is above the freezing point (0°C, 32°F).


95 US MY09.book Page 246 Tuesday, April 15, 2008 11:03 AM
246 Car care and technical information
Anti-corrosion treatment
The entire car is corrosion-protected at the factory in different stages by an electrolytic immersion coating and a PVC-based protective coating to protect against corrosion caused by stones flung up by the wheels. A thin penetrating anti-rust oil is also applied in cavities and body members.
In addition to conventional anti-corrosion treatment like painting, underbody treatment and cavity treatment, most of the body panel surfaces are galvanized. These include the hood, the doors and the underbody.
The anti-corrosion treatment on the underside of the car and inside the wheel arches is particularly exposed to constant wear and possible damage, the degree of which will obviously depend on driving conditions.
What causes rust?
Steel body panels of automobiles are subject to rusting whenever air and moisture manage to penetrate the protective finish, and body panels may rust through if the process is unchecked. Rusting can occur wherever water is trapped or where the car's panels are continuously damp. Damage to paint and undercoating by stones, gravel and minor crashes immediately exposes metal to air and moisture. Road salts used for de-icing will collect on the bottom of the car and promote rusting. Areas of the country with high humidity have great potential for rust problems, especially where salt is used on roads or there is moist sea air. Industrial pollution (fallout) may also damage paint and promote rusting.
Preventive maintenance
The following procedures are necessary to help protect against rusting. Refer also to the terms and conditions of the Sheet Metal Coverage described in the warranty booklet.
1 Wash the car frequently, and wax at least twice a year. Under adverse conditions, where there is a rapid buildup of dirt, sand or road salt, wash your car at least once a week. After extreme exposure to salted snow or slush, evidenced by a white film on the car, wash the car immediately. Frequent washing will prevent paint damage from acid rain and other airborne contaminants such as tree sap and bird droppings. If any of these contaminants are noticed on the car the finish should be washed immediately.
- Begin washing by rinsing the entire car with water to loosen and flush off heavy concentrations of dirt (include the underbody).
- Sponge the car with a solution of either a good quality car soap or mild general purpose (dish washing) detergent and water.
- Rinse car thoroughly with clean water.
- After washing, check and clear all drains in doors and body panels.
- Wipe the car dry, preferably using a chamois.


95 US MY09.book Page 247 Tuesday, April 15, 2008 11:03 AM


247Car care and technical inform

2 Clean the underside of the car during the winter. Use high pressure water to clean the car's underside (floor panels, wheel wells) at least at mid- winter and in the spring.
3 Inspect the car frequently for leaks or damage, and arrange for needed repairs promptly. After washing or after heavy rain, check for leaks. When washing the car inspect body surfaces for paint damage. While checking for leaks, lift the floor mats and check beneath them. Water can collect in these areas and remain for prolonged periods. Dry any wet areas including the floor mats. Have leaks repaired as soon as possible.
Use touch-up paint to repair small scratches or minor finish damage. Areas where metal is exposed will rust quickly and MUST be repaired immediately by touch-up or professional repainting.
Rust must be removed, the bare metal primed and painted. Major body damage should be repaired immediately and new panels or exposed areas should be undercoated with anti-corrosion material.
Repairs of this type are the owner's responsibility and are not covered under warranty.
4 Inspect the undercoating and touch up if necessary. Pay particular attention to the fenders and wheel housings, which are exposed to abrasion by flying gravel, etc. If the composition has worn or flaked off, the steel must be thoroughly cleaned and dried before a fresh coat is applied. The cleaning is best done with a scraper and a steel wire brush, followed by washing with solvent. Apply the new coating thinly, as otherwise it may run off or fall off when dry.
For long trips
Before setting off on a long journey, it is advisable to have your car checked over by your Saab dealer.
Obtain a few important items to take along on your journey such as spare bulbs, wiper blades, fuses, a Poly-V-belt and the like.
You can check some points yourself before-hand:
• Make sure that the engine is in good condition.
- Check that no oil or gasoline leaks out of the engine or gearbox/transmission.
- Check the coolant and power steering fluid levels. Check also for leaks.
- Inspect the Poly-V-belt and replace it if it shows any signs of hard wear.
- Check the battery charge.
- Check the tires for tread pattern and air pressure, including the compact spare wheel.
- Check the brakes.
- Check all bulbs.
- Check for the presence of the tool kit and the jack in the car.


95 US MY09.book Page 248 Tuesday, April 15, 2008 11:03 AM
248 Car care and technical information
Recovery and/or recycling of automotive materials
Information on the scrapping and recycling of car materials is available on www.saab.com.
Headlight aiming
WARNING
Before checking/adjusting the headlight aiming, switch off the engine to avoid danger of fingers and hands being injured by moving parts.
The radiator fan can start up even when the engine is switched off.
The vehicle has a visual optical headlight aiming system equipped with vertical aiming device. The aim has been preset at the factory and should normally not need further adjustments.
If your headlights are damaged in a crash, the headlight aim may be affected. If you believe your headlights need to be re-aimed, we recommend that you take it to your Saab dealer for service, however, it is possible for you to re-aim your headlights as described in the following procedure.
NOTICE
To make sure that your headlights are aimed properly read all instructions before beginning. Failure to follow these instructions could cause damage to headlight parts or a not correctly aimed headlight.
To check the aim, the vehicle should be properly prepared as follows:
- The vehicle shall be placed so that the headlights are 25 ft (7.6 m) from a light colored wall or other flat surface. The aiming area should be darkened, this will improve your ability to see the beam of the low beam headlight being aimed.
• The vehicle must have all four wheels on a perfectly level surface which is level all the way to the wall or other flat surface. - The vehicle should be placed so it is perpendicular to the wall or other flat surface.
- The vehicle should be unloaded and fuel tank full, and one person or 160 lbs. (75 kg) on the drivers seat.
[Non-Text]


95 US MY09.book Page 249 Tuesday, April 15, 2008 11:03 AM


249Car care and technical inform

- The vehicle should be fully assembled and all other work stopped while headlight aiming is being done.
• The vehicle should not have any snow, ice or mud attached to it. - Tires should be inflated to the prescribed pressure.
- Close all doors.
- Rock the vehicle to stabilize the suspension.
Headlight aiming is done with the vehicle low beam lamps. The high beam lamps will be correctly aimed if the low beam lamps are aimed properly.
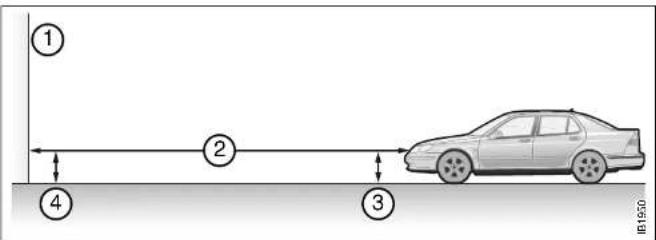
1 Wall or garage door
2 25 ft (7.6 m) between wall and headlight lens.
3 Measurement from the ground to the low beam aiming marker on the headlight lens.
4 Same measurement as (3) but subtract 2 inches for vehicles with halogen lamps and 3 inches for vehicles with xenon lamps.
If you find that the headlight needs adjustment follow these steps:
1 Open the hood and locate the vertical aiming device.
2 Locate the marker on the lens.
3 Measure the distance from the ground to the aim marker on each lens. Subtract 2 inches if the vehicle is equipped with halogen lamps, record this distance.
Subtract 3 inches if the vehicle is equipped with xenon lamps, record this distance.
4 At the wall or other flat surface, measure from the ground to the recorded distance (see point 4) and draw a horizontal line the width of the vehicle.


95 US MY09.book Page 250 Tuesday, April 15, 2008 11:03 AM
250 Car care and technical information
5 Turn on the low beam headlights and place a piece of cardboard or equivalent (although not directly on the lens) in front of the headlight not being aimed. This should allow the beam cut-off of the headlight being aimed to be seen on the flat surface.
NOTICE
Do not cover a headlight directly on the lens to improve beam cut-off when aiming. Covering a headlight may cause excessive heat build-up which may cause damage to the headlight.
6 Turn the vertical aiming screw until the horizontal cut-off of the headlight is aligned with the horizontal line on the wall.
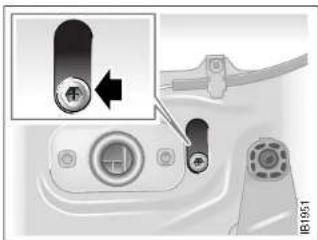
natural_image
Close-up of a mechanical control panel with a dial indicator and lever mechanism (no text or symbols visible)Vertical aiming device

Aiming marker on headlight lens
Horizontal line on wall or other flat surface
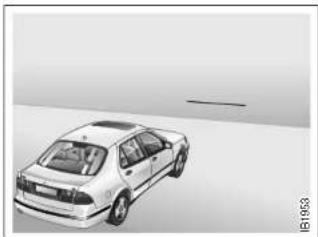
natural_image
Rear view of a silver sedan parked in a row (no visible text or symbols)Correctly adjusted low beam
natural_image
Simple geometric shape with a gray rectangle and white diagonal line, no text or symbols present.


251Customer Assistance and Inl
Customer Assistance and Information
Maintenance schedule _ 252
Owner assistance ____ 253
Reporting Safety Defects (U.S.A.) 254
Reporting Safety Defects to the Canadian government 254
Vehicle Data Collection and Event Data Recorders ____ 255
* Asterisk means: equipment not fitted in all cars (can depend on model variant, engine variant, market specification, options or accessories).


95 US MY09.book Page 252 Tuesday, April 15, 2008 11:03 AM
252 Customer Assistance and Information
Maintenance schedule
The Maintenance Schedule prescribes a service program to the purchaser/operator of a Saab that is reasonable and necessary to ensure the proper emission control systems function, safety and reliability of the Saab automobile in normal use. Additional maintenance is recommended for specific components when the car is operated under certain severe conditions. Proper maintenance is always good advice!
Authorized Saab dealers are equipped and trained to meet your Saab's service needs. They regularly receive up-to-date Saab service manuals and parts and technical service bulletins from Saab and are able, through their franchise agreement, to attend Saab service schools, obtain Saab special tools and technical assistance and purchase original equipment service and replacement parts.
Today's complex automobiles should only be entrusted to the most knowledgeable service professionals. A Saab dealer is your best choice.
Service intervals
A time for service message will illuminate on the Saab Instrument Display (SID) when the car is due for regular maintenance.
Engine oil and filter changes
Changing the engine oil and filter is required at every service point. Use only a Saab approved long-life oil filter and engine oils stated in the Specification section of this Owner's Manual. The use of extra additives in the oil is not necessary and is not recommended, and may be harmful to turbo-chargers.
More frequent oil changes are recommended if your vehicle is operated under the following conditions:
- Most trips are less than 5 to 10 miles (8 to 16 km). This is particularly important when outside temperatures are below freezing.
- Most trips include extensive idling (such as frequent stop-and-go driving).
- Most trips are through dusty areas.
- You frequently tow a trailer or use a carrier on top of your vehicle.
- If the vehicle is used for delivery service, police, taxi or other commercial applications.
If your driving habits match this description, have the engine oil and filter changed in-between normal services at 5,000 mile (8,000 km) intervals. The Saab Warranty and Service Record Booklet has provisions to record extra oil changes.
[Non-Text]


95 US MY09.book Page 253 Tuesday, April 15, 2008 11:03 AM
253Customer Assistance and InI
Service record retention
It is the owner's responsibility to retain service records. If possible, you should keep copies of all shop work orders for all service and repairs, whenever performed. As indicated in the new car and emission control system warranties, it is important to document that all necessary maintenance has been done.
HOW THE SERVICE RECORD IS ORGANIZED
The service record is comprised of a series of coupons on which to record services as they are performed. There are additional coupons for documenting extra engine oil and filter changes, extra automatic transmission fluid services necessary for severe service conditions, and brake fluid changes.
HOW TO USE THE SERVICE RECORD COUPONS
When the car is brought to a Saab dealer for scheduled maintenance, present the Saab Warranty and Service Record Booklet to the service manager. When the technician has completed the service, the technician will sign the maintenance record. The person responsible for quality assurance at the dealership will also sign and stamp the record with the dealer identification stamp.
Service costs
Dealer pricing practices and labor for service work vary. Saab's recommended service times for each service point do not include the labor required to replace wear items, such as wiper blades, brake pads or tires. Nor is labor to perform other service or repairs found to be necessary as a result of the inspections included in these times. Additional labor and parts will be charged for such work when necessary, except as covered under an applicable Saab warranty or any optional extended service contract. Transmission fluid changes or suspension alignment, when necessary, are also additional.
Dealer charges for general shop material, regulated hazardous waste removal, recycling expenses or other operation costs may also be applied to service and repair invoices and are apt to vary by dealer and location.
Owner assistance
Warranties and service problem assistance
For complete information about all applicable warranties, including the New Car Warranty, Perforation Warranty, Vehicle Emission Warranty and Emission Perforation Warranty, consult the Warranties and Service Record Booklet which accompanies this Owner's Manual. It also contains owner assistance information Including Saab Roadside Assistance. If the booklet is lost or misplaced, a new one may be ordered through a Saab dealer or by contacting Saab.
In the U.S. there is a national Customer Assistance Center at Saab Automobile USA, Inc. The toll-free number to call from all 50 states is 1-800-955-9007.
In Canada, please call the Saab Customer Assistance Center at 1-800-263-1999.
A list of authorized Saab sales and service dealers is available for those planning to travel in the United States and Canada.
Canadian or U.S. travelers may call the Customer Assistance Center in the country in which they are traveling.


95 US MY09.book Page 254 Tuesday, April 15, 2008 11:03 AM
254 Customer Assistance and Information
Change of Address Notification (U.S. and Canada)
Two change of address cards are provided at the end of the Warranty and Service Record Booklet. Knowing your current address allows Saab to contact you in the event of a recall or service campaign. Please help us keep our records up to date for your own peace of mind.
Service information
Factory Service Manuals for the Saab 9-5 car line can be ordered through your Saab dealer or by visiting www.saabtechinfo.com. These are comprehensive manuals on CD rom, geared to use by professional technicians.
Consult your Saab dealer for prices and for a listing for your model.
Reporting Safety Defects (U.S.A.)
If you believe that your vehicle has a defect which could cause a crash or could cause injury or death, you should immediately inform the National Highway Traffic Safety Administration (NHTSA) in addition to notifying Saab Cars USA, Inc.
If NHTSA receives similar complaints, it may open an investigation, and if it finds that a safety defect exists in a group of vehicles, it may order a recall and remedy campaign. However, NHTSA cannot become involved in individual problems between you, your dealer, or Saab Automobile USA, Inc.
To contact NHTSA, you may call the toll-free Vehicle Safety Hotline at 1-888-327-4236 (TTY: 1-800-424-9153; go to http://www.safercar.gov; or write to: Administrator, NHTSA, 400 Seventh Street, SW., Washington D.C. 20590. You can also obtain other information about motor vehicle safety from http://www.safercar.gov.
Reporting Safety Defects to the Canadian government
If you live in Canada, and believe that your vehicle has a safety defect, you should immediately notify Transport Canada, in addition to notifying General Motors of Canada Limited.
You may write to Transport Canada at Box 8880, Ottawa, Ontario, K1G 3J2.
In addition to notifying Transport Canada in a situation like this, we certainly hope you will notify us. In Canada, please call our Saab Customer Assistance Center at 1-800-263-1999.
Or write:
General Motors of Canada Limited
Customer Assistance Center,
1908 Colonel Sam Drive,
Oshawa, Ontario, L1H 8P7.


95 US MY09.book Page 255 Tuesday, April 15, 2008 11:03 AM
Vehicle Data Collection and Event Data Recorders
Your vehicle, like other modern motor vehicles, has a number of sophisticated computer systems that monitor and control several aspects of the vehicle's performance. Your vehicle uses on-board vehicle computers to monitor emission control components to optimize fuel economy, to monitor conditions for air bag deployment and, if so equipped, to provide anti-lock braking and to help the driver control the vehicle in difficult driving situations. Some information may be stored during regular operations to facilitate repair of detected malfunctions; other information is stored only in a crash event by computer systems commonly called event data recorders (EDR).
In a crash event, computer systems, such as the Air Bag Sensing and Diagnostic Module (SDM) in your vehicle may record information about the condition of the vehicle and how it was operated, such as data related to engine speed, brake application, throttle position, vehicle speed, steering wheel angle, lateral acceleration, safety belt usage, air bag readiness, air bag performance, and the severity of a collision. This information has been used to improve vehicle crash performance and may be used to improve crash performance of future vehicles and driving safety. Unlike the data recorders on many airplanes, these on-board systems do not record sounds, such as conversation of vehicle occupants,
To read this information, special equipment is needed and access to the vehicle or the SDM is required.
Saab will not access information about a crash event or share it with others other than
- with the consent of the vehicle owner or, if the vehicle is leased, with the consent of the lessee,
- in response to an official request of police or similar government office,
- as part of Saab's defense of litigation through the discovery process, or
• as required by law.
In addition, once Saab collects or receives data, Saab may
- use the data for Saab research needs,
• make it available for research where appropriate confidentiality is to be maintained and need is shown, or
- share summary data which is not tied to a specific vehicle with non-Saab organizations for research purposes.
Others, such as law enforcement, may have access to the special equipment that can read the information if they have access to the vehicle or SDM.
If your vehicle is equipped with OnStar®, please check the OnStar® subscription service agreement or manual for information on its operations and data collection.
255Customer Assistance and Inl


Specifications

natural_image
Illustration of various measuring tools including pressure gauge, protractor, dial indicator, and multimeter (no text or symbols present)General 258
Engine 260
Fuel 260
Engine oil 260
Engine variants 260
Electrical system 260
Brake system 260
Wheels and tires ____ 261
Plates and labels 264
* Asterisk means: equipment not fitted in all cars (can depend on model variant, engine variant, market specification, options or accessories).

natural_image
Pure geometric diagram with crosshair and circular shapes, no text or symbols present95 US MY09.book Page 258 Tuesday, April 15, 2008 11:03 AM
258 Specifications
General
Overall length, including bumpers:
9-5 Sedan 190.4 in (4836 mm)
9-5 SportCombi 190.6 in (4841 mm)
Overall width, including door mirrors 80.4 in (2042 mm)
Maximum height:
9-5 Sedan 57.3 in (1454 mm)
9-5 SportCombi 57.7 In (1465 mm)
Wheelbase 106.4 in (2703 mm)
Ground clearance at gross vehicle weight approx. 4.6 in
(116 mm)
Track
Front ____ 59.9 in (1522 mm) *)
Rear 60.2 in (1528 mm) *
Turning circle (curb to curb) ____ 37.1 ft (11.3 m)
Turning circle (measured at vehicle extremi-
ties) 39.0 ft (11.9 m)
Number of seats (incl. driver) ____ 5
^a) Specified track applies to wheel sizes: 6.5 x 16


VIN on cars sold in
USA
VIN on cars sold in Canada
Permissible load (in addition to driver) = GVW minus curb weight
The maximum permissible axle load, front or rear, must not be exceeded.
The maximum permissible axle load, front or rear, must not be exceeded.
Chassis number in engine bay
Weight ready for driving (i.e. with full fuel
tank, washer-fluid reservoir, standard tools
and spare wheel)
Gross vehicle weight (GVW) ____
3450–3760 lbs.
(1565-1705 kg)
4390–4700 lbs.
(1990–2130 kg)
Maximum axle load:
Front
Rear, 9-5 Sedan
Rear, 9-5 SportCombl
Weight distribution:
Curb weight, front/rear
GVW, front/rear
Maximum roof load
Maximum luggage compartment load§
Maximum combined load, luggage
compartment and roof
2590 lbs. (1175 kg)
2310 lbs. (1050 kg)
2480 lbs. (1125 kg)
60/40%
50/50 %
220 lbs. (100 kg)
176 lbs. (80 kg)
264 lbs. (120 kg)


95 US MY09.book Page 259 Tuesday, April 15, 2008 11:03 AM


259Specifications
Luggage compartment
Luggage compartment, length, 9-5 Sedan:
Rear seat upright ____ 43.0 in (1092 mm) Rear seat folded down ____ 67.5 in (1714 mm)
Luggage compartment, length,
9-5 SportCombi:
Rear seat upright ____ 42.8 in (1087 mm) Rear seat folded ____ 68.2 in (1732 mm)

WARNING
- The GVW and maximum axle loads must not be exceeded. Note that if some accessories (e.g. towbar, CD changer) are fitted, the available load capacity is reduced by the weight of these.
- When carrying a load in the luggage compartment, make sure that it is tied down securely, particularly when part or all of the rear seat is folded down.
Trailer
Maximum towing speed:
Trailer with brakes ____ 60 mph (100 km/h)
Trailer without brakes ____ Local restrictions apply
Maximum weight:
Trailer with brakes 3500 lbs (1588 kg)
Trailer without brakes 1000 lbs (450 kg)
Maximum load on ball hitch 110–165 lbs
(50–75 kg)
The above speed and weight restrictions are those specified by Saab Automobile AB.
Note that local restrictions may apply to trailer speeds and weights (see page 174).


95 US MY09.book Page 260 Tuesday, April 15, 2008 11:03 AM
260 Specifications
Engine
4-cylinder Four cylinders, twin overhead camshafts, 16 valves and two balancer shafts.
Cylinder bores 3.54 in (90 mm)
Stroke 3.54 in (90 mm)
Swept volume 139.7 cu.in (2.290 litres)
Idling speed ____ 825 rpm (man.) 860 rpm (aut.)
Antifreeze Saab-approved antifreeze
Coolant capacity 7.8 qts (7.4 litres)
Fuel
Fuel-tank capacity 18.0 gal. (68 litres)
Gasoline Octane
Use regular unleaded gasoline with a posted octane of 87 or higher.
Although not required, use higher octane fuel for optimum performance - 93 octane.
Gasoline with a lower octane rating can be used, although not lower than 87 octane. However, engine performance will fall slightly and heavy loading and laboring should be avoided. For further information on fuel, see page 148.
Engine oil
Oil capacity incl. filter (on changing) ____ 4.1 qts (4.0 litres)
Engine variants
2.3 Turbo
Rating, SAE at 5000 rpm 260 hp (191 kW)
Maximum torque, SAE at 1900 rpm ____ 258.0 ft.lb.
(350 Nm)
Electrical system
Voltage 12 V
Battery capacity ____ 70 Ah
Brake system
Footbrake (ABS) ____ Hydraulic, dual-circuit brake system. Diagonally split circuit with vacuum servo unit. Disc brakes front and rear. EBD, see page 160.
Parkingbrake ____ Acts on rear wheels
Brake fluid DOT 4


95 US MY09.book Page 261 Tuesday, April 15, 2008 11:03 AM


261Specifications
Wheels and tires
(recommended dimensions)
| 2.3 Turbo |
All season tires
| 215/55 R16 93 H X | |
| 235/45 R17 94 V X |
Winter tires
| 215/55 R16 93 Q X | |
| 225/45 R17 94 Q XL/RF X | |
| 235/45 R17 94 Q X |
Wheel sizes
| 6.5 x 16" X | |
| 7 x 17" X | |
| 7.5 x 17" X | |
| Before changing to wheels/tires of another size, we recommend that you contact an authorized Saab dealer regarding acceptable options.Speed ratings and load indexes, see page 228. | |
Compact spare:
| Wheel | 4 x 16" |
| Tiro | T115/70 R16 |
| Pressure | 60 psi (420 kPa) |
| Maximum life | 2,200 miles(3500 km) |
| Maximum speed | 50 mph (80 km/h) |


95 US MY09.book Page 262 Tuesday, April 15, 2008 11:03 AM


262 Specifications
NOTICE
Snow chains:
Snow chains must not be fitted to the rear wheels, and may only be used with the following wheel-tire combinations:
Wheels Tires
6.5 x 16" 215/55 R16
Before you purchase winter wheels we recommend that you obtain information on the sizes suitable for your car. We therefore recommend that you contact an authorised Saab dealer.
Contact your Saab dealer regarding suitable snow chains.
Snow chains must not protrude more than 0.35 in. (9 mm) from the tire's tread and its inside.
Snow chains must not be fitted to wheels larger than 16".
Snow chains must be tensioned after a short distance.
Max. permissible speed with snow chains fitted is 30 mph (50 km/h).
NOTICE
Wheels larger than 17" must not be fitted.
Exercise care when driving on uneven roads or against the curb if the car is heavily laden. This particularly applies to cars with 17" wheels.
Wheel offset must be 49 mm.


95 US MY09.book Page 263 Tuesday, April 15, 2008 11:03 AM
Lowest recommended tire pressure, cold tires
 | |
 |
| 215/55 R16 93 H 1 | -3 pers./0-100 (0-160) 250/36 230/334-5 pers./0-100 (0-160) 250/36 230/331-5 pers./100-(160-) 290/42 270/39 |
| 235/45 R17 94 V 1 | -3 pers./0-120 (0-190) 240/35 240/354-5 pers./0-120 (0-190) 240/35 240/351-5 pers./120-(190-) 280/41 280/41 |
Winter tires
| 215/55 R16 93 Q 1 | -3 pers./0-100 (0-160) 240/35 240/354-5 pers./0-100 (0-160) 260/38 260/38 |
| 225/45 R17 94 Q XL/RF | 1-3 pers./0-100 (0-160) 250/36 250/364-5 pers./0-100 (0-160) 270/39 270/39 |
| 235/45 R17 94 Q 1 | -3 pers./0-100 (0-160) 240/35 240/354-5 pers./0-100 (0-160) 260/38 260/38 |
Compact spare
| T115/70 R16Spare wheel | Max 50 (80) 420/60 | 420/60 |
1) Do not exceed posted speed limits.
By cold tires is meant tires that are the same temperature as the surrounding air temperature.
The values for tire pressure in the table above are for tires at 68^ F ( 20^ C).
The tire pressure will increase as the tires become warm (e.g. during motorway driving), and decrease as they cool.
When the temperature of the tires increase or decrease by 10 degrees the tire pressure will correspondingly increase or decrease by 10 kPa/2 psi (0.1 bar).
| Tire size Load/speed | mph (km/h)1) | FrontkPa/psi | RearkPa/psi |
| 215/55 R16 93 H 1 | -3 pers./0–100 (0–160) 250/36 230/334–5 pers./0–100 (0–160) 250/36 230/331–5 pers./100– (160–) 290/42 270/39 | ||
| 235/45 R17 94 V 1 | -3 pers./0–120 (0–190) 240/35 240/354–5 pers./0–120 (0–190) 240/35 240/351–5 pers./120– (190–) 280/41 280/41 | ||






















































[Non-Text]


All season tires
 |
 |
 |
 |
 |
 |










































95 US MY09.book Page 264 Tuesday, April 15, 2008 11:03 AM
264 Specifications
Plates and labels
When consulting your Saab dealer, it may be necessary to quote the car's V.I.N., engine and gearbox numbers.
1 V.I.N. number, inside windshield.
2 V.I.N. label and certification label.
3 Gearbox number.
4 Engine number.
5 Canada: Label for tire pressure and color codes (trim and body).
USA: Label for tire pressure can be found on the left B-pillar, see also page 229. Color codes (trim and body) can be found on the V.I.N. label on the B-pillar.
6 Chassis number, stamped on body.
6 Chassis number, stamped on body.
6 Chassis number, stamped on body.
6 Chassis number, stamped on body.
6 Chassis number, stamped on body.
6 Chassis number, stamped on body.
6 Chassis number, stamped on body.
6 Chassis number, stamped on body.
6 Chassis number, stamped on body.
6 Chassis number, stamped on body.


95 US MY09.book Page 265 Tuesday, April 15, 2008 11:03 AM
265Specifications
Adjustable systems
Several of the systems in your Saab car can be adjusted to better fit your individual needs
Some functions are governed by legal requirements and cannot therefore be reprogrammed.
We recommend that you contact an authorized Saab dealer for further information.
Car alarm/central locking system:
- The number of blinks when locking/unlocking.
• Automatic locking of the trunk when the car (SportCombi) is driven, 1 to 8 mph (2–14 km/h), YES or NO.
• Automatic locking of the trunk (Sport-Combi) when it is closed, YES or NO.
• Automatic locking of all doors when the car is driven above 7.5 mph (12 km/h), YES or NO.
Saab Information Display:
- Outdoor temperature display can be adjusted.
Miscellaneous:
- Select the on-time for heated rear seat *.
• Additional sweep of the wipers after wind-shield washer function (ON or OFF).
• Courtesy Headlight Feature on-time can vary from 20 to 50 seconds. - Night panel illumination deactivation speed for the speedometer can be adjusted.
Following adjustments can be done by the driver:
Automatic Climate Control (ACC):
You can choose whether front seat and rear window heating is to be activated manually or automatically; see "Adaptation of ACC" on page 85.
Saab 9-5 Audio System (see page 106):
• Speed dependent volume.
Daytime Running Lights:
To disable, turn off the ignition and pull out fuse 35, see page 217.


267Index
Index
A
A/C system, fault diagnosis 245
A/C system, maintenance 244
ABS brakes 160
ACC 79
ACC functions 82
ACC, automatic climate control 79
ACC, calibration 86
ACC, condensation water 86
ACC, useful tips 86
AUX input 104
Adjustable systems 265
Adjusting the steering wheel ____ 114
Adjustment, seats 18
Air conditioning (A/C), fault diagnosis
and maintenance 244
Airbag 29
Alarm 50
Alarm functions 53
Alarm signals 50, 53
Album information 104
Alternator 199
Alternator drive belt 199, 260
Alternator rating 260
Antennas 109
Anticorrosion treatment 246
Antidazzle rear-view mirror 121
Anti-skid 163
Autochecking of lights on starting ____ 64
Auto-dimming rear-view mirror with
garage door opener 118
Automatic climate control (ACC) ____ 79
Aviod theft, tip 166
B
Battery 197
Battery charging/replacing 197
Battery, boost starting 184
Before a long journey ____ 247
Before towing a camper or trailer ____ 177
Belt guide 12
Boost starting using jump leads ____ 184
Brake and clutch fluid ____ 194
Brake-fluid reservoir ____ 194
Brakes, technical data ____ 261
Bulbs, changing 202
Bulbs, table of 213
Buying new tires ____ 223
C
CD changer 100
CHECK messages ____ 71
CHECKING 71
Car alarm 50
Car care 187
Cargo net, 9-5 SportCombi ____ 137
Carpeting, care of ____ 241
Catalytic converter, important
considerations 145
Central locking 44
Change language in SID ____ 72
Change of address notification ____ 254
Changing a wheel 237
Changing bulbs 202
Changing wiper blades ____ 200
Charge mobile phone 126
Charger/Jump starting 186
Charging the battery/Jump starting _ 186
Chassis number 264
Checks before towing a camper or
trailer 177
Child safety 22
Child safety locks, rear doors 47
Cleaning, engine bay 243
Clock 105
Color code, body 264
Color code, trim 264
Compact spare wheel ____ 235
Compass 122
Condensation water, ACC 86
Connecting a portable player ____ 105
Coolant 193
Courtesy Headlight Feature 74
Crash memory, see EDR 255
Cross modulation 110
Cruise control 159
Cup holder 128


95 US MY09.book Page 268 Tuesday, April 15, 2008 11:03 AM
268 Index
D
DICE/TWICE 215
Date ____ 105
Date code, tires 231
Date display 106
Definitions and terminology, tire ____ 229
Determining correct load, tires ____ 231
Dim-dipped beam 73
Direction indicators 75
Diversity antenna 109
Door handles 44
Door mirrors 116
Doors, locks & luggage compartment 4
Drive belt 260
Drive belt, alternator 199
Drive belts, length 260
Driver's seat, programmable 20
Driving at night 179
Driving in hot weather 173
Driving with a load 179
E
EDR (Event Data Recorders) 255
ESP® 163
Electric heating of rear seat 87
Electric windows 115
Electrical system, technical data ____ 260
Electrically retractable door mirrors _ 1 1 7
Electronic Stability Program ____ 163
Electronic starting interlock 49
Emergency operation of moonroof _ 124
Emission control systems ____ 190
Engine bay 189
Engine bay, cleaning 243
Engine number 264
Engine oil, grade ____ 260
Engine, description ____ 192
Engine, technical data 260
Engine, temperature gauge 66
Engine-oil level, checking ____ 192
Error codes, Audio System 112
Event Data Recorders (EDR) 255
Expansion tank, coolant 193
F
Filling a portable fuel container ____ 148
Flat spots, tires 222
Fluid level, automatic transmission _ 193
Folding the rear seat, 9-5 Sedan ____ 129
Folding the rear seat, 9-5 SportCombi 132
Frequency band 93
Frequently asked questions on airbag 40
Front fog lights 76
Frost warning 68
Fuel 146
Fuel consumption 68
Fuel container 148
Fuel gauge 65
Fuel grade ____ 260
Fuel information 148
Fuse box under hood ____ 218
Fuse panel 214
Fuses 214
G
Gearbox oil, checking ____ 193
General functions 105
Glove compartment 126
H
Handbrake 165
Hazard warning lights 76
Head restraint 21
Headlight flasher 73
Headlights 73
Heated front seats 87
Hood 188
Horn 114
|
If a tire goes flat 226
Ignition switch 140


95 US MY09.book Page 269 Tuesday, April 15, 2008 11:03 AM


269Index
Immobilizer 49
Indicator and warning lights ____ 58
Indicator lights ____ 58
Information about fuel 148
Instrument illumination ____ 75
Instruments and controls 57
Interior equipment 113
Interior lighting 124
Interior rearview mirror 116
J
Jack 238
K
Key 44
Key, remove ____ 140
L
LATCH (child safety) 23
Labeling, tire sidewall 227
Labels 7
Leather upholstery, care of 241
Light horn 73
Light switches 73
Loading MP3 discs 102
Loading your vehicle 229
Luggage-compartment lighting ____ 125
M
MP3 player ____ 102
Main instrument panel 58
Main/dipped beam 73
Maintenance schedule 252
Maintenance, A/C-system 244
Maxi fuses 215
Milometer 64
Moonroof 123
Motoring abroad 247
Multipath propagation 109
N
NIGHT 72
New tires, buying 223
Night Panel 72
0
Odometer 64
Oil capacity, engine 260
Oil specification 260
Outdoor temperature 68
Owner assistance 253
P
Paintwork, touching-in 243
Parcel shelf, folding ____ 133
Parking Assistance 168
Parking lights 73
Plates and labels 264
Poly-V-belt 199
Portable fuel container 148
Portable player 104
Power outlet 126
Power steering ____ 196
Power-steering fluid 196
Pressure gauge 67
Prestige 107
Programme type ALARM ____ 99
Q
Quality grading, tires ____ 224
Questions on function of airbag ____ 40
R
RDS time 106
Radiator fan 199
Radio 93
Radio Data System (RDS) 94
Radio text 94
Radio waves 110
Rain sensor ____ 77
Random playback of MP3 files, CD 103
Random playback, CD 99
Random playback, CD changer 101
Rapid playing an MP3 file 103


95 US MY09.book Page 270 Tuesday, April 15, 2008 11:03 AM
270 Index
Rear fog light 74
Rear seat, 9-5 Sedan, folding ____ 129
Rear seat, 9-5 SportCombi, folding _ 132
Rear window heating 82
Rear-seat head restraints 21
Rear-view mirror, auto-dimming 121
Rearview mirrors 116
Reclamation 248
Recommendations for cars with
automatic transmission, towing a
camper or trailer 175
Refuelling 146
Relay panel 217
Remote control 44
Remote-control battery, changing 49
Remove the key ____ 140
Removing CDs 99
Removing CDs, CD-changer 100
Removing MP3 discs 102
Replacement, wheel ____ 225
Reporting safety defects ____ 254
Reprogramming of systems ____ 265
Reservoir, power-steering fluid 196
Rotation of tires ____ 231
Running-in 170
S
SDM 255
SID 68
Saab Information Display (SID) ____ 68
Saab Parking Assistance 168
Safety belts 12
Safety belts, care of ____ 240
Safety-belt pretensioners 15
Safety-belt reminder 12
Seats 18
Securing a load 47
Selecting a radio station 93
Selecting and changing tracks, CD 99
Selecting/changing MP3 file ____ 103
Selector lever indication, automatic
transmission 67
Sentronic, manual mode 156
Service costs 253
Service information 254
Service intervals 252
Service record retention 253
Setting the clock 105
Setting the date 105
Settings, seats 18
Shadow effect 110
Side airbags 36
Signalling, horn 114
Snow chains ____ 172
Sorting music ____ 103
Sound system 107
Sources of AM interference ____ 111
Sources of FM interference 111
Spare wheel 235
Spark plugs 260
Speed dependent volume
compensation 106
Speedometer 64, 65
Starting in cold weather, ACC ____ 84
Starting in hot weather, ACC ____ 84
Steering wheel adjustment 114
Steering wheel controls 91
Steps for determining correct load
limit 231
Stone-chip damage, repairing 243
Storage compartments 126
Storing radio stations ____ 93
Sun visors 125
Switches ____ 73
Symboler 9
Systems, adjustment 265
T
TCS OFF 63
TP 99
Table of fuses 216
Tachometer 64
Tailgate, opening 47
Tank gauge 65
Technical data 257
Technical data, radio/audio 108
Temperature control, ACC ____ 81


95 US MY09.book Page 271 Tuesday, April 15, 2008 11:03 AM


271Index
Temperature gauge, engine ____ 66
Temperature zones, ACC ____ 81
Textile carpeting 241
Through-load hatch 131
Tie Downs 131
Tightening torque, wheel studs 237
Time display 106
Tip, driving at night 179
Tip, to avoid theft 166
Tips, ACC 86
Tire chains 226
Tire date code 231
Tire direction of rotation 231
Tire Inspection and rotation 221
Tire markings 228
Tire pressure 180
Tire sidewall labeling 227
Tire terminology and definitions ____ 229
Tire, compact spare 235
Tires 220,261
Tires, winter 261
Touching-in the paintwork 243
Towbar attachment 174
Towbar load 178
Towing the car 181
Towing, automatics 181
Traffic programme 99
Trailer weights 259
Treadwear indicators 222
Trionic 190
Trip computer 68
Trip meter 64
Trunk 129
Trunk lid, opening ____ 47
Tuning 93
Turbo gauge 67
Turbo, points to note 144
U
Under the hood 189
Uniform tire quality grading 224
Upholstery and trim 241
Upholstery and trim, care of ____ 241
V
Vanity mirrors 125
Vehicle Data Collection 255
Ventilated front seats ____ 87
Viscosity, engine oil 260
W
Warning labels ____ 7
Warning light, AIR BAG 37
Warning lights 58
Washers 200
Washers, windshield 201
Washing the car 242
Waxing and polishing 243
Wear indicators, tires ____ 222
What Will You See After an Airbag
Inflates? 38
Wheel replacement ____ 225
Wheel, change 237
Wheels and tires 261
Wheels and tires, sizes 261
When it is time for new tires ____ 222
Windshield washers 77
Windshield wipers 77
Winter tires 231, 261
Wiper blades, replacing ____ 200
Wipers and washers 77,200
X
Xenon headlight 202






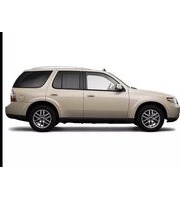

- Owner's Manual
- Saab 9-5, Model Year 2009
- 2
- Introduction
- WARNING
- NOTICE
- Exterior
- Engine compartment
- A/C system
- Coolant
- Battery
- Examples of symbols that can be found in your car
- Safety
- Safety
- Safety belts
- Safety belt reminder
- Correct position for safety belt
- Safety
- Front safety belts
- Belt height adjustment
- Safety belt use during pregnancy
- Safety belt pretensioners
- Safety belt, rear seat
- Safety
- Safety
- Seats
- Side airbags
- Head restraint
- Height
- Safety
- Memory driver's seat \*
- Rear-seat head restraints
- Safety
- Child safety
- Car safety tips
- Protect children from getting trapped in the trunk of a car
- General information on child safety
- Make sure you are acquainted with the legal requirements for seating children in the car.
- LATCH
- Securing a Child Restraint Designed for the LATCH System
- 9-5 SportCombi:
- Safety
- 9-5 Sedan:
- Lockable latch plate
- Safety
- Installation of rear facing child restraints
- Airbag
- Note:
- Safety
- Safety
- Front passenger seat
- Passenger Sensing System
- Safety
- 35Safety
- Safety
- AIRBAG warning light
- Safety
- What Will You See After an Airbag Inflates?
- 39Safety
- AIRBAG servicing
- Scrapping or working on airbags and belt pretensioners
- Safety
- Frequently asked questions on function of airbags
- Definitely not!
- 41Safety
- Adding Equipment to Your Airbag-Equipped Vehicle
- Security
- Doors
- Door handles
- Central locking
- Key / Remote control
- Locking/unlocking the car
- Remote locking
- Remote unlocking
- Security
- If remote unlocking should fall to work
- Locking by key (1)
- Unlocking by key (2)
- Child safety locks
- Trunk lid lock, 9-5 Sedan
- Security
- Unlocking
- Locking
- Trunk Release Handle
- Tailgate, 9-5 SportCombi
- Electronic starting interlock (immobilizer)
- Reprogramming lock system functions
- Changing the key battery
- Security
- Car alarm
- Activating the car alarm
- Security
- Alarm signals
- Panic-function
- Security
- Canada only:
- Instruments and controls
- Main instrument panel
- Indicator and warning lights
- Warning, charging
- Brake warning light
- Warning, oil pressure (engine oil)
- Instruments and controls
- Parking brake warning light
- Anti-lock brake warning
- Headlight and parking light indicator
- Indicator, fuel
- Xenon headlight fault indicator \*
- Instruments and controls
- Indicator, cruise control
- Indicator, high beam
- Indicator, rear fog light
- Indicator, open door
- Indicator, SPORT-mode automatic transmission \*
- Automatic transmission * , fault indicator
- ESP® system, indicator
- ESP® system, OFF-indicator
- Warning, tire pressure
- Instruments and controls
- Autochecking of lights, main instrument panel
- Instruments
- Tachometer
- Odometer and trip meter
- Reset button
- Speedometer
- (U.S. speedometer shown)
- Fuel gauge
- Instruments and controls
- Temperature gauge
- Pressure gauge
- Selector lever indication \*
- Instruments and controls
- Saab Information Display (SID)
- Outdoor temperature
- (Frost warning)
- Entering values for the functions
- Dist.
- Alarm
- Activating speed warning
- Disengaging speed warning
- Instruments and controls
- Using Dist. as a trip meter
- Calculating the arrival time if a specified average speed is maintained:
- Average fuel consumption, Fuel ∅
- Resetting values
- CHECK messages
- Instruments and controls
- NIGHT PANEL
- Units and language versions
- Selecting units and language
- Switches
- Daytime running lights
- Parking lights
- Headlights
- High/low beam
- High beam flasher
- Instruments and controls
- Courtesy Headlight Feature
- Rear fog light
- Turn signal and lane change indicators
- Instrument illumination
- Instruments and controls
- Front fog lights \*
- Hazard warning lights
- Reversing lights
- Wipers and washers
- Headlight washers \*
- Rain sensing wipers \*
- Instruments and controls
- Rear-window wiper (SportCombi) \*
- Automatic climate control (ACC)
- Instruments and controls
- Panel vents
- Temperature control
- MAX heat, red Indication
- MAX cooling, blue indicator
- Instruments and controls
- Functions
- AC OFF
- Air distribution
- Instruments and controls
- Starting in cold weather
- Starting in hot weather
- Adaptation of ACC
- Instruments and controls
- Calibration
- "ACC:CALIBR.
- STARTED
- Useful tips
- Condensation water
- Formation of ice and mist in extreme weather conditions
- Heated front seats \*
- Ventilated front seats \*
- Heated rear seat cushion \*
- Saab 9-5 Audio System
- Saab 9-5 Audio System ✱
- Safety first!
- Saab 9-5 Audio System
- Switching the audio system On/Off
- The audio system will come on:
- The audio system will be switched off:
- Audio settings
- Volume
- Tone controls
- Manual tone and speaker settings
- Centering tone and speaker settings
- Automatic tone setting
- Radio
- Selecting a radio station
- Selecting a frequency band
- Selecting a preset station
- Tuning a station
- Fine tuning
- Automatic tuning
- Manual tuning
- Scanning radio stations
- Storing presets
- Storing the current station as a preset
- Saab 9-5 Audio System
- Number of pages with preset stations
- Radio Data System (RDS)
- Rolling advertisements
- Radio text
- XM™ \* Satellite Radio Service
- Finding a XM™ \* station
- Remove an XM™\* category
- Saab 9-5 Audio System
- Restore removed XM™\* categories
- The XM Categories
- CD player
- Loading CDs
- Removing CDs
- Selecting and changing tracks
- Rapid playing tracks
- Random playback
- Saab 9-5 Audio System
- CD changer \*
- Loading a CD
- Loading several CDs
- Removing a CD
- Removing several CDs
- Selecting/changing CD
- Saab 9-5 Audio System
- MP3 player
- Activating the MP3 player
- Loading MP3 discs
- Removing MP3 discs
- Selecting/changing MP3 file
- Selecting/changing MP3 folder
- Rapid playing an MP3 file
- Random playback of MP3 files
- Playback order
- Sorting music
- Saab 9-5 Audio System
- Song title, artist name, etc.
- MP3/WMA
- Portable player
- AUX input \*
- Connecting and activating a portable player
- General functions
- Setting time and date
- Cars without CD changer
- Cars with CD changer
- Saab 9-5 Audio System
- Time and date display
- Speed dependent volume compensation
- Sound system
- harman/kardon® Sound System
- Saab 9-5 Audio System
- Technical data
- Power output
- Radio module
- CD player and CD changer
- Antennas
- Multipath propagation
- Diversity antenna \*
- Shadow effect
- Cross modulation
- Radio waves, FM/AM
- Sources of FM interference
- Sources of AM interference
- Saab 9-5 Audio System
- Error codes
- Security lock
- Interior equipment and trunk
- Interior equipment and trunk
- Steering wheel adjustment
- Horn
- Electric windows
- To open:
- To close:
- Interior equipment and trunk
- Rearview mirrors
- Door mirrors
- Child safety: rear windows (ON/OFF)
- Electrically retractable door mirrors \*
- Interior equipment and trunk
- Rearview mirror
- Interior rearview auto-dimming mirror with garage door opener, and digital compass \*
- Preparations for first-time programming
- Programming
- Interior equipment and trunk
- Gate Operator / Canadian Programming
- Reprogramming a single button
- Erasing the three buttons
- Opening a garage door
- Rearview auto-dimming mirrors \*
- NOTE
- Interior equipment and trunk
- Compass
- Changing zones
- Moonroof \*
- Ventilation position
- Interior equipment and trunk
- Emergency operation of moonroof
- Interior lighting
- Luggage-compartment lighting
- Sun visors
- Interior equipment and trunk
- Power Outlet \*
- Glove compartment
- Storage facilities
- Interior equipment and trunk
- Cup holders
- Trunk
- Folding the rear seat, 9-5 Sedan
- Interior equipment and trunk
- Trunk pass-through hatch
- Tie Downs
- Interior equipment and trunk
- Folding the rear seat, 9-5 SportCombi
- Parcel shelf, 9-5 SportCombi
- Fold the parcel shelf as follows:
- Extend the parcel shelf as follows:
- Alternative location of the parcel shelf If this is removed:
- Interior equipment and trunk
- Folding the narrow section of the backrest
- Load anchoring
- Interior equipment and trunk
- Cargo net \*
- Interior equipment and trunk
- Storage tray \* under luggage compartment floor, 9-5 SportCombi
- Starting and driving
- Starting and driving
- Ignition switch
- LOCK position
- OFF position
- ON position
- ST (starter) position
- If the car does not start
- "Key not accepted.
- Starting the engine
- Starting and driving
- Cars with manual transmission
- To start the engine the clutch pedal must be fully depressed.
- Cars with automatic transmission \*
- Useful tips on cold climate starting
- Limp-home mode
- Starting and driving
- Important considerations for driving
- Important considerations with catalytic converters
- Starting and driving
- Refueling
- Fuel cap
- Starting and driving
- Filling a portable fuel container Fuel (Gasoline Engine)
- Fuel
- Gasoline Octane
- Use regular unleaded gasoline with a posted octane of 87 or higher.
- Gasoline Specifications
- California Fuel
- Additives
- Fuels In Foreign Countries
- Starting and driving
- Engine Break-In Period
- Wearing in new brake pads
- Gear changing
- Manual transmission \*
- Towing
- Automatic transmission \*
- Starting and driving
- Normal mode
- Sport mode
- Adaptive gear-change pattern
- Lock-up function
- Kick-down
- Park Brake Shift Lock
- Shift Lock override
- Starting and driving
- Automatic transmission * , fault indicator
- Overheated transmission fluid
- "Gearbox too hot.
- Make a safe stop."
- Driving on hilly roads with a heavy load
- Descending hills
- Starting and driving
- Sentronic, manual mode \*
- Selector positions
- Starting and driving
- Adaptive gear-change patterns
- SPORT modes
- Cruise control
- For safety reasons (brake system function) the brakes must be applied once, when the engine has started, before the cruise control system can be activated.
- To set the desired speed
- To increase the preset speed
- Temporary increase in speed
- To cancel temporarily
- To re-engage the system
- Starting and driving
- To reduce the preset speed
- Disengaging the system
- Braking
- Brake pad wear indicators
- ABS brakes
- Starting and driving
- Do not release the brake pedal before the car has come to a halt or the danger has passed!
- Electronic Stability Program (ESP®)
- How the ESP® system works
- Starting and driving
- The ESP® indicator light
- The ESP® OFF-indicator light
- Temporarily turning the ESP® system off
- Parking brake
- Parking
- Starting and driving
- Parking on a hill
- Long-term parking
- Starting and driving
- Saab Parking Assistance \*
- Starting and driving
- Economical motoring
- Factors affecting fuel consumption
- Breaking-in
- Weather conditions
- Driving technique
- Road conditions
- Starting and driving
- Engine block heater \*
- Driving in cold weather
- Tire chains ✱
- Driving in hot weather
- Starting and driving
- Towing a trailer \*
- Trailer hitch attachment \*
- Trailer weight
- Starting and driving
- Recommendations for cars with automatic transmission
- "Gearbox too hot. Make a safe stop."
- Recommendations for cars with manual gearbox
- Driving considerations
- Checks before driving
- Starting and driving
- Trailer hitch load
- Driving with a roof rack load
- Driving with a load
- Starting and driving
- Tires
- Driving with a spare wheel fitted
- Driving with the trunk lid/tailgate open
- Driving in deep water Towing the car
- Starting and driving
- Front towing eye
- Rear towing eye
- Towing the car
- Drive carefully and do not exceed the speed limit for vehicles being towed.
- Cars with automatic transmission
- Transporting the car
- Starting and driving
- Jump starting
- Starting and driving
- Charging the battery/Jump starting
- Car care and technical information
- Car care and technical information
- Hood
- Car care and technical information
- Engine families
- Emission control systems
- Saab Trionic engine management system
- ORVR (Onboard Refueling Vapor Recovery)
- Car care and technical information
- Engine
- Engine oil
- Checking the oil level
- Transmission fluid
- Manual transmission
- Automatic transmission
- Car care and technical information
- Brake and clutch fluid
- Checking the fluid level
- Car care and technical information
- Power steering fluid
- Air filter
- Charging/replacing the battery
- Car care and technical information
- Drive belts
- Car care and technical information
- Changing the windshield wiper blades
- Fitting the wiper blade
- Rear window, SportCombi
- Washer jets
- Washers
- Car care and technical information
- Changing bulbs
- Xenon headlight \*
- Headlight bulb for high beam (Halogen)
- Car care and technical information
- Low beam bulb \*
- Headlight bulb for low beam (Halogen)
- Front direction indicator
- Parking-light bulb
- Car care and technical information
- Rear light cluster, 9-5 Sedan
- Trunk lid light and taillights, 9-5 Sedan
- Refitting the trim
- Car care and technical information
- High-mounted stop lights, 9-5 Sedan
- Rear lights clusters, 9-5 SportCombi
- Reassembly
- Car care and technical information
- Tailgate bulbs, 9-5 SportCombi
- License-plate light
- Side direction indicators
- Courtesy lights (front doors and floor) and luggage-compartment lighting
- Car care and technical information
- Dome light, front
- Dome light, rear
- Glove-compartment illumination
- Other bulbs
- Car care and technical information
- Fuses
- Maxi fuses
- DICE / TWICE
- Relay panel under instrument panel
- Car care and technical information
- Fuse box under hood
- Car care and technical information
- Inflation - Tire Pressure
- High speed operation When to check
- How to Check
- Tire Inspection and Rotation
- Car care and technical information
- Flat spotting
- When It Is Time for New Tires
- Treadwear indicators
- Buying New Tires
- Car care and technical information
- Uniform Tire Quality Grading
- Treadwear 200 Traction AA Temperature A
- Treadwear
- Traction-AA,A,B,C
- Temperature - A, B, C
- Wheel Alignment and Tire Balance
- Wheel Replacement
- Used Replacement Wheels
- Car care and technical information
- Tire Chains
- If a Tire Goes Flat
- Tire Sidewall Labeling
- Department of Transportation (DOT):
- Tire Size
- Car care and technical information
- Tire markings
- Tire load index
- Speed ratings
- Loading Your Vehicle
- Tire Terminology and Definitions
- Car care and technical information
- Steps for Determining Correct Load Limit
- Winter tires
- Tire date code
- Tire direction of rotation
- Car care and technical information
- Automatic tire pressure monitoring system
- If the tire pressure decreases
- Low tire pressure front right. Make a safe stop.
- For further Information on tire air pressure, see page 220.
- Car care and technical information
- Malfunctions
- Removing a tire
- Fitting a tire
- Compact spare tire
- Car care and technical information
- Driving considerations with compact spare wheel/tire fitted
- Changing a wheel
- Car care and technical information
- Car care and technical information
- Tightening torque
- Upholstery and trim
- Cleaning and caring for leather upholstery
- Textile carpeting
- Car care and technical information
- Washing the car
- Waxing and polishing
- Touching up the paint
- Car care and technical information
- Two-coat enamel
- Air conditioning (ACC)
- Fault diagnosis
- Important!
- Inadequate cooling:
- Maintenance
- Car care and technical information
- Anti-corrosion treatment
- What causes rust?
- Preventive maintenance
- For long trips
- Car care and technical information
- Recovery and/or recycling of automotive materials
- Headlight aiming
- Car care and technical information
- Customer Assistance and Information
- Customer Assistance and Information
- Maintenance schedule
- Service intervals
- Engine oil and filter changes
- Service record retention
- HOW THE SERVICE RECORD IS ORGANIZED
- HOW TO USE THE SERVICE RECORD COUPONS
- Service costs
- Owner assistance
- Warranties and service problem assistance
- Customer Assistance and Information
- Change of Address Notification (U.S. and Canada)
- Service information
- Reporting Safety Defects (U.S.A.)
- Reporting Safety Defects to the Canadian government
- Vehicle Data Collection and Event Data Recorders
- Specifications
- Specifications
- General
- Luggage compartment
- Trailer
- Specifications
- Engine variants
- Electrical system
- Brake system
- Specifications
- Specifications
- Plates and labels
- Adjustable systems
- Car alarm/central locking system:
- Saab Information Display:
- Miscellaneous:
- Following adjustments can be done by the driver:
- Automatic Climate Control (ACC):
- Saab 9-5 Audio System (see page 106):
- Daytime Running Lights:
- 267Index
- Index
- A
- B
- C
- Index
- D
- E
- F
- G
- H
- |
- 269Index
- J
- K
- L
- M
- N
- 0
- P
- Q
- R
- Index
- S
- T
- 271Index
- U
- V
- W
- X
Brand : SAAB
Model : 9-5 (2009)
Category : Automobile