
Scanjet 5500P - Scanner HP - Free user manual and instructions
Find the device manual for free Scanjet 5500P HP in PDF.


| Product Type | Flatbed scanner with automatic document feeder (ADF) and transparent materials adapter (TMA) |
| Dimensions (with ADF) | 488 x 340 x 162 mm (19.21 x 13.39 x 6.38 in) |
| Weight (with ADF) | 5.7 kg (12.6 lbs) |
| Power Supply | AC 100-120 V, 60 Hz (North America); 200-240 V, 50 Hz (Europe, UK, Australia); 100-240 V, 50/60 Hz (rest of world) |
| Power Consumption | ENERGY STAR compliant; typical <32 W |
| Interface | USB 2.0 Hi-Speed |
| Optical Resolution | 2400 x 2400 dpi hardware |
| Selectable Resolution | 12 to 999,999 dpi enhanced at 100% scaling |
| Scanning Element | Charge-coupled device (CCD) |
| Scanning Functions | Scan documents, pictures, slides (35 mm), negatives, copy, email, file to disk/CD |
| Automatic Document Feeder (ADF) | Capacity: 50 sheets (75 g/m²); duplex scanning; one-sided up to legal, two-sided up to A4/letter |
| Transparent Materials Adapter (TMA) | For 35 mm slides (up to 3) or negatives (up to 4 frames) |
| Front Panel Buttons | Scan Document, Scan Picture, File, Email, Copy, Number of Copies, Color/B&W, Power Save, Cancel |
| LCD Display | 2-digit LCD showing number of copies and error codes |
| Software | HP Photo & Imaging Software (with OCR) and optional HP Commercial Scanjet 5590 TWAIN |
| Operating Temperature | Scanner/TMA: 10° to 35°C (50° to 95°F); ADF: 10° to 30°C (50° to 85°F) |
| Storage Temperature | -40° to 60°C (-40° to 140°F) |
| Relative Humidity (Operating) | 15% to 80% non-condensing at 10° to 35°C |
| Maintenance | Clean glass with mild glass cleaner and lint-free cloth; clean ADF with HP cleaning cloth; clean feed rollers manually |
| Safety Precautions | Avoid abrasives, acetone, benzene, carbon tetrachloride on glass; disconnect USB and power before cleaning |
| Replacement Parts | ADF cleaning cloth (C9915-60056), roller replacement kit (C9937-68001), ADF window/optic assembly (C9915-60011) |
| Warranty | 1 year in most regions; 30 days in Africa and Middle East |
Frequently Asked Questions - Scanjet 5500P HP
User questions about Scanjet 5500P HP
0 question about this device. Answer the ones you know or ask your own.
Ask a new question about this device
Download the instructions for your Scanner in PDF format for free! Find your manual Scanjet 5500P - HP and take your electronic device back in hand. On this page are published all the documents necessary for the use of your device. Scanjet 5500P by HP.
USER MANUAL Scanjet 5500P HP
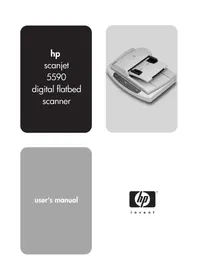
hp scanjet 5590 digital flatbed scanner

user's manual

invent
hp scanjet 5590 digital flatbed scanner
user's manual
copyright and license
© 2004 Copyright Hewlett-Packard Development Company, L.P.
Reproduction, adaptation or translation without prior written permission is prohibited, except as allowed under the copyright laws.
The information contained herein is subject to change without notice.
The only warranties for HP products and services are set forth in the express warranty statements accompanying such products and services. Nothing herein should be construed as constituting an additional warranty. HP shall not be liable for technical or editorial errors or omissions contained herein.
trademark credits

Adobe and the Acrobat logo are registered trademarks or trademarks of Adobe Systems Incorporated in the United States and other countries and regions.
ENERGY STAR is a U.S. registered service mark of the United States Environmental Protection Agency.
Microsoft and Windows are registered trademarks of Microsoft Corporation.
All other product names mentioned herein may be trademarks of their respective companies.
contents
How to use the scanner.... 1
Install the scanning software . . . . . . . . . . . . . . . . . . . . . . . . . . . . . . . . . . . . . . . . . . . . . 1
Front panel and accessories overview 2
Scanning overview 2
Select original types 3
Scan documents 3
Scan pictures 4
Preview a scanned image 4
Save a document to a disk or CD 5
E-mail a scanned document or picture 5
Print copies. 5
Cancel a scan 6
Use the Power Save button. 6
Change settings 6
scan text for editing 6
how to scan from the automatic document feeder .....7
choose acceptable media for the ADF 7
load originals in the ADF 7
scan two-sided documents from the ADF 8
make copies from the ADF 8
how to scan slides and negatives 9
set up the TMA 9
scan slides or negatives 10
care and maintenance 13
clean the scanner glass. 13
clean the TMA 13
clean and maintain the ADF 13
maintain the ADF....16
order maintenance supplies. 16
Troubleshooting 17
Scanner installation or setup problems 17
Scanner initialization or hardware problems .....18
Scanner has stopped working properly 19
Additional troubleshooting information 19
Product support 20
Accessibility website 20
HP Scanjet website 20
Support process 20
Regulatory information and product specifications ..... 24
Scanner specifications (with ADF where indicated) ..... 24
Transparent materials adapter (TMA) specifications ..... 24
Automatic document feeder (ADF) specifications. 25
Environmental specifications for the scanner, ADF, and TMA ..... 25
Purchase accessories 25

How to Use the Scanner
This manual describes how to use the HP ScanJet 5590 digital flatbed scanner and its accessories, resolve installation problems, and reach customer support.
For installation and setup procedures, see the setup poster. For scanning-software procedures, see the HP Photo & Imaging software Help.
Install the Scanning Software
Choose from the following three options when installing the scanner software.
| Software options Description | |
| HP Photo & Imaging Software(most users choose this option) | Requires 160 megabytes (MB) of disk spaceOffers a complete software solution for document and photo management and enhancementCan scan slides and negativesEnables front-panel scanner buttonsIncludes TWAIN connectivity to the most popular imaging software programs |
| HP Commercial Scanjet 5590 TWAIN | Requires 20 MB of disk spaceCan be used with document management or customized business softwareOffers TWAIN contrast and brightness capabilitiesOffers improved two-sided scanning performanceDoes not offer front panel scanner button functionalityCannot scan slides and negatives |
| HP Photo & Imaging Software and HP Commercial Scanjet 5590 TWAIN(both software programs can be installed) | Requires 180 MB of disk spaceCan scan slides and negativesEnables front-panel scanner buttonsIncludes TWAIN connectivity to most popular imaging software programsIncludes commercial TWAIN for document management and customized business software |
See the Readme file on your CD for more information about the TWAIN drivers.
To learn more about TWAIN, you can also visit http://www.twain.org.
Front Panel and Accessories Overview
This section presents an overview of the scanner front panel, the transparent materials adapter (TMA), and the automatic document feeder (ADF).
| Feature Description | ||
 | SCAN DOCUMENT button | Scans an original document to a software program where it can be edited or reformatted. |
 | SCAN PICTURE button | Scans the picture to the HP Photo & Imaging Gallery. |
 | FILE DOCUMENTS button | Scans the original document to be saved on a disk or CD in a designated file format (for example, .PDF, .TIF, or .HTML). |
 | E-MAIL button | Scans the item by using settings that are optimized for e-mail, and sends the scan to your e-mail software (if the software is supported). |
 | COPY button | Scans the item and sends it to a printer to make copies. |
 | NUMBER OF COPIES button | Selects the number of copies to be printed with the COPY button. |
 | COLOR/BLACK & WHITE copy button | Determines whether items will be scanned in color or in black and white when you press the COPY button. |
 | ||
| [arrow] | POWER SAVE button | Turns off the scanner lamp, the LEDs, and the LCD. |
| [boxed] | CANCEL button | Cancels a scan while the scanner is scanning, or cancels a series of scans from the automatic document feeder (ADF). |
 | 2-digit LCD | Indicates the number of copies that will be printed when you press the COPY button. Also shows error codes that identify scanner problems. |
Automatic Document Feeder (ADF)
The HP ScanJet 5590 digital flatbed scanner has an automatic document feeder (ADF) that you can use to scan multiple documents quickly and easily. For more information about the ADF, see how to scan from the automatic document feeder on page 7.
Transparent Materials Adapter (TMA)
You can use the transparent materials adapter (TMA) to scan 35 mm slides or negatives. For more information about the TMA, see how to scan slides and negatives on page 9.
Scanning Overview
You can start scanning in one of three ways: from the front-panel buttons, from the HP Director, or from other software programs.
Macintosh users: See the HP Photo & Imaging software Help for information about scanning procedures.
Scan from the scanner front-panel buttons
The front-panel buttons on the scanner provide shortcuts to frequently used scanning functions, such as scanning documents and pictures. Instructions for using the front-panel buttons are located in this manual.
Note: The HP Photo & Imaging software must be installed to use the front-panel buttons and the TMA.
Scan from the HP Director
Scan from the HP Director when you want more control over your scan, such as when you want to preview the image before the final scan.
To start the HP Photo & Imaging software, double-click the HP Director icon on the desktop. The HP Director window appears. From this window you can scan, view, or print images; use online Help; and more.
If the HP Director icon is not on the desktop, on the Start menu, point to
Programs or All Programs, point to Hewlett-Packard, point to the name of your scanner or to Scanners, and then click Photo & Imaging Director.
Note: The HP Director is available only when the HP Photo & Imaging software is installed.
Scan from other software programs
You can scan an image directly from an open file in one of your software programs if the program is TWAIN-compliant. Generally, the program is compliant if it has an option such as Acquire, Scan, or Import New Object. If you are unsure whether the program is compliant or what the option is, see the documentation for that program.
Select original types
You have two choices for original type: Document or Picture. The scanner optimizes settings based on your choice. Use the following guidelines to determine the best original type for your needs.
| If your original consists of Select this original type | |
| Text, or both text and graphics Document | |
| A printed photograph or graphic Picture | |
Scan documents
Use the SCAN DOCUMENT button ( ) to scan documents.
1 Place the originals face-down on the scanner glass, as indicated by the reference mark, or face-up in the ADF.

2 Press the SCAN DOCUMENT button ( ). The What are you scanning? dialog box appears.
3 Choose the appropriate settings, and then click Scan.
4 When you are finished scanning, click Done. The software sends the scanned file to the specified location.
Note: If you want to preview scans before they are sent to their destination, see preview a scanned image.
Note: To create a searchable PDF from your scan, select the Scan for editable text (OCR)? option in the What are you scanning? dialog box. When you are done scanning your document, save it as a PDF. For more information about OCR scanning, see scan text for editing on page 6.
scan pictures
Use the SCAN PICTURE button (☐) to scan printed photos, graphics, slides, or negatives.
1 Place the original face-down on the scanner glass, as indicated by the reference marks, and close the lid.
2 Press the SCAN PICTURE button ( ).
3 When you are finished scanning, click Done. The image is scanned into the HP Photo & Imaging Gallery.
Note: If you want to preview scans before they are sent to their destination, see preview a scanned image.
Tip: The HP Scanning software can automatically correct your pictures or restore faded colors in old pictures. To turn picture correction on or off, select Auto Correct Photos from the Basic menu of the HP Director, and then choose the options you want.
preview a scanned image
By default, the software does not prompt you to preview the scan when you use any of the front-panel buttons on the scanner.
If you want to preview the scanned file, either begin the scan from the HP Director instead of using the buttons on the front of the scanner, or change the button settings in the HP Director to allow previews.
For more information about changing button settings to preview scans, see "Preview a scanned image" in the online Help.
Note: There is no preview image for the copy function.
Save a document to a disk or CD
Use the FILE DOCUMENTS button (☐) to save scanned documents to a disk, such as a hard disk or a CD.
1. Place the original face-down on the scanner glass, as indicated by the reference marks, or face-up in the ADF. 2. Press the FILE DOCUMENTS button (☐). The "What are you scanning?" dialog box appears. 3. Choose the appropriate settings, and then click Scan. 4. When you are finished scanning, click Done. The Save As dialog box appears. 5. Select a folder in the Save As dialog box, type a file name, and then select a file type. Click OK. The software saves the document to the specified folder.
Note: If you want to preview scans before they are sent to their destination, see "Preview a scanned image" on page 4.
E-mail a scanned document or picture
Use the E-MAIL button (☐) to scan documents or pictures and insert them in an e-mail message as an attachment. You must have an Internet connection and a supported e-mail software program.
1. Place the original face-down on the scanner glass, as indicated by the reference marks, or face-up in the ADF. 2. Press the E-MAIL button (☐). The "What are you scanning?" dialog box appears. 3. Choose the appropriate settings, and then click Scan. 4. When you are finished scanning, click Done. Your e-mail program opens and the scanned file is attached to an e-mail message. 5. The E-mail attachment dialog box appears. Type a file name, and then select a file type. Click Continue. Follow the on-screen instructions. 6. Use your e-mail program to complete and send the e-mail.
Note: To view the scanned image before you e-mail it, double-click the attachment in your e-mail software.
To change the e-mail program, open the HP Director, and then select E-mail Settings in the Settings drop-down list. The Email Settings dialog box appears. Select the e-mail program that you want to use, and then click OK.
Print copies
Use the COPY button ( [icon] ) to scan an original and send it to a printer.
1 Place the original face-down on the scanner glass, as indicated by the reference marks, or face-up in the ADF. 2 Select the copy options:
- Select the number of copies by pressing the NUMBER OF COPIES button (The number of copies appears in the front-panel display.
- Select how the original is scanned by pressing the COLOR button (☐) or BLACK & WHITE button (●○).
3 Press the COPY button (☐). The copies are printed on the default printer.
Note: To change any copy settings, such as size, darkness, or the printer, click Cancel during processing. The hp copying dialog box appears and allows you to change settings.
Note: There is no preview image for the copy function.
cancel a scan
Press the CANCEL button (☑) to cancel a scan in progress, or to cancel a series of scans when you are scanning from the ADF.
use the Power Save button
Use the POWER SAVE button (⏻) to turn off the lamp when you are not using the scanner. When you press the POWER SAVE button (⏻), the scanner lamp, the small indicator lights, and the front-panel display turn off.
To use the scanner again, press any button on the front panel or start a scan from the HP Director. After a short warm-up cycle, the scan begins.
Your scanner automatically goes into Power Save mode after 15 minutes of non-use. To change this to one hour, open the HP Director, and click Settings. Click Scan Preferences, and then click the Quality vs. Speed tab. Select the Extend lamp timeout check box. The scanner stays on for one hour before going into Power Save mode.
change settings
You can change many scan settings from the HP Photo & Imaging software. These include button settings, preferences for automatic exposure, and file destination. Open the HP Director, make sure that the hp scanjet 5590 digital flatbed scanner is selected, and then click Settings.
scan text for editing
The scanner uses optical character recognition (OCR) to convert text on a page to text that you can edit on your computer. The OCR software is installed automatically when you install the HP Photo & Imaging software.
For information about using the OCR software, see scan text for editing in the online Help.
2
how to scan from the automatic document feeder
This section explains how to use the automatic document feeder (ADF) for the HP Scanjet 5590 scanner.
choose acceptable media for the ADF
The ADF works best when the originals meet the following specifications. If the originals do not meet these criteria, scan from the scanner glass.
- For one-sided scanning, you can use legal-size paper: 210 mm by 355.6 mm (8.5 by 14 inches).
- For two-sided scanning, use A4-size or letter-size media. The ADF cannot scan both sides of a document smaller than 127 mm by 127 mm (5 by 5 inches) or larger than 210 mm by 304.8 mm (8.5 by 12 inches).
- Custom-size media ranging from 88.9 mm by 127 mm (3.5 by 5 inches) to 216 mm by 356 mm (8.5 by 14 inches) can be scanned with the one-sided option.
Tip: To scan both sides of a legal-size document, 216 mm by 356 mm (8.5 by 14 inches), scan one side in the ADF, turn the document over, and then scan the other side in the ADF.
- Media weights from 60 to 90 grams per square meter (g/m²) (16 to 24 lbs).
• Media that does not contain perforations or punch holes.
• Media that does not contain wet glue, correction fluid, or ink.
Note: Avoid putting multipart forms, transparencies, magazine pages, gum-backed pages, and lightweight paper in the ADF.
Before placing an original in the ADF, check for and remove curls, wrinkles, staples, paperclips, and any other attached material.
Load originals in the ADF
1. Place a stack of similarly sized documents face-up in the document input tray, with the first page on top.

Load a document and center it in the ADF tray.
2. Adjust the paper guides to center the stack. 3. Press a scanner button or use the HP Director to begin scanning. Follow the instructions on the computer screen to finish scanning.
Scan two-sided documents from the ADF
When you scan documents from the ADF, the "What are you scanning?" dialog box appears. Select "Yes, scan both sides" for two-sided scanning.
The ADF is unable to scan both sides of documents longer than 12 inches. To scan longer two-sided documents, you must set the ADF to scan only one side at a time. To change this setting, clear the "Yes, scan both sides" option in the "What are you scanning?" dialog box.
One-sided scanning is the default method for the ADF. To change this default to two-sided scanning, open the HP Director, click Settings, and then click Scan Preferences. Click the Automatic tab, and then select the setting that you want to assign as the default.
Note: Use A4- or letter-size media for two-sided scanning. The ADF cannot scan both sides of a document smaller than 127 mm by 127 mm (5 by 5 inches) or larger than 210 mm by 304.8 mm (8.5 by 12 inches).
If you are acquiring your scan from an imaging software program using TWAIN, the Commercial Scanjet 5590 TWAIN software offers additional capabilities for brightness and contrast, and improved performance and control for two-sided scanning. For more information about installing the Commercial Scanjet 5590 TWAIN software, see "install the scanning software" on page 1.
Make copies from the ADF
You can use the Copy button (💡) to scan multiple originals from the ADF and send them to a printer. The copy function defaults to the setting used the last time you made copies. For two-sided copies, open the HP Director, and then click Make Copies. Select the Duplex option in the hp copying dialog box. For more information, see "print copies" on page 5.

How to scan slides and negatives
This section contains information about setting up and using the transparent materials adapter (TMA) to scan slides and negatives. You can use the TMA to scan 35 mm slides or negatives.
Tips for scanning transparent items
- To scan items larger than those that the TMA accepts, place the transparency on the scanner glass, place a white sheet of paper on top of the transparency, and then scan as usual.
- When scanning a 35 mm slide or negative, the scanner software automatically enlarges the image to approximately 11 cm by 15 cm (4 by 6 inches). If you want the final image to be larger or smaller, use the Resize tool in the scanner software to set the scaling to the final size that you want. The scanner will scan the item at the proper resolution and enlargement for the size that you select.
- To scan 35 mm slides or negatives by using the TMA, press the SCAN PICTURE button (A) on the front of the scanner, or click Scan Picture in the HP Director.
Set up the TMA
The TMA includes a light source, a positioning plate, and media holders that are placed directly on the top of the scanner glass. Make sure you have all the components of the TMA.

TMA components
1- Negative light shield 2- Negative holder 3- Positioning plate 4- Slide light shield 5- Light source and slide holder
To connect the TMA cable to its port on the scanner
1 Disconnect the power cable from the scanner. 2 On the back of the scanner, find the round TMA port. 3 Holding the TMA cable by its free end, align the connector so that the arrow is on the top side.
4 Gently insert the connector into the TMA port.
Caution! Do not force the cable into the TMA port. Forcing the cable can bend or break internal pins.
5 Reconnect the power cable.

TMA cable and port
Scan slides or negatives
To scan standard 35 mm slides or negatives, use the TMA light source and the positioning plate. For negatives, you need the negative holder. When scanning fewer than three slides, you will need the slide light shield; when scanning fewer than four negative frames, you will need the negative light shield.
To start the scanning process
1. Place the positioning plate on the scanner glass, and match the reference mark on the plate to the reference mark on the scanner.

Place the positioning plate on the scanner glass
2. Insert slides or negatives into the TMA light source.
To load slides into the TMA light source
1. Insert up to three slides into the slide holder on the bottom side of the TMA light source.
Note: Make sure that the shiny side faces the scanner glass when the TMA light source is in position on the scanner glass. (The emulsion side is dull.)
2. If you are scanning fewer than three slides, insert the slide light shield after you load the last slide.

Insert a slide into the slide holder with a slide light shield
To load negatives into the TMA light source
1. Load a negative strip into the negative holder.
Note: Make sure that the shiny side faces the scanner glass when the TMA light source is in position on the scanner glass. (The emulsion side is dull.)
Caution! Negatives are easily damaged. Touch them only on their edges.
2. If you are scanning a negative strip with fewer than four frames, insert the negative light shield after you load the negative strip. Use the arrow icons on the negative light shield to position it correctly.
3 Slide the negative holder into the slide holder on the bottom side of the TMA light source.

1 - Load the negative strip into the negative holder with a negative light shield
2 - Slide the negative holder into the slide holder of the TMA light source
Note: The negative holder is stored in the TMA light source, within the slide holder.

to complete the scanning process
1 Place the TMA light source into the positioning plate with the slides or negatives facing down. The TMA cable should fit in the groove that is on the same end of the positioning plate as the reference marks.

Place the TMA light source on the positioning plate
2 Press the SCAN PICTURE button (☐) on the front of the scanner.
3 In the scan preview, select the area of the slide or negative that you want to scan. Click and hold the selection handle that you want to move and adjust the area to frame the final scan area of the image.
Final scan area
Note: For information about rotating the image, adjusting color or size, or making other changes to the image, see adjust an image during the preview in the HP Photo & Imaging software Help.
4 Click Accept when the image adjustments are complete.
To keep the TMA light source on beyond the default period, select the Extend lamp timeout setting in the software. Open the HP Director, click the Settings menu, click Scan Preferences, and then click the Quality vs. Speed tab.
4
care and maintenance
This section presents information about how to care for and maintain the scanner.
Occasional cleaning of your scanner helps ensure optimal performance. The amount of care necessary depends upon several factors, including the amount of use, the type of media that is fed through the ADF, and the environment. You should perform routine cleaning as necessary.
Routine cleaning and maintenance should include cleaning the scanner glass, the TMA, and the ADF.
Caution! Avoid placing items that have sharp edges in the scanner. Doing so can damage the scanner. Before placing an item on the scanner glass, make sure that the item does not contain wet glue, correction fluid, or other substances that can be transferred to the glass.
clean the scanner glass
1 Disconnect the universal serial bus (USB) cable and power cable from the scanner.
2 Clean the glass by using a soft, lint-free cloth that has been sprayed with a mild glass cleaner, and dry the glass with a dry, soft, lint-free cloth.
Caution! Use only glass cleaner. Avoid abrasives, acetone, benzene, and carbon tetrachloride, all of which can damage the scanner glass. Avoid isopropyl alcohol because it can leave streaks on the glass.
Do not spray the glass cleaner directly on the glass. If too much glass cleaner is applied, the cleaner could run to the edges and damage the scanner.
3 When you have finished, reconnect the USB cable and power cable to the scanner.
Note: For instructions about how to clean the underside of the scanner glass, visit www.hp.com/support.
clean the TMA
Clean the TMA with a dry, soft cloth. If necessary, lightly spray the cloth with glass cleaner and wipe the TMA.
clean and maintain the ADF
The ADF requires periodic cleaning depending on the amount of use and the type of media that is fed through it. Use an HP ADF cleaning cloth to clean the ADF when vertical streaks appear in images scanned by using the ADF, when
Media running through the ADF may be dusty or dirty, or the environment may be dusty. If you use the ADF several times per week, monthly cleaning is recommended. Set up a cleaning routine that is appropriate for your scanner.
Use the following methods to clean the ADF:
• Run the cleaning cloth through the ADF - Clean the ADF window - Clean the feed-roller assembly manually
Run the cleaning cloth through the ADF
1. Open the sealed container, starting at the notch. Take care not to tear the cleaning cloth that is inside. 2. Remove the cleaning cloth and unfold it. 3. Place the unfolded cloth into the paper input tray.
4. Press the SCAN DOCUMENT button ( ).
The cleaning cloth runs through the ADF.
Caution! Wait two minutes to allow the components to dry before proceeding to the next step.
5. Place up to five pages of printed paper in the paper input tray. Scan and view the results.
6. If streaks still appear, repeat steps 3 through 5. The cleaning cloth can be cycled through the ADF up to five times.
Note: If you still have streaks in your scanned image after running the cleaning cloth through the ADF, you might need to clean the ADF window.
Clean the ADF window
If streaks exist on your scanned images, cleaning the ADF window might solve the problem. Use the following steps to remove the clear ADF window, clean it, and replace it in the ADF.
1. Unplug the power cord and the connector from the scanner to the ADF.

2. Remove the ADF from the scanner by opening the ADF and lifting it straight up.
3 Unlock the ADF window.
2 Remove the ADF from the scanner by opening the ADF and lifting it straight up. 3 Unlock the ADF window.
a. Locate the clear ADF window containing the blue-green rectangles on the underside of the ADF. b. Press down one of the tabs next to the blue-green rectangle. c. Pull the blue-green rectangle toward the closest end of the scanner.
d. Repeat these steps for the other tab and blue-green rectangle.

4 Remove the ADF window from the ADF.

5 Wipe the clear plastic area with an HP ADF cleaning cloth or a clean, dry lint-free cloth. Clean both sides before replacing. Make sure that each side is dry and free of spots.

6 Replace the ADF window.
a. Gently lift the edge of the large gray plastic film attached to the bottom of the ADF. b. Slide the clear side of the edge of the clear ADF window under the gray plastic film. c. Slide the clear ADF window forward until it clicks into place. d. Make sure that the small blue-green rectangle at the center of the optic latches underneath the gray tab and not above the tab.

7 Place the ADF on the scanner.
8 Connect the ADF connector to the scanner, and then connect the power cord to the scanner. 9 Use the ADF to scan up to five documents. View the results. If streaks still exist on the scanned images, call HP Customer Support. It may be necessary to order a new clear ADF window/optic assembly (C9915-60011).
clean the feed-roller assembly manually
1 Open the hatch, and then lift the green tab to the fully open position. The feed-roller assembly should be in a nearly vertical position.

Lift the green tab to expose the feed rollers
2 Use an HP ADF cleaning cloth (C9915-60056) to clean each of the feed rollers and the small rubber pad that is located below the rollers.
Note: If you do not have the HP ADF cleaning cloth, use a lint-free cloth that has been dampened with isopropyl alcohol.
3 Wipe the area around the small rubber pad to remove any paper dust. 4 Lower the green tab and feed-roller assembly. 5 Close the hatch.
Maintain the ADF.
If misfeeds are occurring frequently, follow these steps:
1 Clean the feed-roller assembly manually. See "Clean and maintain the ADF." 2 See the online Help for information about resolving ADF problems. 3 If the misfeeds continue, order and install the ADF Roller Replacement kit (C9937-68001). The ADF Roller Replacement kit contains a roller mechanism, a separation pad, new screws for the separation pad, and replacement instructions (see "Order maintenance supplies" for more information).
Order maintenance supplies.
You can purchase maintenance parts online at www.hp.com/support/scannersupplies. Items such as HP ADF cleaning cloths or the ADF Roller Replacement kit are available for worldwide delivery.
5
Troubleshooting
This section contains solutions for common problems with the scanner, the automatic document feeder (ADF), and the transparent materials adapter (TMA).
Scanner installation or setup problems
This section contains solutions for installation and setup problems.
Check your computer
- Make sure that your computer meets the minimum system requirements, which are listed on the scanner box and in the "Scanner installation or setup problems" section of the online Help file.
- If you do not have enough hard-disk space, remove unnecessary files or install the software on a different disk drive.
Use administrative privileges.
If you are installing the scanner on a Microsoft® Windows® 2000 or Windows XP computer, you must be logged on as an Administrator. See your operating system Help for how to log on as an Administrator.
use a valid folder
On a Microsoft Windows computer, if you receive a message such as "Destination Directory Is Invalid" or "Program Folder Is Invalid" during installation, you might not have read/write permissions to that folder.
check the cables
| Cable type | Action |
| Power cable | The power cable is connected between the scanner and an AC outlet.Ensure that the power cable is securely connected between the scanner and a live electrical outlet or surge protector.If the power cable is connected to a surge protector, ensure that the surge protector is plugged into an outlet and turned on.Disconnect the power cable from the scanner and turn off the computer. After 60 seconds, reconnect the power cable to the scanner and then turn on the computer, in that order. |
| USB cable | The USB cable is connected between the scanner and the computer.Use the cable that was included with the scanner. Another USB cable might not be compatible with the scanner.Ensure that the USB cable is securely connected between the scanner and the computer.For additional USB troubleshooting information, see www.hp.com/support, select your country/region, and then use the search tool to find USB troubleshooting topics. |
Macintosh users: Use the Apple System Profiler to make sure that the scanner is connected to the computer correctly.
scanner initialization or hardware problems
This section contains solutions for initialization and hardware problems.
reset the scanner
- If you receive an error message similar to "Scanner initialization failed" or "Scanner not found" when trying to use the scanner, use the following procedure: a. Close the HP Scanning software if it is open. b. Disconnect the cable that connects the scanner to the computer. c. Turn the scanner off by disconnecting the power cable. d. Turn the computer off, wait 60 seconds, and then turn the computer on again. e. Turn the scanner on by reconnecting the power cable. f. Reconnect the cable that connects the computer and the scanner (use a different USB port on the computer if possible).
- A "00" in the LCD on the front panel of the scanner indicates that a USB connection error has occurred. Check that the USB cable is securely connected between the scanner and the computer.
- Make sure that the USB cable is connected to the back of the scanner correctly. The USB symbol on the end of the cable (the connector) should be facing up. When connected correctly, the USB connector will feel slightly loose. When connected incorrectly, the USB plug will feel overly tight.
- Try connecting the USB cable to a different USB port on your computer. If the scanner still fails to initialize, run the Repair utility (Windows computers only). For more information about the Repair utility, see scanner has stopped working properly.
scanner has stopped working properly
If the scanner stops scanning, complete the following steps, in order. After each step, start a scan to see if the scanner is working. If the problem continues, proceed with the next step.
- A cable might be loose. Ensure that both the USB cable and power cable are securely connected.
- Unplug the power cable from the power source, wait 60 seconds, and then plug it back in.
- Restart your computer.
- A software conflict might exist on your computer. You might need to reinstall the HP Photo & Imaging software. To do this, run the Repair utility (Windows computers only).
a. Click Start, click Settings, and then click Control Panel (in Windows XP, click Start, and then click Control Panel). b. Click Add/Remove Programs, and then select the HP Photo & Imaging software. c. Click Add/Remove (or Change, depending on your version of Windows). d. Follow the instructions on the computer screen, and then click Repair.
- Install the scanner on another computer. This helps determine whether the problem is related to the computer or to the scanner.
If the scanner still does not work, visit www.hp.com/support or contact HP Customer Support. For more information about support, see product support on page 20.
additional troubleshooting information
To solve other problems with the scanner, use the Help system. To gain access to the Help, open the HP Director, click Help, and then click HP Scanjet 5590 scanner help. This Help system provides information about the HP Scanjet 5590 scanner as well as information about the HP Photo & Imaging software itself.
This section contains support information, including phone numbers and website information.
accessibility website
Customers with disabilities can get help by visiting www.hp.com/hpinfo/community/accessibility/prodserv/.
hp scanjet website
Visit www.hp.com for a variety of information:
- learn tips for scanning more effectively and creatively
- gain access to HP Scanjet driver updates and software
- Register your product
- Subscribe to newsletters, driver and software updates, and support alerts • Purchase accessories
Support process
The HP support process works most effectively if you perform the following steps in the order specified:
1. Review the electronic Help for the software and scanner, including the Troubleshooting section.
2. Go to the HP Consumer Support Website for support. If you have access to the Internet, you can obtain a wide range of information about your scanner. Visit the HP website for product help, drivers, and software updates at www.hp.com/support. The HP Consumer Support Website is available in the following languages: Dutch, English, French, German, Italian, Portuguese, Spanish, Swedish, Traditional Chinese, Simplified Chinese, Japanese, Korean. (Danish, Finnish, and Norwegian support information is available in English only.)
3. Use HP e-support. If you have access to the Internet, connect with HP via e-mail by going to www.hp.com/support. You will receive a personal reply from an HP Product Support technician. E-mail support is available in the languages listed at that website.
4. Contact your local HP dealer. If your scanner has a hardware failure, take it to your local HP dealer for a solution. Service is free during your scanner's limited warranty period. After the warranty period, the dealer will quote a service charge.
5. Contact the HP Product Support Center for support by phone. Please consult the following website to check the details and conditions of phone support in your country/region: www.hp.com/support. As a part of HP's continuing efforts to improve phone support information services, we advise you to check the HP website on a regular basis for new information regarding service features and delivery. If you cannot solve the problem by using the above options, call HP while you are in front of your computer and scanner. For faster service, please be prepared to provide the following information:
– The scanner's model number (located on the scanner) – The scanner's serial number (located on the scanner) – The computer's operating system – The version of the scanner software (located on the scanner's CD label) – Messages displayed at the time the situation occurred
The applicable conditions for HP phone support are subject to change without notice.
Telephone support is free from the date of purchase for the period specified unless otherwise noted.
| Locations Phone-support period | |
| Africa 30 days | |
| Asia Pacific 1 year | |
| Canada 1 year | |
| Europe 1 year (See the following tables for details for each country.) | |
| Latin America 1 year | |
| Middle East 30 days | |
| United States 1 year | |
Phone support in the United States
Support is available both during and after the warranty period.
Within the period of your warranty, telephone support is provided free of charge. Call 800-HPINVENT (800-474-6836).
U.S. phone support is available in both English and Spanish 24 hours a day, 7 days a week (days and hours of support might change without notice).
After the warranty period, call 800-HPINVENT (800-474-6836). Charges are $25.00 U.S. per issue, and are charged to your credit card. If you think your HP product needs service, call the HP Product Support Center, which can help determine if service is required.
Phone support in Europe, Middle East, and Africa
HP Product Support Center phone numbers and policies can change. Visit the following website to check the details and conditions of phone support in your country/region: www.hp.com/support.
| Algeria +213 (0) 61 | 56 45 43 |
| Austria | +43 (0) 820 87 4417 |
| Bahrain | +973 800 728 |
| Belgium +32 070 300 005 (Dutch) | |
| +32 070 300 004 (French) | |
| Czech Republic +42 (0) 2 6130 7310 | |
| Denmark +45 70202845 | |
| Egypt +20 02 532 5222 | |
| Finland +358 (0)203 66 767 | |
| France +33 (0) 8 92 69 60 22 (Euro 0.34/min) | |
| Germany +49 (0) 180 5652 180 (Euro 0.12/min) | |
| Greece +30 10 60 73 603 | |
| Hungary +36 (0) 1 382 1111 | |
| Ireland +353 1890 923902 | |
| Israel +972 (0) 9 830 4848 | |
| Italy +39 848 800 871 | |
| Luxembourg 900 40 006 (French) | |
| 900 40 007 (German) | |
| Morocco | +212 224 04747 |
| Netherlands | 0900 2020165 (Euro 0.10 per minute) |
| Norway | +47 815 62 070 |
| Poland +48 22 865 98 00 | |
| Portugal +351 808 201 492 | |
| Romania +40 1 315 44 42 | |
| Russian Federation | +7 095 797 3520 (Moscow) |
| +7 812 346 7997 (St. Petersburg) | |
| Saudi Arabia | +966 800 897 1444 |
| Slovakia | +421 2 6820 8080 |
| South Africa | 086 000 1030 (RSA) |
| +27-11 258 9301 (Outside RSA) | |
| Spain | +34 902 010 059 |
| Sweden | +46 (0) 77-120 4765 |
| Switzerland | +41 0848 672 672 (German, French, Italian - Peak time 0.08 CHF/Outside peak 0.04 CHF) |
| Tunisia | +216 1 891 222 |
| Turkey | +90 216 579 71 71 |
| Ukraine | +7 (380 44) 490-3520 |
| United Arab Emirates | +971 4 883 845 |
| United Kingdom | +44 (0)870 010 4320 |
Other phone support worldwide
HP Product Support Center phone numbers and policies can change. Visit the following website to check the details and conditions of phone support in your country/region: www.hp.com/support.
| Argentina +54 11 4778 83800 810 555 5520 | |
| Australia +63 (3) 8877 8000 (or local (03) 8877 8000) | |
| Brazil 0800 15775(11) 3747 7799 | |
| Canada +1 800 hpinvent (or +1 800 474 6836)+1 905 206 4663 (Inside the Mississauga area) | |
| Central Americaand the Caribbean | +1 800 711 2884 |
| Chile 800 360 999 | |
| China +86 (21) 3881 4518 | |
| Colombia 01 800 011 4726 | |
| Costa Rica 0 800 011 0524 | |
| Dominican Republic | 1 800 7112884 |
| Guatemala 1800 999 5105 | |
| Hong Kong SAR +852 2802 4098 | |
| India 1 600 447737 | |
| Indonesia +62 (21) | 350 3408 |
| Jamaica | 0-800-7112884 |
| Japan 0570 000 511 (Inside Japan)+81 3 3335 9800 (Outside Japan) | |
| Korea, Republic of | +82 1588-3003 (Seoul)0 80-999-0700 (Outside Seoul) |
| Malaysia | +60 1 800 805 405 |
| Mexico | 01-800-4726684(55) 5258 9922 |
| New Zealand | +64 (9) 356 6640 |
| Nigeria | +234 1 3204 999 |
| Panama | 001 800 7112884 |
| Peru | 0 800 10111 |
| Philippines + 63 (2) 867 3551 | |
| Puerto Rico | +1 877 2320 589 |
| Singapore | +65 6272 5300 |
| Taiwan | +886 0 800 010055 |
| Thailand +66 (0) 2 353 9000 | |
| Trinidad & Tobago | 1 800 7112884 |
| United States | 1 800 474-6836 (800 HPINVENT) |
| Venezuela | 01 800 4746 8368 |
| Vietnam | +84 (0) 8 823 4530 |
7
Regulatory information and product specifications
This section contains regulatory information and product specifications for the HP Scanjet 5590 scanner and accessories.
Scanner specifications (with ADF where indicated)
| Name Description | |
| Scanner type Flatbed | with automatic document feeder (ADF) |
| Weight with ADF 5.7 | kg (12.6 lbs) |
| Size with ADF | 488 mm by 340 mm by 162 mm (19.21 by 13.39 by 6.38 inches) |
| Scanning element Charged-coupled device | |
| Interface USB 2.0 Hi-Speed | |
| Optical resolution 2400 | by 2400 dpi hardware |
| Selectable resolution | 12 dpi to 999,999 enhanced dpi at 100 percent scaling |
| AC line voltage 100-1 | 20 V 60 Hz – North America200-240 V 50 Hz – Continental Europe, United Kingdom, Australia100-240 V 50 Hz/60 Hz – Rest of the world |
| Power consumption and regulatory information | For power consumption data, information on power supplies and regulatory information see the regulatory_supplement.htm file on the HP Photo & Imaging software CD. |
 | The HP Scanjet 5590 scanner is ENERGY STAR® compliant. As an ENERGY STAR® partner, Hewlett-Packard Company has determined that this product meets the ENERGY STAR® guidelines for energy efficiency. |
Transparent materials adapter (TMA) specifications
| Name | Description |
| Media types | Three 35 mm slides or one 35 mm negative strip |
| Media capacity | Slide: 1.05 mm to 1.9 mm thick and 49.8 mm to 50.8 mm on any side |
| Size | 287 mm by 84 mm by 50 mm (11.3 by 3.3 by 1.97 inches) |
| Weight | 346 g (0.763 lbs) |
| Power requirements | 12.0 V DC, 575 mA, 6.9 watts< (supplied by scanner) |
Automatic document feeder (ADF) specifications
| Name Description | |
| Size | 475 mm by 320 mm by 92 mm (18.7 by 12.6 by 3.6 inches) |
| Weight 2.46 kg (5.4 lbs) | |
| Paper tray capacity | 50 pieces of 75 g/m2 (20-lb bond) |
| Maximum paper size | One-sided scanning: 210 mm by 355.6 mm (8.5 by 14 inches)Two-sided scanning: 210 mm by 304.8 mm (8.5 by 12 inches) |
| Minimum paper size | One-sided scanning: 89 mm by 127 mm (3.5 by 5 inches)Two-sided scanning: 127 mm by 127 mm (5 by 5 inches) |
| Maximum paper weight | 90 g/m2 (24 lbs) |
| Power requirements | .0 A, 32 V, 32 watts (supplied by scanner)800 mA, 19 watts (peak) 625 mA, 15 watts (nominal) |
Environmental specifications for the scanner, ADF, and TMA
| Name Description | |
| Temperature Operating | the scanner and TMA: 10° to 35° C ( 50° to 95° F) |
| Operating the ADF: 10° to 30° C ( 50° to 85° F) | |
| Storage: -40° to 60° C ( -40° to 140° F) | |
| Relative humidity Operating | the scanner, ADF, and TMA: 15 percent to 80 percent noncondensing 10° to 35° C ( 50° to 95° F) |
| Storage: up to 90 percent at 0° to 60° C or ( 32° to 140° F) |
Purchase accessories
You can purchase accessories at your local retailer or online at www.hpshopping.com (USA only). For other regions, use www.hp.com and select your language. Then select the shopping section.
www.hp.com
Printed in U.S.A. 2004

invent


- HP SCANJET 5590 DIGITAL FLATBED SCANNER
- COPYRIGHT AND LICENSE
- TRADEMARK CREDITS
- CONTENTS
- HOW TO USE THE SCANNER
- HOW TO SCAN FROM THE AUTOMATIC DOCUMENT FEEDER
- HOW TO SCAN SLIDES AND NEGATIVES
- CARE AND MAINTENANCE
- TROUBLESHOOTING
- PRODUCT SUPPORT
- REGULATORY INFORMATION AND PRODUCT SPECIFICATIONS
- INSTALL THE SCANNING SOFTWARE
- FRONT PANEL AND ACCESSORIES OVERVIEW
- AUTOMATIC DOCUMENT FEEDER (ADF)
- TRANSPARENT MATERIALS ADAPTER (TMA)
- SCANNING OVERVIEW
- SCAN FROM THE SCANNER FRONT-PANEL BUTTONS
- SCAN FROM THE HP DIRECTOR
- SCAN FROM OTHER SOFTWARE PROGRAMS
- SELECT ORIGINAL TYPES
- SCAN DOCUMENTS
- SCAN PICTURES
- PREVIEW A SCANNED IMAGE
- SAVE A DOCUMENT TO A DISK OR CD
- E-MAIL A SCANNED DOCUMENT OR PICTURE
- PRINT COPIES
- CANCEL A SCAN
- USE THE POWER SAVE BUTTON
- CHANGE SETTINGS
- SCAN TEXT FOR EDITING
- CHOOSE ACCEPTABLE MEDIA FOR THE ADF
- LOAD ORIGINALS IN THE ADF
- SCAN TWO-SIDED DOCUMENTS FROM THE ADF
- MAKE COPIES FROM THE ADF
- TIPS FOR SCANNING TRANSPARENT ITEMS
- SET UP THE TMA
- TMA COMPONENTS
- TO CONNECT THE TMA CABLE TO ITS PORT ON THE SCANNER
- SCAN SLIDES OR NEGATIVES
- TO START THE SCANNING PROCESS
- TO LOAD SLIDES INTO THE TMA LIGHT SOURCE
- TO LOAD NEGATIVES INTO THE TMA LIGHT SOURCE
- TO COMPLETE THE SCANNING PROCESS
- CLEAN THE SCANNER GLASS
- CLEAN THE TMA
- CLEAN AND MAINTAIN THE ADF
- RUN THE CLEANING CLOTH THROUGH THE ADF
- CLEAN THE ADF WINDOW
- CLEAN THE FEED-ROLLER ASSEMBLY MANUALLY
- MAINTAIN THE ADF
- ORDER MAINTENANCE SUPPLIES
- SCANNER INSTALLATION OR SETUP PROBLEMS
- CHECK YOUR COMPUTER
- USE ADMINISTRATIVE PRIVILEGES
- USE A VALID FOLDER
- CHECK THE CABLES
- SCANNER INITIALIZATION OR HARDWARE PROBLEMS
- RESET THE SCANNER
- SCANNER HAS STOPPED WORKING PROPERLY
- ADDITIONAL TROUBLESHOOTING INFORMATION
- ACCESSIBILITY WEBSITE
- HP SCANJET WEBSITE
- SUPPORT PROCESS
- PHONE SUPPORT IN THE UNITED STATES
- PHONE SUPPORT IN EUROPE, MIDDLE EAST, AND AFRICA
- OTHER PHONE SUPPORT WORLDWIDE
- AUTOMATIC DOCUMENT FEEDER (ADF) SPECIFICATIONS
- ENVIRONMENTAL SPECIFICATIONS FOR THE SCANNER, ADF, AND TMA
- PURCHASE ACCESSORIES
Brand : HP
Model : Scanjet 5500P
Category : Scanner