
MX10EUBK - Vacuum Cleaner MIDEA - Free user manual and instructions
Find the device manual for free MX10EUBK MIDEA in PDF.


| Product Type | Cordless Floor Cleaner (Wet & Dry Vacuum) |
| Model | MX10EUBK |
| Brand | Midea |
| Rated Voltage | 220-240 V~ |
| Charging Time | Approximately 4 hours |
| Battery Type | Rechargeable lithium-ion (built-in) |
| Clean Water Tank Capacity | Not specified (approx. 0.5 L based on typical design) |
| Wastewater Tank Capacity | Not specified (approx. 0.4 L based on typical design) |
| Operating Modes | Auto, Quick Suction, Turbo |
| Self-Cleaning Function | Yes (automatic cleaning of roller brush and internal pipe) |
| Drying Function | Yes (warm air drying of roller brush, approx. 50 min) |
| Floor Compatibility | Hard floors (waxed, stone, marble, wood, tile, etc.) |
| Suction Power | Not specified (typical cordless: ~10-20 kPa) |
| Noise Level | Not specified (typical: ~70-80 dB) |
| Weight | Not specified (approx. 4-5 kg based on similar models) |
| Dimensions (H x W x D) | Not specified (approx. 110 x 25 x 20 cm) |
| Accessories Included | Charging base, cleaning brush (with blade), roller brush, filter, cleaning liquid sample |
| Safety Certifications | CE, WEEE compliant |
| Warranty | Not specified (typically 2 years in EU) |
| Country of Origin | China (Midea brand) |
Frequently Asked Questions - MX10EUBK MIDEA
User questions about MX10EUBK MIDEA
0 question about this device. Answer the ones you know or ask your own.
Ask a new question about this device
Download the instructions for your Vacuum Cleaner in PDF format for free! Find your manual MX10EUBK - MIDEA and take your electronic device back in hand. On this page are published all the documents necessary for the use of your device. MX10EUBK by MIDEA.
USER MANUAL MX10EUBK MIDEA
natural_image
Exterior view of a modern white and black vacuum cleaner (no visible text or symbols)Cordless Floor Cleaner
USER MANUAL
MX10EUWH
EN English
DE Deutsch
SE Swedish
NO Norwegian
DK Denmark
LANGUAGES
Thank you for choosing Midea! Please read this user manual carefully before starting to use this new appliance. Ensure that you familiarize yourself with the operating instructions and gain a better understanding of the product features and functions in a safe manner.
CONTENTS
INDEX 01
SAFETY INSTRUCTIONS 02
PRODUCT OVERVIEW 06
PRODUCT INSTALLATION 10
OPERATION INSTRUCTIONS 12
CLEANING AND MAINTENANCE 14
TROUBLESHOOTING 18
TRADEMARKS, COPYRIGHTS AND LEGAL STATEMENT 20
DISPOSAL AND RECYCLING 21
DATA PROTECTION NOTICE 22
SAFETY INSTRUCTIONS
Intended Use
The following safety guidelines are intended to prevent unforeseen risks or damage from unsafe or incorrect operation of the appliance. Please check the packaging and appliance on arrival to make sure everything is intact to ensure safe operation. If you find any damage, please contact the retailer or dealer. Please note modifications or alterations to the appliance are not allowed for your safety concern. Unintended use may cause hazards and loss of warranty claims.
EN
Explanation of Symbols

Danger
This symbol indicates that there are dangers to the life and health of persons due to extremely flammable gas.

Warning of electrical voltage
This symbol indicates that there is a danger to life and health of persons due to voltage.

Warning
The signal word indicates a hazard with a medium level of risk which, if not avoided, may result in death or serious injury.

Caution
The signal word indicates a hazard with a low degree of risk which, if not avoided, may result in minor or moderate injury.

Attention
The signal word indicates important information (e.g. damage to property), but not danger.

Observe instructions
This symbol indicates that a service technician should only operate and maintain this appliance in accordance with the operating instructions.
Read these operating instructions carefully and attentively before using/commissioning the unit and keep them in the immediate vicinity of the installation site or unit for later use!
Safety Instructions
- This product is suitable for hard floors in the indoor environment, including waxed floors, stone floors, rubber floors, marble floors, granite floors, terrazzo floors, solid wood floors, composite floors, bamboo floors, as well as glazed tiles, ceramic facing tiles and other flat ground. It may not achieve the best results if the product is used on uneven ground surface.
- Do not use this product near or on the surface of flammable and explosive objects, which may cause fire and explosion.
- Do not use this product near a working fireplace or heater to prevent deformation of the machine casing.
- Do not use it to clean high-temperature substances (unextinguished cigarette butts, matches or hot ash, etc.), ultra-fine substances (such as lime, cement, wood chips, gypsum powder, ashes, charcoal, etc.), dangerous substances (such as solvents, descaling agents, etc.), chemical substances (such as acidic substances, detergents, etc.) and other substances with uncertain physical properties.
- Do not use this floor cleaner to absorb detergent, kerosene, gasoline, alcohol, paint or perfume, or else it may cause short-circuit, fire or explosion.
- Do not use this floor cleaner to absorb toner used in laser printers and copiers, or else it may cause fire or explosion.
- Do not use this floor cleaner to absorb sharp or large objects, such as glass shards, small toys, pins, paper clips, stones, plaster and large pieces of paper, or else it may block up and damage the machine.
- Do not use this floor cleaner to absorb any burning or smoking objects, such as soot from the unextinguished heat source, burning cigarette butts or matches.
- This product can't be used to clean stains of strong grease, strong viscosity, or strong dyeing properties such as shoe polish, paint, and pigments.
- Do not touch the plug or any live part of the product with wet hands to avoid the risk of electric shock.
- Stop using it if the plug is damaged. Please call our service personnel for replacement in order to avoid hazards.
- Please keep the airflow channels and moving parts of this product away from long hair, loose clothing, fingers and other parts of the body. Do not point the suction tube, accessory tip or tool to the eyes or ears, or put them in the mouth.
- Please use the cleaning agent produced by our company and the manufacturer approved by us.
- Do not add other solutions to avoid generating toxic and harmful gases. If electric leakage, motor over-temperature, abnormal noise, peculiar smell or weak suction is found during use, stop using it immediately and call our service personnel.
- After using the machine, please clean the wastewater tank in time to avoid peculiar smell, and keep the ventilation path unobstructed, so as to avoid obstruction, or else it will cause the suction power to drop, the motor to heat up, and will affect the service life of the floor cleaner.
- After using the machine, please store it in a dry place. A humid place will affect the insulation and service life of the appliance.
- Do not soak or rinse the floor cleaner or floor brush in water.
Safety Instructions
- This appliance can be used by children aged from 8 years and above and persons with reduced physical, sensory or mental capabilities or lack of experience and knowledge if they have been given supervision or instruction concerning use of the appliance in a safe way and understand the hazards involved.
- Cleaning and user maintenance shall not be made by children without supervision.
• Children should not play with the appliance. - Please check the suction nozzle regularly. If there is a blockage, please clear it in time to avoid decrease in suction and affecting the performance of the machine.
Turn off the power before replacing the brush. - In the following situations, do not use the machine, contact to our customer service center for inspection and repair in time:
- Obvious damage or abnormal operation caused by drop;
- Power cord is damaged.
- Do not disassemble the enclosed machine without permission. There are no user serviceable parts. Do not try to change the performance of the machine, or else it will cause danger.
- Using a voltage that does not match the specifications will cause damage to the product and more likely to cause harm to the user. The correct rated voltage is marked on the nameplate.
- When cleaning the stairs, be extra cautious to prevent falling.
- Do not shake or impact the machine up and down to prevent wastewater from flowing into the motor.
- When the motor is working, do not lift or carry the appliance up and down, and do not put the machine on its side to prevent the wastewater from entering the motor.
- To prevent tip-over, place the machine against the wall after use.
- Do not use the floor cleaner before the clean water tank and wastewater tank are installed properly.
- Do not place any small objects in the outlet or block the outlet. Remove any small objects that may interfere with the flow of air through the outlet to prevent overheating of the machine.
- Do not wet the machine body, or it may cause damage and fire due to short circuit.
- This is only allow to use the docking station for charge the battery.
- The plug must be removed from the socket-outlet before cleaning or maintaining the appliance.
- All the technologies and other data in this manual are obtained by our company or the designated third party testing company, and we reserve the right of final interpretation.
Use and Precautions of washer detergent
- Mix and clean according to instructions. It is recommended to use cleaning liquid produced by our company or manufacturers approved by our company, which do not contain acid, alkali solutions or substances harmful to the environment.
- If a large amount of cleaning liquid is added, more foam will be generated when used, which may infiltrate into the motor and cause danger.
- The cleaning liquid should be kept out of reach of children. If the cleaning liquid accidentally gets into eyes, rinse thoroughly with clean water; in case of accidental ingestion, seek medical treatment immediately. Follow local environmental protection regulations when handling wastewater and cleaning liquid.
READ CAREFULLY AND KEEP FOR FUTURE REFERENCE
PRODUCT OVERVIEW
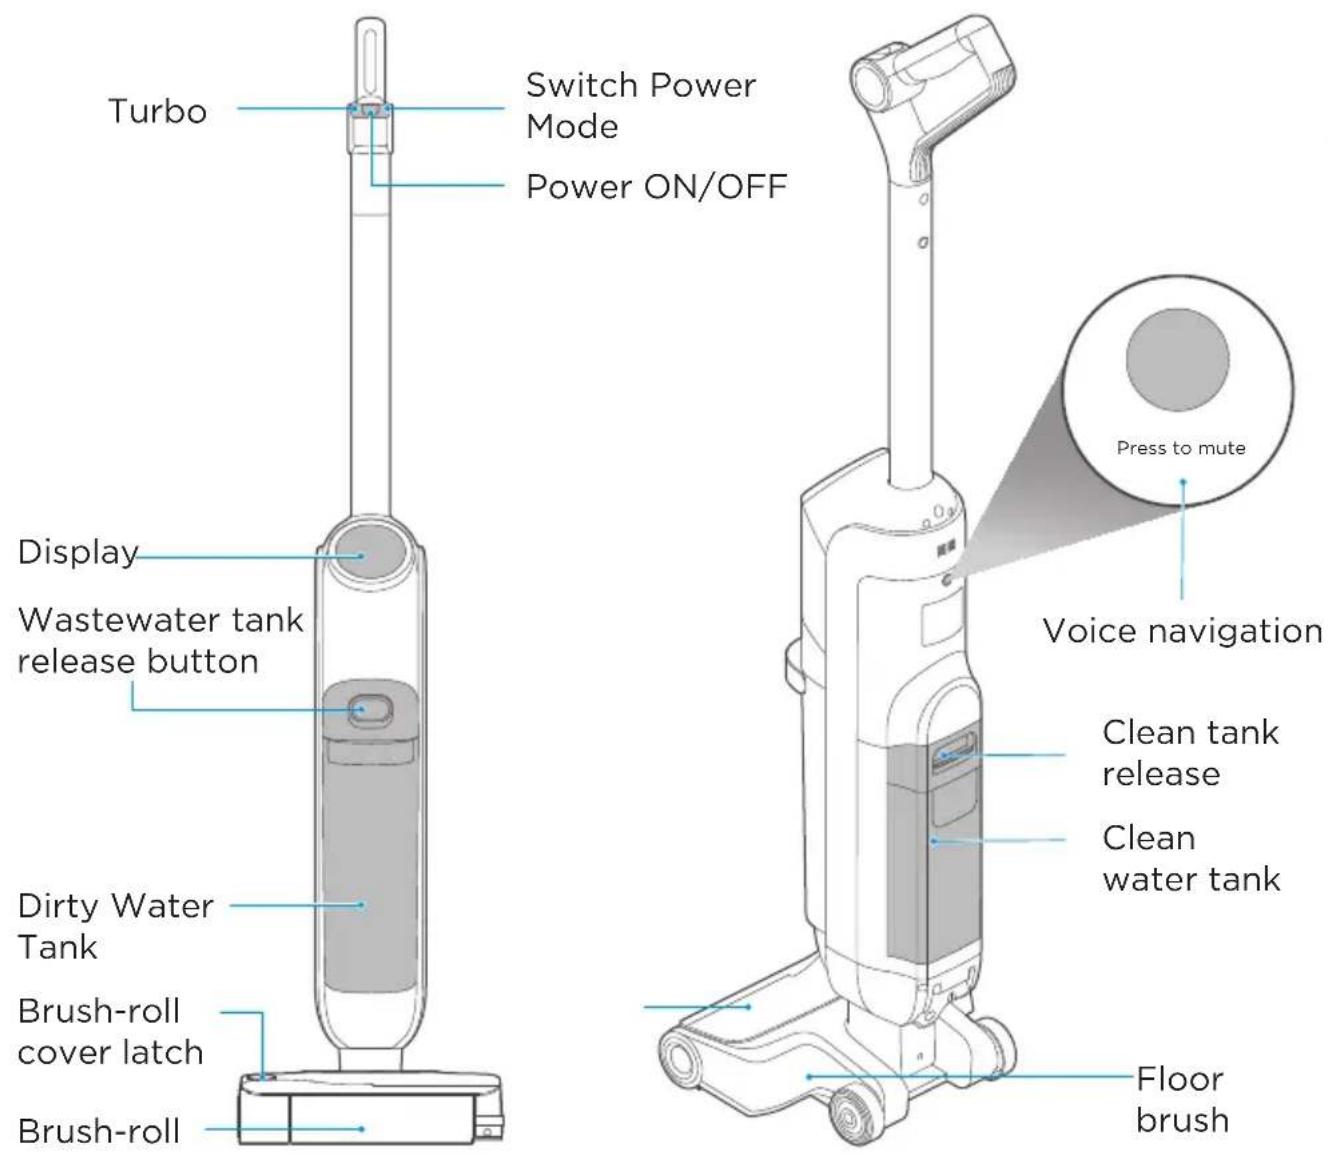
Product introduction
List of Accessories
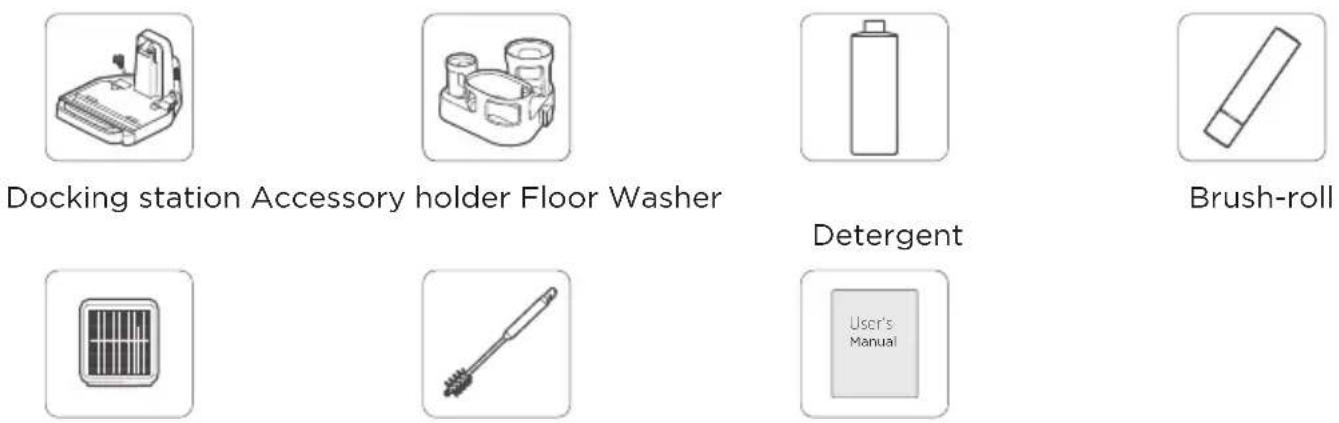
Filter Cleaning brush User's Manual
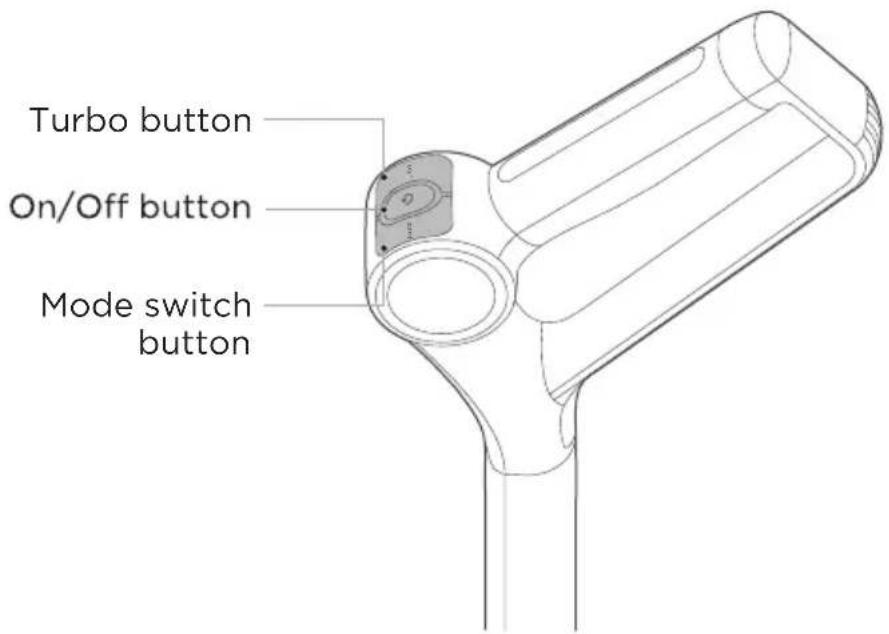
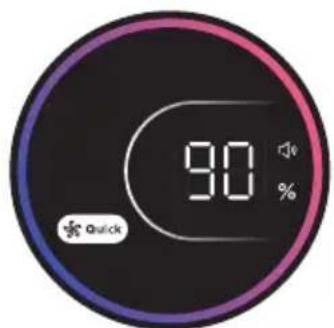
Mode switch button
- Auto mode: The machine dispenses water onto the brush-roll to wet and clean the floor.
- Quick suction mode: The machine ceases water discharge and efficiently vacuums dry debris or residual water.
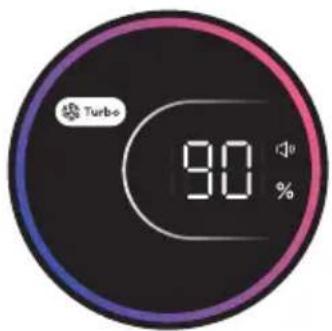
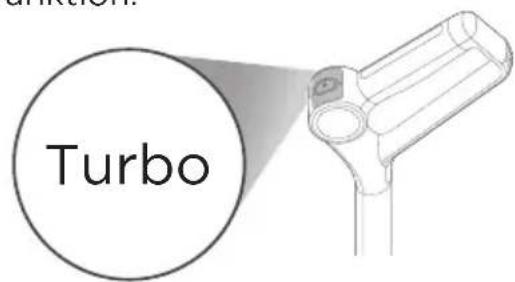
Turbo button2.1.
- Turbo mode: The brush-roll speed and water flow are increased to effectively remove heavy stains from the floor.
Docking Station
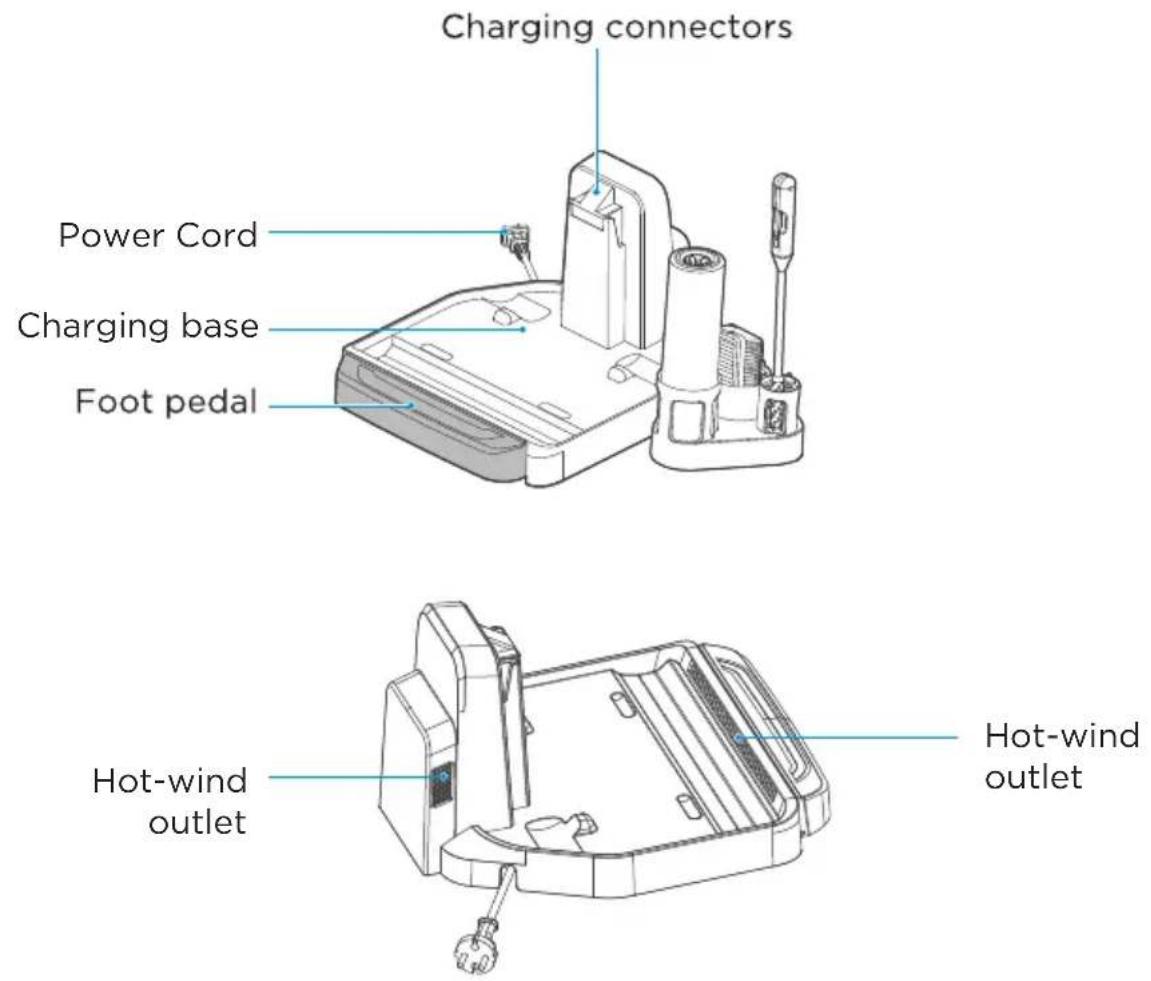
• After use, put the machine into the charging base for charging, self-cleaning and drying.
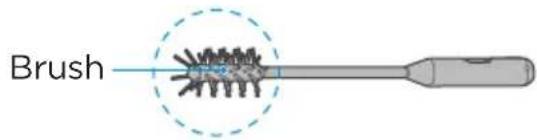
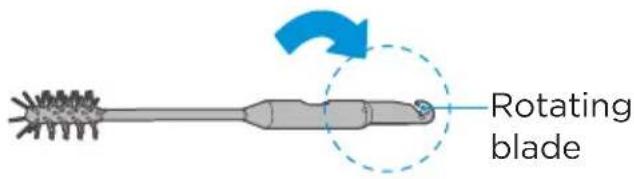
Cleaning brush
• One end is a brush to clean the stubborn dirt attached to the wastewater tank and the pipe under the ventilation pipe;
EN
- The other end is a rotating blade to clean the hair wrapped on the roller brush.
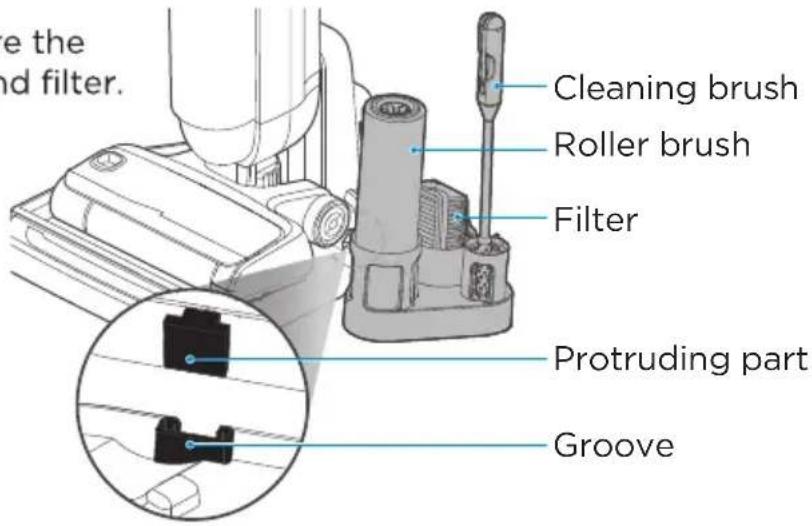
Accessory holder
- Insert the protruding part of the accessory holder into the groove of the air-drying base;
- This holder is designed to store the roller brush, cleaning brush, and filter.
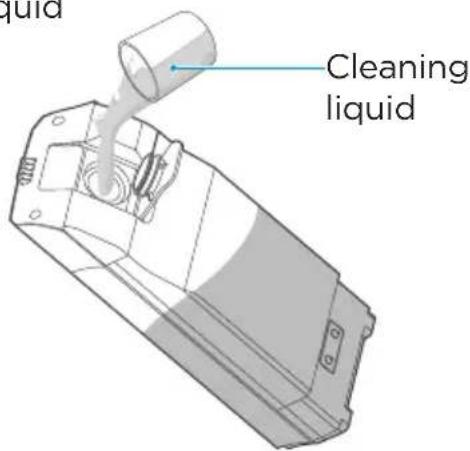
Cleaning liquid
- Pay attention to the proportion of cleaning liquid added;
- Use the cleaning liquid provided with the product.
PRODUCT INSTALLATION
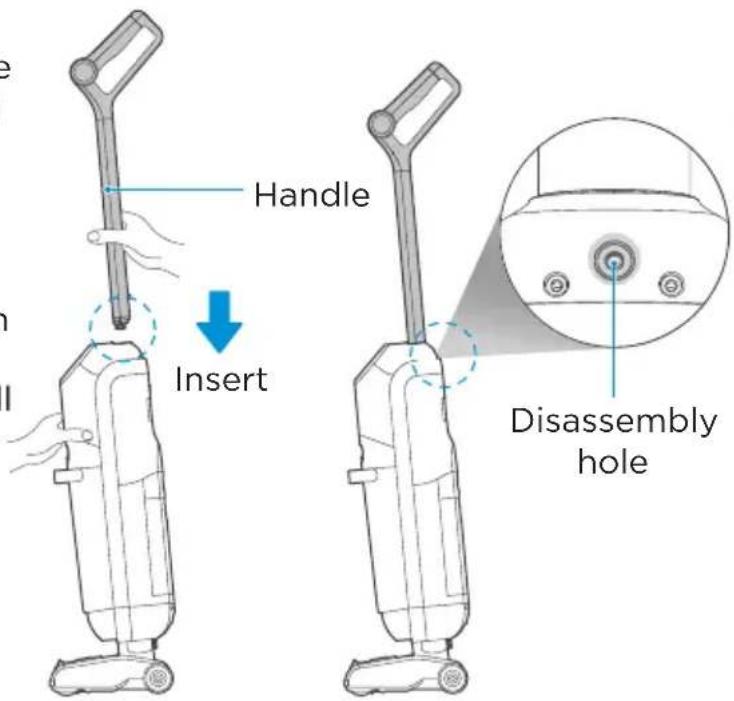
Handle Installation and Removal
Installation
Insert the end of the handle into the port of the main unit vertically until you hear a click, indicating successful installation.
Removal
Remove the rubber from the hole in the back, insert a screwdriver or other tools into the hole, and pull the handle upward to detach it.
EN
Charging Battery

Attention
Charge the product before the first use.
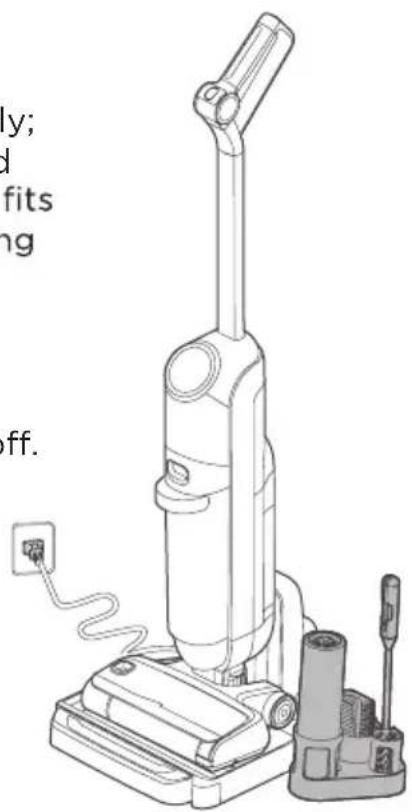
- Connect the power plug to 220-240V\~ power supply;
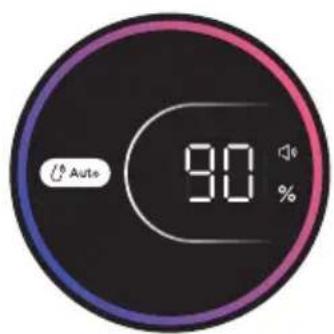
- Put the machine upright into the charging base, and make sure that the bottom of the body completely fits into the charging base. You will hear a prompt saying "start charging," and the screen will display the charging quantity.
- It takes about 4 hours to fully charge the machine. When the battery is fully charged, the screen will turn off and the machine will automatically power off.
Filling clean water tank

Attention
Fill water only to the clean water tank.
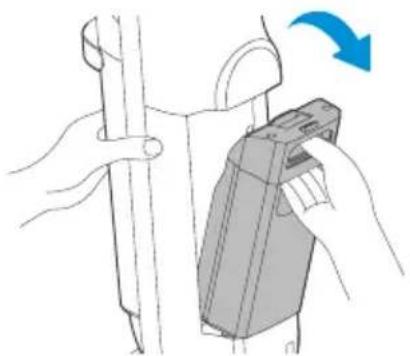
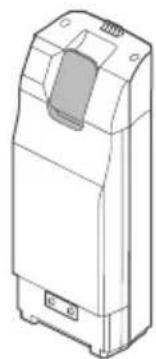
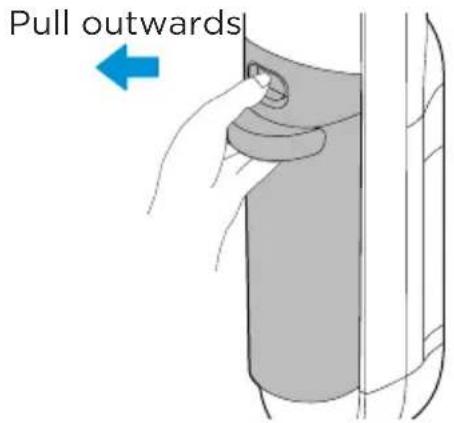
- Press the clean water tank button with the thumb and pull outward to remove the clean water tank;
natural_image
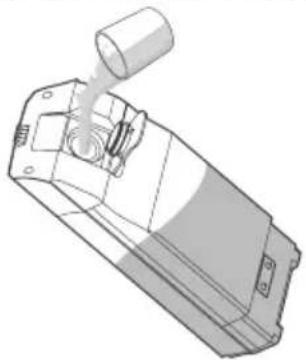
Illustration of a hand holding a vertical tube and a device with a blue arrow indicating rotation (no text or symbols)- If deep cleaning is required, pour cleaning liquid into the tank following the instructions on the bottle;
natural_image
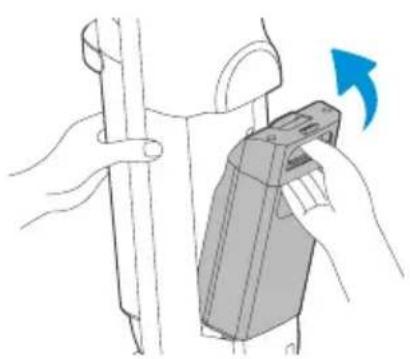
Technical line drawing of a mechanical component with a cylindrical top and internal structure (no text or symbols)- Reinstall the clean water tank onto the body. Ensure a successful installation by listening for a click.
natural_image
Illustration of a hand holding a vertical tube and a device with an arrow indicating rotation (no text or symbols)Open the top cover of the clean water tank and fill it with tap water;
natural_image
Technical line drawing of a mechanical device with handle and base plate (no text or symbols)Tighten the cover of the clean water tank;
natural_image
Line drawing of a mechanical device with a handle and mounting feet (no text or symbols)When the clean water tank is low on water, a voice prompt will alert you. In this case, no water is sprayed in auto mode, but the quick mode can be used normally.
natural_image
Line drawing of a vacuum cleaner with handle and base (no text or symbols)
Please add water to clean water tank
OPERATION INSTRUCTIONS
Turning on and Cleaning
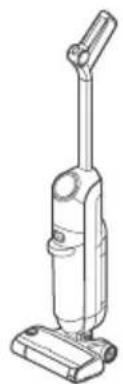
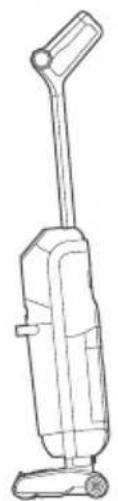
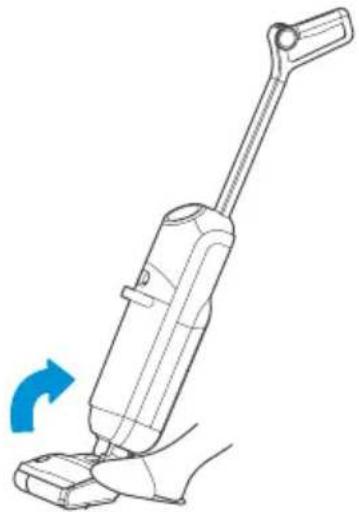
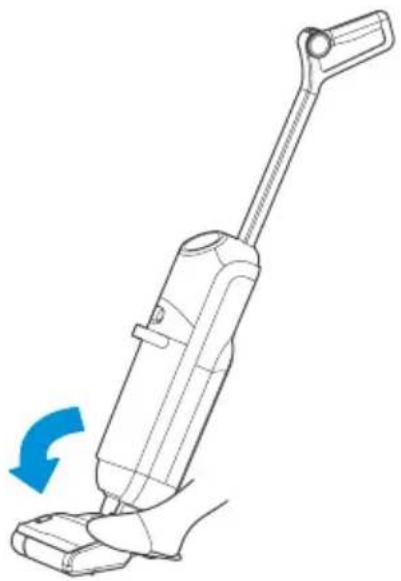
- Step on the floor brush and pull the handle, and the machine will enter standby mode.
natural_image
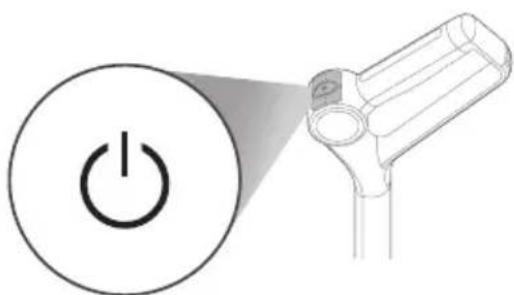
Line drawing of a vacuum cleaner with handle and wheels (no text or symbols)- Press the On/Off button to turn on/off the machine.
natural_image
Line drawing of a vacuum cleaner with a blue arrow indicating clockwise motion (no text or symbols)- It enters auto mode after turning on; you can press the Mode button to switch to quick suction mode.
natural_image
Diagram showing a power button icon next to a handheld device (no text or symbols)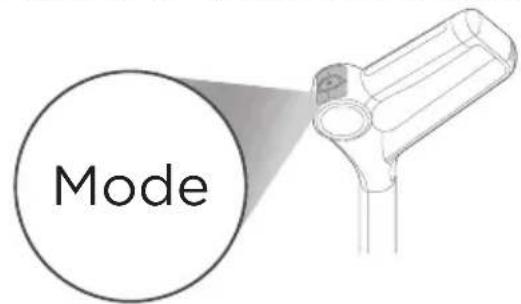
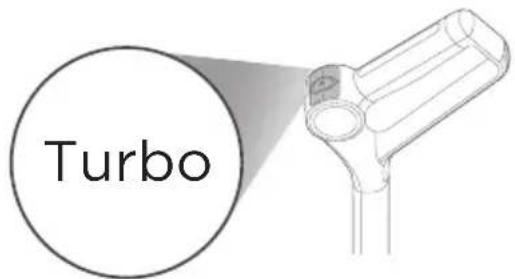
- Press the Trubo button to enable or disable this function.

Attention
After using the machine, it is recommended to place it vertically on the specially designed charging base.
Upright Pause Function
While in operation, you can step on the floor brush to erect the body, the machine will stop working and enter standby mode; it will automatically turn off after 3 minutes of standby.
EN
natural_image
Line drawing of a vacuum cleaner with a blue arrow indicating clockwise motion (no text or symbols)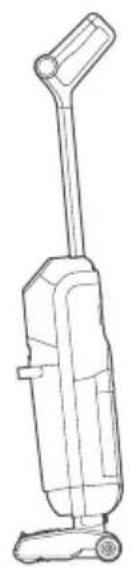
natural_image
Line drawing of a vacuum cleaner (no text or symbols)Self-cleaning + Drying Function
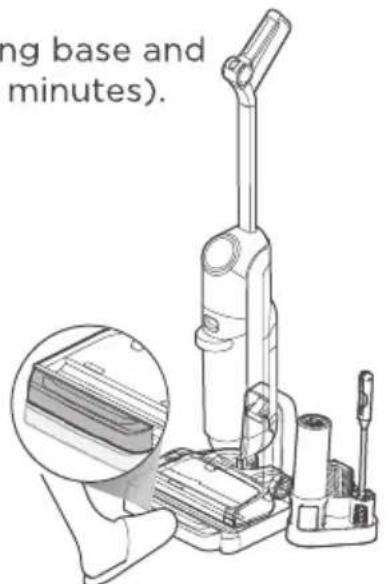
Put the machine into the charging base, ensure that it is in the charging state, step on the pedal of the charging base with your foot, and start self-cleaning; during the process, if you need to stop the self-cleaning/drying function, step on the pedal for 3 seconds or press the On/Off button; after self-cleaning, clean the wastewater tank in time; if there are residual stains on the base, clean them promptly.
Self-cleaning: the machine automatically cleans the roller brush and body pipe (takes about 2 minutes).
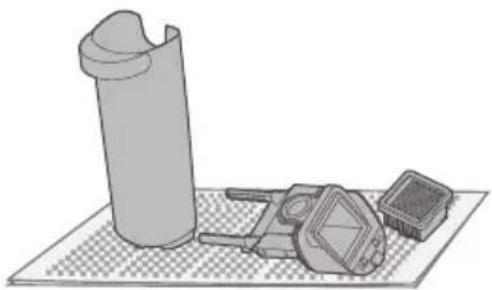
Drying: Allow warm air to blow on the charging base and properly dry the roller brush (takes about 50 minutes).
CLEANING AND MAINTENANCE
Waste water detect alarm

Attention
- After cleaning, it is recommended to place the machine upright in the charging base; do not place the machine in places with direct sunlight or moisture;
- To maintain optimal performance, it is recommended to regularly maintain its parts.
- Before cleaning, please disconnect the power supply to stop the machine;
-
Scrub with water or neutral detergent, wring out the cleaning cloth before scrubbing to avoid water leaking into the electrical components.
-
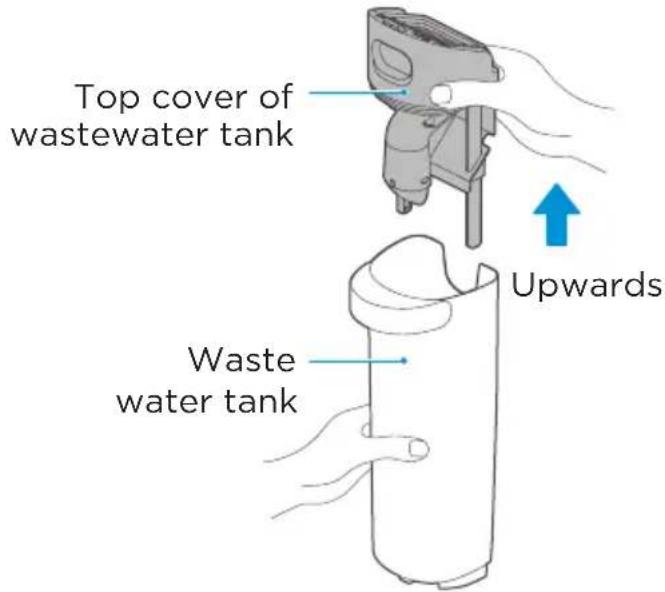
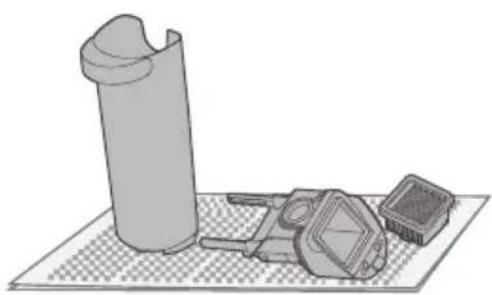
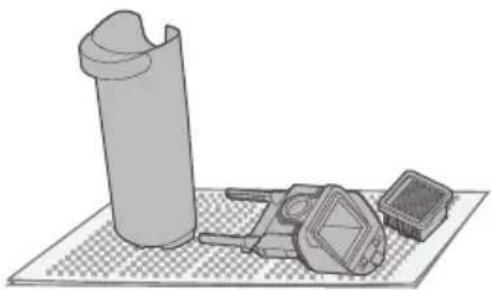
Press the button of wastewater tank with your thumb and pull outward to remove the tank.
Hold the tank with one hand and pull out the top cover of the tank with the other hand.
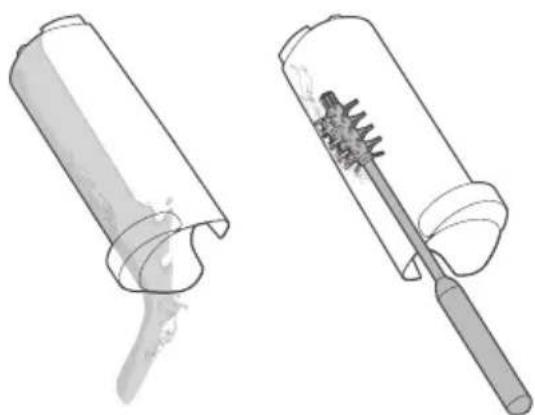
- As shown in the figure, pour out the wastewater from the side of the tank. If there is stubborn dirt on the inner wall of the tank, please clean it directly with a cleaning brush.
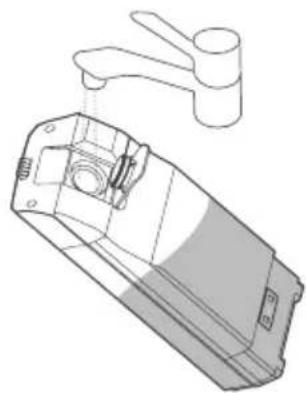
Take out the filter from the top cover of the wastewater tank and check whether there is any foreign matter stuck on the cover.
natural_image
Illustration of two cleaning tools: a cylindrical brush and a brush with a textured brush (no text or symbols)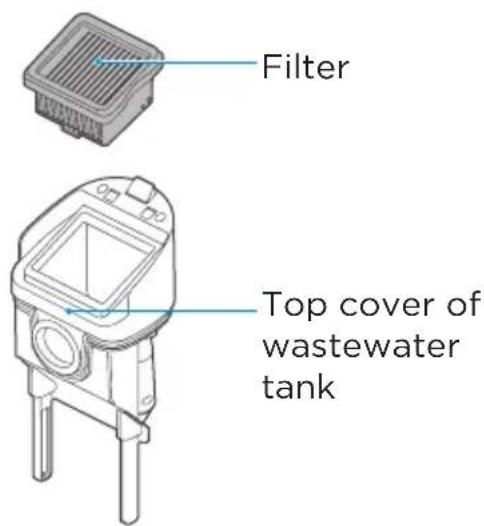
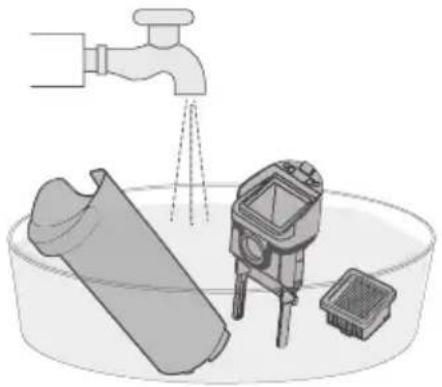
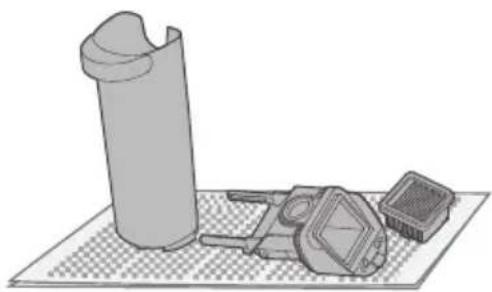
- Wash with clean water after removal, thoroughly dry it, and put it back in its original position.
EN
natural_image
Illustration of a faucet spraying water into a basin with a plastic bag and a small electronic device (no text or symbols)Wash
natural_image
3D rendered mechanical components including a cylindrical part, a remote control unit, and a small rectangular component on a checkered mat (no text or symbols)Dry
- Press the following elastic buckles on both sides to remove the air duct and rinse it with water; install as it was after rinsing.
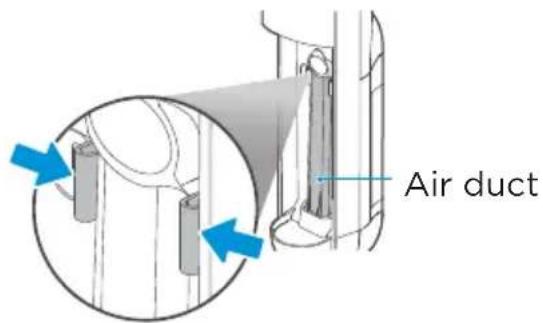
Press to remove
Install the wastewater tank back onto the machine until you hear a click sound. It is recommended to hold the body with another hand when installing the wastewater tank to avoid tipping over.
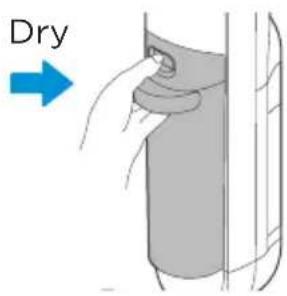

Attention
- It is recommended that after each use, the roller brush and cover should be cleaned and dried in time;
-
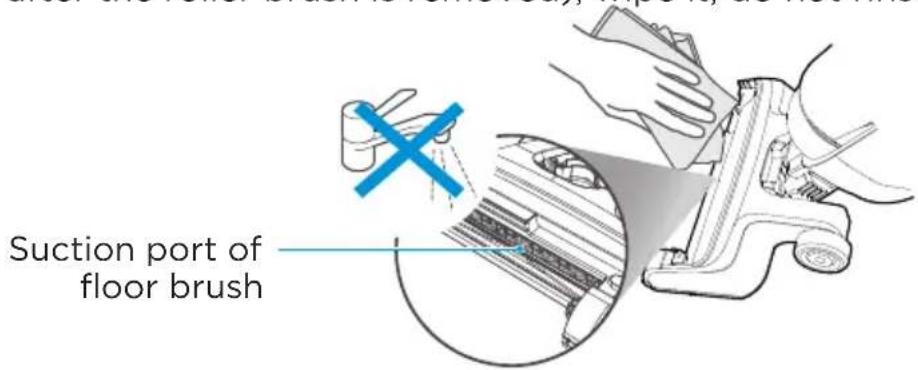
If residual stains are found on the suction surface of the floor brush, wipe it with a wet cloth. Do not rinse it with water.
-
- Press the latch as shown, and remove the cover and the roller brush;
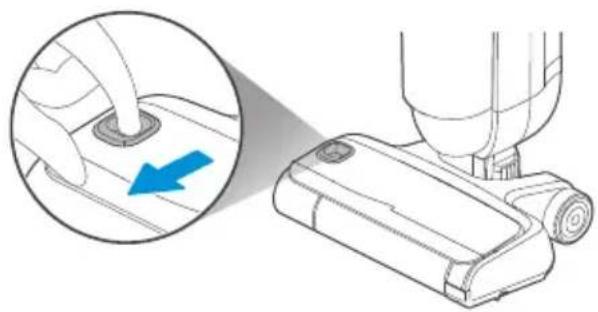
natural_image
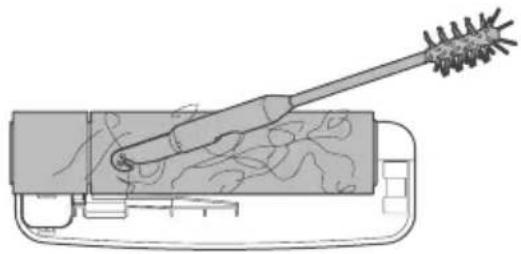
Illustration showing a hand inserting a cable into a device, with a blue arrow indicating the cable's direction (no text or symbols present)Remove the cover and the roller brush, open the rotating blade of the cleaning brush, and remove hair and other entanglements from the roller brush;
natural_image
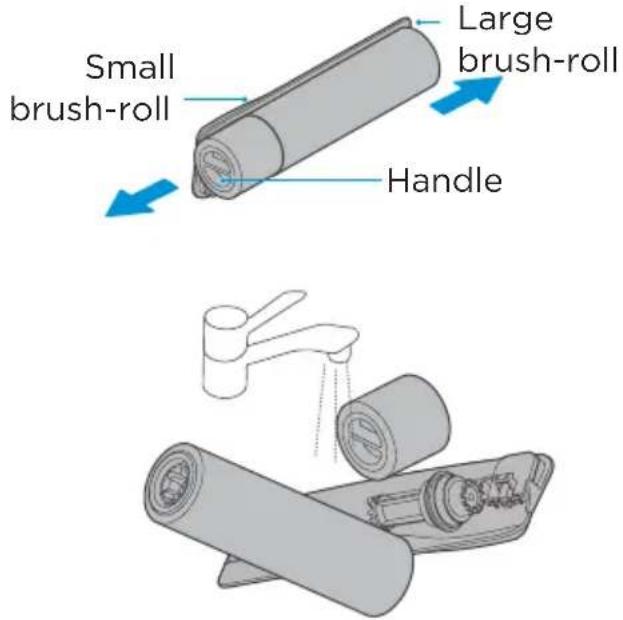
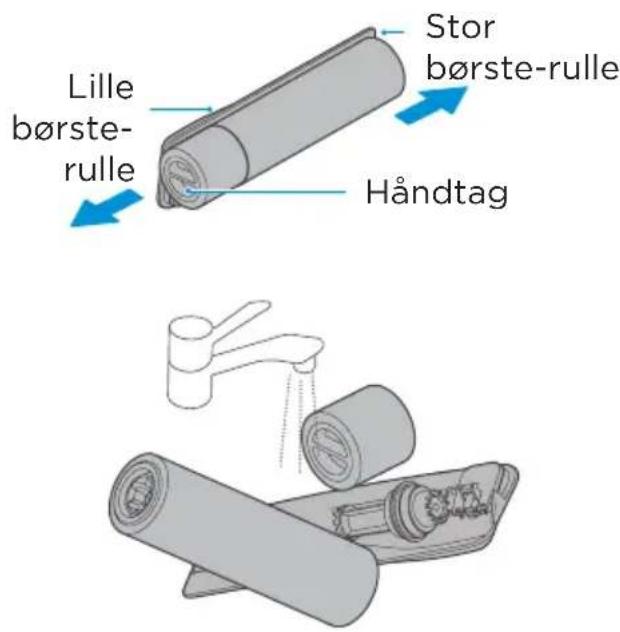
Diagram of a handheld device with a brush and internal components (no text or symbols)- 4 Remove the small roller brush and large roller brush in the direction shown in the figure. Rinse the roller brushes and cover with clean water;
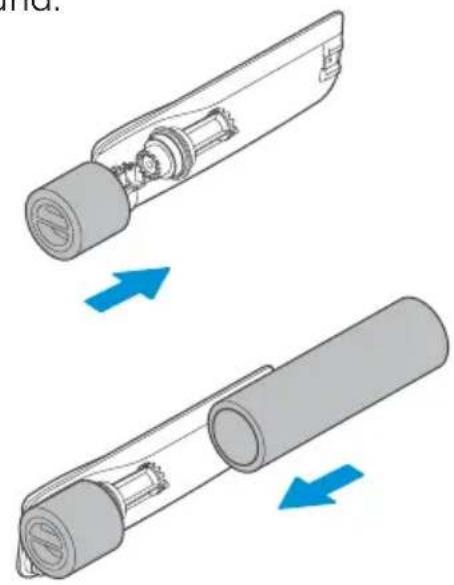
After cleaning, install the small and large roller brushes in turn according to the direction shown in the figure. The installation is successful when you hear a click sound.
natural_image
Diagram showing two mechanical components with blue arrows indicating motion, no text or symbols present- If residual stains are found in the suction port of the floor brush (exposed part after the roller brush is removed), wipe it; do not rinse with water;
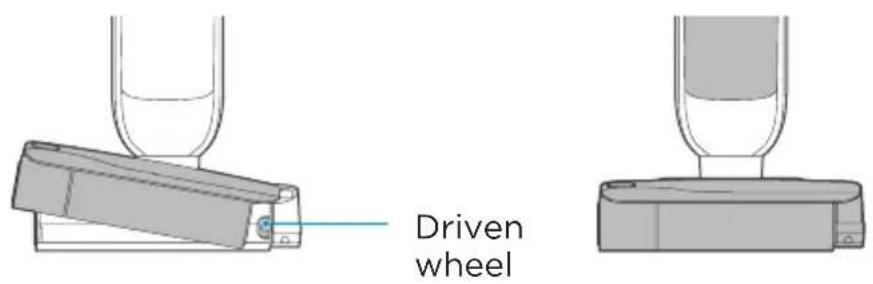
- After cleaning, align the cover of the roller brush and one end of the roller brush with the driven wheel of the floor brush motor. Then, align the latch of the cover of the roller brush with the latch slot of the cover. The installation is successful when you hear a click sound.
TROUBLESHOOTING
Please check the following table in case of any abnormal conditions when using the product.
| Possible cause SolutionProblem | ||
| The floor cleaner does not work | ·The roller brush is entangled by hair or stuck by foreign objects | Remove the roller brush to clean and reinstall |
| ·Wastewater tank is full Clean the wastewater tank | ||
| ·Water shortage in clean water tank | Add water to clean water tank | |
| ·There is garbage blockage in the pipe | Clean the pipes under the wastewater tank | |
| ·Low battery voltage | Charge the device | |
| Suction power is weakened | ·Roller brush, roller brush cover, or wastewater tank is not installed in place | Remove and reinstall them |
| ·Roller brush is entangled by hair | Clean the roller brush | |
| ·There is hair accumulation on the roller shaft | Remove the roller brush to clean the shaft | |
| ·Floor brush suction or pipe blockage | Wipe the floor brush suction and clean the pipe under the air duct | |
| ·Wastewater tank filter is dirty | Clean the filter and dry thoroughly before installation | |
| ·Wastewater tank filter isn't installed | Install filter | |
| Noise when the fan is running | ·Foreign matter in the suction port of the floor brush or in the pipe | Wipe the suction port and clean the pipe under the air duct |
| ·Wastewater tank is full | Empty and clean the wastewater tank | |
| ·Air duct isn't installed | Install air duct | |
EN
EN
| Possible cause SolutionProblem | ||
| Floor brush doesn’t spray water | Water shortage in clean water tank | Add water to the clean water tank |
| Clean water tank is not installed properly | Reinstall the clean water tank | |
| Air outlet leaks water | Too much water in the wastewater tank | Reduce the water in the wastewater tank |
| Wastewater tank filter isn’t installed | Install filter | |
| Wastewater tank filter is not cleaned and dried after use | Clean the filter and dry thoroughly before installation | |
| Water leakage at the bottom of floor brush | Wastewater tank or filter isn’t installed | Install wastewater tank and filter |
TRADEMARKS, COPYRIGHTS AND LEGAL STATEMENT
Midea logo, word marks, trade name, trade dress and all versions thereof are valuable assets of Midea Group and/or its affiliates (“Midea”), to which Midea owns trademarks, copyrights and other intellectual property rights, and all goodwill derived from using any part of an Midea trademark. Use of Midea trademark for commercial purposes without the prior written consent of Midea may constitute trademark infringement or unfair competition in violation of relevant laws.
This manual is created by Midea and Midea reserves all copyrights thereof. No entity or individual may use, duplicate, modify, distribute in whole or in part this manual, or bundle or sell with other products without the prior written consent of Midea.
All the described functions and instructions were up to date at the time of printing this manual. However, the actual product may vary due to improved functions and designs.
DISPOSAL AND RECYCLING
Important instructions for environment
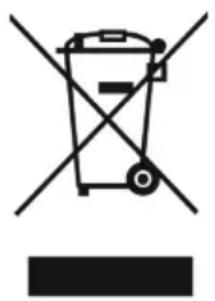
Compliance with the WEEE Directive and Disposing of the Waster Product: This product complies with EU WEEE Directive (2012/19/EU). This product bears a classification symbol for waster electrical and electronic equipment (WEEE).
This symbol indicates that this product shall not be disposed with other household wastes at the end of its service life. Used device must be returned to official collection point for recycling of electrical electronic devices. To find these collection systems please contact to your local authorities or retailer where the product was purchased. Each household performs important role in recovering and recycling of old appliance. Appropriate disposal of used appliance helps prevent potential negative consequences for the environment and human health.
natural_image
Symbol of a trash bin crossed with no text or numbers, representing discarded waste (no text present)Compliance with RoHS Directive
The product you have purchased complies with EU RoHS Directive (2011/65/EU). It does not contain harmful and prohibited materials specified in the Directive.
Package information
Packaging materials of the product are manufactured from recyclable materials in accordance with our National Environment Regulations. Do not dispose of the packaging materials together with the domestic or other wastes. Take them to the packaging material collection points designated by the local authorities.

natural_image
Recycling symbol with three chasing arrows forming a triangle (no text or labels)DATA PROTECTION NOTICE
For the provision of the services agreed with the customer,
we agree to comply without restriction with all stipulations of applicable data protection law, in line with agreed countries within which services to the customer will be delivered, as well as, where applicable, the EU General Data Protection Regulation (GDPR).
Generally, our data processing is to fulfil our obligation under contract with you and for product safety reasons, to safeguard your rights in connection with warranty and product registration questions. In some cases, but only if appropriate data protection is ensured, personal data might be transferred to recipients located outside of the European Economic Area.
Further information are provided on request. You can contact our Data Protection Officer via MideaDPO@midea.com. To exercise your rights such as right to object your personal date being processed for direct marketing purposes, please contact us via MideaDPO@midea.com. To find further information, please follow the QR Code.
natural_image
Line drawing of a vacuum cleaner with attached circuit board and power outlet (no text or symbols)
Achtung
natural_image
Illustration of a hand holding a vertical tube and a device with a blue arrow indicating rotation (no text or symbols)natural_image
Technical line drawing of a mechanical device with handle and base plate (no text or symbols)DE
natural_image
Technical line drawing of a mechanical component with a cylindrical part inserted, showing internal components and flow direction (no text or symbols)natural_image
Line drawing of a mechanical device with a handle and mounting base (no text or symbols)natural_image
Illustration of a hand holding a vertical object with a blue arrow indicating direction (no text or symbols)
natural_image
Line drawing of a vacuum cleaner with handle and base (no text or symbols)
natural_image
Line drawing of a vacuum cleaner with handle and wheels (no text or symbols)natural_image
Line drawing of a hand holding a vacuum cleaner with a blue arrow indicating rotation (no text or symbols)natural_image
Diagram showing a power button icon next to a handheld device with a label (no text or symbols on the device itself)natural_image
Illustration of a hand holding a cylindrical device with a handle, showing a left-side arrow (no text or symbols)natural_image
Two technical illustrations of a spray gun, one showing internal components and the other showing a brush (no text or symbols present)natural_image
Illustration of a faucet spraying water onto a plastic bag, with a small electronic device and a small box nearby (no text or symbols)Waschen Trocknen
natural_image
3D rendered mechanical assembly with cylindrical component, housing, and base on a checkered grid surface (no text or symbols)DE
natural_image
Diagram showing a hand inserting a cable into a device, with a magnified inset highlighting the cable's direction (no text or symbols present)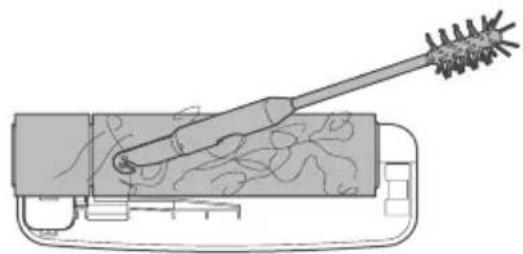
natural_image
Diagram of a handheld device with a brush and internal components, no text or symbols presentnatural_image
Two-step diagram showing a device being folded into a cylindrical component, with blue arrows indicating direction of movement (no text or symbols present)natural_image
Symbol of a trash bin crossed with no visible text or labelsDE
natural_image
Recycling symbol with three chasing arrows forming a triangle (no text or labels)DATENSCHUTZHINWEIS
INSTALLATION AV PRODUKTEN 10
BRUKSANVISNING 12
RENGÖRING OCH UNDERHÅLL 14
FELSÖKNING 18
VARUMÄRKEN, UPPHOVSRÄTT OCH RÄTTSLIGT MEDDELANDE 20
AVFALLSHANTERING OCH ÅTERVINNING 21
MEDDELANDE OM DATASKYDD 22
SÄKERHETSINSTRUKTIONER
Avsedd användning
2. Turboknapp
INSTALLATION AV PRODUKTEN
natural_image
Line drawing of a vacuum cleaner with attached circuit board and power outlet (no text or symbols)natural_image
Illustration of a hand holding a vertical tube and a device with a blue arrow indicating rotation (no text or symbols)natural_image
3D technical illustration of a mechanical component with a cylindrical part inserted, showing internal structure and mounting holes (no text or symbols)natural_image
Illustration of a hand holding a tool next to a device, with a blue arrow indicating direction (no text or symbols present)natural_image
Technical line drawing of a mechanical device with handle and base plate (no text or symbols)natural_image
Line drawing of a rectangular electronic device with a central slot and mounting base (no text or symbols)natural_image
Line drawing of a vacuum cleaner (no text or symbols)natural_image
Line drawing of a vacuum cleaner with handle and wheels (no text or symbols)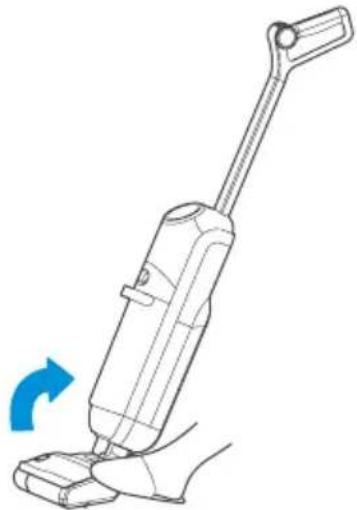
natural_image
Line drawing of a vacuum cleaner with a blue arrow indicating rotation (no text or symbols)natural_image
Diagram showing a power button icon and a handheld device with a light beam (no text or symbols)natural_image
Line drawing of a two-wheeled vacuum cleaner with a blue arrow indicating rotation (no text or symbols)natural_image
Technical line drawing of a vacuum cleaner with a magnified inset showing internal components (no text or symbols)RENGÖRING OCH UNDERHÅLL
natural_image
Two technical illustrations of a brush tool, one open and one with a brush (no text or symbols)natural_image
Illustration of a faucet spraying water onto a sink with a bag and a small appliance inside (no text or symbols)Tvätta
natural_image
3D rendered mechanical components including a cylindrical component and a rectangular housing on a checkered floor (no text or symbols)Torka
natural_image
Diagram showing a hand inserting a cable into a device, with a magnified inset highlighting the cable's direction (no text or symbols present)natural_image
Diagram of a tool interacting with a device, showing internal wiring and a brush (no text or symbols)natural_image
Diagram showing two mechanical components with blue arrows indicating motion, no text or symbols presentnatural_image
Symbol of a trash bin crossed with no text or numbers, representing waste sorting or disposal (no text present)natural_image
Recycling symbol with four chasing arrows forming a triangle (no text or labels)MEDDELANDE OM DATASKYDD
2. Turboknapp
natural_image
Line drawing of a vacuum cleaner with attached circuit board and power outlet (no text or symbols)natural_image
Illustration of a hand holding a vertical tube with a blue arrow indicating rotation (no text or symbols)natural_image
Technical line drawing of a mechanical component with a cylindrical part inserted, showing internal components and a base plate (no text or symbols)natural_image
Illustration of a hand holding a vertical tool next to a device with an arrow indicating rotation (no text or symbols present)natural_image
Technical line drawing of a mechanical component with no visible text or symbols- Stram til dekselet på rentvannstanken.
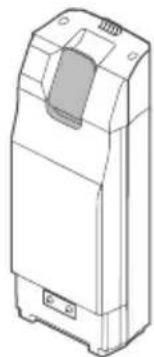
natural_image
Line drawing of a rectangular electronic device with a central slot and mounting base (no text or symbols)natural_image
Line drawing of a vacuum cleaner (no text or symbols)
natural_image
Line drawing of a vacuum cleaner with handle and wheels (no text or symbols)natural_image
Line drawing of a hand using a vacuum cleaner with a blue arrow indicating rotation (no text or symbols)natural_image
Diagram showing a power button icon and a handheld device with a light beam (no text or symbols)natural_image
Line drawing of a two-wheeled vacuum cleaner with a blue arrow indicating rotation (no text or symbols)natural_image
Line drawing of a vacuum cleaner with a magnified inset showing internal components (no text or symbols)RENGJ∅RING OG VEDLIKEHOLD
natural_image
Illustration of a hand inserting a device into a container (no text or symbols visible)natural_image
Simple line drawing of a cylindrical object with a curved handle and a small leaf-like shape inside (no text or symbols)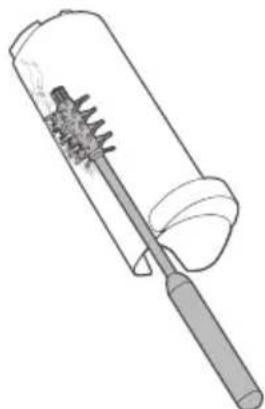
natural_image
Line drawing of a mechanical tool with a spring-like component inserted into a cylindrical housing (no text or symbols)natural_image
Technical line drawing of a mechanical component with three legs and a central square hole (no text or symbols)natural_image
Illustration of a water tap spraying water onto a sink with a plastic bag and a digital device (no text or symbols)Vask
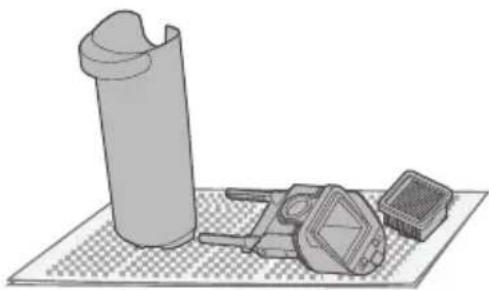
natural_image
3D rendered mechanical components including a cylindrical part, a small electronic component, and a small rectangular housing on a checkered mat (no text or symbols)Tørk
natural_image
Diagram showing a hand inserting a plug into a device, with a blue arrow indicating the insertion point (no text or symbols present)natural_image
Diagram of a mechanical device with a lever and internal components (no text or symbols)natural_image
Diagram showing two mechanical components with blue arrows indicating motion, no text or symbols presentnatural_image
Symbol of a trash bin crossed with no text or numbers, representing waste sorting or disposal (no text present)NO
natural_image
Recycling symbol icon with three chasing arrows forming a triangle (no text or labels)PERSONVERNERKLÆRING
2. Turbo-knap
natural_image
Line drawing of a vacuum cleaner with attached circuit board and power outlet (no text or symbols)natural_image
Illustration of hands holding a vertical object with a blue arrow indicating rotation (no text or symbols)natural_image
3D technical illustration of a mechanical component with a cylindrical top and internal structure (no text or symbols)natural_image
Illustration of a hand holding a pen and a device with a blue arrow indicating rotation (no text or symbols)natural_image
Technical line drawing of a mechanical device with handle and base components (no text or symbols)natural_image
Line drawing of a portable electronic device with a handle and control panel (no text or symbols)natural_image
Line drawing of a vacuum cleaner (no text or symbols)Fyld vand i rentvandstanken
BETJENINGSVEJLEDNING
natural_image
Line drawing of a vacuum cleaner with handle and wheels (no text or symbols)natural_image
Line drawing of a hand holding a vacuum cleaner with a blue arrow indicating rotation (no text or symbols)natural_image
Diagram showing a power button icon and a handheld device with a light beam (no text or symbols)- Tryk på Turbo-knappen for at aktivere eller deaktivere denne funktion.
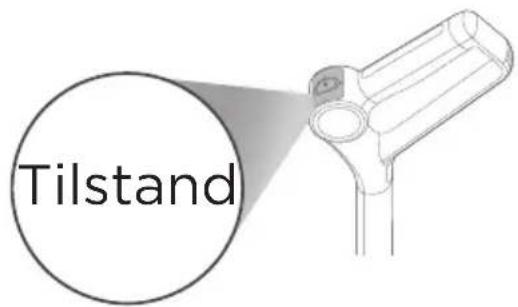

Vær opmærksom
natural_image
Line drawing of a two-wheeled vacuum cleaner with a blue rotation arrow indicating motion (no text or symbols)natural_image
Technical line drawing of a vacuum cleaner with a magnified inset showing internal components (no text or symbols)RENG∅RING OG VEDLIGEHOLDELSE
Alarm for spildevandstank

Vær opmærksom
natural_image
Two technical illustrations of a mechanical device, one showing a cylindrical component and the other a textured brush (no text or symbols)natural_image
Illustration of a faucet spraying water onto a sink with a bag and a small appliance inside (no text or symbols)Vask
natural_image
3D rendered mechanical assembly with cylindrical component, housing, and base plate on a checkered mat (no text or symbols)Tørring
natural_image
Diagram showing a hand inserting a component into a device, with a blue arrow indicating direction (no text or symbols present)natural_image
Diagram of a tool interacting with a device, showing a brush and internal components (no text or symbols)- Fjern den lille rullebørste 4. og den store rullebørste i den retning, der er vist på figuren. Skyl rullebørsterne og dækslet med rent vand.
natural_image
Diagram showing two mechanical components with blue arrows indicating motion, no text or symbols presentnatural_image
Symbol of a trash bin crossed with two crossed arms, no text or labels presentDK
natural_image
Recycling symbol with three chasing arrows forming a triangle (no text or labels)MEDDELELSE OM DATABASESKYTTELSE
make yourself at home
- USER MANUAL
- CONTENTS
- SAFETY INSTRUCTIONS
- Intended Use
- Explanation of Symbols
- Danger
- Warning of electrical voltage
- Warning
- Caution
- Attention
- Observe instructions
- Use and Precautions of washer detergent
- READ CAREFULLY AND KEEP FOR FUTURE REFERENCE
- PRODUCT OVERVIEW
- Mode switch button
- Turbo button2.1.
- Docking Station
- Cleaning brush
- EN
- Accessory holder
- Cleaning liquid
- PRODUCT INSTALLATION
- Handle Installation and Removal
- Charging Battery
- Filling clean water tank
- OPERATION INSTRUCTIONS
- Turning on and Cleaning
- Upright Pause Function
- Self-cleaning + Drying Function
- CLEANING AND MAINTENANCE
- Waste water detect alarm
- TROUBLESHOOTING
- TRADEMARKS, COPYRIGHTS AND LEGAL STATEMENT
- DISPOSAL AND RECYCLING
- Important instructions for environment
- Compliance with RoHS Directive
- Package information
- DATA PROTECTION NOTICE
- Achtung
- DATENSCHUTZHINWEIS
- SÄKERHETSINSTRUKTIONER
- Avsedd användning
- Turboknapp
- INSTALLATION AV PRODUKTEN
- RENGÖRING OCH UNDERHÅLL
- MEDDELANDE OM DATASKYDD
- RENGJ∅RING OG VEDLIKEHOLD
- PERSONVERNERKLÆRING
- Turbo-knap
- BETJENINGSVEJLEDNING
- Vær opmærksom
- RENG∅RING OG VEDLIGEHOLDELSE
- Alarm for spildevandstank
- MEDDELELSE OM DATABASESKYTTELSE
Brand : MIDEA
Model : MX10EUBK
Category : Vacuum Cleaner