
i-maxx - Uncategorized HARTAN - Free user manual and instructions
Find the device manual for free i-maxx HARTAN in PDF.


| Product Type | Baby Stroller |
| Brand | Hartan |
| Model | i-maxx |
| Recommended Age | From 6 months |
| Maximum Child Weight | 22 kg |
| Maximum Basket Load | 5 kg |
| Seat Positions | Adjustable backrest (recline) |
| Footrest | Adjustable height |
| Canopy | Adjustable, pull forward/backward |
| Wheels | Swivel front wheels, lockable |
| Brakes | Rear wheel brake lever |
| Harness | 5-point harness with crotch strap |
| Folding Mechanism | One-hand fold with auto lock |
| Accessories Included | Bumper bar, basket |
| Cleaning Instructions | Wipe with damp cloth, air dry |
| Maintenance | Lubricate hinges with silicone-free oil or Vaseline |
| Safety Warnings | Not suitable for jogging or skating; do not hang bags on handles |
| Replacement Parts | Use only manufacturer-recommended parts |
| Warranty | Subject to technical modifications |
Frequently Asked Questions - i-maxx HARTAN
User questions about i-maxx HARTAN
0 question about this device. Answer the ones you know or ask your own.
Ask a new question about this device
Download the instructions for your Uncategorized in PDF format for free! Find your manual i-maxx - HARTAN and take your electronic device back in hand. On this page are published all the documents necessary for the use of your device. i-maxx by HARTAN.
USER MANUAL i-maxx HARTAN
natural_image
Line drawing of a baby stroller with front wheel, backrest seat, and canopy (no text or symbols)DE……2
GB……10
FR……18
NL……26
IT……34
DK……42
NO……50
SE……58
FIN……66
ES……74
RU……82
CZ……90
PL……98
HU……106
HR……114
TR……122
SLO……130
SLV……138
natural_image
Technical line drawing of a car interior frame with steering wheel and dashboard (no text or symbols)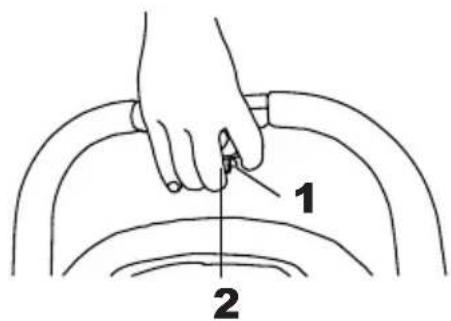
F2
F3
natural_image
Technical line drawing of a mechanical assembly with no visible text or symbols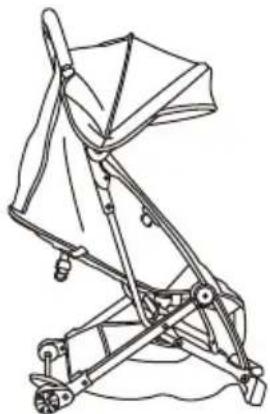
natural_image
Line drawing of a baby stroller with wheels and a canopy cover (no text or symbols)F4
natural_image
Mechanical assembly diagram showing hands operating a valve mechanism (no text or labels)F7F8F9
natural_image
Line drawing of a robotic arm gripping a tool, with no visible text or symbols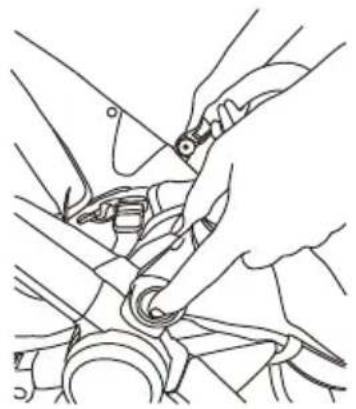
natural_image
Line drawing of a hand using a tool to adjust or install a mechanical component (no text or symbols visible)1. Spielbügel
natural_image
Line drawing of a mechanical device with a wheel and lever (no text or symbols)F11
natural_image
Technical line drawing of a wheel and shaft assembly (no text or symbols)F12
2. Schwenkräder
natural_image
Technical line drawing showing mechanical assembly and hand positioning (no text or symbols)F13F14
4. Bremse
natural_image
Technical line drawing showing two mechanical assembly steps with no visible text or symbolsF15F16
5. Verdeck
natural_image
Illustration of two hands folding a folded garment with a belt, showing the process with arrows indicating movement (no text or symbols)F17F18
natural_image
Three technical line drawings of a stroller with hand and wheel components, showing different mechanical configurations (no text or symbols present)natural_image
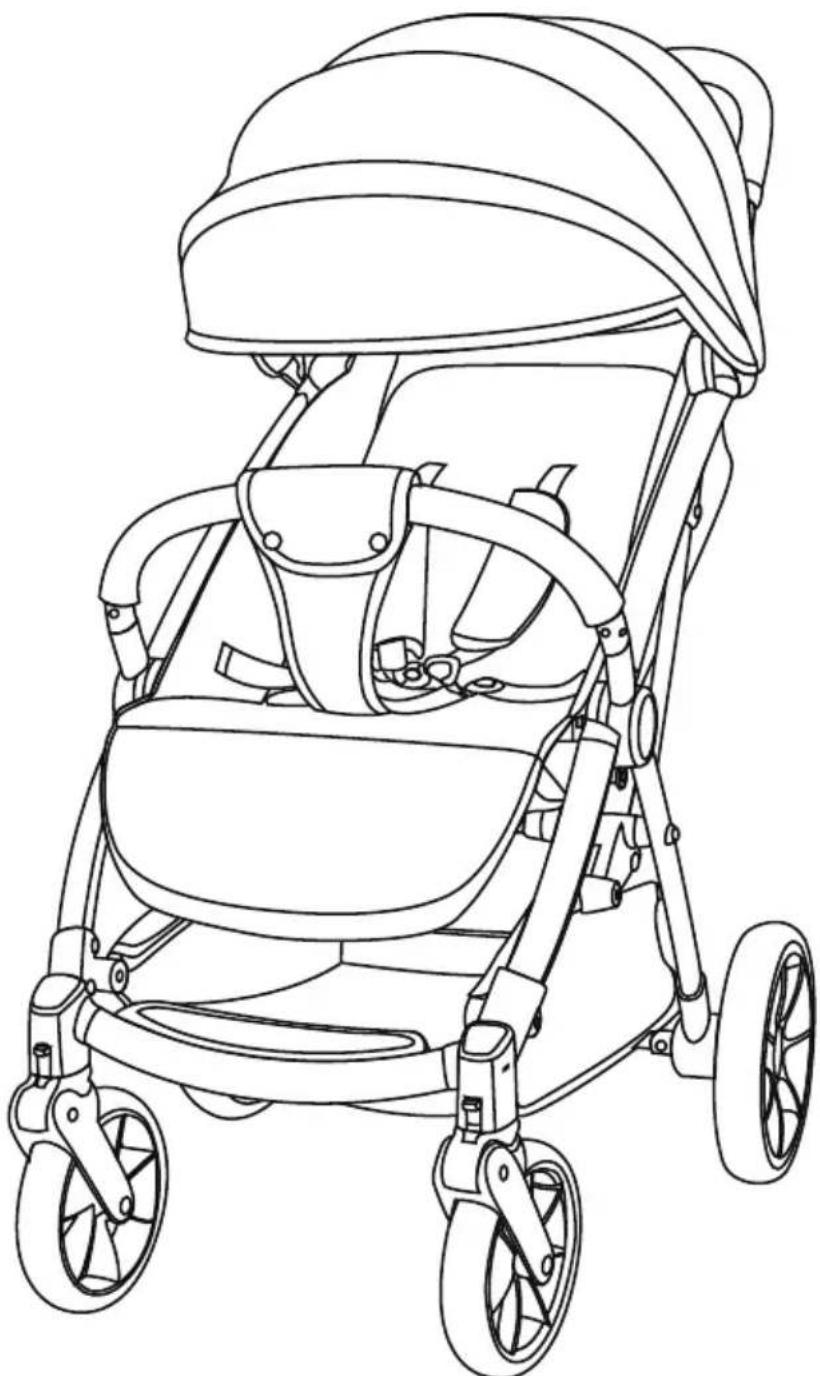
Diagram of two hands holding mechanical components, no text or symbols presentSuitable for children aged 6 months +, max. weight 22kg. This product is not suitable for use when jogging or skating.
natural_image
Line drawing of a stroller with canopy and wheels (no text or symbols)Please read these instructions carefully and save them for future reference.
Parts list:
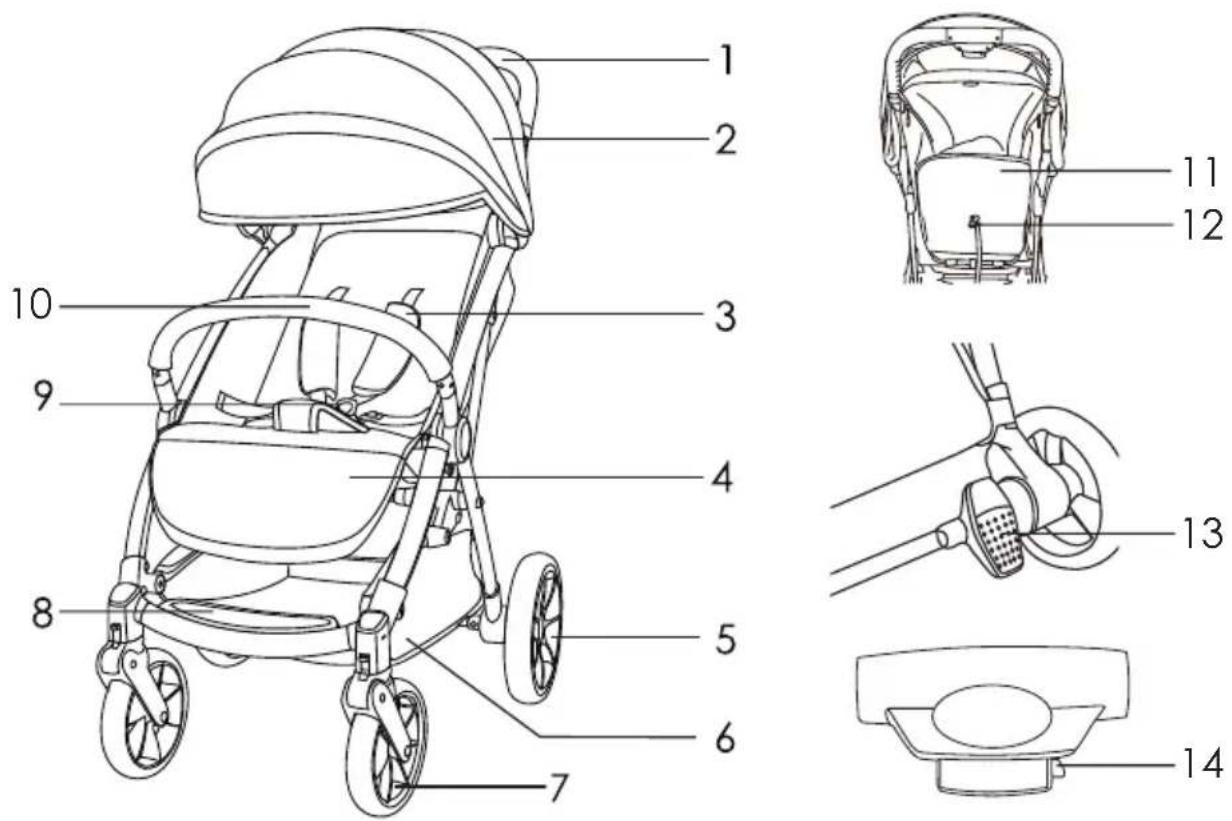
- handle grip
- canopy
- shoulder protector
- footrest
- rear wheels
- basket
-
front wheels
-
footboard
- harness buckle
- front bumper
- backrest
- backrest adjustable button
- brake lever
- lock / unlocking folding mechanism
WARNING
- Please read these instructions carefully and keep for future reference. Your child's safety may be affected if you do not follow these instructions.
- Do not carry additional children, bags, goods or accessories in stroller except as recommended in the manufacturer's instructions.
- Do not leave the child unsupervised in the stroller. This might be dangerous.
- Before making adjustments to stroller ensure that child's body is clear of any moving parts.
- To avoid serious injury from falling or sliding out, always use the harness restraints provided.
- Check the correct settings for the backrest system before using the stroller. Additional belt systems must be secured before using the D-ring of the seat.
- Do not allow child to stand on the seat extender.
- Do not allow your child to stand on the seat or the footrest.
- This stroller is designed for one child only.
- Do not hang bags on handles as this may cause the product to become unstable.
- Do not use on escalator or stairs. Fold stroller and carry.
- Put on all the brakes whenever you park the stroller.
- Ensure stroller is completely erected and check all locks are engaged before placing a child in the stroller.
- Any goods carried in the basket are not to exceed 5 kgs.
- Do not use stroller near open fire, exposed flame, BBQ or heater.
- Do not use the stroller if any screws, nuts, bolts, etc. are missing or any component is damaged.
- This product is not suitable for running or skating.
• Always use the crotch strap in combination with the waist belt.
- Please ensure that you complete regular routine inspections, maintenance, cleaning of this stroller.
- Regular care of all metal parts on the stroller is necessary to keep the premium looking.
- Please do not place the stroller on parquet, laminate, linoleum or carpet floors! The wheels may cause stains on the floor, that cannot be removed!
- Note that the fabric patterns, color pictures and stroller accessories on the stroller in this instruction manual may vary from that of the product that you have purchased.
- Please note, that from some kind of fabrics (e. g. jeans) can bleed out some color. This is a normal reaction and no cause for reclamation.
- subject to technical modifications and amendments.
- Do not lift the stroller by the safety bar. The safety bar may become detached.
- WARNING – To avoid injury ensure that your child is kept away when unfolding and folding this product.
- WARNING – Do not let your child play with this product.
- WARNING – This seat unit is not suitable for children under 6 months.
- WARNING – Check that the seat unit attachment devices are correctly engaged before use.
- Children weighing over 22 kg must not use this stroller.
- Put on all the parking device, when placing and removing the children.
- Any load attached to the handle and / or on the back of the backrest and / or on the sides of the vehicle will affect the stability of the pushchair.
- Only replacement parts recommended or supplied by the manufacturer / distributor can be used.
CARE AND MAINTENANCE
- Before starting operation, please apply some lubricant like silicone free oil or Vaseline onto the hinges and joints to ensure smooth function.
- Clean the seat, wipe with damp cloth and dry it in the air.
- Check your stroller regularly. If any parts, like bolts, screws, fabric pieces or stitching, are found to be loose, broken or damaged, always repair or replace them.
- Where damage or disfunction occurs, stop using the stroller.
- The frames must be cleaned by using household soaps or detergent with warm water.
• Overheating or strong sun exposure may cause aging and make the fabric color fade.
natural_image
Technical line drawing of a mechanical device with gears and brackets (no text or symbols)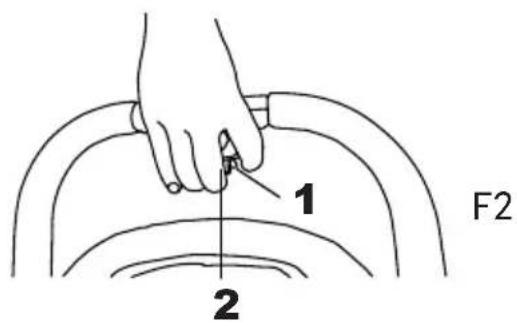
F3
natural_image
Technical line drawing of a mechanical assembly with no visible text or symbols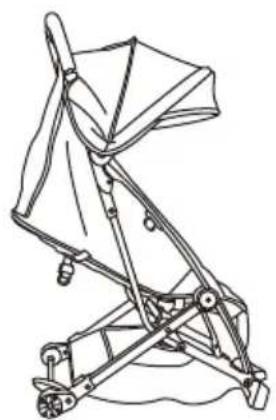
natural_image
Line drawing of a baby seat with adjustable arms and wheels (no text or symbols)F4
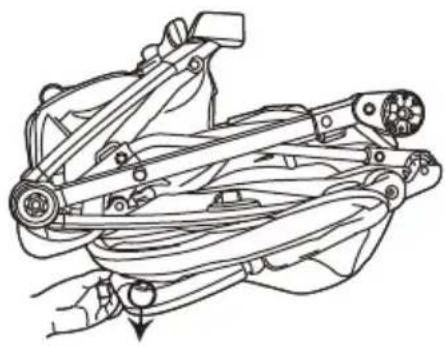
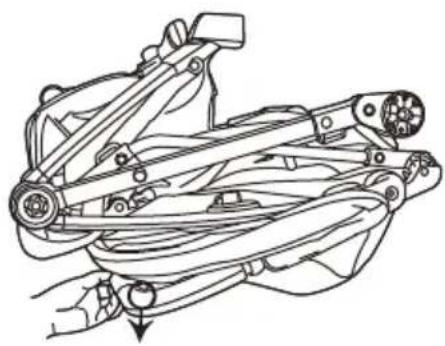
- To unfold frame: take out the wheels first, see F1. Afterwards hold the hand grip by one hand (see F2). During keeping button 1 pressed keep button 2 pressed at the same time. Then pull up the buggy (see F3) until unfolded completely (see F4).
natural_image
Circular diagram with radial lines and central dots, no text or symbols presentrear wheel front wheel
natural_image
Line drawing of a mechanical device with a wheel and lever (no text or symbols)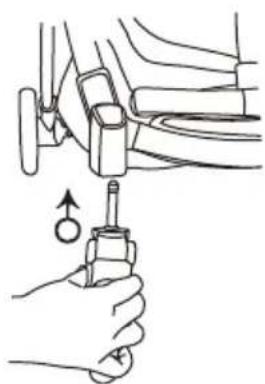
natural_image
Illustration of a hand holding a car seatbelt with a tool inserted, showing mechanical components and a circular motion indicator (no text or symbols)F5
natural_image
Technical line drawing of a mechanical component with a hammer indicating the angle (no text or symbols)F6
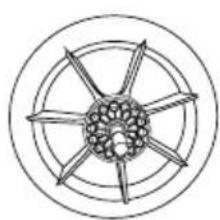
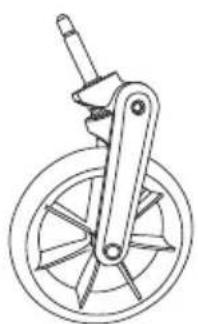
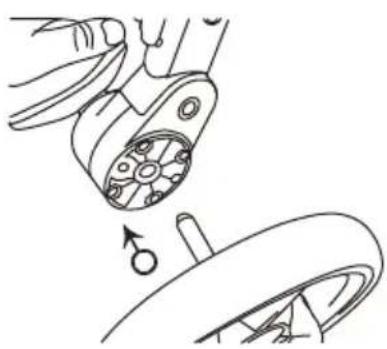
- To assemble the wheels insert the steel pin of the front wheel into the front leg until the wheel clicks into position (see F5). Afterwards insert the steel pin of the rear wheel into the rear leg until the wheel clicks into position (see F6).
Use instructions:
natural_image
Technical line drawing of a mechanical assembly with no visible text or symbolsF7F8F9
natural_image
Line drawing of a robotic arm gripping a tool, with no text or symbols present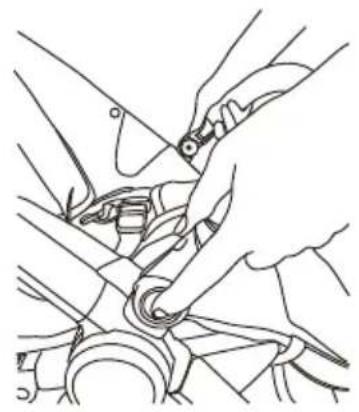
natural_image
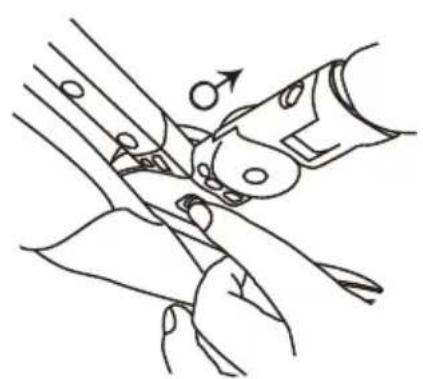
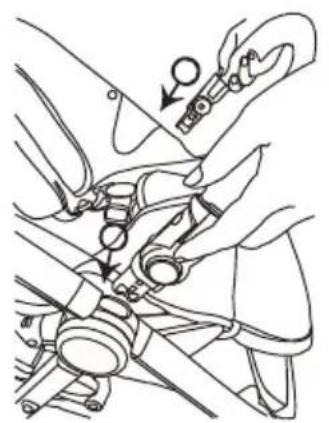
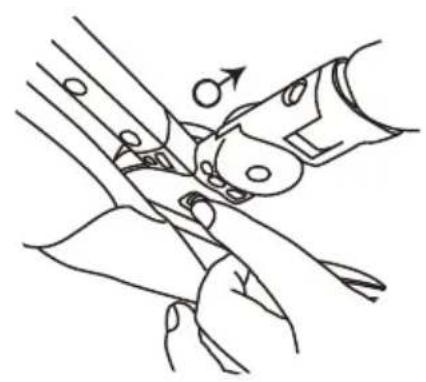
Line drawing of a hand using a tool to adjust or install a mechanical component (no text or symbols visible)- Bumper bar assembling (see F7): insert the bumper bar into the hole, then install and fix the bumper bar.
detach (see F8): press the button inside the bumper bar joint, pull out the bumper bar, so it can be detached.
use (see F9): press the buttons on the two sides of the bumper bar, to adjust the bumper bar up and down.
F10
natural_image
Line drawing of a mechanical device with a wheel and lever (no text or symbols)F11
natural_image
Technical line drawing of a wheel and shaft assembly (no text or symbols)F12
2. Swivel wheels
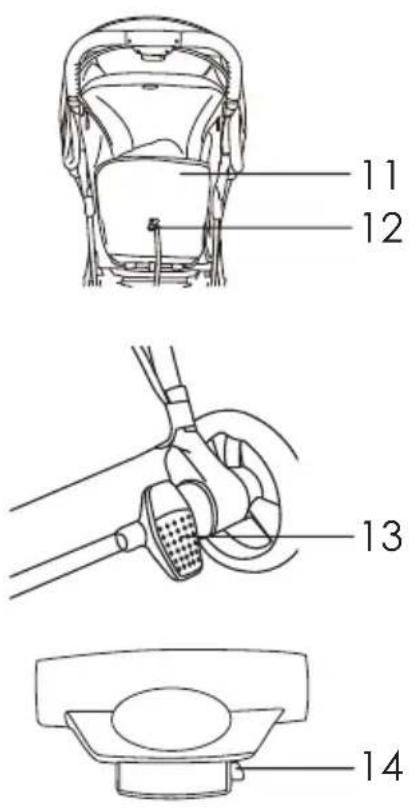
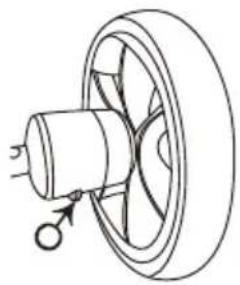
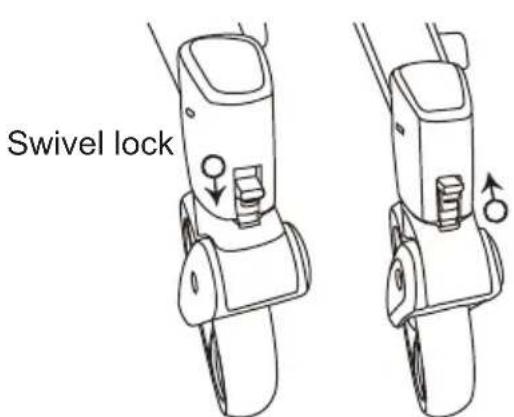
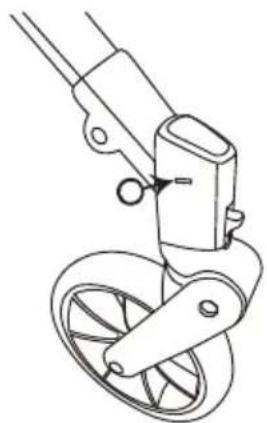
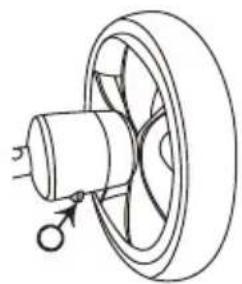
To lock the swivel wheels push both swivel lock levers down, see F10. To detach the swivel wheels press down the steel button inside (siehe F11) and pull out the wheels. To detach the rear wheels press button F12 and pull out the wheels.
3. Footrest
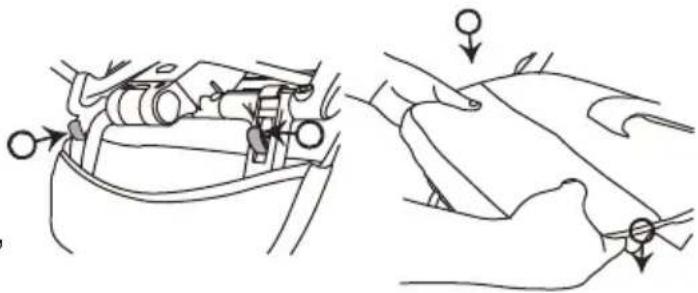
To adjust the footrest pull out the levers on both sides (see F13 and F14) to lower down.
To adjust the footrest to higher position, only need to lift up the footrest.
natural_image
Technical line drawing showing mechanical assembly and hand positioning (no text or symbols)F13F14
4. Brakes
To brake:push the wheel brake lever down. To release:lift the rear brake lever up.
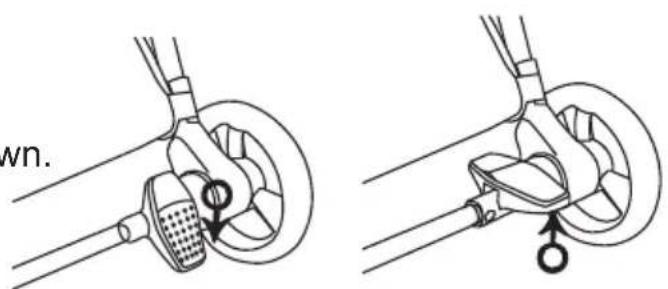
F15F16
5. Canopy
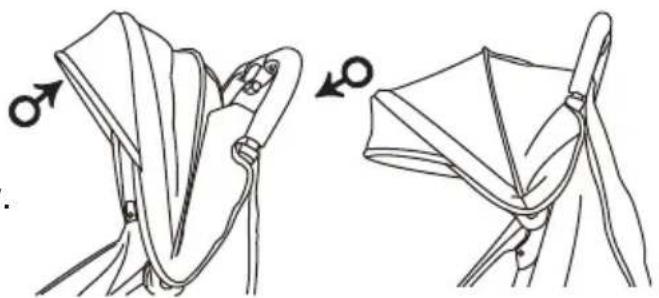
To use canopy: pull the canopy forward or backward to open or close the canopy.
natural_image
Illustration of two hands folding a folded garment with a belt, showing step-by-step folding (no text or symbols)F17F18
natural_image
Three technical line drawings of a stroller and bicycle, showing mechanical components and wiring (no text or symbols)6. To adjust the backrest:
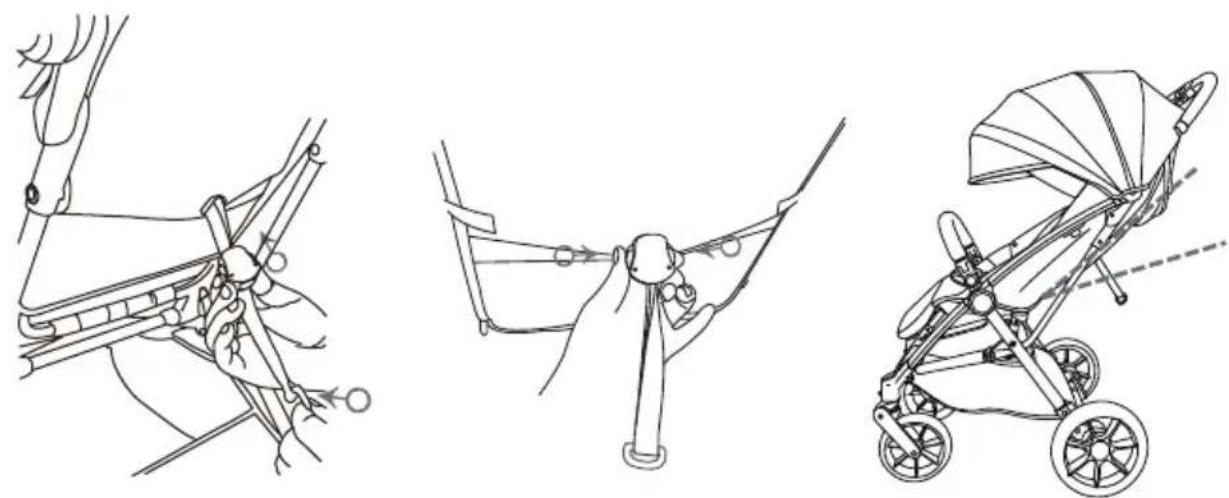
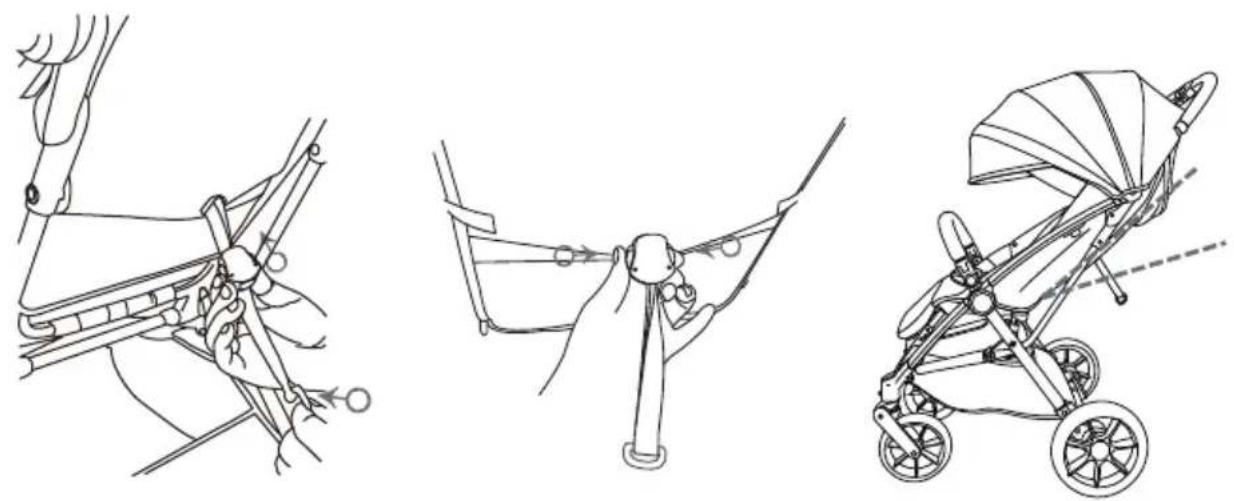
To recline: pull down the reclining adjuster to lower down the backrest. To raise up: hold reclining strap with one hand, with other hand slide the adjuster upward to pull up the backrest.
natural_image
Diagram of two hands holding tools on a mechanical component, no text or symbols present7. To use the seat belt:
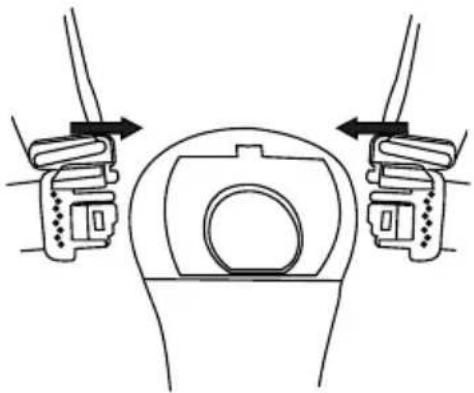
Securing the seat belt: attach the inserts of the shoulder belt to the buckle until you hear the "click" sound to make sure it is secured.
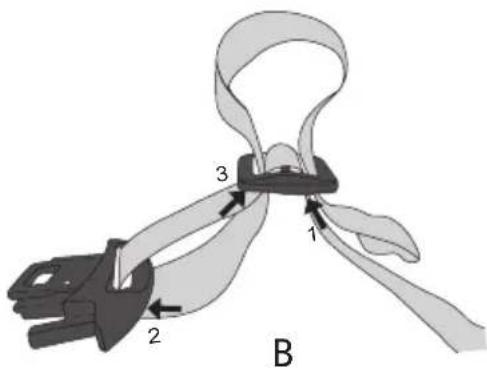
- Releasing the seat belt: press down the button on the buckle and pull out both side of the inserts using the other hand.
Adjusting the length of the belt: See the illustration for how to shorten and lengthen the belt straps (see B).
WARNING! Always use the leg straps in combination with the safety belt.
To fold the stroller:
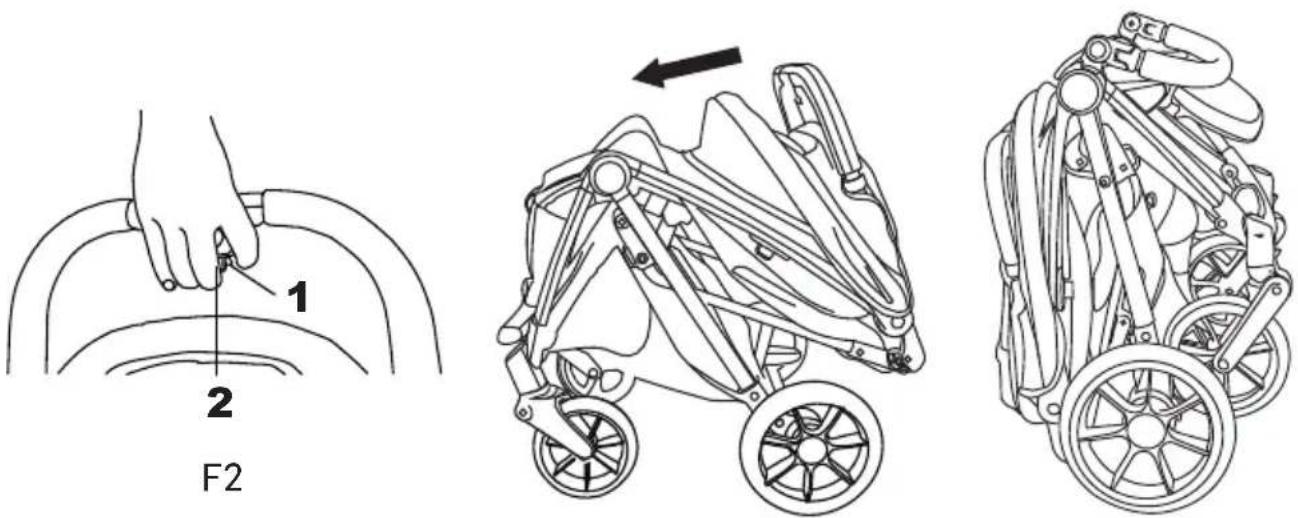
(see F2) Hold the handle with one hand. During keeping button 1 pressed, press button 2 at the same time. Then push the handle forward and down until the stroller locks automatically and stands by itself.
Note: Prior to folding, please fold down the bumper bar and fold back the canopy.
Brand : HARTAN
Model : i-maxx
Category : Uncategorized