
IV140 - Pregnant MONITOR AUDIO - Free user manual and instructions
Find the device manual for free IV140 MONITOR AUDIO in PDF.


| Product Type | In-wall / On-wall Speaker |
| Brand | Monitor Audio |
| Model | IV140 |
| Speaker Configuration | 2-way |
| Driver Size | 6.5" (165 mm) bass/mid driver, 1" (25 mm) tweeter |
| Frequency Response | 45 Hz – 30 kHz |
| Sensitivity | 88 dB (1W @ 1m) |
| Impedance | 6 ohms (nominal) |
| Power Handling (RMS) | 80 W |
| Recommended Amplifier Power | 20 – 120 W per channel |
| Dimensions (H x W x D) | 11.8" x 7.5" x 3.5" (300 x 191 x 89 mm) |
| Weight | 5.5 lbs (2.5 kg) |
| Finish | White (paintable grille) |
| Mounting Type | In-wall or surface mount with optional bracket |
| Cleaning Instructions | Wipe with a dry, soft cloth. Do not use abrasive cleaners or solvents. |
| Safety Precautions | Ensure secure mounting to avoid falling. Keep away from moisture and heat sources. |
| Spare Parts Availability | Contact Monitor Audio or authorized dealer for replacement drivers or grilles. |
| Repair Policy | Refer to warranty card. Do not attempt internal repairs. |
| Environmental Protection | Dispose of in accordance with local WEEE regulations. |
Frequently Asked Questions - IV140 MONITOR AUDIO
User questions about IV140 MONITOR AUDIO
0 question about this device. Answer the ones you know or ask your own.
Ask a new question about this device
Download the instructions for your Pregnant in PDF format for free! Find your manual IV140 - MONITOR AUDIO and take your electronic device back in hand. On this page are published all the documents necessary for the use of your device. IV140 by MONITOR AUDIO.
USER MANUAL IV140 MONITOR AUDIO
INVISIBLE IN-WALL SPEAKER IV140
INSTALLATION INSTRUCTIONS
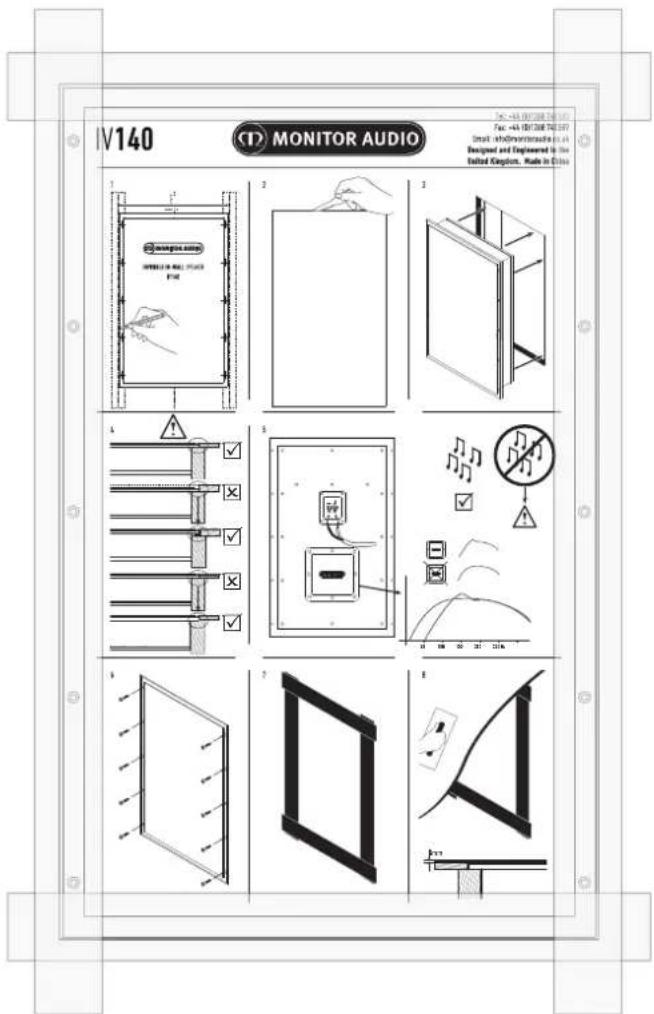
Installation Instructions
- If using the pre-construction bracket, place this into position now prior to plaster-boarding. The plasterer can then fix the plasterboard around the pre-construction bracket.
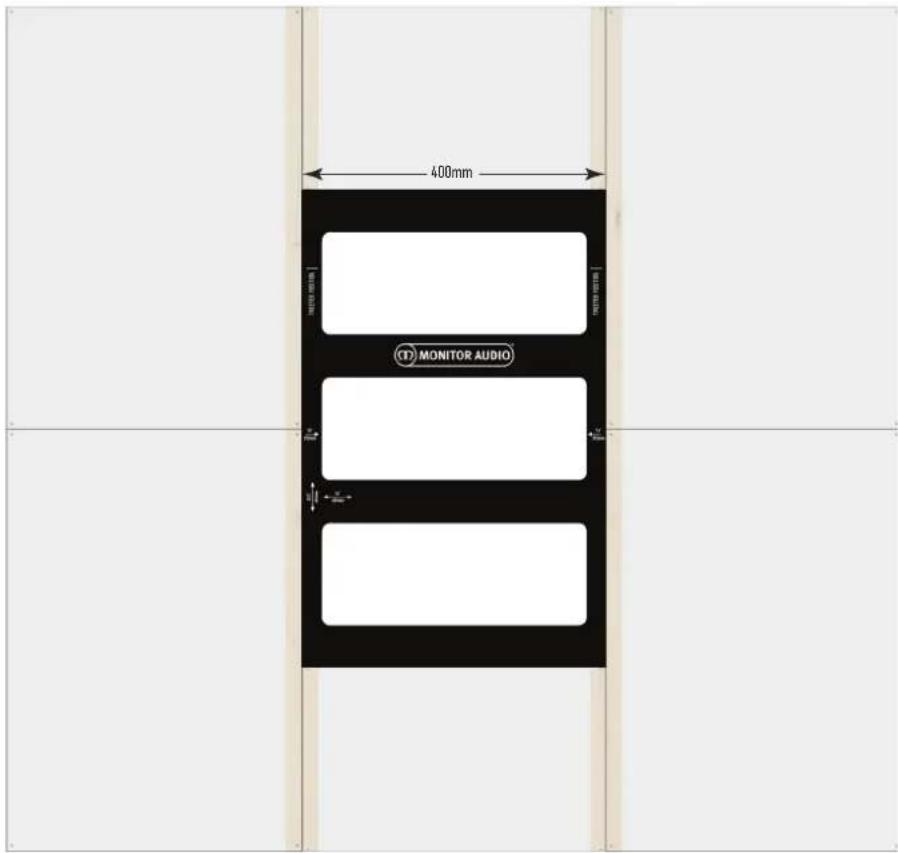
- If not using the pre-construction bracket and the plaster is all ready up, the location of the studs needs to be accurately determined. Draw around template ensuring the speaker is between the centres of the 400mm studs.
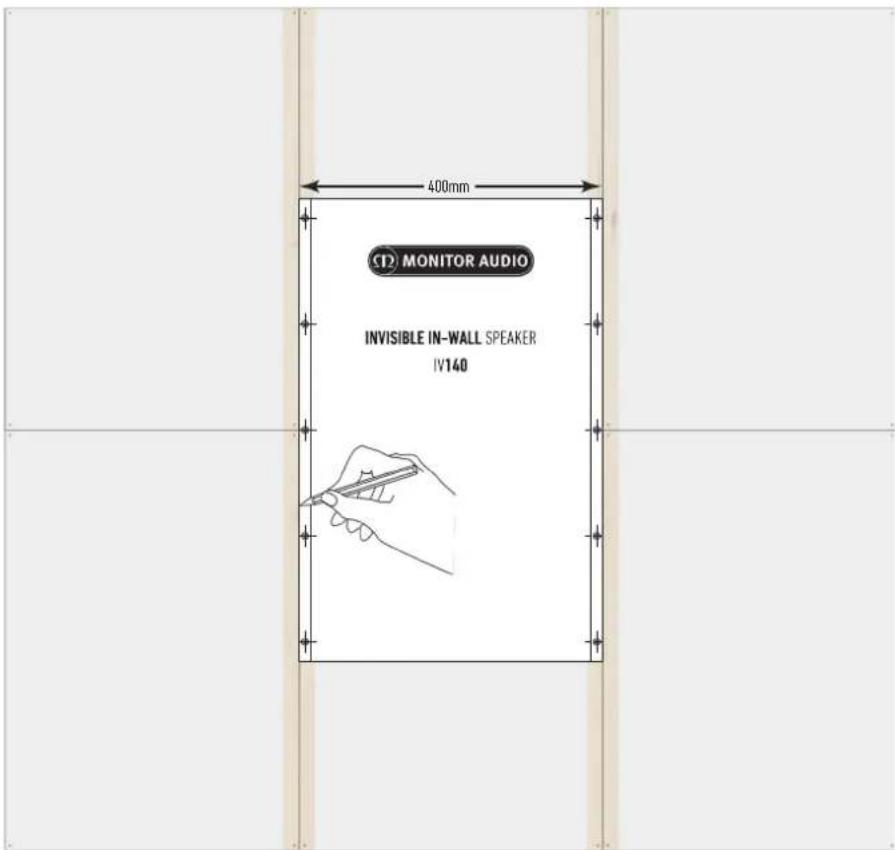
- Cut around the marked line.
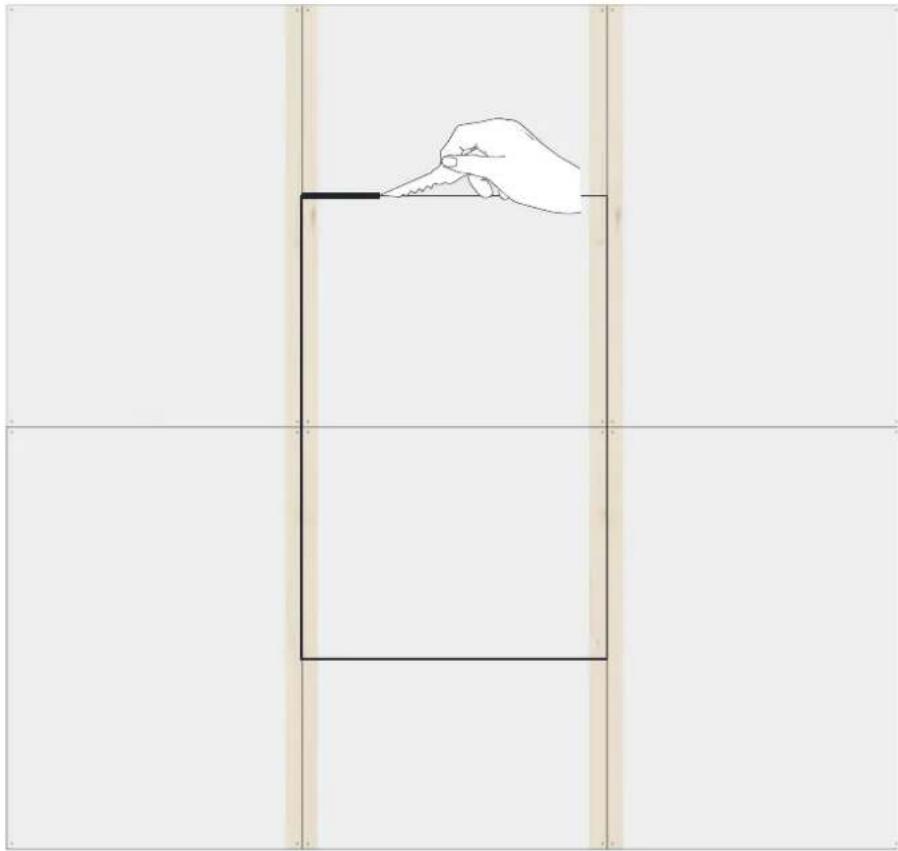
natural_image
Simple line drawing of a hand holding a small object above a rectangular frame, with no text or symbols present.- Test fit the speaker ensuring it fits neatly in the cut out and that the screw holes line up with the studs.

Do not try to remove the printed membrane off the front of the speaker.
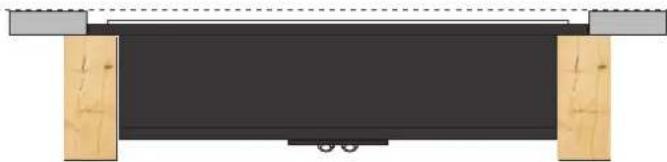
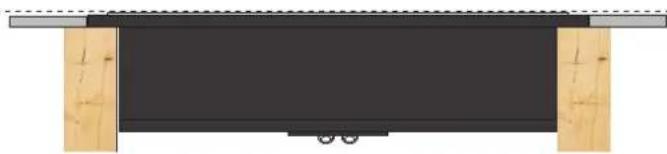
- Check the depth of the speaker is correct. The front white membrane of the speaker should be flush with the plasterboard. If using 12mm plasterboard, there should need to be any additional work to carry out but checking is advisory.
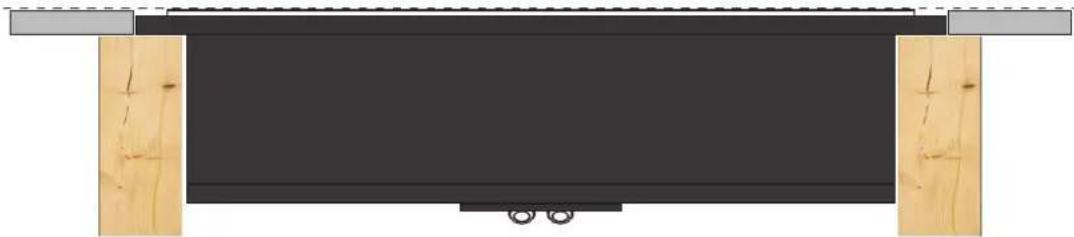
natural_image
Top-down view of a dark rectangular object with two wooden supports and a central horizontal beam, no visible text or symbols.
If it is lower than the plasterboard, use the supplied card shims to space it off of the studs.
natural_image
Pure diagram of a rectangular structure with two wooden supports and a central dark rectangle, no text or symbols present.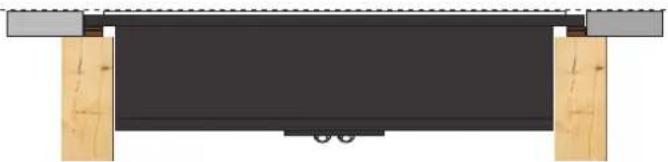
natural_image
Simple diagram of a rectangular structure with two vertical supports and a central horizontal bar, no text or symbols present.If it is proud of the plasterboard then some material will need to be taken off the studs to ensure it is flush.
natural_image
Simple diagram of a black rectangular object with two wooden supports at both ends, no text or symbols present.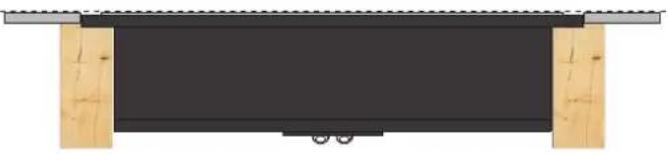
natural_image
Simple line drawing of a rectangular structure with two vertical supports and a central horizontal bar (no text or symbols)- Once you are happy with the fit, wire up the speaker and test that it works.
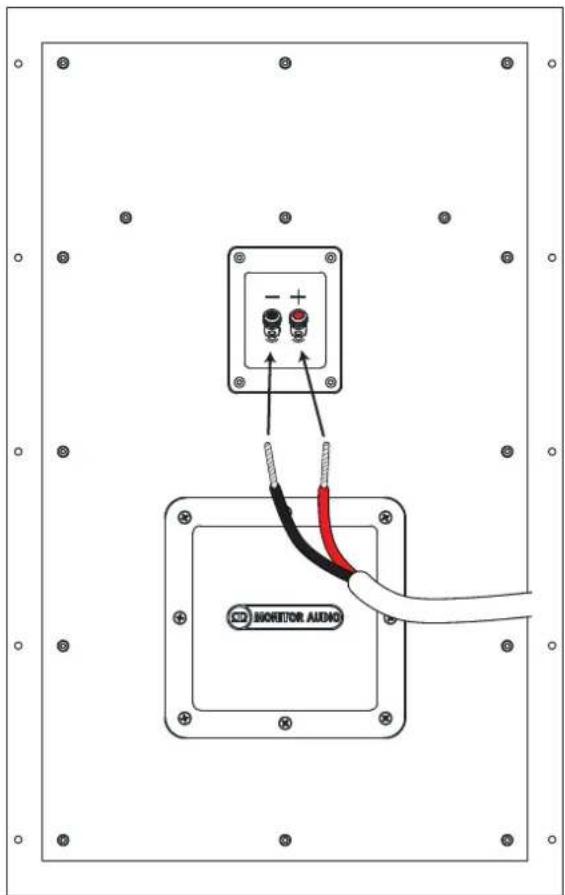

More bass can be achieved by removing the rear plastic square panel just below the terminal panel.
Note: The sound heard outside of the wall and without plaster is not a true representation of the final sound you will get.
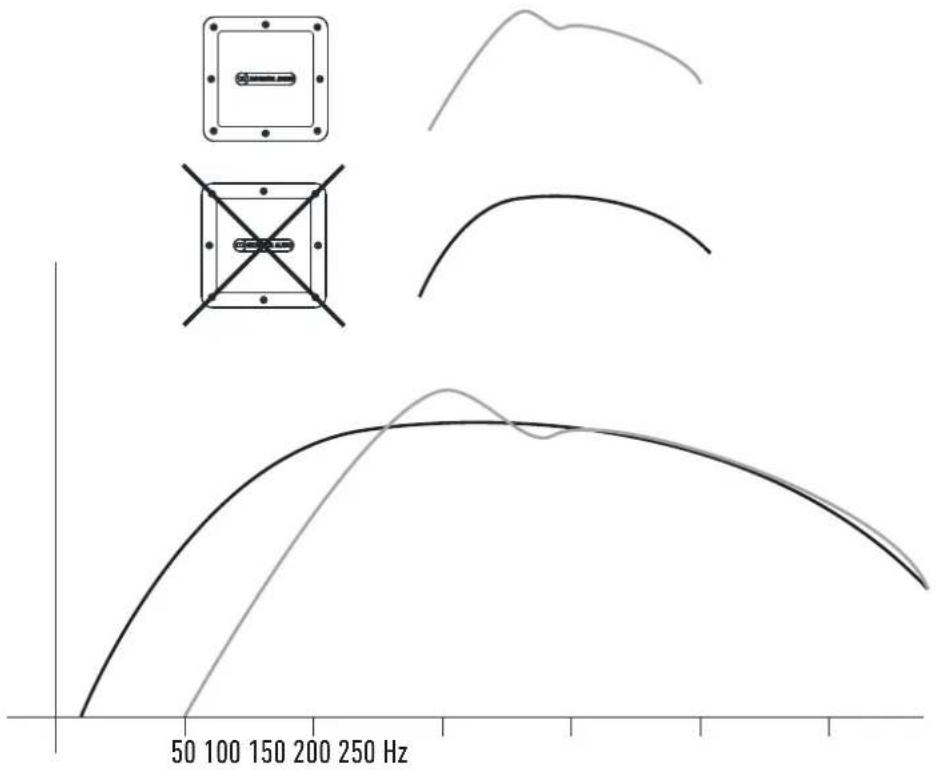
line
| Frequency (Hz) | Value | | -------------- | ----- | | 50 | 0 | | 100 | 10 | | 150 | 30 | | 200 | 40 | | 250 | 35 |- Once you are happy with your installation and sound choice, screw the speaker in place
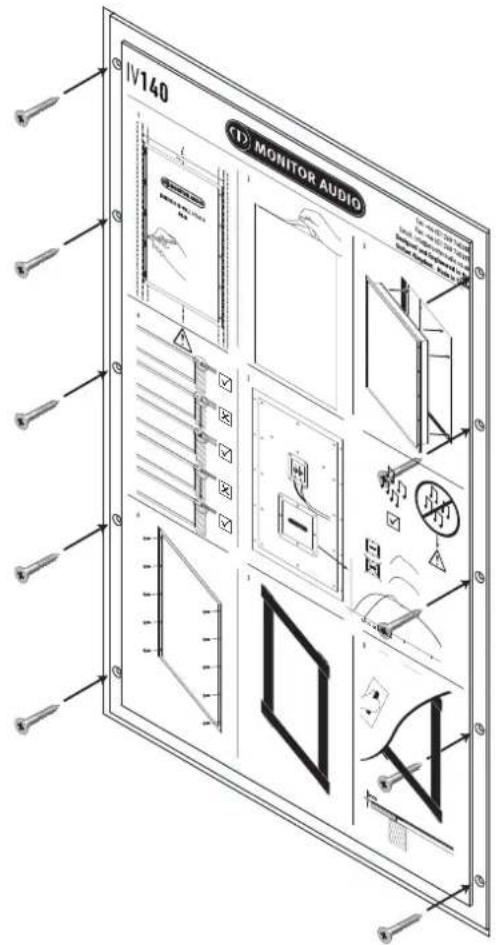
- Apply webbed tape over the screws so that it bridges the gap between the speaker membrane and the plasterboard. The card shims can be used here as well if you wish to reduce the void between the outer edge of the frame and the membrane - plasterboard level.
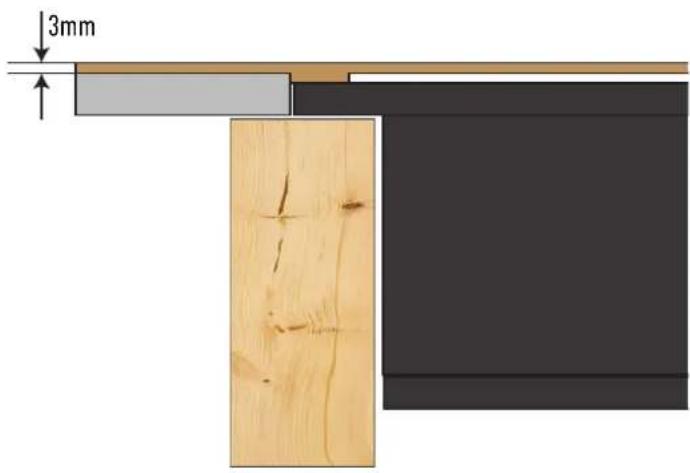
- Plaster the speaker into the wall with no more than 3mm of plaster.
MONITOR AUDIO®
Monitor Audio Ltd.
24 Brook Road
Rayleigh, Essex
SS6 7XJ
England
Tel: +44 (0)1268 740580
Fax: +44 (0)1268 740589
Email: info@monitoraudio.co.uk
Web: www.monitoraudio.com
Designed and Engineered
in the United Kingdom.
Made in China
Version 1. 2017
Brand : MONITOR AUDIO
Model : IV140
Category : Pregnant