
G2638CR - Microwave SAMSUNG - Free user manual and instructions
Find the device manual for free G2638CR SAMSUNG in PDF.


| Product Type | Solo Microwave |
| Model Number | G2638CR |
| Capacity | 28 Liters |
| Power Output | 900 W |
| Dimensions (W x H x D) | 517 x 314 x 476 mm |
| Weight | 12.5 kg |
| Voltage / Frequency | 230 V / 50 Hz |
| Display Type | LED Digital |
| Control Type | Touch and Dial |
| Door Type | Drop-down with Handle |
| Interior Material | Ceramic Enamel |
| Functions | Defrost, Auto Cook (15 presets), Quick Start, Eco Mode |
| Child Safety Lock | Yes |
| Turntable Diameter | 360 mm |
| Cavity Light | Yes |
| Cleaning | Wipe with damp cloth; use steam clean function |
| Safety Features | Auto shut-off, door interlock, overheating protection |
| Spare Parts Available | Mica plate, turntable glass, turntable motor, filter |
| Repairability Index | 8.2 / 10 |
| Energy Consumption | 0.9 kWh / cycle |
| Standby Power | < 1 W |
Frequently Asked Questions - G2638CR SAMSUNG
User questions about G2638CR SAMSUNG
0 question about this device. Answer the ones you know or ask your own.
Ask a new question about this device
Download the instructions for your Microwave in PDF format for free! Find your manual G2638CR - SAMSUNG and take your electronic device back in hand. On this page are published all the documents necessary for the use of your device. G2638CR by SAMSUNG.
USER MANUAL G2638CR SAMSUNG
natural_image
Illustration of a microwave oven with control panel and display, surrounded by food items (no text or symbols)Kort oversigt

natural_image
Abstract geometric shapes including a triangle and a diamond with a small boat on top, set against a gray oval background (no text or symbols)natural_image
Abstract diagram with a black arrow pointing to a gray oval containing the letter 'U', no text or symbols present.natural_image
Cartoon character wearing a top hat and star-patterned coat, waving with one hand (no text or symbols)natural_image
Simple line drawing of a circular heating element with three legs and a central hole (no text or symbols)
natural_image
Line drawing of a microwave oven with lid and vent, no text or symbols presentnatural_image
Simple black-and-white diagram showing a clock icon and a diamond shape (no text or symbols)
natural_image
Illustration of a microwave oven with a roasted chicken on a tray, no text or symbols presentnatural_image
Abstract geometric diagram with black shapes and a central triangle, no text or symbols present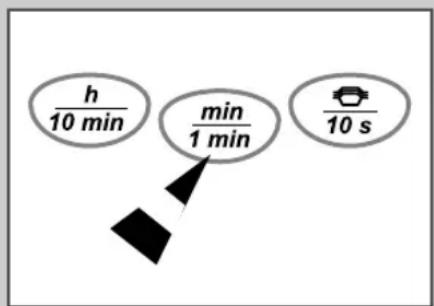

natural_image
Abstract geometric diagram with a circle containing a triangle and a diamond shape, no text or symbols present.natural_image
Simple line drawing of an hourglass with a pointer and geometric shapes (no text or symbols)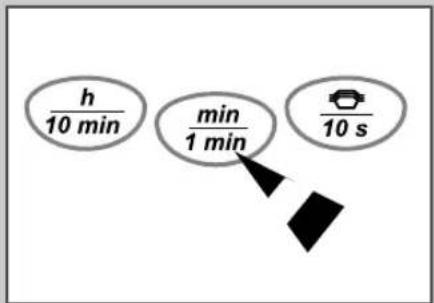


natural_image
Three circular icons showing food items: a plate with dumplings, a cup with a teacup, and a coffee cup (no text or symbols)natural_image
Abstract geometric diagram with curved lines and shapes (no text or symbols)
natural_image
Abstract geometric diagram with curved lines and shapes (no text or symbols)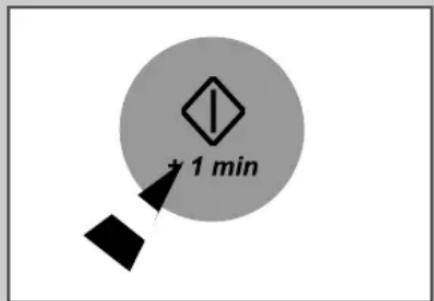
natural_image
Line drawing of a circular container with internal compartments and a handle (no text or symbols)Grilning
natural_image
Line drawing of a circular mechanical component with internal blades and mounting brackets (no text or symbols)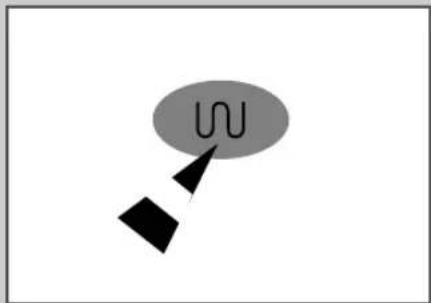
natural_image
Simple diagram with a black arrow pointing to a gray oval containing the letter 'U', no text or symbols present.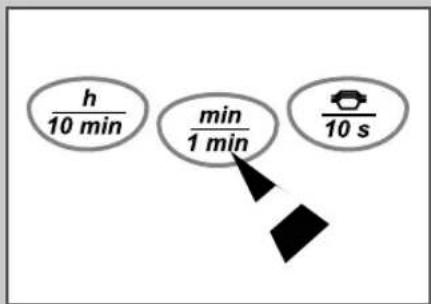

natural_image
Simple diagram with an hourglass and a diamond shape, no text or symbols present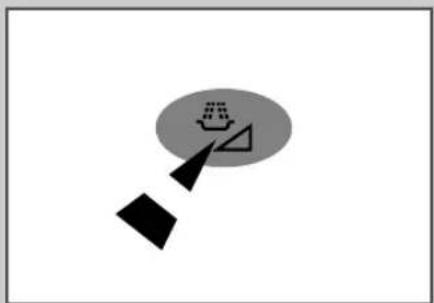
natural_image
Simple diagram with a boat icon and two geometric shapes (triangle and square) pointing to it, no text or symbols present.

natural_image
Simple diagram with a pointing arrow and a curved line inside an oval (no text or symbols)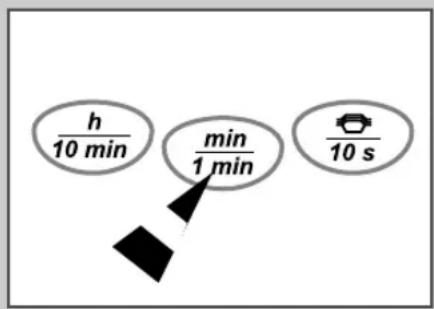
natural_image
Two abstract geometric shapes with black and gray tones, no text or symbols presentnatural_image
Two abstract geometric shapes with arrows pointing to symbols: a triangle and a clock, both without any text or labels.natural_image
Line drawing of a rectangular container filled with food items, no text or symbols presentKonverteringstabel
| GRAM/MILLILITEREN | |
| 1 | 25 |
| 2 | 50 |
| 3 | 75 |
| 4 (1/4 lb) | 100 |
| 5 (1/4 pint) | 150 |
| 6 | 175 |
| 7 | 200 |
| 8 (1/2 lb) | 225 |
| 9 | 250 |
| 10 (1/2 pint) | 275 |
| 11 | 300 |
| 12 (3/4 lb) | 350 |
| 13 | 375 |
| 14 | 400 |
| 15 (3/4 pint) | 425 |
| 16 (1 lb) | 450 |
| 17 | 475 |
| 18 | 500 |
| 19 | 550 |
| 20 (1 pint) | 575 |
natural_image
Line drawing of a bowl containing various fruits and vegetables (no text or symbols)natural_image
Line drawing of a rectangular container with internal compartments (no text or symbols)natural_image
Simple line drawing of a fork pressing down on a pair of sausages (no text or symbols)Owner's Instructions and Cooking Guide
natural_image
Illustration of a microwave oven with control panel and side dishes, surrounded by food items (no text or symbols)Quick Look-up Guide



natural_image
Abstract geometric diagram with a boat on a boat, arrowhead, and triangle (no text or symbols)Place the food in the oven. Select the power level by pressing the button once or several times.

Place the frozen food in the oven. Select the food category by pressing the AUTO (button once or several times.

natural_image
Simple diagram with a wavy line and a black arrow pointing to it, no text or symbols present.Place the food on the rack in the oven. Press the button.

Select the cooking time by pressing the 10min, 1min or 10s. buttons as required.
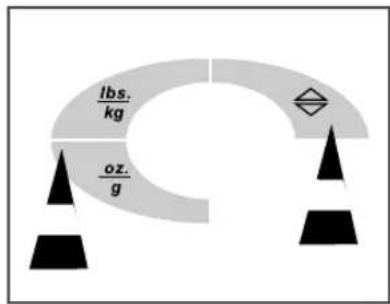
Select the weight by pressing the lbs./kg and oz./g buttons as required.
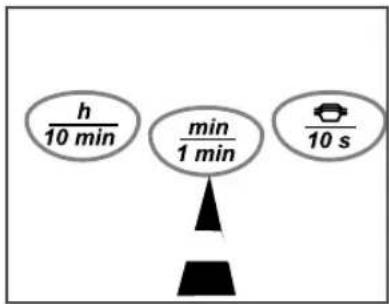
Select the cooking time by pressing the 10min, 1min and 10s. buttons.
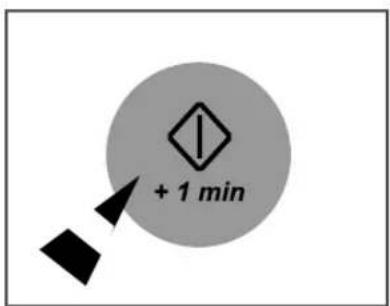
Press the button.
Result: ♦ Cooking starts.
◆ The oven beeps four times when cooking is over.
To toggle between pounds and ounces or kilograms and grams, press the AUTO ( ### ) and lbs./kg buttons simultaneously. Increase or decrease the cooking time by pressing the button.
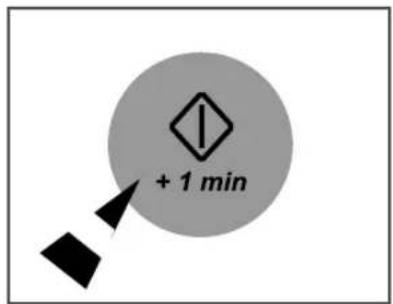
Press the button.

Press the button.

natural_image
Cartoon character wearing a top hat and star-patterned coat, waving with one hand (no text or symbols)You have just purchased a SAMSUNG microwave oven.
Your Owner's Instructions contain much valuable information on cooking with your microwave oven. Take the time to read them as they will help you take full advantage of the microwave oven features.
Contents
◆ QUICK LOOK-UP GUIDE.... 2
♦ Oven 5
◆ Control Panel 6
◆ USING THIS INSTRUCTIONS BOOKLET 7
◆ INSTALLING AND PREPARING YOUR MICROWAVE OVEN
■ Safety Precautions 8
■ Accessories 10
- Installing Your Microwave Oven.... 11
■ Setting the Time 11
■ How a Microwave Oven Works 12
- Checking that Your Oven is Operating Correctly.... 12
■ What to Do if You are in Doubt or Have a Problem.... 13
■ Cooking/Reheating 14
■ Power Levels and Time Variations.... 15
■ Stopping the Cooking 16
■ Adjusting the Cooking Time.... 16
■ Setting a Standing Time 17
■ Using the Instant Cook Feature.... 18
- Instant Reheat Settings 19
■ Using the Auto Reheat Feature.... 20
■ Auto Reheat Settings.... 21
◆ DEFROSTING
■ Using the Auto Defrost Feature.... 22
■ Auto Defrost Settings.... 23
- Choosing the Accessories 23
♦ TRADITIONAL COOKING METHODS
- Grilling 24
♦ COMBINED COOKING
■ Multistage Cooking 25
■ Alternating function of Microwaves and the Grill 26
Contents (continued)
◆ Features Common to All Types of Cooking
■ Using the Memory Cook Feature.... 27
■ Switching the Beeper Off.... 27
■ Using the Demonstration Mode.... 28
■ Safety-locking Your Microwave Oven.... 28
◆ Recommendations for Use
■ Cookware Guide.... 29
■ Cooking Guide.... 30
- Cleaning Your Microwave Oven 38
■ Storing and Repairing Your Microwave Oven 38
■ Technical Specifications.... 39


- INSTANT REHEAT SELECTION 2. AUTO DEFROST FEATURE SELECTION
- AUTO COOK FEATURE SELECTION 4. WEIGHT SELECTION
- COOKING TIME ADJUSTMENT BUTTONS 6. MEMORY COOK FEATURE SELECTION
- MICROWAVE MODE SELECTION 8. GRILL MODE SELECTION
- COMBINED MODE SELECTION(MICROWAVE + GRILL) 10. TIME SETTING AND SERVING SELECTION
- CLOCK SETTING 12. STANDING TIME ADJUSTMENT BUTTONS
- STOP/CANCEL BUTTON 14. START BUTTON
- DISPLAY
You have just purchased a SAMSUNG microwave oven. Your Owner's Instructions contain much valuable information on cooking with your microwave oven:
◆ Safety precautions
♦ Suitable accessories and cookware
◆ Useful cooking tips
Inside the cover you will find a quick look-up guide explaining three basic cooking operations:
♦ Cooking a dish
♦ Defrosting a dish
♦ Grilling a dish
At the front of the booklet you will find illustrations of the oven, and more importantly the control panel, so that you can find the buttons more easily.
The step-by-step procedures use four different symbols.

Press Hold down


Important Note

PRECAUTIONS TO AVOID POSSIBLE EXPOSURE TO EXCESSIVE MICROWAVE ENERGY
Failure to observe the following safety precautions may result in harmful exposure to microwave energy.
(a) Under no circumstances should any attempt be made to operate the oven with the door open or to tamper with the safety interlocks (door latches) or to insert anything into the safety interlock holes.
(b) Do not place any object between the oven door and front face or allow food or cleaner residues to accumulate on sealing surfaces. Ensure that the door and door sealing surfaces are kept clean by wiping after use first with a damp cloth and then with a soft dry cloth.
(c) Do not operate the oven if it is damaged until it has been repaired by a qualified microwave service technician trained by the manufacturer.
It is particularly important that the oven door closes properly and that there is no damage to the:
(1) Door, door seals and sealing surfaces
(2) Door hinges (broken or loose)
(3) Power cable
(d) The oven should not be adjusted or repaired by anyone other than a properly qualified microwave service technician trained by the manufacturer.
Before cooking food or liquids in your microwave oven, please check that the following safety precautions are taken.
1 DO NOT use any metallic cookware in the microwave oven:
◆ Metallic containers
◆ Dinnerware with gold or silver trimmings
♦ Skewers, forks, etc.
Reason: Electric arcing or sparking may occur and may damage the oven.
2 DO NOT heat:
◆ Airtight or vacuum-sealed bottles, jars, containers
Example: Baby food jars
◆ Airtight food
Example: Eggs, nuts in shells, tomatoes
Reason: The increase in pressure may cause them to explode.
Tip: Remove lids and pierce skins, bags, etc.
3 DO NOT operate the microwave oven when it is empty.
Reason: The oven walls may be damaged.
Tip: Leave a glass of water inside the oven at all times. The water will absorb the microwaves if you accidentally set the oven going when it is empty.
4 DO NOT cover the rear ventilation slots with cloths or paper.
Reason: The cloths or paper may catch fire as hot air is evacuated from the oven.
5 ALWAYS use oven gloves when removing a dish from the oven.
Reason: Some dishes absorb microwaves and heat is always transferred from the food to the dish. The dishes are therefore hot.
6 DO NOT touch heating elements or interior oven walls.
Reason: These walls may be hot enough to burn even after cooking has finished, although they do not appear to be so. Do not allow inflammable materials to come into contact with any interior area of the oven. Let the oven cool down first.
7 To reduce the risk of fire in the oven cavity:
♦ Do not store flammable materials in the oven
◆ Remove wire twist ties from paper or plastic bags
◆ Do not use your microwave oven to dry newspapers
If smoke is observed, keep the oven door closed and switch off or disconnect the oven from the power supply
8 Take particular care when heating liquids and baby foods.
ALWAYS allow a standing time of at least 20 seconds after the oven has been switched off to allow the temperature to equalize.
◆ Stir during heating if necessary and ALWAYS stir after heating.
◆ To prevent eruptive boiling and possible scalding, you should stir before, during, and after heating.
◆ In the event of scalding, follow these FIRST AID instructions:
- Immerse the scalded area in cold water for at least 10 minutes.
- Cover with a clean, dry dressing.
- Do not apply any creams, oils or lotions.
♦ NEVER fill the container to the top and choose a container that is wider at the top than at the bottom to prevent the liquid from boiling over. Bottles with narrow necks may also explode if overheated.
◆ ALWAYS check the temperature of baby food or milk before giving it to the baby.
♦ NEVER heat a baby's bottle with the teat on, as the bottle may explode if overheated.
9 Be careful not to damage the power cable.
Do not immerse the power cable or plug in water and keep the power cable away from heated surfaces.
- Do not operate this appliance if it has a damaged power cable or plug.
10 Stand at arm's length from the oven when opening the door.
Reason: The hot air or steam released may cause scalding.
11 Keep the inside of the oven clean
Reason: Food particles or spaltered oils stuck to oven walls or floor can cause the damage of painting and reduce the efficiency of the oven.
12 "Clicking" sound might be noticed while operating, especially at defrosting mode.
Reason: When the power output is changing electrically, you may hear that sound. This normal.
13 When the microwave oven is operating without any load, the power will be cut off automatically for safety. Afer standing over 30 min, you can operate the oven normally.
14 Please don't mind if the oven works continuously after the cooking over.
Reason: This oven is designed to work without microwave energy to cool internal electric parts after the cooking. (The display reads 0")
Open the door or press any buttons except one minute + button to stop the oven.
IMPORTANT SAFETY INSTRUCTIONS
During cooking, you should look into the oven from time to time when food is being heated or cooked in disposable containers of plastic, paper or other combustible materials.
IMPORTANT
Young children should NEVER be allowed to use or play with the microwave oven. Nor should they be left unattended near the microwave oven when it is in use. Items of interest to children should not be stored or hidden just above the oven.
Accessories

Depending on the model that you have purchased, you are supplied with several accessories that can be used in a variety of ways.
1 Coupler, already placed over the motor shaft in the base of the oven.
Purpose: The coupler rotates the glass plate.
2 Roller ring, to be placed in the centre of the oven.
Purpose: The roller ring supports the glass plate.
3 Glass plate, to be placed on the roller ring with the centre fitting on to the coupler.
Purpose: The glass plate serves as the main cooking surface; it can be easily removed for cleaning.
4 Metal rack, to be placed on the glass plate.
Purpose: The metal rack can be used to cook two dishes at the same time. A small dish may be placed on the glass plate and a second dish on the rack. The metal rack can be used in grill and combination cooking.

natural_image
Line drawing of a circular heating element with two legs and a central hub, labeled '4' (no text or symbols on the diagram itself)
DO NOT operate the microwave oven without the roller ring and the glass plate.
Installing Your Microwave Oven
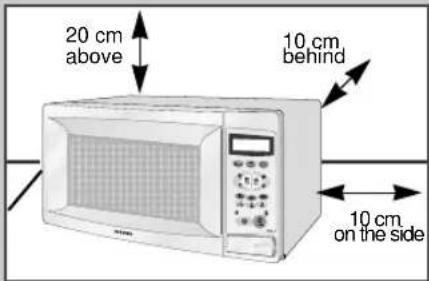
Place the oven on a flat, level surface strong enough to safely bear the weight of the oven.
1 When you install your oven, Make sure there is adequate ventilation for your oven by leaving at least 10 cm (4 inches) of space behind, on the sides of the oven and 20 cm (8 inches) of above.
2 Remove all packing materials inside the oven. Install the roller ring and turntable. Check that the turntable rotates freely.
Never block the air vents as the oven may overheat and automatically switch itself off. It will remain inoperable until it has cooled sufficiently.
For your personal safety, plug the cable into a 3-pin, 230 Volt, 50Hz, AC earthed socket. If the power cable of this appliance is damaged, it must be replaced by a special cable (I-SHENG SP022, KDK KKP4819D, EUROELECTRIC 3410, SAMIL SP-106B, MOONSUNG EP-48E). Contact your local dealer to have it replaced. The power cable of ISRAEL is PENCON(ZD16A), S/AFRICA APEX LEADS SA16 and NIGERIA, GHANA, KENYA and U.A.E is PENCON(UD13A1).
Do not install the microwave oven in hot or damp surroundings like next to a traditional oven or radiator. The power supply specifications of the oven must be respected and any extension cable used must be of the same standard as the power cable supplied with the oven. Wipe the interior and the door seal with a damp cloth before using your microwave oven for the first time.

natural_image
Line drawing of a microwave oven with a circular lid and vent, no text or symbols presentSetting the Time
Your microwave oven has an inbuilt clock. The time can be displayed in either the 24-hour or 12-hour notation. You must set the clock:
◆ When you first install your microwave oven
◆ After a power failure

Do not forget to reset the clock when you switch to and from summer and winter time.
1 To display the time in the... Then press the button...
24-hour notation Once 12-hour notation Twice
2 Set the hour by pressing the "h" button the appropriate number of times, until the correct figure is displayed.
You can hold the "h" button down to scroll rapidly through the figures.
3 Set the minutes by pressing the "min" button the appropriate number of times, until the correct figure is displayed.
You can hold the "min" button down to scroll rapidly through the figures.
4 When the right time is displayed, press the button again to start the clock. Result: The time is displayed whenever you are not using the microwave oven.

natural_image
Simple diagram with a clock and arrowhead, no text or symbols present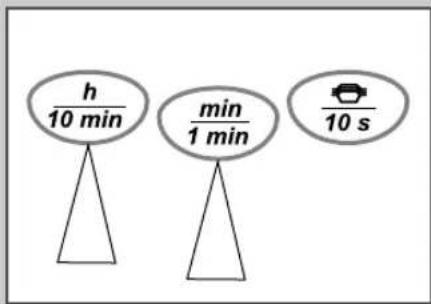
natural_image
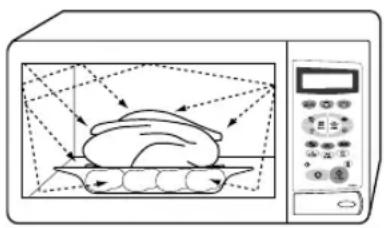
Illustration of a microwave oven with a roasted chicken on a tray, no text or symbols presentMicrowaves are high-frequency electromagnetic waves; the energy released enables food to be cooked or reheated without changing either the form or the colour.
You can use your microwave oven to:
♦ Defrost
◆ Reheat
♦ Cook
Cooking Principle
1 The microwaves generated by the magnetron are distributed uniformly as the food rotates on the glass plate. The food is thus cooked evenly.
2 The microwaves are absorbed by the food up to a depth of about 1 inch (2.5 cm). Cooking then continues as the heat is dissipated within the food.
3 Cooking times vary according to the dishes used and the properties of the food:
◆ Quantity and density
◆ Water content
♦ Initial temperature (refrigerated or not)

As the centre of the food is cooked by heat dissipation, cooking continues even when you have taken the food out of the oven. Standing times specified in recipes and in this booklet must therefore be respected to ensure:
◆ Even cooking of the food right to the centre
◆ The same temperature throughout the food
Checking that Your Oven is Operating Correctly
flowchart
graph TD
    A["Input: h/10 min"] --> B["Process Step"]
    C["Input: min/1 min"] --> B
    D["Input: 10 s"] --> B
    B --> E["Output"]
The following simple procedure enables you to check that your oven is working correctly at all times. If you are in doubt, refer to the section entitled “What to Do if You are in Doubt or Have a Problem” on the next page.

◆ The oven must be plugged into an appropriate wall socket.
◆ The glass plate must be in position in the oven.
◆ If a power level other than the maximum (100% - 800W) is used, the water takes longer to boil.
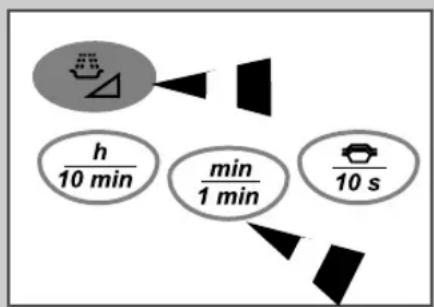
1 Open the oven door by pushing the large button in the bottom right-hand corner of the control panel. Place a bowl of water on the glass plate. Close the door.
2 Press the button and set the time to 4 to 5 minutes by pressing the 1min button the appropriate number of times.
3 Press
Result: The oven heats the water for 4 to 5 minutes. The water should then be boiling.
What to Do if You are in Doubt or Have a Problem
Becoming familiar with a new appliance always takes a little time. If you have any of the problems listed below, try the solutions given. They may save you the time and inconvenience of an unnecessary service call.
Problem Checks/Explanation/Solution
| Condensation inside the oven This is normal.Air flow around the door and outer casingLight reflection around the door and outer casingSteam escaping from around the door or vents | |
| The oven does not start when you press the button. ♦ Is the door completely closed? | |
| You cannot enter any settings ♦ You have pressed to stop cooking temporarily; press to cancel your settings completely or to continue cooking the food in the oven. | |
| The food is not cooked at all ♦ | Have you set the timer correctly and/or pressed the button?♦ Is the door closed?♦ Have you overloaded the electric circuit and caused a fuse to blow or a breaker to be triggered? |
| The food is either overcooked or undercooked | Was the appropriate cooking length set for the type of food?♦ Was an appropriate power level chosen? |
| Sparking and cracking occur inside the oven (arcing) | Have you used a dish with metal trimmings?♦ Have you left a fork or other metal utensil inside the oven?♦ Is aluminium foil too close to the inside walls? |
| The oven causes interference with radios or televisions | Slight interference may be observed on televisions or radios when the oven is operating. This is normal.Solution: Install the oven away from televisions, radios and aerials.If interference is detected by the oven's microprocessor, the display may be reset.Solution: Disconnect the power plug and reconnect it. Reset the time. |
If the above guidelines do not enable you to solve the problem, take a note of:
◆ The model and serial numbers, normally printed on the rear of the oven
- Your warranty details (date and place of purchase)
◆ A clear description of the problem
Then contact your local dealer or SAMSUNG after-sales service.

natural_image
Abstract geometric diagram with a central triangle and arrow pointing to a circular shape (no text or symbols)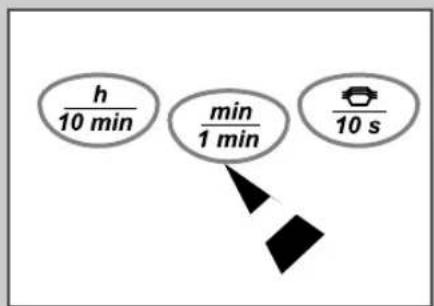
flowchart
graph TD
    A["10 min"] --> B["1 min"]
    C["10 s"] --> D["Black Diamond"]

The following procedure explains how to cook or reheat food.

ALWAYS check your cooking settings before leaving the oven unattended.
1 Open the oven door.
Place the food in the centre of the glass plate. Close the door.

Never switch the microwave oven on when it is empty.
2 Press the button
Result: The following indications are displayed:
I (one-stage cooking)

(microwave mode)

(maximum cooking power)
3 Select the appropriate power level by pressing the button again until the corresponding percentage is displayed. Refer to the power level table on the next page for further details.
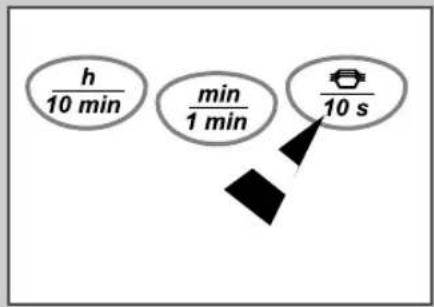
4 Set the cooking time by pressing the 10min, 1min and 10s. buttons.
Example: For a cooking time of 3 minutes, 30 seconds, press 1 min three times, followed by 10 s. three times.
Result: The cooking time is displayed.
5 Press the button.
Result: The oven light comes on and the glass plate starts rotating. Cooking starts and when it has finished:
◆ The oven beeps four times
◆ The current time is displayed again

You can change the power level during cooking by pressing the button the number of times required.

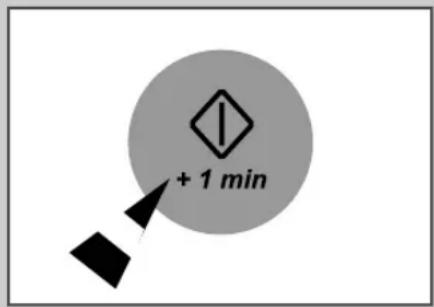
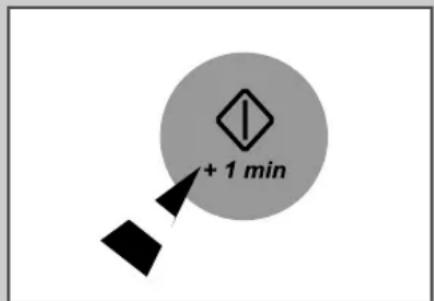
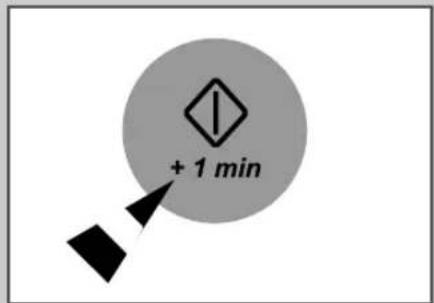
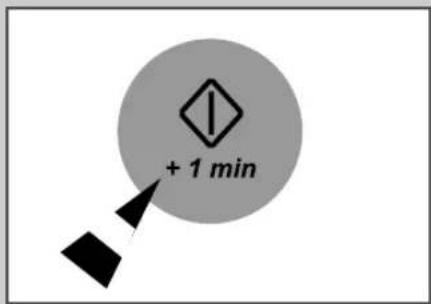
If you wish to heat a dish for a short period of time at maximum power (100%), you can also simply press the ◆ button once for each minute of cooking time. The oven starts immediately.
Power Levels and Time Variations
The power level function enables you to adapt the amount of energy dissipated and thus the time required to cook or reheat your food, according to its type and quantity. You can choose between ten power levels.
| Power Level | Percentage | OUTPUT | |
| MWO | Grill | ||
| HIGH | 100 % | 800 W | - |
| SAUTÉ | 90 % | 720 W | - |
| REHEAT | 80 % | 640 W | - |
| MEDIUM HIGH | 70 % | 560 W | - |
| SIMMER | 60 % | 480 W | - |
| MEDIUM | 50 % | 400 W | - |
| MEDIUM LOW | 40 % | 320 W | - |
| LOW | 30 % | 240 W | - |
| DEFROST ( ⋮ ) | 20 % | 160 W | - |
| WARM | 10 % | 80 W | - |
| GRILL | - | - | 1000 W |
| Alternating function or MW and GRILL | 100 % | 800 W | 1000 W |
| Proportion of the time during the running function for 100 sec. | 18 % | 82 % | |
The cooking times given in recipes and in this booklet correspond to the specific power level indicated.
If you select a... Then the cooking time must be...
Higher power level Decreased
Lower power level Increased
Stopping the Cooking
natural_image
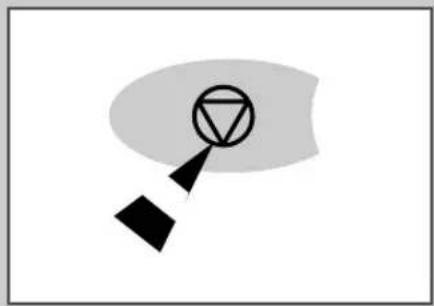
Abstract geometric diagram with a circle containing a triangle and a diamond shape, no text or symbols present.You can stop cooking at any time so that you can:
◆ Check the food
♦ Turn the food over or stir it
Leave it to stand
To stop the cooking... Then...
Temporarily ♦ Open the door
or ♦ Press the button
Result: Cooking stops.
To resume cooking, close the door and press ◆ again.
Completely Press the button twice.

Result: The cooking settings are cancelled.
Adjusting the Cooking Time

Like traditional cooking, you may find that, depending on the food's characteristics or your tastes, you have to adjust the cooking times slightly. You can:
◆ Check how cooking is progressing at any time simply by opening the door
◆ Increase the remaining cooking time
To increase the cooking time of your food, press the button once for each minute to be added.
Example: To add three minutes, press the button three times.
Setting a Standing Time
The Hold Timer can be used in two different ways:
◆ As a simple cooking timer
To set a standing time for defrosting when combining the defrosting mode with the microwave mode.
To use the hold timer... Then...
As a simple cooking timer 1 Press the button.

2 Select the required time by pressing the 10min, 1min, and 10s. buttons.
3 Press the button. Result: The oven beeps four times when the standing time is over.
To set the standing time See page 25. during defrosting

natural_image
Simple line drawing of an hourglass with a diamond pointer (no text or symbols)

natural_image
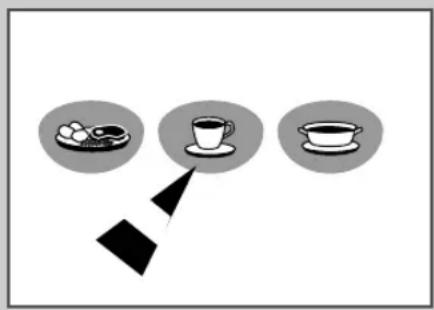
Three circular icons showing food items: a plate with dumplings, a cup on a saucer, and a teacup (no text or symbols)With the Instant Reheat feature, the Reheating time is set automatically and you do not have to press the button.
You can adjust the number of servings by pressing the appropriate Instant Reheat button the required number of times.

Use only dishes that are microwave-safe.
1 Open the oven door by pushing the large button in the bottom right-hand corner of the control panel.
2 Place the food in the centre of the glass plate.
3 Close the door.
4 Select the serving type and number by pressing the appropriate Instant Reheat button once or several times:


Plated meal Drinks Soup/sauce
Example: Press the button three times to reheat three cups of coffee. Refer to the table on the next page.
Result: Reheating starts after about two seconds. When it has finished:
◆ The oven beeps four times
◆ The current time is displayed again
Here are a few tips and recommendations to be followed when cooking or reheating food with the Instant Cook Feature.
| Button Serving Type Serving Size Standing Time Recommendations | |
| Plated meal 300-400 g 2 min. Take the ceramic plate with the plated meal out of (Reheating) 450-550 g the refrigerator and cover it with cling film and place it on the rotary plate. The plated meal consists of 3 components e.g meat with sauce, vegetables and side dishes like pasta, rice or potatoes. Make sure that all the components are piping hot. | |
| Drinks 150 ml (1 cup) 1 - 2 min. Put the liquid into cups (e.g. ceramic cups) and put Coffee, tea 300 ml (2 cups) 1 cup in the centre of the rotary plate, two cups milk, water 450 ml (3 cups) opposite each other and 3 or 4 cups in a circle. 600 ml (4 cups) | |
| Soup/Sauce 200 - 300 ml 2 min. Put the soup/sauce (coming out of the refrigerator or 400 - 500 ml out of a can) into a deep ceramic soup plate or bowl 600 - 700 ml and cover during heating.Stir before standing. 800 - 900 ml | |
Recommendations:
All the reheating programs except the drinks are made for food which has refrigerator temperature. But all the programs are also suitable for room temperature convenience food.e.g. for canned food.(like soup)
IMPORTANT: take the food out of the can and put it on a plate or into a bowl before reheating.
Using the Auto Reheat Feature


natural_image
Abstract geometric diagram with a curved shape and two black shapes (diamond and triangle) pointing toward it, no text or symbols present.
The Auto Reheat feature has six pre-programmed cooking times. You do not need to set either the cooking times or the power level.
You can adjust the type of food by pressing the AUTO (-) button and the size of servings by pressing the Dish button.

Use only dishes that are microwave-safe.
1 Open the oven door by pushing the large button in the bottom right-hand corner of the control panel.
2 Place the food in the centre of the glass plate.
3 Close the door.
4 Select the type of food that you are cooking by pressing the AUTO () button once or several times. Refer to the table on the following page for a description of the various pre-programmed settings.
5 Select the number of settings by pressing the Dish button once or several times.
6 If you wish to... Press ...

Increase the cooking time Until the symbol is displayed near the AUTO indication
Decrease the cooking time Until the symbol is displayed near the AUTO indication
Return to the initial setting
◆ Once if the ▲ symbol is displayed near the AUTO indication
◆ Twice if the symbol is displayed near the AUTO indication

To meet your individual taste (e.g. you would like to have your vegetables just cooked or very well cooked) and to adapt the program to the kind of food you are cooking with them (e.g. the potato type is very soft or firm), you can decrease or increase the cooking time by displaying the symbol.
7 Press

Result: The food is cooked according to the pre-programmed setting selected.
Auto Reheat Settings
Here are a few tips and recommendations to be followed when cooking or reheating food with the Auto Cook feature.
| Code Food Serving Size Standing Time Preparation | ||||
| 1 Peeled potatoes 400 - 500 g 2mins Take potatoes which have similar size and weigh550 - 650 g them. After washing and peeling put them into a700 - 800 g glass bowl ( microwavesuitable ) next to each other andadd 45 ml ( 3 tablespoons ) water. Cover withlid during cooking and standing time. | ||||
| 2 Fresh vegetables 200 - 300 g 2mins Wash and prepare the vegetables so that they are400 - 500 g suitable for cooking, weigh them and put them into600 - 700 g a glass bowl (microwave suitable) afterwards.Add 45ml (3 tablespoons) water to the smallestquantity and 60ml (4 tablespoons) to the otherquantities. Cover with lid during cooking and standingtime. | ||||
| 3 Fresh fish 200 - 300 g 2mins Wash the whole fish or fish filletst and put some350 - 450 g - lemon juice over it. Put them into microwave-500 - 600 g suitable glass or ceramic dish (lay whole fishes650 - 750 g head to tail into it).Cover with microwave-suitable cling film duringcooking and standing time. | ||||
| 4 Chicken pieces 350 - 450 g 2 - 3 mins. Brush the chicken pieces with oil and spices like500 - 600 g pepper and paprike. Lay the chicken pieces with650 - 750 g the bone-side up on the rack. Turn over, as soonas the beep sounds. | ||||
| 5 Jacket potatoes | 2 x 175 - 225 g4 x 175 - 225 g | 4-5 mins | Take potatoes which have similar size and weightwithin the weight range of 175g to 225g per potato.Wash the potatoes and prick the skin with a fork . Laythem on the glass plate and turn over, as soon as thebeep sounds.Lay 2 potatoes opposite each other.Lay 4 potatoes in a circle. | |
| 6 Burgers/Fish fingers(for zen) | 2 ro 4 thin burgers8 fish fingers(less crisp)1 or 2 thick burgers8 fish fingers(more crisp) | - | Take the burgers, fish fingers out the freezer and placethe burger directly on the rack and the fish finger on therack with aluminium foil. Turn over during cooking, assoon as the beep sounds. | |
Recomma Fish:
| Peeled Potatoes: | This program is suitable for all kinds of potatoes. If you wish to cook a softer type, simply press the LESS - button. If you wish to cook a harder type, simply press the MORE - button. |
| Fresh Vegetables: | This program is suitable for all kinds of vegetables. If you wish to cook a softer type (like courgettes), simply press the LESS - button. If you wish to cook normal type (like broccoli, cauliflower or carrots), you just choose the normal program. For any harder type of vegetables or if you wish you vegetables cooked loger, you simply press the MORE - button |
| Fresh Fish: | This program is suitable for whole fishes like trouts and for fish fillets of e.g. cod, haddock, sea bream, plaice and salmon. |
| Baked Potatoes: | This program is suitable for all kinds of potatoes. If you have a softer type, simply press the LESS - button. If you have a harder type, simply press the MOREE - button. |
Using the Auto Defrost Feature


natural_image
Abstract geometric diagram with a curved gray arc and two black shapes (diamond and triangle) pointing inward, no text or symbols present.
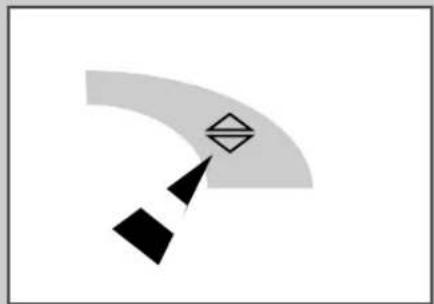
The Auto Defrost feature enables you to defrost meat, poultry, fish or fruit. The defrost time and power level are set automatically. You simply select the programme and the weight.

Use only dishes that are microwave-safe.
1 Open the oven door by pushing the large button in the bottom right-hand corner of the control panel.
2 Place the frozen food in the centre of the glass plate.
3 Close the door.
4 Press the AUTO () button.
Result: The following indications are displayed:

(Auto Defrost mode)

(defrost time adjustment mode)

(weight)
5 Press the AUTO ( ) button once or several times according to the type of food to be defrosted. Refer to the table on the next page for further details.
6 Select the food weight by pressing the lbs./kg and oz./g buttons.

- You can toggle between pounds and kilograms by pressing simultaneously the AUTO (and lbs/kg button.
When you have selected as the type of food, the maximum weight possible is 300 g.
7
If you wish to... Press ...

Increase the defrosting time Until the symbol is displayed near the AUTO indication
Decrease the defrosting time Until the symbols displayed near the AUTO indication
Return to the initial setting
◆ Once if the ▲ symbol is displayed near the AUTO indication
◆ Twice if the ▼ symbol is displayed near the AUTO indication
8 Press

Result :
◆ Defrosting begins.
According to the defrosting mode that you have chosen, the oven may beep half way through defrosting to remind you to turn the food over.
9 If the oven beeps half way through defrosting, press again to finish defrosting.

You can also defrost food manually. To do so, select the microwave cooking/reheating function with a power level of 20%. Refer to the section entitled "Cooking/Reheating" on page 14 for further details.
Auto Defrost Settings
The following table presents the various Auto Defrost programmes, the weights, standing times and any appropriate recommendations.
| Code Food Serving Size Standing Time Recommendations | |
| Meat 0.2 - 2.0 kg 20 - 40 mins. Shield the edgeparts with aluminium foil.roast beef Turn over when beep sounds during defrostingroast porkbeef steakpork chopsminced beef | |
| Poultry 0.2 - 2.0 kg 20 - 40 mins. Shield the chicken leg and wings with aluminium foil.whole and Turn over when beep sounds during defrosting.pieces | |
| Fish 0.2 - 2.0 kg 20 - 40 mins. Shield the tail of whole fishes with aluminium foil.whole fish Turn over when beep sounds during defrosting.fish fillets | |
| Fruit 0.2 - 0.3 kg 5 -10 mins. Put the frozen fruit into a glass bowl and cover with lid.Stir very carefully before standing time. This program is made for all kinds of fruit, e.g. all kind of berries, apple mango or pear slices etc. | |
Choosing the Accessories
Use microwave-safe dishes; do not use plastic containers, dishes, paper cups, towels, etc.
If you wish to select the combined cooking mode (grill and microwave), use only dishes that are microwave-safe and oven-proof. Metallic cookware or utensils may damage your oven.

For further details on suitable cookware and utensils, refer to the Cookware Guide on page 29.

natural_image
Line drawing of a circular mechanical component with internal blades and mounting brackets (no text or symbols)Grilling

natural_image
Line drawing of a circular mechanical component with internal blades and mounting brackets (no text or symbols)
flowchart
graph TD
    A["U"] --> B["Output 1"]
    A --> C["Output 2"]

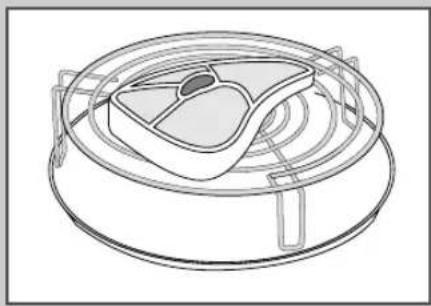
The grill enables you to heat and brown food quickly, without using microwaves. To this aim, a grill rack is supplied with your microwave oven.

Always use oven gloves when touching the dishes in the oven, as they will be very hot.
1 Preheat the grill to the required temperature, by pressing the button and then the 10min, 1min and 10s. buttons.
2 Open the door and place the food on the rack.
3 Press the button
Result: The following indications are displayed:
I (one-stage cooking)
U (grill mode)
4 Set the grilling time by pressing the 10 min, 1 min and 10 s. buttons. The maximum grilling time is 60 minutes.
5 Press the button.
Result: Grilling starts and when it has finished:
◆ The oven beeps four times
◆ The current time is displayed again

Please don't mind if heater turns off and on while grilling. This system is originally designed to prevent over heating of the oven.
Multistage Cooking
Your microwave oven can be programmed to cook food in up to three stages.
Example: You wish to defrost food and cook it without having to reset the oven after each stage. You can thus defrost and cook a 1.3kg chicken in three stages:
♦ Defrosting
◆ Standing for 20 minutes.
◆ Alternating function of MW and GRILLCooking for 45 minutes

The first two stages must be defrosting and a standing time.
1 Press the AUTO ( ) button once or several times.
2 Set the weight by pressing the lbs./kg and oz./g buttons the appropriate number of times (1.3kg in the example)

You can toggle between pounds and kilograms by pressing simultaneously the AUTO (and lbs./kg buttons.
3 If you wish to... Press ...

Increase the defrosting time Until the symbol is displayed near the AUTO indication
Decrease the defrosting time Until the symbols displayed near the AUTO indication
Return to the initial setting
◆ Once if the ▲ symbol is displayed near the AUTO indication
◆ Twice if the symbol is displayed near the AUTO indication
4 Press the button and set the standing time by pressing the 10min, 1min and 10s. buttons the appropriate number of times (20 minutes in the example)
5 To select... Then press...
| The microwave mode | ; if necessary, set the power level by pressing the button again once or several times. |
| The grill mode | UU. |
| The combined microwave and times grill mode | ;If necessary, set the power level by pressing the button again once or several times.(30% in the example). |
6 Set the cooking time by pressing the 10min, 1min and 10s. buttons the appropriate number of times .(45 minutes in the example)
7 Press .
Result:
The three modes (defrosting, standing time and cooking) are selected one after the other. According to the defrosting mode that you have chosen, the oven may beep half way through defrosting to remind you to turn the food over.
When cooking is over, the oven beeps four times.
◆ The current time is displayed again.


natural_image
Simple diagram with an hourglass icon and a black diamond shape pointing to it (no text or symbols)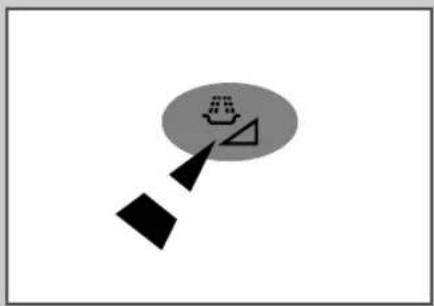
natural_image
Simple diagram with a boat icon and two geometric shapes (triangle and square) pointing to it, no text or symbols present.
Alternating Function of Microwaves and the Grill

flowchart
graph TD
    A["Start"] --> B{Decision}
    B --> C["Loop"]
    C --> D["End"]


You can also combine microwave cooking with the grill, to cook quickly and brown at the same time.

♦ ALWAYS use microwave-safe and oven-proof cookware. Glass or ceramic dishes are ideal as they allow the microwaves to penetrate the food evenly.
◆ ALWAYS use oven gloves when touching the dishes in the oven, as they will be very hot.
1 Open the oven door by pushing the large button in the bottom right-hand corner of the control panel. Place the food on the rack and the rack on the glass plate. Close the door.
2 Press the () button.
Result: The following indications are displayed:
I (one-stage cooking)
U (Alternating function of Microwaves and the Griu)
3 Set the cooking time by pressing the 10min, 1min and 10s. buttons.
4 Press the button.
Result: ♦ Combination cooking starts.
When the cooking time is over, the oven beeps four times.
◆ The current time is displayed again.
The power level allows you to modulate the quantity of energy dissipated and the time required to cook and grill the food, according to its type and volume.
Power Level Microwave Power Grill Power
100% 800 W 1000 W
Alternating function or MW and GRILL during 100sec. 18% of the time will MW power be on and 82% of the time grill power will be on.

The maximum microwave power for the Alternating function of Microwaves and grill mode is 18%.
Using the Memory Cook Feature
If you often cook or reheat the same types of dishes, you can store the cooking times and power levels in the oven's memory, so that you do not have to reset them each time.
You can store two different settings.
Storing the Settings
1 To programme the... Then press the button...
First setting Once
Second setting Twice
2 Set your cooking programme as usual (cooking time and power level); see page 15 if necessary.
3 Press .
Result: Your settings are now stored in the oven's memory.

The Memory Cook feature can only be used with the following modes:
◆ Microwave
Grill
◆ Alternating function MW and the GRILL
Using the Settings
1 Place the food to be cooked in the oven.
2 To select the... Then press the button...
First setting Once
Second setting Twice
3 Press . Result: The food is cooked as requested.
Switching the Beeper Off
You can switch the beeper off whenever you want.
1 Press the and buttons at the same time.
Result: ♦ The symbols no longer displayed.
◆ The oven does not beep each time you press a button or when cooking ends.
2 To switch the beeper back on, press the and buttons again at the same time.
Result: ♦ The symbols displayed again.
◆ The oven operates with the beeper on again.

natural_image
Abstract geometric shape with a curved gray arc and black triangular segments, no text or symbols present.

Using the Demonstration Mode
natural_image
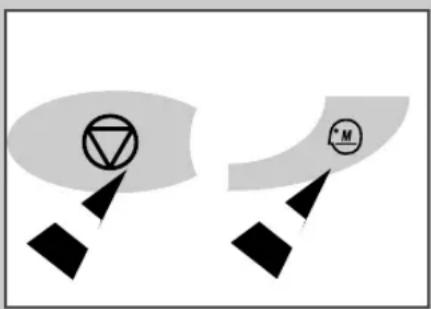
Two abstract geometric shapes with black diamonds and symbols, no text or labels presentYou can try out the various features of your microwave oven without actually cooking food, using the demonstration mode. You should clear the demonstration mode when you have finished to be able to cook food. The same buttons are used to set and clear the demonstration mode.
1 Press the and buttons at the same time. Result: The 8888 indication flashes.
2 Select the required function, by pressing the appropriate button.
3 Press the button to activate the demonstration mode.
Result: ◆ The corresponding cooking time is decreased at high-speed.
♦ Cooking does not actually take place.
◆ The oven beeps four times when the function is over.
4 To clear the demonstration mode, press the and buttons at the same time.
Result: The next time you use your microwave oven, cooking takes place normally.
Safety-locking Your Microwave Oven

natural_image
Two abstract geometric shapes with black triangles and symbols, no text or labels presentYour microwave oven is fitted with a special Child Safety programme, which enables the oven to be “locked” so that children or anyone unfamiliar with it cannot operate it accidentally.
The oven can be locked at any time.
1 Press the and buttons at the same time.
Result: ♦ The oven is locked (no functions can be selected). ♦ A key symbol ( ) is displayed.
2 To unlock the oven, press the and buttons again at the same time.
Result: ♦ The key symbol ( ) is no longer displayed. ♦ The oven can be used normally.
To cook food in the microwave oven, the microwaves must be able to penetrate the food, without being reflected or absorbed by the dish used.
Care must therefore be taken when choosing the cookware. If the cookware is marked microwave-safe, you do not need to worry.
The following table lists various types of cookware and indicates whether and how they should be used in a microwave oven.
| Cookware Microwave-Safe Comments | ||
| Aluminium foil | ✓ ✗ | Can be used in small quantities to protect areas against overcooking. Arcing can occur if the foil is too close to the oven wall or if too much foil is used. |
| Browning plate | ✓ | Do not preheat for more than eight minutes. |
| China and earthenware | ✓ | Porcelain, pottery, glazed earthenware and bone china are usually suitable, unless decorated with a metal trim. |
| Disposable polyester cardboard dishes | ✓ | Some frozen foods are packaged in these dishes. |
| Fast-food packaging | ||
| Polystyrene cups and containers polystyrene to melt. | ✓ Can be used to warm food. Overheating may cause the | |
| Paper bags or newspaper | ✗ May catch fire. | |
| Recycled paper or metal trims | ✗ May cause arcing. | |
| Glassware | ||
| Oven-to-table ware | ✓ Can be used, unless decorated with a metal trim. | |
| Fine glassware | ✓ Can be used to warm foods or liquids. Delicate glass may break or crack if heated suddenly. | |
| Glass jars | ✓ Must remove the lid. Suitable for warming only. | |
| Metal | ||
| Dishes | ✗ May cause arcing or fire. | |
| Freezer bag twist ties ✗ | ||
| Paper | ||
| Plates, cups, napkins and kitchen paper | ✓ | For short cooking times and warming. Also to absorb excess moisture. |
| Recycled paper | ✗ May cause arcing. | |
| Plastic | ||
| Containers | ✓ | Particularly if heat-resistant thermoplastic. Some other plastics may warp or discolour at high temperatures. Do not use Melamine plastic. |
| Cling film | ✓ | Can be used to retain moisture. Should not touch the food. Take care when removing the film as hot steam will escape. |
| Freezer bags | ✓ ✗ | Only if boilable or oven-proof. Should not be airtight. Prick with a fork, if necessary. |
| Wax or grease-proof paper | ✓ | Can be used to retain moisture and prevent spattering. |
A Few Cooking Techniques
To ensure even cooking of the food in your microwave oven, lay the food out carefully using the following simple techniques. DO NOT forget to observe standing times.

natural_image
Simple line drawing of a rectangular container filled with five round food items (no text or symbols)
natural_image
Line drawing of a rectangular container with three internal compartments (no text or symbols)Imperial/Metric Conversion Chart
| OUNCES/FLUID OUNCES | APPROXIMATE GRAMMES/MILLILITRES |
| 1 | 25 |
| 2 | 50 |
| 3 | 75 |
| 4 (1/4 lb) | 100 |
| 5 (1/4 pint) | 150 |
| 6 | 175 |
| 7 | 200 |
| 8 (1/2 lb) | 225 |
| 9 | 250 |
| 10 (1/2 pint) | 275 |
| 11 | 300 |
| 12 (3/4 lb) | 350 |
| 13 | 375 |
| 14 | 400 |
| 15 (3/4 pint) | 425 |
| 16 (1 lb) | 450 |
| 17 | 475 |
| 18 | 500 |
| 19 | 550 |
| 20 (1 pint) | 575 |
When cooking food with irregular forms, place the thinnest parts, which will cook faster, towards the centre of the dish.
Examples: Chicken legs, lamb cutlets, whole fish.
To prevent the thinnest parts of some food from becoming overcooked, cover the tips with small pieces of aluminium foil (keep away from the oven walls).
Examples: Heads and tails of whole fish, wings on a whole chicken.

natural_image
Line drawing of a bowl containing various fruits and vegetables (no text or symbols)If you are cooking several pieces of the same type of food, try to have them of even sizes and place then in a ring around the dish.
Examples: Potatoes, cauliflower pieces, tomatoes.

natural_image
Simple line drawing of a hand holding a fork above three sausages (no text or symbols)Food with skins must be pricked with a fork to allow the steam to escape and to prevent the skin from breaking.
Examples: Potatoes, tomatoes, sausages, egg yolks, whole fish.
Reheating
| Food Power Level Comments | Cooking Time(Mins.) | |||
MAIN COURSES | Individual plates of food1 plate2 plates4 plates | 2 - 33 - 41/26 - 8 | MED-HIGH (70%) | • Cover the meat with gravy, with the meat and vegetables towards the outside of the plate.• Turn half way through heating.• Stack on a plate stacker. |
| Cooked meats, chicken, chops, burgers, etc.1 serving2 servings | 1 1/2 - 321/2 - 41/2 | MED-HIGH (70%) | • Cover with cling film.• Re-arrange once during cooking. | |
| Stirrable casseroles1 serving2 servings4-6 servings | 2 - 44 - 66 - 10 | MED-HIGH (70%) | • Cover with cling film.• Stir well after 1 minute. | |
| Non-stirrable dishes(eg. LASAGNE)1 serving2 servings4 servings | 5 - 89 - 1212 - 16 | MED-LOW (30%)MED-LOW (30%)MEDIUM (50%) | • Cover with cling film.• Rotate dish at 2-minute intervals. | |
| VEGETABLES | 1 serving2 servings4 servings | 1 - 11/21 1/2 - 331/2 - 6 | HIGH (100%) | • Cover with cling film.• Stir well half way through cooking. |
STARCHY FOODS | Pies1 family pie, chilled1 individual pie2 individual piesmince pies1 individual pie4 individual pie | 7 - 10231/2 - 41/4 - 1/23/4 - 21/2 | MED-HIGH (70%)HIGH (100%)HIGH (100%)HIGH (100%) | • If necessary, remove from foil tray.• Stand on and cover with absorbent kitchen paper. |
| Pizza1 whole individual pizza1 slice of pizza | 3 - 411/2 - 2 | MED-HIGH (70%)HIGH (100%) | --- | |
| Rice1 serving cooked4 servings cookedIndividual curry with rice | 2 - 38 - 103 - 5 | MED-HIGH (70%) | • Add a little stock, cream or butter to:- Add moisture- Prevent sticking | |
| Pasta1 serving4 servings | 3 - 410 - 12 | MED-HIGH (70%) | • Add a little stock, cream or butter to:- Add moisture- Prevent sticking | |
CANNED FOODS | Convenience foods(baked beans, spaghetti), soups and rice pudding7oz (200g)15oz (425g) | 2 - 33 - 4 | HIGH (100%) • Transfer to a suitable oven-proof dish.• Cover with cling film.• Stir well after 1 and 2 minutes. | |
PUDDINGS | Sponge pudding1 serving4 servingsChristmas pudding1 servingWhole (1lb-450g) | 1 - 11/22 - 31/2 - 14 - 5 | HIGH (100%)HIGH (100%)MED-HIGH (70%) | • Cover with cling film.• Leave to stand for 2 to 3 minutes before serving, particularly if topped with jam.• Reheat carefully in an uncovered dish, as the high alcohol and sugar content could cause the pudding to burn if overheated. |
Defrosting
| Food Standing Time (Mins. Comments(Mins. per lb/450g) | ||||
MEAT | Whole joints (beef, lamb,pork, etc.) | 8 - 11 | 20 - 30 | • Shield any thin or narrow ends with foil.• Turn twice during defrosting. |
| Minced beef/lamb | 7 - 9 | 10 - 15 | • Break apart frequently.• Remove thawed pieces as soon aspossible and leave to stand. | |
| Steak, chops, cutlets | 6 - 9 | 10 - 15 | • Turn half way through defrosting.• Shield ends and bones with foil, if necessary. | |
| Sausages, bacon | 4 - 5 | 5 | • Separate and re-arrange twice during defrosting. | |
| Cooked casseroles | 15 | 5 mins. half way,5 mins. at end | • Break up and set aside thawed pieces as they defrost. | |
| Cubed meat | 7 - 8 | 10 - 15 | ||
POULTRY | Whole chicken, duck,turkey, etc. | 8 - 10 | 20 - 30 | • Shield wings, breast bone, drumsticks withfoil, as necessary.• Defrost breast side down first and turn halfway through defrosting. |
| Drumsticks, wings, thighsSmallLarge | 6 - 87 - 9 | 10 - 1510 - 15 | • Arrange thinner ends towards the centre of the dish.• Turn and re-arrange twice during defrosting. | |
FISH | Whole fish (trout, mackerel) | 4 - 5 | 5 - 10 | • Shield thin ends with foil, if necessary.• Arrange in a single layer.• Turn once during defrosting. |
| Fillets (plaice, kippers) | 3 - 5 | 10 - 15 | ||
| Steaks (cod, salmon) | 4 - 5 | 10 - 15 | ||
| Prawns, scallops | 5 - 6(per 8oz/225g) | 5 - 10 | • Stir half way through defrosting. | |
| Boil in bag fish | 3 - 5 | 5 | • Pierce the bag and place in an oven-proof dish.• Turn half way through defrosting. | |
FRUIT | Loose, soft fruit(raspberries, cherries,strawberries) | 6 - 8 | 5 - 10 | • Measure out required amount.• Stir once or re-arrange during defrostingand standing time. |
| Loose, hard fruit(apples, peaches, rhubarb) | 7 - 8 | 5 - 10 | ||
| Purees, fruit dessert | 7 - 10 | 10 - 15 | • Stir carefully during defrosting. | |
| Fruit pie, trifles, cheesecakeswith fruit toppings | 3 - 4 | 10 - 15 | • Stand on serving plate. | |
FLOURPRODUCTS | BreadLarge sliced/unsliced loaf | 5 - 7 / 6 - 8 | 10 - 15 | • Remove from plastic wrapping.• Stand on absorbent kitchen paper.• Turn over halfway through defrosting.• Over-defrosting will dehydrate the bread. |
| Small sliced/unsliced loaf | 3 - 5 / 4 - 6 | 10 - 15 | ||
| 1 slice | 10 - 20 secs. | - | ||
| Bread rolls and croissants124 | 15 - 15 secs.30 secs.1 - 11/2 | 1 - 21 - 21 - 2 | ||
| Uncooked pastry | 1(per 8oz-225g) | 20 | • Remove from wrapping.• Stand on absorbent kitchen paper.• Turn frequently so that it does not get warm in places. | |
| Filled flans(7-8 in/18-20 cm) | 4 - 5 | 5 - 10 | • Stand on kitchen paper on the serving plate.• Remove paper before serving. | |
| Sausage rolls (4) | 2 - 3 | 5 | • Wrap each roll in kitchen paper to absorbmoisture.• The standing time is essential. | |
| Sponge cakesWholeIndividual | 1 - 11/240 - 60 secs. | 5 - 10 | • Stand on kitchen paper. | |
Cooking Meat
| Food Power Level Comments | Cooking Time(Mins. per lb/450g) | |||
BEEF | Small roasts (fillet)RareMediumWell done | 66 - 88 - 9 | HIGH (100%)for first 3 min. thenMEDIUM (50%) | Turn over half way through cooking.Stand for 15 - 25 minutes. |
| Thick roasts(rib, rump, top side)RareMediumWell done | 10 - 121314 - 15 | HIGH (100%)for first 5 min. thenMEDIUM (50%) | Shield bone and outer edge with foil.Turn over half way through cooking.Stand for 15 - 25 minutes. | |
| Brisket and pot roasts(well done) | 20 | HIGH (100%)for first 5 min. thenMEDIUM-LOW (30%) | Cook covered.Stand for 20 minutes. | |
| Steak (225g)RareWell done | 35 | MED-HIGH (70%) | --- | |
LAMB | Tender cuts(leg, fillet, crown)MediumWell done | 10 - 1212 - 14 | HIGH (100%)for first 5 min. thenMEDIUM (50%) | Turn over half way through cooking.Stand for 15 - 25 minutes. |
| Tougher cuts(shoulder, boned breast)Well done | 15 | |||
| Chops, cutletsWell done | 8 - 10 | MED-HIGH (70%) | Arrange the thin ends towards the centre of the dish.Stand for 5 minutes. | |
PORK | Leg, shoulderWell done | 10 - 12 | HIGH (100%)for first 5 min. thenMEDIUM (50%) | Turn over half way through cooking.Stand for 15 - 25 minutes. |
| ChopsWell done | 8 - 10 | MED-HIGH (70%) | Arrange the thin ends towards the centre of the dish.Stand for 5 minutes. | |
VEAL | Leg, shoulder, loin, rackWell done 15 HIGH (100%) | for first 5 min. thenMEDIUM (50%) | Turn over half way through cooking.Stand for 15 - 20 minutes. | |
GAMMON | Joints (well done) | 10 - 12 | MEDIUM (50%) | Turn over half way through cooking.Stand for 15 - 20 minutes. |
| Steaks (well done) | 6 - 8 | MED-HIGH (70%) | Turn over half way through cooking.Stand for 5 minutes. | |
| Bacon1 slice2 slices4 slices | 3/4 - 11/411/2 - 21/423/4 - 4 | HIGH (100%) | Loosely cover with kitchen paper. | |

Cooking Poultry
| Food | Cooking Time(Mins. per lb/450g) | Power Level Comments | |
| CHICKEN(Whole) | Whole withoutstuffing 6 - 8 | HIGH (100%) • Stand on a roasting rack or upturned saucerin an oven-proof dish.For the first half of the cooking time:– Cook breast side down– Protect wing tips with foil if necessary• Stand for 10-15 minutes. | |
| Whole with stuffing | 8 - 9 | HIGH (100%) | |
CHICKEN(Portions) | Thighs, drumsticks 6 - 8 HIGH (100%) • Position thicker parts towards outer edge ofthe dish, skin side upwards.Reposition half way through cooking. | ||
| Breast 2 - 3 HIGH (100%) • Cover during cooking to prevent the chickenMEDIUM (50%) from becoming dry. | |||
| Boneless roll 8 - 10 MED-HIGH (70%) • Turn over half way through the cooking time.Wrap ends in foil, if they feel warm during cooking. | |||
| TURKEY(Whole) | Whole, up to 8 lbs (4kg) 9 - 10 HIGH (100%) • Cook in the same way as a whole chicken.for first 10 mins. • If stuffing:then – Fill neck end loosely with stuffingMED-HIGH(70%) – Cook rest of stuffing separately– Make sure the stuffing is thoroughly cooked. | ||
DUCK | Whole or portions | 7 - 10 | HIGH (100%)for first 10 mins. ch thenMED-HIGH(70%) during cooking.Cook to well done but do not overcook.Leave to stand, covered with foil. |
Cooking Fish
| Food | Weight | Cooking Time (mins. at HIGH) | Comments | |
| FISH(Whole) | Small fish (5 in/ 12 cm) | 8oz (225g) | 3 - 5 | • Shield head and tail with foil.• Turn over half way through cooking. |
| Medium fish (8in/ 20 cm) | 1 lb (450g) | 5 - 8 | ||
| Large fish (over 10in/ 25 cm) | 2 lb(1 kg) | 8 - 10 | ||
| FISH(Portions) | Fish fillets | 1 lb(450 g) | 4 - 7 | • Overlap thin ends. |
| Fish steaks | 1 lb (450 g) | 5 - 8 | • Arrange thicker parts towards the outside of the dish. | |
| SEAFOOD | Whole prawans (peeled) | 1 lb (450 g) | 7 - 8 | • Stir or turn several times during cooking. |
| Scallops | 1 lb (450 g) | 6 - 8(MED-HIGH 70%) | ||
| Lobster, crab | 1 lb (450 g) | 6 - 8 | ||
Cooking Pasta and Rice
| Food | Weight | Cooking Time (mins. at HIGH) | Standing Time | Comments | |
PASTA  | Egg noodles tagliatelle | 8oz (225g) | 5 - 6 | 2 | • Cook uncovered with 1 tablespoon of oil and 1 pint (600ml) of boiling, salted water. |
| Macaroni | 8oz (225g) | 8 - 10 | 2 | • Cook uncovered with 1 tablespoon of oil and 13/4 pints (1 litre) of boiling, salted water. | |
| Lasagne | 8oz (225g) | 8 - 10 | 3 | ||
| Pasta shells | 8oz (225g) | 14 - 18 | 2 | ||
| Spaghetti | 8oz (225g) | 8 - 12 | 3 | • Break in half, if necessary.• Cook uncovered with 1 tablespoon of oil and 11/2 pints (800ml) of boiling, salted water, | |
RICE 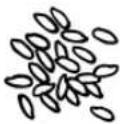 | Easy-to-cook rice | 8oz (225g) | 10 | 3 | • Cook covered with 1 pint (600ml) of boiling, salted water. |
| Long grain rice | 8oz (225g) | 10 - 12 | 3 | ||
| Easy-to-cook brown rice | 8oz (225g) | 20 | 5 | • Cook covered with 11/4 pint (650ml) of boiling, salted water. | |
| Brown rice | 8oz (225g) | 20 - 25 | 5 | • Cook covered with 11/2 pint (800ml) of boiling, salted water. | |
| Savoury rice | 4.5oz (130g) | 12 - 14 | 2 | • Cook covered with 3/4 pint (400ml) of boiling, salted water. | |
Cooking Fresh Vegetables
| Food Quantityl Comments | Cooking Time(Mins. at HIGH) | |||
POTATOES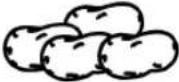 | Whole jacket potatoes | 124 | 4 - 56 - 812 - 14 | • Wash well and prick all over with a fork.• When almost cooked, wrap in foil and leave to stand for 5 minutes. |
| Pealed potatoes cut into 1 inch (3 cm) cubes | 3 | 6 - 7 | • Place in a large oven-proof dish and cover tightly.• Stir well half way through the cooking time.• If mashing, add 1 - 2 minutes to the cooking time. | |
BEANS, PEAS,etc. | French beans | 1lb (450g) | 6 - 8 | • Add 2 fl. oz (30ml) of water.• Taste after the minimum cooking time.• Serve immediately. |
| Sliced runner beans | 1lb (450g) | 5 - 6 | ||
| Broad beans | 8oz (225g) | 4 - 5 | ||
| Peas | 8oz (225g) | 4 - 6 | ||
| Mange-tout | 12oz (375g) | 6 - 7 | ||
CABBAGE,CAULIFLOWER,etc. | Cabbage(roughly chopped) | 1/2 medium | 5 - 7 | • Add 4 fl. oz (60ml) of water. |
| Brussel sprouts | 1lb (450g)8oz (225g) | 8 - 105 - 7 | ||
| Cauliflower, divided into flowerets | 1 whole | 10 | • Add 4 fl. oz (60ml) of water.• Arrange the flowerets with the stalks towards the centre of the dish. | |
| Broccoli | 1lb (450g)8oz (225g) | 7 - 84 - 5 | ||
| Spinach | 1lb (450g) | 5 - 6 | • Cook tender leaves only with very little water.• Cover lightly. | |
| Spring greens | 1lb (450g) | 7 - 8 | ||
ROOTVEGETABLES | Carrots(thinly sliced) | 1lb (450g)8oz (225g) | 106 - 7 | • Add 4 fl. oz (60ml) of water. |
| Beetroot (unpeeled) | 4 medium | 12 - 15 | ||
| Swede and turnip | 1lb (450g) | 10 - 12 | • Add 4 fl. oz (60ml) of water.• Cover tightly.• Stir half way through cooking. | |
| Parsnips (quartered) | 1lb (450g) | • Wrap in cling film or cook in a covered dish. | ||
OTHERVEGETABLES | Mushrooms | 8oz (225g) | 2 - 3 | • Cook in a covered dish with melted butter.• Do not overcook. |
| OnionsWholeQuartered | 2 large4 - 5 | 4 - 62 - 3 | • Blanch in a covered dish with no additional water. | |
| Tomatoes | 2 | 2 - 3 | • Halve crosswise.• Dot with butter or grated cheese.• Cook in an uncovered dish. | |
| Courgettes | 8oz (225g) | 3 - 4 | • Cook in a little water until just soft. | |
| Celery stalks (halved) | 4 stalks | 2 - 3 | • Add 2 fl. oz (30ml) of water. | |
| Corn on the cob | 124 | 2 - 33 - 46 - 8 | • Wrap individually in cling film or place in a shallow oven-proof dish.• Turn twice during cooking. | |
| Asparagus | 1lb (450g) | 5 - 6 | • Add 4 fl. oz (60ml) of water. | |
| Artichokes | 1 | 4 - 5 | • Wrap individually in cling film. | |
| Pumpkin in 1 inch (3cm) cubes | 8oz (225g) | 6 - 7 | • Place in a large oven-proof dish and cover tightly.• Stir well half way through cooking.• If mashing, add 1 - 2 minutes to the cooking time. | |
Cooking Frozen Vegetables
| Food Quantityl Comments | Cooking Time(Mins. at HIGH) | |||
| POTATOES | Potato slices(1/2 inch/1cm thick) | 12 | 4 - 56 - 8 | • Oven chips are unsuitable for microwave cooking. |
BEANS,PEAS, etc. | French beans | 1lb (450g) | 8 - 10 | • Add 2 fl. oz (30ml) of water.• Place in a shallow oven-proof dish and cover.• Add 2 fl. oz (30ml) of water. |
| Broad beans | 12oz (375g) | 7 - 8 | ||
| Peas | 4oz (125g)8oz (225g)1lb (450g) | 2 - 34 - 58 | ||
| Mange-tout | 8oz (225g) | 4 - 5 | ||
| Mixed vegetables | 4oz (125g)8oz (225g) | 3 - 44 - 6 | ||
CABBAGE,CAULIFLOWER,etc.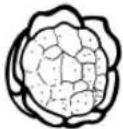 | Cabbage | 8oz (225g) | 3 - 4 | • Add 3 fl. oz (45ml) of water.• Add 2 fl. oz (30ml) of water.• Taste after the minimum cooking time to avoid overcooking. |
| Brussel sprouts | 8oz (225g) | 4 - 5 | ||
| Cauliflower | 8oz (225g) | 5 - 6 | • Add 2 fl. oz (30ml) of water.• Rearrange half way through cooking.• Leave to stand for 1 - 2 minutes and salt to taste. | |
| Broccoli | 8oz (225g) | 5 | • Do not add any water. | |
| Spinach | 8oz (225g) | 4 - 5 | --- | |
ROOTVEGETABLES | Carrots 8oz (225g) 4 - 6 | • Add 2 fl. oz (30ml) of water. | ||
OTHERVEGETABLES | Corn on the cob | 13 - 4 | 2 - 38 - 10 | • Add a knob of butter.• Add 2 fl. oz (30ml) of water. |
| Sweet corn | 8oz (225g) | 3 - 4 | ||
Grilling
| Food Grill Quantity | tyl Comments | Cooking Time (min) | Standing Time | ||||
| 1 Side 2 | Side | ||||||
| LAMB CHOPS | Medium | Grill | 2 (100-150g) | 14 - 15 • Bush the well with oil and lay them on the rack, turn over. | |||
| CHICKEN PIECES | Thighs | Microwave & Grill | 2 (100-250g)) | 13 - 14 | 10 - 11 | 2 - 3 | • Brush the chicken pieces with oil and add spices (like special chicken spices). Put them bone - side up on the rack and turn them over. |
| Wings | Microwave & Grill | 4 (700-800g) | 9 - 10 | 7 - 8 | |||
| WHOLE FISH (TROUT e.g.) | Microwave & Grill | 1 (250g) 7 - 8 | 6 - 7 | 2 - 3 | • Brush the fish with oil and put it on the rack. Turn over and add spices after grilling is finished. In case the fish is too long, cut the tail off. | ||
| GRILL SAUSAGES | Grill | 4 (80 - 100g) | 10 - 11 | 7 - 8 | -- | • Put the sausages on the rack and turn them over. | |
| TOAST SLICES | Grill | 2 - 4 | 3.30 - 4 | 2.30 - 30 | -- | • Put the slices on the rack and turn them over. | |
| BREAD ROLLS | Grill | 2 - 4 | 2 - 3 | 1.30 - 2.30 | -- | • Put the rolls on the rack and turn them over. | |
| TOAST HAWAII/CHEESE TOAST | Microwave & Grill | 2 - 4 | 6 - 8 | -- | 2 - 3 | • Put baking paper on the rack, before you lay the toast slices on it, Turn the toast over. | |
| PIZZA SLICE | Microwave & Grill | 150g | 6 - 7 | -- | 2 - 3 | • Put baking paper on the rack, before you lay the pizza slice on it. Turn the pizza over. | |

Recommendations
DO NOT spill water in the vents.
NEVER use any abrasive products or chemical solvents.
Take particular care when cleaning the door seals to ensure that no particles:
◆ Accumulate
◆ Prevent the door from closing correctly
The following parts of your microwave oven should be cleaned regularly to prevent grease and food particles from building up:
◆ Inside and outside surfaces
◆ Door and door seals
♦ Glass plate and roller ring

ALWAYS ensure that the door seals are clean and the door closes properly.
1 Clean the outside surfaces with a soft cloth and warm, soapy water. Rinse and dry.
2 Remove any splashes or stains on the inside surfaces or on the roller ring with a soapy cloth. Rinse and dry.
3 To loosen hardened food particles and remove smells, place a cup of diluted lemon juice on the glass plate and heat for ten minutes at maximum power.
4 Wash the dishwasher-safe plate whenever necessary.
Storing and Repairing Your Microwave Oven
A few simple precautions should be taken when storing or having your microwave oven serviced.
The oven must not be used if the door or door seals are damaged:
♦ Broken hinge
♦ Deteriorated seals
♦ Distorted or bent oven casing
Only a qualified microwave service technician should perform repairs.

NEVER remove the outer casing from the oven. If the oven is faulty and needs servicing or you are in doubt about its condition:
◆ Unplug it from the wall socket
◆ Contact the nearest after-sales service centre
Storing the Oven
If you wish to store your oven away temporarily, choose a dry, dust-free place.
Reason: Dust and damp may adversely affect the working parts in the oven.
SAMSUNG strives to improve its products at all times. Both the design specifications and these user instructions are thus subject to change without notice.
Power source 230 V \~50 Hz
Power consumption
Microwave 1200 W
Grill 1000 W
Combined mode 1350 W
Output power 80 W/800 W - 10 levels (IEC-705)
Operating frequency 2450 MHz
Magnetron OM75SH(31)
Cooling method Cooling fan motor
Dimensions (W x H x D)
Outside 489 x 275 x 364 mm
Oven cavity 306 x 181 x 322 mm
Volume 0.6 cubic feet
Weight
Net 15.5 kg approx.

ELECTRONICS
- Kort oversigt
- Grilning
- Owner's Instructions and Cooking Guide
- Quick Look-up Guide
- Contents
- Contents (continued)
- ◆ Features Common to All Types of Cooking
- ◆ Recommendations for Use
- PRECAUTIONS TO AVOID POSSIBLE EXPOSURE TO EXCESSIVE MICROWAVE ENERGY
- Before cooking food or liquids in your microwave oven, please check that the following safety precautions are taken.
- IMPORTANT SAFETY INSTRUCTIONS
- IMPORTANT
- Accessories
- Installing Your Microwave Oven
- Setting the Time
- Cooking Principle
- Checking that Your Oven is Operating Correctly
- What to Do if You are in Doubt or Have a Problem
- The following procedure explains how to cook or reheat food.
- Power Levels and Time Variations
- Stopping the Cooking
- Adjusting the Cooking Time
- Setting a Standing Time
- Recommendations:
- Using the Auto Reheat Feature
- Auto Reheat Settings
- Recomma Fish:
- Using the Auto Defrost Feature
- Auto Defrost Settings
- Choosing the Accessories
- Grilling
- Multistage Cooking
- Alternating Function of Microwaves and the Grill
- Power Level Microwave Power Grill Power
- Using the Memory Cook Feature
- Storing the Settings
- Using the Settings
- Switching the Beeper Off
- You can switch the beeper off whenever you want.
- Using the Demonstration Mode
- Safety-locking Your Microwave Oven
- A Few Cooking Techniques
- Cooking Frozen Vegetables
- Recommendations
- Storing and Repairing Your Microwave Oven
- Storing the Oven
- Power consumption
- Weight
Brand : SAMSUNG
Model : G2638CR
Category : Microwave