BB-200 - Hi-Fi System Block - Free user manual and instructions
Find the device manual for free BB-200 Block in PDF.


| Product Type | Hi-Fi System |
| Brand | Block |
| Model | BB-200 |
| Power Output | Approx. 50W RMS per channel (estimated) |
| Dimensions (W x H x D) | Approx. 430 x 140 x 350 mm (main unit) |
| Weight | Approx. 5.5 kg (main unit) |
| Power Supply | AC 230V ~ 50Hz |
| Power Consumption | Approx. 120W (max) |
| Standby Power Consumption | < 1W |
| Supported Media | CD, MP3 via USB, FM Radio |
| Audio Inputs | AUX (3.5mm), USB Type A |
| Audio Outputs | Speaker terminals (4-8 ohms), Headphone jack |
| Remote Control | Included (IR) |
| Display | LCD with backlight |
| Equalizer Presets | Rock, Pop, Jazz, Classic, Flat |
| Radio Bands | FM (87.5 - 108 MHz) |
| Number of Speakers | 2 (passive bookshelf speakers) |
| Speaker Impedance | 6 ohms |
| Cleaning Instructions | Wipe with dry soft cloth; avoid solvents |
| Safety Certifications | CE, RoHS |
| Repairability Index | 7/10 (estimated) |
| Spare Parts Availability | Contact Block support for details |
| Warranty | 2 years limited warranty |
Frequently Asked Questions - BB-200 Block
User questions about BB-200 Block
0 question about this device. Answer the ones you know or ask your own.
Ask a new question about this device
Download the instructions for your Hi-Fi System in PDF format for free! Find your manual BB-200 - Block and take your electronic device back in hand. On this page are published all the documents necessary for the use of your device. BB-200 by Block.
USER MANUAL BB-200 Block
HIFI | STREAMING | AUDIO ○ ● ●
natural_image
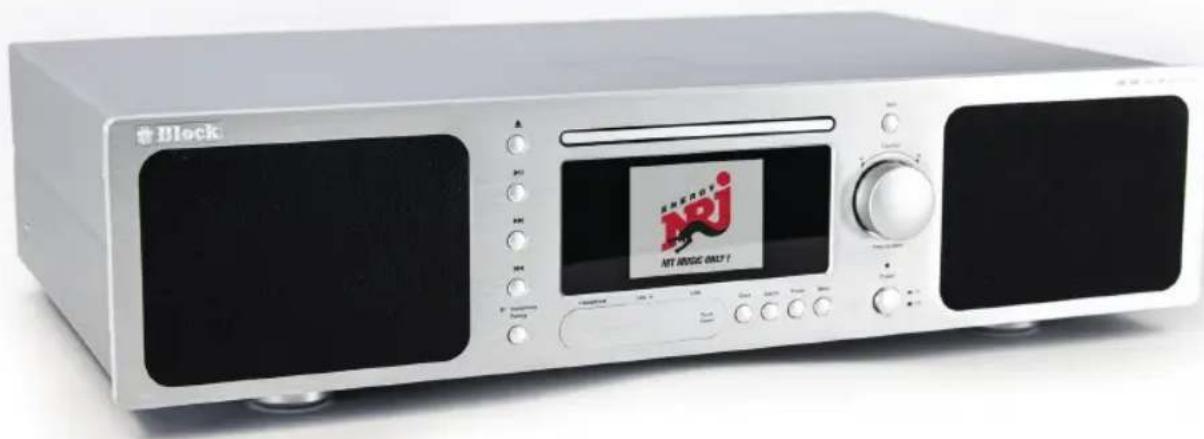
Exterior view of a silver Block electronic device with a digital display showing the 'JNJ NET MUSIC ONLY 1' (no visible text beyond branding)APPLE® PC (MAC OS X®)
block@audioblock.com
DEAR COSTUMER,
Thank you for choosing this high quality device. This manual shall give you an overview of how to operate your device. You will receive safety informations and you will be informed about how to clean your equipment best. The safety and operating informations have to be strictly followed in order to ensure the long-term and safe functioning of the product. Please, take some time to peruse the manual carefully. The operating instructions should be retained in a safe place for future reference, to be given with a resale. Due to software updates or technical developments with third manufactures (e.g. Apps), parts of this manual can be updated. Please visit our website „www.audioblock.com“ to check whether there are updated operating instructions for downloading. For this purpose, compare the status on the cover page with the information on the internet. If you have any further questions regarding your device, please contact an authorized specialist supplier or our service centre. In case of a defect resulting from improper operation, misuse or non-observance of the operating instructions, please be aware that the guarantee will be invalidated. Besides, no liability can be accepted for consequential damages. This product is EMC certified and got all the directives and requirements of the European Union. CE and RoHS documentation are provided.
CONTENTS

Safety instructions.... 34-37
Before operating....38
Operating Elements on the Device.... 38-39
The remote control....40
Connections to the device 41
Assembling the device 42
Initial commissioning and installation 43
Manual Installation (WLAN & LAN) 44
The amplifier....45
The FM radio....46
The DAB + radio....47
The internet radio....48
The media player (USB front connection) 49
Music streaming-function....50
Spotify Connect....51
Connecting external remote control ....52
Connecting external devices via Bluetooth ^ ....53
Various connections....54-55
Short manual disc mode and Blu-ray 56
The remote control in Blu-ray mode....57
System settings ....58
Troubleshooting....59
Care and transport....60
Technical data....61
SAFETY INSTRUCTIONS
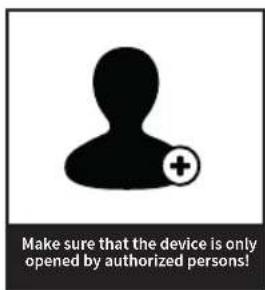
Caution: to avoid the risk of electric shock, do not modify this device! The opening of the device as well as changes in the appliance may be carried out only by authorized personnel. Important security instructions:
Before using the device for the first time, please read the operating instructions thoroughly.
▶ This device is to be used indoors only.
▶ This device may be connected only to a socket intended for it.
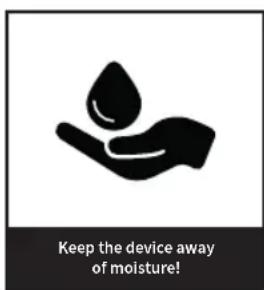
▶ This device is not to be exposed to humidity.
▶ Make sure the appliance does not stand to close to other objects
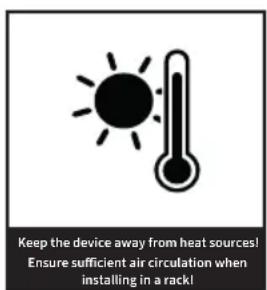
▶ Make sure the appliance does not stand near a heat source
▶ Make sure that the connection cable is not damaged or is going to be damaged

INFORMATION ON DISPOSAL OF THE OLD EQUIPMENT:
Your product is made of high quality and recyclable materials. With this symbol, the product fulfils the EU Directive 2002/96 / EC. Please do not dispose of your appliance in the domestic waste but in a suitable separate collection of materials. Electronic devices, accessories and packaging shall be handled to special places intended and marked by signs for its purpose. For more information, where you find these places, please contact your local garbage disposal service. Please, keep to this regulation in order to give a better environment to our children.
The equipment complies with the EU norm (73/23/EEC). and fulfils the electromagnetic compatibility (89/336/EEC).
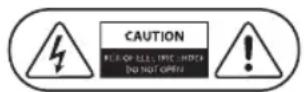
The flash icon shall warn the user of not isolated hazardous voltages in the device's housing. This voltage could be strong enough to injure people through an electrical shock. The exclamation mark shall draw the attention of the user to the fact that the manual, delivered together with the device, contains important operating and maintenance instructions.
Please note that we accept no liability for problems that may arise from third-party providers.
HANDLING BATTERIES
Batteries may contain flammable substances. Improper handling can cause batteries to leak, strongly heat, ignite, or even explode what, could damage your device and your health.
FOLLOW THESE INSTRUCTIONS:
▶ Keep children away from batteries.
In case of batteries have been swallowed, report this to your doctor immediately.
▶ Never charge batteries (unless specifically stated).
▶ Never discharge batteries by high power output.
▶ Never short - circuit batteries.
▶ Never expose batteries to excessive heat such as sunshine, fire or something similar.
Do not disassemble or deform batteries. Your hands or fingers could be injured or battery fluid could get into your eyes or on your skin. Should this happen, rinse the affected area with plenty of clear water and inform your doctor immediately.
▶ Avoid strong jolts and vibrations
▶ Never exchange the polarity. Make sure that the poles Plus (+) and minus (-) are correctly inserted, to prevent short circuits.
If necessary, clean battery and device contacts before insertion. Do not mix new and old batteries or batteries of different types. This could cause malfunctions on your device Besides, the weaker battery would discharge too strongly.
▶ Remove any discharged batteries immediately from the unit.
- Remove the batteries from your device if they haven't been used for an extended period of time.
- Replace at the same time all discharged batteries in a device with new batteries of the same type. If I you want to store or to dispose the batteries, isolate their contacts with an adhesive tape.
SAFETY INSTRUCTIONS
Do not let electrical appliances in children's hands! Never let children unattended to use electrical devices. Also keep the Packaging foils far away from children. There is a danger of shocking and suffocation.
SAFE POSITIONING
▶ Use the device exclusively in dry rooms
If the device comes from a cold into warm surroundings, it could be humid inside the equipment. In this case, wait about two to three hours before using it.
▶ Place the device on a firm and horizontal plane surface.
▶ Place the device with at least 10 cm of distance to the wall.
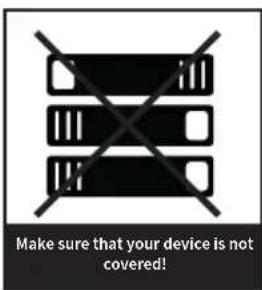
▶ Do not cover existing ventilation openings.
- Avoid the proximity of heat sources, such as radiators, or devices with strong magnetic fields, such as loudspeakers.
▶ Do not place open sources of fire, such as burning candles, on the device.
▶ Do not place the device on sensitive surfaces.
SECURE CONNECTION
Connect the device only to an easily accessible and suitable installed socket. With 230 V \~ 50 Hz.
The net plug must be freely accessible so that the device can be easily and quickly disconnect from the power supply, in case of emergency.
- Locate the power cable so that nobody can trip over it or step on it.
▶ Do not use extension cables. Do not bend or squeeze the net cable.
▶ Always pull the mains cable from the socket.
SAFE USE
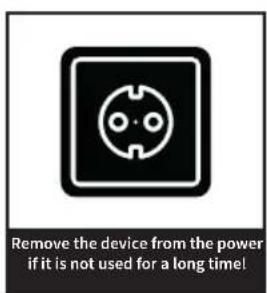
- Disconnect the power plug from the power socket and remove the aerial cable from the device if you do not use the unit for a long time or when a thunderstorm is approaching.
The net cable shall not be wrapped around the device during operation nor in touch to hot surfaces. Avoid humidity to enter the housing.
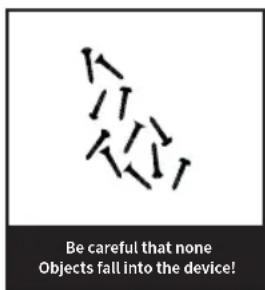
▶ Never touch the device, the net cable or the net plug with wet hands. There is a risk of electric shock. Should an item or liquid get into the housing, immediately disconnect the device from the power supply and have it checked.
▶ Have your equipment inspected by qualified personnel before restarting it. Otherwise there is the anger of electric shock.
▶ Never use the device if it is damaged, or if there is any damage to the net cable or to the plugs. In case the appliance is damaged, immediately pull the plug from the socket.
▶ Never open the device. In case of fault, please contact our service centre or any other specialized shop.
▶ The remote control has an infrared diode Class 1.
▶ Do not look at the LED with optical devices.
BEFORE COMMISSIONING
Before you can use your internet radio, streaming functionality or using a smartphone app, you will need:
• A quick Internet access.
- A router, preferably with WLAN (wireless access point).
- If your router does not provide WLAN, you can also connect your device via an Ethernet cable
- While setting up the device choose between wireless (WLAN) and cable connection.
- If your wireless network is set to Wired Equivalent Privacy (WEP) or Wi-Fi Protected Access (WPA), you will need the WEP or WPA code.
• Before you continue make sure that your wireless network is switched on and has broadband internet access.
- If you have any problems connecting your device to your router please try to solve them by referring to the router's operating manual.
-
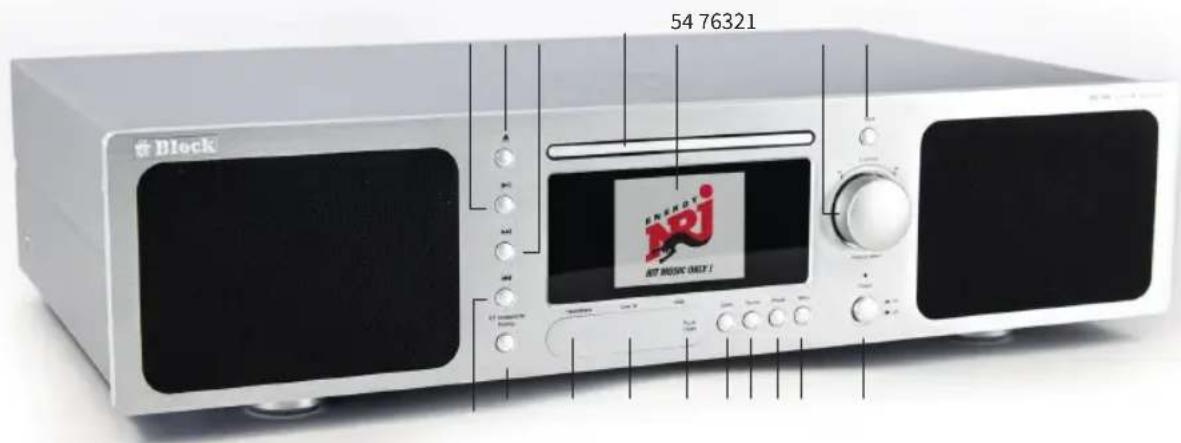
„Play / pause“ button: After a single pressure, the device stops on pause, a further one will resume the playback. If you press it for 5 seconds, the device will stop the playback. This key function is valid for CD and media players.
-
„Eject“-Button: Opens and closes the CD-Blu-Ray-drive
- „Forward“ button: Press this button on radio mode and the device searches automatically the next radio station. On CD and media play-
er mode the device changes to the next track.
- Disc drive (CD/Blu-Ray)
- Colour display
- Multifunction knob: With left / right rotation, the volume can be raised or lowered. Press the menu key to switch to the menu mode, the single points can be selected by rotating and activated by pressing the multifunction knob.
- „Back“ button: press this button to return to the previous menu item.
- „Backward“ button: Press this button on radio mode and the device searches automatically for the next radio station. On CD and media player mode, the device changes to the track before.
- BT Headphone pairing: Press the pairing button for connect a Bluetooth Headphone/speaker.
- 6,3mm Headphone Jack.
- 3,5mm line-in input jack for analog media players.
-
USB input
-
"Clock" button: Press the button to switch to standby mode. Date and time are shown in the display. After a further pressure the device will start again with the latest mode.
- "Source" button: Press this button to get an overview about the sources.
- „Preset“ button: Press this button to show the saved radio stations in DAB and UKW mode. In CD and Blu-ray mode hold the button to activate the sound setting „VOL plus“. Hold the button for a second time to activate „Vol plus2“. To deactivate the sound setting hold the button again. This function can also be used for optical and analog input sources.
- "Menu" button: Press this button to switch to the system menu. Press and hold about 2 seconds to go to remote learning screen.
- "Power" button: Press this button to switch it on and off (Real power disconnector).
THE REMOTE CONTROL
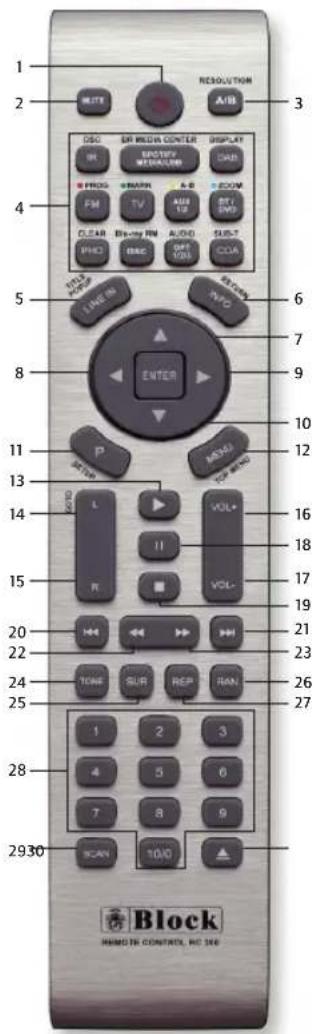
- „Standby“ button: Switches the device into „Clock“ mode, the display will show the time and the date. To save energy switch off the device with the main power button.
- "Mute" button: Switches the sound off.
- „A/B“ button: Turns off the speakers.
- Operating Mode select button: • IR: Starts the Internet radio • Media / USB (SPO-TIFY): Starts the media player or USB playback. Press it again to switch to Spotify mode. • DAB: Starts the DAB + radio reception. • FM: Starts the FM radio reception. • TV / AUX: This button activates all the external inputs on the rear panel. • BT: Pressing activates the Bluetooth mode. • PHO: Activate the sound settings. 1x for „VOL plus“ | 2x for „VOL plus2“ | 3x deactivates sound settings • DISC: Starts the Disc modus. • OPT: Pressing several times switches on the optical inputs from 1-3 • COA: Activates the back-sided coaxial entrance.
- „Line-In“ button: Activates the front connector behind the magnetic cover.
- "Info" button: Press this button to select FM, DAB+, Internet radio and media player additional information can be called up.
- Arrow upwards: In FM mode to increase the frequency in 0.05 MHz. In menu to select the different points.
- Arrow to the left: To reach the previous setting in the menu.
- Arrow to the right: To access selected functions in the menu.
- Arrow down: In FM mode by the frequency in 0.05 MHz increments to reduce. To select the different points in the menu.
- „P“ button: Recalls or saves preset radion stations.
- „Menu“ button: Shows the system menu.
- "Play" button: Starts playing the music (CD, Blu-Ray, media player).
- „Balance L” button: Moves the speaker balance to the left.
- "Balance R" button: Moves the speaker balance to the right.
- "Volume +" button: Increases the volume.
- "Volume -" button: Reduces the volume.
- „Pause“ button: Pauses the music.
- "Stop" button: Stops playing the music.
- „Back“ button: On radio mode, the device searches the previous lower radio station. On CD/Blu-Ray and media player mode, the unit goes back to the previous track.
-
"Forward" button: Onradiomode, the devices are closest then higher radiostation. On CD/Blu-Ray and media player mode, the device jumps to the next track.
-
„Fast backward“ button: Only on CD/Blu-Ray mode.
- "Fast forward" button: Only on CD/Blu-Ray mode
- „Tone“ button: Activates the treble and bass settings. To adjust the volume, use the VOL- / VOL + buttons.
- „SUR“ button: Press this button to switch to the different digital sound optimizations.
- „RAN“ button: Switches the random playback on / off during CD/Blu-Ray operation.
- „REP“ button: Switches to automatic replay during CD/Blu-Ray operation.
- Button „1 - 10“: On radio mode, recalls on the stored transmitters and on CD/Blu-Ray mode, it chooses the single pieces of the CD/Blu-Ray.
- „SCAN“ button: Searches automatically all available stations in DAB + mode.
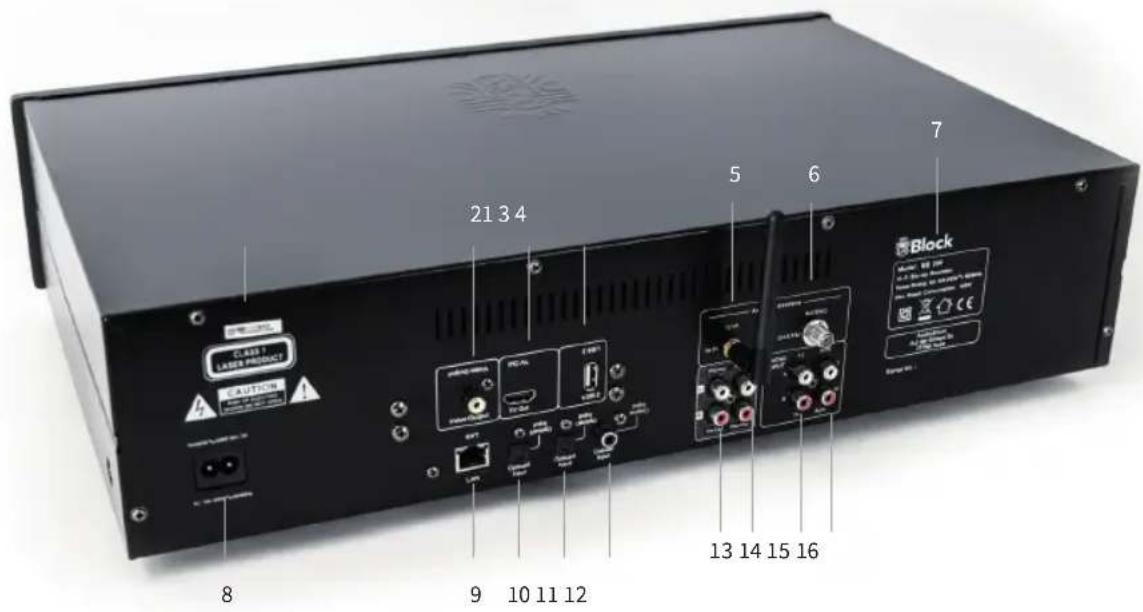
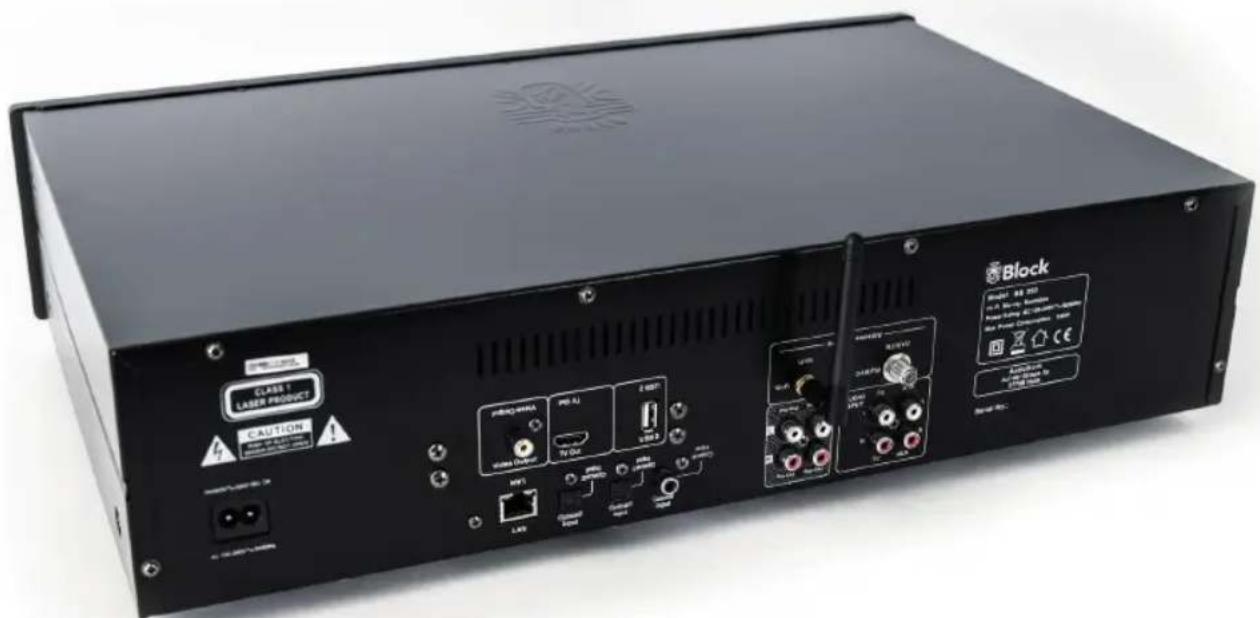
CONNECTIONS ON THE DEVICE
- Warnings
- Video output
- Digital Video output
- USB 2 for playing videos
- WLAN aerial connection
- DAB + / FM aerial connection
- Inspection marks and disposal instructions.
- Main connection: The main connection cable may show no damages or defects.
-
Lan connector jack for RJ-45 plug (Ethernet)
-
Optical Input: Connect an optical digital cable.
- Optical Input: Connect an optical digital cable.
- Coaxial input: Connect here a coaxial cable
- Pre-Out Output jack: To connect another amplifier or a subwoofer.
- Rec-Out jack: To connect a recording device.
- TV input jack: To connect an additional device.
- AUX input jack: To connect an additional device.
ASSEMBLING THE DEVICE
▶ Connect the FM / DAB + cable antenna to the device.
If you need additional input sources such as from the tape deck, TV, DVD player, satellite receiver, connect these devices to the corresponding input jack of the BB-200 using suitable cables. For this purpose, you have two analogue inputs (TV & AUX) and three digital grounding cables (2x optical and 1x coaxial) are available. In addition, an analogue line-in connection is also provided at the front.
When using an external device to record the signal sources of your BB-200, please connect this unit to the REC-OUT jack. This output emits an unregulated signal without volume control or sound regulation from the BB-200.
If you want to use another (high end) amplifier or an active subwoofer on the BB-200, please connect it to the pre-out jacks of the BB-200. This output emits a signal from the BB-200 influenced in volume and tone control.
When connecting your BB-200 wireless over an existing WLAN to the Internet, please install the supplied WLAN aerial.
When connecting your BB-200 to the Internet via Ethernet (wired), please connect your router using the RJ-45 cable to the Ethernet socket of the BB-200.
▶ Connect the power cable to the device and to a power outlet.
FIRST COMMISSIONING AND INSTALLATION
After you have safely installed your device and have carried out all the wirings, you can switch on your BB-200 for the first time. Have your password (WEP or WPA) and if necessary your network identifier (SSID) ready for a possible WLAN installation. After turning on the BB-200 will start on CD mode.
Please confirm the privacy policy (visit frontiersmart.com/privacy for more information). Please confirm the question after starting the setup-wizard with "Yes", press the arrow button of the remote control until "Yes" appears and confirm with the key "Enter":
▶ Select your desired time format, either 12 h or 24 h and confirm with the button „Enter“.
▶ Select in the next step „Update from DAB“ (recommended) and confirm.
▶ Every time your BB-200 starts it will in future recover automatically the information to time and date from this source.
For the following time zone setting, please select UTC +1: 00 for use in Germany. For other locations please select the appropriate time zone and confirm.
In the following setting, please indicate whether your location currently has summer time, then „ON“ would be the correct option.
In the following query „Keep network connected?“, it should be confirmed with „Yes“ in order to avoid interruption and streaming problems.
▶ When choosing WLAN region, please choose "Most of Europe".
Now it starts searching a WLAN connection and shows you all found WLAN networks (SSID) in your surroundings. Please select „Skip WPS“. Select your WLAN network and enter your password. In case your WLAN does not appear, this could be due to the following reasons:
▷ WLAN aerial not installed.
WLAN signal too weak at the installation place (perhaps it would be necessary to adjust the aerial to the router and on the BB-200 or use a WLAN repeater).
WLAN SSID suppressed on the router, select the input "Manual configuration".
If you connect the BB-200 with an ethernet cable with your router, instead of using WLAN, select "Cable".
In case your router supports WPS, select "Press key" and then press the appropriated button on the router. Alternatively you can also choose "Skip WPS" and subsequently enter the network password (WEP or WPA). Afterwards, in both cases the device should be finally connected.
MANUAL WLAN INSTALLATION
If any problem appears while setting up the setup-wizard, or you prefer to do a manual setup, please proceed as follows:
Press the „Menu“ button on the remote control. Using the arrow keys on the remote control, choose first „System Settings“, then select „Internet Settings“, then „Manual Settings“, then „Wireless“.
▶ Select in the next step „DHCP active“. This is the default setting of all conventional Internet router and it takes a lengthy network configuration * Confirm the setting.
Now enter the name of your wireless network (SSID), pay attention to the correct spelling and use of capital/small letters. Confirm with "OK".
▶ Select the type of your password protection (usually WPA2 and AES). In case of doubt, consult the manual of your router.
Enter the password of your WLAN network. Pay attention to the correct spelling and use of capital and small letters. Confirm with "OK".
Now the router and your BB-200 should be connected and an internet connection should exist and „Connected“ shall appear on the display.
MANUAL CABLES INSTALLATION (ETHERNET)
Should you do without a WLAN connection and connect the BB-200 to your router by cable (Ethernet), please proceed as follows:
Connect a free Lan jack to your router and to the Lan jack on the BB-200 using a Ethernet cable (RJ-45)
▶ Press the key „Menu“ on the device or on the remote control. Choose first „System Settings“, then „Internet Settings“, then „Manual Settings „and then“ Cable „using the multi-function rotary knob.
▶ Next, select “DHCP „DHCP active“. This is the default setting of all conventional Internet router and it takes a lengthy network configuration * Confirm the setting.
Now the router and your BB-200 should be connected and an Internet connection should exist, „Connected“ shall appear on the display.
THE AMPLIFIER
The BB-200 is equipped with a high-quality AB class amplifier with an output of 2 x 14 & 1 x 40 watts to 4 ohms (RMS).
To change the sound, use the following settings:
VOLUME:
Use „VOL +“ and „VOL-“ buttons on the remote control or the multi-function knob on the device to change the volume of your system overall.
Please note that for different signal sources, the volume of the BB-200 can vary with the volume setting. This is not a defect but it is caused by different input levels of the connected signal sources.
BALANCE:
Use the buttons „L“ and „R“ on the remote control to change the balance between the two speakers and move to centralise the sound in the room.
BASS:
To raise or lower the bass, press „Tone“ on the remote control until „Bass“ appears on the display. Use the „VOL+“ and „VOL-“ buttons on the remote control. This function deactivates after a short time
VOLUME:
Press „Tone“ on the remote control so often, until „Treble“ appears in the display. Now press the „VOL+“ and „VOL-“ buttons on the remote control to increase or decrease the volume. This function deactivates itself after a short time.
DSP-SETTING (DIGITAL SOUND PROCESSING):
This key, is used to switch on various digital sound enhancements such as „Normal“, “Live”, „Jazz“, „Rock“, „Hall“, „Classic“, „Pop“ and „Stadium“, press several times to view the different modes. Try to find out which setting suits you best, on the „Normal“ mode this function is deactivated.
SOUND SETTING „VOL PLUS“:
With this function you can choose between two different sound settings „VOL plus and VOL plus2“.
THE FM RADIO
You can enjoy your FM radio with the supplied FM and DAB + reception combination, as well as with a house antenna or a cable connection (adapter is included). You can activate the FM radio with the remote control, pressing the „FM“ button as well as pressing “Source” on the device.
FIRST SETUP:
Press the button "Scan" on the remote control. The tuner will now search for the next available station
If you want to save this station as favourite, press the „P“ button on the remote control, use the arrow keys to select an available memory and keep pressing „Enter“ until the announcement „saved“ appears. Now you can access this station by pressing the receptive key on the remote control's numeric keypad. You are also able to overwrite memory stations that have been stored at any time with new stations.
▶ Repeat steps 1-2 until you have stored all the desired stations or until the frequency is run through once. You can save up to ten stations as favourites.
▶ Please use the little yellow reception quality icon in the lower right corner of the display to align your antenna optimally.
DAILY OPERATION:
▶ Press the button “FM” on the remote control to start the radio.
▶ You can select your saved radio stations at any time using the numeric keypad of your remote control.
The radio disposes of RDS, it becomes up-to-date information about the program, e.g. title, genre, etc. (depending on the transmitter). You can get more information by pressing the „Info“ button on your remote control once or several times.
By pressing the „left arrow“ on the remote, you can access additional settings on the device:
▶ Scan settings: „Only strong radio stations“ - Yes / No
Audio settings: „Mono Only“ Yes / No (Select „YES“ for strong-sounding stations).
- With the buttons „Forward“ and „Back“, you can switch the frequency band to the next higher or lower available station.
THE DAB + RADIO
You can operate your DAB + radio with the enclosed combination aerial for FM and DAB + reception as well as with a house antenna. A connection to the cable network is not possible at the moment, because the DAB + stations are unfortunately not deposited. You can activate the DAB + radio with the remote control, „DAB“ button, as well as by pressing repeatedly the „Source“ button.
INITIAL SET-UP:
Press the „DAB“ button on your remote control. It starts searching automatically. After the search is completed, all the found radio stations will be shown on the display.
Use the arrow button on the remote control to select the desired station and confirm with „Enter“. If you want to save this station as a favourite, press the „P“ button on the remote control, choose a free storage space and press „Enter“ until the message „saved“ appears on the display. Now you are able to play this station by pressing the respective button on the numeric keypad on the remote control. In this case, you can always override the occupied radio station memory.
Press the „left arrow“ button on the remote control to return to the list. Repeat steps 2-3 until you have saved all the desired stations. You can save up to 10 stations as favourites.
▶ Please use the little yellow reception quality icon on the lower right corner of the display to align your antenna optimally.
IN DAILY OPERATION:
▶ Start the DAB + radio using the „DAB“ button on your remote control.
▶ You can use the numeric pad of your remote control to play saved stations.
The DAB + radio includes digital text functions, which are shown on the display. You can get further informations depending on the station, by pressing the „Info“ button on your remote control once or several times. Press „Enter“ to switch to full screen display.
▶ Once you press the „left arrow“ button on the remote control you return to the complete station list.
Press the „left arrow“ button twice on the remote control to appeal for other settings on the device. The DRC function is not popular in Germany because the DAB + stations do not support this. The function „Invalid shorten“ removes non-receivable stations, e.g. after moving.
▶ Use the buttons „Forward“ and „Back“ to change the station to the next higher or lower station.
THE INTERNET RADIO
If you have your BB-200 connected to the Internet, you shall receive Internet radio without any further settings. Your Internet radio shall be automatically connected to one of the largest databases of Internet radio stations, with more than 25,000 broadcasters and podcasts worldwide. You can activate the Internet radio with the remote control, the „IR“ button and on the device by pressing the „Source“ button several times. You can also use the corresponding buttons on the device to access the „Internet radio“ via the following points: „Menu“ → „Main menu“, → “Internet radio”,
IN DAILY OPERATION:
▶ Start the Internet radio using the button „IR“ on your remote control.
▶ Selecting radio stations:
By pressing the „Menu“ button on the remote control and selecting „Last listened“, the display will show you all the last stations you have listened to.
Press the "Menu" button on the remote control and choose „Station list /My Favourite” and the display will show you all the stations that you have saved as favourites. Mark them as a favourite so you are able to find them again quickly. To select stations as favourites, just press „Enter” on the remote control for a long time or hold the multifunction knob on the device pressed. If you want to delete one of the favourites, select it using the multifunction knob on the device and hold it pressed until the equipment asks if the station should be deleted from the list of favourites.
If you press the “Menu” button on the remote control and select „Channel list / Local Germany“, all German stations will be shown, either every available station, only the most popular ones or sorted by genre.
Pressing the „Menu“ button on the remote control and selecting „Channel list / station“ all available stations worldwide will be shown, sorted by country, genre, popular stations or new stations. You also have the option to search for a station by entering the name.
Just as described in FM or DAB + function, other than to “Favourites”, you can also save stations to the remote control’s number block.
The radio includes digital text functions; up-to-date information about the program, such as title, genre, etc., appears on the display. Pressing the „Info“ button on your remote control once or several times will give you further information depending on the station.
THE MEDIA PLAYER (USB FRONT PORT)
You can connect a removable disk (e.g. USB stick or USB hard disk with own power supply) to the USB front port of your BB-200. This memory medium has to be formatted FAT 32 in order to be read by the BB-200. Depending on the manufacturer of the storage medium, this may possibly be limited in its size.
The BB-200 recognizes MP3, WMA and FLAC files with a maximum sampling rate of 48 KHz at 16 bit (FLAC) and 320 Kbit / s (MP3 and WMA). To activate the USB media player, you can press the „Media / USB“ key on the remote control, or you just press the „Source“ key on the device several times. You can also use the corresponding buttons on the device to access the „Media player“ via the following points: „Menu“ → „Main menu“ → „Media player“.
Select „USB Play“ from the menu to play music from your plugged-in storage media. The BB-200 shows the contents of the medium on the display. Within the list, you can navigate with the help of the arrow buttons on your remote control, press “Enter” to choose and play the desired tracks or folders.
To create your own play list, you have to select a track on the stick and then hold the multifunction button on the device for a while or just press the „Enter“ button on the remote control. This will add the piece of music to your play list.
The USB function is capable of reading out additional stored songs information. E.g. read MP3 tags. By pressing the „Info“ button on your remote control once or several times, you can retrieve this information depending on the file.
Additional features in the media player menu:
▶ Repeat: When the function is switched on, individual tracks, playlists or the entire content will be re-played.
▶ Shuffle: When the function is activated, tracks are played within a Playlist or the entire content will be replayed according to the random principle.
MUSIC STREAMING
The „streaming“ of music in the home area means the transfer of music data from an external device such as a computer, tablet PC or smartphone to a player, such as your BB-200.
The prerequisite is that these devices shall be located in the same network (WLAN or LAN). We briefly introduce you here to the most common device streaming solution:
APPLE® PC (MAC OS X®)
The use of the Airplay® function of iTunes® is not possible with the BB-200.
Nevertheless, you can stream with the Apple Macintosh®: Please install a streamings server, e.g. the free software „Serviio®“ * (Http://serviio.org/download) and start it. Through the function „Media / USB - Shared Media“ you will now find a Serviio® server, which can be used to access all the music from your Apple Macintosh. In case of problems for further information, please consult the installation instructions for Serviio®.
WINDOWS® PC
▶ A streaming function is integrated into the Windows Media Player ^® * up version 8,
Please activate this (see Windows Media Player® user guide): You can then use the „Media / USB - Shared Media“ function to access every song from the Windows Media Player. In case of problems For further information please read the operating instructions of Windows Media Player.
STREAMING FROM SMARTPHONE OR TABLET PC (ANDROID ^® )
▶ Please read the enclosed operating instructions for the App „UNDOK™“ to learn how you can play the music of your Android device on the BB-200.
STREAMING FROM IPOD ^® , IPHONE ^® , OR IPAD ^® DEVICES OR TABLET PC CIOS ^®
Please read the enclosed operating instruction for the App „UNDOK™“ to know how to play the music from your iOS device on the BB-200.
STREAMING SERVICES
At the moment, there are a large number of streaming services with the most different technologies in the market. If you want to use it on your BB-200, simply connect your BB-200 via Bluetooth to your mobile phone, tablet or PC. Select it as output device.
TO USE CONNECT (SPOTIFY)

To use Connect you need Spotify Premium. Details can be found on the attached flyer.
Connect with your new device the same wireless network that also connects your phone, tablet, or PC (further information you find in the operation instructions).
▶ Open the Spotify app on your mobile, tablet or PC and play a song. If you are using the app on your phone, tap the picture to the song in the lower-left corner of the screen. Tablet and PC users please go to step 4.
▶ Tap the Connect icon.
▶ Select your device from the list.
If it is not indicated, make sure it is connected to the same wireless network as your phone, tablet, or PC. Ready! Have fun listening to music!
REMOTE CONTROL WITH THE APP „UNDOK™“\*
If you have an iPhone®, iPod®, or iPad®, please go to the Apple App Store® and search for the term „undok“. Important: Select „iPhone Apps“ beforehand! If you have an Android device (tablet PC or smartphone), visit Google's Play-Store® and search for the term „undok“. Install the free app on your mobile device. Important: To operate your BB-200, the Smartphone / Tablet and the BB-200 has to be registered in the same WLAN network and the BB-200 has to be switched on!
Now start the app „UNDOK™“. The app will search for all DLNA-capable devices in the WLAN.
▶ Now choose your BB-200.
- Your BB-200 is now connected to the app „UNDOK™“ and you can operate the device: „Source“ function: Select the desired source among the available signal sources.
„Browse“ function: The many options of the signal source can be selected here, depending on the selected signal source. For an overview of the functions, please look up in the manual the respective chapter on signal sources.
„Now running“ function: Provides information and covers (if available) to the currently played track on radio station.
Additional functions „Settings“: This menu allows you to switch the device off and on, change the sound settings, terminate the app and make further settings.
ADAPTING EXTERNAL REMOTE CONTROLS
Your BB-200 can learn the codes from other remote controls, e.g. from a TV remote control. Proceed as follows:
- Press the „Menu“ button on the appliance for 3 seconds, then the device enters the learning mode
- „Press on Block FB button“ will appear on the display. Press a button on the remote control to select a function to transfer.
- The following appears on the display: „Code from Block FB accepted“ and shortly afterwards „Please press external FB key“. Now press the button on the extern remote control to release the function to be transferred.
- „Key code has been transmitted“ appears on the display. Then it jumps back to fist point.
- Repeat these steps until all functions (max. 50) have been transferred to your remote control unit. Exit the programming by pressing again the „Menu“ button on the device. If you have programmed a key incorrectly, simply repeat all steps with the right keys, the device will overwrite the faulty settings.
- To delete all programs, press and hold the key „Back“ on the device, and then restart the device completely.
CONNECT EXTERNAL DEVICES VIA BLUETOOTH®
Your device is equipped with a modern Bluetooth® interface. This allows you to pair any Bluetooth® source with the BB-200. Possible sources are smartphones (iOS, Android, Windows Phone), Tablet PCs (iOS, Android, Windows 8) or media players (iPod, similar) with Bluetooth® function. Connecting external devices via Bluetooth® Your device is equipped with a modern Bluetooth® interface. Through this you can pair any Bluetooth source with the BB-200. Possible sources with Bluetooth function are smartphones (iOS, Android, Windows Phone), tablets (iOS, Android, Windows 8) or media players (iPod, similar). To activate the Bluetooth® function, press the „Source“ button until Bluetooth® appears on the display, then activate the Bluetooth function on your external device or even press the „BT“ knop on your remote control. Pair an external device with the BB-200: On your external device, search for Bluetooth devices in your surroundings, select your BB-200 and begin the pairing (coupling the devices) In case of problems, or if you need further information about the pairing, please consult the instruction manual of the device you wish to pair with your BB-200. Afterwards you can activate the music playback function of your external device and your BB-200 will play the music. Please note that you can only link sources using the built-in Bluetooth function. The pairing of, for example, external speakers to the BB-200 is not possible!
CONNECT YOUR BLUETOOTH HEADSET TO THE BB-200
With the BB-200 you have the possibility to connect a Bluetooth headset via Bluetooth. Please switch your headphones to the parry mode. press the „BT Headphone Parring“ button on the device. Then press the button again and your BB-200 will now search for your Bluetooth output device. In this mode the BB-200 connects automatically. If you would like to deactivate the parring mode again, please hold down the button „BT Head phone Parring“ for approx. 3 seconds. Please make sure your headphones got the „automatic handshake“ function!
THE OPTICAL CONNECTION
The rear optical connections of the BB-200 (also S / PDIF ^ or TOSLINK ^ ) process stereo light wave signals in digital form (no Dolby ^ surround or similar). These connections are particularly suitable for external CD players, data recorders or many modern televisions. For most televisions, the optical audio output on the TV menu must first be activated. For the connection, please consult the operating instruction of the external device. A suitable cable is available in an accessory shop.
THE COAXIAL CONNECTION
The rear coaxial connector of the BB-200 processes electrical stereo audio signals (no Dolby ^® surround or similar) in digital form. This connection is particularly suitable for external CD players, data recorders or satellite receivers. For the connection, please consult the operating instruction of the external device. A suitable cable is available in an accessory shop.
THE AUX CONNECTION
The rear AUX connector of the BB-200 processes electrical high-level audio signals in analogue form. This connector is suitable for all external devices with analogue audio output. For the connection, please consult the operating instruction of the external device. A suitable cinch cable is available in an accessory shop.
THE TV AND AUX CONNECTION
The rear TV and AUX connections of the BB-200 process electrical high-level audio signals in analogue form. These connections are suitable for all external devices with analogue audio output, for example, for the connection of a TV or satellite receiver with analogue audio output (e.g. over the headphone output of the TV). For the connection, please consult the operating instruction of the external device.. A suitable cinch cable is available in the accessory shop.
THE PRE-OUT OUTPUT
The rear pre-out output sends high-level electrical audio signals in analogue form. These signals will not change in sound and volume after the settings made on the BB-200. This output is particularly suitable for an additional amplifier, e.g., an active subwoofer in a second room, or radio loudspeakers, e.g. for terrace or kitchen.
THE REC-OUT OUTPUT
The rear rec-out output sends high-level electrical audio signals in analogue form. These signals will not change in sound and volume after the settings on the BB-200, but transmitted unchanged from the respective signal source. This output is particularly suitable for recording devices such as tape recorder or cassette recorder. The USB connection
THE USB CONNECTION
See page 49 for a more detailed description of the USB front connector.
THE LINE-IN CONNECTOR
The line-in connector located behind the magnetic cover at the front of the BB-200 processes electrical high-level audio signals in analogue form. This connector is suitable for all external devices with analogue audio output, like media players, iPod®, smartphones etc. (connection over headphone output). For the connection, please consult the operating instruction of the external device. A suitable 3.5 mm cable is available in the accessory shop
THE HEADPHONE CONNECTION
The headphone jack of the BB-200, located behind the magnetic cover on the front, allows you to connect a commercially available headphone with 6.3 mm jack plug. A 3.5 mm jack adapter for smaller headphones can be obtained from the accessory shop.
SHORT MANUAL DISC MODE BLU-RAY PLAYER
This is a short manual for the first commissioning of your new Blu-ray Player. For detailed information go to www.audioblock.com
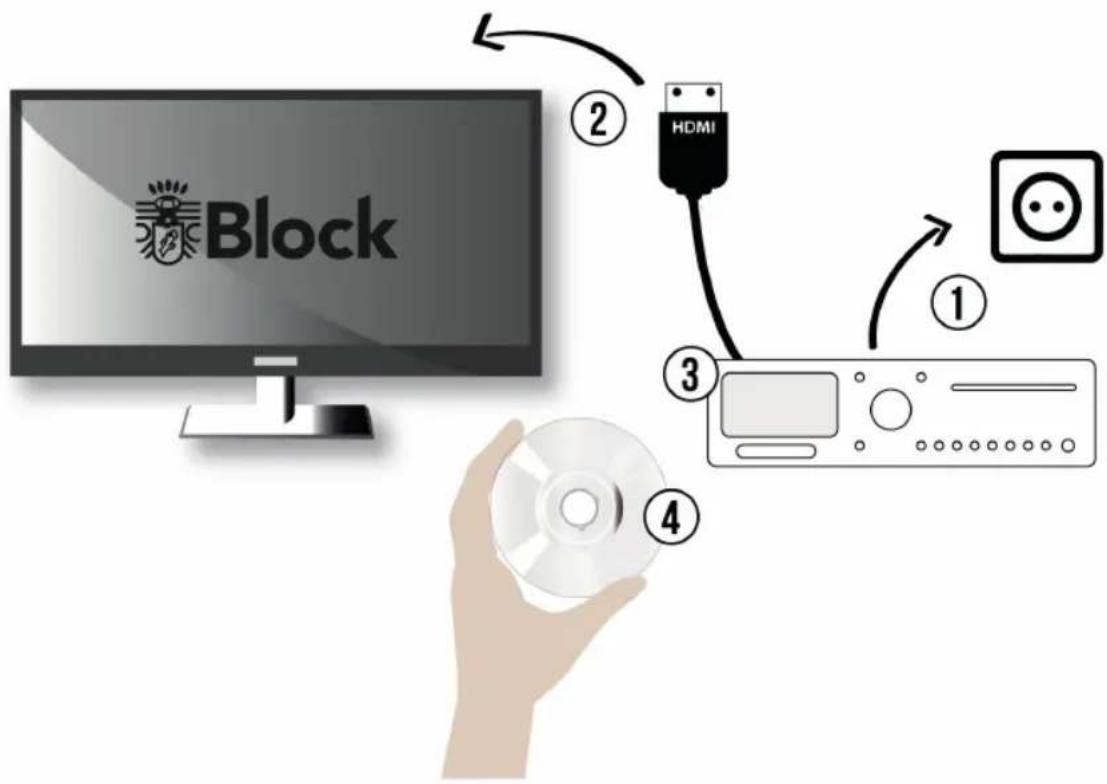
- Connect your BB-200 to the mains and finish setup wizard.
- Connect BB-200 with your TV.
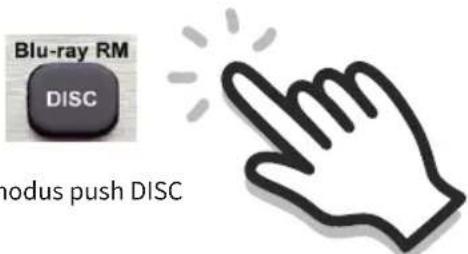
- Start your Blu-ray player. You can go to there by pressing „Disc“ on you remote control. Press it again to set you RC into Blu-ray mode. Now the commands wich are above the selection buttons of your RC apply. With the setup button you have the possibility to set various system settings of your Blu-ray player.
- Insert the Disc. Disc starts automatically.
- With your RC you can choose individual manu items of your disc.
THE REMOTE CONTROL IN BLU-RAY MODE
Note that button assingments change in Blu-ray mode by pressing the disc button. (Display news Blu-ray Remote) The function are now adapted to the Blu-ray player. The description above the keys are activated. Please note that same function of the selection buttons are dependent to the insert disc. For example, suptitels or other features may not be available.
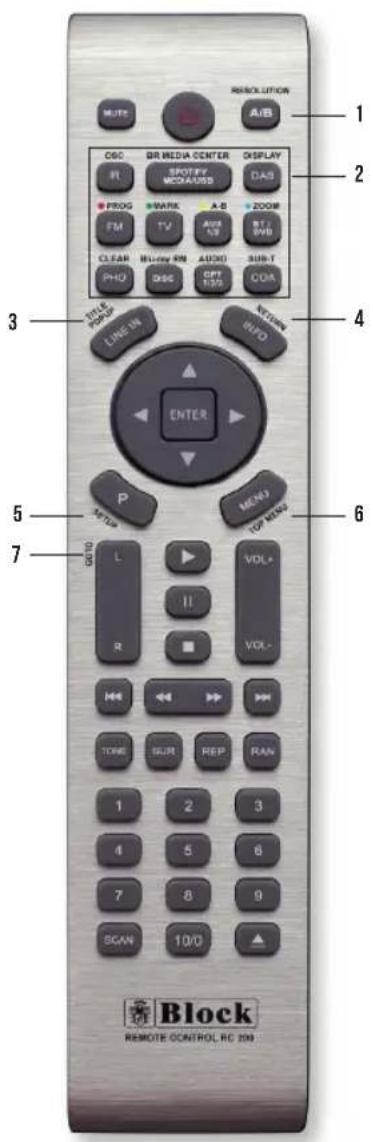
-
Resolution: Press this button to change the resolution of the TV screen.
-
Blu-ray Tastenfelder:
OSC: To access On TV Screen Control Menu.
BR MEDIA CENTER: Press this key to open Blue-ray media source list screen on TV, control together with moving keys(left,right,up, down, ok) to select playing source within Blu-ray Disc, USB.
DISPLAY: On TV screen display the current status or the disc information.
PROG: Press this key to open Program TV screen, control together with moving keys (left,right,up, down, ok) to select playing track number. On the Blu-ray bookmark screen, press this key to delete bookmark.
MARK: Add bookmark at any point during playback Video. When playing DVD disc, press and hold this key for about 3 seconds to open bookmark list.
A-B: Press A-B can repeat playback of a user defined section. If the Blu-ray disc with bookmark function, press this key to open bookmark screen on TV.
ZOOM: During play video or photo files, press this key to zoom in or zoom out the picture. If the Blu-ray disc with bookmark function, press this key to open bookmark screen on TV.
CLEAR: To clear an entry, follow the information on TV screen to do operate.
Blu-ray RM: When input soure is Blu-ray Disc, Press this key to turn on or turn off remote function for Blu-ray control.
AUDIO: Select an audio language.
SUB-T: Select a subtitle language on a disc.
-
TITLE POPUP: To open the Title menu of a disc.
-
RETURN: Return to a previous display menu.
-
SETUP: To open the setupmenu.
-
TOP MENU: To open the Blu-ray player menu.
-
GOTO: Disc starts playing at the specified time.
SYSTEM SETTINGS
Press the „Menu“ button on your remote control or on the device and select the System settings item. In the following menu you carry out the following settings:
INTERNET SETTINGS:
In this menu, you can change the settings you have made for your Internet connection, e.g. when you change the location. You can also restart the assistant wizard, or manually set up the connection.
LANGUAGE:
Select your desired display language for the device.
DEFAULT SETTINGS:
Selecting and confirming this item resets all settings back to the factory settings. Please use this feature if massive problem occurs with the receipt of data from the Internet or the general operating software of the device. You should also perform this function if you want to resell the device. After running the factory settings, a new start requires a restart of the device wizard.
SOFTWARE UPDATE:
The BB-200 checks regularly whether there is any update available on the Internet and points it out. You can then choose to run the update. You can disable this feature (not recommended), or check the operating software for update process.
SETUP WIZARD:
Selecting and confirming this item starts the setup wizard. All the settings you then make override the old settings. You can also use the setup wizard to update the time settings (summer and winter time) if problems occur during the automatic changeover.
INFO:
Selecting and confirming this point will show you technical information about the installed software version, the manufacturer ID of the device, and the name under which your device appears on the network.
ADDITIONAL COMFORT FEATURES
Press the „Menu“ button on your remote control or on the device and select „Main menu“. In the following menu you can also select „Snooze“ and „Alarm clock“ in addition to the already known signal sources:
SLUMBER:
Select „Snooze“ on your remote control using the arrow keys and confirm with „Enter“. The „Sleep“ indicator appears. Use the arrow button to set the desired time when the device will automatically switch the best mode. Confirm your selection with „Enter“. Exit this menu by pressing the „Menu“ button again.
ALARM CLOCK:
Select „Alarm clock“ on your remote control using the arrow keys and confirm with „Enter“. The „Alarm“ menu appears. You can now set two different alarms. For example, e.g. the first alarm clock. In the next menu, you can switch the alarm on and off, set the clock, select between daily, individual days, weekends, etc., the signals source with which you want to wake up and adjust the volume. Press the „Back“ button to return to the previous menu. The alarm function is now active.
ERROR MESSAGES AND TROUBLESHOOTING (NETWORK)
| MESSAGE CAUSE TROUBLESHOOT | ||
| No connection 1. Incorrect password2. Correct password, no contact to the router | 1. Enter the correct password2. Disable the Mac filter on the router | |
| Format Error | The file format is not recognized | Make sure the stream is encoded in WMA, MP3, or FLAC with no more than 48 KHz. If not, please re-encode. |
| Network Error | Wrong information is received from the network | The data from the server are not readable, possibly restart the BB-200 and the router |
| Network not available | Problems connecting the router Switch on or restart the router | |
| Network timeout | No response off-line | The selected station is currently not available, please change the transmitter |
| Not authorized | Wrong entry with the password or not registered with the UPnP server | Enter the correct password. |
| update failed Software update failed Check your network settings, or try again later. | ||
ERROR MESSAGES AND GENERAL TROUBLESHOOTING
| ERROR DESCRIPTION POSSIBLE CAUSE AND REMEDY | |
| No power even though the unit is on | - The power cable is not connected- The socket is defective- The fuse in the device is defective - Fault must be repaired by a technician- The power cable is defective |
| No sound - The unit is not on at all | - The volume is too low- No input signal- The wrong input is set on the device |
| Loud buzzing - Your unit is too close to another unit or TV | |
| Distorted sound - Volume, bass or Treble are set too high- Speakers may be defective- There is a bridge (short circuit) on the loudspeaker cable | |
| The remote does not work - Make sure that the batteries are inserted correctly- Are the batteries empty? Please replace them with new ones- Point the remote control at the receiver on the unit- Remove all objects between the remote control and the unit- Determine if the distance between the FB and the device is more than 8 meters | |
| Keys do not work (Device or remote control) | - Turn the unit off and then on again.- Alternatively, remove the device from the power and then reconnect it. (The device can be influenced by external power interferences) |
| Fault in reception - The station is not set correctly- The antenna is not properly aligned- Restart a station search | |
| Network connection is not possible | - The network is currently unavailable. Please try again later- The router does not allow any port, since the device is not yet Address. Start the network wizard- Check the distance between the router and the device- Change the selected encryption method of the router- Determine whether a firewall rejects the device- Check, if used, the network cable |

Repairs and interventions in the device may only be carried out by authorized persons. Qualified personnel are made.
CARE AND TRANSPORT
CARE AND CLEANING OF THE APPLIANCE
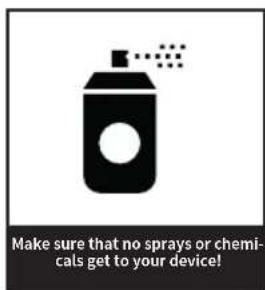
Before you clean it, disconnect it from the power supply. Use only clean and dry cloths to clean your appliance. If the appliance is very dirty, you can clean the unit with a damp cloth and mild cleaning fluid. Never use liquids such as gasoline, alcohol, petroleum or other solvents.
TRANSPORT THE UNIT
Please keep the packaging and the instructions for use so that you can pack the unit properly for transporting or shipping. The original packaging is designed so that you can safely transport or ship the device. Please keep this manual for future reference.
TECHNICAL SPECIFICATIONS
Mains voltage: AC 240 V / \~ 50 Hz
Power consumption of 100 watts (max.) | Standby: <2 watts | Off: 0 watts
Connections:
- Antenna connection
- 2x stereo inputs (RCA), 430 mV
- 1x stereo input (3.5 mm jack), 430 mV
- Network: LAN or WLAN, Bluetooth®
- 2 x USB connection
- 2 x Optical digital input (S / PDIF® or TOSLINK®)
- 1 x coaxial digital input (RCA)
Outputs
▷ 6.3 mm headphone jack
▷ Analogue pre-out (RCA)
▷ Analogue rec-out (RCA)
Built-in amplifier with 2 x 15 watts RMS at 4 ohms:
- Frequency response: 10 Hz - 30 KHz
- Signal-to-noise ratio: > 85 dB
- Channel separation: > 60 dB
- Distortion Factor: 0.007%
Built-in DAB + radio: 174.928 - 239.200 MHz • Built-in FM radio: FM 87.5 - 108 MHz • Built-in Internet radio with more than 25,000 channels and podcasts worldwide • Built-in disc player (Blu-Ray, DVD, HDCD / CD-R / CD-RW / MP3) • Remote control adapting function • Built-in media player (MP3, WMA, FLAC) • ADi- mensions (B | H | T) | Weight: 540 x 330 x 120 mm 11 kg
CONFORMITY NOTE
CE
This device complies with the basic requirements and other relevant regulations of the EMC directive 2014 / 30EU, the directive for low-voltage devices 2014/35 / EU, the ErP directive 2009/125 / EC, the R & TTE directive 1999/5 / EC and the RoHS directive 2011/65 / EU. To receive the full EU declaration of conformity, send an email to the following email address:
block@audioblock.com

bar
| Category | Value | |---|---| | Bar 1 | 63 | | Bar 2 | 63 |
AUDIOBLOCK GMBH
- APPLE® PC (MAC OS X®)
- DEAR COSTUMER,
- CONTENTS
- SAFETY INSTRUCTIONS
- INFORMATION ON DISPOSAL OF THE OLD EQUIPMENT:
- HANDLING BATTERIES
- FOLLOW THESE INSTRUCTIONS:
- SAFE POSITIONING
- SECURE CONNECTION
- SAFE USE
- BEFORE COMMISSIONING
- THE REMOTE CONTROL
- CONNECTIONS ON THE DEVICE
- ASSEMBLING THE DEVICE
- FIRST COMMISSIONING AND INSTALLATION
- MANUAL WLAN INSTALLATION
- MANUAL CABLES INSTALLATION (ETHERNET)
- THE AMPLIFIER
- VOLUME:
- BALANCE:
- BASS:
- DSP-SETTING (DIGITAL SOUND PROCESSING):
- SOUND SETTING „VOL PLUS“:
- THE FM RADIO
- FIRST SETUP:
- DAILY OPERATION:
- THE DAB + RADIO
- INITIAL SET-UP:
- IN DAILY OPERATION:
- THE INTERNET RADIO
- THE MEDIA PLAYER (USB FRONT PORT)
- MUSIC STREAMING
- WINDOWS® PC
- STREAMING FROM SMARTPHONE OR TABLET PC (ANDROID ® )
- STREAMING FROM IPOD ® , IPHONE ® , OR IPAD ® DEVICES OR TABLET PC CIOS ®
- STREAMING SERVICES
- TO USE CONNECT (SPOTIFY)
- REMOTE CONTROL WITH THE APP „UNDOK™“\*
- ADAPTING EXTERNAL REMOTE CONTROLS
- CONNECT EXTERNAL DEVICES VIA BLUETOOTH®
- CONNECT YOUR BLUETOOTH HEADSET TO THE BB-200
- THE OPTICAL CONNECTION
- THE COAXIAL CONNECTION
- THE AUX CONNECTION
- THE TV AND AUX CONNECTION
- THE PRE-OUT OUTPUT
- THE REC-OUT OUTPUT
- THE USB CONNECTION
- THE LINE-IN CONNECTOR
- THE HEADPHONE CONNECTION
- SHORT MANUAL DISC MODE BLU-RAY PLAYER
- THE REMOTE CONTROL IN BLU-RAY MODE
- SYSTEM SETTINGS
- INTERNET SETTINGS:
- LANGUAGE:
- DEFAULT SETTINGS:
- SOFTWARE UPDATE:
- SETUP WIZARD:
- INFO:
- ADDITIONAL COMFORT FEATURES
- SLUMBER:
- ALARM CLOCK:
- ERROR MESSAGES AND TROUBLESHOOTING (NETWORK)
- ERROR MESSAGES AND GENERAL TROUBLESHOOTING
- CARE AND TRANSPORT
- CARE AND CLEANING OF THE APPLIANCE
- TRANSPORT THE UNIT
- TECHNICAL SPECIFICATIONS
- CONFORMITY NOTE
- CE
Brand : Block
Model : BB-200
Category : Hi-Fi System