MPC 20 - Uncategorized PCE Instruments - Free user manual and instructions
Find the device manual for free MPC 20 PCE Instruments in PDF.


| Product Type | Process Meter / Controller |
| Display | 5-digit LED, red, 14.2 mm high |
| Dimensions (W x H x D) | 96 x 48 x 120 mm (panel cutout 92 x 45 mm) |
| Weight | Approx. 200 g |
| Power Supply | 85–265 V AC/DC, 50/60 Hz |
| Input Signal Types | Voltage: 0–10 V, Current: 0/4–20 mA |
| Accuracy | ±0.5% of reading ±1 digit |
| Measurement Functions | Min/Max hold, tare, scaling, offset |
| Operating Temperature | 0 to +50 °C |
| Storage Temperature | -20 to +70 °C |
| Front Panel Protection | IP65 (dust and water jet protected) |
| Safety | Overvoltage protection up to 30 V on inputs |
| Maintenance | Clean front panel with a soft, dry cloth; do not use solvents |
| Spare Parts | Replacement fuses (5x20 mm, 100 mA/250 V) available |
| Certifications | CE compliant |
Frequently Asked Questions - MPC 20 PCE Instruments
User questions about MPC 20 PCE Instruments
0 question about this device. Answer the ones you know or ask your own.
Ask a new question about this device
Download the instructions for your Uncategorized in PDF format for free! Find your manual MPC 20 - PCE Instruments and take your electronic device back in hand. On this page are published all the documents necessary for the use of your device. MPC 20 by PCE Instruments.
USER MANUAL MPC 20 PCE Instruments
User Manual
PCE-MPC 20 / PCE-MPC 30 Particle Counter

User manuals in various languages (français, italiano, español, português, nederlands, türk, polski, русский, 中文) can be found by using our product search on: www.pce-instruments.com
Last change: 31 August 2023
v1.0
Contents
1 Safety notes....1
2 Measurement functions....1
2.1 PCE-MPC 30 .... 1
2.2 PCE-MPC 20 1
3 Specifications....2
4 Delivery scope....2
5 System description 3
6 Operation 4
6.1 Preparation 4
6.2 Switch the meter on / off 4
6.3 Description of the icons 5
6.4 Measurement parameter selection 6
6.5 Particle measurement 6
6.6 Formaldehyde measurement (HCHO) (PCE-MPC 30 only)....11
7 Data storage 13
7.1 File Browser....13
7.2 PC / USB....14
8 System settings....14
8.1 Date/Time 14
8.2 Language....14
8.3 Auto Power Off....15
8.4 Display timeout....15
8.5 Alarm 15
8.6 Memory status....15
8.7 Factory setting....15
8.8 Units (°C / °F)....16
9 Internal help....16
10 Contact....16
11 Disposal 16
1 Safety notes
Please read this manual carefully and completely before you use the device for the first time. The device may only be used by qualified personnel and repaired by PCE Instruments personnel. Damage or injuries caused by non-observance of the manual are excluded from our liability and not covered by our warranty.
- The device must only be used as described in this instruction manual. If used otherwise, this can cause dangerous situations for the user and damage to the meter.
- The instrument may only be used if the environmental conditions (temperature, relative humidity, ...) are within the ranges stated in the technical specifications. Do not expose the device to extreme temperatures, direct sunlight, extreme humidity or moisture.
- Do not expose the device to shocks or strong vibrations.
• The case should only be opened by qualified PCE Instruments personnel.
- Never use the instrument when your hands are wet.
- You must not make any technical changes to the device.
- The appliance should only be cleaned with a damp cloth. Use only pH-neutral cleaner, no abrasives or solvents.
• The device must only be used with accessories from PCF Instruments or equivalent.
- Before each use, inspect the case for visible damage. If any damage is visible, do not use the device.
- Do not use the instrument in explosive atmospheres.
- The measurement range as stated in the specifications must not be exceeded under any circumstances.
- Non-observance of the safety notes can cause damage to the device and injuries to the user.
We do not assume liability for printing errors or any other mistakes in this manual.
We expressly point to our general guarantee terms which can be found in our general terms of business.
2 Measurement functions
2.1 PCE-MPC 30
The device counts particles in different sizes and measures dust exposure as mass concentration PM 2.5 and PM 10. Furthermore, a measurement of formaldehyde exposure is integrated.
2.2 PCE-MPC 20
The device counts particles in different sizes and measures dust exposure as mass concentration PM 2.5 and PM 10.
3 Specifications
| Specifications | Explanations |
| Mass concentration | |
| Channels | PM 2.5 + PM 10 |
| Measurement range | 0 ... 2000 μg/m3 |
| Resolution | 1μg/m3 |
| Particle counter | |
| Channels | 0.3, 2.5, 10 |
| Flow rate | 2.83 l/min |
| Counting efficiency | 50 % at 0.3 μm / 100 % at >4.5 μm |
| Coincidence error | <5 % at 70629400 particles per m3 |
| Data storage | 5000 data sets (with SD card) |
| Counting mode | cumulative, differential, concentration |
| Air temperature and humidity | |
| Air temperature | 0 ... 50 °C / 32 ... 122 °F |
| Accuracy | ±1 °C / 1.8 °F at +10 ... +40 °C / 50 ... 104 °F, otherwise ±2 °C / 3.6 °F |
| Dew point temperature | 0 ... 50 °C / 32 ... 122 °F |
| Accuracy | ±1 °C / 1.8 °F at +10 ... +40 °C / 50 ... 104 °F, otherwise ±2 °C / 3.6 °F |
| Relative humidity | 0 ... 100 % RH |
| Accuracy | ±3.5 % at 20 ... 80 % RH, otherwise ±5 % |
| HCHO formaldehyde (PCE-MPC 30 only) | |
| Measurement range | 0.01 ... 5 ppm |
| Accuracy | ±5 % of measurement range |
| Resolution | 0.01 ppm |
| General | |
| Operating conditions | 0 ... 50 °C / 32 ... 122 °F, 10 ... 90 % RH |
| Storage conditions | -10 ... 60 °C / 14 ... 140 °F, 10 ... 90 % RH |
| Display | 2.8 " 320 x 240 pixel LCD |
| Power supply battery | 7.4 V, 1200 mAh, 8.88 Wh |
| Battery life | approx. 4 h |
| Battery charging time | approx. 2 h |
| Power supply plug-in mains adaptor | Primary 100 ... 240 V AC, 50 / 60 Hz, 0.6 A Secondary 9 V DC 1500 mA |
| Dimensions | 240 x 75 x 57 mm / 9.4 x 3 x 2.2 in |
| Weight | 570 g / 1.3 lbs |
4 Delivery scope
1 x PCE-MPC 20 or PCE-MPC 30
1 x zero filter
1 x battery
1 x plug-in mains adaptor
1 x mini USB cable
1 x mini tripod
1 x hard case
1 x user manual
5 System description
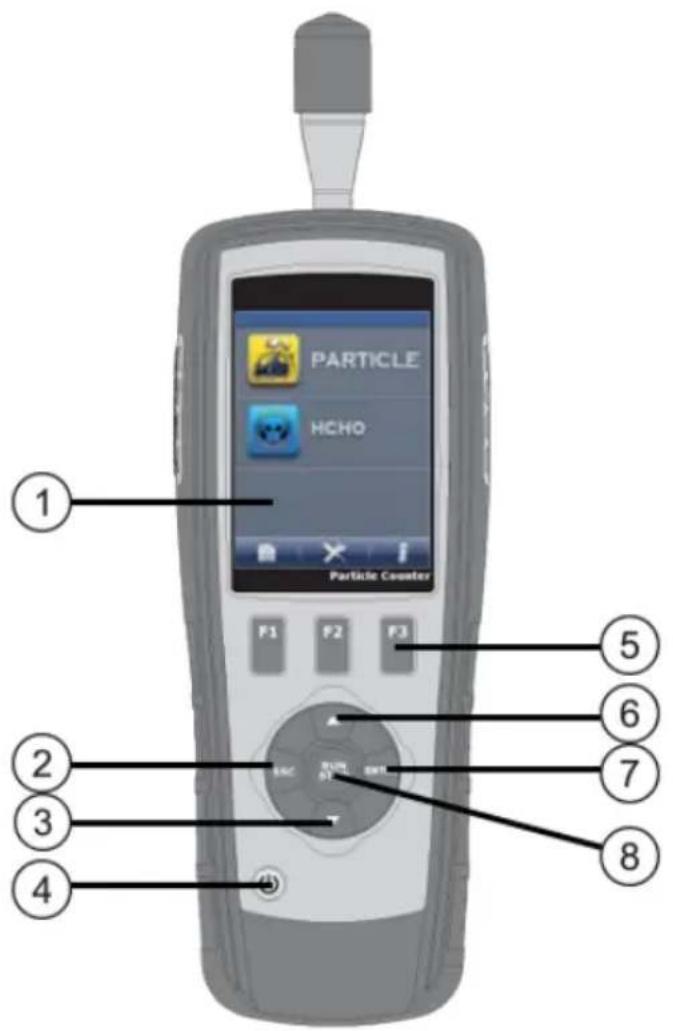
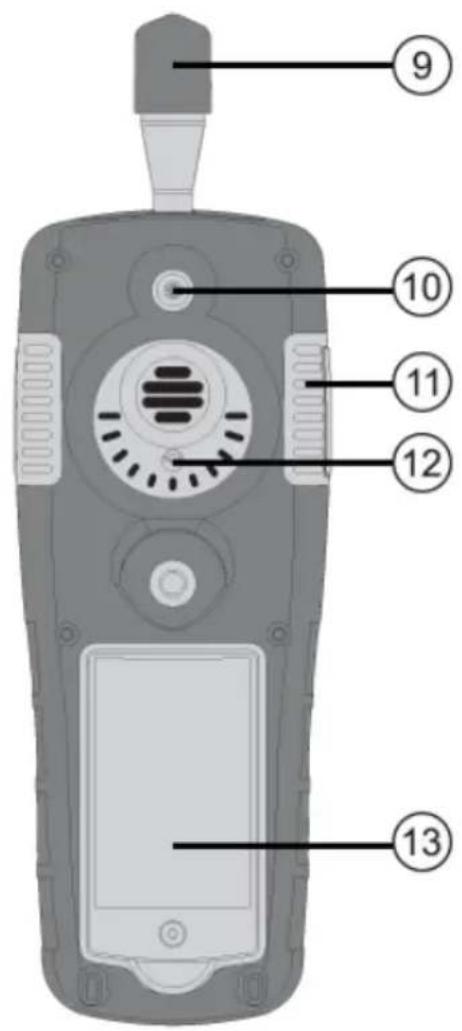
① Display
② "ESC" key
③ ▼ key
④ ON/OFF key
⑤ Function keys
⑥ ▲ key
⑦ ENTER" key
⑧ "RUN / STOP" key
⑨ Air inlet nozzle
⑩ Temperature/humidity sensor
⑪ USB socket / 9 V DC input
⑫ HCHO sensor (PCE-MPC 30 only)
⑬ Battery compartment
6 Operation
6.1 Preparation
6.1.1 Insert battery
- Open the battery compartment cover on the back of the meter.
- Insert the battery at the top first, with the terminals facing the front of the meter, and press the bottom of the battery into the compartment, using light pressure.
- Close the compartment and fasten the locking screw.
6.1.2 Insert SD card
A micro SD card can be inserted into the meter to expand the memory.
- Open the battery compartment cover on the back of the meter.
- Remove the battery.
- Slide the SD card holder slightly towards the top of the instrument.
- Flip open the holder and insert a micro SD card into the holder with the contacts facing down.
- Fold the holder and push it slightly towards the bottom of the meter to lock it.
6.1.3 Zero measurement
Make a zero measurement with the zero filter before the measurement.
- Unscrew the air inlet nozzle at the top of the instrument.
- Screw on the zero filter.
- Perform a measurement in cumulative measurement mode.
- Repeat the measurement until all three channels show zero. The system cleans itself automatically when measuring with the zero filter.
- Unscrew the zero filter and screw the air inlet nozzle back on.
6.2 Switch the meter on / off
- To switch on the instrument, press and hold the ON / OFF key until the start-up screen is visible.
• To switch off the meter, press and hold the ON / OFF key until the screen darkens.
6.3 Description of the icons
 | Particle measurement |
 | Formaldehyde measurement (PCE-MPC 30 only) |
 | Memory |
 | System settings |
 | Internal help |
| Icon | Description | Icon | Description |
 | Cumulative mode |  | Measurement running |
 | Concentration mode |  | Measurement pause |
 | Differential mode |  | Formaldehyde measurement (PCE-MPC 30 only) |
6.4 Measurement parameter selection
When using the PCE-MPC 30, you can use the ▲ and ▼ keys to select between the measurement parameters particles and formaldehyde.
With the PCE-MPC 20, only the particle measurement parameter is available.
Press the "ENTER" key to call up the measurement parameter.
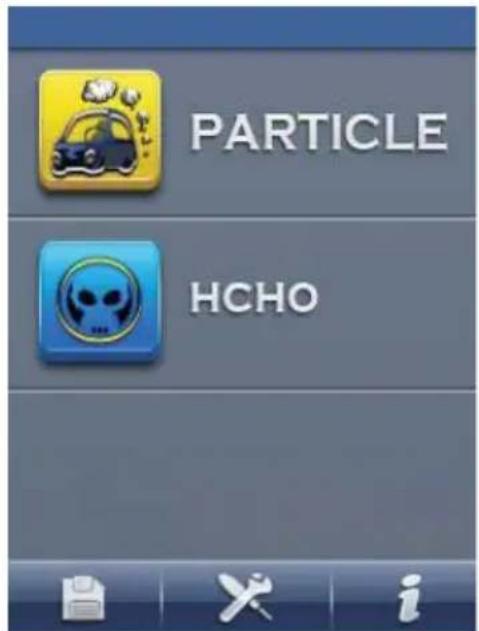
PCE-MPC 30
PCE-MPC 20

6.5 Particle measurement
After calling up the particle measurement parameter, you can start the dust measurement with the "RUN / STOP" key. After the set measuring time and measuring intervals have elapsed, the measurement ends automatically. You can stop the measurement at any time with the "RUN / STOP" key. The display shows the date and time in the upper area, the settings and measured values of the dust measurement in the middle area and the measured values of the temperature and humidity measurement in the lower area.
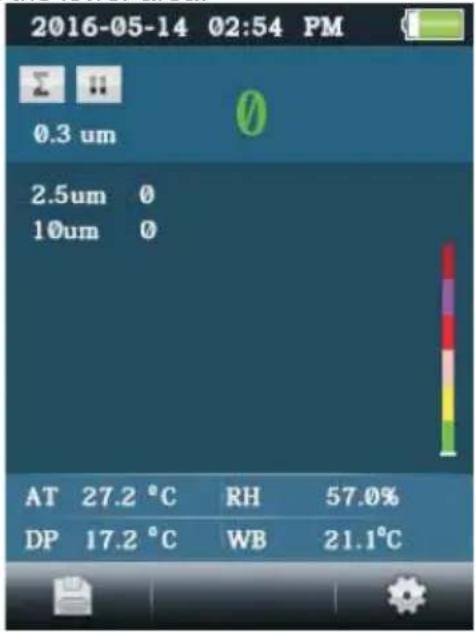
6.5.1 Settings for particle measurement
- Press the "F3" key while in the "particle measurement" menu item to enter the settings menu.
- Use the arrow keys to navigate and confirm your selection with the "ENTER" key.
- Press the ESC key to exit the function.
The following functions can be set / changed
| Sample Time (sampling duration) |
| Start Delay |
| Ambient Temp. / % RH |
| Sample Cycle (sampling cycle) |
| Masscon / Particle (mass concentration / particle) |
| Sample Mode |
| Interval |
| Level Indication (reference channel colour indicator) |
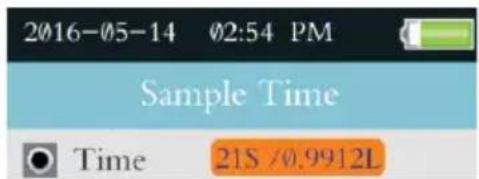
6.5.2 Sampling duration
Here you can change the duration of the sampling. Furthermore, the flow rate for the set duration of sampling is displayed.
- Navigate to the menu item "Sample Time" with the ▲ and ▼ keys.
- Confirm the selection with the "ENTER" key.
- Press the "ENTER" key again to enter change mode.
• Use the ▲ and ▼ keys to set the measurement duration. - Press the "ESC" key to save the entry and return to the overview.
6.5.3 Start delay
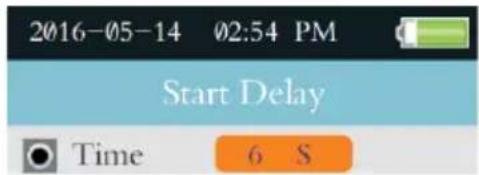
Here you can set the start delay time.
- Navigate to the menu item "Start Delay" with the ▲ and ▼ keys.
- Confirm the selection with the "ENTER" key.
- Press the "ENTER" key again to enter change mode.
• Use the ▲ and ▼ keys to set the measurement duration. - Press the "ESC" key to save the entry and return to the overview.
6.5.4 Temperature / humidity
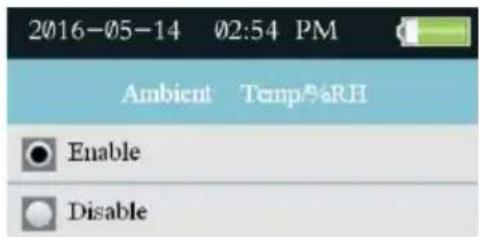
Here you can select whether the temperature and humidity values are to be shown on the display or not.
- Navigate to the menu item "Ambient Temp./%RH" with the ▲ and ▼ keys.
- Confirm the selection with the "ENTER" key.
• Use the ▲ and ▼ keys to select. - Press the "ESC" key to save the entry and return to the overview.
6.5.5 Sample cycle
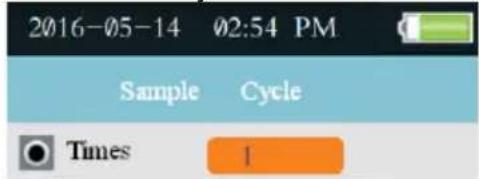
Here you can select the frequency of sampling during a measurement process.
- Navigate to the menu item "Sample Cycle" with the ▲ and ▼ keys.
- Confirm the selection with the "ENTER" key.
- Press the "ENTER" key again to enter change mode.
• Use the ▲ and ▼ keys to make a selection. - Press the "ESC" key to save the entry and return to the overview.
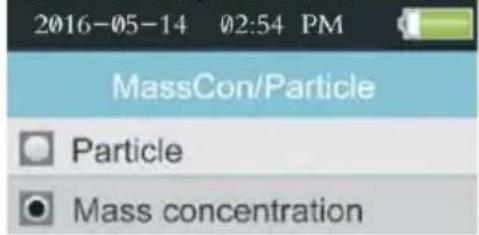
6.5.6 Mass concentration / particles
Here you can choose between mass concentration and particle counting.
• Use the ▲ and ▼ keys to navigate to the menu item "MassCon/Particle".
- Confirm the selection with the "ENTER" key.
• Use the ▲ and ▼ keys to make a selection.
- Press the "ESC" key to save the entry and return to the overview.
6.5.7 Sample mode
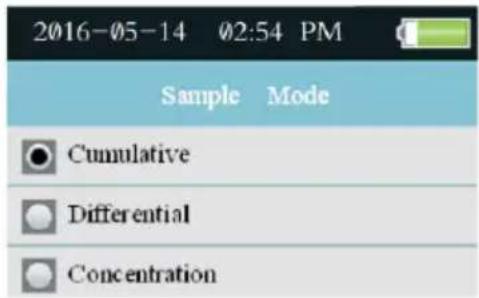
Here you can choose between the sample modes Cumulative, Differential and Concentration. This menu item is only available if under item 6.5.6 the option Particles is set.
- Navigate to the menu item "Sample Mode" with the ▲ and ▼ keys.
- Confirm the selection with the "ENTER" key.
• Use the ▲ and ▼ keys to select. - Press the "ESC" key to save the entry and return to the overview.
6.5.7.1 Explanation of sample modes
- Cumulative & differential:
→ The recorded particle counts are summed up per channel (cumulative); starting from the largest channel.
→ In differential mode, the absolute particle counts per channel are found.
→ Example:
| Channel [μm] | Cumulative particle count [PK] | Particle count differential [PD] | Calculation |
| 0.3 | 1060 | 1000 | = [PK,60]+[PD,1000]=[PK,1060] |
| 2.5 | 60 | 50 | = [PK,10]+[PD,50]=[PK,60] |
| 10.0 | 10 | 10 | --- |
Concentration:
→ Here you can find the average numbers of the respective particles per channel; also called particle density.
6.5.8 Interval
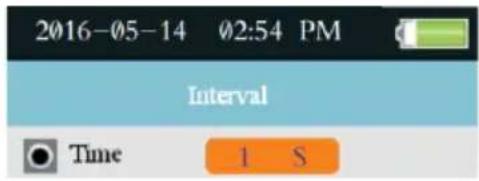
Here you can set the time between the sample cycles set as described in chapter 6.5.5.
- Navigate to the menu item "Interval" with the ▲ and ▼ keys.
- Confirm the selection with the "ENTER" key.
- Press the "ENTER" key again to enter change mode.
• Use the ▲ and ▼ keys to make a selection. - Press the "ESC" key to save the entry and return to the overview.
6.5.9 Reference channel colour indicator (Level Indication)
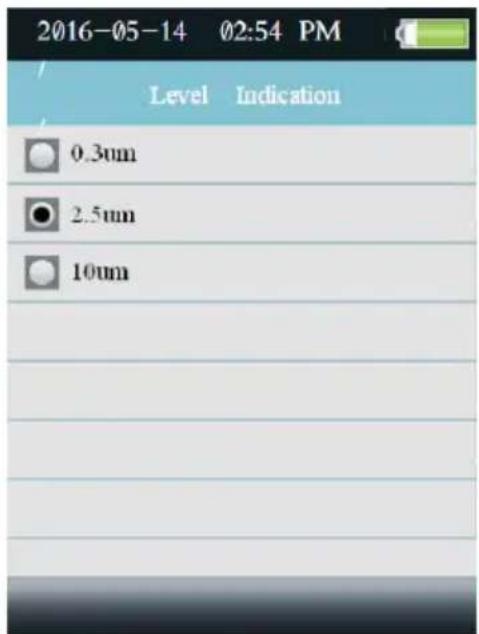
Here you select the reference channel for the colour alarm indicator.
• Use the ▲ and ▼ keys to navigate to the menu item "Level display".
- Confirm the selection with the "ENTER" key.
• Use the ▲ and ▼ keys to make a selection.
- Press the "ESC" key to save the entry and return to the overview.
•
Limit values of the colour indicator:
| Particle | Mass concentration | ||||
| 0.3 μm | 2.5 μm | 10 μm | pm 2.5 | pm 10 | |
| Green | <100000 | <545 | <68 | <35 | <70 |
| Yellow | <250000 | <1235 | <170 | <75 | <150 |
| Orange | <500000 | <2470 | <340 | <115 | <230 |
| Red | <667500 | <3300 | <454 | <150 | <300 |
| Purple | <1000000 | <4950 | <680 | <250 | <500 |
| Dark red | ≥1000000 | ≥4950 | ≥680 | ≥500 | ≥500 |
6.6 Formaldehyde measurement (HCHO) (PCE-MPC 30 only)
After calling up the formaldehyde measurement parameter, the instrument starts measuring directly after the start delay time has elapsed. You can stop or start the measurement at any time by pressing the "RUN / STOP" key. The display shows the date and time as well as the icons for the current device status in the upper area and all measured temperature and humidity values are shown below. The main area shows the formaldehyde reading. The lower area shows the difference value (between min. and max.), the average value as well as the max. and min. values.
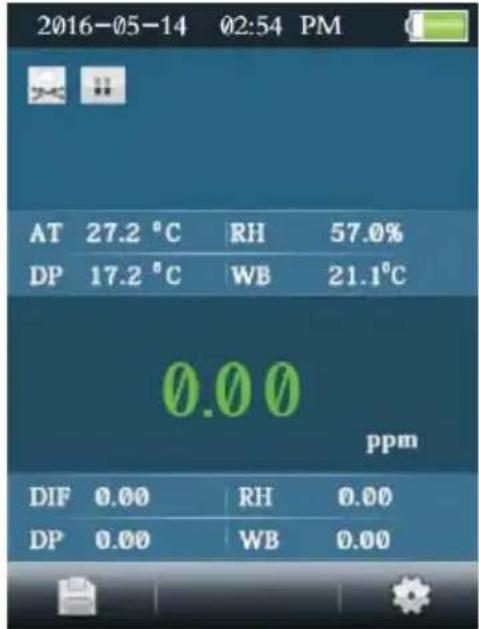
6.6.1 Settings for the formaldehyde measurement
- Press the "F3" key while in the "formaldehyde measurement" menu item to access the settings menu.
- Use the arrow keys to navigate and confirm your selection with the "ENTER" key.
- Press the ESC key to exit the function.
The following functions can be set / changed
| Start Delay |
| HCHO Alarm |
| Max / Min |
| Average / Dif (differential) |
| Ambient Temp. / %RH |
| Dewpoint / Wetbulb |
| Unit (ppm/mg/m3) |
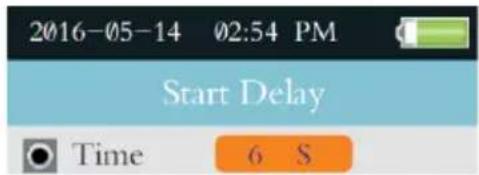
6.6.2 Start delay
Here you can set the start delay time.
- Navigate to the menu item "Start Delay" with the ▲ and ▼ keys.
- Confirm the selection with the "ENTER" key.
- Press the "ENTER" key again to enter change mode.
• Use the ▲ and ▼ keys to set the measurement duration. - Press the "ESC" key to save the entry and return to the overview.
6.6.3 Formaldehyde HCHO Alarm
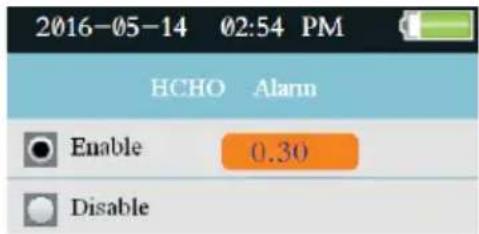
Here you can enable or disable the alarm and change the alarm limit value.
• Use the ▲ and ▼ keys to navigate to the menu item "HCHO Alarm".
- Confirm the selection with the "ENTER" key.
• Use the ▲ and ▼ keys to make a selection.
- Confirm your entry with the "ENTER" key.
• After confirming "Enable", you can change the limit value with the ▲ and ▼ keys.
- Press the "ESC" key to save the entry and return to the overview.
6.6.4 Max./Min. values
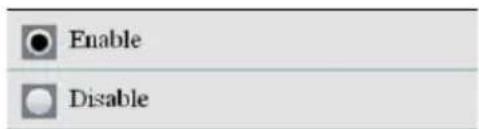
Here you can select whether the max. and min. values are to be shown on the display or not.
- Navigate to the menu item "Max / Min" with the ▲ and ▼ keys.
- Confirm the selection with the "ENTER" key.
• Use the ▲ and ▼ keys to make a selection. - Press the "ESC" key to save the entry and return to the overview.
6.6.5 Mean / differential
Here you can choose whether the mean value (average of the measured values) and the differential value (difference between min. and max. value) should be shown on the display or not.
- Proceed according to the instructions as described in 6.6.4.
6.6.6 Ambient temperature / humidity
Here you can select whether the temperature and relative humidity should be shown on the display or not.
• Proceed according to the instructions as described in 6.6.4.
6.6.7 Dew point / wet bulb
Here you can select whether the dew point and wet bulb temperature should be shown on the display or not.
- Proceed according to the instructions as described in 6.6.4.
6.6.8 Units (ppm / mg/m³)
Here you can choose between the units ppm and mg/m ^3 .
- Proceed according to the instructions as described in 6.6.4.
7 Data storage
The internal memory or an SD card memory is available for saving the data.
The measured values during particle measurement are automatically saved after each measurement process. To save the measured values during formaldehyde measurement, press the "F1" key. Automatic storage is not available for formaldehyde measurement.
You can view the saved records, internal and SD card, with the file browser on the unit.
You can view and save the data sets on the SD card on the PC via USB cable.
7.1 File Browser
- Switch on the unit or press the "ESC" key repeatedly while it is switched on until you are in the start screen.
- On the PCE-MPC 30, you can use the ▲ and ▼ keys to select between the particle measurement and formaldehyde measurement memory areas.
- With the PCE-MPC 20, only the particle measurement memory area is available.
- Press the "F1" key to open the file browser.
- In the file browser, you can select the data records saved in the internal memory or on the SD card, depending on the selection in the system settings.
- Use the ▲ and ▼ keys to select the data record and confirm your selection with the "ENTER" key.
- By pressing the "F1" key and confirming the security prompt, you can delete the selected record.
- Press the "ESC" key to return to the overview.
- By pressing the "F1" key and confirming the security prompt, you can delete all data records.
7.2 PC / USB
Only the data saved on the SD card can be viewed / transferred via the USB cable. During USB connection, the operating functions of the meter are disabled.
- Connect the USB cable to the meter and the PC.
- The display shows a USB pen drive icon to confirm the connection.
• A USB drive is displayed on the PC. - Click on the USB drive and open the corresponding folder / file.
8 System settings
Here you can make / change the basic settings of the instrument.
- Switch on the meter or press the "ESC" key repeatedly while it is switched on until you see the start screen.
- Press the "F2" key to open the settings menu.
The following setting options are available.
| Date/Time | Set time and date |
| Language | Set language |
| Auto Power Off | Set automatic power off time |
| Display timeout | Set automatic power off time of the display |
| Alarm | Enable/disable alarm |
| Memory status | Call up the memory capacity / space left of the memory card |
| Factory Setting | Reset the meter to factory settings |
| Units (°C/°F) | Selection between the temperature units |
| Version | Firmware version |
8.1 Date/Time
- Navigate to the menu item "Date / Time" with the ▲ and ▼ keys.
- Confirm the selection with the "ENTER" key.
• Use the ▲ and ▼ keys to change the date format. - Confirm your entry with the "ENTER" key.
- Continue in this way until the last entry item.
- Press the "ESC" key to return to the menu overview.
8.2 Language
Choose between English, French, German or Spanish.
- Navigate to the menu item "Language" with the ▲ and ▼ keys.
- Confirm the selection with the "ENTER" key.
• Use the ▲ and ▼ keys to select. - Press the "ESC" key to save the entry and return to the overview.
8.3 Auto Power Off
Choose between the options deactivate, 3, 15 or 60 min to determine whether or after what time the meter should switch off in case of inactivity.
- Navigate to the menu item "Auto Power Off". with the ▲ and ▼ keys.
- Confirm the selection with the "ENTER" key.
• Use the ▲ and ▼ keys to make a selection. - Press the "ESC" key to save the entry and return to the overview.
8.4 Display timeout
Choose between the options deactivated, 90 s, 2 or 4 min to determine whether or after what time the screen display switches off. The screen is switched on again with the next keystroke.
• Use the ▲ and ▼ keys to navigate to the menu item "Display timeout".
- Confirm the selection with the "ENTER" key.
• Use the ▲ and ▼ keys to make a selection.
- Press the "ESC" key to save the entry and return to the overview.
8.5 Alarm
Select between the options Alarm on or off.
- Navigate to the menu item "Alarm" with the ▲ and ▼ keys.
- Confirm the selection with the "ENTER" key.
• Use the ▲ and ▼ keys to make a selection. - Press the "ESC" key to save the entry and return to the overview.
8.6 Memory status
Select between the options internal memory or SD memory card. Furthermore, the current memory status is displayed.
• Use the ▲ and ▼ keys to navigate to the menu item "Memory status".
- Confirm the selection with the "ENTER" key.
• Use the ▲ and ▼ keys to make a selection.
- Press the "ESC" key to save the entry and return to the overview.
8.6.1 Format SD card
- Press the "F1" key in the memory status window.
- Confirm the security prompt with the "F1" key.
8.7 Factory setting
Here, the meter can be reset to its factory settings.
• Use the ▲ and ▼ keys to navigate to the menu item "Factory Setting".
- Confirm the selection with the "ENTER" key.
• Use the ▲ and ▼ keys to make a selection.
- Press the "ESC" key.
- If "YES" is selected ("F1" key), the meter is reset to its factory settings without a confirmation prompt and returns to the overview.
- Pressing the "F3" key returns you to the overview without formatting.
8.8 Units (°C / °F)
Choose between the temperature unit options °C and °F.
• Use the ▲ and ▼ keys to navigate to the menu item "Units (°C / °F)".
- Confirm the selection with the "ENTER" key.
• Use the ▲ and ▼ keys to make a selection.
- Press the "ESC" key to save the entry and return to the overview.
9 Internal help
Here, you can view notes on key assignment and device use.
- Switch on the instrument or press the "ESC" key repeatedly while it is switched on until you see the start screen.
- Press the "F3" key to access the notes.
- Use the "F1" and "F3" keys to scroll through the help section.
- Press the "ESC" key to exit the internal help section.
10 Contact
If you have any questions, suggestions or technical problems, please do not hesitate to contact us. You will find the relevant contact information at the end of this user manual.
11 Disposal
For the disposal of batteries in the EU, the 2006/66/EC directive of the European Parliament applies. Due to the contained pollutants, batteries must not be disposed of as household waste. They must be given to collection points designed for that purpose.
In order to comply with the EU directive 2012/19/EU we take our devices back. We either re-use them or give them to a recycling company which disposes of the devices in line with law.
For countries outside the EU, batteries and devices should be disposed of in accordance with your local waste regulations.
If you have any questions, please contact PCE Instruments.


PCE Instruments contact information
Germany France Spain
PCE Deutschland GmbH PCE Instruments France EURL PCE Ibérica S.L.
Im Langel 26 23, rue de Strasbourg Calle Mula, 8
D-59872 Meschede 67250 Soultz-Sous-Forets 02500 Tobarra (Albacete)
Chester Rd, Old Trafford
Manchester M32 0RS
United Kingdom
Tel: +44 (0) 161 464902 0
Fax: +44 (0) 161 464902 9
info@pce-instruments.co.uk
www.pce-instruments.com/english
Italy
PCE Italia s.r.l.
Via Pesciatina 878 / B-Interno 6
55010 Loc. Gragnano Pehlivan Sok. No.6/C
Capannori (Lucca)
Italia
www.pce-instruments.com/turkish
The Netherlands
PCE Brookhuis B.V.
Institutenweg 15
7521 PH Enschede
Nederland
Telefoon: +31 (0)53 737 01 92
info@pcebenelux.nl
www.pce-instruments.com/dutch Fax: +1 (561) 320-9176
info@pce-americas.com
www.pce-instruments.com/us
United States of America
PCE Americas Inc.
1201 Jupiter Park Drive, Suite 8
Jupiter / Palm Beach
33458 FL
USA
Tel: +1 (561) 320-9162
Denmark
PCE Instruments Denmark ApS
Birk Centerpark 40
7400 Herning
Denmark
- User Manual
- Contents
- Safety notes
- Measurement functions
- PCE-MPC 30
- PCE-MPC 20
- Delivery scope
- System description
- Operation
- Preparation
- Insert battery
- Insert SD card
- Zero measurement
- Switch the meter on / off
- Description of the icons
- Measurement parameter selection
- Particle measurement
- Settings for particle measurement
- Sampling duration
- Start delay
- Temperature / humidity
- Sample cycle
- Mass concentration / particles
- Sample mode
- Explanation of sample modes
- Interval
- Reference channel colour indicator (Level Indication)
- Formaldehyde measurement (HCHO) (PCE-MPC 30 only)
- Settings for the formaldehyde measurement
- Start delay
- Formaldehyde HCHO Alarm
- Max./Min. values
- Mean / differential
- Ambient temperature / humidity
- Dew point / wet bulb
- Units (ppm / mg/m³)
- Data storage
- File Browser
- PC / USB
- System settings
- Date/Time
- Language
- Auto Power Off
- Display timeout
- Alarm
- Memory status
- Format SD card
- Factory setting
- Units (°C / °F)
- Internal help
- Contact
- Disposal
- PCE Instruments contact information
- Germany France Spain
- Italy
- The Netherlands
- United States of America
- Denmark
Brand : PCE Instruments
Model : MPC 20
Category : Uncategorized