
VMC16 - Vacuum packing machine VacPak-It - Free user manual and instructions
Find the device manual for free VMC16 VacPak-It in PDF.


| Product Type | Chamber Vacuum Packaging Machine |
| Brand | VacPak-It |
| Model | VMC16 |
| Chamber Dimensions | 17 1/4"W x 16 3/4"D x 3 7/8"H |
| Maximum Pouch Size | 16" x 18" |
| Material | Stainless Steel Body & Transparent Lid |
| Seal Bar | Single 16" Bar |
| Voltage | 120V |
| Wattage | 1150W |
| Pump Type | Oil Pump |
| Pump Power | 1-1/2 HP |
| Pump Life | 200,000+ Cycles |
| Vacuum Time | Adjustable 20-40 Seconds (Default 40) |
| Seal Time | Adjustable 0-6 Seconds (Default 1.2) |
| Cooling Time | Adjustable (Default 2 Seconds) |
| Display | Digital LED Display and Analog Vacuum Gauge |
| Key Features | Adjustable Vacuum, Seal & Cooling Time; Removable Seal Bar; Easy Oil Check & Fill |
| Certifications | ETL |
| Power Cord | NEMA 5-15P, 3-prong grounded plug |
| Oil Change Interval | First 20 hours, then every 50 hours |
Frequently Asked Questions - VMC16 VacPak-It
User questions about VMC16 VacPak-It
0 question about this device. Answer the ones you know or ask your own.
Ask a new question about this device
Download the instructions for your Vacuum packing machine in PDF format for free! Find your manual VMC16 - VacPak-It and take your electronic device back in hand. On this page are published all the documents necessary for the use of your device. VMC16 by VacPak-It.
USER MANUAL VMC16 VacPak-It
natural_image
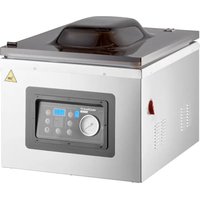
Exterior view of a VACPAK-IT vacuum cleaner with digital display and control buttons (no readable text beyond branding)186VMC10OP
Single
10 ^1/4 " Seal Bar
Oil Pump
186VMC10DPU
Single
10 ^1/4 " Seal Bar
Dry Pump
186VMC16
Single
16" Seal Bar
Oil Pump
186VMC32
Double
16" Seal Bars
Oil Pump

natural_image
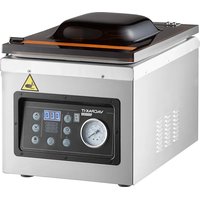
Exterior view of a VACPAK-IT vacuum cleaner with control panel and display (no readable text or symbols beyond branding)TABLE OF CONTENTS
Food Storage and Safety Information .... 3
Control Panel (VMC10 /DPU /OP) 4
Control Panel (VMC /16 /32) 5
Setup Instructions (VMC10 /DPU /OP) 6
Setup Instructions (VMC /16 /32) .....7
Operating Instructions 8
Maintenance Guide....9
Troubleshooting.... 10
Model Specifications....11
Warranty 12
2. VACPAK-IT
FOOD STORAGE & SAFETY
Vacuum packaging with any model in the VACPAK-IT line will yield unbelievable results. These machines remove up to 95% of the air from the package. This will help keep food fresher up to 5 times longer than under normal storage methods. You can store dry foods like pasta, cereal and flour, fresh meats like pork, chicken and beef, vegetables like carrots, potatoes and squash, or even frozen liquids like soups and drink mixes. The possibilities are endless.
Once packaged, there are a variety of unique methods to cook your stored food. You can cook the food traditionally or sous vide it for a tender and lush flavor. Vegetables should always be blanched – cook until crispy and then submerge in cold water to stop the cooking process – to kill any enzymes that may cause out-gassing when vacuumed.

IMPORTANT
NEVER vacuum pack garlic, fungi (like mushrooms), or soft cheese (like Brie, Camembert, and Ricotta).
A dangerous chemical reaction takes place when air is removed, causing them to be extremely dangerous if ingested.

| FOOD | TYPICAL STORAGE | VACUUM FRIDGE STORAGE | VACUUM FREEZER STORAGE |
| Fresh Beef & Veal 1-2 Weeks 1 Month 1-3 Years | |||
| Ground Meat 1-2 Weeks 1 Month 1 Year | |||
| Fresh Pork 1 Week 2-4 Weeks 2-3 Years | |||
| Fresh Fish 3-4 Days 2 Weeks 2 Years | |||
| Fresh Poultry 1 Week 2-4 Weeks 2-3 Years | |||
| Smoked Meats | 2-4 Weeks | 6-12 Weeks | 3 Years |
| Fresh Produce (Blanched) | 1-2 Weeks 2-4 Weeks 2-3 Years | ||
| Fresh Fruits | 3-4 Days 2 Weeks | 2-3 Years | |
| Hard Cheeses | 2-4 Days | 6-12 Weeks 6 Months | |
| Sliced Deli Meats | 1-2 Weeks | 6-12 Weeks | Not Recommended |
| Fresh Pasta | 1 Week 2-3 Weeks 6 Months | ||

- Vacuum Gauge - Indicates the vacuum pressure level inside the chamber.
- “Seal Time” Light - Illuminates when adjusting seal time. It also illuminates during the sealing process.
- “Vac Time” Light - Illuminates when adjusting vacuum time. It also illuminates during the vacuum process.
- LED Display - Displays current cycle time in seconds.
- Up/Down Arrow Buttons - Press to increase/decrease the vacuum or sealing time.
- ON/OFF Button - Press to turn the machine on or off. Can also be used as an emergency stop button.
- Start Button - Press to begin the indicated process.
- Seal Button - Press to begin the sealing process manually for fragile foods.
- Set Button - Press to set the vacuum or sealing time, then use the up/down arrow buttons to make adjustments.
4. VACPAK-IT

pie
| Category | Value | | -------- | ----- | | Set | 789 | | Down | | | Up | | | Stop | |- Vacuum Gauge - Indicates the vacuum pressure level inside the chamber.
- “Cooling” Light - Illuminates when adjusting the cooling time. It also illuminates during the cooling process.
- “Sealing” Light - Illuminates when adjusting seal time. It also illuminates during the sealing process.
- “Gas” Light - This unit does not have a gas flush option. Set to 0.0 seconds.
- “Vacuum” Light - Illuminates when adjusting the vacuum time. It also illuminates during the vacuum process.
- LED Display - Displays current cycle time in seconds.
- Set Button - Press to set the vacuum or sealing time, then use the up/down arrow buttons to make adjustments.
- Down & Up Arrow Buttons - Press to decrease/increase the vacuum, sealing, or cooling time.
- Stop Button - Press to stop the vacuum cycle and seal the bag immediately.
CAUTION: DO NOT IMMERSE IN WATER
To provide continued protection against risk of electric shock, connect to properly grounded outlets only.
ATTENTION: NE PAS IMMERGER.
Adding Oil (Except VMC10DPU)
- Remove the back panel by unscrewing all the corner screws.
- Remove the oil fill bolt located on the vacuum pump using a thumbscrew cap.
- Fill the pump with oil until it reaches the white line marked on the bottle.
- Replace the oil fill bolt on the vacuum pump, and then replace the back panel of the unit.
Initial Setup
- Attach the power cord to the unit and plug the cord into a grounded electrical outlet.
- Release the lid lock, located on the right side of the machine, and allow the lid to lift and remain open.
NOTE: Do not use the machine with the lid lock engaged. Always release the lid lock before use. The lid lock feature is only to be used when the machine is in storage, never while in use.
- Press the ON/OFF Button on the control panel to turn the machine on. The LED screen on the control panel will illuminate, confirming the machine is on.
Adjusting Timing Controls
Note: All adjustments and changes to this unit's timing must be made with the lid lock disengaged and the lid open. DO NOT use the machine with the lid lock engaged.
- To set and adjust the timing controls, press the "Set" button on the front control panel. You can repress the "Set" button to cycle through the settings for Vacuum or Sealing. Once selected, the current time setting will appear on the LED Screen.
The unit's standard settings are:
Vacuum Time – 40 Seconds Sealing Time – 1.2 Seconds
- Once the setting is selected, you can increase or decrease the time by pressing the "Up" or "Down" arrow buttons accordingly. The new time settings will appear on the screen and be saved to the machine.
Note: For setting the Vacuum time, you can use filler plates to occupy space in the chamber, leaving less air to be removed from the chamber, thus decreasing the overall vacuuming time.
Note: For setting the Sealing time, it is recommended you increase the seal time by small increments of 0.1 to avoid over-sealing or melting the bag.
- Upon finishing setting the timing controls, press the "Set" button until no lights on the control panel are illuminated. The machine will not operate until all lights are off.
6. VACPAK-IT
CAUTION: DO NOT IMMERSE IN WATER
To provide continued protection against risk of electric shock, connect to properly grounded outlets only.
ATTENTION: NE PAS IMMERGER.
- Remove the round cover on side panel by unscrewing the 4 screws.
- Remove the oil fill bolt located on the vacuum pump using a thumbscrew cap.
- Fill the pump with oil until it reaches the white line marked on the bottle.
- Replace the oil fill bolt on the vacuum pump, and then replace the back panel of the unit.
Initial Setup
- Attach the power cord to the unit and plug the cord into a grounded electrical outlet.
- Release the lid lock, located on the right side of the machine, and allow the lid to lift and remain open.
NOTE: DO NOT use the machine with the lid lock engaged.
Always release the lid lock before use. The lid lock feature is only
to be used when the machine is in storage, never while in use.
- Locate the red dial on the left side of the machine. Turn the power on by rotating the dial towards the front of the machine, from the "0" to the "1" position.
The LED screen on the control panel will illuminate, confirming the machine is on.
Adjusting Timing Controls
Note: All adjustments and changes to this unit's timing must be made with the lid lock disengaged and the lid open. DO NOT use the machine with the lid lock engaged.
- To set and adjust the timing controls, press the "Set" button on the front control panel. You can repress the "Set" button to cycle through the settings for Vacuum, Sealing, or Cooling. Once selected, the current time setting will appear on the LED Screen.
The unit's standard settings are:
Vacuum Time - 40 Seconds
Sealing Time - 1.2 Seconds
Cooling Time - 2 Seconds
- Once the setting is selected, you can increase or decrease the time by pressing the "Up" or "Down" arrow buttons accordingly. The new time settings will appear on the screen and be saved to the machine.
Note: For setting the Vacuum time, you can use filler plates to occupy space in the chamber, leaving less air to be removed from the chamber, thus decreasing the overall vacuuming time.
Note: For setting the Sealing time, it is recommended you increase the seal time by small increments of 0.5 to avoid over-sealing or melting the bag.
- Upon finishing setting the timing controls, press the "Set" button until no lights on the control panel are illuminated. The machine will not operate until all lights are off.

IMPORTANT
NEVER vacuum pack garlic, fungi (like mushrooms), or soft cheese (like Brie, Camembert, and Ricotta).
A dangerous chemical reaction takes place when air is removed, causing them to be extremely dangerous if ingested.

Note: DO NOT use the machine with the lid lock engaged. Always release the lid lock before use. The lid lock feature is only to be used when the machine is in storage, never while in use.
-
Select a suitable Vacuum chamber pouch for this machine.
-
VMC10DPU & VMC10OP units can accommodate up to a 10" x 15" pouch.
-
VMC16 & VMC32 units can accommodate up to a 16" x 18" pouch.
-
Place item(s) in pouch, leaving at least 2" space between the item and the top of the pouch.
Note: If item(s) to be sealed contain sharp objects such as bones, stems or cloves, make sure to cover them with a folded paper towel to protect the pouch from potential punctures. - Lay the pouch flat into the chamber, with the pouch opening laid across the seal bar at the front of the chamber. Ensure the pouch lies flat across the seal bar and contains no wrinkles, while making sure the end of the pouch does not extend outside the chamber.
- Close the lid and press down firmly on the corners of the lid for 3-4 seconds until the vacuum cycle begins. (Press the "Start" button if operating a VMC10DPU/OP unit.)
The unit will now enter into the VACPAK-IT procedure as follows:
• Vacuum cycle begins, air is removed from the chamber and pouch.
- Sealing cycle begins, the seal bars heat and seal the pouch.
- (VMC16/32 only) Cooling cycle begins, the seal is cooled to prevent melting.
• The cycle finishes and the lid releases.
Note: Some models have a manual "Seal" or "Stop" button that can be used to seal the pouch immediately. This is useful when vacuuming fragile foods to prevent crushing.
- Inspect the pouch to ensure desired vacuum and seal is achieved.
Vacuum Quality - If the quality of vacuum is not adequate or if the pouch is not tight enough, inspect the pouch for air pockets or air leaks. If no leaks are evident, increase the vacuum time by 5 seconds and begin the process again at Step 2.
Note: Some vegetables may emit out-gassing when the air is removed from them. Make sure to blanch – cook until crispy and then submerge in cold water to stop the cooking process – to prevent this out-gassing from occurring.
Seal Quality - A good seal will be clear upon inspection. Seals that are spotty, incomplete, wrinkled, milky, or white colored are inadequate. If the seal is white or milky, cut seal portion and decrease the seal time by 0.1 seconds. If the seal is spotty or incomplete, cut the seal portion and increase the seal time by 0.1 seconds. Begin the process again at Step 2.
- If the Vacuum and Seal are of good quality, the VACPAK-IT process is finished.
Enjoy the deliciousness of your freshly vacuum packed food!
8. VACPAK-IT
Changing Oil (Except VMC10DPU)
It is recommended to change the vacuum pump oil in your VACPAK-IT machine after the first 20 hours of use. Further oil changes should occur after every 50 hours of use.
Required Supplies:
- Machine Oil
• Empty Oil Bottle with Spout
• Phillips Head Screwdriver -
Adjustable Wrench
• Oil Drain Pan or Container -
Warm up the current pump oil by running the machine for a few cycles.
- Turn the unit off and disconnect the power cable from the outlet.
- Remove the back panel of the unit by unscrewing the four corner screws.
- Locate the oil drain bolt on the bottom of the vacuum pump under the unit's housing. Place an oil drain pan or container under the drain bolt. Remove the bolt and the oil will begin to drain.
- Once all oil has been drained, replace the oil drain bolt on the pump.
Note: Dispose of used machine oil properly according to your local and state regulations. - Remove the oil fill bolt located on the vacuum pump using a wrench or similar tool.
- Fill the pump with oil until the level is at least halfway up the sight glass. (Approx 3.5oz of oil).
- Replace the oil fill bolt on the vacuum pump, and then replace the back panel on the unit.
- The oil has successfully been replaced and the unit is ready to use.
Routine Cleaning
- After each day's use or when the machine is dirty, remove the seal bar and wipe down the chamber, lid and exterior with a damp cloth and mild soap to remove food particles and other debris.
- The seal bar should be wiped clean with a damp cloth only.
- Never use an acetone, acetone-based or abrasive cleaner on the lid or other plastic parts. Parts can become discolored, scratched, or even appear burned if these materials are used.
- The stainless steel housing should be cleaned and cared for by using a traditional stainless steel cleaning material.
- Inspect the power cord for tears, frays, or other damage. Do not use machine if the power cord is damaged.
TROUBLESHOOTING
| ISSUE | REMEDY |
| Unit won't turn on | ·Ensure the machine is properly plugged into a grounded outlet.·Check the power cord for tears, frays, or other damage.Do not use machine if the power cord is damaged.·Make sure the power switch is turned on.The LED screen will be illuminated when on. |
| Not achieving a complete vacuum | ·Vacuum time may not be set high enough. Set the vacuum time higher in small increments and try again until the desired vacuum is achieved.·The edge of the bag must be across the seal bar, and not extend past the chamber, ensure there are no wrinkles in the bag and that the bag is inside the chamber.·Make sure the seal is complete and that the seal is clear. If the seal is spotty, incomplete, wrinkled, milky, or white colored, they are inadequate. Cut seal portion and restart the vacuum process.·Ensure both the sealer and bag are clean, dry and free of debris for the vacuum process to be successful. Wipe the surface of the seal bar and inside of the bag and try again. |
| Bag loses vacuum after being sealed | ·Check for sharp items such as bones, stems, cloves and others that can puncture the bags, cover them with a folded paper towel and vacuum in a new pouch.·Some fruits and vegetables can release gases if not properly prepared before storing. Make sure to blanch or freeze food before packaging. If in doubt about the quality of the food, discard immediately. |
| Pouch not sealed properly | ·The sealing time may not be long enough for an adequate seal. Increase the seal time in small increments of 0.1 seconds and try again.·Ensure both the sealer and bag are clean, dry and free of debris for the vacuum process to be successful. Wipe the surface of the seal bar and inside of the bag and try again.·The edge of the bag must be across the seal bar, and not extend past the chamber, ensure there are no wrinkles in the bag and that the bag is inside the chamber. |
| Buttons not working | ·In rare cases, the buttons and/or programs may not work properly. If this occurs, unplug the machine and plug it back in to reset the programming. |
10. VACPAK-IT
MODEL SPECIFICATIONS
| Model | VMC10DPU VMC10OP VMC16 VMC32 | |||
| Chamber Dimensions | 11"W x 15 12 "D x 3 18 "H | 11"W x 15 12 "D x 3 18 "H | 17 14 "W x 16 34 "D x 3 78 "H | 17 14 "W x 16 34 "D x 3 78 "H |
| Material | Stainless Steel Body & Transparent Lid | Stainless Steel Body & Transparent Lid | Stainless Steel Body & Transparent Lid | Stainless Steel Body & Transparent Lid |
| Seal Bar | Single 10 14 " Bar Single 10 14 " Bar Single 16" | Bar Dual 16" Bar | ||
| Voltage | 120V 120V 120V 120V | |||
| Wattage | 1100W 1000W 1150W 1180W | |||
| Plug Type | NEMA 5-15P NEMA 5-15P NEMA 5-15P NEMA 5-15P | |||
| Pump Type | Dry Oil Oil Oil | |||
| Pump Power | 1/4 HP 1/4 HP 1-1/2 HP | 1-1/2 HP | ||
| Pump Life | 200,000+ Cycles | 200,000+ Cycles | 200,000+ Cycles | 200,000+ Cycles |
| Vacuum Time | 25-40 Seconds | 20-40 Seconds | 20-40 Seconds 20-40 Seconds | 40 Seconds |
| Seal Time | 0-6 Seconds | 0-6 Seconds | 0-6 Seconds | 0-6 Seconds |
| Features | Digital Vacuum Pressure DisplayTraditional Analog Pressure GaugeRemovable Seal BarNo Hassle Dry PumpAdjustable Vacuum And Seal Time | Digital Vacuum Pressure DisplayTraditional Analog Pressure GaugeRemovable Seal BarEasy Check and Fill Oil PumpAdjustable Vacuum And Seal Time | Digital Vacuum Pressure DisplayTraditional Analog Pressure GaugeRemovable Seal BarEasy Check and Fill Oil PumpAdjustable Vacuum, Seal, and Cooling Time | Digital Vacuum Pressure DisplayTraditional Analog Pressure GaugeRemovable Seal BarsEasy Check and Fill Oil PumpAdjustable Vacuum, Seal, and Cooling Time |
| Certifications | ETL | ETL | ETL | ETL |
- TABLE OF CONTENTS
- VACPAK-IT
- FOOD STORAGE & SAFETY
- IMPORTANT
- VACPAK-IT
- CAUTION: DO NOT IMMERSE IN WATER
- ATTENTION: NE PAS IMMERGER.
- Adding Oil (Except VMC10DPU)
- Initial Setup
- Adjusting Timing Controls
- The unit's standard settings are:
- VACPAK-IT
- The unit will now enter into the VACPAK-IT procedure as follows:
- VACPAK-IT
- Changing Oil (Except VMC10DPU)
- Required Supplies:
- Routine Cleaning
- TROUBLESHOOTING
- VACPAK-IT
- MODEL SPECIFICATIONS
Brand : VacPak-It
Model : VMC16
Category : Vacuum packing machine