
Pack 'n Play Snuggle Suite LX - Travel cot GRACO - Free user manual and instructions
Find the device manual for free Pack 'n Play Snuggle Suite LX GRACO in PDF.


| Product Type | Travel Cot / Playard |
| Brand | Graco |
| Model | Pack 'n Play Snuggle Suite LX |
| Dimensions (Open) | 39 x 29 x 28 inches (99 x 74 x 71 cm) |
| Dimensions (Folded) | 10 x 10 x 28 inches (25 x 25 x 71 cm) |
| Weight | 25 lbs (11.3 kg) |
| Maximum Weight Capacity (Bassinet) | 30 lbs (13.6 kg) |
| Maximum Weight Capacity (Changing Table) | 15 lbs (6.8 kg) |
| Material | Polyester, metal frame |
| Assembly | No tools required, quick set-up |
| Included Accessories | Bassinet, changing table, storage organizer, carry bag |
| Cleaning Instructions | Spot clean with mild soap and water, air dry |
| Safety Standards | Meets ASTM and CPSC safety standards |
| Age Range | Newborn to toddler (up to 35 lbs/15.9 kg) |
| Special Features | Click-Connect technology, removable full-size bassinet, elevated changer |
| Warranty | 1 year limited manufacturer warranty |
Frequently Asked Questions - Pack 'n Play Snuggle Suite LX GRACO
User questions about Pack 'n Play Snuggle Suite LX GRACO
0 question about this device. Answer the ones you know or ask your own.
Ask a new question about this device
Download the instructions for your Travel cot in PDF format for free! Find your manual Pack 'n Play Snuggle Suite LX - GRACO and take your electronic device back in hand. On this page are published all the documents necessary for the use of your device. Pack 'n Play Snuggle Suite LX by GRACO.
USER MANUAL Pack 'n Play Snuggle Suite LX GRACO
Read all instructions BEFORE assembly and USE of product. KEEP INSTRUCTIONS FOR FUTURE USE.
6-B Replacement Parts • Warranty Information
Failure to follow these warnings and the instructions could result in serious injury or death.
Setting Up the Playard
- This product requires adult assembly.
- Keep fingers clear of top corners during setup. Be sure playard is completely set up before use. Check that the four top rails are completely latched, the center of the floor is pushed down, the mattress/pad is flat, the straps are securely fastened to the bottom of the unit and the four corners are tucked under the stiffeners. Always follow the instructions in the owner's manual to set up the playard.
- Never use this product if there are any loose or missing fasteners, loose joints, broken parts or torn mesh. Check before assembly and periodically during use. Contact Graco at 1-800-345-4109 for replacement parts and instructions if needed. Never substitute parts.
Using the playard
- The playard is for playing or sleeping. When used for playing, never leave child unattended and always keep child in view. When used for sleeping, you must still provide the supervision necessary for the continued safety of your child.
• Always keep the playard away from hazards in the area that may injure your child. -
When child is able to pull to standing position, remove large toys and other objects that could serve as steps for climbing out.
-
Stop using this product when your child reaches 35 in. (89 cm) in height, weighs more than 30 lb (14 kg), or is able to climb out.
- Do not modify playard or add any attachments that are not listed in the owner's manual, including an add-on bassinet.
- Child can become entrapped and die when improvised netting or covers are placed on top of a playard. Never add such items to confine child in playard.
- NEVER leave child in product with side lowered. Be sure side is in raised and locked position whenever child is in product.
- If refinishing, use a nontoxic finish specified for children's products.
Avoiding Suffocation Hazards
- Unlike cribs that have rigid sides, the playard has flexible sides. As a result, the playard mattress/pad is specially designed to prevent suffocation. The playard mattress/pad has a solid base, a certain length and width, and is less than one inch thick in order to meet safety standards. Using a thicker or a different sized mattress/pad may allow a child's head to get between mattress/pad and the side of the playard causing suffocation.
• Infants can suffocate
- In gaps between a mattress too small or too thick and products sides
- On soft bedding.
NEVER add a mattress, pillow, comforter or padding. Use ONLY mattress pad provided by Graco.
WARNING
- To reduce the risk of SIDS, pediatricians recommend healthy infants be placed on their backs to sleep, unless otherwise advised by your physician.
- Never use plastic shipping bags or other plastic film as mattress covers not sold and intended for that purpose. They can cause suffocation.
-
NEVER use a water mattress with the playard.
-
NEVER place the playard near a window where cords from blinds or drapes can strangle a child.
- NEVER hang strings on or over the playard.
- NEVER place items with a string around a child's neck, such as hood strings, pacifier cords, etc.
• NEVER attach strings to toys.
This product is not intended for commercial use.
Avoiding Strangulation Hazards
- Strings and cords can cause strangulation. Keep strings and cords away from child.
FOR SAFE BATTERY USE
Keep the batteries out of children's reach.
Any battery may leak battery acid if mixed with a different battery type, if inserted incorrectly (put in backwards) or if all batteries are not replaced or recharged at the same time. Do not mix old and new batteries. Do not mix alkaline, standard (carbon-zinc) or rechargeable (nickel-cadmium) batteries.
Any battery may leak battery acid or explode if disposed of in fire or an attempt is made to charge a battery not intended to be recharged. Never recharge a cell of one type in a recharger made for a cell of another type.
Discard leaky batteries immediately. Leaky batteries can cause skin burns or other personal injury. When discarding batteries, be sure to dispose of them in the proper manner, according to your state and local regulations.
Always remove batteries if the product is not going to be used for a month or more. Batteries left in the unit may leak and cause damage.
Recommended type batteries—alkaline disposables. NEVER mix battery types. Change batteries when product ceases to operate satisfactorily.
Troubleshooting: If your device is not functioning properly, check for the following problems:
-
No batteries in electronics module.
-
Batteries dead.
-
Batteries in backwards—check “+” and “-”.
-
Corrosion on battery terminals. Rotate batteries in place against terminals, or clean with sandpaper or steel wool if corrosion is severe.
-
Batteries too weak.
If you still have problems, call our toll-free number, USA 1-800-345-4109.
WARNING
Changes or modifications not expressly approved by the party responsible for compliance could void the user's authority to operate the equipment.
This device complies with part 15 of the FCC Rules. Operation is subject to the following two conditions: (1) This device may not cause harmful interference, and (2) this device must accept any interference received, including interference that may cause undesired operation.
NOTE: This equipment has been tested and found to comply with the limits for a Class B digital device, pursuant to Part 15 of the FCC Rules. These limits are designed to provide reasonable protection against harmful interference in a residential installation. This equipment generates, uses and can radiate radio frequency energy and, if not installed and used in accordance with the instructions, may cause harmful interference to radio communications.
However, there is no guarantee that interference will not occur in a particular installation. If this equipment does cause harmful interference to radio or television reception, which can be determined by turning the equipment off and on, the user is encouraged to try to correct the interference by one or more of the following measures:
- Reorient or relocate the receiving antenna.
- Increase the separation between the equipment and receiver.
- Connect the equipment into an outlet on a circuit different from that to which the receiver is needed.
- Consult the dealer or an experienced radio/TV technician for help.
ADVERTENCIA
This model may not include some features shown below. Check that you have all the parts for this model BEFORE assembling your product. If any parts are missing, call Customer Service.
Tools required: Philips Screwdriver
natural_image
Line drawing of a person wearing a hooded jacket with straps (no text or symbols)B

C
F
J

natural_image
Simple line drawing of a curved mechanical or electrical component with labeled points J and K (no text or symbols beyond labels)D

natural_image
Line drawing of a backpack with front and back panels (no text or symbols)E

natural_image
Line drawing of a folded or draped fabric item (no text or symbols)H

L

natural_image
Simple line drawing of a rectangular box with internal compartments and decorative elements (no text or symbols)FEATURES ON CERTAIN MODELS
- CARACTERÍSTICAS EN CIERTOS MODELOS
M
N

natural_image
Simple line drawing of a rectangular object with a rounded top and a rectangular inner rectangle (no text or symbols)0
P

Q

R

S
T

U
natural_image
Medical illustration showing a hand holding a surgical instrument with a red arrow indicating a specific area (no text or symbols present)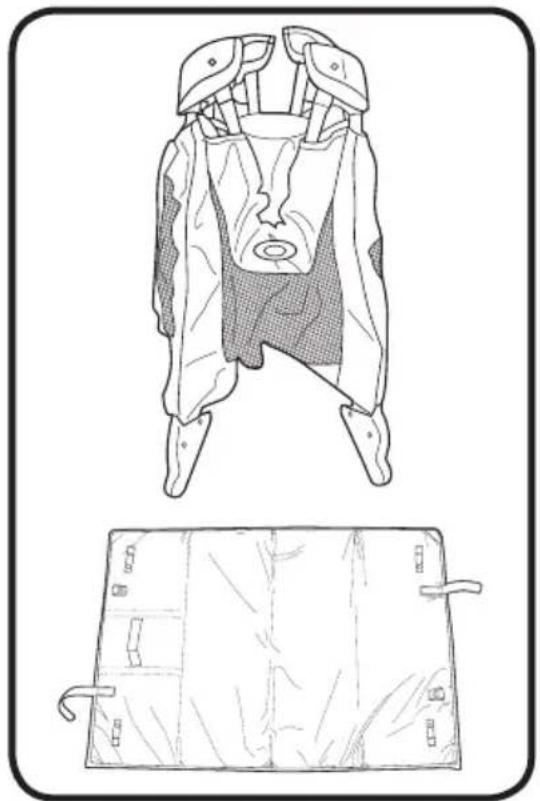
natural_image
Technical line drawing of a mechanical device with two views: top shows front view of internal components, bottom shows side view of a rectangular component (no text or symbols)


natural_image
Line drawing of a person sitting in a wooden crate with a patterned seat (no text or symbols)
natural_image
Illustration showing a folding box and a baby in a baby care unit, with a red arrow indicating the down object (no text or symbols present)- When setting up, lock rails before lowering center.
Be sure top rails have become rigid. If not, pull up again until they are rigid. If top rails do not latch, lift the center of the floor higher.
natural_image
Diagram showing a red arrow pointing upward from a central point on a textured surface, with no visible text or symbols.3-B Bassinet Set Up • Armado del moisés
WARNING
SUFFOCATION HAZARD Infants have suffocated:
- In gaps between extra padding and side of the bassinet, and
- On soft bedding.
Use ONLY mattress/pad provided by Graco. NEVER add a pillow, comforter or another mattress for padding.
- FALL HAZARD: To help prevent falls, do not use this product when the infant begins to push up on hands and knees or weighs over 15 lbs (6.8 kg), whichever comes first.
- Use bassinet with only one child at a time.
- Never place a child under the bassinet.
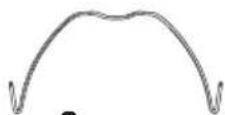
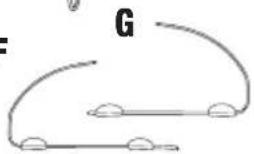
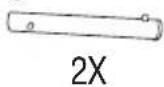
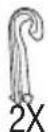
- The bassinet must be fully assembled and installed, including four metal tubes, eight clips and mattress/pad, before using. Do not modify bassinet or add any attachments that are not listed in the owner's manual.
- DO NOT store the bassinet in the playard while in use.
- To help prevent heat build-up inside the playard and to avoid overheating your child, when using the bassinet DO NOT use an outdoor canopy.
- To reduce the risk of SIDS, pediatricians recommend healthy infants be placed on their backs to sleep, unless otherwise advised by your physician.
- If a sheet is used with the pad use only the one provided by Graco or one specifically designed to fit the dimensions of the bassinet.
- Never place child in bassinet while seat is attached.
ADVERTENCIA
NOTE: Bassinet mounts should always be attached on the end with the wheels as shown.
natural_image
Illustration of a baby care cart with a red downward arrow indicating a drop or reduction (no text or symbols present)

- Insert tapered end of bar into end of other bar with hole in it. Repeat with other set of bars.
Check:Tubes MUST be assembled before placing mattress/pad in bassinet.
natural_image
Line drawing of a baby car seat with a red downward arrow indicating the load or position (no text or symbols present)natural_image
Diagram of a baby care cart with a red upward arrow indicating movement or pressure point (no text or symbols present)natural_image
Illustration of a person adjusting a furniture frame with a red arrow indicating movement (no text or symbols)
3. Center of floor must be up.
a. Lift up slightly on the top rail.
b. Push in on the button located on the side of the top rail to release the two tubes.
c. Push down.
d. Repeat on all four rails until all tubes are released.
- If top rails do not unlatch, DO NOT FORCE. Lift the center of the floor higher.
- Both tubes must be released for the top rail to fold.
natural_image
Illustration of a medical procedure with hands performing a procedure, no text or symbols present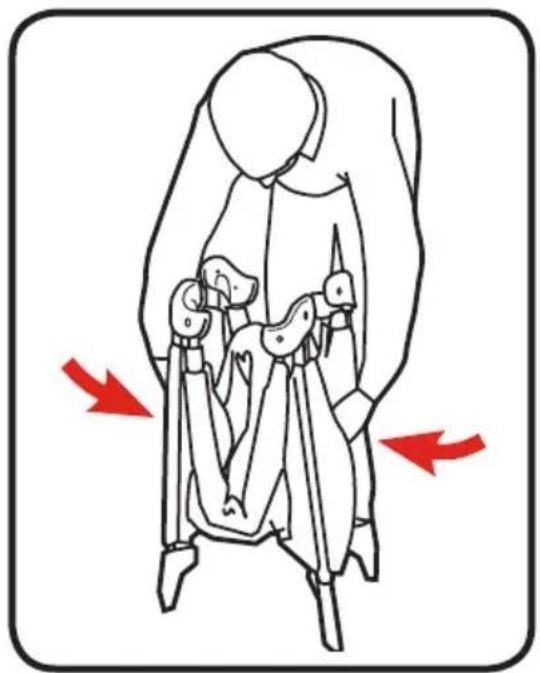
natural_image
Illustration of a person seated with hands placed on the back, showing red arrows indicating movement or pressure direction (no text or symbols)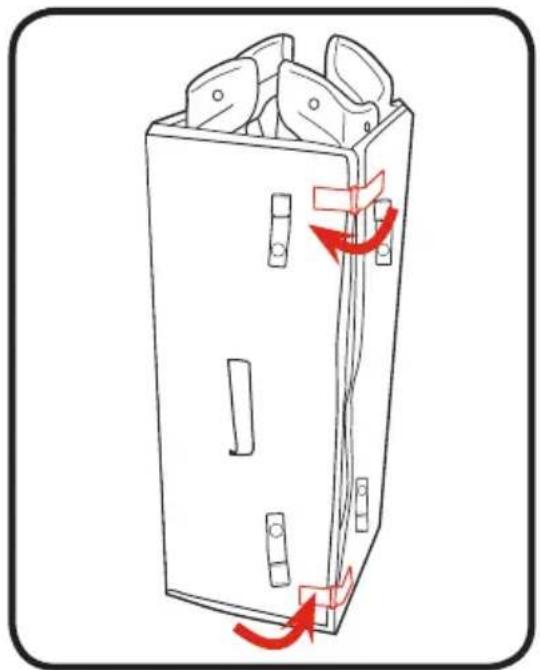
natural_image
Diagram of a door handle with red arrows indicating movement or force, showing internal compartments and lock positions (no text or symbols)4 Use . Use
4-B To Cover • Para cubrir

natural_image
Illustration of a person holding a bag with a red mark, no text or symbols presentnatural_image
Illustration of a person holding a bottle with a red object inside, no text or symbols presentYou must remove the module from the unit when your child can pull up to a standing position.

ADVERTENCIA
natural_image
Illustration showing a hand holding a device with a tool, and a close-up of a device with four circular components (no text or symbols)
natural_image
Illustration showing a hand inserting a patient's abdomen into a device, with no visible text or symbols.
natural_image
Illustration of a surgical procedure on an anatomical structure, showing tissue manipulation with a tool (no text or labels)
flowchart
graph TD
    A["Device Icon"] --> B["Central Circle"]
    B --> C["Speaker Icon"]
    B --> D["Arrow Icon"]
    B --> E["Circle Icon"]
    B --> F["Lightbulb Icon"]
    B --> G["Clock Icon"]
    B --> H["Arrow Icon"]
    B --> I["Arrow Icon"]

natural_image
Simple line drawing of a light bulb inside a circle, enclosed in a rounded rectangle (no text or symbols)
natural_image
Simple musical note icon inside a circle, enclosed in a rounded rectangle (no text or symbols)LIGHTS— Press once to turn top light (A) on, press twice to turn both lights on, press three times to turn bottom light (B) on, and four times to turn lights off.
MUSIC— Each press will start the next music function in sequence, after the 5th song is selected, the next press will turn music off.
VOLUME— Press the plus (+) to raise the volume and the minus (-) to lower the volume.
NATURE SOUNDS— Each press will change to the next nature sound. After the 5th sound is selected, the next press will turn sound off.
SONIDOS DE LA NATURALEZA—
TIMER— Press once to set timer to 5 minutes, Press twice for 10 minutes, Press 3 times for 15 minutes.
natural_image
Simple line drawing of a bird inside a circle, enclosed in a rounded rectangle (no text or symbols)
natural_image
Simple stopwatch icon inside a circle, no text or symbols present5-B Changing Table • Mudador
WARNING
FALL HAZARD Children have suffered serious injuries after falling from changing table. Falls can happen quickly.
• STAY within arms reach.
- Use changing table only on this playard model.
- ALWAYS secure this unit to the support frame by attaching to identified location. Before each use, check the attachment by grasping the sides/ends of the changing table, and pulling upward. See instructions.
- Do not use on the floor, bed, counter or other surfaces.
Suffocation Hazard Babies have suffocated while sleeping on changing table: changing table is not designed for safe sleep.
- NEVER allow baby to sleep on changing table.
- Weight limit for the changing table is 30 lb (13.6 kg). Do not use the changing table as extra storage.
- Use only the pad provided by Graco.
- Do not use changing table if it is damaged or broken.
Strangulation Hazard: Child can lift changing table and get neck trapped between changing table and playard frame. Always remove the changing table when your child is in the playard.
- Never use changing table on the same side as seat.
ADVERTENCIA
natural_image
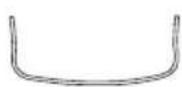
Line drawings of various hand tools and components, including a rectangular frame, a curved bracket, a tool holder, and a bracket with a handle (no text or symbols present)Slide tube through fabric as shown. Repeat with other tube.
natural_image
Line drawing of a baby care station with mesh ventilation and a red cushion (no text or symbols)
natural_image
Illustration of a hand holding a pen-like object with a red arrow indicating upward motion (no text or symbols)-
Tubes should appear exactly as shown.
-
Los tubos deberán aparecer exactamente como se indica.

natural_image
Line drawing of a rectangular object with internal structure and red connectors at corners (no text or symbols)
natural_image
Line drawing of a baby care unit with mesh mesh and red cushion (no text or symbols)Prevent serious injury or death: Failure to follow these warnings and the instructions could result in serious injury or death.
FALL HAZARD: Babies have suffered skull fractures falling while in and from bouncer.
- Use bouncer ONLY on floor.
- ALWAYS use restraints and adjust to fit snugly at all times.
- WHEN USED AS A SEAT ON THE PLAYARD: To prevent falls, stop using the product when infant:
- Begins to wiggle out of position or turn over in the product or
• Head touches the upper edge of the product or - Weighs more than 15 lb (6.8 kg) (approximately 3 months of age).
- WHEN USED AS A BOUNCER: To prevent falls stop using the product when infant:
- Starts trying to sit up or has reached 18 lb (8.2 kg), whichever comes first.
- Child's movement can slide seat.
- Never place product near edges of counter tops, tables or other elevated surfaces.
- NEVER use this product as a means to transport an infant in a motor vehicle.
SUFFOCATIONHAZARD: Infants have suffocated:
- When product was placed on a soft surface and tipped over.
- NEVER place product on beds, sofas, cushions or other soft surfaces.
- On added pillows, blankets and extra padding.
- ONLY use the pad provided by the manufacturer.
- NEVER place extra padding under or beside infant.
- When trapped between product and adjacent surfaces.
- Always attach the product at the identified locations on playard.
- Always use the bassinet when using the seat.
- NEVER use seat in a different product.
- NEVER use in contained areas (e.g. crib, playard) or next to vertical surfaces (e.g. walls and dressers).
- Never use this seat on any other product.
- Never leave child unattended.
- ALWAYS place child on back.
• This product is not safe for sleep.
- Use seat with only one child at a time.
• NEVER place a child under the seat.
- The seat must be fully assembled before using.
Do not modify seat or add any attachments that are not listed in the owner's manual.
• Always check to make sure seat is securely attached to bassinet.
- Never place any objects in seat while child is in it.
STRANGULATION HAZARD:
- Children have STRANGLED in loose or partially buckled harness straps. Fully restrain the child at all times.
- NEVER place child in bassinet while seat is attached.
- Do not use this product if it is damaged or broken.
- Strings and cords can cause strangulation. Keep strings and cords away from child.
- NEVER place the seat near a window where cords from blinds or drapes can strangle a child.
- NEVER hang strings on or over the seat.
- NEVER place items with a string around a child's neck, such as hood strings, pacifier cords, etc.
- NEVER attach strings to toys.
- Make sure canopy is securely attached when in use.
- Canopy for indoor use only.
- DO NOT store the seat in the playard while in use.
- Never use this seat on any other product.
• To prevent serious injury or death, DO NOT REMOVE FOAM.
• Head support for use only with this product.
ADVERTENCIA
• To prevent serious injury or death, DO NOT REMOVE FOAM.
- Remove and IMMEDIATELY discard the zip tie.
ADVERTENCIA
natural_image
Diagram of a medical procedure showing a hand holding a device with a red arrow indicating force or insertion (no text or symbols present)-
Insert the head support strap through the slot in the seat. CHECK that strap is not twisted.
-
Inserte la correa del apoyacabezas a través de la ranura del asiento. VERIFIQUE que la correa no esté torcida.

natural_image
Technical line drawing of a mechanical component with a hand operating a tool (no text or symbols)-
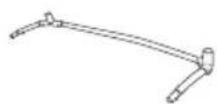
Place seat tubes as shown.
-
Ponga los tubos del asiento como se indica.
-
Insert tube into head end housing as shown.
The metal button should be facing out when snapped in place as shown.
natural_image
Illustration of a hand holding a device with a red arrow indicating clockwise motion (no text or symbols)
natural_image
Diagram showing a mechanical component with a red arrow indicating direction (no text or symbols)
natural_image
Close-up of a sewing machine needle with a red strap and black handle, no visible text or symbolsSNAP! iCLIC!
- Insert tube into foot end housing as shown.
The metal button should be facing out when snapped in place as shown.
natural_image
Illustration of a hand holding a flexible hose with a red arrow indicating clockwise motion (no text or symbols)
natural_image
Illustration of a hand pointing at a device component (no text or symbols)
SNAP! iCLIC!


natural_image
Technical line drawing of a device housing with three views: top, front, and side (no text or symbols)
natural_image
Technical line drawing of a mechanical assembly with a hand operating a component (no text or symbols)natural_image
Illustration of a person performing a medical procedure on a patient's abdomen (no text or symbols present)
natural_image
Illustration of a person performing a medical procedure on a patient's seat (no text or symbols present)
natural_image
Technical line drawing of a mechanical assembly with no visible text or symbols
natural_image
Technical line drawing of a mechanical component with no visible text or symbols
natural_image
Line drawings of car body parts including front, side, and side profiles (no text or symbols)
natural_image
Illustration of a hand holding a medical device with red tubing and arrows indicating motion (no text or symbols)natural_image
Illustration of a person's head with two hands holding red straps, showing a medical device inside (no text or symbols)natural_image
Diagram of a hand holding a device with red arrows indicating motion or force, no text or symbols presentnatural_image
Medical illustration of a patient's seatbelt device with surgical hardware (no text or labels)
natural_image
Line drawing of a car interior with stethoscope and seatbelt (no text or symbols)
natural_image
Line drawing of a medical device with attached straps and a small object, no text or symbols present
natural_image
Illustration showing two steps of a medical procedure: lifting a bandage and adjusting a stethoscope (no text or symbols present)

natural_image
Illustration of a hand adjusting a garment with a red arrow indicating the step (no text or symbols present)Latch the seat onto the bassinet mounts on both sides of the bassinet as shown.
natural_image
Diagram of a helmet with two views: top view shows dome pattern, bottom view shows cap with red pattern (no text or symbols)Only use this head support on this swing. Never use this head support on any other product.
To use integrated electronic switch, slide button to left or right for hi or lo speed.
-
Use slide adjuster at waist for tighter adjustment.
-
Use el ajustador deslizable en la cintura para ajustar el apriete.

natural_image
Illustration of a hand adjusting a belt buckle with a red arrow indicating motion (no text or symbols)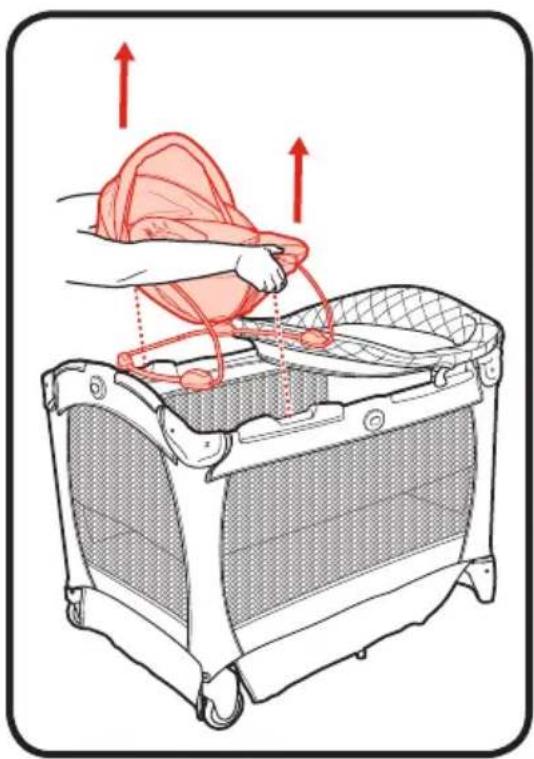
natural_image
Illustration of a person using a net to lift a basket, with red arrows indicating force direction (no text or symbols)Always keep objects out of child's reach. Remove this accessory when child is able to pull himself up in the playard.
ADVERTENCIA
natural_image
Illustration of a three-tiered plastic container with a 2X label, no text or symbols present.
natural_image
Illustration of hands performing a medical procedure on a patient's foot (no text or symbols present)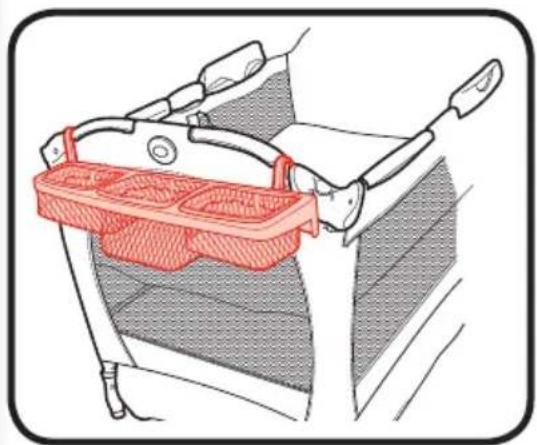
natural_image
Diagram of a car interior showing a red plastic container with handles and a mesh panel (no text or symbols)6-A Care and Maintenance
FROM TIME TO TIME CHECK YOUR PLAYARD for worn parts, torn material or stitching. Replace or repair the parts as needed. Use only Graco® replacement parts.
IF PLAYARD IS USED AT THE BEACH, you MUST clean sand off your playard, including the feet, before packing it into cover. Sand in top rail lock may damage it.
TO CLEAN PLAYARD, use only household soap or detergent and warm water.
TO WASH CARRY BAG, machine wash in cold water on delicate cycle and drip-dry. NO BLEACH.
TO WASH BASSINET: Remove electronics module and vibration unit. NEVER remove cord from bassinet. Hand wash with warm water and household soap. Drip dry.
TO WASH SEAT:
- Remove seat pad from frame as shown below.
- Remove vibration unit.
- Remove small cord as shown below.
Machine wash in cold water on delicate cycle and drip-dry. NO BLEACH. Refer to your care tag on your seat pad for washing instructions.

natural_image
Technical illustration showing a mechanical assembly with red arrows indicating motion or force direction (no text or symbols present)PARA LAVAR EL ASIENTO:
To purchase parts or accessories or for warranty information in the United States, please contact us at the following:
To register your Graco product from within the U.S.A. visit us online at www.gracobaby.com/productregistration or return registration card provided with your product. We currently do not accept product registrations from those living outside the United States of America.
natural_image
Line drawing of a rectangular electronic device with internal components and red connectors, labeled with number 3 (no text or symbols on the device itself)


- Failure to follow these warnings and the instructions could result in serious injury or death.
- Setting Up the Playard
- Using the playard
- Avoiding Suffocation Hazards
- WARNING
- This product is not intended for commercial use.
- Avoiding Strangulation Hazards
- FOR SAFE BATTERY USE
- Troubleshooting: If your device is not functioning properly, check for the following problems:
- ADVERTENCIA
- FEATURES ON CERTAIN MODELS
- - CARACTERÍSTICAS EN CIERTOS MODELOS
- 3-B Bassinet Set Up • Armado del moisés
- Center of floor must be up.
- 4-B To Cover • Para cubrir
- SONIDOS DE LA NATURALEZA—
- 5-B Changing Table • Mudador
- SUFFOCATIONHAZARD: Infants have suffocated:
- STRANGULATION HAZARD:
- 6-A Care and Maintenance
- TO WASH SEAT:
- PARA LAVAR EL ASIENTO:
Brand : GRACO
Model : Pack 'n Play Snuggle Suite LX
Category : Travel cot