ST-D700VP3.6-B - Surveillance Camera Security Tronix - Free user manual and instructions
Find the device manual for free ST-D700VP3.6-B Security Tronix in PDF.


| Product Type | Surveillance Camera |
| Brand | Security Tronix |
| Model | ST-D700VP3.6-B |
| Camera Type | Bullet Camera |
| Image Sensor | 1/3" CMOS |
| Resolution | 700 TVL (Analog) |
| Lens Focal Length | 3.6 mm |
| Minimum Illumination | 0.1 Lux (Color), 0.01 Lux (B/W) |
| Infrared Distance | 20 m (65 ft) |
| Video Output | 1 Vp-p Composite (75 Ω) |
| Power Supply | 12 VDC, 500 mA |
| Power Consumption | < 5 W |
| Dimensions (W x H x D) | 70 x 70 x 120 mm (2.8 x 2.8 x 4.7 in) |
| Weight | 200 g (0.44 lb) |
| Operating Temperature | -10°C to 50°C (14°F to 122°F) |
| Weatherproof Rating | IP66 |
| Mount Type | Wall or Ceiling Mount |
| Motion Detection | Yes (via DVR or external) |
| Night Vision | Yes, IR LEDs |
| Cleaning Instructions | Clean lens with soft, dry cloth; avoid solvents |
| Safety Certifications | CE, RoHS |
| Warranty | 1 Year Limited |
Frequently Asked Questions - ST-D700VP3.6-B Security Tronix
User questions about ST-D700VP3.6-B Security Tronix
0 question about this device. Answer the ones you know or ask your own.
Ask a new question about this device
Download the instructions for your Surveillance Camera in PDF format for free! Find your manual ST-D700VP3.6-B - Security Tronix and take your electronic device back in hand. On this page are published all the documents necessary for the use of your device. ST-D700VP3.6-B by Security Tronix.
USER MANUAL ST-D700VP3.6-B Security Tronix
THE IMAGE OF QUALITY
INSTALLATION MANUAL
ST-D700VP3.6-B-W
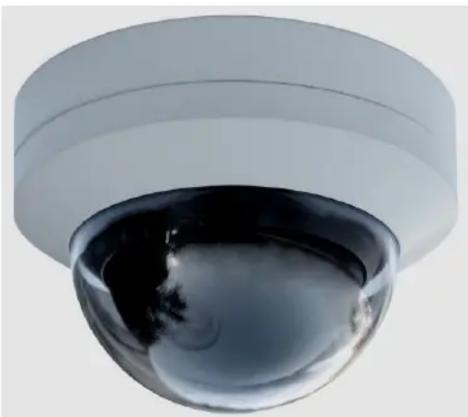
Vandal-proof Dome Color Camera
PACKAGE CONTENTS
This package contains:
One ST-D700VP3.6 vandal-proof color camera
Mounting hardware
One installation manual
Note: The ST-D700VP3.6 requires a minimum 12VDC 150mA power supply such as the ST-PS12VDC1A or ST-PS12VDC2A.
PRODUCT DESCRIPTION
The ST-D700VP3.6 is a vandal-proof dome color camera designed around a 1/3" Pixel Plus Color CMOS sensor with 700TVL of resolution. The camera's 3.6mm lens provides an optimal field of view. The ST-D700VP3.6 size and packaging allow it to be easily and discretely installed. Its rich color, high definition and stability make it attractive for CCTV security applications.
SPECIFICATIONS
ST-D700VP3.6
Specifications (Typical)
| 1. Image Sensor | 1/3" Pixel Plus Color CMOS Sensor |
| 2. Pixels (HxV) | 728 x 488 |
| 3. Scanning System | NTSC |
| 4. Horizontal Resolution | 600TV Lines |
| 5. Synchronization | Internal, Negative Sync |
| 6. Minimum Illumination | 0.1Lux |
| 7. Scanning System | 2 :1 interlace |
| 8. Auto Electronic Shutter | 1/60s ~ 1/100,000s |
| 9. Gain Control | Automatic |
| 10. Lens | 3.6mm F2.0 Board Lens |
| 11. S/N Ratio | >48dB |
| 12. Video Output | 1.0Vp-p/75Ω |
| 13. Operation Temperature, Relative Humidity | 14°F - 113°F, 95% maximum |
| 14. Power Requirements | DC12V 150mA |
| 15. Dimensions | 3.7"x2.7" |
| 16. Weight | 12.3 oz |
| 17. Environmental rating | IP65 |
INSTALLATION AND OPERATION

This symbol is intended to alert the user to the presence of important operating and maintenance (servicing) instructions.

This symbol is intended to alert the user to the presence of un-insulated “dangerous voltage” within the product’s enclosure that may be of sufficient magnitude to constitute a risk of electrical shock.
CAUTION: To reduce the risk of electrical shock do not remove the cover or back of this unit. No user serviceable parts are inside.
CAUTION: To prevent electric shocks and risk of fire hazards, do not use other than specified power source.
1. UNPACKING and HANDLING
Each unit is shipped assembled and factory tested.
Ensure that all accessories are removed from the container before discarding packing material.
2. MECHANICAL INSPECTION
Inspect the front and rear of the equipment for shipping damage. Make sure the equipment is clean, and no connectors are broken, damaged, or loose. If equipment appears to be damaged or defective please contact your distributor or Securitytronix at 1-610-429-1511 for assistance.
3. SPECIAL ATTENTION
a. The installer must comply with electrical safety standards. There must be sufficient space between the camera's power supply and video line and any high voltage equipment and/or cables. b. To help ensure the camera's life and proper operation do not point the camera towards the sun or strong light. c. Do not install the camera in an environment where the temperature is above 113°F. d. Do not install the camera near a magnetic field or a high-power motor. e. Do not mount the camera near a radiator or heater. f. Only use a dry cloth to clean the camera. If there is dirt that is difficult to remove wipe gently with a mild detergent. Never use strong or abrasive detergents. g. A minimum 12VDC 150mA power supply must be used. AC power cannot be applied. Using an AC or other incorrect power supply will damage the camera. h. Only qualified installers are allowed to install, test and disassemble the camera. i. The camera is a low voltage product. If installed outdoors proper safety and lightening grounding are required.
4. WIRING CONNECTIONS
a. Connect the power supply's DC plug to the camera's power port. b. Connect the camera to the monitor with a 75Ω coaxial video cable. c. Connect power supply's AC plug to a suitable AC power outlet. d. Adjust the lens direction according to the required surveillance area and environment.


5. TROUBLESHOOTING
a. No picture after applying power – (i) check all plugs and cables are securely connected to the proper connectors; (ii) ensure your power supply is providing the correct voltage and current. b. The picture has ripples – (i) check to see if the power supply is experiencing AC ripple, if so a filter may be required; (ii) determine if the monitor is faulty; (iii) determine if other peripheral equipment is causing ripple and if so make the necessary adjustments. c. The picture background continuously changes color – a fluorescent lamp's magnetic field may cause color roll, therefore, reduce the number of fluorescent lamps or increase the distance between the camera and the lamps. d. The picture appears smeared – (i) the power supply voltage level may be unstable, therefore, try another power supply; (ii) ensure the cables are correctly connected and/or the cables are of the correct impedance. e. Other interference may require a Securitytronix ground loop isolation filter. f. Additional troubleshooting assistance can be found on-line at www.securitytronix.com in addition to support from Securitytronix sales engineers at 1-610-429-1511.
Brand : Security Tronix
Model : ST-D700VP3.6-B
Category : Surveillance Camera