
TT-45 - Gramophone MAJESTIC - Free user manual and instructions
Find the device manual for free TT-45 MAJESTIC in PDF.


| Product Type | Gramophone / Turntable |
| Brand | Majestic |
| Model | TT-45 |
| Dimensions (W x D x H) | 420 mm x 360 mm x 140 mm |
| Weight | 5.2 kg |
| Power Supply | AC 120 V / 60 Hz (or 220 V depending on region) |
| Speed Settings | 33 1/3, 45, 78 RPM |
| Platter Material | Aluminum |
| Drive Type | Belt-drive |
| Tonearm Type | Straight, counterweight adjustable |
| Cartridge Included | Magnetic cartridge with diamond stylus |
| Outputs | RCA line out, headphone jack (3.5 mm) |
| Built-in Speaker | No (requires external speakers or amplifier) |
| Material | MDF wood veneer cabinet |
| Maintenance | Clean stylus with brush; keep platter dust-free; replace stylus after 500 hours of use |
| Safety Warnings | Do not expose to moisture; avoid moving parts during operation; unplug when cleaning |
| Spare Parts | Stylus (replaceable), belt, cartridge available from authorized dealers |
| Reparability | Modular components; user-replaceable stylus and belt; service by qualified technician for motor or electronics |
| Country of Origin | China |
Frequently Asked Questions - TT-45 MAJESTIC
User questions about TT-45 MAJESTIC
0 question about this device. Answer the ones you know or ask your own.
Ask a new question about this device
Download the instructions for your Gramophone in PDF format for free! Find your manual TT-45 - MAJESTIC and take your electronic device back in hand. On this page are published all the documents necessary for the use of your device. TT-45 by MAJESTIC.
USER MANUAL TT-45 MAJESTIC

LEGGERE ATTENTAMENTE IL SEGUENTE MANUALE D'ISTRUZIONI PRIMA DELL'UTILIZZO DELL'APPARECCHIO

MAJESTIC
MOD. NO TT45CD MP3/USB/SD/AX
SWITCHING POWER SUPPLY
MODEL:GKYPB0200120ED
NPUT:100-240V - 50/60Hz DJA Max
OUTPUT:12V=2A

Importato da:
New Majestic S.p.A.
Via Rossi Martini, 41
26013 Crema (CR)
Italia
www.newmajestic.com
MADE IN CHINA
AVVERTENZA:
AL FINE DI PREVENIRE IL RISCHIO DI SCOSSE ELETTRICHE SI RACCOMANDA DI NON UTILIZZARE LA PRESA CON PROLUNGHE O ALTRE USCITE, AMENO CHE LA PRESA NON SI INSERISCA PERFETTAMENTE. AL FINE DI PREVENIRE INCENDI O SCOSSE ELETTRICHE NON ESPORRE L'APPARECCHIO ALLA PIOGGIA O ALL'UMIDITA'.

Fig 1
- Avvertenza:
VISTA DALL'ALTO

A Altoparlanti (Stereo)
B Manopola TUNER/CD/USB-SD/AUX-PH

RIPRODUZIONE LINE-IN (AUX-IN)

TT 45CD MP3/USB/SD/AX

CE

OWNER'S MANUAL
FM STEREO RADIO/CD/TURNTABLE WITH HORN
WITH USB/SD PLAYING AND ENCODING
AUTO STOP

MAJESTIC
MOD. NO TT45CD MP3/USB/SD/AX
TO PREVENT FIRE OR SHOCK HAZARD, DO NOT USE THIS PLUG WITH AN EXTENSION CORD, RECEPTACLE OR OTHER OUTLET UNLESS THE BLADES CAN BE FULLY INSERTED TO PREVENT BLADE EXPOSURE. TO PREVENT FIRE OR SHOCK HAZARD, DO NOT EXPOSE THIS APPLIANCE TO RAIN OR MOISTURE.

The LIGHTENING FLASH with arrowhead symbol, within an equilateral triangle is intended to alert the user to the presence of uninsulated 'dangerous voltage' within the product's enclosure that may be of sufficient magnitude to constitute a risk of electric shock to persons.
WARNING: TO REDUCE THE RISK OF ELECTRIC SHOCK DO NOT REMOVE COVER (OR BACK), NO USER SERVICEABLE PARTS INSIDE REFER SERVICING TO QUALIFIED SERVICE PERSONNEL

The exclamation point within an equilateral triangle is in-tended to alert the user to the presence of important operating and maintenance (servicing) instructions in the literature accompanying the appliance.
IMPORTANT SAFETY INSTRUCTIONS
- Read, keep and follow all these instructions in this manual.
- Clean only with dry cloth.
- Do not block any ventilation openings. Install in accordance with the manufacturer's instructions.
- Do not install near any heat sources such as radiators, heat registers, stoves, or other apparatus(including amplifiers) that produce heat.
- Protect the power cord from being walked on or pinched particularly at plugs, convenience receptacles, and point where they exit from the apparatus.
- Unplug this apparatus during lightening storms or when unused for long periods of time.
- Refer all servicing to qualified service personnel. Servicing is required when the apparatus has been damaged in any way, such as power-supply cord or plug is damaged, liquid has been spilled or objects have fallen into the apparatus, the apparatus has been exposed to rain or moisture, does not operate normally, or has been dropped.
- This appliance shall not be exposed to dripping or splashing water and no object filled with liquids such as vases shall be placed on the apparatus.
- Do not overload wall outlet.
- Operate controls and buttons as described in the manual.
- Store your CDs in a cool area to avoid damage from heat
- When moving the set, be sure to first disconnect the power cord.
- Install the unit in a place equipped with adequate ventilation openings, do not block the ventilation openings.
- No naked flame sources, like candles, must be placed on the appliance.
- The mains socket is used to disconnect the appliance and it must be easily accessible at any time.
PARTS LIST
A) Horn Speaker

B) Middle Tube

C) Screw(3pcs)

Important Notes
Assemble this unit on a clean and smooth surface, so as not to scratch or damage the surface of the unit.
BIG HORN SPEAKER ASSEMBLY INSTRUCTIONS
1.) Look at Fig 1. Insert the speaker and syphon into the hole on the unit.

Fig 1
HOW TO REPLACE THE STYLUS
The stylus should last about 50 hours under normal use. However, it is recommended that the stylus be replaced as soon as you notice a change in sound quality.
Prolonged use of a worn-out stylus may damage the record.
Wear and tear on the stylus will be accelerated when playing 78 RPM records. The higher speed of 78 RPM records can wear the stylus more quickly.
Caution:
- Do not remove or bend the stylus.
• To avoid injury, do not touch the needle. - Turn off the unit's power before you replace the stylus.
- Keep it out of the reach of children.
Handle with care, as the stylus is delicate. Use of a bent or broken stylus may damage the record and cause the turntable to malfunction.
- Do not expose Stylus to extreme heat.
- Contact a qualified repair company if you experience difficulty in changing the stylus.
Removing an old stylus
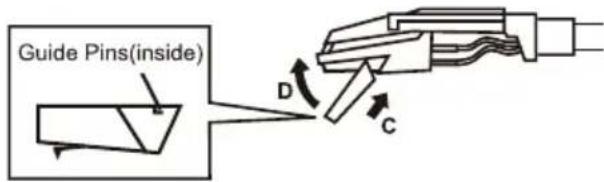
- Set a screwdriver at the tip of the stylus and push down to the direction "A".
- Pull the stylus out toward direction "B".

Installing a new stylus
- Hold the tip of the stylus and insert the other edge by pressing toward direction "C".
- Push the stylus up toward direction "D" until it locks at the tip.
NOTE: The stylus, being subject to wear, is not under guarantee.
PREPARATION FOR USE
- Carefully remove the unit from the display carton and remove all packing material from the unit.
• Unwind the FM Antenna wire and extend it to its full length. - Place the unit on a stable, level surface, convenient to an AC 230 V, 50 HZ outlet out of a strong magnetic field.

Remove the opaque white plastic stylus cover from the phonograph stylus by sliding it in the direction of the arrow.
During this operation pay attention to the stylus, because the stylus damage is not covered by guarantee.
Remove the twist-tie that was used to secure the tone arm during shipment.
- Release the tone arm lock lever.
- Connect the unit with the DC power adaptor (included).
POWER SOURCE
This system is designed to operate with DC power adaptor (12V 2A) only.
Attempting to operate from any other power source may cause damage to the system, and such damage is not covered by your warranty.
Connect the Power Cable to DC Input jack.
Connect the Adaptor power cable to your AC 230V-50Hz household plug.
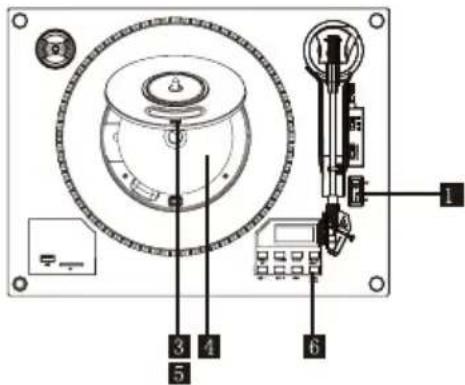
FUNCTION BUTTONS
FRONT SIDE

TOP SIDE


A TURNTABLE
B 45 RPM ADAPTOR (included)
C LEVER
D TURNTABLE ARM SUPPORT
E TURNTABLE ARM
PLAYBACK SPEED SELECTOR
A Speakers (stereo)
B CD/USB-SD/AUX-PH/TUNER
Turn the knob to CD to play a CD

Turn the knob to USB-SD to play the music from USB or SD

Turn the knob to AUX-PH to play a audio device or a record

Turn the knob to TUNER to listen to radio

D TUNING Display Plate
E TUNING knob
F VOLUME knob
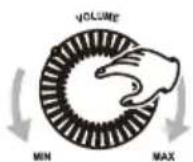
Turn the knob clockwise and counter-clockwise to adjust the volume
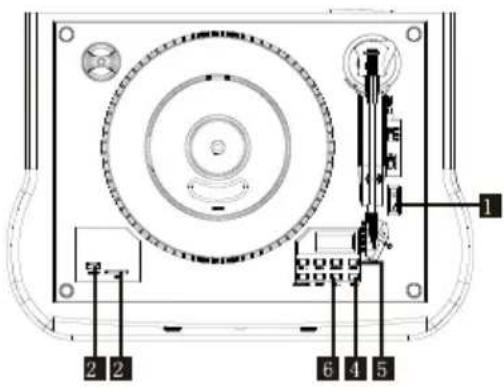
USB slot
SD card slot
K Disc tray
LCD display
When the unit is on, this display will light.
M FOLDER UP button
N SKIP-button
PROGRAM button
P SKIP+ button
REPEAT button
R STOP button
S RECORD/ERASE button
PLAY/PAUSE button
ON/OFF button
V CD DOOR
W AUTO STOP
LISTENING TO A CD

- Push the POWER button to turn the unit "on"

- Set the function knob (TUNER/CD/USB-SD/AUX-PH) to CD.

-
Press the CD door "OPEN"
-
Place a disc on the tray with the printed label face up.
• Never place more than one disc on the tray.
- The disc must be placed in the center of the disc tray. If the disc is not correctly loaded, it may not be possible to open the tray again once it has closed. To avoid this possibility you should be sure that the disc is always centered on the tray.
- Do not force the tray by hand during opening and closing operations.
- Press the CD door down gently to close the CD door. total number of tracks total number of tracks
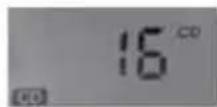

Total Number of tracks will appear on the display.
-
Playing will started automatically.
-
Turn the VOLUME knob to adjust the volume.

Program Function
In stop mode
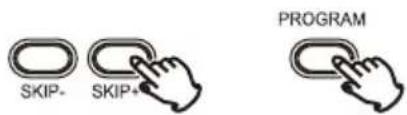
Press the PROGRAM button, the display will show "MEMORY 1 and blinking "P01 11 . Press the skip- or skip+ button to select your ideal track and press the PROGRAM button again to save the track.
If you want to save another track, repeat the above steps
This unit can program up to 20 tracks
To playback the programmed track, press the PLAY/PAUSE button. Press the STOP button one time to stop the playback. Press the STOP button one more time to stop the programmed track, and the "MEMORY" will disappear on the display. If turn off the power of the unit, or set the function knob to other modes (TUNER/CD/USB-SD/AUX-PH) | the programmed tracks will be automatically erased.
PLAYING AUX-IN
Press the power button to turn the unit "on"
Set the function knob (TUNER/CD/USB-SD/AUX-PH) to AU-PH. W will show up on the LCD. Connect external music devices with the unit through AUX IN jack via a 3.5mm cable. Almost all external devices can be connected.

• LINE OUT JACKS
LINE OUT will allow you to listen the audio with your existing amplifiers
Make sure to connect the white plug to white jacks(Lefl) and the red plug to the red jacks(Right).

LINE OUT
Detach the stylus guard (white plastic cover)
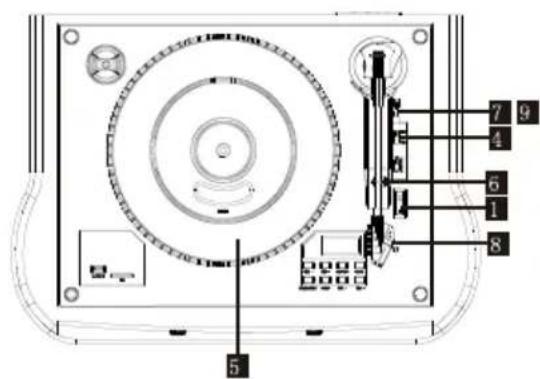
1 Push the POWER button to "on"

2 Set the function knob (CD/USB-SD/AUX-PH/TUNER) to AUX-PH

3 Select the speed.

4 Put the record on the turntable.
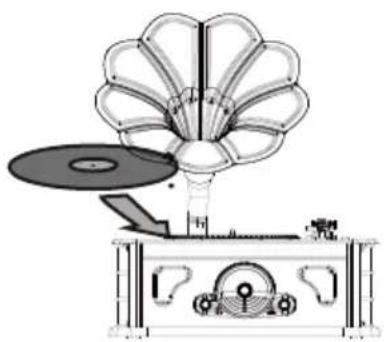
5 Gently push the clamper to the right to release the tone arm.
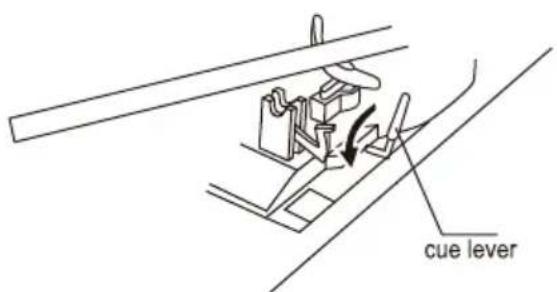
- Raise the cue lever to lift the tone arm off the tone arm support.

- Move the tone arm gently to the edge of the record (or the start point of a track).
The turntable will begin to turn.

- Gently lower the tone arm by slowly releasing the cue lever.
You can lower the tone arm manually if the cue lever has not been raised.
- Turn the VOLUME knob to adjust the volume.
When the tone arm reaches the end of th record it will automatically stop. Please bring the tone arm to the support by hand.

NOTE: During playing records, you can set the unit to AUTO STOP by press this button to ON position, and if in OFF position, the unit will keep running at the end, and please bring the tone arm to the rest manually. The spinning will stop then.

LISTENING TO A RADIO

- Push the power button to turn the unit 'on'

- Set the function knob (TUNER/CD/USB-SD/AUX-PH) to Tuner.
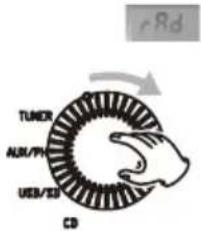
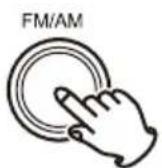
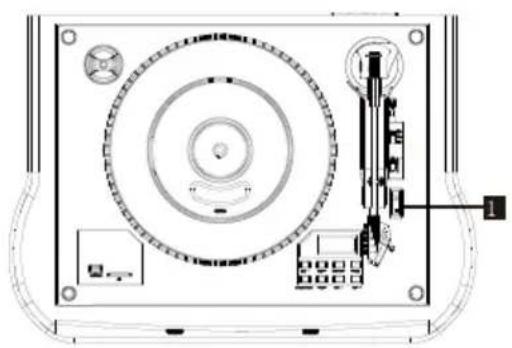
- Select AM or FM using this button.
-
In TUNER Mode, the lower half of the round plate will light up If the station signal is strong.
-
Turn the tuning knob to select your interested station.
-
Turn the VOLUME knob to adjust the volume.

LISTENING TO A USB DISK OR SD CARD

USB and SD card playing

- Push the power button to 'on'.

- Set the function knob (TUNER/CD/USB-SD/AUX-PH) to USB / SD.

- Insert USB disk or SD card into slot. The LCD will display the total folder and tracks.
If no USB disk or SD card. "NOF* will show on the display."
- Press 'PUVY / PAUSE' to start music playback. Turn the volume knob to adjust to volume.


-
Press the SKIP-/SKIP+ once or repeatedly until the desired track number appears on the dlsplay.Playback will begin automatically.
-
You can press the FOLDER button to choose the desired folder.
-
Press STOP to stop playback
To pause the music, press PLAYER/ PAUSE, press it again to resume play. If USB disk and SD Card both in the port, please long press 'PLAY/ PAUSE' button to choose the function of USB disk or SD Card.
USB AND SD RECORDING

Recording AUX/Records/Radio to USB/SD
Recording CD/MP3 disc to USB/SD
- Push the POWER button to turn the unit on.
1.1 Push the POWER button to turn the unit on.
- Insert USB device or SD card to the disk.
- Set the function knob (TUNER/CD/USB-SD/AUX-PH) to the AUX-PH/TUNER in position (depending on what media you are playing with).

-
Start playback of the record/radio at the point you want to start recording.
-
Insert USB device or SD card to the unit.
- Set the function knob (TUNER/CD/USB-SD/AUX-PH) to CD or USB/SD.
- Insert USB device or SD card to the unit.
- Set the function knob (TUNER/CD/USB-SD/AUX-PH) to CD or USB/SD.
- Insert USB device or SD card to the unit.
- Set the function knob (TUNER/CD/USB-SD/AUX-PH) to CD or USB/SD.

-
Start playback of the CD disc at the point you want to start recording.
-
Press the RECORD/ERASE button one time to start recording:
-
Press the RECORD/ERASE button to start recording.
If USB device and SD card both on, "ONE" will first show on the LCD, press the SKIP-/SKIP+ button to select the content you want to record "ONE/FOLDER/ALL" ("ONE" stands for the current track, "FOLDER" stands for the whole current folder, "ALL" stands for all the tracks on the disc) Press RECORD/ERASE again, then "USB" will blink, Press SKIP-/SKIP+ to select the devices you want to recording to (USB or SD card). Press RECORD/ERASE again to confirm and start recording.
If only USB or SD card on, recording will start after you choosein the first step. Press STOP to stop the recording.
If USB device and SD card both on, a USB b will blink on the display, press SKIP-/SKIP+ button to choose recording to USB or SD card. Press the RECORD/ERASE again to confirm and start recording. If only one media (USB or SD Card) on, Press the RECORD/ERASE button one time, recording will start automatically. There may be little time delay before recording, please wait for a while patiently -
Press the STOP button to stop the recording process, and "END" will appear on the display.
TROUBLESHOOTING
If you experience any problems with the unit, please take a moment to look through this chart and see if you can solve the problem yourself before you call your dealer.
No power
Check the connection to the AC power source. Check and make sure the AC source is not a switched outlet and if it is, the switch is turned on. Make sure there is power to the AC outlet by plugging another item such as a lamp or fan.
No sound.
Adjust the volume,
The sound is noisy.
The unit is too close to a TV set or similar appliances. Relocate the unit further away from them, or turn the other appliances off.
Tuner
Cannot listen to any station, or signal is too weak.
Tune in the station property.
If a TV is near the unit, turn it off.
Rotate the unit or antenna wire for the best reception position.
Record Player Can not play.
Turn the VOLUME knob clockwise, and turn the function to AUX/PH mode
Loosen the screw, and detach the stylus guard.
(The stylus guard is a white plastic cover that protects the stylus during transportation. Failing to remove this guard will not allow the needle to touch the grooves of the record and no sound will be heard)
If the stylus is worn-out, change the stylus.
Select the correct speed (33-1/3,45 or 78rpm).
Sound skips.
Place the unit on a stable surface to avoid vibration and shock. Make sure the unit is level both front to back and side to side.
Clean the surface of the record/disc.
Don't use scratched, damaged or warped records.
CD Player
Can not play.
Turn the VOLUME knob clockwise, and turn the function to CD mode
Load a disc with the playing side facing down.
If the disc is dirty, clean the surface of the disc.
A blank disc has been loaded. Load a pre-recorded disc.
You cannot play back unfinalized CD-R/CD-RW /CD-MP3 discs.
Finalize such a disc in a CD recorder and try again.
USB/SD Card Player
Can not play
Some USB flash drives and SD cards may not be compatible with this unit.
PIs check the specification on the last page of this manual.
If normal operation cannot be obtained, unplug the power cord from the outlet and plug it again.
Beware of condensation
When the unit (or a record/disc) is moved from a warm to a cold place, or used after a sudden temperature change, there is the danger of condensation; vapor in the air could condense on the internal mechanism, making correct operation erratic or impossible. To prevent this, or if this occurs, leave the unit turned on for one or two hours.
Maintenance
Always keep the turntable clean.
If the surface of the unit gets dirty, wipe with a soft cloth or use a diluted mild liquid soap. Be sure to remove any excess liquid completely. Do not use thinner, benzine or alcohol as they may damage the surface of the unit. Allow the surface of the unit to dry completely before using.
TECHNICAL SPECIFICATIONS:
AMPLIFIER SECTION:
Output Power: 2 x 20W
RADIO SECTION:
FM 87,5 - 108MHz
TURNTABLE SECTION:
Piezo Tips
Turntable 33-1/3 -45 -78 RPM
GENERAL
AC 100-240V / DC 12V 2A Power Supply
UNIT SIZE: 49(L) x 40,0 (D) x 69,0 (H) cm
WEIGHT: 6,70 Kgs
INFORMAZIONE AGLI UTENTI DI APPARECCHIATURE DOMESTICHE

- LEGGERE ATTENTAMENTE IL SEGUENTE MANUALE D'ISTRUZIONI PRIMA DELL'UTILIZZO DELL'APPARECCHIO
- MAJESTIC
- AVVERTENZA
- RIPRODUZIONE LINE-IN (AUX-IN)
- TT 45CD MP3/USB/SD/AX
- OWNER'S MANUAL
- IMPORTANT SAFETY INSTRUCTIONS
- PARTS LIST
- IMPORTANT NOTES
- BIG HORN SPEAKER ASSEMBLY INSTRUCTIONS
- HOW TO REPLACE THE STYLUS
- CAUTION
- REMOVING AN OLD STYLUS
- INSTALLING A NEW STYLUS
- PREPARATION FOR USE
- POWER SOURCE
- FUNCTION BUTTONS
- FRONT SIDE
- TOP SIDE
- LISTENING TO A CD
- PROGRAM FUNCTION
- IN STOP MODE
- PLAYING AUX-IN
- LINE OUT JACKS
- LISTENING TO A RADIO
- LISTENING TO A USB DISK OR SD CARD
- USB AND SD RECORDING
- TROUBLESHOOTING
- NO POWER
- NO SOUND
- THE SOUND IS NOISY
- TUNER
- CANNOT LISTEN TO ANY STATION, OR SIGNAL IS TOO WEAK
- RECORD PLAYER CAN NOT PLAY
- SOUND SKIPS
- CD PLAYER
- CAN NOT PLAY
- USB/SD CARD PLAYER
- BEWARE OF CONDENSATION
- MAINTENANCE
- TECHNICAL SPECIFICATIONS
- INFORMAZIONE AGLI UTENTI DI APPARECCHIATURE DOMESTICHE
Brand : MAJESTIC
Model : TT-45
Category : Gramophone