
H 608 - Oven Rommer - Free user manual and instructions
Find the device manual for free H 608 Rommer in PDF.


| Product Type | Built-in Electric Oven |
| Brand | Rommer |
| Model | H 608 |
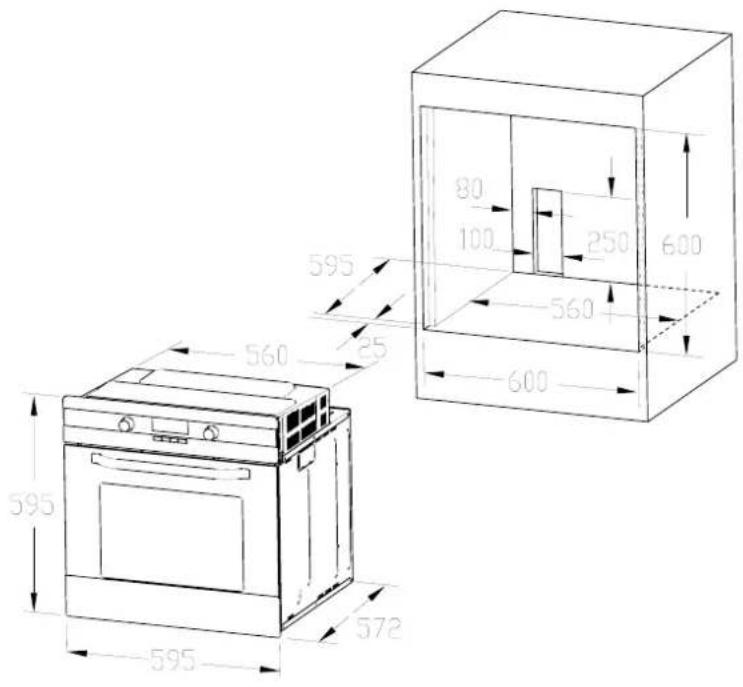
| Dimensions (H x W x D) | 595 x 595 x 575 mm |
| Weight | 35 kg |
| Power Supply | 230 V, 50 Hz |
| Power Consumption | 3.2 kW |
| Oven Capacity | 70 L |
| Functions | Convection, Grill, Top/Bottom Heat, Defrost, Fan Heat |
| Temperature Range | 50°C - 250°C |
| Timer | Electronic with End-of-Cooking Signal |
| Cleaning | Easy-Clean Enamel Interior |
| Safety Features | Child Lock, Cool Touch Door, Automatic Shut-Off |
| Door Type | Drop-Down with Glass Window |
| Display | LED Digital Display |
| Spare Parts Availability | Heating Elements, Thermostat, Fans, Glass Panel, Seals |
| Repairability | Modular Design; Replacement Parts Easy to Source |
| Energy Efficiency Class | A+ |
| Manufacturer | Rommer |
Frequently Asked Questions - H 608 Rommer
User questions about H 608 Rommer
0 question about this device. Answer the ones you know or ask your own.
Ask a new question about this device
Download the instructions for your Oven in PDF format for free! Find your manual H 608 - Rommer and take your electronic device back in hand. On this page are published all the documents necessary for the use of your device. H 608 by Rommer.
USER MANUAL H 608 Rommer
natural_image
Front view of a standard oven with control knob and door, labeled 'ROMMER' at bottom (no other text or symbols)Querido Cliente:
natural_image
Simple line drawing of a ladder-like structure with horizontal bars (no text or symbols)natural_image
Pure geometric line drawing of a rectangular frame with internal lines and a small protrusion at the bottom (no text or symbols)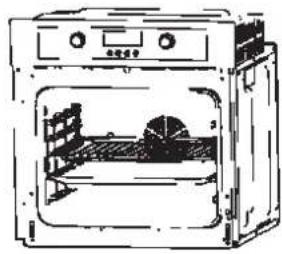
natural_image
Line drawing of an open oven with a dish inside, showing internal components and no text or symbols.Bandeja telescópica
natural_image
Diagram showing a top-down view of a lampshade and a circular object with a curved arrow, no text or symbols present.FUNCIÓN CATALÍTICA
INSTALACIÓN
LIMPIEZA Y MANTENIMIENTO
Mantenga el horno limpio..
Built-In Electric Oven
User Manual
natural_image
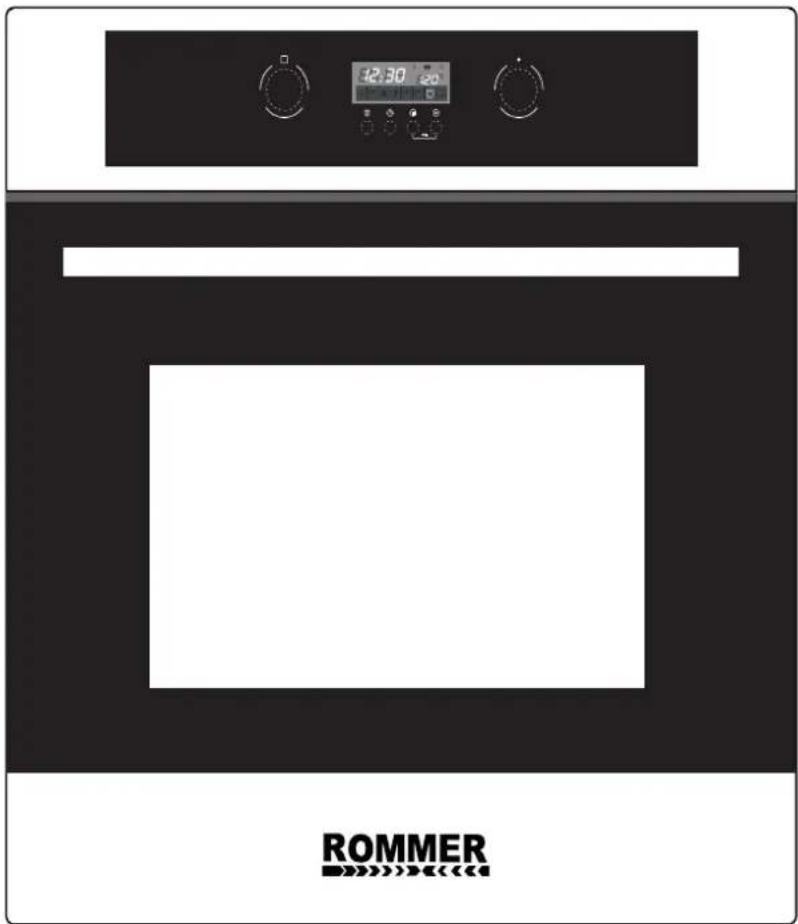
Front view of a standard Rommer oven with digital display and control knobs (no text or symbols on main body)ACKNOWLEDGMENT
Thank you for purchasing our product.We hope you enjoy using the many features and benefits it provides. Before using this product please study this entire Instruction Manual carefully. Keep this manual in a safe place for future reference.Ensure that other people using the product are familiar with these instructions as well.
WARNING
When the oven is first switched on, it may give off an unpleasant smelling. This is due to the bonding agent used for the insulating panels within the oven. This is completely normal, if it does occur, you merely have wait for the smell to clear before putting food into the oven.
Do not use harsh abrasive cleaners or sharp metal scrapers to clean the glass of the oven. This can scratch the surface and may result in permanent damage to the glass.
During use, the appliance becomes very hot. Care should be taken to avoid touching heating elements inside the oven.
Do not allow children to go near the oven when it is operating, especially when the grill is on.
■ Ensure that the appliance is switched off before replacing the oven lamp to avoid the possibility of electrice shock.
The means for disconnection must be incorporated in the fixed wiring in accordance with the wiring specifications.
- Conductors of supply cords shall have a nominal cross-sectional ares not less than 3G1.5mm2.
This appliance is not intended for use by persons (including children) with reduced physical, sensory or mental capabilities, or lack of experience and knowledge, unless they have been given supervision or instruction concerning use of the appliance by person responsible for their safety.
SAFETY HINTS
The oven must be used only of the purpose for which it was designed; it must only be used for cooking food. Any other use, e.g. as a form of heating is a breech of use and is therefore dangerous. The manufacturer will not be held liable or responsible for any damage to a property caused through incorrect use. When using any electrical appliance you must follow a few basic rules.
Do not use the oven unless you are wearing something on your feet. Do not touch the oven with wet or damp hands or feet.
- Do not allow children or irresponsible people to use the oven unless they are carefully supervised.
If the above instructions are not adhered to the manufacture cannot guarantee the safe operation of the oven.
- Do not use the power cord with an adapter, power board or extension cable.
If the cable is damaged it must be replaced promptly by a qualified technician.
If the oven breaks down or develops a fault, switch it off at the mains and do not touch it. Please contact the After Sales Service Centre.
If the cable is at all damaged it must be replaced promptly. When replacing the cable, follow these instructions. -Remove the power cable and replace it with one of the H05VV-F, and H05V2V2-F type.
-The cable must be able to bear the electrical current required by the oven.
-Cable replacement must be carried out by properly qualified technicians.
-The earthing cable (yellow-green) must be 10mm longer than the power cable.
Heating resistance temperature of power cord is above 70^ C. The power cord should be connected with duplex switch, which is no less than 250V and 20A (no need to be connected with plug).
DECLARATION OF COMPLIANCE

When you have unpacked the oven, make sure that it has not been damaged in any way. If you have any doubts at all, do not use it: contact a professionally qualified person. Keep packing materials such as plastic bags, polystyrene, or nails out of the reach of children because these are dangerous to children.
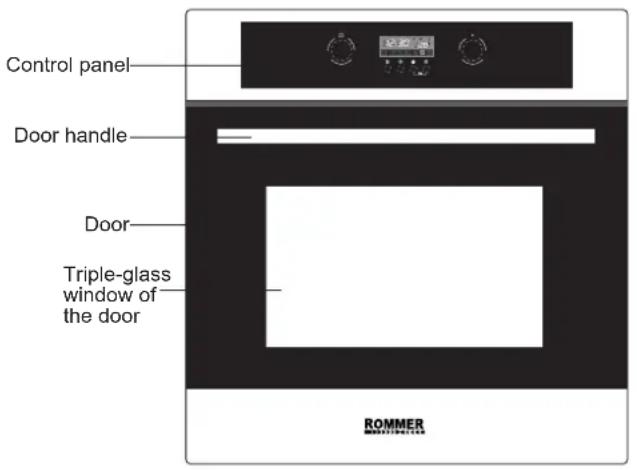
PRODUCT DESCRIPTION
| Symbol Function description | |
 | Oven Light. |
 | This oven function setting serves for defrosting of food. Air at room temperature is forced into the internal cavity of the oven.Note: This function in suitable for defrosting food or raw products before final preparation. |
 | Heating the oven using the circular heater and the fan function.The air circulation creates an even temperature throughout the oven.The temperature can be set within the range of 50-240°C .Note: This function is also suitable for baking/roasting food in two separate baking dishes simultaneously (suitable for baking larger and thicker baked goods,such as cakes,or a larger amount of food).Preheating of the oven is not necessary. |
 | Grill using the fan function.Due to the hot air circulation, the temperature in the oven is hotter in the upperpart.The temperature can be set within the range of 50-200°C.Note:This function is suitable for grilling or roasting big pieces of meat at a higher temperature.Leave the oven door closed. Preheating the oven is not necessary. |
 | Big grill. The big grill uses infrared heat. The temperature can be set within the range of 180-240°C.Note:Ideal for bigger pieces of meat. During cooking, refrain from opening the oven door.During grilling, place the food as high as possible. |
 | Infrared grill.The temperature can be set within the range of 180-240°C .Note:Use for smaller or thinner pieces of meat.During cooking, refrain from opening the oven door.During grilling,put the food as high as possible. |
 | Heating the oven using the top and bottom elements. The temperature can be set within the range of 50-250°CPut the food in the oven after it has reached the preset temperature.During cooking,refrain from opening the door. |
 | Heating the oven using the bottom element. Preset temperature to 60°C .Note: Thus function is ideal for cooking pizza. |
OPERATION INSTRUCTIONS
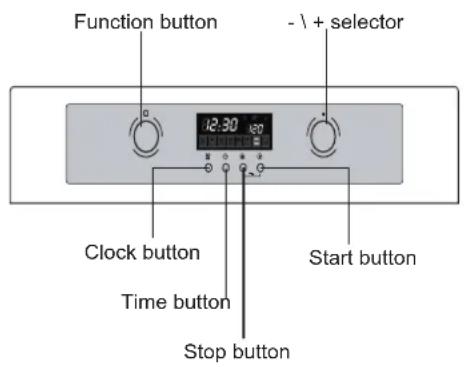
1. Clock Setting
After connectiong the unit to the power, the symbols 00:00 will be visible on the display.
1) Press "L", the hour figures will flash.
2) Turn " 🔊" to adjust the hour figures, (Time should be within 0--23).
3) Press "L", the minutes will flash.
4) Turn "☐" to adjust the minutes setting, (time should be within 0-59).
5) Press " L " to finish the clock settings. ":" will flash, and the time will be illuminated.
Note: The clock is 24 hours.
2. Function Setting
1) Turn " [icon] " to choose the cooking function you require. The related indicator will illuminated.
2) Turn "☐" to adjust the temperature.
3) Press "▶" to confirm the start of cooking.
4) If step 2 is ignored, Press "▶" to confirm the start of cooking. and the default time is 9 hours, the default temperature will display on the LCD.
NOTE:
1) the step quantities for the adjustment time of the coding switch are as follow:
0----0:30 min : 1 minute
0:30--9:00 hour : 5 minutes
2) the step quantities for the adjustment of temperature is 5 degrees.
3) turn " 🔍 " to adjust the cooking time when cooking begins. Then press " ⬇ " to start cooking.
If "▶" not pressed within 3 seconds, the oven will revert back to the previous time to continue cooking.
4) turn" " to adjust the temperature when cooking begins. The related indicator will be illuminated.
Then press" ▶ " to start cooking. If " ▶ not pressed in 3 seconds, the oven will revert back to the previous temperatrue to continue cooking.
3. Inquiring function
During cooking process, you can use inquiring function, after 3 seconds return to the current working state.
1) During cooking mode, press "L" button to see the current time.
2) If the clock was set, press " "button to ask for current time.
4. Lock-out Function for Children
To Lock : press "☐" and "▶" simultaneously for 3 seconds, there will be a long "beeping" sound indicating the children-lock is on and the "●" will be illuminated.
Lock quitting : press " □ " and " ▶ " simultaneously for 3 seconds, there will be a long "beeping" sound indicating the child-lock is released.
5. Reminder Function:
The oven has 9 hours reminder, this function will help to reminder you to start cooking in a certain time from 1 minute to 9 hours.
Only when oven in standby model, the reminder can be set. Follow below to set the reminder:
1) Press reminder setting button " √";
2) Turn "○" to set the hour time of reminder.
3) Press reminder setting button " 📋 " again;
4) Turn "☐" to set minute time of reminder.
Note: After the set time, the oven buzzer will sound for 10 times, "√" symbol disappears on the screen. to reminder you start cooking. You can cancel the reminder during set it by press stop button; After the reminder was set, you can cancel it by press stop button twice.
6. Start/Pause/Cancel Function
1) If the cooking time has been set, press "▶" to start cooking. If the cooking is paused, press "▶" to resume cooking.
2) During cooking process, press "☐" once to pause the cooking. Press "☐" twice to cancel the cooking.
7. Energy-Saving Function
1) In waiting state, press " ▶" for three seconds, the LED display will go off and set to energy-saving mode.
2) If no operation in 20 minutes under waiting state, the LED display will go off and go into energy-saving mode.
3) Under the energy-saving mode, press any key or turn coding switch to exit energy-saving mode.
8. Note
(1) The buzzer will sound once when turning the knob at the beginning.
(2) Once the cooking programme has been set and the "button is not pressed within 5 minutes, the current time will be displayed. The setting will be cancelled.
(3) The buzzer sounds when effectively pressed, if not effectively pressed there will be no response.
(4) The buzzer will sound five times to remind you when cooking has finished.
ACCESSORIES
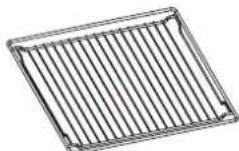
Wire shelves : For grill .dishes, cake pan with items for roasting and grilling.
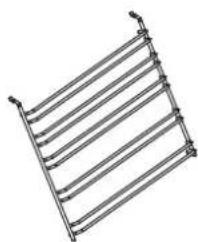
Slider bracket : These shelf support rails on the right and left sides of the oven can be removed for cleaning oven walls.
natural_image
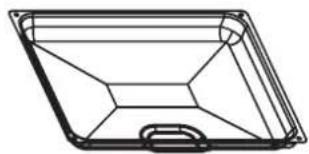
Pure diagram of a ladder structure without any text, numbers, or symbolsUniversal pan: For cooking large quantities of food such as moist cakes, pastries, frozen food etc, or for collecting fat/ spillage and meat juices.
natural_image
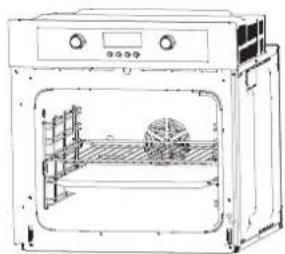
Line drawing of a rectangular tray with internal geometric lines and a small loop at the bottom (no text or symbols)SHELF PLACEMENT WARNING:
To ensure the oven shelves operate safely, correct placement of the shelves between the side rails is imperative. This will ensure that during careful removal of the shelf or tray, hot food items should not slide out.
natural_image
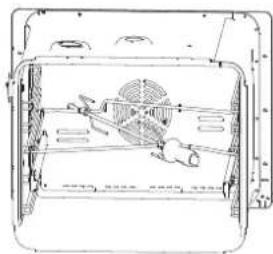
Line drawing of an open oven with a dome-shaped opening and internal structure (no text or symbols)use of rotisserie accessories
The rotisserie works in combination with the grill element to cook cuts of meat or poultry, at the same time browning to perfection.
natural_image
Technical line drawing of a mechanical fan assembly (no text or symbols)NOTE: The number of accessories included depends on the particular appliance purchased.
BULB REPLACEMENT
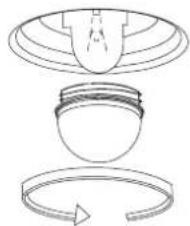
The bulb in the light is a specific bulb, and has high temperature resistance (230-240V\~25W). For replacement, proceed as follows:
- Disconnect power from the mains outlet or switch off the circuit breaker of the unit's mains outlet.
- Unscrew the covering glass and replace the bulb with a new one of the same type.
- Screw the covering glass back in place.
natural_image
Diagram showing three stages of a mechanical or electrical component: top view, side view with a bulb-like structure, and bottom view with a circular arrow indicating rotation (no text or symbols)CATALYTIC SELF-CLEANING (Not all the model has this function)
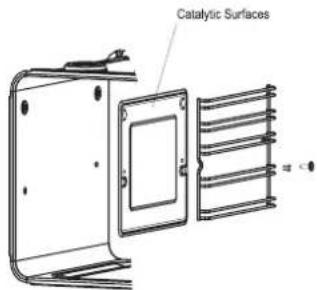
Your oven might equipped with catalytic liners
The side walls of oven are coated with self-cleaning enamel. The surface cleans itself while the oven is working. We recommend heating the oven without any food at regular intervals to complete the self-cleaning process.
- Remove all side-in items from the oven.
- Using warm water and washing up liquid to clean the oven floor and dry it.
-
Use the conventional heat functions(☐). Set the oven temperature to 250°C. switch the oven off after 45 minute.
-
Wiping off any remaining soiling with a soft damp sponge when the oven has cooled.
IMPORTANT: Do not use oven cleaner on catalytic surface of oven, It will not affect the surface self-cleaning properties while the enamel become discolour slightly.
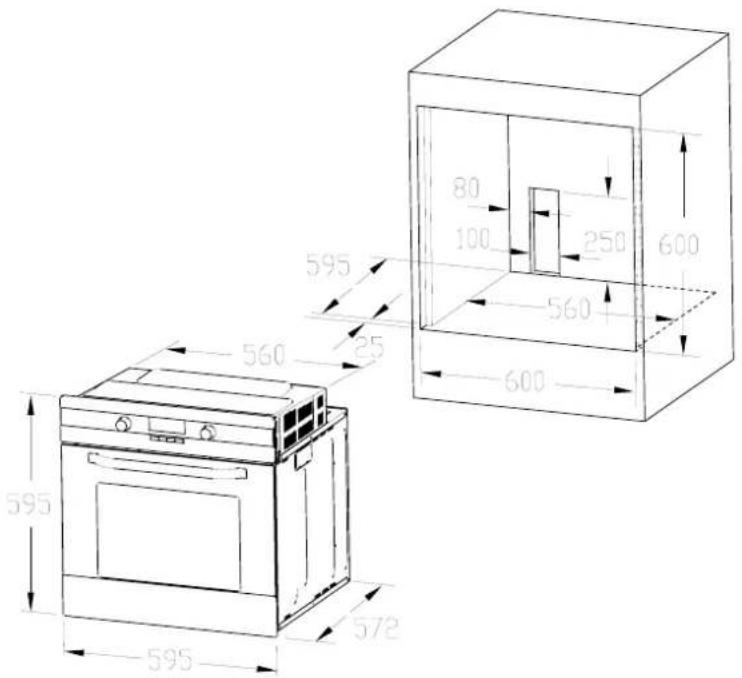
INSTALLATION
CLEANING AND MAINTENANCE
For the sake of a good appearance and reliability, keep the unit clean. The modern design of the unit facilitates maintenance to a minimum. The parts of the unit which come into contact with food have to be cleaned regularly.
■ Before any maintenance and cleaning, disconnect the power
■ Set all controls in the OFF position.
- Wait until the inside of the unit is not hot but only slightly warm- cleaning is easier than when warm.
- Clean the surface of the unit with a damp cloth, soft brach or fine sponge and then wipe dry. In case of heavy soiling, use hot water with non-abrasive cleaning product.
For cleaning the glass of the oven door, do not use abrasive cleaners or sharp metal scrapers, these can scratch the surface or lead to the glass being damaged.
■ Never leave acidic substances (lemon juice, vinegar) on stainless steel parts.
- Do not use a high pressure cleaner for cleaning the unit.
■ The baking pans may be washed in mild detergent.
This appliance is marked according to the European directive 2002/96/EC on Waste Electrical and Electronic Equipment(WEEE).
By ensuring this product is disposed correctly, you will help prevent potential negative consequences for the environment and human health, which could otherwise be caused by inappropriate waste handling of this product. The symbol on the product indicates that this product may not be treated as household waste. Instead it shall be handed over to the applicable collection point for the recycling of electrical and electronic equipment. Disposal must be carried out in accordance with local environmental regulations for waste disposal. For more detailed information about treatment, recovery and recycling of this product, please contact your local city office, your household waste disposal service or the shop where you purchased the product.
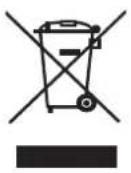
Table and tips
| Food Weight | Shelf position | Cooking Method | Temp.°C | Time | Dish | ||
| 1st side (min.) | 2nd side (min.) | ||||||
| Biscuits | ---- 1+3 | 80 15-30 Baking tray | |||||
| Sausages | 400g 4 240 | 5-10 | 3-6 | wire shelves | |||
| Toast | 4 pieces | 4 240 4-7 | --- | wire shelves | |||
| Toast | 9 pieces | 4 240 4-7 | --- | wire shelves | |||
| Beef | 1000g | 2 210 10-20 | 5-15 | wire shelves | |||
| Pork | 1000g | 2 190 19-29 | 11-21 | wire shelves | |||
| Chicken | 1300g | 2 180 35-45 | 15-25 | on ceramic plates + wire shelves | |||
| Burgers | 1000g | 4 240 10-20 | 5-10 | wire shelves | |||
| Pork fillet | 1000g | 4 240 15-25 | 10-20 | wire shelves | |||
| Sausages | 4 240 4-8 | 3-5 | wire shelves | ||||
| Filet of beef | 400g | 4 240 10-20 | 5-15 | wire shelves | |||
| Rich biscuits | ---- | 3 | 180 | 15-25 | ---- | Baking tray | |
| Victoria sandwich | ---- | 2 | 170 | 23-35 | ---- | Baking tray | |
| Swiss Roll | ---- | 3 | 200 | 10-18 | ---- | Baking tray | |
| Small cakes 3 | ---- | 160 | 20-30 | ---- | ---- | ||
| Sponge cake 2 | ---- | 160 | 25-35 | ---- | ---- | ||
| Apple pie 2 | ---- | 190 | 50-70 | ---- | ---- | ||
| Apple pie | ---- | 1+3 | 190 | 50-70 | ---- | ---- | |
| Small cakes | ---- | 3 | 160 | 20-30 | ---- | ---- | |
| Small cakes | ---- | 1+3 | 160 | 20-30 | ---- | ---- | |
| Bread(pieces) | ---- | 4 | 240 | 1-3 | ---- | ---- | |
| Burgers | ---- | 4 | 240 | 10-207-17 | ---- | ||
1000g
- Querido Cliente:
- Bandeja telescópica
- FUNCIÓN CATALÍTICA
- INSTALACIÓN
- LIMPIEZA Y MANTENIMIENTO
- Built-In Electric Oven
- User Manual
- ACKNOWLEDGMENT
- WARNING
- SAFETY HINTS
- DECLARATION OF COMPLIANCE
- PRODUCT DESCRIPTION
- OPERATION INSTRUCTIONS
- Clock Setting
- Function Setting
- NOTE:
- Inquiring function
- Lock-out Function for Children
- Reminder Function:
- Start/Pause/Cancel Function
- Energy-Saving Function
- Note
- ACCESSORIES
- SHELF PLACEMENT WARNING:
- use of rotisserie accessories
- BULB REPLACEMENT
- CATALYTIC SELF-CLEANING (Not all the model has this function)
- INSTALLATION
- CLEANING AND MAINTENANCE
Brand : Rommer
Model : H 608
Category : Oven