
Tuttoluxo 2S PWC-200 - Vacuum Cleaner Zepter - Free user manual and instructions
Find the device manual for free Tuttoluxo 2S PWC-200 Zepter in PDF.


| Product Type | Canister Vacuum Cleaner |
| Model | Tuttoluxo 2S PWC-200 |
| Brand | Zepter |
| Motor Power | 1200 W |
| Suction Power | Adjustable, up to 300 AW |
| Dust Capacity | 5 L (bagged) |
| Filtration | HEPA H13 filter |
| Cord Length | 8 m |
| Weight | 4.5 kg |
| Dimensions (LxWxH) | 45 x 30 x 25 cm |
| Noise Level | 75 dB |
| Vacuum Type | Dry vacuum |
| Attachments | Crevice tool, dusting brush, upholstery nozzle, floor brush |
| Bag Type | Zepter disposable dust bags (type A) |
| Maintenance | Clean filter every 3 months, replace bag when full |
| Safety | Thermal overload protection, automatic shut-off |
| Warranty | 2 years |
| Country of Origin | Switzerland |
| Power Supply | 220-240 V, 50-60 Hz |
| Cord Type | Retractable power cord |
| Control Type | Foot pedal on/off, suction control on handle |
| Successor Model | Tuttoluxo 3S |
Frequently Asked Questions - Tuttoluxo 2S PWC-200 Zepter
User questions about Tuttoluxo 2S PWC-200 Zepter
0 question about this device. Answer the ones you know or ask your own.
Ask a new question about this device
Download the instructions for your Vacuum Cleaner in PDF format for free! Find your manual Tuttoluxo 2S PWC-200 - Zepter and take your electronic device back in hand. On this page are published all the documents necessary for the use of your device. Tuttoluxo 2S PWC-200 by Zepter.
USER MANUAL Tuttoluxo 2S PWC-200 Zepter
• COMPANY HOME AT A SAIRS SERVICES AS ZETA GROUP, MACHU 09 EN • WORK AND MARKINGS.
Zepfer INTERNATIONAL LIVE ONLINE
TUTTOLUXO2S
WATER VACUUM CLEANING SYSTEM BY ZEPTER

natural_image
Golden and silver vacuum cleaner device with reflective surfaces (no visible text or symbols)cleanSy by Zeptar
OPERATING INSTRUCTIONS
PWC-200
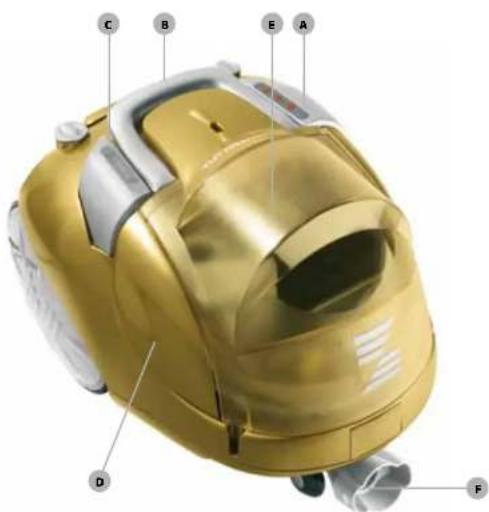
1 - OVERVIEW OF TUTTOLUXO 2S (PWC-200)



*Optional




TUTTOLUXO2S
WATER VACUUM CLEANING SYSTEM BY ZEPTER
1 WARRANTY CARD (12 months): TUTTOLUXO 2S (PWC-200)
2 DATE OF PURCHASE:
3 SERIAL NO.:
4 STAMP AND SIGNATURE OF RETAILER:
5 NAME AND ADDRESS OF PURCHASER:
6 FAULT/DEFECT:
7 This warranty card has to be sent to the retailer, together with the defective device and the receipt as proof of purchase.
cleanSy by Zopter

INSTRUCTIONS FOR USE
TUTTOLUXO2S
WATER VACUUM CLEANING SYSTEM BY ZEPTER

natural_image
Golden vacuum cleaner with reflective surface, no visible text or symbolsINDEX
1 OVERVIEW OF TUTTOLUXO 2S page 03
2LIST OF ACCESSORIES AND FILTERS page 03
3LIST OF FUNCTIONS page 04
4LIST OF FEATURES page 04
4.1 Patented features: page 04
Spray System™, Slalom System™, Simply System™
4.2 Safety features page 05
4.3 Technical data page 05
5IMPORTANT SAFETY NOTICE page 06
6GETTING STARTED page 07
6.1 Hose and accessories fittings page 08
6.2 Preparing the vacuum function page 08
7OPERATION page 09
7.1 Vacuuming Wet & Dry with Water Filter page 09
7.2 Air Cleaning & Air Aroma Therapy page 10
8USAGE OF ACCESSORIES AND FILTERS page 11
9MAINTENANCE
page 14
9.1 Filters page 14
9.2 Simply System™ page 16
10 WARRANTY STATEMENT page 17
11 DISPOSAL INFORMATION page 17
12 TROUBLESHOOTING page 18
13 USE OF ACCESSORIES page 19
WARRANTY CARD
1 - OVERVIEW OF TUTTOLUXO 2S
AMotor push button
BCarrying handle
CCable rewind button
DTank lid fasteners
ETank lid
FHose connection socket
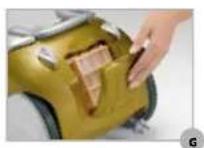
GPolyester filter
HCable winding
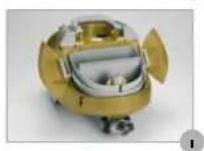
iFlaps of the water tank open
JWater bucket, internal view
KVacuum control on handle
LSLALOM SYSTEM ™
2 - LIST OF ACCESSORIES AND FILTERS
ACCEssoriEs
A. Big brush and carrier for accessory
A1.Parquet accessory
B. Floor brush for liquids
C. Small nozzle
D.Round brush
E.Flat special brush
F.Radiator brush
G.Small brush
H.Stainless steel telescopic tube
i.Flex-tube
J.Extension tube *optional
K.Turbo brush *optional
FiLTErs
1Floater Filter
2Air Intake Filter
3Polyester Filter
4Motor Intake Filter
5Hepa Filter * optional
3 - LIST OF FUNCTIONS
- Vacuum cleaning - wet & dry with water filter
- Air Cleaning & Air Aroma Therapy
4 - LIST OF FEATURES
Several features make your TUTTOLUXO 2S your special agent in the war against dirt and grime. TUTTOLUXO 2S can be moved around swiftly, effortlessly and efficiently and is so safe to handle at the same time.
4.1 PATENTED FEATURES:
SPRAY SYSTEM ^M , SLALOM SYSTEM ^M , SIMPLY SYSTEM ^TM
TUTTOLUXO 2S is equipped with the exclusive SPRAY SYSTEM ^™ , a sophisticated system of filtration through highly efficient nebulized water (cloud like) which captures even the finest particles by binding these to the water particles which then by gravity fall into the container.
Moreover, it offers an intelligent and environmentally aware 4 level filtering system: no more paper filters to buy separately and then dispose of. As well as saving on running costs, TUTTOLUXO 2S saves you time, as you do not have to go and buy any chemicals or dust bags, and produces less waste.
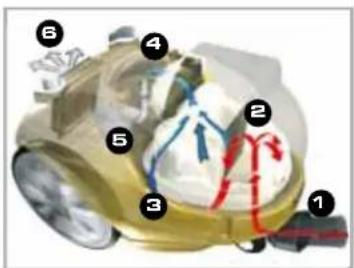
The exclusive Spray System ^TM uses a process called “nebulization”, part of a four-level filter system, to capture even the smallest dust particles.
① TUTTOLUXO 2S vacuums any kind of dust and dirt. ② Deep inside the TUTTOLUXO 2S water is sprayed in a micro-sized mist that instantly bonds to dirt and dust particles, creating the unique Water Filter and removing them from the air, and ③ sucking them into the water tank. ④ - ⑤ The 4-level filter system traps the remaining smallest particles. ⑥ The air that comes out is clean, fresh, and breathable – totally purified!
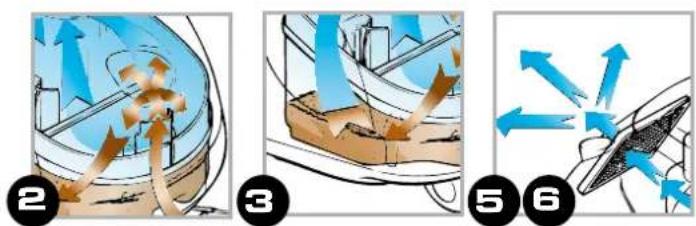
Nebulization Purified airTrapped dirt
SLALOM SYSTEM™
The extraordinary patented design of TUTTOLUXO 2S makes the machine surprisingly easy to handle. The small front wheels and the hose connection are both swivel to allow you maximum freedom of movement and also prevent the hose from wearing out. There is no need to pull it, as is usually done with conventional vacuum cleaners, to drag the machine forward (Pict. 1).
Insert the hose with its connection into the SLALOM SYSTEM™ socket at the front and push the plug into the socket (Pict. 2).

natural_image
Close-up of a yellow robotic device with red and black buttons, no visible text or symbols
natural_image
Close-up of a yellow hard hat and a handheld device (no visible text or symbols)SIMPLY SYSTEM™
See Chapter 9 - Maintenance
4.2 SAFETY FEATURES
Mechanical safety features:
- Intake and outtake air for the vacuum motor are kept in separate directions in order to keep the motor cooled.
- Safety float
4.3 TECHNICAL DATA
Data plate characteristics
WARNING! Make sure the technical data on the data plate matches that of your electricity mains.
Technical characteristics
• Voltage 230 V +/- 6%
- Motor vacuum power: 1200W higher technology gives same power as a 1600 W motor but: quieter, lower vibrations, lower energy consumption, higher reliability and higher air volume.
• Effective Air flow: 22 l/sec
• Vacuum pressure: 2130 mm H _2 O (\~ 20.8 kPa)
• Recovery tank volume: 1.6 l
• Length of flexible tube: 2 m
• Working reach: 8 m
• Length of power lead: 5.5 m
- Cable rewind button
Patented systems:
- Spray System ^TM
- Slalom System ^TM
- Simply System ^TM
Product code: PWC-200
- Weight: 7 kg
• Size: 336x332x479 cm
5 - ImPORTANT SAFETY NOTICE
When using an electrical appliance, basic precautions should always be followed, including the following:
CAREFULLY READ ALL INSTRUCTIONS BEFORE USING THIS APPLIANCE!
The manufacturer cannot be held responsible for any damage caused by non-compliance of these Important Safety Instructions.
WARNING! Remember this is an electric appliance; failure to follow these instructions could lead to harm to yourself or others.
Before using:.
- Before connecting the appliance to the mains, make sure the data on the data plate match those of your electricity mains. The electrical data plate is located on the machine bottom.
- After removal from its packing, make sure the machine is intact, carefully inspecting its housing and all accessories.
- If in doubt, do not use the appliance and refer to your Zepter Service Centre.
- Make sure the machine is safely placed on its wheels on level ground when in use.
- If your mains socket is not compatible with the machine plug, have the plug replaced with a suitable one by qualified personnel, who will also have to check that the mains socket is suitable for the amount of power required by the machine.
- The use of adaptors, multiple sockets and/or extensions is to be avoided; if you cannot do without them, make sure that only standard or multiple adaptors and extensions are used which conform to your national safety regulations.
- Do not use the appliance if any damage is shown on the power cord or the plug. In case of malfunctioning, switch off and unplug without trying to repair it. For any repair, refer only to a Zepter Service Centre.
During use:
- This appliance should only be used for the activities it has been designed for, i.e. domestic house cleaning and air enhancement. The manufacturer cannot be held responsible for any damage or injury deriving from improper, incorrect or unreasonable use.
- Do not use on children or animals or allow it to be used as a toy.
- Always unwind the power cord completely; this will help avoid overheating inside the appliance.
- Never open or remove the cover while the machine is running.
- Never obstruct the air outlet located at the back of the machine. Always make sure that no foreign objects are blocking the outtake.
- Do not vacuum without water for filtration, this will clog the filters and could damage the machine. This is not true for vacuuming liquids only!
- This appliance is not intended for use by persons (including children) with reduced physical, sensory or mental capabilities, or lack of experience and knowledge, unless they have been given supervision or instruction concerning use of the appliance by a person responsible for their safety. Children should be supervised to ensure not to play with the appliance.
- Do not use accessories not provided by the producer.
- Never pull the power cord to unplug the machine from the mains socket. Take hold of the plug and pull out.
- This appliance is equipped with a power cord reel. Hold the plug when rewinding. Do not allow the plug to whip around when rewinding.
- Do not expose or use the machine outdoors with climatic conditions such as rain, hail, snow, wind, etc.
- Never vacuum, for any reason whatsoever, toxic, or highly flammable substances, explosives, embers or lit cigarettes. Do not use the appliance to clean the chimney or the uptake or to remove oily substances (such as soot).
- Never vacuum up construction dirt or dust, this could damage your machine
- Never vacuum detergent, foam or foaming substances, these could damage your machine.
• Always turn off all functions before unplugging.
• Always disconnect from the mains when the appliance is not being used. - Do not use the power cord to lift the appliance or to drag it about while you are cleaning!
Maintenance:
- Always follow the instructions and keep your appliance in good working condition.
- Repairs must be performed only by a Zepter Service Centre and in accordance with national and local safety regulations. Unauthorised repairs could cause injury or machine damage. The manufacturer cannot be held responsible for unauthorised work.
Disposal:
- At the end of its lifecycle, we recommend making the machine safe by cutting off the power cord. Do so only after unplugging it from the mains! Do not dispose of the machine as ordinary rubbish, but leave it with personnel, qualified to collect such material. In this way it will be properly disposed of and recycled. This is a valuable aid for safeguarding our environment!
- Save these instructions for future referral!
6 - GETTING STARTED
First, remove the upper protection and unpack the machine.
WARNING! Remove and dispose of plastic bags and/or keep them out of reach of children.
WARNING!
Make sure the power cord is not plugged in before you start any operation. Place the appliance on the floor and open the tank lid as shown in Pict.1 and 2.
WARNING!
For safety reasons, never vacuum, for any reason, toxic or highly flammable substances, explosives, embers or lit up cigarettes, detergents or foam of any kind. Do not use the appliance to clean the chimney or the uptake or to remove oily substances. This could lead to serious danger and to a possible machine breakdown!
CAUTION!
Before you turn on the machine, for sucking up solids, remove the top of the
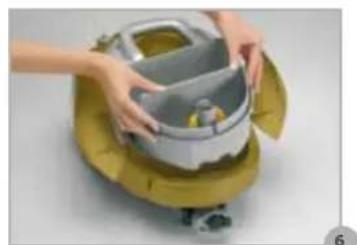
bucket (Pict.3) and fill it with cold water (pict. 4), up to the level corresponding to the mark printed on the separator "livello HD" (Pict. 5). The tank can be removed for filling, if required (Pict. 6). Close the tank lid and refasten it. Now you can connect the appliance to the mains.

natural_image
Hand placing a yellow industrial machine component with a red arrow indicating upward motion (no text or symbols visible)3

natural_image
Hand pouring liquid into a yellow industrial machine (no visible text or symbols)The image is too blurry to recognize any text content.

natural_image
Hand placing a yellow backpack with a red arrow pointing to it, no visible text or symbols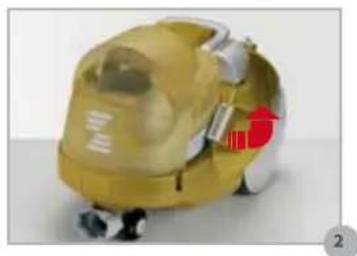
natural_image
Yellow and white mechanical device with a red warning label (no visible text or symbols)
natural_image
Close-up of a yellow and gold mechanical device with internal components (no visible text or symbols)5
natural_image
Person holding a large container of food inside a yellow appliance (no visible text or symbols)Water level
EN
6.1 HOSE AND ACCESSORIES FITTING
Insert the hose with its connection into the SLALOM SYSTEM ^™ at the front. (See Chapter 4.1: Patented Features, Slalom System ^™ ).
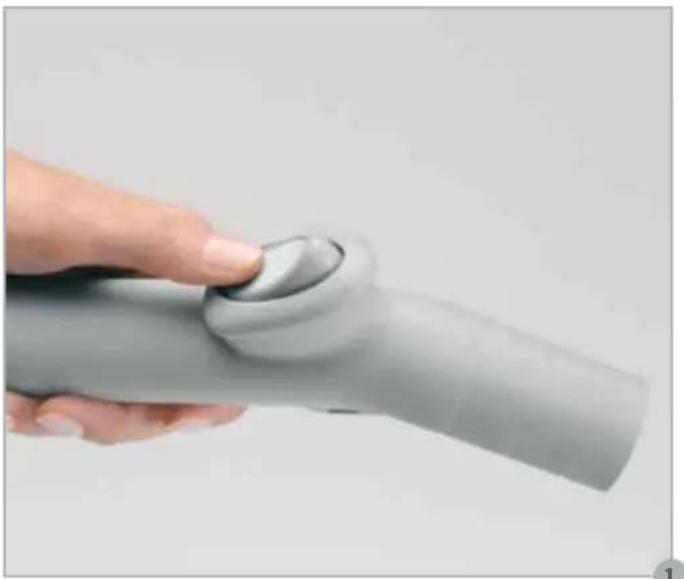
In order to clean floors, it will be necessary to insert the proper accessories into the special extension tube (Pict.1) by using the proper fit/release button (Pict. 2) and then connect to the grip handle by simply pressing.
When the hose is inserted, all 3 orange lights will start blinking. The machine is now on "STAND BY", ready for use.
The tank lid fasteners have been designed in such a way that, should they be hit when they are open, they will not be damaged. They might break loose, but it is very easy to put them back into place, by fitting the forks onto the support pins (Pict. 3).
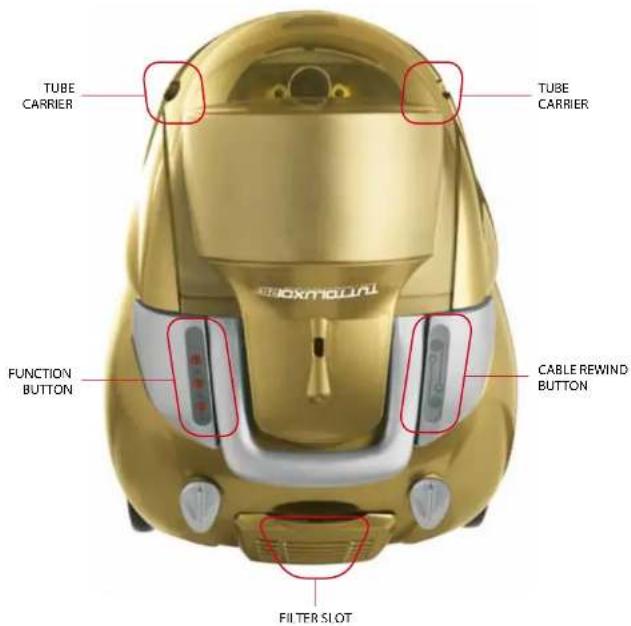
For your convenience you will find 2 TUBE-CARRIERS on each side of the device in which you can insert the extension tubes whenever you need your hands free for something else (move furniture around, etc.), (Pict. 4).
6.2 PREPARING THE VACUUM FUNCTION
Connect the power cord (Pict.5) by pulling it out from the back of the machine and inserting it into a mains plug. In order to avoid the power cord getting hot inside the machine, always pull it out to its complete extension. To rewind, push the cable winder button (Pict.6) on the upper right side of the machine; do not let the plug whip around while rewinding.
Upon plugging into the mains, 3 flashing LEDs on the function button (Pict.7) will come on to signal that the machine is now connected and on standby. Press the function button again and quickly release, the three flashing LEDs now go off, and one steady orange LED will come on: the machine is now running on minimum speed and you can start vacuuming.
If you want to change vacuum power, keep the function button pressed for a few seconds: 2 steady LEDS will come on, to indicate MEDIUM vacuum power; or if you keep the function button pressed, the speed will change to MAX and so on until the button is released at the desired speed.
Reminder! To turn the machine off, give a short push on the same button! To switch off the motor, press and then quickly release the function button.

natural_image
Hand holding a gray mechanical component, possibly a tool or bracket, with no visible text or symbols.
natural_image
Close-up of a hand holding a pen or tool with a red arrow pointing to the tip (no text or symbols visible)
natural_image
Close-up of a hand adjusting a yellow bag with a red arrow pointing to the cup (no text or symbols visible)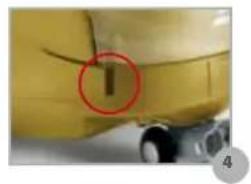
natural_image
Close-up of a yellow vehicle's side panel with a red circle highlighting a specific component (no visible text or symbols)
natural_image
Close-up of a yellow mechanical component with a small mark and label '5' (no readable text or symbols)
natural_image
Close-up of a white plastic door handle with a small circular button, no visible text or symbols
7 - OPERATION
7.1 VACUUMING - WET & DRY WITH WATER FILTER
Please only vacuum liquids such as water and spilled beverages. Always clean afterwards according to instructions below.
WARNING! To vacuum up liquids, you do not have to fill the water tank with clean water! If large amounts of water are to be vacuumed, you should use medium speed and maximum speed for small amounts, never minimum. The appliance can suck-up up to 1.6 litres of liquid. In excess of this quantity, the safety float is enabled making a noise and the motor noise becomes more acute. At this point, turn the vacuum function off immediately and empty the water bucket.
Fill the water tank as described in chapter 6. Carry on with your cleaning operations, choosing the best accessory for the job, see chapter 8.
To have maximum vacuum power, select vacuum power on the machine (function button). The small nozzle (C) will turn out to be really useful for all those hidden spots in the kitchen, in the bathroom, etc. To dust lamps, shades or other delicate objects, use the round brush (D), reducing vacuum speed with the main control, or otherwise with the handle shutter (Pict.1) which is very useful for changing vacuum power directly while you are working. If you are vacuuming dust or other kinds of dirt, replace the water frequently.
If you only want to vacuum dust, refill the water tank in any case as described in chapter 6.
Vacuuming
Follow the instructions above and then choose the accessory best indicated for what it is you want to do. Turn on and choose the desired speed. Use the lowest speed for delicate materials and medium or high speed for most other jobs, just as required.
Vacuuming liquids only
If you want to vacuum liquids, such as spilled water, no need to add water first, but you can start vacuuming directly. For best results do the following:
Medium speed - large amounts of localised liquids (e.g. a siphon) High speed - small amounts of liquids
Use of the handle
The handle is equipped with a manual shutter which allows for variation of the vacuum strength through opening or closing of the shutter with your thumb, without having to change speed on the machine, this is useful when you need less speed for an instant while working.
natural_image
Hand holding a gray cylindrical device with a knob, against a plain background (no text or symbols visible)EN
7.2 AIR CLEANING & AIR AROMA THERAPY
The quality of the air we breathe is certainly one of the most important factors affecting our health and well-being. With TUTTOLUXO 2S it is possible to add essential or balsamic oils to the water in the purification tank. This will allow an intense Aroma therapy or Balsam therapy treatment, much to the delight of everyone.
Of course you can also add a few drops of ZEPTER AROMA LIQUID to the water in the water tank when vacuum cleaning. In this way you can enjoy the fragrance and invigoration of aroma therapy while working and for many hours afterward.
Aroma therapy:
- Open the tank lid and take out the purification tank.
- CAUTION! Make sure the tank is clean.
- Refill the tank with clean water, as described in chapter 6, adding 1 litre of water.
- Add to the water a few drops of concentrated fragrance (Pict. 1), for instance CleanSy Aroma or Zepter Cosmetics Aroma Liquid. Damage can be caused to the plastic parts by use of inappropriate oils.
- Reassemble the purification tank and the lid.
- Plug in. Switch on the appliance at medium or lowest speed, by pressing the motor button once.
- Pure and perfumed air will come out of the grille at the back, quickly refreshing all rooms in the house, and getting rid of stuffiness and bad odours, (Pict. 2).

natural_image
Close-up of a hand placing a small object into a metallic cylindrical device with open doors (no visible text or symbols)
natural_image
Yellow industrial robot with visible exhaust plume, no text or symbols present8 - USAGE OF ACCESSORIES AND FILTERS
A. Big Brush and carrier for accessory
A1. Parquet accessory
B. Floor brush for liquids
C. Small nozzle
D. Round brush
E. Flat special brush
F. Radiator Brush
G. Small Brush
H. Stainless steel telescopic tube
I. Flex-tube
J. Extension tube *optional
K. Turbo brush *optional
A1. PARQUET ACCESSORY
To be used in conjunction with the Big brush, it is the ideal accessory for cleaning parquet or other wooden floors. The washable felt dish is inserted into the lower part of the parquet accessory brush.


B. FLOOR BRUSH FOR LIQUIDS
This accessory has been specifically designed to vacuum liquids, but can vacuum also solids. After use, rinse with hot water.
A. BIG BRUSH and carrier for accessory
Robust and reliable, it is suitable for all types of surfaces.
The accessory can take up two positions: with bristles in, ideal for rugs and carpets or large quilted surfaces (e.g. beds, sofas, etc.), or with bristles out for floors in general. Use your foot to change the position of the bristles by pushing the lever one way or the other. The brush movement is guided by small wheels.
During breaks or after work, you can fasten the hose and floor brush on the tube carrier. This will allow the hose/brush ensemble to rest on the TUTTOLUXO 2S, with no risk of it falling on the floor, and saving yourself unnecessary strain.

C. SMALL NOZZLE
An accessory designed for hard to reach places, like corners, crevices and deep into sofa cushions, and car seats.


EN
D. roUND BrUsH
With soft, horse hair bristles, it is ideal accessory to dust furniture, books, picture frames and other objects.

E. FLAT sPECiAL BrUsH
To be used like Round brush (D) but for delicate surfaces like plants, paintings, statues, etc..

F. rADiATor BrUsH
It is perfect for cleaning radiators or between other tight spaces.

G. sMALL BrUsH
Suitable for all types of quilted material and upholstery items, even small ones like cushions, chairs upholstery, etc. It is also useful to clean delicate fabrics and clothes. To vacuum delicate padded items (e.g. Alcantara), we recommend low vacuum speed, to avoid creasing.

H. sTAiNLEss sTEEL TELEsCoPiC TUBE
With rapid lock system for choosing desired length. Max length 94 cm.

natural_image
Two technical illustrations: one showing a metallic rod with a handle, the other showing hands holding a tool (no text or symbols visible)i. FLEX TUBE
Your flexible connection between main device and accessories. Length 2.4 m.

J. EXTENsioN TUBE \*oPTioNAL
Allows you to reach high-up places in order to remove cobwebs or anything else and its light weight means no tired arms. Max length 73.5 cm.

natural_image
Two-panel image showing a black cylindrical object and a hand holding a handgun, both labeled J1 (no text or symbols on the objects themselves)K. TUrBo BrUsH \*oPTioNAL
It is provided with a suction unit and a rotating carpet sweeper brush, operated by the same suction air. Turbo Brush is a carpet sweeper that is able to completely vacuum dust as well as pet hairs and other fibres from rugs and carpets.

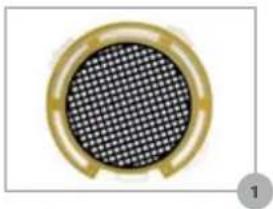
1. FLOATER FILTER
This filter traps the bigger dirt (e.g. leaves) which is not caught by the rainstorm of the Spray System™ and is therefore an important gate-keeper and protector for the Air Intake Filter.
natural_image
Circular metallic component with a grid pattern, no visible text or symbols
natural_image
Close-up of a cylindrical electronic component with a metallic body and transparent casing (no visible text or symbols)2. AIR INTAKE FILTER
A function you can find in all TUTTOLUXO models, designed to prevent particles a fu (from carpets, dust or dirt present in the air) from reaching and damaging the motor, as well as to filter the motor cooling air. This prevents large particles that may escape water filtration due to their size (e.g. a leaf) from getting into the air intake fan as well as protecting the same from objects falling in or being placed there by a child. (Pict.3).

natural_image
Close-up of a small metallic object with two circular features inside a transparent container (no visible text or symbols)3. POLYESTER FILTER
For those requiring a greater filtering capacity, the manufacturer has equipped TUTTOLUXO 2S with a washable polyester filter. This filter is additionally reducing considerably the "noise pollution" from vacuuming.
In order to keep the filter always clean and ready for maximum performance, it should be inspected monthly.
The Polyester filter at the rear air-outlet is designed to trap particles as small as 0.3 micron, catching anything that escaped in the water tank.
The Polyester filter, mainly used for noise reduction makes the TUTTOLUXO 2S one of the most silent appliances in its class, in the world (Pict.4).

natural_image
Close-up of a hand inserting a small object into a golden robotic device (no visible text or symbols)4. MOTOR INTAKE FILTER:
Designed to prevent various particles (from carpets, dust or dirt present in the air) from reaching the motor. It is also used to filter the motor cooling air, a function to be found only with all TUTTOLUXO models (Pict. 5).

natural_image
Close-up of a yellow industrial machine with visible gears and a small black component, no text or symbols present.5. HEPA FILTER \*optional
High Efficiency Particulate Air.
The HEPA filter technology assures maximum efficiency of 99.97% particle capture down to 0.3 microns. The HEPA filter also helps to eliminate microorganisms in indoor air (Pict.6).

natural_image
Exterior view of a rectangular electronic component with a square top and internal slots (no text or symbols visible)9 - mAINTENANCE
The appliance does not need any particular maintenance, but it is advisable to go through the operations described below in order to ensure perfect efficiency.
After periods of intense use (check at least once every three months) it is necessary to check the efficiency of all filtering elements.
The appliance outer surfaces can be cleaned with a cloth soaked in neutral detergent. Should the appliance fall or overturn, switch off immediately and disconnect from the mains.
If the machine gets in contact with water, dry it with a dry cloth and wait a few minutes before switching on again.
Do not put away the appliance whilst the tank still contains dirty water, as this may cause bad smells from mould and encrustations forming inside the tank.
IMPORTANT! Before carrying out any type of maintenance, turn the machine off and disconnect from the mains.
9.1 FILTERS
The following filters should be replaced immediately if you notice any damage to them! Contact your Zepter Service Centre for new filters.
FLOATER FILTER
This filter traps the bigger dirt (e.g. leaves) which are not kept by the rainstorm of the Spray System™ and is therefore an important gate-keeper and protector for the next filter, the Air Intake Filter.
Check the efficiency of filter.
To do this, remove the filter with the help of the float, by pushing it up against the filter. Wash the filter element with plenty of cold water and neutral detergent. Do not leave the filter to dry on heaters or radiators! Allow the filter to dry naturally (not on radiators or heaters). Do not use the appliance until the
filter is perfectly dry. Use of a damp filter could damage the appliance.
As soon as stains or mould appear on the filters surface, replace them with new ones, to be found at a Zepter Service Centre. The life of this particular component is strongly influenced by how much the appliance is actually being used.

natural_image
Two views of a semiconductor component: one with a grid-patterned circular cross-section, the other with a transparent cylindrical housing (no text or symbols visible)AIR INTAKE FILTER
This prevents particles that have not been fully filtered by the water from reaching the motor. Check the efficiency of filters when you are cleaning the purification tank. To do this, remove and rinse repeatedly the two filters, separating them from the cover and the machine body (Pict.3) with the help of a small pliers (eyebrow tweezers will do). Wash the filter element with plenty of cold water and neutral detergent.
Do not leave the sponge filter to dry on heaters or radiators! As soon as stains or mould appear on the filters surface, replace them with new ones, to be found at a Zepter Service Centre. The life of this particular component is strongly influenced by how much the appliance is actually being used.

natural_image
Close-up of a yellow surface with a circular dark object and two small rings, no visible text or symbols.POLYESTER FILTER
In order to keep the filter always clean and ready for maximum performance, it should be inspected monthly.
To inspect the filter, proceed in the following way:
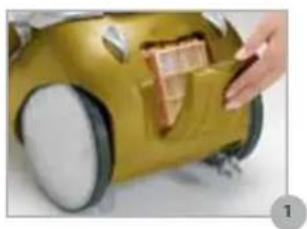
1) Remove the grilled cover at the back of the TUTTOLUXO 2S (Pict. 1). The polyester filter is fitted inside. Place the grilled cover on the floor and extract the filter as shown (Pict. 2).
2) Check the filter state; if there are traces of dust or dirt, wash with plenty of cold water and neutral detergent to remove.
3) Allow the filter to dry naturally (not on radiators or heaters). Do not use the appliance until the filter is perfectly dry. Use of a damp filter could damage the appliance.
4) After cleaning, put the filter back into place and reassemble the cover, making sure to properly fit the grilled cover hooks onto the slits on the appliance body. Once the grilled cover is in place, rotate it upwards for the final fixing with the stopping tongue.
After some periods of use, should the polyester filter be torn or damaged, it should be replaced with a new one from the Zepter Service Centre.
natural_image
Close-up of a hand placing a small object onto a golden robotic device (no visible text or symbols)
natural_image
Close-up of a hand placing a small white object into a golden robotic device (no text or symbols visible)MOTOR INTAKE FILTER
Designed to prevent various particles (from carpets, dust or dirt present in the air) from reaching the motor. It is also used to filter the motor

natural_image
Close-up of a mechanical component with a circular housing and mounting holes (no visible text or symbols)cooling air, a unique function to be found only in TUTTOLUXO 2S.
natural_image
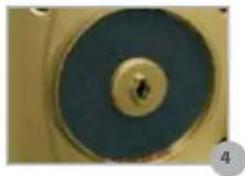
Close-up of a circular mechanical component with a central hole and a dark blue center (no visible text or symbols)- Check that the aspirating filter is clean, and therefore efficient, at least once a month, if you use the vacuum cleaner daily. (Pict. 3)
- If needed, remove and rinse the aspirating filter frequently. To remove it, it is necessary to first take off the tank and so avoid that, on turning the appliance over, water is spilled on the motor fan.
Find the lower cover and remove it by undoing the central screw, simply using your hands or a coin.
Remove the filter (Pict. 4-5) and wash it with water and neutral detergent.
Before using the vacuum cleaner again, it is important that the filters are dry, so that they can operate at their best.
Do not leave the motor intake filter to dry on heaters or radiators!

natural_image
Close-up of a yellow industrial machine wheel with visible gears and a black screw, partially detached with small debris (no text or symbols)HEPA FILTER \* OPTIONAL
High Efficiency Particulate Air
The HEPA filter technology assures maximum efficiency of 99.97% particle capture down to 0.3 microns. The HEPA filter also helps to eliminate microorganisms in indoor air.
In order to keep the filter always clean and ready for maximum performance, it should be inspected monthly.
EN
To inspect the filter, proceed as for replacing the Polyester Filter
1) Remove the grilled cover on the back of the TUTTOLUXO 2S.
The HEPA filter is fitted inside. Place the grilled cover on the floor and extract the filter as shown.
2) Check the filter state; if there are traces of dust or dirt, replace it.
3) Put the new HEPA filter into place and reassemble the cover, making sure to properly fit the grilled cover hooks onto the slits on the appliance body. Once the grilled cover is in place, rotate it upwards for the final fixing with the stopping tongue.
After some periods of use, should the HEPA filter be torn or damaged, it should be replaced with a new one from a Zepter Service Centre.

natural_image
3D rendering of a square electronic component with a dark top surface and internal slots (no text or symbols visible)TANK LID WITH FLOAT
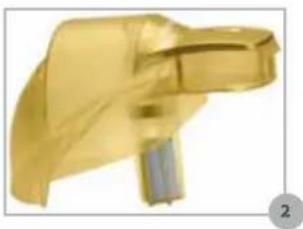
Also check efficacy of the Safety Float located on the tank lid. If encrusted with dirt or mould, this may not function correctly. Check that the float can move freely within its cage. Rinse the lid with plenty of hot water and neutral detergent.
natural_image
Close-up of a golden plastic or plastic tool with a small metallic component (no visible text or symbols)REPLACEMENT OF FILTERS:
Floater Filter (PWC-700-4): Replace yearly or earlier according to condition.
Air Intake Filter (PWC-700-2): Replace yearly or earlier according to condition.
Polyester Filter (PWC-700-1): Replace yearly or earlier according to condition.
Motor Intake Filter (PWC-700-3): Replace yearly or earlier according to condition.
Hepa Filter (PWC-700-5): Replace every 6-12 months.
9.2 SIMPLY SYSTEM™
No need to store up on bags or filters thanks to the SIMPLY SYSTEM ^TM .
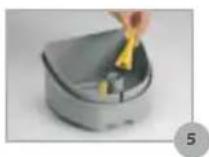
Cleaning the purification tank is all that is required for top TUTTOLUXO 2S efficiency. At the end of your work, empty the liquid waste of the purification tank as shown in (Pict. 3). To make this operation easier, the divider inside the tank can be taken off (Pict. 4) and it is also advisable to remove the nebulizers (Pict. 5). Rinse tank, divider and nebulisers with abundant hot water and neutral detergent until all residues and stains on the tank walls have been removed.


WARNING!
We strongly advise, after aspirating liquids or solids, to rinse the water bucket inside and any accessory used, by emptying the tank and aspirating 1 litre of cold, clean tap water, repeat this twice. Also, please do not leave any aspirated liquid inside the tank, to prevent the formation of limescale or moulds, and consequently bad odours.
WARNING!
When you take off the divider, make sure that it is put back correctly into the proper guides with its curved side facing forwards and upwards and that it touches the bottom (otherwise it won't slide in). Please be careful, these are delicate pieces. In case one gets broken or lost, immediately ask for a spare part from your Zepter Service Centre. Do not use the TUTTOLUXO 2S without it. Allow all pieces to dry or dry them yourself before replacing them in the machine and closing the cover. Moisture left inside could create mildew and unpleasant odours.
10 - WARRANTY STATEMENT
This appliance can only be assigned to the functions it has been designed for, i.e. house cleaning and air enhancement. The maker cannot be held responsible for any damage deriving from improper, incorrect or unreasonable use.
All our appliances have undergone strict inspection tests and are guaranteed against manufacturing defects. The guarantee starts from the date of purchase. The date of purchase is the date shown on the invoice issued by the dealer upon the delivery of the appliance.
The manufacturer undertakes to repair or replace cost-free within the guarantee period those parts that prove to have manufacturing defects. Those defects that are not clearly attributable to either the material or the manufacturing will be examined at one of our Technical Service Centres or at our headquarters and charged according to the outcome.
The Warranty is only valid if:
- The machine shows material or product defects.
- No signs of breaking by the customer or the presence of no original pieces fit by other people had been found.
- Original accessories had been used.
- The machine has not been overloaded or crashed.
The Warranty does not include:
-
The parts which can normally wear out.
-
The damages caused by transport, inadequate use, negligence, incorrect installation and use, not in conformity with the warning listed in the machine catalogue.
-
Consumables (1. Floater filter 2. Air Intake Filter 3. Polyester Filter 4. Motor Intake Filter 5. Hepa Filter).
This guarantee does not affect the consumer's statutory rights under applicable national legislation in force, nor the consumer's rights against the retailer arising from the sales/purchase agreement.
In the absence of applicable national legislation, this guarantee will be consumer's sole and exclusive legal remedy, and the manufacturer shall not be liable for any incidental or consequential damages for breach of any express of implied guarantee of this product. The liability of manufacturer is limited to and shall not exceed the purchase price of the product actually paid by the consumer.
This guarantee covers no damage to the product resulting from abuse or misuse of the product, inappropriate packaging, accidents, maintenance and repairs done by unauthorised centres.
If, after the purchase of the product, its label with the serial number has been removed or is not recognisable, the manufacturer reserves the right to refuse the guarantee service.
11 - DISPOSAL INFORmATION
In accordance with art. 13 of Legislative Decree no. 151 dated 25 July 2005, the implementation of European Directives 2002/95/EC, 2002/96/EC and 2003/108/EC on the reduced use of hazardous substances in electrical and electronic equipment, and their disposal, the barred bin symbol means that at the end of its useful life the product must be disposed of separately from ordinary waste. At the end of its useful life, therefore, the user must dispose of the appliance at
the specific differentiated waste collection centres for electronic and electro-technical waste, or alternatively give it to the retailer to dispose of appropriately upon purchasing a new equivalent appliance, under the one-for-one rule.
All packaging materials can be recycled, please help to keep our environment clean!

12 - TROUBLESHOOTING
| TroUBLECAUsEsoLUTioN | ||
| While working, an accessory detaches itself. | The accessory is not correctly connected. | Check that the accessory is correctly connected. |
| Vacuum power is too low or performance goes down while working with the vacuum. | A filter is dirty blocking intake. Check and clean filter. | |
| The filters are not properly mounted. Check filter and if necessary reposition. | ||
| Air is coming in where it should not. | Check that the cover, hose and accessories are correctly mounted and fastened. | |
| The gasket along the water bucket is not properly positioned. | Reposition correctly the gasket between the bucket and cover. | |
| The hose or an accessory is obstructed by dirt. Check and free the passageway. | ||
| The pivoting front wheel passage is obstructed. Check and free the passageway. | ||
| The motor works correctly but vacuum performance is poor. | The floater is closing the air passage. | Empty the water bucket and fill up to minimum level with clean water. |
| The hose or accessories smell unpleasant. | Dirt and grime has accumulated in the hose, accessories or bucket. | Clean all parts with clean water and if necessary light detergent, but make sure to clean and dry after each use. |
13 - USE OF ACCESSORIES
*Parquet accessory to be used in conjunction with the Big brush.
| Big brush | *Parquet accessory + Big brush | Floor brush for liquids | Small nozzle | Round brush | Flat special brush | Radiator brush | Small brush | Turbo brush *optional | |
| A | A1 | B | C | D | E | F | G | K | |
| MArBLE/ sToNE Floor | √ | √ | √ | √ | |||||
| CArPET | √ | √ | |||||||
| PArQUET | √ together | √ | √ | √ | |||||
| rUGs | √ | √ | √ | ||||||
| TiLED FLoors | √ | √ | √ | ||||||
| TiLE GroUT | √ | √ | |||||||
| sINK/ ToiLET BATH | √ | ||||||||
| DELICATE AND DECorATiVE iTEMs | √ | √ | |||||||
| rADiATors/ sTEEL | √ | √ | |||||||
| TAPs | √ | ||||||||
| KiTCHEN WorKToP | √ | √ | √ | ||||||
| LiNoLEUM | √ | √ | √ | ||||||
| ArMCHAirs soFAs | √ | √ | √ | ||||||
| CAr | √ | √ | √ | √ | √ | √ | |||
| WiNDoWs | √ |
EN
NOTES
- TUTTOLUXO2S
- OPERATING INSTRUCTIONS
- INSTRUCTIONS FOR USE
- INDEX
- - OVERVIEW OF TUTTOLUXO 2S
- - LIST OF ACCESSORIES AND FILTERS
- ACCEssoriEs
- FiLTErs
- - LIST OF FUNCTIONS
- - LIST OF FEATURES
- PATENTED FEATURES:
- SPRAY SYSTEM M , SLALOM SYSTEM M , SIMPLY SYSTEM TM
- SLALOM SYSTEM™
- SIMPLY SYSTEM™
- SAFETY FEATURES
- Mechanical safety features:
- TECHNICAL DATA
- Data plate characteristics
- Technical characteristics
- Patented systems:
- Product code: PWC-200
- - ImPORTANT SAFETY NOTICE
- CAREFULLY READ ALL INSTRUCTIONS BEFORE USING THIS APPLIANCE!
- WARNING! Remember this is an electric appliance; failure to follow these instructions could lead to harm to yourself or others.
- Before using:.
- During use:
- Maintenance:
- Disposal:
- - GETTING STARTED
- WARNING!
- CAUTION!
- EN
- HOSE AND ACCESSORIES FITTING
- PREPARING THE VACUUM FUNCTION
- - OPERATION
- VACUUMING - WET & DRY WITH WATER FILTER
- Vacuuming
- Vacuuming liquids only
- Use of the handle
- AIR CLEANING & AIR AROMA THERAPY
- Aroma therapy:
- - USAGE OF ACCESSORIES AND FILTERS
- roUND BrUsH
- FLAT sPECiAL BrUsH
- rADiATor BrUsH
- sMALL BrUsH
- sTAiNLEss sTEEL TELEsCoPiC TUBE
- i. FLEX TUBE
- EXTENsioN TUBE \*oPTioNAL
- TUrBo BrUsH \*oPTioNAL
- FLOATER FILTER
- AIR INTAKE FILTER
- POLYESTER FILTER
- MOTOR INTAKE FILTER:
- HEPA FILTER \*optional
- - mAINTENANCE
- FILTERS
- FLOATER FILTER
- AIR INTAKE FILTER
- POLYESTER FILTER
- MOTOR INTAKE FILTER
- HEPA FILTER \* OPTIONAL
- TANK LID WITH FLOAT
- REPLACEMENT OF FILTERS:
- SIMPLY SYSTEM™
- - WARRANTY STATEMENT
- The Warranty is only valid if:
- The Warranty does not include:
- - DISPOSAL INFORmATION
- - TROUBLESHOOTING
- - USE OF ACCESSORIES
- NOTES
Brand : Zepter
Model : Tuttoluxo 2S PWC-200
Category : Vacuum Cleaner