
TuttoSteamy PWC-301 - Steam cleaner Zepter - Free user manual and instructions
Find the device manual for free TuttoSteamy PWC-301 Zepter in PDF.


| Type | Steam cleaner |
| Brand | Zepter |
| Model | TuttoSteamy PWC-301 |
| Dimensions (L x W x H) | 390 x 390 x 440 mm |
| Net weight | 5.0 kg |
| Gross weight (with accessories) | 9.5 kg |
| Total power | 2350 W |
| Boiler power | 1500 W |
| Voltage | 220-240 V ~ 50-60 Hz |
| Boiler volume | 2.4 L |
| Boiler capacity | 1.6 L (max. fill) |
| Max. steam pressure | 450 kPa (4.5 bar) |
| Steam output | 0-80 g/min |
| Operating temperature | 148°C |
| Protection class | IPX4 |
| Main functions | Steam cleaning, disinfection, ironing |
| Safety features | Service pressure switch, service thermostat, safety thermostat, tamper-proof cap with pressure release valve, stainless steel boiler, steam control on handle |
| Allergen control | Eliminates bacteria, mites, germs, and pathogenic agents |
| Accessories included | Domestic iron, rubber mat, flex tube, extension tube, triangular brush, wiper 22x22 cm, floor wiper 44x32 cm, rectangular brush, brush coupling, small round brush, inclined precision head, window wiper, hook for extension pipe, screws |
| Descaling | Use Zepter STOP-CALC (PWC-300-57) according to water hardness: soft every 75 fills, hard every 50 fills, very hard every 30 fills |
| Warranty | Against manufacturing defects per local legislation; excludes normal wear, improper use, unauthorized repairs |
Frequently Asked Questions - TuttoSteamy PWC-301 Zepter
User questions about TuttoSteamy PWC-301 Zepter
0 question about this device. Answer the ones you know or ask your own.
Ask a new question about this device
Download the instructions for your Steam cleaner in PDF format for free! Find your manual TuttoSteamy PWC-301 - Zepter and take your electronic device back in hand. On this page are published all the documents necessary for the use of your device. TuttoSteamy PWC-301 by Zepter.
USER MANUAL TuttoSteamy PWC-301 Zepter
natural_image
Yellow and black vacuum cleaner device with brand logo (no visible text or symbols on body)1 - OVERVIEW OF TUTTOSTEAMY - PWC-301
1 TUTTOSTEAMY body
2 Wheels
3 Power cord
4 Main switch
4B Main switch light (orange)
5 Heating switch
5B Heating switch light (green)
6 Water level indicator light
7 Steam pressure indicator light
8 Pressure indicator
9 Safety valve
10 Steam intensity regulator
11 Hose connection socket
12 Quick coupler plug
LIST OF ACCESSORIES
29 Domestic iron
30 Rubber mat
31 Flex tube with plug
32 Extension tube
33 Triangular brush
34 Wiper 22x22 cm
35 Floor wiper 44x32 cm
36 Rectangular brush
37 Brush coupling
38 Small round brush D.30
39 Inclined precision head
40 Window wiper/suction
41 Hook for extension pipe
42 Screws for hook
2 - FUNCTIONS AND FEATURES
- Steam Cleaning & Disinfection 2. Steam Ironing
With the TUTTOSTEAMY professional iron, any fabric can be ironed (following the instructions on the labels) or clothes can be freshened up.
You can use TUTTOSTEAMY on different surfaces
| LARGE SURFACES SMALL SURFACES | UPHOLSTERY GLASS SURFACES | ||
| • Tiled floor, parquet, stone and linoleum floor.• Wax-treated tiled floor (for wax removal).• Tiles or tiled walls.• Roller shutters, guillotine windows.• Carpets. | • Radiator interstices, joints between tiles, skirting boards.• Door or window frames.• Shutters. | • Rugs and carpets.• Upholstered furniture (sofas, armchairs). | • Windows, glass walls.• Glass doors.• Mirrors. |
STEAM CLEANING: HEALTHY AND POWERFUL
Water, in the form of steam, is the most effective and environment-friendly way to clean and disinfect. It is the natural way to cleanse deeply, respecting the environment and avoiding modern detergents.
In the form of steam, water is used sparingly. Due to its very high temperature and considerable capacity, the steam produced by TUTTOSTEAMY provides for thorough cleaning, dissolving grease and dust particles that are usually difficult to remove.
The steam cleans and sanitizes while eliminating bacteria, mites, germs, and pathogenic agents, collects dust particles together and prevents the development of dust-related allergies.
Thanks to TUTTOSTEAMY, you can now take advantage of all this while doing your housework, as well as contributing to environmental protection and to your health.
EN
3 - CONTROL PANEL
• 4 Main switch
• 4B Main switch light (orange)
- 5 Heating switch
• 5B Heating switch light (green)
• 6 Water level indicator light
• 7 Steam pressure indicator light

4 - SAFETY FEATURES
• Service pressure switch
• Service thermostat
• Safety thermostat
• Steam control on the waterproof handle
• Tamper-proof cap with pressure release valve
• Stainless steel boiler
5 - TECHNICAL DATA
DATA PLATE CHARACTERISTICS

WARNING! Make sure the technical data on the data plate matches that of your electricity mains supply.
Technical characteristics
• Total power:2350 W
• Boiler volume: 2.4 L
• Boiler capacity: 1.6 L
• Boiler draw rate: 1500 W
• Max. Steam pressure: 450 kPa (4.5 bar)
- Operating temperature: 148^ C
• Steam pressure working range: 450 kPa (4.5 bar) - 100 kPa (1.0 bar)
• Steam output: 0-80g/min
• Voltage: 220-240 V
• Frequency: 50-60 Hz
• Protection factor: IPX4
• Temperature during transport and storage: 0÷40°C
• Working room temperature: 0÷40°C
Product code: PWC-301
- Net weight: 5.0 kg
• Gross weight: 9.5 kg (with all accessories)
• Dimensions: 390x390xH440mm
6 - WARNINGS
This Operation and Maintenance Manual uses the symbols indicated below, in order to draw your attention to important information.
 | DANGER | Warning of possible serious or fatal injury. |
 | WARNING | Warning of possible minor injury or material damage. |
 | ATTENTION | Warning of possible damage or destruction of the device. |
 | IMPORTANT / NOTE | Additional information and helpful hints for the correct use of the device. |
One of the following symbols will be used according to the nature of the danger:
 | DANGER | Danger due to electrical current. |
 | WARNING | Danger due to hot steam. |
 | WARNING | Danger of scalding. |
This appliance is in compliance with the latest European Standards and is a high quality product with an emphasis on customer safety. The applications of the appliance are fully described in the instruction manual.
The manual uses specifications to draw your attention to some details.

WARNING! For safety reasons, be careful.

NOTE! It contains additional information and useful advice for the appropriate use of the appliance.
- This user's manual is an integral part of the appliance. Read all the instructions and safety notices contained in the present manual carefully, as they give important information on the use and maintenance of the machine. Keep the manual for future reference.
- This appliance calls for the use of water and steam: follow all instructions contained in the present manual thoroughly.
- After removing the packing, make sure the machine is intact, carefully inspecting the steam cleaner body and the accessories pack.
- If you do not understand the information, do not use the appliance and refer to professionally qualified Zepter personnel.
- Before connecting the appliance to the mains, make sure the data on the data plate match those of your electricity mains. The electrical data plate is located on the bottom of the appliance.
- If your mains socket is not compatible with the machine plug, have the plug replaced with a suitable one by Zepter qualified personnel. They should also check that the mains socket is suitable for the amount of power required by the appliance.
- The use of adaptors, multiple sockets and/or extensions is generally to be avoided; if you cannot do without them, make sure that only standard or multiple adaptors and extensions are used which conform to current safety regulations.
- Do not use the appliance if any damage is visible on the power cord or the plug. In case of malfunction, switch off without trying to make repairs. For any repairs refer only to your Zepter Repair Centre.
- Should the appliance fall or overturn, switch off immediately and disconnect from the mains. Wait a second, put the device back into its working position and after a few more seconds turn it on again. Never turn the machine over when there is water in the tank: the water could get into electrical parts.
- In case of emergency disconnect the device from the mains.
- This appliance can only be assigned to the functions it has been designed for, i.e. house cleaning. The maker cannot be held responsible for any damage deriving from improper, incorrect or unreasonable use.
EN
- Do not use the appliance in the presence of explosives, highly flammable materials, gas or naked flames.
- This appliance can be used by children aged from 8 years and over and persons with reduced physical, sensory or mental capabilities or lack of experience and knowledge if they have been given supervision or instruction concerning use of the appliance in a safe way and understand the hazards involved.
• Children must not play with the appliance. - Cleaning and user maintenance must not be carried out by children without supervision.
- Do not use accessories which are not provided by the maker, as they could cause serious danger.
- Only use the appliance in its horizontal position, with all wheels resting on the floor.
- The power cord must be completely unwound before use. Do not damage the cord by squashing it, stepping on it, pulling it, knotting it or by touching it with hot or sharp objects.
- Disconnect from the mains when the appliance is not in use.
- Be very careful not to come into contact with the hot surface of the appliance or with the steam during use. Never empty the boiler when the water inside is still hot.
-
Never aim the jet of steam at persons or animals, electrical installations, materials containing asbestos, or toxic and hazardous materials.
-
Steam must not be directed towards equipment containing electrical components, such as the interior of an oven.
- Do not use steam to clean the appliance itself when it is working, or to clean clothes or shoes when they are being worn. Never have wet hands or feet wet when the appliance is connected and you are using it.
- Stop steam delivery when replacing accessories. Disconnect the appliance when not in use and before filling the boiler and replacing the steam tube. Never touch the steam jet with your hands.
- Never pull the power cord to unplug the machine from the mains socket.
- Do not expose the machine to severe weather elements, such as: rain, hail, snow, wind, etc... Never put the appliance into any type of liquid.
- Use the appliance with the utmost care when children are nearby.
- Do not use the power cord to lift the appliance or to drag it about while you are cleaning!
- If you decide to no longer use the appliance, we recommend making it safe by cutting the power cord, after unplugging it from the mains! We also recommend not treating it as ordinary rubbish, but to deliver it into the hands of personnel qualified to collect such material. In this way it will be properly disposed of, but most of all it will be possible to recycle components, and reuse them to make other objects, safeguarding the environment, which belongs to all of us.
Never cover the equipment; it could overheat.
7 - CLEANING - PRACTICAL ADVICE

WARNING!
• Always ensure that the use of a steam cleaner is suitable for the material or surface to be cleaned
- Follow the manufacturer's instructions as regards the cleaning of material. If there is no information available, always carry out a test on a less visible part of the material. In the event of damage, do not use the steam cleaner.
• Always apply a cotton cloth to the brushes to avoid scratches.
• Always work from the top downwards on vertical surfaces. Place a cloth under the surface to be cleaned to collect dirt.
- Use the extension tubes only when necessary.
- Spray steam on small surfaces each time. Once the dirt has dissolved, it is much easier to remove it.
- For more stubborn dirt, treat the surfaces directly with the steam jet.
- To clean stains from upholstery or from carpets and rugs, spray the steam onto the area to be cleaned and then go over lightly with the triangular brush, without pressing down. Leave the surface to dry, and then check if the stain has disappeared. Repeat if necessary.
- For delicate surfaces such as wood, spray on a little steam and leave to dry.
- Carpets must first be cleaned with the vacuum cleaner, and then with the steam cleaner.

NOTE:
• The steam jet can't remove lime scale. To get rid of this, use a descaler.
8 - STEAM CLEANING - PRACTICAL ADVICE

WARNING!
Furniture surfaces can be cleaned with the steam cleaner in keeping with the following conditions:
- Do not clean furniture surfaces with the direct steam jet.
• Always use a soft, absorbent cloth.
- Apply little steam pressure.
- Do not apply pressure when cleaning.
WORKING WITH STEAM CLEANING

NOTE:
- At the start of either cleaning or ironing, or after a long period of inactivity, it is recommended that you spray some steam on a separate cloth to eliminate any possible water residues from the steam tube.
-
For effective cleaning, it is the steam intensity, and not the pressure applied to the accessory, that is essential.
-
Adjust the steam intensity with the steam regulator (10). Press the button on the handle of the steam nozzle to release the steam.
- Direct the steam jet towards the surface to be cleaned. Clean the dirty surface evenly with the floor-polisher. For more stubborn dirt, rub a little without pressing on the brush.
- Collect the dissolved dirt with a cloth.
| RECOMMENDED STEAM INTENSITY LEVEL OF DIRT STEAM INTENSITY | |
| Very light dirt 1-2/6 | |
| Light dirt 3-4/6 | |
| Stubborn dirt 5-6/6 |
TUTTOSTEAMY IS AN EFFECTIVE REMEDY AGAINST MITES
Mites are parasites invisible to the naked eye, responsible for bothersome allergies. They feed on diverse organic remnants, and for this reason their ideal habitat is amidst the folds of mattresses, blankets, rugs and carpets. Mites live in large colonies, especially in springtime. Just imagine that in one gram of dust, you can find up to 15,000 mites!

EN
9 - GETTING STARTED

ATTENTION!
For first time use, the following operation is recommended.

WARNING!
Make sure the power cord is not plugged in before you start.

ATTENTION!
Lay TUTTOSTEAMY on a flat and steady surface.
9.1 FILLING WITH WATER

ATTENTIONI Fill TUTTOSTEAMY with filtered water (from ZEPTER water filtration systems) or with tap water with a low mineral content (soft water).
Do not put any type of detergent or chemical substance into the boiler.
a) Unscrew the safety valve (9) anti-clockwise (picture A).
b) Pour in a suitable quantity of water (min. 0.5 l - max. 1.6 l).
Use a funnel for higher precision (picture B).
c) Screw safety valve back – clockwise. Ensure that safety valve is properly closed/tight.

natural_image
Close-up of a hand pressing down on a black mechanical component (no visible text or symbols)
natural_image
Close-up of a hand pouring liquid into a red container with a white handle (no text or symbols visible)
NOTE: TUTTOSTEAMY is equipped with a safety valve that prevents the valve from opening as long as steam pressure is high. Current steam pressure can be monitored by looking at the steam pressure indicator (8).

NOTE: When water level is too low, the orange indicator light comes on (6).
9.2 CONNECTING OR REMOVING THE FLEX TUBE (31)
a) Lift the socket cover
b) Insert flex tube into the socket (11) (picture C).
The pin has to be turned upwards and inserted into the socket cover opening (picture D).

natural_image
Close-up of a hand interacting with a yellow MTTO smart air purifier (no visible text or symbols)
natural_image
Close-up of a black electrical plug with a yellow connector (no visible text or symbols)c) Release the socket cover.
To remove the flex tube observe the following steps:
a) Lift the socket cover above the safety pin.
b) Gently pull the flex tube out of the socket.
c) Release the socket cover.
ATTENTION!
Ensure that the safety pin is correctly attached by pulling it lightly.
9.3 CONNECTING THE ACCESSORIES
In order to use the device correctly and get the requested results, it will be necessary to insert the proper accessories onto the extension tube (32).
natural_image
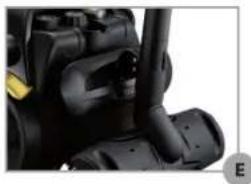
Close-up of a black mechanical component with no visible text or symbolsATTENTION! If the appliance is being used for the first time, apply the hook (41) onto the brush coupling (37). For more information, please refer to chapter 11 "Usage of accessories". Put the hook in the correct position (picture E) and secure it with the screws (42). Ensure the hook is fixed properly and cannot be lost during use.

WARNING! The accessories heat up during use. Be careful when replacing or removing the accessories.

natural_image
Hand holding a black hair accessory with a brush, no visible text or symbols
natural_image
Close-up of hands using a black brush to handle a textured object, labeled 'Fb' in the corner (no other text or symbols visible)
natural_image
Hand holding a black handheld device with a cylindrical sensor or probe, no visible text or symbols
natural_image
Close-up of hands holding a black device with a strap (no visible text or symbols)To connect the rectangular (36) or triangular (33) brush, the brush coupling (37) needs to be attached (pictures Fa - Fd).

NOTE: For the connection and usage of individual accessories, please refer to chapter 11 "Usage of accessories".
9.4 CONNECTING TUTTOSTEAMY

WARNING! Before TUTTOSTEAMY is plugged into the mains, verify the following:
• Water is filled (min 0.5 l – max. 1.6 l)
• Flex tube (31) is connected to the device
- Correct accessory is applied

natural_image
Close-up of a hand interacting with a yellow appliance via a black control panel (no visible text or symbols)Now, TUTTOSTEAMY can be plugged into the mains and start to be used.
- Press the main switch (4), orange light comes on (4B) (picture G).
- Press heating switch (5) and heating begins. Green indicator (5B) comes on when heating process is finished (picture I).
Parallel pressure indicator (8) starts to show current steam pressure.

- When green heating indicator (5B) is on,

NOTE: TUTTOSTEAMY is equipped with a safety valve that prevents the valve from opening as long as steam pressure is high. Current steam pressure can be monitored by looking at the steam pressure indicator (8).

NOTE: When water level is too low, the orange indicator light comes on (6). To continue the steam cleaning process, follow chapter 10 instructions "Water Re-fill"

ATTENTION: Do not lift up the device by flex tube when it is in use. Tuttosteamy must be on steady and flat surface with all wheels during use.
9.5 DISCONNECTING TUTTOSTEAMY
When the steam cleaning job is done and/or an accessory needs to be changed, the device has to be disconnected.
- Turn the heating switch (5) off.
- Turn the main switch (4) off.
- Remove the power cord (3) from the mains.

NOTE: Steam intensity regulator (10) adjustable positions: on position 1, steam quantity is minimum, whereas in position 6 it is maximum (picture I). Do not use position one for more than 5 minutes.

natural_image
Close-up of a rotary dial with numbered buttons (1, 2, 3, 4, 5, 6) and a close-up view of the dial (no visible text or symbols)EN
10 - WATER RE-FILL
12
If during steam cleaning the orange water level indicator light (6) comes ON, the water level is too low and a re-fill is necessary.
In this case
-
Disconnect TUTTOSTEAMY following the instructions in point 5 of chapter 9 "Disconnecting TUTTOSTEAMY".
-
Turn the steam intensity regulator knob (10) to position 0.
-
Let the device cool. Current steam pressure is shown on pressure indicator (8). As soon as device reaches again normal pressure again, safety valve (9) can be opened (picture J).

natural_image
Close-up of a hand pressing down on a black mechanical component with two adjustment knobs (no visible text or symbols)
NOTE: TUTTOSTEAMY is equipped with a safety valve that prevents the valve from opening as long as steam pressure is high.
-
Unscrew the safety valve (9) anti-clockwise
-
Pour a suitable quantity of water (min. 0.5 l – max. 1.6 l). Use a funnel for higher precision.
-
Screw safety valve back – clockwise. Ensure that safety valve is properly closed/tight.
-
Press the main switch (4), orange light comes on (4B)
-
Press heating switch (5) and heating begins. Green indicator light (5B) comes on when heating process is finished. Parallel pressure indicator (8) starts to show current steam pressure.
-
When green heating indicator (5B) is on, steam can be released.
-
TUTTOSTEAMY is now fully ready and can be used again.
11 - USAGE OF ACCESSORIES

CAUTION!
Every time an accessory is changed or replaced, the main device has to be disconnected.
The accessories heat up during use. Be careful when replacing or removing them. Do not work with wet feet or hands.
11.1 EXTENSION TUBE (32)
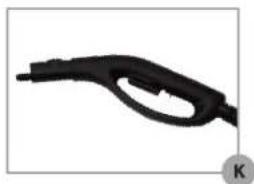
Each accessory can be connected directly to flex tube (31) (picture K) or to extension tube (32) (picture L).
natural_image
Black handheld electric shock absorber (no text or symbols visible)
natural_image
Simple line drawing of a pen-like object with a curved handle, no text or symbols present11.2 TRIANGULAR BRUSH (33) AND RECTANGULAR BRUSH (36)
To use the triangular or rectangular brushes, the brush coupling needs to be attached (37)
- Keep the brush coupling (37) oriented downwards and inserted it into brush (pictures M; O)
- Place the coupling (37) in a working position while rotating upwards (pictures N; Q)
- Connect extension tube (32) or nozzle from flex tube (31) to brush coupling. Press the spring button and insert end of extension tube or nozzle into brush coupling until the spring bottom snaps into its correct position.

natural_image
Person holding a black handheld device with a probe, no visible text or symbols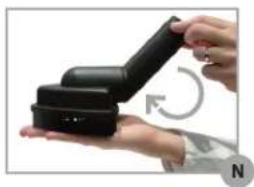
natural_image
Close-up of hands holding a black electronic device with a curved arrow indicating rotation (no text or symbols visible)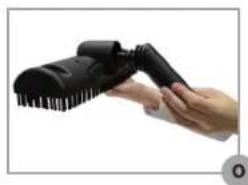
natural_image
Hand holding a black hairdryer brush applying powder (no text or symbols visible)
natural_image
Person using a black cleaning brush to clean or brush the brush (no text or symbols visible)
natural_image
Close-up of hands using a black brush to press or adjust a small object, with an arrow indicating rotation (no text or symbols visible)REMOVING BRUSHES
- Push the spring bottom on the flex tube nozzle (31) or extension tube (32) and pull it out of the brush coupling (37)
- Direct brush coupling (37) downwards and remove the brush from brush coupling.
APPLYING PROTECTIVE CLOTHS

NOTE: Cotton cloths help protect the surfaces to be cleaned from scratches. Dirty cloths can be machine washed.

WARNING!
Cotton cloths become hot during use.
Cloths can be changed only after device has been disconnected.
RECTANGULAR BRUSH (36) - FLOOR WIPER (44X32 CM) (35)
- Place the protective cloth on a flat surface
- Put the brush (36) in the centre of the cotton cloth (35).
- Press the right clamp and insert cloth under the holder. (pictures R; Ra)
- Release the clamp.
- Repeat same procedure for left side.

natural_image
Close-up of hands pressing down on a black foam roller (no text or symbols visible)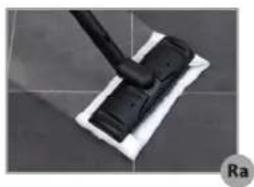
natural_image
Close-up of a black-handled mop on a white surface, with 'Ra' label in corner (no other text or symbols)TRIANGULAR BRUSH (33) - WIPER (22X22CM) (34)
This cotton cloth is specially devised for the triangular brush (33).
- Place the triangular brush (33) on the cloth (34).
- Wrap the cloth around the brush. (picture S; Sa)

natural_image
Close-up of hands using a spray gun to clean a white surface (no text or symbols visible)
natural_image
Close-up of a black brush applying white foam onto a red surface, with 'Sa' watermark in corner (no text or symbols on brush)11.3 SMALL ROUND BRUSH (38)

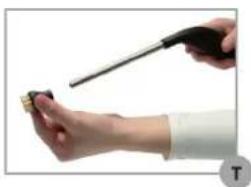
NOTE: use the small brush only with inclined precision head (39).
- Attach the small round brush (38) to the end of the inclined precision head (39). (pictures T; Ta)
- Connect the precision head (39) to the extension tube (32) or directly to the flex tube nozzle (31)
- Press the spring button and insert end of extension tube or nozzle into inclined precision head (39) until the spring bottom snaps into its correct position.
natural_image
Close-up of hands using a handheld tool to apply a small object (no visible text or symbols)
natural_image
Close-up of a black handheld device with a small protrusion and a circular label 'Ta' in the corner (no readable text or symbols on the device itself)11.4 WINDOW WIPER (40)
The window wiper is for easy cleaning of glass and other smooth surfaces

WARNING! When the outside temperature is around freezing point, the glass of the window should be quickly sprayed with steam at a distance of 10 - 20cm . Then spray the steam on the entire surface of the glass to compensate the sudden change in temperature and to avoid pressure on the glass surface. Sudden changes in temperature between the glass of the window and steam may cause the glass to break.
- Connect extension tube (32) or nozzle from flex tube (31) to window wiper (40). Press the spring button and insert end of extension tube or nozzle into window wiper until the spring bottom snaps into its correct position (pictures U; Ua)
- Spray the steam onto window from top to bottom (Picture Ua) by placing the regulator to position 6.
- Remove the dirt with window wiper (40).
- After each application, clean the blade of the window wiper with a clean cloth. Only by cleaning and applying the correct pressure to the blade is it possible to clean the window without smudges.

natural_image
Black T-shaped object with a small protrusion, possibly a tool or component (no text or symbols visible)
natural_image
Close-up of a black-handled tool applying paint to a white surface near a window (no text or symbols visible)
NOTE: Very dirty windows must first be cleaned with the triangular brush (33) or rectangular brush (36) with the cloths (34/35).
12 - IRONING
1 Iron body
2 Steam locking button
3 Iron temperature regulation dial
4 LED temperature indicators
5 Steam push button
6 Iron status LED light
7 Iron power cable with plug
8 Ceramic soleplate
9 Rubber mat
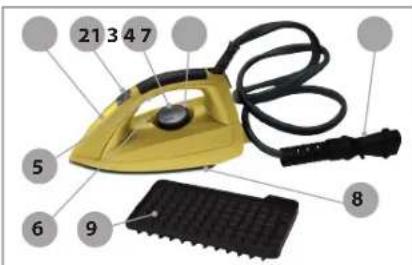
| PART FUNCTION | |
| Rubber mat | Insulated protection to rest the iron on |
| Steam switch (Pressure key) | Steam release during ironing. (Push- button with locking function) |
| Iron status LED light (red) | Shows when the iron is ready for use |
| Iron temperature regulation DIAL | For the adjustment to the required ironing temperature |
| Iron steam cable with plug | For connecting to the steam cleaner |
| Non-stick ceramic coated soleplate | Easier and smoother movements on the fabric surface |
Advantages of non-stick ceramic coated soleplate
- Ceramic does not stick to synthetics or fabric blended with spandex (follow recommended temperatures)
- Ceramic does not create static electricity, so it helps keep synthetics from clinging.
- Ceramic is a good conductor of heat and this helps to distribute it evenly across the surface it covers
TUTTOSTEAMY IS AN EFFECTIVE REMEDY AGAINST MITES

CAUTION!
- Never use with wet hands or feet.
- Always remove the steam cleaner plug from the socket before connecting the iron.
- The steam tube should never come into contact with the sole plate of the iron or any sharp objects or corners.
Only place the iron on the specially-designed base. - Never leave the iron unattended while connected to the appliance.
SUITS
SHIRTS

PULLOVERS


NOTE: Ceramic soleplates can pick up colour from natural fibres and will become darker over time. This will not affect the functionality of the iron.
CONNECTING THE IRON
Pour the water into the boiler (see point 1 of chapter 9 "Filling with water"). (Pictures A + B).
a) Lift the socket cover (11), ensure that the pin is turned upwards and insert it into the socket cover opening. Plug the iron into the socket. Release the socket cover. (picture C).
b) Connect the power cable to the power supply, turn on the main switch (4) and the heating switch (5).
c) Set the desired temperature with the iron temperature regulator (3) (picture D). Set the steam intensity with the steam regulator (10) on the machine to position 3. When the green light comes on (7), it means that the iron is ready for use.

natural_image
Close-up of a hand pressing down on a mechanical component (no visible text or symbols)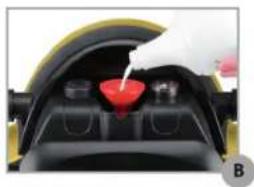
natural_image
Close-up of a hand pouring liquid into a red container with a white plastic lid (no text or symbols visible)
natural_image
Yellow and black compact vacuum cleaner with iron stand (no visible text or symbols)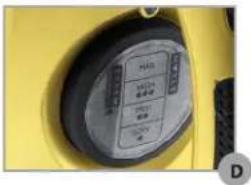
Set the required ironing temperature by turning regulator dial (3), corresponding power LED is switched ON.
| Type of fabric | Temperature setting |
| Synthetic fabric (e.g. acrylic, viscose, polyamide and silk) | ● |
| Wool | ●● |
| Light cotton | ●●● |
| Linen/ cotton | ●●●● |

ATTENTION!
Steam ironing is only possible at a temperature higher than ●● Note: The steam regulator (10) on the main body should be set to position 3.
WARM UP (energy saving function)
Iron status LED light is flashing when the iron is warming up. When required temperature is reached; the red LED diode lights up.
STANDBY (energy saving function)
If the iron is not in use for 30 seconds in horizontal position or 15 minutes in
vertical position, it will automatically go into standby. The iron status LED light and power LED light will flash. To re-activate the iron, just start ironing again.
IRONING WITH THE STEAM IRON

CAUTION!
Follow the ironing instructions are for the laundry or clothes to be ironed. Direct the first steam jet onto a separate cloth. While ironing, only press the steam button at a suitable distance. Let the iron slide lightly over the laundry. No excessive pressure is required. Always iron on an ironing surface that is permeable to steam and heat-resistant. Select the ironing temperature according to the type of material. Follow the instructions on the garment labels. Always iron completely dry laundry to prevent further creases from forming. Iron delicate clothes inside out.
BEFORE STARTING TO IRON
Separate the laundry according to the types of material while checking for any repairs to be made. Also check that all of the laundry is clean, without any stains.

- Ironing at a maximum iron temperature of 200^
• Dampen the material

- Ironing at a maximum iron temperature of 150 °C
- Put a damp cloth between the iron and the garment

- Ironing at a maximum iron temperature of 100 °C
- Put a damp cloth between the iron and the garment

• Textiles are not to be ironed
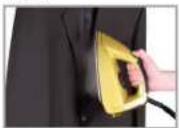
FRESHENING UP CLOTHES

natural_image
Hand using a golden iron on a textured surface, no visible text or symbolsAdjust the required temperature with the temperature regulator (3) of the iron. Set the steam intensity regulator (10) on the main body to 3. Spray steam onto the garment hung at a distance of about 20 cm. For delicate materials, it is recommended that you place a clean cotton cloth over the garment before steam spraying (Picture E).
13 - CLEANING AND MAINTENANCE

NOTE: All maintenance jobs must be carried out only when the appliance is cold and unplugged.

CAUTION!
• Before carrying out any maintenance or cleaning, remove the plug from the socket.
- Do not empty the boiler if there is still hot water inside.
• To prevent the accumulation of limescale, descaling is recommended as follows:
Soft water - every 75 fills
Hard water - every 50 fills
Very hard water - every 30 fills
- When long inactivity is expected, it is recommended that you empty the water out of the boiler.
• Always leave both the equipment and the iron to cool before putting them away.
• Always follow the instructions and keep your appliance in good working condition.
- If the appliance is lent to other people, always supply the instruction manual with it.
CLEANING
- Clean the outside of the appliance with a damp cloth. Avoid using solvents or detergents.
- Never use solvents as they could damage the plastic areas of the appliance.
• Clean the iron sole plate when still warm using specific products and a dry cloth.
• Clean the accessories using only water. - Leave the cleaned brushes to dry with their bristles facing upwards to prevent warping.
DESCALING THE BOILER (USING THE DESCALER)
Special descaler - STOP-CALC can be purchased separately under item code PWC-300-57).
Please contact ZEPTER sales personal to order STOP-CALC.
The descaler prevents limescale from forming on the components of the appliance and in the pipes which come into contact with steam.

ATTENTION!
If STOP-CALC PWC-300-57 is used, follow next recommendations.
Do not swallow. Do not mix with other substances. If the product comes into contact with the eyes or face, wash with plenty of water. Store in its original container, keeping it tightly closed.
Keep out of the reach of children. The appliance cannot be used as long as the liquid is inside the boiler.
| Classification | Hardness in mg/L | Hardness in dGh/°dH |
| Soft | 0-60 | 0.3-3.00 |
| Moderately hard | 61-120 | 3.72-6.75 |
| Hard | 121-180 | 6.78-10.08 |
| Very Hard | ≥ 181 | ≥ 10.14 |
1dGH=10mg/L CaO (Calcium oxide) = 17.848 ppm
Recommended descaling frequency:
Soft water - every 75 fills
Hard water - every 50 fills
Very hard water - every 30 fills
• To find out the water hardness in your area, contact your municipal authorities or water utility company
1) Pour about 1 litre of hot water into the appliance
2) Pour the contents of HALF the bag provided and allow the solution to work for about 8 hours.
3) Do not close the cap.
4) Rinse the boiler twice or 3 times after descaling to remove any residues. To empty the boiler, turn the device upside down and let the water drain out.
- The contents of the bag provided is enough for two descaling operations.
5) It is recommended to using only Zepter descaler.
- To ensure the effective and long life of the appliance, the boiler is best descaled according to the following table of dGH-degrees of general hardness.
14 - TROUBLESHOOTING

DANGER!
- Repairs must only be performed by a Zepter Service Centre and in accordance with national and local safety regulations. Unauthorised repairs could cause injury or machine damage. The manufacturer cannot be held responsible for unauthorised repair work.

NOTE: Despite proper use of the appliance, problems may occur. The following table shows some of the possible problems and their corresponding solutions. Should our advice not assist, please contact your local Authorized Service Centre.
| ISSUE CAUSE SOLUTION | ||
| The flow of steam does not come out regularly and is accompanied by water spray. | The boiler has been filled with too much water. | Unscrew the safety valve, turn the device up side down and drain the excess water. Be careful not to overfill the appliance (max 1.6 litres). |
| The steam cleaner is ready for use but no steam is released. | The steam plug has not been correctly attached. | Check the plug has been correctly inserted into the steam socket. |
| The steam intensity regulator is in its closed position (0). | Turn the steam intensity regulator to the open position 1-6. | |
| The accessory is clogged. | Check the accessories. | |
| An accessory becomes detached during use. | The accessory has not been properly connected. | Connect the accessory properly. |
15 - USE OF ACCESSORIES
| 31 | 36 | 33 | 40 | 39 | 32 | 38 | 34 | 35 | |
| PARQUET | √ | √ √ | √ √ | ||||||
| WOOD | √ √ | √ √ √ | |||||||
| LINOLEUM | √ √ | √ √ √ | |||||||
| MARBLE/ STONE | √ √ | √ √ √ | |||||||
| CERAMIC | √ √ | √ √ √ | |||||||
| SKIRTING BOARDS | √ √ | √ √ √ | |||||||
| CRACKS | √ √ | √ √ √ | |||||||
| CREVICES | √ √ | √ √ √ | |||||||
| SHUTTERS | √ √ | √ √ √ | |||||||
| RUGS | √ √ | √ √ √ | |||||||
| UPHOLSTERY | √ √ | √ | |||||||
| COUCHES | √ √ | √ | |||||||
| WINDOWS | √ √ | √ | |||||||
| DELICATE FURNITURE/LACQUERED SURFACES | √ √ | √ √ √ | |||||||
| PLASTIC COATED | √ √ | √ √ √ |
ACCESSORIES
29 Domestic iron
30 Rubber mat
31 Flex tube with plug
32 Extension tube
33 Triangular brush
34 Towel wipe 22x22 cm
35 Floor wiper 44x32 cm
36 Rectangular brush
37 Brush coupling
38 Small round brush D.30
39 Inclined precision head
40 Window wiper/suction
41 Hook for extension pipe
42 Screws for hook
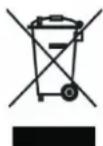
At the end of its lifecycle, we recommend making the machine safe by cutting off the power cord. Do so only after unplugging it from the mains! In accordance with art. 13 of Legislative Decree no. 151 dated 25 July 2005, the implementation of European Directives 2002/95/EC, 2002/96/EC and 2003/108/EC on the reduced use of hazardous substances in electrical and electronic equipment, and their disposal, the barred bin symbol means that at the end of its useful life the product must be disposed of separately from
ordinary waste. At the end of its useful life, therefore, the user must dispose of the appliance at the appropriate differentiated waste collection centres for electronic and electro-technical waste, or alternatively return it to the retailer to dispose of appropriately upon purchasing a new equivalent appliance, under the one-for-one rule.
17 - WARRANTY STATEMENT
This appliance can only be assigned to the functions it has been designed for, i.e. house cleaning and air enhancement. The maker cannot be held responsible for any damage deriving from improper, incorrect or unreasonable use. All our appliances have undergone strict inspection tests and are guaranteed against manufacturing defects. The guarantee starts from the date of purchase. The date of purchase is the date shown on the invoice issued by the dealer upon the delivery of the appliance. The warranty period is applicable in accordance with local national law and regulations in force.
The manufacturer undertakes to repair or replace cost-free within the guarantee period those parts that prove to have manufacturing defects. Any defects that are not clearly attributable to either the material or the manufacturing process will be examined at one of our Technical Service Centres or at our headquarters and charged for accordingly.
The Warranty is only valid if:
1 The machine shows material or product defects.
2. No signs of damage by the customer or original pieces fitted by other people are found.
3. Original accessories have been used.
4. The machine has not been overloaded or damaged.
5. The device is regularly cleaned and maintained according to the manufacturer's instructions (chapter 13 - Cleaning and maintenance)
The Warranty does not include:
- Parts subject to normal wear and tear.
- Damage caused by transport, inappropriate use, negligence, incorrect installation and use, non-conformity with the warnings listed in the machine catalogue.
- Consumables.
This guarantee does not affect the consumer's statutory rights under current applicable national legislation, nor does it affect the consumer's rights in relation to the retailer arising from the sales/purchase agreement. In the absence of applicable national legislation, this guarantee will be the consumer's sole and exclusive legal remedy, and the manufacturer shall not be liable for any incidental or consequential damage due to the breach of any express or implied guarantee of this product. The liability of the manufacturer is limited to, and shall not exceed, the original purchase price of the product paid by the consumer.
This guarantee covers no damage to the product resulting from abuse or misuse of the product, inappropriate packaging, accidents, maintenance and repairs carried out by unauthorised centres.
If, after the purchase of the product, its label with the serial number has been removed or is not recognisable, the manufacturer reserves the right to refuse the guarantee service.
- - OVERVIEW OF TUTTOSTEAMY - PWC-301
- LIST OF ACCESSORIES
- - FUNCTIONS AND FEATURES
- You can use TUTTOSTEAMY on different surfaces
- STEAM CLEANING: HEALTHY AND POWERFUL
- EN
- - CONTROL PANEL
- - SAFETY FEATURES
- - TECHNICAL DATA
- DATA PLATE CHARACTERISTICS
- Technical characteristics
- - WARNINGS
- - CLEANING - PRACTICAL ADVICE
- WARNING!
- NOTE:
- - STEAM CLEANING - PRACTICAL ADVICE
- WORKING WITH STEAM CLEANING
- TUTTOSTEAMY IS AN EFFECTIVE REMEDY AGAINST MITES
- - GETTING STARTED
- ATTENTION!
- FILLING WITH WATER
- ATTENTIONI Fill TUTTOSTEAMY with filtered water (from ZEPTER water filtration systems) or with tap water with a low mineral content (soft water).
- CONNECTING OR REMOVING THE FLEX TUBE (31)
- CONNECTING THE ACCESSORIES
- CONNECTING TUTTOSTEAMY
- DISCONNECTING TUTTOSTEAMY
- - WATER RE-FILL
- - USAGE OF ACCESSORIES
- CAUTION!
- EXTENSION TUBE (32)
- TRIANGULAR BRUSH (33) AND RECTANGULAR BRUSH (36)
- REMOVING BRUSHES
- APPLYING PROTECTIVE CLOTHS
- RECTANGULAR BRUSH (36) - FLOOR WIPER (44X32 CM) (35)
- TRIANGULAR BRUSH (33) - WIPER (22X22CM) (34)
- SMALL ROUND BRUSH (38)
- WINDOW WIPER (40)
- - IRONING
- Advantages of non-stick ceramic coated soleplate
- CONNECTING THE IRON
- WARM UP (energy saving function)
- STANDBY (energy saving function)
- IRONING WITH THE STEAM IRON
- BEFORE STARTING TO IRON
- FRESHENING UP CLOTHES
- - CLEANING AND MAINTENANCE
- CLEANING
- DESCALING THE BOILER (USING THE DESCALER)
- - TROUBLESHOOTING
- DANGER!
- ACCESSORIES
- - WARRANTY STATEMENT
- The Warranty is only valid if:
- The Warranty does not include:
Brand : Zepter
Model : TuttoSteamy PWC-301
Category : Steam cleaner