
LED5501 - Television Manta - Free user manual and instructions
Find the device manual for free LED5501 Manta in PDF.


| Product Type | LED TV |
| Brand | Manta |
| Model | LED5501 |
| Screen Size (Diagonal) | 55 inches |
| Resolution | 3840 x 2160 (4K UHD) |
| Aspect Ratio | 16:9 |
| Refresh Rate | 60 Hz |
| Backlight Type | Direct LED |
| Smart TV Platform | Android TV |
| Connectivity | HDMI x3, USB x2, AV, LAN, Wi-Fi, Bluetooth |
| Audio Output | 2 x 8W Speakers |
| Power Consumption (Typical) | 120 W |
| Standby Power Consumption | <0.5 W |
| Energy Class | A+ |
| Dimensions with Stand (W x H x D) | 1240 x 770 x 250 mm |
| Dimensions without Stand (W x H x D) | 1240 x 720 x 90 mm |
| Weight with Stand | 14.5 kg |
| Weight without Stand | 14.0 kg |
| VESA Mount Standard | 400 x 200 mm |
| Tuner | DVB-T2/C/S2 |
| Remote Control | Included (IR) |
| Maintenance & Cleaning | Wipe with dry soft cloth; avoid liquids |
| Safety | Do not expose to moisture; keep ventilation slots clear |
| Spare Parts & Repairability | Contact Manta support for spare parts |
Frequently Asked Questions - LED5501 Manta
User questions about LED5501 Manta
0 question about this device. Answer the ones you know or ask your own.
Ask a new question about this device
Download the instructions for your Television in PDF format for free! Find your manual LED5501 - Manta and take your electronic device back in hand. On this page are published all the documents necessary for the use of your device. LED5501 by Manta.
USER MANUAL LED5501 Manta
natural_image
Abstract black-and-white circular logo with interlocking curved shapes (no text or symbols)MANTA
LED TV
LED5501
natural_image
Black-and-white photo of a butterfly perched on a flower with buds (no text or symbols visible)natural_image
Technical line drawing of an open computer chassis showing internal components and connectors (no text or symbols)
natural_image
Technical line drawing of an open computer monitor chassis showing internal components and mounting brackets (no text or labels)natural_image
Close-up of a dark, curved object with a gray arrow pointing to it (no text or symbols visible)natural_image
Two black rectangular objects, one with a ventilation grille and the other a small rectangular object (no text or symbols visible)natural_image
Close-up of a dark, elongated object with a gray arrow pointing to it (no text or symbols visible)
natural_image
Black-and-white photo of a butterfly on a flower with measurement annotations (30°, 30°, 7m) below, no readable text or symbols on the image itself.
bar
PICTURE | Picture Mode | Standard | Current Value | |---|---|---| | Contrast | 50 | 50 | | Brightness | 50 | 50 | | Colour | 50 | 50 | | Tint | 50 | 50 | | Sharpness | 50 | 50 | | Contrast Booster | On | | | Colour Temperature | Normal | |bar
PICTURE | Picture Mode | Standard | Value | |---|---|---| | Contrast | 50 | 50 | | Brightness | 50 | 50 | | Colour | 50 | 50 | | Tint | 50 | 50 | | Sharpness | 50 | 50 | | Contrast Booster | On | | | Colour Temperature | Normal | || APPLICATIONS | |
| Channel | Enter |
| Channel Options | Enter |
| Country | Russia |
| DTV Type | Terrestrial |
| Auto Tuning | Enter |
| ATV Manual Tuning | Enter |
| DTV Manual Tuning | Enter |
| Common Interface | Enter |
| PREFERENCES | |
| Menu Language | English |
| Teletext Language | English |
| Key Lock | Off |
| PC Settings | Enter |
| Energy Saving Setting | Enter |
| PIN Setting | Enter |
| Parental Control | Enter |
Energy Saving Settings

Zmiana kodu PIN (Change Pin Code)
| Hotel Mode | On |
| Panel Lock | Off |
| Setup Menu Lock | Off |
| Max Volume | 100 |
| Default Volume | Off |
| Volume | 30 |
| Picture Mode | Standard |
| Power on Source | Disabled |
USTAWIENIA (SETUP)
High voltages are used in the operation of this product. to reduce the risk of electric shock, do not remove cover of the cabinet, refer servicing to qualified service personal
If the TV any changes or coarse adjustment, electric shocks to be hurt, do not attempt to open a machine-maintenance, customer contact centres needed overhaul.

The exclamation point within an equilateral triangle is intended to alert the user to the presence of important operating in the literature accompanying the appliance.

natural_image
Warning symbol of a lightning bolt inside a triangle (no text or numbers)Warning The lightning flash with arrowhead symbol within an equilateral triangle, is intended to alert the user to the presence of uninsulated dangerous voltage within the products enclosure that may be of sufficient magnitude to constitute a risk of electric shock to persons.
Important Safety Precautions
- Read these instructions.
- Keep these instructions.
- Heed all warnings.
- Follow all instructions.
- Do not use this apparatus near water.
- Clean only with dry cloth.
- Do not block any ventilation openings. Install in accordance with the manufacturer's instructions.
- Do not install near any heat sources such as radiators, heat registers, stoves, or other apparatus (including amplifiers) that produce heat.
- Do not defeat the safety purpose of the polarized or grounding-type plug. A polarized plug has two blades with one wider than the other. A grounding type plug has two blades and third grounding prong. The wide blade or third prong are provided for your safety. When the provided plug does not fit into your outlet, consult an electrician for replacement of the obsolete outlet.
- Protect the power cord from being walked on or pinched, particularly at plugs, convenience receptacles, and the point where they exit from the apparatus.
- Only use attachments/accessories specified by the manufacturer.
- Use only with the cart, stand, tripod, bracket, or table specified by the manufacturer, or sold with the apparatus. When a cart is used caution when moving the cart/apparatus combination to avoid injury tip-over.
- Unplug this apparatus during lightning storms or when unused for long periods of time.
- Refer all servicing to qualified service personnel. Servicing is required when the apparatus has been damaged in any way, such as power-supply cord or plug is damaged, liquid has been spilled or objects have fallen into the apparatus, the apparatus has been exposed to rain or moisture, does not operate normally, or has been dropped. Warning to reduce the risk of fire or electric shock, do not expose this apparatus to rain or moisture.
- The apparatus shall be disconnected from the mains by placing the power/standby switch in the standby position and unplugging the power cord of the apparatus from the AC mains receptacle.
- The socket-out shall be installed near the equipment and shall be easily accessible.
- This product should never be placed in a built-in installation such as a bookcase or rack unless proper ventilation is provided or the manufacturer's instructions have been adhered to.
- Apparatus shall not be exposed to dripping or splashing.
- Do not place any sources of danger on the apparatus (e.g. liquid filled objects, lighted candles).
- Wall or Ceiling Mounting - The appliance should be mounted to a wall or ceiling only as recommended by the manufacturer.
- Never place the TV, remote control or batteries near naked flames or other heat sources, including direct sunlight. To prevent the spread of fire, keep candles or other flames away from the TV, remote control and batteries at all times.
- The USB terminal should be loaded with 0.5 A under normal operation.
TV Bracket assemble
Fix the TV on the wall
- First, put the TV on the table smoothly and put some soft cloth on the table to avoid scratching the screen.
- User the screw driver to take off the screws which are fixed on the bottom stand (the direction of the arrow, refer to the ptoto1). And take off the bottom stand (please take off the screws and bottom stand carefully).
- Make one bracket which can fix on the wall according to the size of arrow direction of photo2 and photo3.
- Drill four holes properly on the wall (the size only for reference) and put into four screws.(optional parts) Drill four holes properly on the wall (the size only for reference) and put into four screws.(optional parts)
- according to the step 4, use the screwdriver to lock the screw on the back of the TV. then hang the TV on the wall.

natural_image
Top-down schematic of a computer monitor layout showing front, top, and side views (no text or labels)1

natural_image
Top-down schematic of a room layout with furniture and fixtures (no text or labels)2

flowchart
graph TD
    A["●"] --> B["●"]
    B --> C["●"]
    C --> D["●"]
    D --> A
    style A fill:#fff,stroke:#000
    style B fill:#fff,stroke:#000
    style C fill:#fff,stroke:#000
    style D fill:#fff,stroke:#000
3

Note:
- The bracket fixed on the wall is optional part.
- when you assemble the TV, there should be no other articles on the around and front and please keep the distance from other articles.
- When assemble the TV, please ask the career man to fix in order to avoid the danger.
- The fixing picture is only for reference.
- Please follow the use manual about bracket assemble to fix the TV.
- Attach the mounting bracket from the VESA compatible wall mounting kit.
TV Buttons And Terminal Interface
TV Buttons
Note: The following is only functional schematic, And the actual position and arrangement of different models may be different.
VOL+
VOL -
CH+
CH-
MENU
SOURCE

(1):Turn ON/OFF Power.
SOURCE: External Signal Input Selection.
MENU: Display Main MENU And Confirm MENU Item Selection.
CH+/-:Selecting Channel.
VOL+/-:Adjusting Volume.
Terminal Interface
Note: The following are the various terminal interface, the actual position and arrangement, the number of different models may be different.
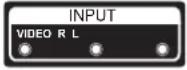 | AV inputExternal AV Signal Input AndRelevant Rith/Left Sound Channel | 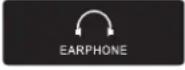 | EARPHONE outputWhen earphones are plugged in,speakers are disabled |
 | CI SLOTThe card reader input CI(common interface) this requires CAM (conditional access module) used for pay TV. |  | USB inputConnect a USB device here to play its media files or to recordprograms via the PVR function. |
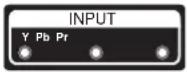 | Y Pb Pr inputConnect to the composite terminal of your DVD/VCR (Some models without this interface) | 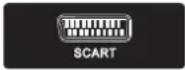 | SCART inputstandard,it supports composite and RGBsignal input.It is a connection for european (Some models without this interface) |
 | HDMI inputDigital signal input from HDMI video connector. |  | SPDIFConnect the SPDIF receiver. |
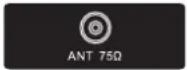 | ANT 75Connect the antennal/cadle tv input (75/VHF/UHF) | ||
 | VGA inputPC analog signal input | ||
 | PC AUDIO INPUTVGA input and audio input when VGA input |
External device connection diagram

flowchart
graph TD
    A["DVD"] --> C["Set-top boxes"]
    B["HDMI"] --> C
    C --> D["AV input connection"]
    D --> E["AV input connection"]
    E --> F["Output 1"]
    E --> G["Output 2"]

Install and connect TV

3
2
1
Set your TV
To put your TV in a firm place which can bear the weight of the TV. To avoid danger, please don't expose the TV near water or heating place (such as light, candle, heating machine), do not block the ventilation at the back of TV.
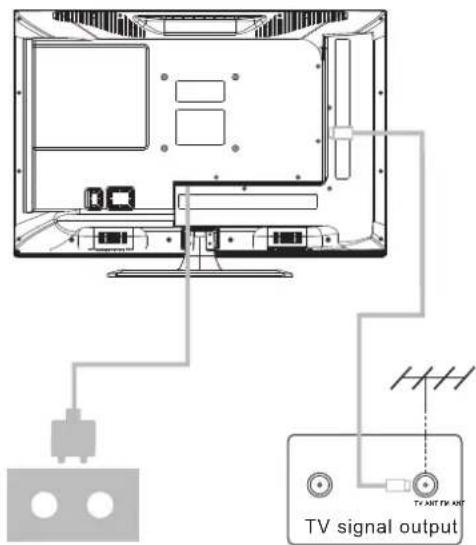
Connect antenna and power
- Connect the antenna cable to the antenna socket on the back of the TV.
- To plug the power cord of TV (AC 100-240V\~50/60Hz).
Turn on TV
- Press the power button of the TV the indication light will turn to green. if it is on standby mode (the light is red), press the power button on the remote control to turn on the TV.
Note:
Picture for reference purposes only.
TV Stand Installation Instructions
1- Place the stands into their own slots under the device.
2- Fasten the stand to the device with screw.

natural_image
Technical line drawing of a computer monitor rear panel with visible internal components and connectors (no text or labels)
natural_image
Technical line drawing of an open computer chassis showing internal components and mounting brackets (no text or symbols)Note:
Picture for reference purposes only. Please prevail in kind
REMOTE CONTROL INSTRUCTIONS

POWER: Press the TV on and standby.
MUTE: Press to mutes the sound.
NUMBER: Numeric buttons for direct channel access.
-/--/: Call up the program table.
CD : go back to the last viewed channel.
AUDIO: Switch the audio channel in DVD or multimedia mode.
FAV: Press to display the favorite channel list which you stored before.
FAV+ or FAV-: Scans up or down through the current favorite channel list.
CHANNEL “+” “-”: Press to change the TV channels.
VOL “+” “-”: Press to increase or decrease the volume.
P.MODE: Press to select the picture mode.
S.MODE: Press to select the sound mode.
SLEEP: Press to select a preset time interval for automatic shut off.
ASPECT:Aspect Ratio.
SOURCE : Press to display the input source menu.
INFO : Displays the current input information.
◀▶ ▲▼: Use to select on-screen menu items and change menu values.
OK: Enter and conform button.
MENU: Press to display the OSD menu.
EXIT: Exit the menu
TEXT: To enter Teletext mode
INDEX: To display the index page
MIX: TV and TXT picture are mixed together in transparent background.
REVEAL: Teletext mode-To reveal or hide the hidden words.
HOLD: Teletext mode-Hold current page which is displayed.
SUBPAGE: Sub coded page access.
SIZE: Change the size of display in Teletext mode.
CANCEL: To cancel the display.
▶II: PLAY/PAUSE
■:STOP
◀: Fast return key
▶:Fast forward key
◀: Previous key
▶: Next key
T-SHIFT: Press to activate Time Shift function in Digital TV mode, for delayed viewing.
TV/RADIO: When watching a channel, allows you switch between TV and Radio modes.
REC: Presonal video record button.
EPG: Shows Electronic Program Guide.
Colour buttons: Channel Edit
Function Description
Picture Menu
The picture is for a reference only; the actual item is the standard.
Press TV MENU button to display the main menu.
Press ▲/▼ button to select Picture in the main menu, and then press ENTER button to enter.

bar
PICTURE | Picture Mode | Standard | Normal | |---|---|---| | Contrast | 50 | 50 | | Brightness | 50 | 50 | | Colour | 50 | 50 | | Tint | 50 | 50 | | Sharpness | 50 | 50 | | Contrast Booster | On | | | Colour Temperature | Normal | |- Press ▲/▼ button to select the option that you want to adjust in the Picture menu, and then press ENTER button or ▶ button to enter.
- Press ◀/▶ button to adjust or press ▲/▼ button to select. And press ENTER button to select the sub menu.
- After finishing your adjustment, press MENU button to save and return back to the previous menu, and press EXIT button to exit the entire menu.
Picture Mode
Press ▲/▼ button to select Picture Mode, then press ENTER button to enter and press ◀/▶ button to select.
You only can change the value of brightness, contrast, sharpness, color, when the picture is in User mode.
TIPS: You can press P-MODE button on the remoter control again and again to change the picture mode directly.
Picture Mode
Standard
Contrast
Press ▲/▼ button to select Contrast, then press ENTER button to enter and press ◀/▶
button to adjust. Then press MENU button to return back the previous menu directly.
Brightness
Press ▲/▼ button to select Brightness, then press ENTER button to enter and press ◀/▶ button to adjust. Then press MENU button to return back the previous menu directly.
Colour
Press ▲/▼ button to select Colour, then press ENTER button to enter and press ◀/▶ button to adjust. Then press MENU button to return back the previous menu directly.
Tint
Press ▲/▼ button to select Tint, then press ENTER button to enter and press ◀/▶ button to adjust. Then press MENU button to return back the previous menu directly.
Sharpness
Press ▲/▼ button to select Sharpness, then press ENTER button to enter and press ◀/▶ button to adjust. Then press MENU button to return back the previous menu directly.
Contrast Booster
Press ▲/▼ button to select Contrast Booster, then press ENTER button to enter and press ◀/▶ button to select On or Off. Then press MENU button to return back the previous menu directly.
Colour Temperature
Press ▲/▼ button to select Colour Temperature, then press ENTER button to enter and ◀/▶ button to select Standard, Cool, Warm.
DNR
Press ▲/▼ button to select DNR, and then press ENTER button to enter and ◀/▶ button to select Off, Low, Middle, High.
Reset
Press ▲/▼ button to select Reset, then press ENTER button to enter the confirm menu, and then choose OK to reset the value.
SOUND Menu
The picture is for a reference only; the actual item is the standard.
Press MENU button to display the main menu.
Press ▲/▼ button to select Sound in the main menu, and then press ENTER button or ▶ button to enter.

bar
SOUND | Sound | Stable Sound | Standard | | :--- | :--- | :--- | | Bass | 50 | 50 | | Treble | 50 | 50 | | Balance | 0 | 0 | | Surround | Off | Off | | AVL | Off | Off | | Digital Audio Output | PCM | PCM | | Reset | Enter | Enter |- Press ▲/▼ button to select the option that you want to adjust in the Sound menu, then press ENTER button to enter.
- press ◀/▶ button to adjust or press ▲/▼ to select, and press ENTER button to select submenu.
- After finishing your adjustment, Press MENU button to save and return back to the previous menu, or press EXIT button to exit the entire menu.
Sound mode
Press ▲/▼ button to select Sound mode, and then press ENTER button to enter. And then press ◀/▶ button to select.
You can change the value of bass and treble, Balance and EQ, when the sound is in User mode.
TIPS: You can press S-MODE button on the remote control to change the Sound Mode directly.
Sound Mode
Standard
Bass
Press ▲/▼ button to select Bass, then press ENTER or ▶ button to enter and press ◀/▶ button to adjust. It can only be adjusted under user mode. Then press MENU button to return
back the previous menu directly.
Treble
Press ▲/▼ button to select Treble, then press ENTER button to enter and press ◀/▶ button to adjust. It can only be adjusted under user mode Then press MENU button to return back the previous menu directly.
Balance
Press ▲/▼ button to select Balance, then press ENTER button to enter and press ◀/▶ button to adjust. Then press MENU button to return back the previous menu directly.
Surround
Press ▲/▼ button to select Surround, and then press ENTER button to enter and press ◀/▶ button to select ON or OFF.
AVL
Press ▲/▼ button to select AVL, and then press ENTER button to enter and press ◀/▶ button to select ON or OFF.
Digital Audio Output
Press ▲/▼ button to select Digital Audio Output, then press ENTER button to enter and press ◀/▶ button to select.
Then press ENTER button or ▶ button to enter and press ◀/▶ button to adjust, then press MENU button to return back the previous menu directly.
Reset
Press ▲/▼ button to select Reset, then press ENTER button to enter RESET menu.
APPLICATIONS
The picture is for a reference only; the actual item is the standard.
Press MENU button to display the main menu.
Press ▲/▼ button to select APPLICATIONS in the main menu, and then press ENTER button to enter.
 |  |  |  |  |
| APPLICATIONS | ||||
| Channel | Enter | |||
| Channel Options | Enter | |||
| Country | Russia | |||
| DTV Type | Terrestrial | |||
| Auto Tuning | Enter | |||
| ATV Manual Tuning | Enter | |||
| DTV Manual Tuning | Enter | |||
| Common Interface | Enter | |||
- Press ▲/▼ button to select the option that you want to adjust in the APPLICATIONS menu, and then press ENTER button to enter.
- Press ◀/▶ button to select and press ENTER button to select the sub menu.
- After finishing your adjustment, press MENU button to save and return back to the previous menu, or press EXIT button to exit the entire menu.
Channel
Press ▲/▼ button to select Channel, and then press ENTER button to play the channel selected. The menu will appear as follows:
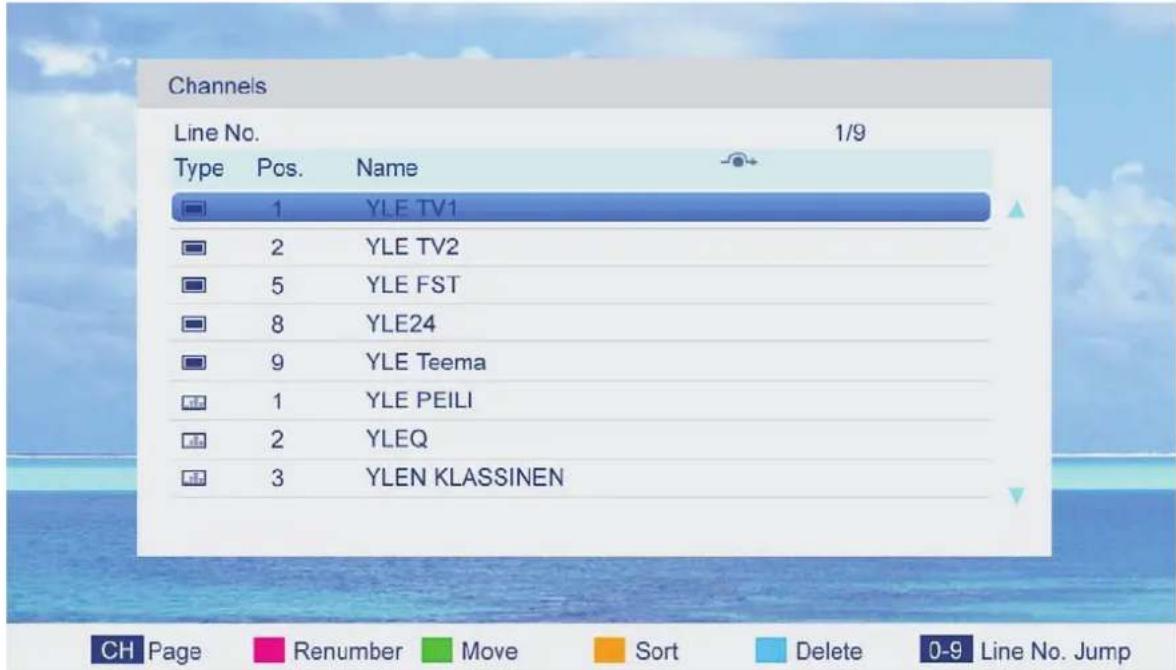
Key Description:
CH button: Press CH+ or CH- to turn the page.
RED button: Press this button to modify the channel number.
GREEN button: Press this button to move down the channel.
YELLOW button: Press this button to the order to restore the default channel.
GREEN button: Press this button to delete the channel selected.
0-9 button: Press these buttons to jump to the appropriate channel by inputting different channel number.
Channel Options
Press ▲/▼ button to select Channel Options, and then press ENTER button to the channel List menu. The menu will appear as follows:

Key Description:
CH button: Press CH+ or CH- to turn the page.
RED button: Press this button to set the favorites channels.
GREEN button: Press this button to lock the channel.
YELLOW button: Press this button to skip the channel, if the channels already skipped, press YELLOW button again will cancel skip.
Country
Press ▲/▼ button to select Country, and then press ◀/▶ button to select which area you stay.
DTV Type
Press ▲/▼ button to select DTV Type, then press ◀/▶ button to select.
(Available DTV Type: Cable, Terrestrial)
Auto Tuning
Press ▲/▼ button to select Auto Tuning, and then press ENTER button to enter (When the System Lock is on, please input the PIN code to unlock).
Select to open the auto searching page, and press Enter button to start the scan.
DEFAULT CODE:0000
ATV Manual Tuning
Press ▲/▼ button to select ATV Manual Tuning, and then press ENTER button to start the scan.
DTV Manual Tuning
Press ▲/▼ button to select DTV Manual Tuning, and then press ENTER button to start the scan.
Common Interface
Press ▲/▼ button to select Common Interface, and then press ENTER button to display the CI slot Information.
PREFERENCES
The picture is for a reference only; the actual item is the standard.
Press MENU button to display the main menu.
Press ▲/▼ button to select PREFERENCES in the main menu, and then press ENTER or ▶ to enter.

natural_image
Five icons on a blue background: monitor, speaker, printer, progress bar, and wrench (no text or symbols)PREFERENCES
| Menu Language | English |
| Teletext Language | English |
| Key Lock | Off |
| PC Settings | Enter |
| PIN Setting | Enter |
| Parental Control | Enter |
| Auto Power Down | 4 hours |
- Press ▲/▼ button to select the option that you want to adjust in the PREFERENCES menu, then press ENTER to enter.
- Press ◀/▶ button to adjust or press ▲/▼ button to select.
- After finishing your adjustment, press MENU button to save and return back to the previous menu and press EXIT button to exit the entire menu.
Menu Language
Press ▲/▼ button to select Menu Language, then press ENTER or ▶ button to enter the sub menu, then press ▲/▼ button to select, then press ENTER or ▶ button to confirm.
Teletext Language
Press ▲/▼ button to select Teletext Language, then press ENTER or ▶ button to enter the sub menu, then press ▲/▼ button to select, then press ENTER or ▶ button to confirm.
Key Lock
Press ▲/▼ button to select Key Lock, then press ENTER button to enter and press ◀/▶ button to select ON or OFF.
PC Settings
Press ▲/▼ button to select PC Settings, then press ENTER to enter the sub menu. Then Press ▶ to enter, then press ENTER or ▶ to confirm. (When the PC signal is connected).
PIN Setting
Press ▲/▼ button to select PIN Setting, then press ENTER button to enter the sub menu, and than you can set a password.
Parental Control
Press ▲/▼ button to select Parental Control, then press ENTER or ▶ button to enter the sub menu. Then press ▲/▼ button to select Rate (From4-17, or None). Then press ENTER or ▶ button to confirm.
Change Pin Code
Press ▲/▼ button to select Change Pin Code, then press ENTER to enter and Change Pin Code menu will appear as follows:
Input old password at "Old Password", (if the old password is incorrect, the password will not be allowed to modify.)
Input new password at "New Password".
Input new password again at "Confirm New Password", if new password and confirm new password consistent, the successfully updated menu will appear a few second, otherwise, the menu will display the password mismatch.
Auto Power Down
Press ▲/▼ button to select Auto Power Down and press ◀/▶ button to select OFF/1 hours/2 hours/3 hours/4 hours
Hotel Mode
Choosing the ▲ / ▼ select the menu item Hotel Mode, then go to the sub-menu, press ENTER to enter the sub-menu and activate the selected item:
Hotel Mode Settings
| Hotel Mode | On |
| Panel Lock | Off |
| Setup Menu Lock | Off |
| Max Volume | 100 |
| Default Volume | Off |
| Volume | 30 |
| Picture Mode | Standard |
| Power on Source | Disabled |
SETUP
The picture is for a reference only; the actual item is the standard.
Press MENU button to display the main menu.
Press ▲/▼ button to select Setup in the main menu, then press ENTER to enter.
| SETUP | |
| OSD Timer | Off |
| Cinema | Super Live |
| Blue Screen | On |
| Sleep Timer | Off |
| Location | Home |
| Quick Setup | Enter |
| Upgrade | Enter |
| Channel Details | Enter |
| Reset TV | Enter |
- Press ▲/▼ button to select the option that you want to adjust in the Setup menu, then press ENTER or ▶ button to enter.
- Press ◀/▶ button to adjust or press ▲/▼ button to select.
- After finishing your adjustment, press MENU button to save and return back to the previous menu and press EXIT button to exit the entire menu.
OSD Timer
Press ▲/▼ button to select OSD Timer, and then Press ◀/▶ button to select. (Available OSD Timer: 10 S, 20 S, 30S, 40S, 50S, 60S, off), then press ENTER button to confirm.
Cinema
Press ▲/▼ button to select Cinema, and then Press ◀/▶ button to select. (Available Cinema: Auto, 4x3, Wide, Super Live), then press ENTER button to confirm.
Blue Screen
Press ▲/▼ button to select Blue Screen, then press ◀/▶ to select On or Off. Then press ENTER to confirm.
Sleep Timer
Press ▲/▼ button to select Sleep Timer, and then Press ◀/▶ button to select. (Available Sleep Timer: 00:15, 00:30, 01:00, 01:30, 02:00, off), then press ENTER button to confirm.
Location
Press ▲/▼ button to select Location, and then Press ◀/▶ button to select Home or Store, then press ENTER button to confirm.
Quick Setup
Press ▲/▼ button to select Quick Setup, and then Press then press ENTER button to enter the sub menu, enter the password if locked, and then you can quickly make some basic settings of the TV.
Upgrade
Press ▲/▼ button to select Upgrade.
Channel Detaile
Press ▲/▼ button to select Channel Detaile.
Reset TV
Press ▲/▼ button to select Reset TV, and then press ENTER to enter the sub menu, enter the password if locked, and then you can restore factory settings.
Shopping Mode
Press ▲/▼ button to select Shopping Mode.
Multimedia
MEDIA OPERATION
The picture is for a reference only; the actual item is the standard.
Note: Before operation MEDIA menu, Plug in USB device or memory card, then press SOURCE button to set the Source to Media.
Press ▲/▼ button to select MEDIA in the Source Menu, and then press ENTER or ▶ to enter. You can also enter the Media by pressing MEDIA button on the remote control.

- Press ▲/▼ button to select the option that you want to adjust in the Media menu, then press ENTER or ▶ button to enter.
- Press ◀/▶ button to adjust or press ▲/▼ button to select.
- After finishing your adjustment, press MENU button to save and return back to the previous menu and press EXIT button to exit the entire menu.
Photo
The picture is for a reference only; the actual item is the standard.
Press ◀/▶ button to select Music in the main menu, and then press ENTER button to enter.
Press EXIT button to return back to the previous menu.

Press ▲/▼ to select the photos, press ENTER or ▶ || button to view.
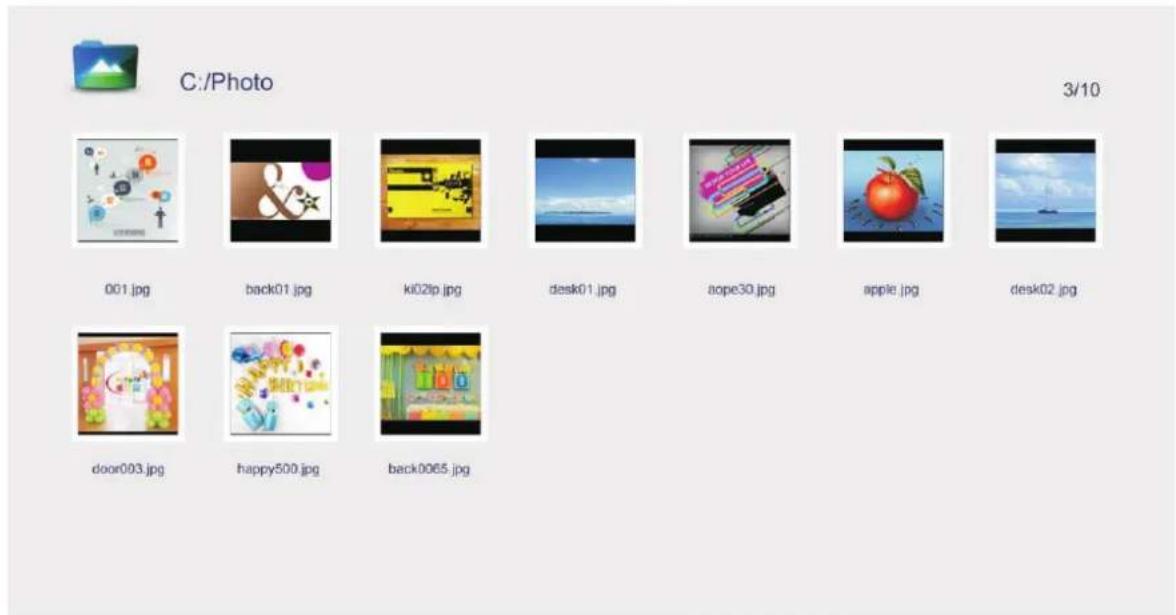

Select

Features

Page
You can see the information of the current playing photo after press INFO button, then press
▶ || button to play or pause, you can see the playing state in the right.
Then press ▲/▼ or ◀/► button to ratite the picture.
Notes: Other menu and description are the same as that for Movie menu.
Movie
The picture is for a reference only; the actual item is the standard.
Press ◀/▶ button to select Movie in the main menu, then press ENTER button to enter.
Press EXIT button to return back to the previous menu.

Press ▲/▼ button to select the folder that you want to view.
Press ENTER button to select the sub folder.
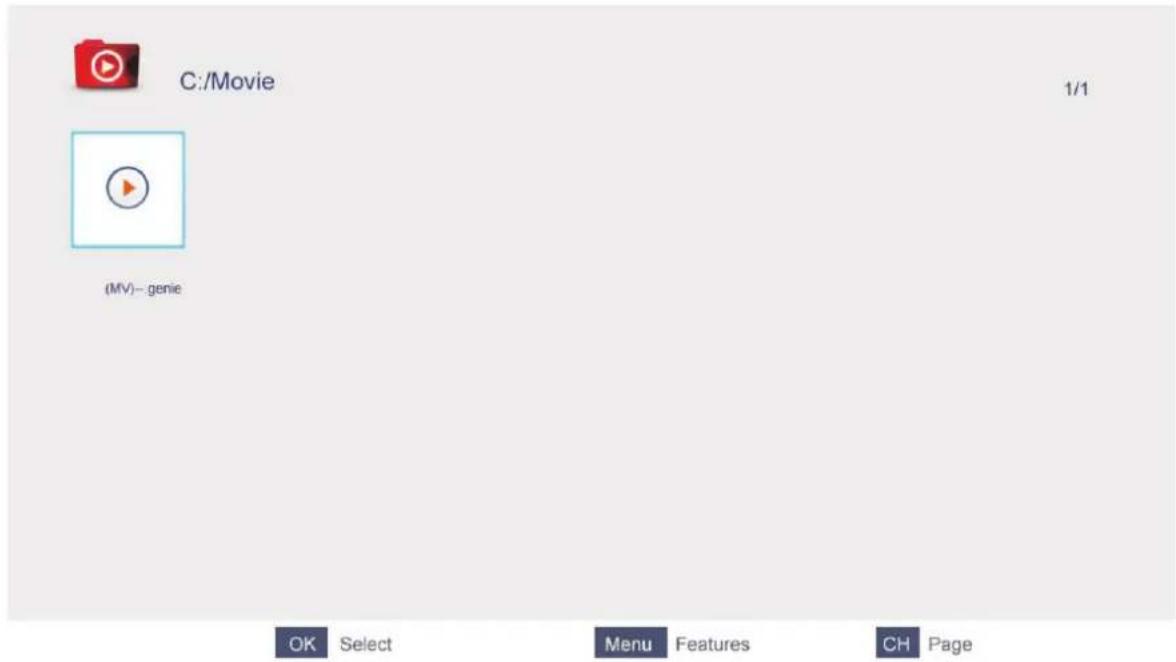
Press ENTER button or ▶ || button to play,
Press ■ button or EXIT button to stop playing.
Press the ◀ button to return back to previous page.
You can see the information of the current playing media at the first flew second or after press INFO button.
Music
The picture is for a reference only; the actual item is the standard.
Press ◀/▶ button to select Music in the main menu, and then press ENTER button to enter.
Press EXIT button to return back to the previous menu.

Press ▲/▼ button to select the sonny you want to listen, and then press ENTER or ▶ || or ▶ button to play.
Press ◀ button to return back to the previous menu.

C:/Music
1/1

128cm.mp3

Select

Features

Page
You can see the information of the current playing sonny at the left of the menu.
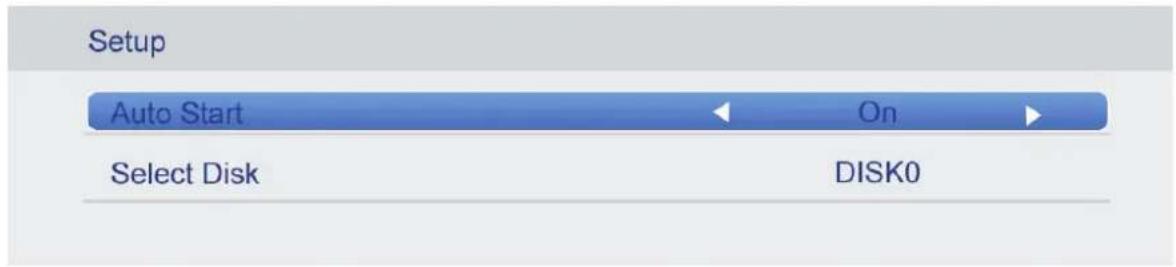
Setup
The picture is for a reference only; the actual item is the standard.
Press ◀/▶ button to select Setup in the main menu, and then press ENTER button to enter. Press EXIT button to return back to the previous menu.

Press ▲/▼button to select the option, and then Press ◀/▶ button to select it on or off.
How to use Record
The HK-RTD2957support two type to record :
A、Direct Record
B、Subscribe Record
Direct Record.
- In the DTV source, you can start record function by press the "REC" key while program playing. Before that, you have to make sure the USB storage device is inserted and the device checking and Initialization is done.
If you press "REC" key when there's no USB storage device inserted, the prompt window will appear as follow.

If you press "REC" key during the device checking and Initialization, the prompt window will show black screen about 2s.when the TV is recording, it will appear the recording menu.
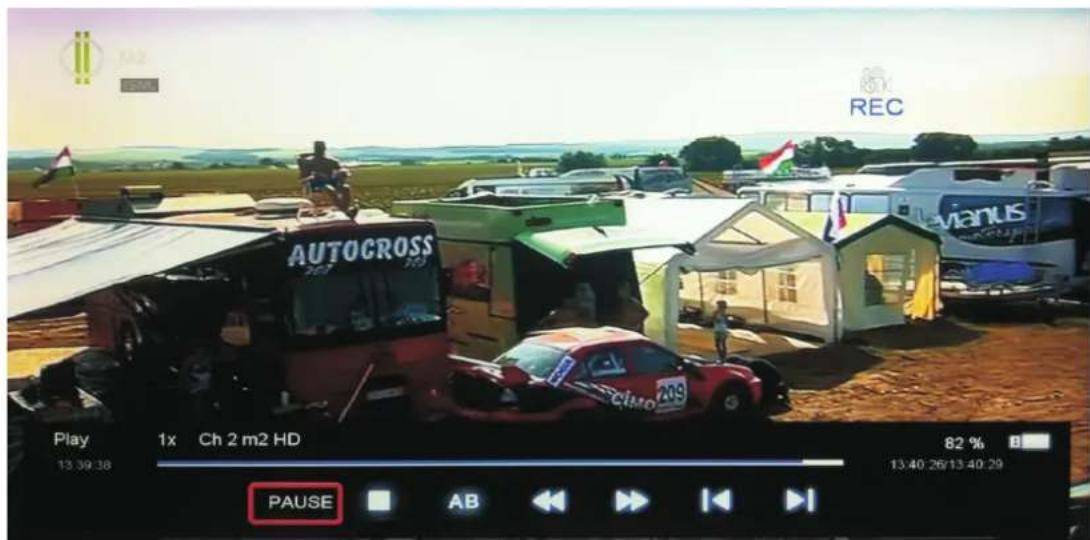
- After record started, you can select the items for the functions:
PLAY/PAUSE/STOP/AB/FF/FR/PRVE/NEXT。You can seen the detail info by the record menu.

PLAY/PAUSE: you can set the play mode PLAY/PAUSE;
STOP: you can stop the recording, it will appear the menu for check whether to stop the recording.
AB: you can set two point for play the record file from A to B.
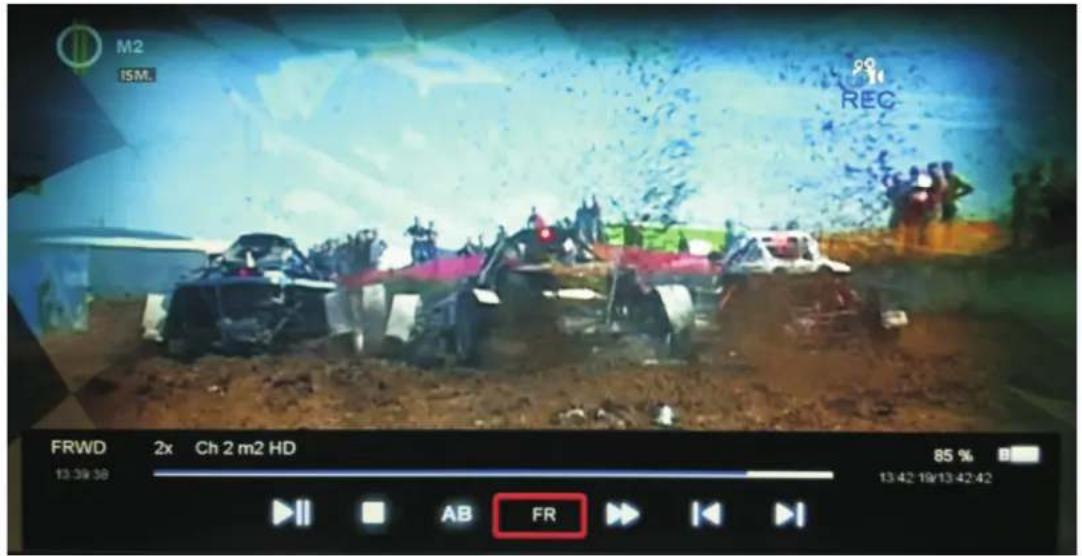
FF/FR: you can set the play mode FF/FR;
PRVE/NEXT: you can play the record file to PRVE/NEXT 30s.
-
After record started, you can press the button of PLAY/FF/FR/PRVE/NEXT on the RC, you can play the record file by PALY/PAUSE/FF/FR/PRVE/NEXT/STOP.
-
You can press "STOP" key to stop record function after confirm.

Subscribe Record
- In the DTV source, you can enter the Timer menu set the Subscribe Record. Press the "ENTER" key to add the record task.
The Way: Main menu-->APPLICATIONS-->Programme Timers-->Programme Timers
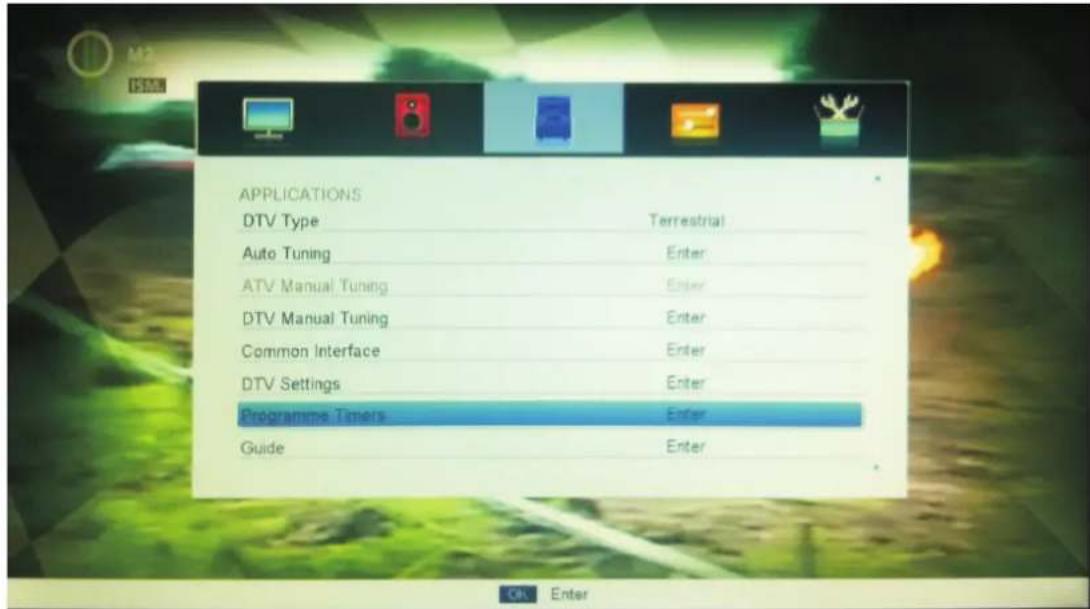

- If you enter the Timer Edit menu, you can set the record task that you want to record.

- When you success to set the record task, if the TV is standby mode, it will auto power on when three minutes before the start of the task.
- When the record task time is start, It will auto record, but you must check you USB storage device inserted and it is enough speed to record. Otherwise the task will failure.
- The TV enter false standby mode when the task is start, you can press the "POWER" key to watch the TV program. You can do same operation as Direct Record. When you press "POWER" again, if the task is not over, the TV will power off the panel and continue to record. The TV will real power off until the record task is over.
- When you open the EPG menu, press the BLUE button, you can enter the programmer time menu too.
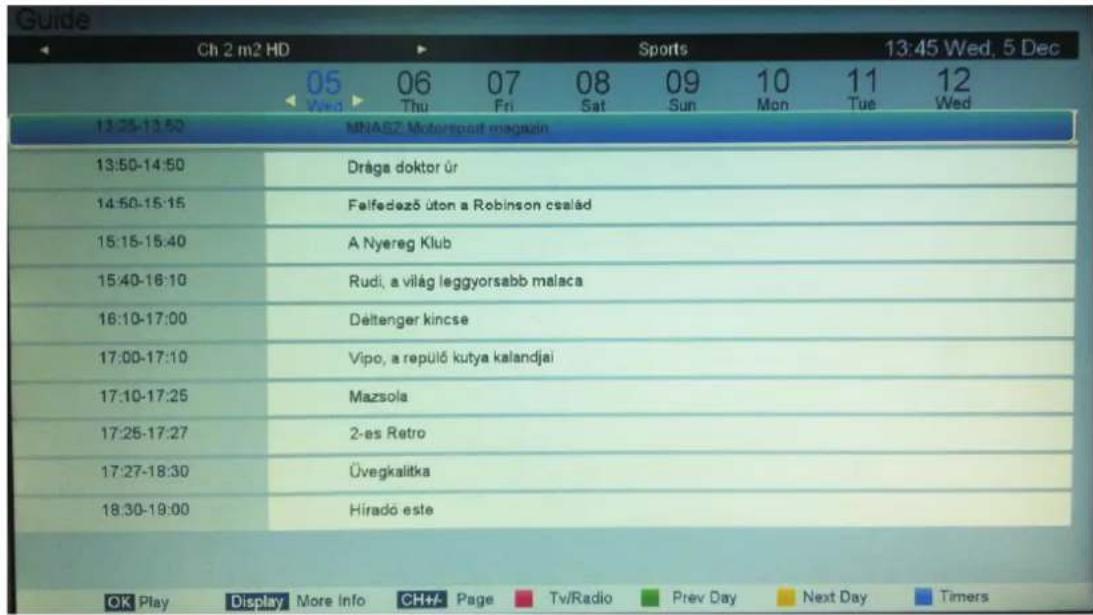
- When you open the display menu, and select the next program, you can press the ENTER to set the record task, the task will auto set by the appear menu, you can modify it too.

Note: Record function will stop when there's no space left on the USB storage device.
- In the DTV source, you can start timeshift function by press the "PLAY/PAUSE" key while program playing. Before that, you have to make sure the USB storage device is inserted and the device checking and Initialization is done.
If you press "PLAY/PAUSE" key when there's no USB storage device inserted, the prompt window will appear as follow.
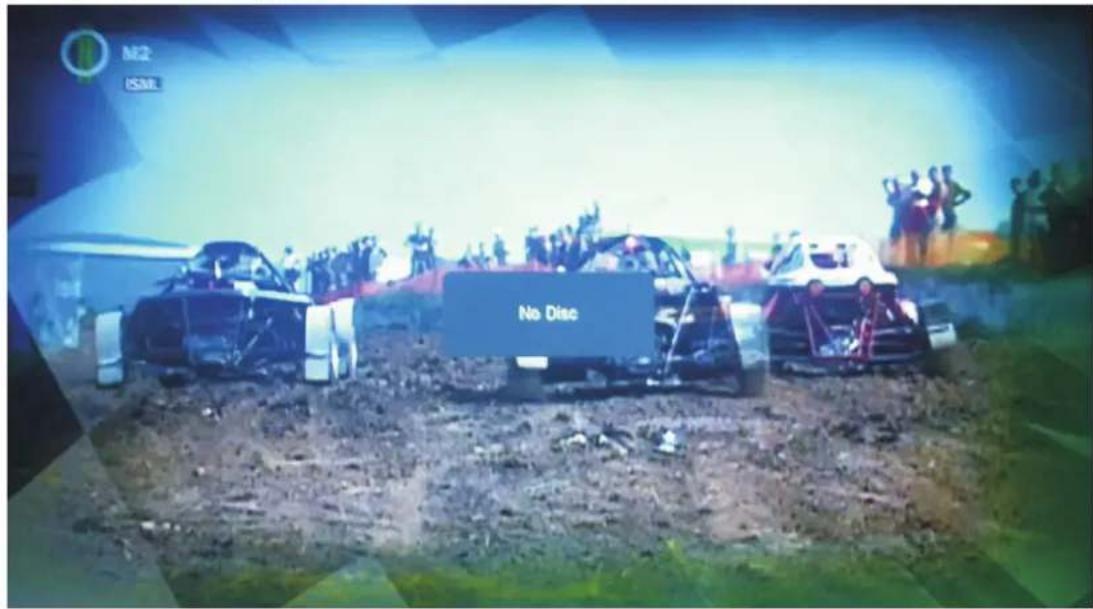
If you press "PLAY/PAUSE" key during the device checking and Initialization, the prompt window will appear as follow.
If you press "PLAY/PAUSE" key during the device checking and Initialization, the prompt window will show black screen about 2s.when the TV is timeshifting, it will appear the timeshift menu.

- After timeshift started, you can select the items for the functions:
PLAY/PAUSE/STOP/AB/FF/FR/PRVE/NEXT。You can seen the detail info by the timeshift menu.

PLAY/PAUSE: you can set the play mode PLAY/PAUSE;
STOP: you can stop the recording, it will appear the menu for check whether to stop the recording.
AB: you can set two point for play the record file from A to B.
FF/FR: you can set the play mode FF/FR;
PRVE/NEXT: you can play the record file to PRVE/NEXT 30s.
-
After record started, you can press the button of PLAY/FF/FR/PRVE/NEXT on the RC, you can play the record file by PALY/PAUSE/FF/FR/PRVE/NEXT/STOP.
-
you can press "STOP" key to jump to the realtime broadcast of the program, and another press of "STOP" key, you can stop timeshift function after confirm.
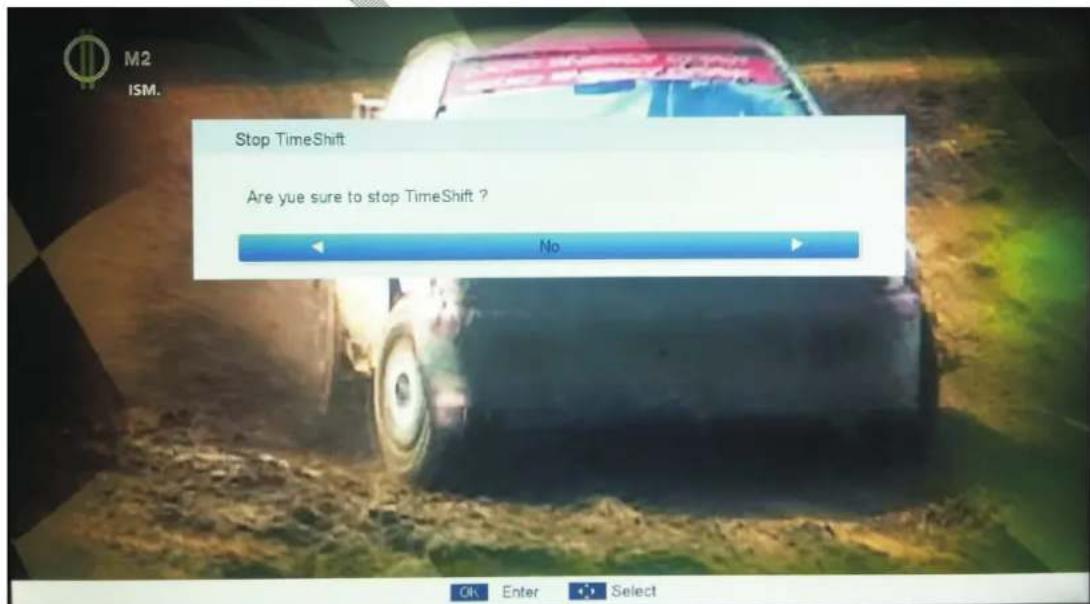
Note: Timeshift function will stop when there's no space left on the USB storage device.
Help
| No Power | Check the AC cord of TV is plus in or not. If still no power, please Pull out the plug and replug in after60 seconds. And open the TV again |
| Signal receive not properly | To cause double image or phantom if there has high building or high mountain round TV. You can adjust image effect by manually operation: consult instruction of vernier regulation or change the direction of external antenna.If you use the indoor antenna . under certain circumstance, receive will be more difficult .So you can change the direction of the antenna to adjust the image effect . If can't change image receiving effect either , you have to use external antenna. |
| No picture | Check the antenna at the back of TV is connected properly or not.Try to select other channels and check whether the TV problem itself or not |
| but,Video is ok without audio | Increase the volume.Check the TV is in mute mode or not , and please press the mute button to make sound resume. |
| Audio is ok, but color error or no picture. | Increase contrast and brightness. |
| snow statics picture and noise | Check the antenna at the back of TV is connected or not. |
| Level broken line | vacuum, such as hair drier, Maybe has electrical appliance interfere-please turn off these kinds of electrical appliance, cleaner and so on. |
| Image or-Dual "simulacrum" The TV no response with the Remote. | Perhaps the location for the antenna is not good.Use the tall beamed antenna can be improved quality of the display image.Operate the remote direct to the remote sensor on the TV.If still no response for the TV, please check if the plastic bag on the remote take or not. And check if the location for the battery is correct.Change the new battery.The TV will shift to the STAND BY if no response from the remote in the few minutes. |
| .NO Video In (PC Mode) | Please check if the display cable connect to the VGA correcte.Please check if there has the bend on the display cable. |
| Vertical twinkling (PC Mode) | Enter the main menu, Use the clock regulator for the Video display noise to eliminate the vertical line. |
| horizontal ripping (PC Mode) | Adjust the Audio sound horizontal in the main menu to clear the horizontal ripping line. |
| The screen is too bright or too dark (PC Mode) | Adjust the contrast ratio or brightness in the main menu. |
| PC Function no response | Check the computer setting in the state of compatible display resolution |
| Ripping line in RCA connecting | Please use good quality connecting cable. |
| Problem still exist | Unplug the power cable and wait for 30 seconds, then connect.If there is some problem with our TV, do not repair it by yourself, please contact with the customer service center. |
There will be complete picture and the brightness will come down if the TV is in: Note So please do not keep the TV in a state of same, the static picture for too long time Menu or same picture that has much difference in brightness and contrast ratio for too long time.
Product fiche
LLLEEEDDD555555000111
- Supplier's name: Manta S.A.
- Supplier's model: LED5501
• Energy efficiency class: A - Visible screen diagonal in centimetres and in inches: 140cm; 55"
- On-mode power consumption: <164 W
• Annual energy consumption: 160 kWh/year - Standby and off-mode power consumption: < 0.5 W
- Screen resolution in physical horizontal and vertical pixel count: 1920x1080
Note!
Product design and Technical parameters may be change without notice. This mainly concerns parameters technical, software and user manual present. User's Manual is a general orientation on service product. Manufacturer and distributor do not assume any responsibility as compensation for any inaccuracies errors in the descriptions appearing in this user manual.
Notes

INFORMACJA O PRAWIDŁOWYM POSTĘPOWANIU W PRZYPADKU UTYLIZACJI URZĄDZEŃ ELEKRONICZNYCH I ELEKTRYCZNYCH
- MANTA
- LED TV
- Energy Saving Settings
- Zmiana kodu PIN (Change Pin Code)
- USTAWIENIA (SETUP)
- Important Safety Precautions
- TV Bracket assemble
- Fix the TV on the wall
- Note:
- TV Buttons And Terminal Interface
- TV Buttons
- Terminal Interface
- Install and connect TV
- Set your TV
- Connect antenna and power
- Turn on TV
- TV Stand Installation Instructions
- REMOTE CONTROL INSTRUCTIONS
- Function Description
- Picture Menu
- Picture Mode
- Contrast
- Brightness
- Colour
- Tint
- Sharpness
- Contrast Booster
- Colour Temperature
- DNR
- Reset
- SOUND Menu
- Sound mode
- Bass
- Treble
- Balance
- Surround
- AVL
- Digital Audio Output
- APPLICATIONS
- Channel
- Channel Options
- Country
- DTV Type
- Auto Tuning
- ATV Manual Tuning
- DTV Manual Tuning
- Common Interface
- PREFERENCES
- Menu Language
- Teletext Language
- Key Lock
- PC Settings
- PIN Setting
- Parental Control
- Change Pin Code
- Auto Power Down
- Hotel Mode
- SETUP
- OSD Timer
- Cinema
- Blue Screen
- Sleep Timer
- Location
- Quick Setup
- Upgrade
- Channel Detaile
- Reset TV
- Shopping Mode
- Multimedia
- MEDIA OPERATION
- Photo
- Movie
- Music
- How to use Record
- Direct Record.
- Subscribe Record
- Help
- Product fiche
- LLLEEEDDD555555000111
- Note!
- Notes
- INFORMACJA O PRAWIDŁOWYM POSTĘPOWANIU W PRZYPADKU UTYLIZACJI URZĄDZEŃ ELEKRONICZNYCH I ELEKTRYCZNYCH
Brand : Manta
Model : LED5501
Category : Television