
TTL700 - Washing machine TELEFUNKEN - Free user manual and instructions
Find the device manual for free TTL700 TELEFUNKEN in PDF.


| Product Type | Freestanding Washing Machine |
| Brand | Telefunken |
| Model | TTL700 |
| Dimensions (H x W x D) | 85 x 60 x 60 cm |
| Weight | 70 kg |
| Power Supply | 220-240 V, 50 Hz, 2000 W |
| Drum Capacity | 7 kg |
| Spin Speed | 1200 rpm |
| Energy Class | A |
| Wash Programs | Cotton, Synthetics, Delicates, Quick, Wool, Hand Wash, Rinse & Spin, Drum Clean |
| Temperature Selection | Cold - 90°C |
| Delay Start | Up to 24 hours |
| Child Lock | Yes |
| Noise Level (Wash/Spin) | 56 dB / 74 dB |
| Water Consumption | 49 L per cycle |
| Annual Energy Consumption | 176 kWh |
| Safety Features | Anti-flood system, Door lock, Overflow protection |
| Maintenance | Clean lint filter monthly, Descaling every 3 months, Drum clean program |
| Spare Parts Availability | Common parts available online (door seal, pump, belt, etc.) |
| Repairability Index | 8.0 / 10 |
| Included Accessories | User manual, Inlet hose, Drain hose, Transit bolts |
Frequently Asked Questions - TTL700 TELEFUNKEN
User questions about TTL700 TELEFUNKEN
0 question about this device. Answer the ones you know or ask your own.
Ask a new question about this device
Download the instructions for your Washing machine in PDF format for free! Find your manual TTL700 - TELEFUNKEN and take your electronic device back in hand. On this page are published all the documents necessary for the use of your device. TTL700 by TELEFUNKEN.
USER MANUAL TTL700 TELEFUNKEN
Full Automatic Washing Machine
User's manual
- Model:TTL-700
- Please read this manual carefully before using.
- Retain it for future reference.
Contents
Before using
Names of the parts....1
Safety precautions ....2
Special function introduction .... 4
Installation and adjustment .....4
Install the water inlet hose....6
Using process
Preparation before washing .....8
Put in the laundries .....9
Add the detergent ....10
Close the top lid 10
Use the operation buttons .....11
Washing finished 15
Disposal after washing .....16
Trouble shooting Answer to question....17
Packing list Specification....18
Names of the parts
Before Using
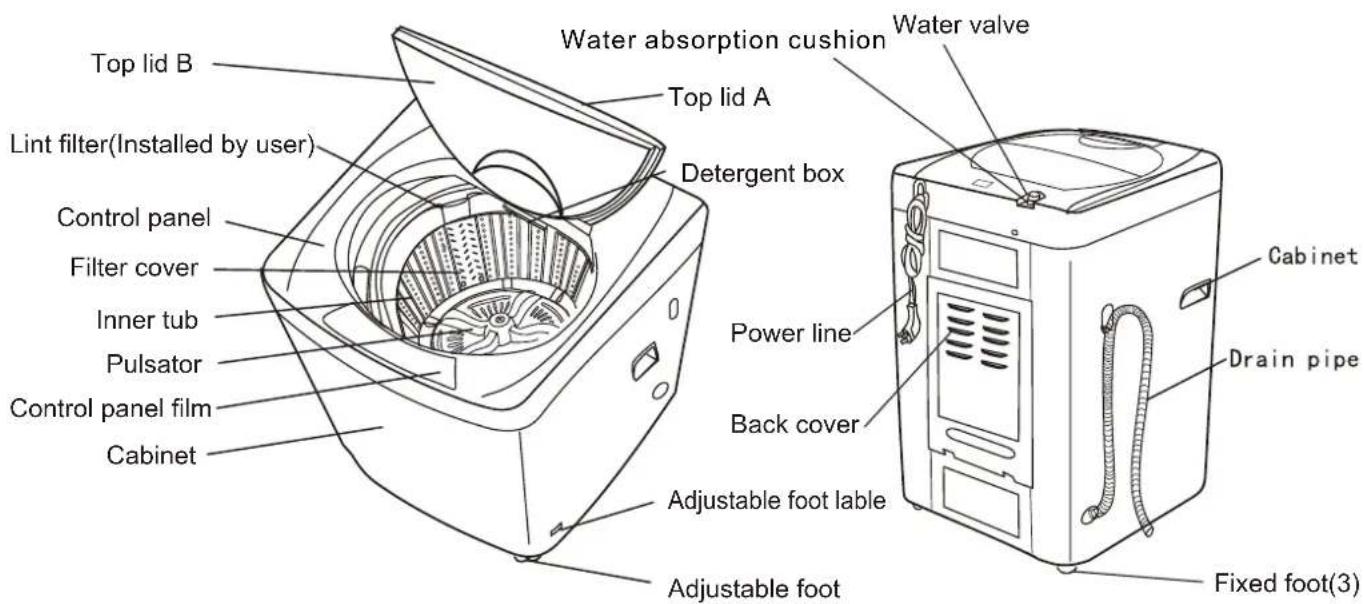
Accessories
 | Bottom plate (one)Tapping screws ST4X12-A (seven) |
The end connecting to machine  | Water inlet hose (one)water inlet Hose jointer (one) |
| The end connecting to the water inlet hose jointer | |
 | Lint filter (one) |
 | Drain hose hook (one) |
Meaning and description of the symbols
| Warning sign | Contents marked with that symbol are related to the safety of the product and the personal safety of the users. Please operate in strict conformity to the contents. Otherwise, it may cause damage of the machine or injure the personal safety of the user. |
| Forbidding sign | Contents marked with that symbol are actions forbidden to perform. Performing of those actions may result in damage of the machine or injure the personal safety of the user. |
All the pictures in this manual are sketch-map. And because of the component of product, so the washing machine and accessories which you received cannot be match accurately with the sketch map in this manual.
Safety precautions
Before Using
Please plug the plug on special 220V AC receptacle. Be sure to use three-phase power receptacle. Ensure the earthing prong of the power receptacle is earth-ed reliably. Use a leakage protector if possible.

In normal usage of the washing machine, the power plug shall be ready to be pulled or plugged with hang. Be sure to pull the plug off and close the water faucet when occurring power failure, delivering the machine, setting the machine idle or cleaning the machine, Do not plug or pull the power plug with wet hand.

natural_image
Hand holding a switch next to an electrical outlet, with an exclamation mark and warning symbol (no text or labels)Do not bend, stretch, twist, bind the power cord by force, or reform it. Do not press or clamp it with heavy items. If the power cord and power plug are bad, or the receptacle is loose, be sure to have it replaced by the technicians of our special shop or our agent, or the customer care department to avoid any risk. Keep the prong of the power plug clean. If dust is found on the power plug, please wipe it off with dry cloth.
natural_image
Three black-and-white icons: a plug with smoke, a warning symbol with a question mark, and an exclamation mark (no text or labels)In case the washing machine is installed on ground with carpet, be careful not to block the ventilation hole with carpet. The ventilation holes

Do not use water with temperature higher than 50°C

Do not put the machine at damp place like the bathroom. Never wash it with water. Do not put wet laundries on the control panel coating.

Do not wash waterproof laundry like the raincoat, bikecovers, etc. To avoid abnormal vibrations in spinning.

natural_image
Simple line drawing of a person holding an umbrella next to a prohibition symbol (no text or labels)Do not let the machine share one receptacle with other electrical appliances. If the plugging into the receptacle is loose, do not use the plug any more.

natural_image
Line drawing of two cables connecting a wall socket (no text or symbols)
Safety precautions
Before Using
Do not put hand into the rotating tub. It is dangerous even if the rotation speed is slow. Take special care of the children. Keep children away from the washing machine to avoid them climbing on.

natural_image
Cartoon illustration of a boy washing clothes on a table with a sad face (no text or symbols)
Do not put any hot or heavy items (such as the kettle with hot water) on the washing machine.

natural_image
Cartoon illustration of a distressed character with steam and fangs, no text or symbols present
The handicapped or children without care shall not use the machine.

natural_image
Cartoon illustration of a smiling face and hand holding a bag, next to a smiling container (no text or symbols)
Do not decompose, repair or alter the machine by yourself.
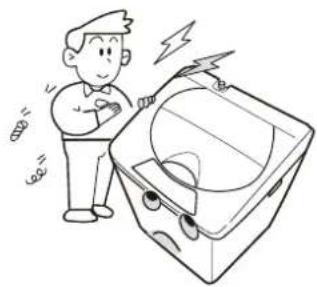
natural_image
Cartoon illustration of a person standing next to a washing machine with lightning bolts (no text or symbols)
Do not wash laundries with volatile materials (such as thinner, petrol etc.)
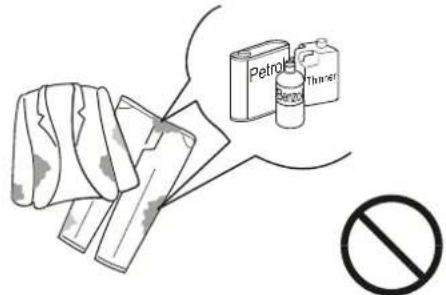
Keep the machine away from direct sunlight and heat source like the heater.
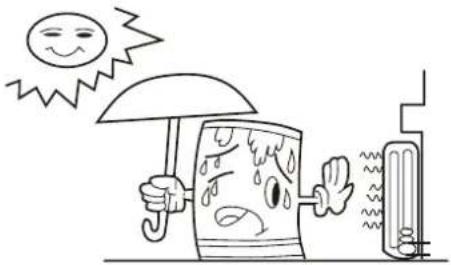
natural_image
Cartoon illustration of a smiling sun and umbrella holding an umbrella, next to a thermometer with steam rising (no text or symbols)
Please keep the lint filter in good condition, and install it to proper position. If the lint filter is lost or damaged, please contact the local customer care department of our company.

To protect your laundries and washing machine, please take out all of the coins, buttons, sand, hairpin and other foreign materials before washing.

Please check if the water faucet is open, and if the connection of the water inlet pipe is proper. Hang up the drain pipe.
It is suggested to use foamless washing powder.
Special function introduction Before Using
- Alarming function when open the cover:
During working except for water and drain, the machine will stop running and alarm if opens the cover.
- Child safety lock program
1. Purpose
Child safety lock program is an added function of the washing machine. The purpose is protecting children from potential dangerous, which due to children climb onto washing machine and open the top lid, results in falling into washing tub and drowned. The process of this program as follows: when the child safety lock program has been started up; then if the top lid is opened, the machine will alarm immediately. If it cannot be dealt with duly (the way of solving: release child safety lock program), the machine will drain if there has water in washing tub after 15 seconds. After 10 minutes, the power is off automatically. So this can reach the purpose of protect children without care from potential dangerous.
2. Start up child safety lock program
The program is optional anytime after the machine has been started. Push and hold PROCEDURE SELECTION and RESERVATION buttons for more than 2 seconds at the same time. After 2 beep sounds, the child safety lock program works; all buttons are locked and cannot be selected.
3. Release child safety lock program
Similarly, push and hold PROCEDURE SELECTION and RESERVATION buttons for more than 2 seconds at the same time. After a beep sound, the child safety lock program is released; all buttons are unlocked.
4. Notice items
Child safety lock program is an added function. Only when it has been started up, it can work.
It is necessary for selecting child safety lock program, which the top lid must be closed.
The top lid cannot be opened after this program has been selected. Once the top lid is opened, the machine will enter into alarming status. It is necessary to release child safety lock program.
The child safety lock program can be optional only when the machine has been started.
After the child safety lock program takes effect, all buttons are locked and cannot be selected. Only when the program has been released, the buttons can resume its function.
During start or release this program, the current wash program of washing machine shall not be affected except for the beep sound.
The power is off or pull power plug off, the child safety lock program is released automatically. The program cannot be remembered after the power fails.
Installation and adjustment
Please install and adjust the machine according to the requirement of the manual. It is very important to your security and correct operating the machine.
Install bottom plate install lint filter
Push lint filter downward to I .location for lint filter
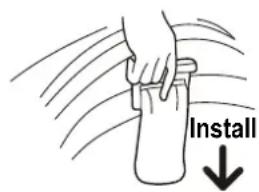
After you open the package, please lean the washing machine gently down on soft items (like the towel cloth, blanket, etc.). Install the bottom plate to the bottom of the machine with the seven screws by a cross screwdriver, then lift the machine up gently. See to the figure:

Adjust the installation position
The distance that washing machine away from wall should be above 20mm. The largest allowed slope of the shank base of the machine is 2^ . The slanting or rough ground will result in unstable running or stoppage of the machine. Please adjust it with following methods:
- Confirm it's horizontal:
Hang the lead line to confirm if it is horizontal.
- Adjust the adjustable foot:
-
To twist the adjustable foot, please first lift up the side of the foot slightly, loosen the adjustable nut, and twist the foot.
-
Fasten the nut after adjustment.
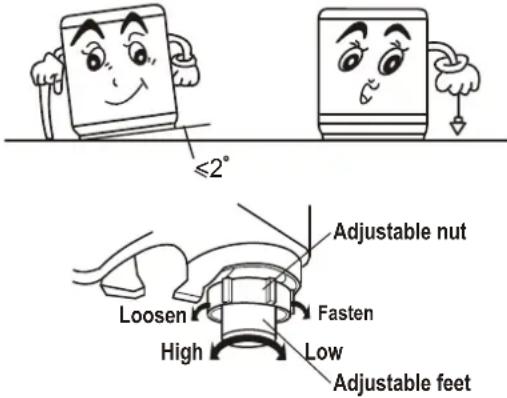
Usage of the drain hose
The drainage shall be smooth with the drain hose.
- put the drain hose up to suitable position. Do not put it on ground
- Do not step on or press the drain hose.
Notes: the highest point of drain pipe should be higher than the water level of washing tub for avoiding to siphon phenomenon during drain.
The highest point


Install the water inlet hose
Before Using
Confirm the water faucet
Water faucet, suitable

Water faucet, not suitable
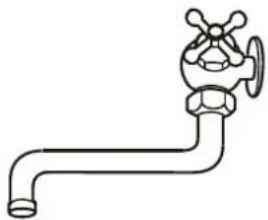
natural_image
Line drawing of a faucet with a valve and bulb (no text or symbols)It is required that the front end shall be longer than 10cm.
The outlet end surface of the faucet shall be flat and smooth. If not please file it to avoid leakage.
Connection between the water inlet hose jointer and the water faucet
- Press the lower end of the lock lever and push down the slider. Take off the water inlet hose jointer from the water inlet hose component. See to Figure 1.
- Loosen the screw till the water faucet can be accessed. Put the jointer of the water inlet hose on the faucet. See to Figure 2. (If the faucet is too large and the jointer cannot be set on the water faucet, please loosen the four screws and take out the bushing in the jointer. See to the figure.)

Figure 1
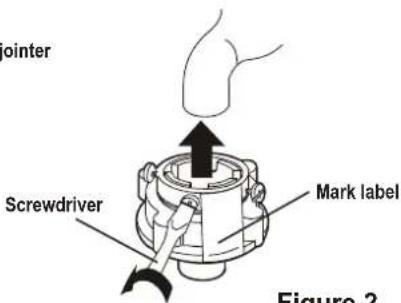
Figure 2

Figure 3
- Fasten the four screws evenly. See to Figure 4.
- Take off the nameplate. Twist the fastening nut as per the indication of the figure to seal up the outlet end surface of the faucet. See to Figure 5.
Remarks: Before installation, the threading is 4mm above the upper surface of the nut. After installation, the threading is 2mm above the upper surface of the nut. See to Figure 6.

Figure 4

Figure 5
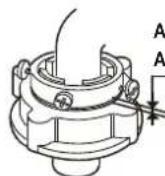
About 4mm before twisting
About below 2mm after twisting
Figure 6
Connection between the water inlet hose and the washing machine
- Do not take off the water absorption cushion. Please check if the cushion is dropped or damaged before each usage. If it happens please contact our after-sale department immediately.
- Put the nut of the water inlet hose on the valve jointer.
3.Fasten the nut. Swing it gently to confirm if it's suitable.
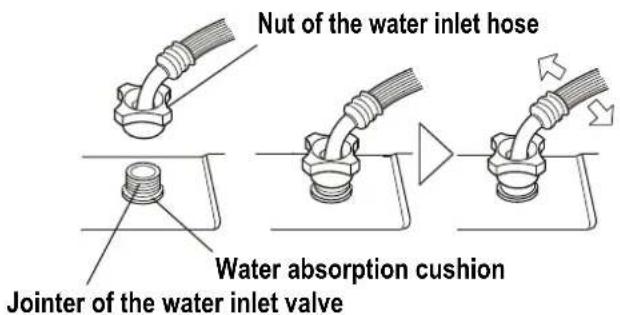
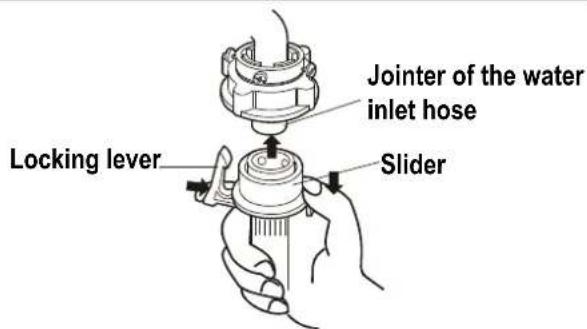
Connection between the jointer of the water inlet hose and the water inlet hose
- Push down the slider. Insert the water inlet hose into the jointer.
- Hang the lock lever to the jointer. Release the slider till a click sound is heard.
Check the connection between the jointer of the water inlet hose and the water faucet
1.Swing the hose gently to confirm if it is fastened stable.
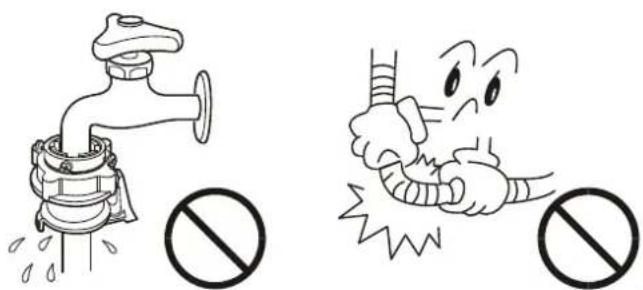
2. After installation, open the faucet to check if it leaks.
3.Do not bend the hose with overstrain.
4. Before each usage please check if the connection between the jointer of the water inlet hose and the water faucet, and the installation of the water inlet hose are firm, so as to prevent dropping from improper Installation position.
Dismantle the water inlet hose
- Close the water faucet.
- Press the locking lever. Push down the slider. Then pull of the water inlet hose. If the machine is used more than once every week, the jointer of the water inlet hose can be kept on the faucet to prevent damaging the fixing screw.

1 Preparation before washing Using process

natural_image
Line drawing of a smiling woman holding a basket (no text or symbols)Preparation before washing
- Connect the water inlet hose.
- Confirm that the washing machine is earthed reliably. Then insert the power plug into the receptacle. Do not connect the earth terminal to the gas pipe and tap water pipe.
- Hang up the drain hose.

natural_image
Illustration of two cartoon characters connected by a power plug and tubing (no text or symbols)Pay attention to followings before washing the laundries
| Confirm if there's special requirement for the laundries. | Clear the pocket.Take out the coins,sand, hairpins etc. | Fasten the buttons and zippers. | The quantity of the laundries shall not exceed the rated value.The big laundries like the jeans shall be put in loosely. | When the pulsator is running, the buttons of the laundries may cause noise. For the sake of discretion, please put the laundries with buttons into other laundries. |
| A. Check if the laundries are applicable for washing with the machine.B. For those desrepaired laundries,wash after mending.C. Seperate the laundries with unfast color from other laundries.D. Put those laundries difficult to absorb water into water with hand.E. For those laundries with heavy soil, please first remove the dirt like mud or dust. For the parts with heavy soil, Please apply detergent in advance, which can make it easier to remove the soil.F. For those laundries that may get lint ball and those with long fur, turn it over before putting in.G. Do not put those laundries polluted by chemicals directly into the washing machine.H. For those small laundries and those may get twisting or worn, and woolen/fur laundries, please put them into Mesh bag for washing. | ||||
2 Put in the laundries
Using process

natural_image
Illustration of a nurse in uniform preparing food at a sink (no text or symbols present)● The capacity of washing and spinning of the machine refer to the largest weight of the standard laundries under dry condition that can be washed or spun in one time. One time washing quantity shall be lower than the rated capacity. The largest capacity of this machine is 7.2kg.
● The thicknesses, size, type of the cloth will influence the actual washing capacity. It is suitable for one time washing to put in reasonable amount of laundries and the laundries can be turned round in washing.
- Do not select 4 water level or above for laundries less than 1.0kg , so as to avoid splashing of water.
Reference weight of the laundries:
● working suit(up,down) (cotton, about 1120g)
- Blanket (cotton, about 900g)

- Jeans(about 800g)


● blending coat (about 800g)
● Pajamas (About 200g)


natural_image
Cartoon illustration of a smiling rectangular character with arms and eyes, waving (no text or symbols)
● Jacket (cotton, about 800g)
● Shirt (cotton, about 300g)

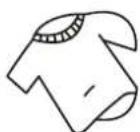
● Undershirt (cotton, about 180g)
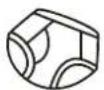
● Underpants (cotton, about 70g)

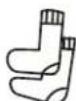
● Socking (blending, about 50g)
● single bed sheet (cotton, about 600g)
3 Add the detergent
Using process
Location for concentrated powder

How to use the whitener
- Fill water to decided level. Dilute the whitener with container. Pour it slowly into the washing tub.
- Avoid using whitener on laundries with color or pattern as they are prone to lose color.
● The whitener shall not touch the laundries directly. - Refer to the user's manual for the usage and quantity of the whitener.
-
For powder whitener, please dissolve it before use.
-
Add the detergent and softener into the box directly as indicated in the left figure.
● After adding, please close the detergent box. See to following table for the dosage of the detergent.
How to use the washing powder
● Direct dissolved in the machine
1. Fill water to "Low" water level.
2.Add the power. Run for 30 seconds to dissolve it completely.
3. Put in the laundries. Select suitable water level.
- The instant dissolving of the washing powder: 1. Prepare warm water of 30^ and a container. 2. Add the powder while stirring to fully dissolve it.
● The powder is more prone to pollute the laundries than the detergent. Therefore please use it with proper quantity.
- It is suggested not to use high-sudsing detergent.
- Washing powder with poor quality or not used for a long period may get blocked. Please clean the detergent box in time.
● Different washing powders have different dosage. Please refer to the usage manual of the washing powder for the details.
4 Close the top lid
If you open the top lid, the machine will stop working except for water filling and draining.

natural_image
Line drawing of a square washing machine with a circular vent and side latch (no text or symbols)5 Use the operation buttons Using process
A. Description of the function of the buttons
Mode and meaning of the indicator light

: ○ :Flashing: indicate the running program
On: indicate the program about to run, or indicate the selected mode

Flashing rapidly: indicate abnormal condition
WATER LEVEL SELECTION button
- The user selects a suitable water level depending on the load. If QUICK WASH is selected, water level will indicate 2.
- After water level reaches 2, it will wash while water filling, and wash normally upon the water level reaching 4.
- After washing for 1 min, pressing WATER LEVEL button will enable supplemental water filling, which will stop automatically upon the water reaching overflow level.
- The user selects a suitable water level depending on the load. If QUICK WASH is selected, water level will indicate 2.
- After water level reaches 2, it will wash while water filling, and wash normally upon the water level reaching 4.
- After washing for 1 min, pressing WATER LEVEL button will enable supplemental water filling, which will stop automatically upon the water reaching overflow level.
PROGRAM SELECTION button
| ● You can select from the following four programs. | ||
| Program | STANDARD | Normal wash |
| JEANS | Large, thick or heavily soiled laundry | |
| GENTLE | Woolen textiles or underwear | |
| QUICK WASH | 10 min quick wash for load below 2 Kg | |

bar
| Value | |---| | 9 | | 10 | | 8 | | 6 | | 4 | | 2 |
WATER LEVEL SELECTION
FUZZY

GENTLE


PROGRAM SELECTION
SOAK
WASH
ORINSE
SPIN

PROCEDURE SELECTION
PROCEDURE SELECTION button
| ●With it you can select one or several processes of soak, wash, rinse and spin. |

flowchart
graph TD
    A["TELEFUNKEN"] --> B["NUMERAL TUBE"]
    B --> C["START/PAUSE BUTTON"]
    C --> D["POWER ON/OFF BUTTON"]
    D --> E["Child safety lock program"]
    E --> F["RESERVATION BUTTON"]

    subgraph NUMERAL TUBE
        G["To indicate - during sensing."]
        H["To indicate remaining min. During program running."]
        I["To indicate remaining reserved time (hrs) during reservation period."]
        J["To indicate fault symbols for abnormal conditions (see page 17)"]
        K["Page 17"]
    end

    subgraph START/PAUSE BUTTON
        L["After the power is switched on, press it to start the machine"]
        M["During working, push it to pause."]
        N["During pause, push this button to restart and go on working."]
    end

    subgraph Child Safety Lock Program
        O["Start up: The program is optional anytime after the machine has been started. Push and hold PROCEDURE SELECTION and RESERVATION buttons for more than 2 seconds at the same time. After 2 beep sounds, the child safety lock program works; all buttons are locked and cannot be selected."]
        P["Release: push and hold PROCEDURE SELECTION and RESERVATION buttons for more than 2 seconds at the same time. After a beep sound, the child safety lock program is released; all buttons are unlocked."]
    end

    subgraph RESERVATION BUTTON
        Q["Push the button to select the reserve washing time from 2 to 24 hours."]
        R["Pressing the button, the numeral tube displays the reserved hours to the wash cycle end. The point light flashes to indicate in-reservation."]
    end
Remarks: After pressing POWER ON/OFF to connect power supply, if the washing machine lasts idle more than 10 min, it would automatically shut off the supply.
B. Steps of using the operation buttons and description of the steps

flowchart
graph LR
    A["9 10"] --> B["WATER LEVEL SELECTION"]
    C["7 8"] --> D["PROGRAM SELECTION"]
    E["5 6"] --> F["PROCURE SELECTION Lock"]
    G["3 4"] --> H["QUICK WASH"]
    I["1 2"] --> J["SOXK (RESERVE, RESERVES, HOURS LATER)"]
    K["SOAK"] --> L["SURPLUS(MIN)"]
    M["WASH"] --> L
    N["RINSE"] --> L
    O["SPIN"] --> L
    P["TTL-700"] --> Q["START PAUSE"]
    R["POWER ON/OFF"] --> S["1"]
1 Push the POWER ON/OFF button to switch on the power

2 Push the PROGRAM SELECTION button to select the suitable automatic program

After switching on the power, the machine will set to STANDARD program automatically. To select other program, push the PROGRAM SELECTION button till the corresponding indicator is on. Refer to the
PROGRAM SELECTION button in Page 11.
For example: select QUICK WASH for the quick washing of the laundries with light dirt.

- In selecting the STANDARD or JEANS programs, the machine will execute fuzzy program to control the complete procedure automatically according to the cloth, weight and water temperature to select water level, current and washing time.
3 Push the PROCESS SELECTION button to select suitable programs

After switching on the power, the machine will set to wash-rinse-spin program automatically. That is the most common program. To select other program, push the PROCE DURE SELECTION button to select one or more programs among soak/wash/rinse/spin. Refer to the Selection method of the procedure programs for the selection.

Attention
- Even there's no water in the tub, the spinning will start after a certain period.
- Do not use the SOAK program for the woolen laundries.
- Wash the laundries that are prone to lose colors separately from other laundries.
- The pulsator will not rotate unless the water is filled to selected water level.

natural_image
Cartoon illustration of a shopping bag and a jacket with expressive faces, no text or symbols presentSelection method of the procedure programs
| Times of pushingPROCEDURE SELECTIONbutton | Selected procedureprogram | Applicable procedure | Contents(the lighted indicatorsindicate the programs about to run) | |||
| 0 | Wash, rinse, spin | When the common laundriesneed washing, rinsing andspinning. | Soak● | Wash○ | Rinse○ | Spin○ |
| 1 | Wash(the washingliquid remains in thetub) | Repeat using the washingliquid | Soak● | Wash○ | Rinse● | Spin● |
| 2 | Wash, rinse(the rinsing liquid remainsin the tub) | Repeat using the washingliquid | Soak● | Wash○ | Rinse○ | Spin● |
| 3 | Rinse, spin | When the laundries need rinsing and spinning aftermanual washing | Soak● | Wash● | Rinse○ | Spin○ |
| 4 | Spin(spin after drain) | When the laundries need onlyspinning after manualwashing (first drain then spin) | Soak● | Wash● | Rinse● | Spin○ |
| 5 | Soak, wash, rinse, spin | If the laundries are very dirty,or the sleeve and collar aredirty, first soak then wash | Soak○ | Wash○ | Rinse○ | Spin○ |
- If you push the PROCEDURE SELECTION button for 6 times, it will resume the original mode, and it will circulate like that.
- The soak program can be used as fitting of the STANDARD & JEANS automatic programs. Soak with slight stirring before wash.
4 Push the WATER LEVEL button to select suitable water level

WATER LEVEL SELECTION

When the power is switched on, the washing machine will check the cloth automatically. After that, the water level is set automatically. To select other water level, push the WATER LEVEL SELECTION button in page 11.

5 Push the RESERVATION button to select suitable reserve program

RESERVATION

When the power is switched on, the reservation program is disabled automatically. If you need to finish the washing in reserved time, please push the RESERVATION button to select suitable program. Refer to the
RESERVATION in Page 12 for selection.
Page 12
- Confirm the reservation program
- When the reservation program is started, pressing the button, the numeral tube displays the reserved hours to the wash cycle end. The point light flashes to indicate in-reservation.
- To change the running program or cancel reservation, you have to switch off the power and make new selection.


The washing will finish about 18 hours later
6 Push the START/PAUSE button

START PAUSE

6 Washing finished
The power will be switched off automatically after the finishing of the washing.

natural_image
Cartoon illustration of a woman cooking with a cup and another character holding a microphone (no text or symbols)After Finishing wash, alarm automatically
7 Disposal after washing
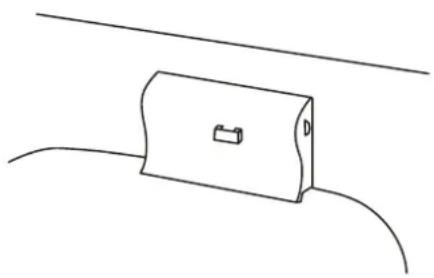
- After using, please clean the lint and foreign materials of the lint filter etc. in time. Otherwise, it may influence your using the machine.
- Please first pull off the power plug from the receptacle before cleaning.
Please rotates detergent box to control panel after clean it.
natural_image
Simple line drawing of a rectangular object with a small protrusion, connected to a curved line (no text or symbols)- The lint filter must be used during washing.
- It must be cleaned in time after each using Lint filter:
1 pull upward to dismantle lint filter;
2 push downward to install lint filter;
3 please clean lint filter after wash.

Dismantle & Install

Clean
The filter screen of the water inlet valve is likely to be blocked by foreign materials to influence the water inlet. Please clean it with brush every two months.

natural_image
Line drawing of a hand using scissors to press a cylindrical component (no text or symbols)If the cabinet is dirty, wipe it with wet cloth
- Do not flush it directly with water.
- Wipe it with neutral detergent.
- Do not wipe it with thinner, petrol, alcohol etc.


natural_image
Line drawing of a hand cleaning a small object inside a rectangular box (no text or symbols)- After washing, close the water faucet. (If needed, you can dismantle the water inlet hose).
- Do not store water in the washing machine for a long period. Drain the water completely after each using.
- Be sure to pull off the power plug before maintenance.
- Hang up the power cord and drain hose.
- Wipe off the water drops on the surface of the machine and inside the tub. Open the top lid for some time (about 1 hour), then close the top lid.
Trouble-shooting Answer to question
(If there's a breakdown, please pull off the power plug before checking) The following phenomena are not breakdowns sometimes. Please confirm again before sending it to repair. If there are real breakdowns, please come to the special maintenance department or after-sale service department of our company. Do not repair it by yourself.
Phenomena Reason How to settle
| After the reservation is started, it rings and the digital tube displays "E0" | ● The top lid is not closed | ● Close the top lid |
| The draining does not work, or the speed of draining is too slow. The digital tube displays "E1" and it rings. | ● Is the drain hose blocked by foreign material?● Is the drain hose frozen?● After long running of pump in the hot weather, power will be cut automatically for safe. | ● Clean the foreign material. Open and close the top lid once.● Clean the frozen material.● Some minutes later the machine will continue to work |
| It stops running except water filling and draining.The digital tube displays "E2" and it rings. | ● The top lid is not closed | ● Close the top lid |
| The safety switch acts. The spinning cannot work (after twice revising). The digital tube displays "E3" and it rings. | ● Are the laundries put slantingly?● Is the machine slanting? | ● Re-order the laundries. Close the top lid.● Level the machine in right position. Open and close the top lid once. |
| It does not do water inlet or the speed is slow (the water level is not reached after 15 minutes). The digital tube displays "E4" and it rings. | ● Is the water faucet open or is there water supply failure?● Is the water inlet valve is blocked | ● Open the water faucet. Open and close the top lid once.● Clean the water inlet valve. Open and close the top lid once. |
| The machine does not act.(The indicators are off.) | ● Is there power failure?● Is the power plug loose? | ● Use it when the power is on.● Insert the power plug tightly. |
| There's abnormal sound inside the machine. | ● Is the machine slanting?● Is there metal material inside the washing machine?● Are the laundries slanting in spinning? | ● Level the machine properly.● Fasten the buttons and zipper● Re-order the laundries. Close the top lid. |
| The water faucet leaks. | ● Is the jointer screw of the water inlet hose is loose or twisted awry? | ● Fasten the jointer screw properly. |
Common phenomena
| Phenomena | Explanation |
| The spinning is intermittent when it starts. | Balance the laundries to avoid slanting. |
| Pause during washing. | supplemental water filled after fabric sensor has checked fabric (about 48 seconds) |
| Select spin, but it doesn't work. | The program is setting the drain time. Some time is needed before it starts spinning. |
| The pulsator pauses during water inlet in wash and rinse. | It is to avoid splashing during water inlet. |
| There may be some water flowing out of the drain hose in the first use of the machine. | It is the water remained in the factory inspection of performance. |
Packing list
| Name | Quantity | Storage position |
| ● User's manual | ● One | ● Inside the document bag |
| ● Lint filter | ● One | ● Inside the document bag |
| ● Drain hose hook | ● One | ● Inside the inner tub |
| ● Components of the water inlet hose | ● One | ● Inside the accessory bag |
| ● Bottom plate | ● One | Between the upper cushion of the washing machine package and the upper seal of the package carton |
| ● Tapping screws ST4x12-A | ● Seven | ● Inside the document bag |
| ● Full automatic washing machine with pump | ● One |
Specification
| Rated washing / spinning capacity 7 | 2kg (weight of standard dry cloth) |
| Water level/Water quantity (about) | 1/13L 2/16L 3/24L 4/28L 5/31L6/34L 7/37L 8/40L 9/43L 10/46L |
| Injection pressure | 0.03MPa~0.78MPa |


- Full Automatic Washing Machine
- User's manual
- Contents
- Before using
- Using process
- Trouble shooting Answer to question....17
- Names of the parts
- Safety precautions
- Special function introduction Before Using
- - Alarming function when open the cover:
- - Child safety lock program
- Purpose
- Start up child safety lock program
- Release child safety lock program
- Notice items
- Child safety lock program is an added function. Only when it has been started up, it can work.
- It is necessary for selecting child safety lock program, which the top lid must be closed.
- The top lid cannot be opened after this program has been selected. Once the top lid is opened, the machine will enter into alarming status. It is necessary to release child safety lock program.
- The child safety lock program can be optional only when the machine has been started.
- After the child safety lock program takes effect, all buttons are locked and cannot be selected. Only when the program has been released, the buttons can resume its function.
- During start or release this program, the current wash program of washing machine shall not be affected except for the beep sound.
- The power is off or pull power plug off, the child safety lock program is released automatically. The program cannot be remembered after the power fails.
- Installation and adjustment
- Install bottom plate install lint filter
- Adjust the installation position
- Usage of the drain hose
- Install the water inlet hose
- Confirm the water faucet
- Connection between the water inlet hose jointer and the water faucet
- Connection between the water inlet hose and the washing machine
- Connection between the jointer of the water inlet hose and the water inlet hose
- Check the connection between the jointer of the water inlet hose and the water faucet
- Dismantle the water inlet hose
- Preparation before washing Using process
- Preparation before washing
- Pay attention to followings before washing the laundries
- Put in the laundries
- Reference weight of the laundries:
- Add the detergent
- How to use the whitener
- How to use the washing powder
- Close the top lid
- Use the operation buttons Using process
- Description of the function of the buttons
- Mode and meaning of the indicator light
- WATER LEVEL SELECTION button
- Attention
- Push the WATER LEVEL button to select suitable water level
- Push the RESERVATION button to select suitable reserve program
- - Confirm the reservation program
- Push the START/PAUSE button
- Washing finished
- Disposal after washing
- Trouble-shooting Answer to question
- Packing list
- Specification
Brand : TELEFUNKEN
Model : TTL700
Category : Washing machine