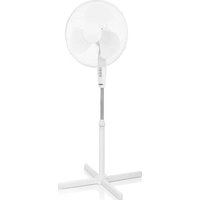
VE-5836UK - Household Fan TRISTAR - Free user manual and instructions
Find the device manual for free VE-5836UK TRISTAR in PDF.


| Product Type | Pedestal Fan |
| Brand | TriStar |
| Model | VE-5836UK |
| Power Supply | 220-240V ~ 50/60Hz |
| Speed Settings | Multiple (via speed control buttons) |
| Oscillation | Yes (push/pull oscillation knob) |
| Height Adjustment | Yes (via height adjustment ring and extension rod) |
| Assembly Required | Yes (stand, cage, blades) |
| Control Type | Buttons (speed) and knob (oscillation) |
| Cage Material | Metal (front and rear) |
| Blade Material | Plastic |
| Stand Material | Plastic pedestal and metal extension rod |
| Safety Features | Children aged <8 not allowed; keep cord out of reach |
| Cleaning | Damp cloth; do not immerse |
| Guarantee | 24 months |
| Intended Use | Household only |
| Installation Clearance | Minimum 10 cm free space around |
| Spare Parts Availability | At www.tristar.eu |
Frequently Asked Questions - VE-5836UK TRISTAR
User questions about VE-5836UK TRISTAR
0 question about this device. Answer the ones you know or ask your own.
Ask a new question about this device
Download the instructions for your Household Fan in PDF format for free! Find your manual VE-5836UK - TRISTAR and take your electronic device back in hand. On this page are published all the documents necessary for the use of your device. VE-5836UK by TRISTAR.
USER MANUAL VE-5836UK TRISTAR
natural_image
Modern minimalist desk lamp with a circular top and stand, no visible text or symbolsCONTROLS
ASSEMBLY
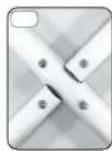
Unscrew four screws on the stand
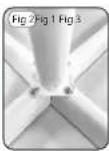
Place pedestal on feet & fasten screws
Remove the height adjustment ring
Slide stand cover down onto base
Loosen height adjustment ring to extend the extension
Loosen rear fixing knob & attach extension rod
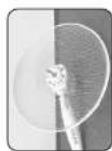
Fit rear cage Secure rear cage with re locking
are rear cage
with rear
locking ring
Loosen screw & nut on bottom of rear cage
Open front cage clips
Tighten screw & nut & close cage clips
EN | Instruction Manual
SAFETY
- This appliance shall not be used by children aged less than 8 years. This appliance can be used by children from 8 years and above and persons with reduced physical, sensory or mental capabilities or lack of experience and knowledge if they have been given supervision or instruction concerning use of the appliance in a safe way and understand the hazards involved. Children shall not play with the appliance. Keep the appliance and its cord out of reach of children aged less than 8 years. Cleaning and user maintenance shall not be made by children unless older than 8 and supervised.
- By ignoring the safety instructions, the manufacturer cannot be held responsible for the damage.
- If the supply cord is damaged, it must be replaced by the manufacturer, its service agent or similarly qualified
persons in order to avoid a hazard. - Never move the appliance by pulling the cord and make sure the cord cannot become entangled.
- The appliance must be placed on a stable, level surface.
- The user must not leave the device unattended while it is connected to the supply.
• This appliance is only to be used for household purposes and only for the purpose it is made for.
• To protect yourself against an electric shock, do not immerse the cord, plug or appliance in the water or any other liquid.
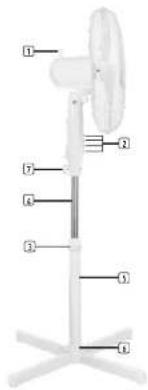
CONTROLS
- Oscillation knob
- Speed control buttons
- Height adjustment ring
- Extension rod
- Pedestal
- Stand cover
- Rear fixing knob
BEFORE THE FIRST USE
• Take the appliance and accessories out of the box. Remove the stickers, protective foil or plastic from the device.
- Follow the assembly diagram to assemble the product.
- Place the device on a flat stable surface and ensure a minimum of 10cm free space around the device. This device is not suitable for installation in a cabinet or for outside use.
- Put the power cable into the socket. (Note: Make sure the voltage which is indicated on the device matches the local voltage before connected the device. Voltage 220V-240V 50/60Hz.
TrISTAR
VE-5836UK EN | Instruction manual
ASSEMBLY
Fig 1 Unscrew the four screws from the stand feet and cross the stand feet.
Fig 2 Place the pedestal on the feet and fasten the four screws in place.
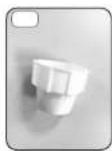
Fig 3 Remove height adjustment ring by unscrewing and sliding up.
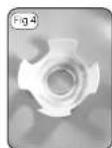
Fig 4 Slide stand cover down onto the base and screw the height adjustment ring back in place.
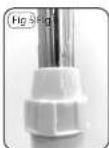
Fig 5 Loosen height adjustment ring to extend the extension rod and tighten back into place.
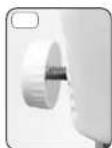
Fig 6 Loosen rear fixing knob and attach extension rod.
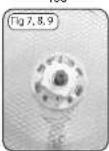
Fig 7 Unscrew the rear locking ring from the motor shaft in anti-clockwise direction.
Fig 8 Set the rear cage and fit it well on the two position holes and make sure these holes are properly put through the holes on the rear cage.
Fig 9 Hold the rear cage and screw the rear locking ring into the motor front cover in a clockwise direction.
Fig 10 Install the fan blade onto motor shaft and fit the fan blade lock cap.
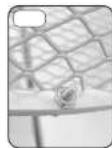
Fig 11 Loosen the screw and nut on the bottom of the rear cage.
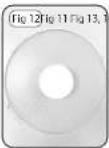
Fig 12 Open front cage clips and position onto rear cage ensuring the screw bottom is aligned between both.
Fig 13 Tighten screw and nut.
Fig 14 Close the cage clips over both front and rear cage.
USE
- Use the speed control buttons to choose the desired ventilation level.
• To make the fan head oscillate, push down the oscillation knob. - To stop the fan head from oscillating, pull up the oscillation knob.
CLEANING AND MAINTENANCE
- Clean the appliance with a damp cloth. Never use harsh and abrasive cleaners, scouring pads or steel wool which can damage the device.
- Never immerse the electrical device in water or any other liquid. The device is not dishwasher proof.
GUARANTEE
This product is provided with a 24 months guarantee. Your guarantee is valid if the product is used in accordance to the instructions and for the purpose for which it was created. In addition, the original purchase (invoice, sales slip or receipt) needs to be retained and to be submitted on request with the date of purchase, the name of the retailer and
the item number of the product. The guarantee does not cover damage caused by:
- Accident or unanticipated events (e.g. lightning, water, fire).
- Improper use or transport.
- Disregard of safety and maintenance instructions.
- Other improper treatment or modification.
ENVIRONMENT
图
This appliance should not be put into the domestic garbage at the end of its durability but must be offered at a central point for the recycling of electric and electronic domestic appliances. This symbol on the appliance, instruction manual and packaging directs your attention to this important issue. The materials used in this appliance can be recycled. By recycling used domestic appliances, you contribute an important push to the protection of our environment. Ask your local authorities regarding the point of recollection.
SUPPORT
You can find all available information and spare parts at www.tristar.eu
Tristar Europe B.V. | Jules Verneweg 87 | 5015 BH Tilburg | The Netherlands


Brand : TRISTAR
Model : VE-5836UK
Category : Household Fan