
MoveLink LT2 - Mikrofon GODOX - Kostenlose Bedienungsanleitung
Finden Sie kostenlos die Bedienungsanleitung des Geräts MoveLink LT2 GODOX als PDF.


| Produkttyp | 2,4 GHz Digitales Drahtlosmikrofonsystem |
| Modell | MoveLink LT2 |
| Marke | Godox |
| Abmessungen (Sender/Empfänger) | 50 mm × 40 mm × 14 mm |
| Abmessungen (Ladecase) | 163 mm × 66 mm × 28 mm |
| Gewicht (Sender/Empfänger) | 27 g |
| Gewicht (Ladecase) | 129 g |
| Stromversorgung | Integrierter Lithium-Akku, 300 mAh, USB Typ-C oder Ladecase |
| Betriebszeit | Ca. 6 Stunden |
| Übertragungstechnik | 2,4 GHz Frequenzsprungverfahren (FHSS) |
| Reichweite | Bis zu 50 Meter (bei freier Sicht) |
| Frequenzbereich | 50 Hz – 20 kHz |
| Signal-Rausch-Verhältnis | ≥ 70 dB |
| Klangqualität | Verlustfrei, klar und stabil |
| Anzeige | TFT-Display mit Parametereinstellungen |
| Überwachung | 3,5 mm Kopfhörer-Echtzeitüberwachung |
| Kanäle | Zwei Sender, ein Empfänger; umschaltbar Mono/Stereo |
| Lautstärkeregelung | 16 Stufen, -5 dB bis +10 dB mit Stummschaltung |
| Mikrofonanschluss | 3,5 mm TRS für externes Lavaliermikrofon (umschaltet automatisch) |
| Befestigungsmöglichkeiten | Rückenclip (mit Magnet) und magnetischer Eisenplatte |
| Ladeoptionen | USB Typ-C direkt oder über MoveLink Ladecase (separat erhältlich) |
| Wartung | Trocken halten; vor Stößen schützen; keine Selbstreparatur |
| Sicherheit | Nicht öffnen; von Kindern fernhalten; nicht über 40 °C lagern |
| Garantie (Hauptgerät) | 12 Monate |
| Garantie (Akku) | 3 Monate |
Häufig gestellte Fragen - MoveLink LT2 GODOX
Benutzerfragen zu MoveLink LT2 GODOX
0 Frage zu diesem Gerät. Beantworten Sie die, die Sie kennen, oder stellen Sie Ihre eigene.
Eine neue Frage zu diesem Gerät stellen
Laden Sie die Anleitung für Ihr Mikrofon kostenlos im PDF-Format! Finden Sie Ihr Handbuch MoveLink LT2 - GODOX und nehmen Sie Ihr elektronisches Gerät wieder in die Hand. Auf dieser Seite sind alle Dokumente veröffentlicht, die für die Verwendung Ihres Geräts notwendig sind. MoveLink LT2 von der Marke GODOX.
BEDIENUNGSANLEITUNG MoveLink LT2 GODOX
神牛微信公众号
Follow WaPai Public Account
合格证
QC PASS
深圳市神牛摄影器材有限公司
地址:深圳市宝安区福海街道塘尾社区螺川工业区厂房2栋
电话: 0755-29609320(8062) 传真: 0755-25723423 邮箱: godox@godox.com
GODOX Photo Equipment Co., Ltd.
Add. Building 2, Yaochuan Industrial Zone, Tangwei Community, Fuhai Street, Bao'an
District, Shenzhen 518103, China Tel: +86-755-29609320(8062)
Fax: +86-755-25723423 E-mail: godox@godox.com
godox.com
Made in China


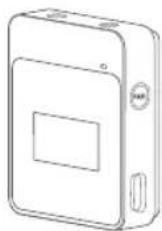
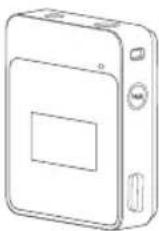
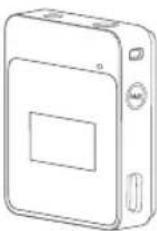
MoveLink
MoveLink 2.4GHz wireless
microphone system
说明手册 | Instruction Manual
前言
欢迎使用神牛2.4GHz数字无线麦克风系统MoveLink,利用2.4G波段来传输的音频产品,本产品适用于直播、采访、授课、短视频拍摄等场景,请仔细阅读本说明书,以便能正确的操作,发挥本产品的优越性能。
产品特点
① 系统使用的是全球通用频段2.4GHz 无线技术,采用跳频技术可避免同频干扰、可跟WIFI、蓝牙同时使用(在大量WIFI节点存在的场合受影响);
② 无损音质,清晰稳定;
③ 无线距离最大可达50米;
④ TFT显示屏提供各项参数形象显示;
⑤ 3.5mm耳机实时监听;
⑥ 输出音量控制,提供静音功能;
① 发射/接收匹配稳定;
⑧ 支持两路发射一路接收;
⑨ 单声道/立体声切换模式,轻松做到多输出选择;
两种充电方式,内置锂电池可通过USB Type-C接口直充,或放入内置三个充电座的MoveLink触点式充电盒,充电盒连接电源进行充电。
警告
请勿私自拆卸产品,如产品出现故障须由本公司或授权的维修人员进行检查维修。
请保持干燥:请勿用湿手接触产品,亦不可将产品浸入水中或暴露于雨中。
请勿让儿童接触本产品。
请勿在易燃易爆环境中使用,在这些场合下,请注意相关警告标识。
请勿放置在超过40度的高温环境中。
△ 若发生任何故障,请立即关闭电源。
部件名称
MoveLink TX (发射器)
- 内置麦克风
2.3.5mm 音频接口 - 开 / 关机键
- 静音键
- 工作指示灯
- 配对键
- TFT 显示屏
- USB Type-C 接口
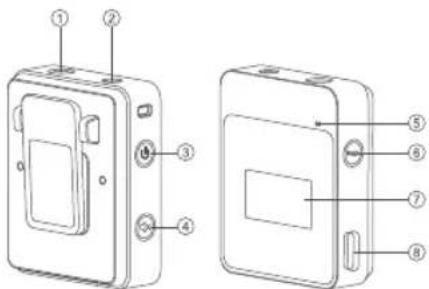
MoveLink RX(接收器)
1.3.5mm 音频同步监听接口
2.3.5mm TRS 音频输出接口
3. 开关机 / 切换音量设置键
4. 声音 + /
5. 工作指示灯
6. 配对键
7. TFT 显示屏
8. USB Type-C 接口
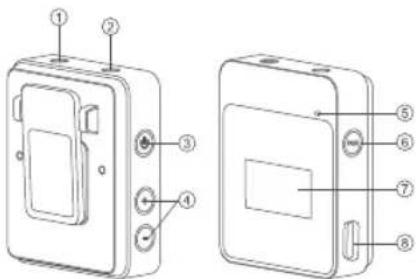
功能与使用方法
MoveLink TX (发射器)
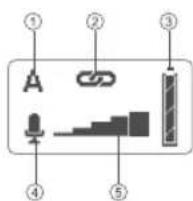
1. 屏幕显示
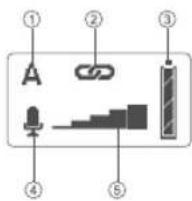
① 连接通道 A 表示连接 A 通道
② 连接状态下图为已连接
③ 电池电量
④ 录音与静音图标此图为录音状态
⑤ 音浪指示
2. 功能介绍
开关机:长按电源开关即可开/关机;开机状态下如有接入电源的USB Type-C数据线插入,长按电源键进入待机状态,待机状态显示充电动画;待机状态下长按电源键可开机。
短按静音键可开关静音。
PAIR 长按配对键可配对接收器,配对成功灯为蓝色。
① 将接入电源的USB Type-C数据线插入发射器的USB Type-C接口即可充电。充电时,会显示充电动画。
3. 安装方法
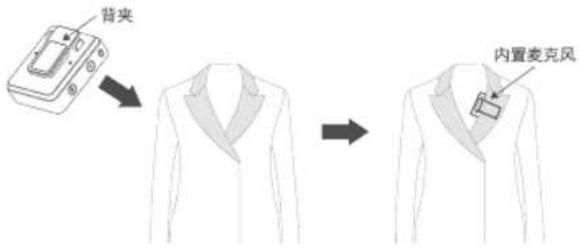
使用内置麦克风:
背夹安装方法
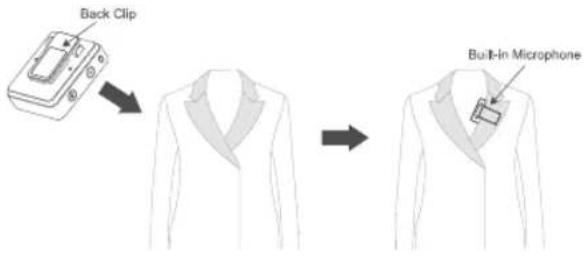
把发射器通过背夹安装到衣领上,使内置麦克风指向音源方向。
在使用过程中为了更好的隐蔽性,建议将背夹朝外固定使用。
磁吸片安装方法
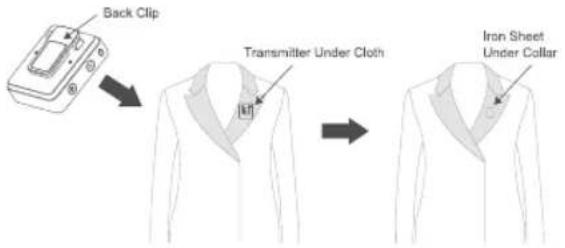
MoveLink 发射器和接收器的背夹均含磁铁,具有磁力,可以吸附在光滑的金属铁表面。标配铁片可以强力吸附背夹,让发射器或接收器隐藏于衣服内。一手拿发射器,背夹朝外放入衣服内,另一只手将铁片覆盖在衣服上面吸附背夹,背夹被强力吸住后,可松手使用。注意,单层衣服可强力吸附,加厚、超厚或多层衣服,吸附能力减弱,会出现吸附不住的情况,这种情况下,请勿使用此安装方法。
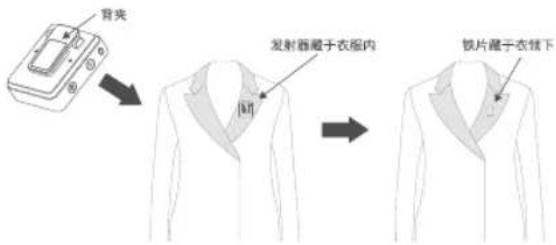
使用外置麦克风:
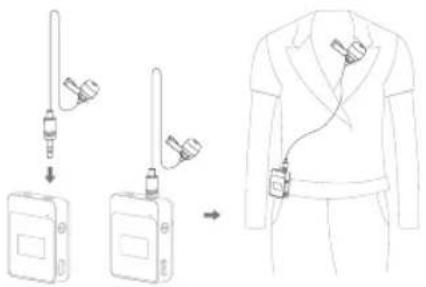
把3.5mm领夹式麦克风插入发射器的3.5mm音频接口并扣紧;把发射器通过背夹夹到腰带上,再把另一头的领夹麦克风夹到衣领上。当使用外置麦克风时,内置麦克风会自动关闭。
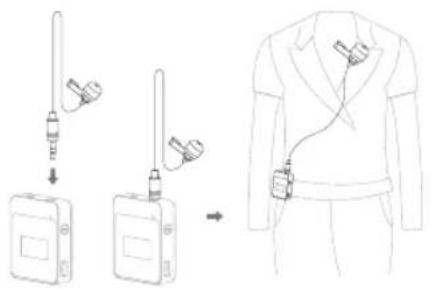
MoveLink RX(接收器)
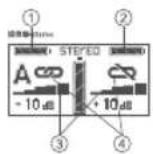
1. 屏幕显示
①A通道发射器电量
② B 通道发射器电量
① A/B 通道音浪动态显示
④ 显示 A/B 通道断开与连接
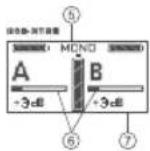
⑤ 声道选择显示
⑥ A/B 通道音量调节显示
⑦音量调节界面
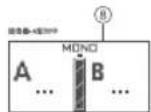
⑧ 配对界面
2. 功能介绍

A. 开关机:长按电源开关即可开 / 关机;开机状态下如有接入电源的 USB Type-C 数据线插入,长按电源键进入待机状态,待机状态显示充电动画;待机状态下长按电源键可开机。

B. 音量调节:
(1) 双通道音量设定模式时,短按“声音+/-”按键实现 A/B 发射器音量同时增加 / 减少功能;长按“声音+/-”按键实现 A/B 发射器音量同时持续增加 / 减少功能;
(2) 如需切换通道,短按电源开关键 ⏻ 可切换单独调节“A 通道”/“B 通道”/“双通道”音量,显示屏闪烁数字的通道为可调节音量通道,3 秒无操作切换为双声道调节。
(3) 单通道音量设定模式时,短按 / 长按“音量+”实现闪烁,通道声音递增,若 A/B 发射器音量调节达到最大值。只显示当前音量条,不做实际控制;短按 / 长按“音量-”实现闪烁,通道声音递减,若 A/B 发射器音量调节达到最小值,只显示当前音量条,不做实际控制。
(4) 音量调节为 16 榧:-5dB - 10dB。
C. 长按配对键可配对发射器信号,左声道自动接收 A 发射器的信号,右声道自动接收 B 发射器的信号,短按实现独立声道和立体声切换。
D. 将接入电源的 USB Type-C 数据线插入接收器的 USB Type-C 接口即可充电。充电时,会显示充电动画。
3. 安装方法
搭配相机使用安装方法:
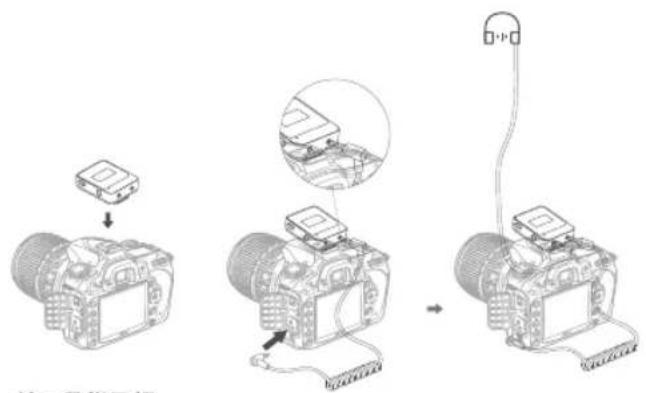
把接收器通过背夹夹到相机的热靴座固定,通过3.5mm TRS-TRS音频连接线连接接收器和相机。把耳机插入耳机监听插孔进行监听。
接口及指示灯
- 接口:
发射器 LINE IN: 音频信号输入 ○
接收器 LINE OUT: 音频信号输出
接收器音频同步接收口:监听接口连接耳机线 ○○
- 指示灯:
工作指示灯:常亮绿色时为产品在开机状态下正常工作。
(1) 发射器:
待机状态时,指示灯熄灭;
开机状态时,无连接橙黄色常亮;连接通道时蓝色常亮;
正在配对时,红灯循环快闪两次。
(2) 接收器:
待机状态时,指示灯熄灭;
开机状态时,无连接橙黄色常亮;连接通道时蓝色常亮;
正在配对时,红灯循环快闪两次。
包装清单
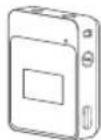
MoveLink TX [发射器]
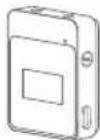
MoveLink RX (接收器)
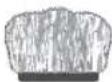
防风毛罩
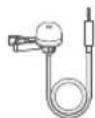
全向型领宾式麦克风
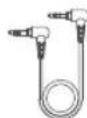
3.5mm TRS-TRS
音频连接线
(相机适配线)
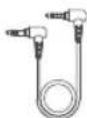
3.5mm TRS-TRRS
音频连接线
(手机适配线)
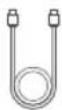
USB Typc-C 数据线
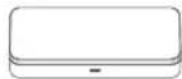
MoveLink充电盒

手提绳

铁片

说明书
(含保修卡)
| 名称 | 型号 | 标配物品 |
| MoveLink 发射器 | MoveLink TX | MoveLink TX (发射器)×1防风毛罩×1USB Type-C数据线×1铁片×1 |
| MoveLink 接收器 | MoveLink RX | MoveLink RX (接收器)×1USB Type-C数据线×1铁片×1 |
| MoveLink M1组合 | MoveLink M1 | MoveLink TX (发射器)×1MoveLink RX (接收器)×1防风毛罩×11.2m全向型领夹麦克风×13.5mmTRS-TRS音频连接线(相机适配线)×13.5mmTRS-TRRS音频连接线(手机适配线)×1USB Type-C数据线×2铁片×2 |
| MoveLink M2组合 | MoveLink M2 | MoveLink TX (发射器)×2MoveLink RX (接收器)×1防风毛罩×21.2m全向型领夹麦克风×23.5mmTRS-TRS音频连接线(相机适配线)×13.5mmTRS-TRRS音频连接线(手机适配线)×1USB Type-C数据线×3MoveLink充电盒×1手提绳×1铁片×3 |
注意:所有型号包装清单均包含产品说明书(含保修卡)。
可选配物品
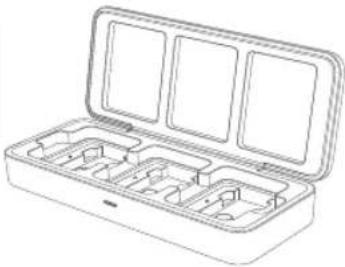
- MoveLink 充电盒 ML-C3(标配 USB Type-C 数据线 ×1、手提绳 ×1)
MoveLink 充电盒内置三个充电座,接入电源后,可同时为 MoveLink 系统的发射器 / 接收器触点式充电。
注:MoveLink M1 套装不标配充电盒,MoveLink M2 套装标配充电盒。
natural_image
Line drawing of an open cylindrical device with multiple compartments (no text or symbols)MoveLink 充电盒充电示意图:
充电过程黄灯常亮,充满绿灯常亮。
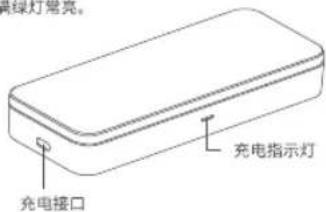
MoveLink 系统有两种充电方式:A. 可通过 USB Type-C 接口直充;B. 也可放 MoveLink 充电盒触点式充电。
规格参数
| 名称 | MoveLink RX (接收器) | MoveLink TX (发射器) |
| 模拟输出 | 3.5mmTRS | |
| 灵敏度 | -32dB+/-2dB | |
| 最大SPL | 120dB | |
| 模拟输入 | 3.5mmTRS领夹式麦克风输入 | |
| 等效输入噪音 | 21.8dB (A加权) | |
| 频率范围 | 50Hz-20KHz | |
| 最大输出电平 | +3dBu | |
| 信噪比 | 70dB或更高 | |
| 固定方式 | 背夹插口(可安装相机闪光灯热靴里) | |
| 显示屏 | TFT显示屏 | |
| 动态范围 | 100dBA (麦克风前置放大器) | |
| 工作范围 | 50米(无遮挡条件下) | |
| 供电方式 | 内置锂电池 | |
| 工作时间 | 约6H | |
| 电池容量 | 300mAh | |
| 传输类型 | 2.4GHz数字跳频系统 | |
| 拾音模式 | 全向型 | |
| 工作环境温度 | -10~50°C | |
| 整机尺寸 | 长50mm×宽40mm×厚14mm | |
| 整机重量 | 27g | |
| 名称 | MoveLink充电盒ML-C3 |
| 材质 | ABS材质 |
| 适用机型 | MoveLink TX、MoveLink RX |
| 充电输入 | USB Type-C |
| 尺寸 | 长163mm×宽66mm×厚28mm |
| 重量 | 129g |
故障排除
如不能接收到音频信号,请检查电池是否正确安装以及是否打开发射器电源;发射器和接收器是否设置在同一组别和频道;麦克风及耳机是否已正确牢固连接到位;功能模式是否设置正确。
检查发射器是否设置的静音。
如您的发射器受到他人干扰,改变发射器和接收器的频道设置即可。
如您发现发射音频距离有限或者有漏发现象,请检查是否电池耗尽,请尝试更换电池。
维护保养
避免跌落:如果受到强烈碰撞或振动,发射器和接收器可能会发生故障。
保持干燥:本产品是非防水产品,如果将其浸入水中或放置于高湿度的环境中将可能发生故障。内部构造生锈可能会导致无法修理的损害。
避免温度骤变:温度的突变,诸如在寒冷天进出温暖的大楼将可能会使发射器和接收器内部结露。为避免结露,请将设备事先装入手提袋或塑料包内,以防温度突变。
远离强磁场:无线电广播发射机等设备产生的强静电或强磁场可能会干扰本产品正常工作。
Forward
Thank you for purchasing Godox MoveLink 2.4GHz wireless microphone system. These products are suitable for video recording, journalistic shooting, audio recording, etc. Please read this manual carefully before using to make sure the correct operation and exert the optimum function.
Features
① Adopt globally accepted 2.4GHz wireless and frequency-hopping technology to avoid same frequency disturbance, which can be used in WIFI and Bluetooth simultaneously (may be influenced in occasions with multiple WIFI nodes)
② Clear, stable and lossless sound quality
③ The maximum wireless distance up to 50m
④ With TFT display to show the parameters setting
⑤ Support 3.5mm Earphone real-time monitoring
⑥ With output volume control and silence function
⑦ Stable match of transmitting and receiving
⑧ Supports two-way transmitting and one-way receiving
③ Freely switch mono or stereo channel to offer more output options
Two lithium battery charging methods through USB port or MoveLink charging case connected to power supply.
Warning
Do not disassemble. Should repairs become necessary, this product must be sent to an authorized maintenance center.
△ Always keep this product dry. Do not use in rain or in damp conditions.
⚠️ Keep out of reach of children.
Do not use the device in the presence of flammable gas. In certain circumstance, please pay attention to the relevant warnings.
Do not leave or store the product if the ambient temperature reads over 40°C.
⚠ Turn off the devices immediately in the event of malfunction.
Names of Parts
MoveLink TX (Transmitter)
- Built-in Microphone
- 3.5mm Audio Port
- Power Switch Button
- Mute Button
- Working Indicator
- Pairing Button
- TFT Display
- USB Type-C Port
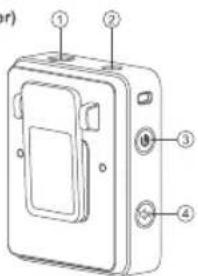
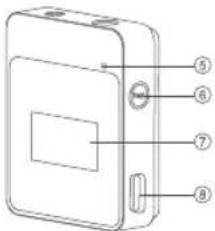
MoveLink RX (Receiver)
- 3.5mm Audio Sync Monitoring Port
- 3.5mm TRS Audio Output Port
- Power Switch/Switch Volume Setting Button
- Sound +/-
- Pairing Button
- Working Indicator
7.TFT Display - USB Type-C Port
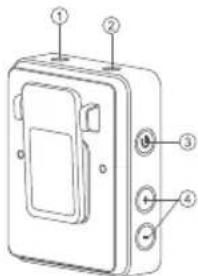
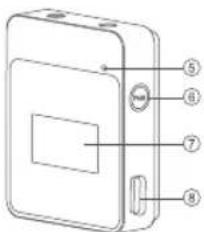
Functions and Operation
MoveLink TX (Transmitter)
1. Display
Icon 1: connecting channel. A means connecting to A channel.
Icon 2: connecting state. The icon on the picture means connected state.
Icon 3: battery level.
Icon 4: recording and silent icon. The icon on the picture means recording state.
Icon 5: soundbyte indication.
2. Function Introduction
Power switch: long press the power switch to power on or off. In the state of power-on, if there is USB Type-C Cable inserted, long press the power switch to enter standby state and the charging animation will be displayed. In standby state, long press the power switch to power on.
Short press the TX mute button to switch on or off silent mode.
PAR Long press the pairing button to match the receiver. The indicator will light blue when successfully matched.
Charge the products through USB Type-C port directly. The charging animation will be displayed in charging.
3. Installation Method
Using built-in microphone:
Through the back clip
Install the transmitter on the collar through the back clip, aiming the built-in microphone towards the sound source direction.
For achieving better invisibility during the usage, it is recommended to fix the back clip towards the outside.
Through the magnetic mount
Back clip of MoveLink transmitter and receiver with magnetic which can be mount on smooth metal iron surface. The including iron sheet can strongly absorb the back clip, allowing the transmitter or receiver to be hidden in the clothes. Hold the transmitter in one hand with the back clip facing out and put it into the clothes. With the other hand, cover the iron sheet on the clothes to absorb the back clip. After the back clip is strongly sucked, you can let them go. Note that single-layer clothes can be strongly adsorbed. Thicker, ultra-thick or multilayer clothes will have weak adsorption capacity and will not be able to adsorb. In this case, please do not use this installation method.
Using External Microphone:
Insert the 3.5mm lavalier microphone into the transmitter's 3.5mm audio port and lock it tightly. Clip the transmitter onto the belt by back clip and clip the lavalier microphone on the other end onto the collar. When using the external microphone, the built-in microphone will be automatically turned off.
MoveLink RX (Receiver)
1. Screen Display
Icon 1: A channel transmitter's battery level
Icon 2: B channel transmitter's battery level
Icon 3: A/B channel's soundbyte dynamic display
Icon 4: Connection or disconnection of A/B channel
Icon 5: Sound channel selection display
Icon 6: A/B channel's volume adjustment display
Icon 7: Sound volume adjustment interface
Icon 8: Pairing interface
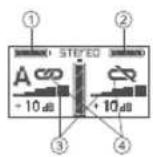
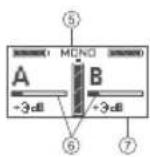
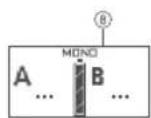
2. Function Introduction

A. Power Switch:
long press the power switch to power on or off. In the state of power-on, if there is USB Type-C inserted, long press the power switch to enter standby state and the charging animation will be displayed. In standby state, long press the power switch to power on.

B. Volume Adjustment:
(1) In dual sound setting mode, short press the "sound +/-" button to increase or decrease the A/B transmitter's sound volume simultaneously; long press the "sound +/-" button to increase or decrease the A/B transmitter's sound volume gradually.
(2) Switch Channel: Short press the power switch button ⏻ to separately adjust the volume of "A channel", "B channel" and "A&B dual channel". The channel with blinking figures can be adjusted volumes and will be switched to dual channel adjustment if there are no operations after 3 seconds.
(3) In mono channel mode setting, short press or long press the "volume +" to increase the channel's volume gradually. If one of the transmitter's volumes is up to maximum, the current volume slider can only be displayed instead of being controlled; short press or long press the "volume -" to decrease the channel's volume gradually. If one of the transmitter's volumes is up to minimum, the current volume slider can only be displayed instead of being controlled.
(4) There are 16 levels of volume adjustment: -5dB-10db.

C. Long press the pairing button to match the singles of transmitters. The left channel will automatically receive A transmitter's singles while the right channel will receive B transmitter's. Short press the pairing button to select mono channel and stereo channel.

D. Charge the products through USB Type-C port directly. The charging animation will be displayed in charging.
3. Installation Method
Install the receiver onto the camera's hotshoe and fix it through the back clip. And connect the receiver with the camera by 3.5mm TRS-TRS audio connect cable. Then, insert the your earphone plug into the 3.5mm Audio Sync Monitoring Port to monitor.
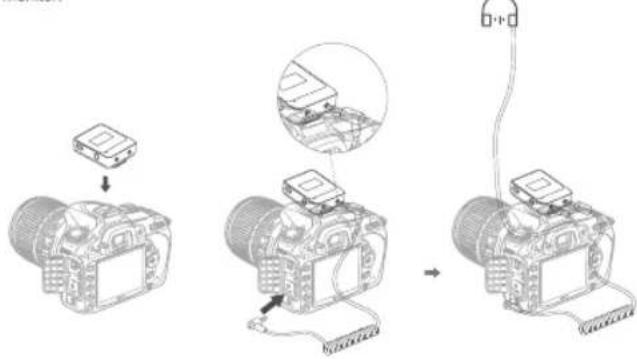
Port and Indicator
1. Ports:
Transmitter LINE IN: audio singles input
Receiver LINE Out: audio singles output
Receiver Audio Sync Monitoring Port: insert the earphone plug into ○○ monitoring port
2. Indicator:
Working indicator: the indicator will display green in normal working state.
(1) Transmitter
In standby state, the indicator will be off.
In boot-up state, the indicator will be orange in non-connection, be blue in connec-
tion.
During the pairing, the indicator will blink in red for two times circularly.
(2) Receiver
In standby state, the indicator will be off.
In boot-up state, the indicator will be orange in non-connection, be blue in connec-
tion.
During the pairing, the indicator will blink in red for two times circularly.
What's in the Box
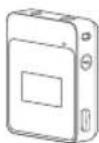
MoveLink TX
[Transmitter]
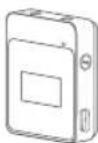
MoveLink RX
(Receiver)
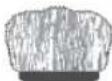
Wind Cap
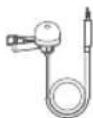
Omnidirectional
Lavator
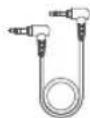
3.5mm TRS-TRS
Audio Connect Cable
(For Camera)
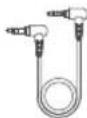
3.5mm TRS-TRRS
Audio Connect Cable
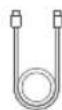
USB Type-C
Cable
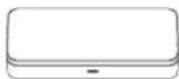
MoveLink Charging Case

Wrist Strap

Iron Sheet

Instruction Manual (Including Warranty)
| Name | Model | Included Items |
| MoveLink Transmitter | MoveLink TX | MoveLink TX (Transmitter) ×1Wind Cap ×1USB Type-C Cable ×1Iron Sheet ×1 |
| MoveLink Receiver | MoveLink RX | MoveLink RX (Receiver) ×1USB Type-C Cable ×1Iron Sheet ×1 |
| MoveLink M1 | MoveLink M1 | MoveLink TX (Transmitter) ×1MoveLink RX (Receiver) ×1Wind Cap ×11.2m Omnidirectional Lavalier Microphone ×13.5mmTRS-TRS Audio Connect Cable (for camera) ×13.5mmTRS-TRRS Audio Connect Cable (for phone) ×1USB Type-C Cable ×2Iron Sheet ×2 |
| MoveLink M2 | MoveLink M2 | MoveLink TX (Transmitter) ×2MoveLink RX (Receiver) ×1Wind Cap ×21.2m Omnidirectional Lavalier Microphone ×23.5mmTRS-TRS Audio Connect Cable (for camera) ×13.5mmTRS-TRRS Audio Connect Cable (for phone) ×1USB Type-C Cable ×3MoveLink Charging Case ×1Wrist Strap ×1Iron Sheet ×3 |
Note: Packing lists of all models also include the instruction manual (with warranty).
Optional Accessory
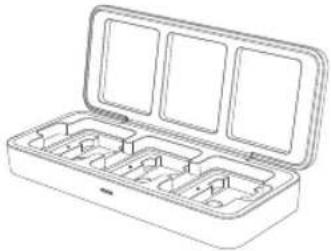
- MoveLink Charging Case ML-C3(Include USB Type-C Cable and a Wrist Strap) There are three charging bases in MoveLink, which can charge three transmitters or receivers of MoveLink system after being connected to power supply.
Note: MoveLink M1 do not include MoveLink Charging Case while MoveLink M2 includes a MoveLink Charging Case.
natural_image
Line drawing of a closed storage tray with multiple compartments (no text or symbols)MoveLink Charging Case Schematic Diagram of Charging: The indicator will display yellow during the charging process and turn to green when being fully charged.
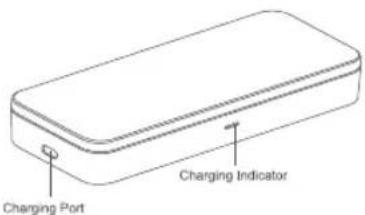
MoveLink system has two charging ways:
A. being charged from USB Type-C cable;
B. being charged through MoveLink Charging Case.
Technique Data
| Name | MoveLink RX (Receiver) | MoveLink TX (Transmitter) |
| Simulated Output | 3.5mmTRS | |
| Sensitivity | -32dB+/-2dB | |
| Max. SPL | 120dB | |
| Simulated Input | 3.5mmTRS Lavalier microphone input | |
| Equivalent Input Noise Level | 21.8dB (A weighting) | |
| Frequency Range | 50Hz-20KHz | |
| Max. Output Electrical Level | +3dBu | |
| Single to Noise Ratio | 70dB or higher | |
| Fixing Method | Back clip (installed onto camera's hotshoe) | |
| Display | TFT Display | |
| Dynamic Range | 100dBA (microphone preamplifier) | |
| Working Range | 50m (in no shelter situation) | |
| Power Supply | Built-in lithium battery | |
| Working Time | Approx. 6H | |
| Battery Capacity | 300mAh | |
| Transmission Type | 2.4GHz Frequency hopping system | |
| 2.4G Wireless Frequency Range | 2404MHz~2476MHz | |
| Max,Transmitting Power of 2.4G wireless | 18dbm | |
| Sound Pick-up Mode | Omnidirectional | |
| Working Environment Temperature | -10~50°C | |
| Dimension | Length 50mm × width 40mm × thickness14mm | |
| Weight | 27g | |
| Name | MoveLink Charging Case ML-C3 |
| Material | ABS Material |
| Suitable Models | MoveLink TX, MoveLink RX |
| Charging Input | USB Type-C |
| Dimension | Length 163mm × Width 66mm × Thickness 28mm |
| Weight | 129g |
Troubleshooting
Unable to receive audio signal. Make sure batteries are installed correctly and Power Switch is turned on. Check if the transmitter and the receiver are set to the same channel, if the microphone or earphone is well connected, or if the devices are set to the correct mode.
Check if the transmitter is set to mute mode or not.
Signal disturbance or shooting interference. Change a different channel of the transmitter and receiver.
Operation audio distance limited or signal missing. Check if batteries are exhausted. If so, replace them.
Maintenance
Avoid sudden drops. The device may fail to work after strong shocks, impacts, or excess stress.
Keep dry. The product isn't water-proof. Malfunction, rust, and corrosion may occur and go beyond repair if soaked in water or exposed to high humidity.
Avoid sudden temperature changes. Condensation happens if sudden temperature changes such as the circumstance when taking the product out of a building with higher temperature to outside in winter. Please put the product in a handbag or plastic bag beforehand.
Keep away from strong magnetic field. The strong static or magnetic field produced by devices such as radio transmitters leads to malfunction.
Changes made to the specifications or designs may not be reflected in this manual.
FCC Caution
This device complies with part 15 of the FCC Rules. Operation is subject to the following two conditions:
(1) This device may not cause harmful interference, and
(2) this device must accept any interference received, including interference that may cause undesired operation.
Any Changes or modifications not expressly approved by the party responsible for compliance could void the user's authority to operate the equipment.
Note: This equipment has been tested and found to comply with the limits for a Class B digital device, pursuant to part 15 of the FCC Rules. These limits are designed to provide reasonable protection against harmful interference in a residential installation. This equipment generates uses and can radiate radio frequency energy and, if not installed and used in accordance with the instructions, may cause harmful interference to radio communications. However, there is no guarantee that interference will not occur in a particular installation. If this equipment does cause harmful interference to radio or television reception, which can be determined by turning the equipment off and on, the user is encouraged to try to correct the interference by one or more of the following measures:
- Reorient or relocate the receiving antenna.
- Increase the separation between the equipment and receiver.
- Connect the equipment into an outlet on a circuit different from that to which the
- receiver is connected.
Consult the dealer or an experienced radio/TV technician for help.
The device has been evaluated to meet general RF exposure requirement. The device can be used in portable exposure condition without restriction.
产品保修
尊敬的用户,本保修卡是申请保修服务的重要凭证,请您配合销售商填写并妥善保管,谢谢!
| 产品信息 | 型号 | 产品条码 |
| 用户信息 | 姓名 | 联系电话 |
| 通信地址 | ||
| 销售商信息 | 名称 | |
| 联系电话 | ||
| 通信地址 | ||
| 销售日期 | ||
| 备注 | ||
注:此表应由销售商盖章确认。
产品信息
本文件适用于相关《产品保修信息》(见后面说明)所列产品,其他非属此范围的产品或部件(如促销品、赠品及其他出厂后附加的部件等)不在此保修承诺内。
保修期
产品及部件的相应保修期按相关的《产品保修信息》执行。保修期自产品首次购买日起算,购买日以购买产品时保修卡登记日期为准。
如何获得保修服务
要保修服务,您可直接与产品销售商或授权服务机构联系,也可拨打神牛产品售后服务电话,与我们联系,由我们的服务人员为您安排服务。申请保修时,您应提供有效的保修卡作为保修凭证,方可获得保修。如您不能提供有效的保修卡,则在我们可确认产品或部件属于保修范围的情况下,也可以为您提供保修,但这不作为我们的义务。
不适用保修的情况
如产品存在下列情况,本文件项下的保证和服务将不适用①产品或部件超过相应保修期;②错误或不适当使用、维护或保管导致的故障或损坏,如:不当搬运;非按产品合理预期用途使用;不当插拔外接设备;跌落或外力挤压;接触或暴露于不适当温度、溶剂、酸碱、水浸或潮湿环境;③由非神牛授权机构或人员安装、修理、更改、添加或拆卸造成的故障或损坏;④产品或部件原有识别信息被修改变更或除去;⑤无有效保修卡;⑥使用非合法授权、非标准或非公开发行的软件造成的故障或损坏;⑦因不可抗力或意外事件造成的故障或损坏;⑧其他非因产品本身质量问题导致的故障或损坏。遇上述情况,您应向相关责任方寻求解决,神牛对此不承担任何责任。因非在保修期或保修范围内的部件、附件或软件导致产品不能正常使用的,不是保修范围内的故障。产品使用过程中正常的脱色,磨损和消耗,不是保修范围内的故障。
产品保修和服务支持信息
产品的保修期和服务类型按以下《产品保修信息》执行:
| 产品类别 | 选件名称 | 保修期(月) | 保修服务类型 |
| 部件 | 电路板 | 12 | 客户送修 |
| 电池 | 3 | 客户送修 | |
| 充电器、电源线,同步线等带电性能的部件 | 12 | 客户送修 | |
| 其他 | 如电池盒、防风棉、防风毛罩、锁紧装置、手提绳、扎带、魔术贴、领夹、便携袋、包装等 | 无 | 无保修 |
神牛产品售后服务电话 0755-29609320-8062
Warranty
Dear customers, as this warranty card is an important certificate to apply for our maintenance service, please fill in the following form in coordination with the seller and safe-keep it. Thank you!
| Product Information | Model | Product Code Number |
| Customer Information | Name | Contact Number |
| Address | ||
| Seller Information | Name | |
| Contact Number | ||
| Address | ||
| Date of Sale | ||
| Note | ||
Note: This form shall be sealed by the seller.
Applicable Products
The document applies to the products listed on the Product Maintenance Information (see below for further information). Other products or accessories (e.g. promotional items, giveaways and additional accessories attached, etc.) are not included in this warranty scope.
Warranty Period
The warranty period of products and accessories is implemented according to the relevant Product Maintenance Information. The warranty period is calculated from the day(purchase date) when the product is bought for the first time, and the purchase date is considered as the date registered onthe warranty card when buying the product.
How to Get the Maintenance Service
If maintenance service is needed, you can directly contact the product distributor or authorized service institutions. You can also contact the Godox after-sale service call and we will offer you service. When applying for maintenance service, you should provide valid warranty card. If you cannot provide valid warranty card, we may offer you maintenance service once confirmed that the product or accessory is
involved in the maintenance scope, but that shall not be considered as our obligation.
Inapplicable Cases
The guarantee and service offered by this document are not applicable in the following cases: ①. The product or accessory has expired its warranty period; ②. Breakage or damage caused by inappropriate usage, maintenance or preservation, such as improper packing, improper usage, improper plugging in/out external equipment, falling off or squeezing by external force, contacting or exposing to the improper temperature, solvent, acid, base, flooding and damp environments, etc; ③. Breakage or damage caused by non-authorized institution or staff in the process of installation, maintenance, alternation, addition and detachment; ④. The original identifying information of product or accessory is modified, alternated, or removed; ⑤. No valid warranty card; ⑥. Breakage or damage caused by using illegally authorized, nonstandard or non-public released software; ⑦. Breakage or damage caused by force majeure or accident; ⑧. Breakage or damage that could not be attributed to the product itself. Once met these situations above, you should seek solutions from the related responsible parties and Godox assumes no responsibility. The damage caused by parts, accessories and software that beyond the warranty period or scope is not included in our maintenance scope. The normal discoloration, abrasion and consumption are not the breakage within the maintenance scope.
Maintenance and Service Support Information
The warranty period and service types of products are implemented according to the following Product Maintenance Information:
| Product Type | Name | Maintenance Period(month) | Warranty Service Type |
| Parts | Product Main Body | 12 | Customer sends the product to designated site |
| Battery | 3 | Customer sends the product to designated site | |
| Charger, Power Cable, Sync Cable, Electrical Parts etc. | 12 | Customer sends the product to designated site | |
| Other Items | Battery Case, Windscreen Foam, Wind Cap, Locking Device, Lanyard, Tio, Velcro Tape, Clip, Bag, Package etc. | No | Without warranty |
Godox After-sale Service Call 0755-29609320-8062

- 合格证
- 深圳市神牛摄影器材有限公司
- MoveLink
- 前言
- 产品特点
- 警告
- 部件名称
- MoveLink TX (发射器)
- MoveLink RX(接收器)
- 功能与使用方法
- 屏幕显示
- 功能介绍
- 安装方法
- 磁吸片安装方法
- 使用外置麦克风:
- 接口及指示灯
- 可选配物品
- 故障排除
- 维护保养
- Forward
- Features
- Warning
- Names of Parts
- MoveLink TX (Transmitter)
- MoveLink RX (Receiver)
- Functions and Operation
- Display
- Function Introduction
- Installation Method
- Using built-in microphone:
- Through the back clip
- Through the magnetic mount
- Using External Microphone:
- Screen Display
- Port and Indicator
- Ports:
- Indicator:
- What's in the Box
- Optional Accessory
- Troubleshooting
- Maintenance
- FCC Caution
- 产品保修
- 产品信息
- 保修期
- 如何获得保修服务
- 不适用保修的情况
- 产品保修和服务支持信息
- Warranty
- Applicable Products
- Warranty Period
- How to Get the Maintenance Service
- Inapplicable Cases
- Maintenance and Service Support Information
Marke : GODOX
Modell : MoveLink LT2
Kategorie : Mikrofon