ECD 16 8 - Bohrmaschine Power Craft - Kostenlose Bedienungsanleitung
Finden Sie kostenlos die Bedienungsanleitung des Geräts ECD 16 8 Power Craft als PDF.


| Produkttyp | Akku-Bohrschrauber |
| Marke | Power Craft |
| Modell | ECD 16 8 |
| Spannung | 16,8 V |
| Leerlaufdrehzahl | 0-650 min-1 |
| Drehmomentstufen | 6 Stufen + Bohrstufe |
| Bohrfutter-Spannbereich | 1,0 - 10 mm |
| Rechts-/Linkslauf | Ja |
| Ladespannung | 20 V |
| Ladestrom | 450 mA |
| Netzspannung Ladegerät | 230 V ~ 50 Hz |
| Ladezeit | ca. 3-5 Stunden |
| Schalldruckpegel | 72 dB(A) |
| Schallleistungspegel | 82 dB(A) |
| Vibration | < 2,5 m/s2 |
| Akku-Typ | Ni-Cd, abnehmbar |
| Lieferumfang | Bohrschrauber, Akku, Ladegerät, Ladeadapter, Koffer |
| Sicherheitshinweise | Vor Nässe schützen, Kinder fernhalten, Schutzbrille tragen, versteckte Leitungen prüfen |
| Wartung | Akku regelmäßig laden, nicht tiefentladen, Kontakte sauber halten |
| Entsorgung | Altbatterien nicht in den Hausmüll, sondern zu einer Sammelstelle bringen |
Häufig gestellte Fragen - ECD 16 8 Power Craft
Benutzerfragen zu ECD 16 8 Power Craft
0 Frage zu diesem Gerät. Beantworten Sie die, die Sie kennen, oder stellen Sie Ihre eigene.
Eine neue Frage zu diesem Gerät stellen
Laden Sie die Anleitung für Ihr Bohrmaschine kostenlos im PDF-Format! Finden Sie Ihr Handbuch ECD 16 8 - Power Craft und nehmen Sie Ihr elektronisches Gerät wieder in die Hand. Auf dieser Seite sind alle Dokumente veröffentlicht, die für die Verwendung Ihres Geräts notwendig sind. ECD 16 8 von der Marke Power Craft.
BEDIENUNGSANLEITUNG ECD 16 8 Power Craft
GB Operating Instructions Battery-powered Drill/Screwdriver with Adjustable Torque
POWER CRAFT®
CE
Art.-No.: 45.196.07
natural_image
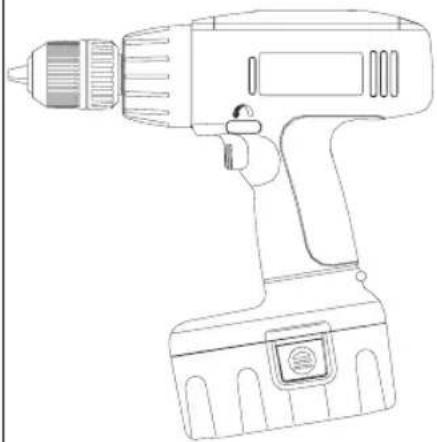
Line drawing of a handheld electric drill (no text or symbols)ECD 16,8

GB Important: Read and note the operating instructions and safety regulations before using!
GB Please pull out page 2
natural_image
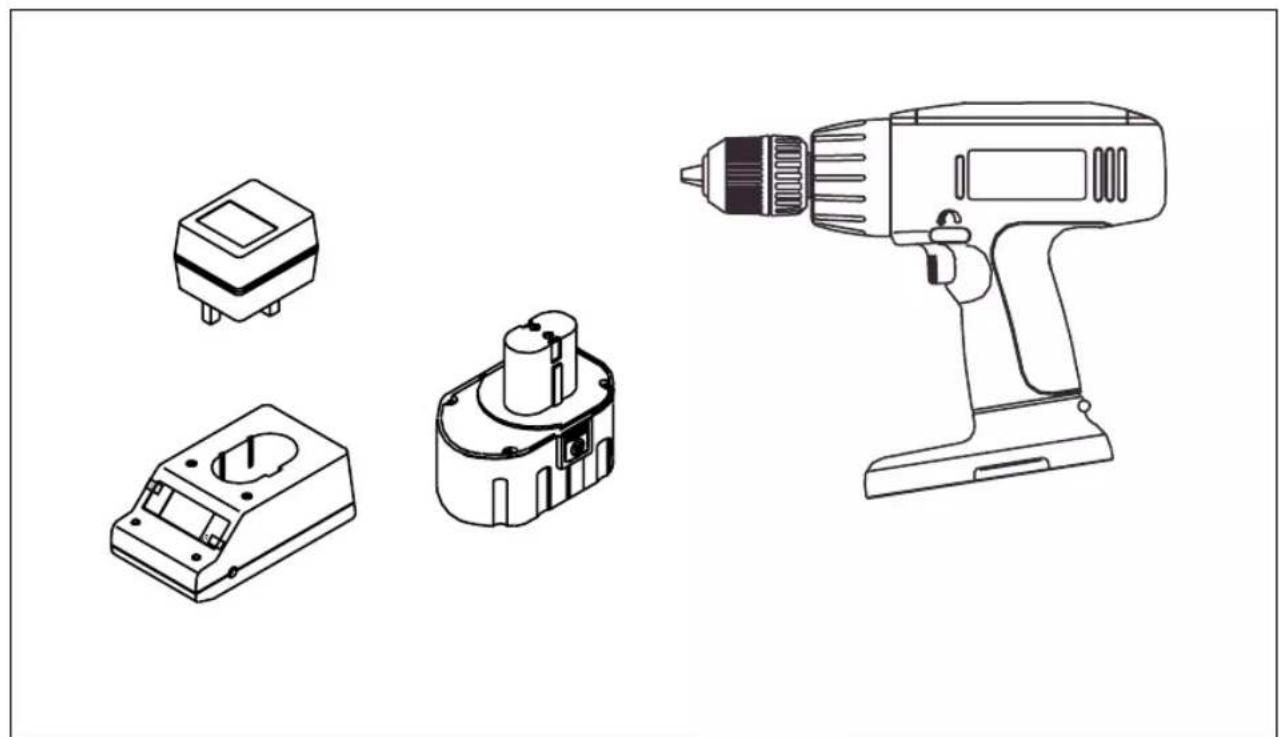
Line drawings of four electronic components: a square component, a plastic housing, a cylindrical device, and a handheld electric drill (no text or symbols)GB Items supplied:
1 battery-powered
drill/screwdriver
1 removable battery pack
1 battery charging base
1 230 V adaptor
1 blow moulded case (BMC)
GB
Tool illustration:
Figure 1: Torque adjustment facility Figure 2: Bit holder
Figure 3: Forward / Reverse selector switch Figure 4: On/Off switch
Figure 5: Removable battery pack; press both clips to take out the battery pack
Important notes:
It is imperative to read these notes before putting your battery-powered drill/screwdriver into operation:
- The removable Ni-Cd battery pack supplied with your battery-powered drill/screwdriver has to be charged before you use the tool for the first time.
- Charge the battery pack with the supplied charger. It takes approx. 3-5 hours to charge an empty battery. Never use the supplied charger to charge any other tools or appliances.
- The battery pack reaches its maximum capacity after approx. five discharge/charge cycles.
- Ni-Cd batteries will also discharge when they are not in use. It is recommended, therefore, to charge the batteries regularly.
- Please note the data quoted on the rating plate of the battery charger. Operate the charger only from the same mains voltage as that quoted on the rating plate.
- In periods of heavy duty the battery pack will grow warm. Allow the battery pack to cool to room temperature before starting to charge it.
Safety regulations:
- Protect your battery-powered drill/screwdriver and charger from the damp and rain.
- Keep the charger and battery-powered drill/screwdriver safe from children.
- Use only sharp drill bits and undamaged, properly fitting screwdriver bits.
- Wear suitable working clothes and safety goggles.
- Never use the battery-powered drill/screwdriver and charger in the vicinity of vapours and combustible liquids.
- Look for concealed electric cables, gas pipes and water pipes before drilling and screwdriving in walls.
-
Never throw old batteries into an open fire. Risk of explosion!
-
Old and defective batteries do not belong in the refuse bin. Think of the environment! Cadmium is toxic. For correct disposal, take old and defective batteries to your local old battery depot. Ask at your town hall for details of the old battery depots in your area.
- Avoid contact with leaky batteries. Should contact arise nevertheless, wash the affected area of skin immediately with soap and water. If battery acid gets in your eye, rinse the eye with clear water for at least 10 minutes and consult a doctor immediately.
- Protect the charger and its cable from damage and sharp edges. Damaged cables are to be replaced immediately by an electrician.
- Examine your tool for any signs of damage. Have repairs carried out only by an electrician.
- Make sure that the contacts of the Ni-Cd battery pack do not touch other metallic objects, e.g. nails and screws. Risk of short-circuiting!
Putting into operation:
Loading the Ni-Cd battery pack
- Pull the battery pack out of the handle (Figure 5) by depressing the clips on the side.
- Check that your mains voltage is the same as that quoted on the rating plate. Insert the charger in a socket-outlet and connect the charging cable with the charging adapter. The green LED on the charging adapter indicates the presence of charging voltage.
- Insert the battery pack in the charging adapter. The red LED indicates that the battery pack is being charged. It takes a maximum of 3-5 hours to charge an empty battery. The battery pack may grow warm while it is being charged. This is normal. Important! The charger does not switch off automatically when the battery pack is fully charged!
If the battery pack fails to become charged, please check
●whether there is voltage at the socket-outlet
●whether there is proper contact at the charging contacts on the charger.
●that both red and green ligths are illuminated

If the battery still fails to become charged, please return
●the charger
●the battery pack
to our Customer Service Department.
Timely recharging of the Ni-Cd battery pack is recommended in the interest of long battery life. Recharging is always necessary when you notice that the power of the battery-powered drill/screwdriver is decreasing.
Never allow the battery pack to discharge completely. This will result in damage to the Ni-Cd battery pack!
Adjusting the torque (Figure 1)
The Einhell battery-powered drill/screwdriver is equipped with a 6-step mechanical torque adjustment facility. The torque for a specific size of screw is selected with the set-collar (Figure 1). The correct torque depends on several factors:
●on the type and hardness of material in question
●on the type and length screws used
●on the requirements needing to be met by the screwed joint.
The clutch disengages with a grating sound to indicate when the set torque is reached.
Drilling
For drilling purposes, move the set-collar to the last step „Drill“ (Figure 1). In this setting the slip clutch is inactive. The maximum torque is available in drilling mode.
Forward/Reverse switch (Figure 3)
With the slide switch above the On/Off switch you can select the direction of rotation of the battery-powered drill/screwdriver and secure it against being switched on accidentally. You can choose between clockwise and anticlockwise rotation. To avoid causing damage to the gearing it is advisable to change the direction of rotation only when the tool is at a standstill. The On/Off switch is blocked when the slide switch is in centre position.
On/Off switch (Figure 4)
Infinitely variable speed control is possible with the On/Off switch. The further you press the switch, the higher the speed of the battery-powered drill/screwdriver.
Screwdriving
We recommend using self-centering screws (e.g. Torx screws, recessed head screws) designed for reliable working. Be sure to use a bit that matches the screw in shape and size. Set the torque, as described elsewhere in these operating instructions, to suit the size of screw.
Technical data
| Voltage supply 16,8 V = | |
| Speed | 0-650 |
| Torque 6 levels | |
| Forward and reverse rotation yes | |
| Chuck clamping diameter 1.0 - 10 mm | |
| Battery charging voltage 20 V = | |
| Battery charging current 450 mA | |
| Mains voltage for charger 230 V ~ 50 Hz | |
| Sound pressure level LPA: 72 dB(A) | |
| Sound power level LWA: 82 dB(A) | |
| Vibration _w | < 2,5 m/s ^2 |
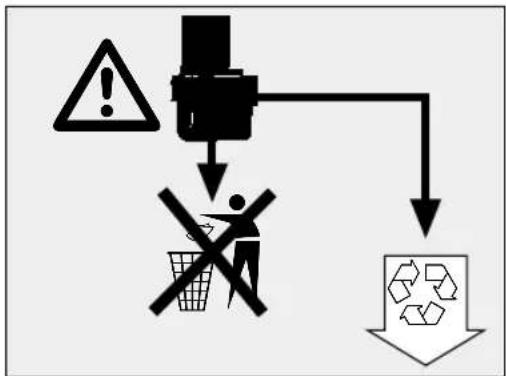
Old and defective batteries do not belong in the refuse bin. Think of the environment! Cadmium is toxic. For correct disposal, take old and defective batteries to your local old battery depot. Ask at your town hall for details of the old battery depots in your area.
Expulsion drawing: ECD 16,8 Art.-No.: 45.196.07 I.-No.: 01010
When ordering replacement parts, please quote the replacement part numbers of the parts you need.
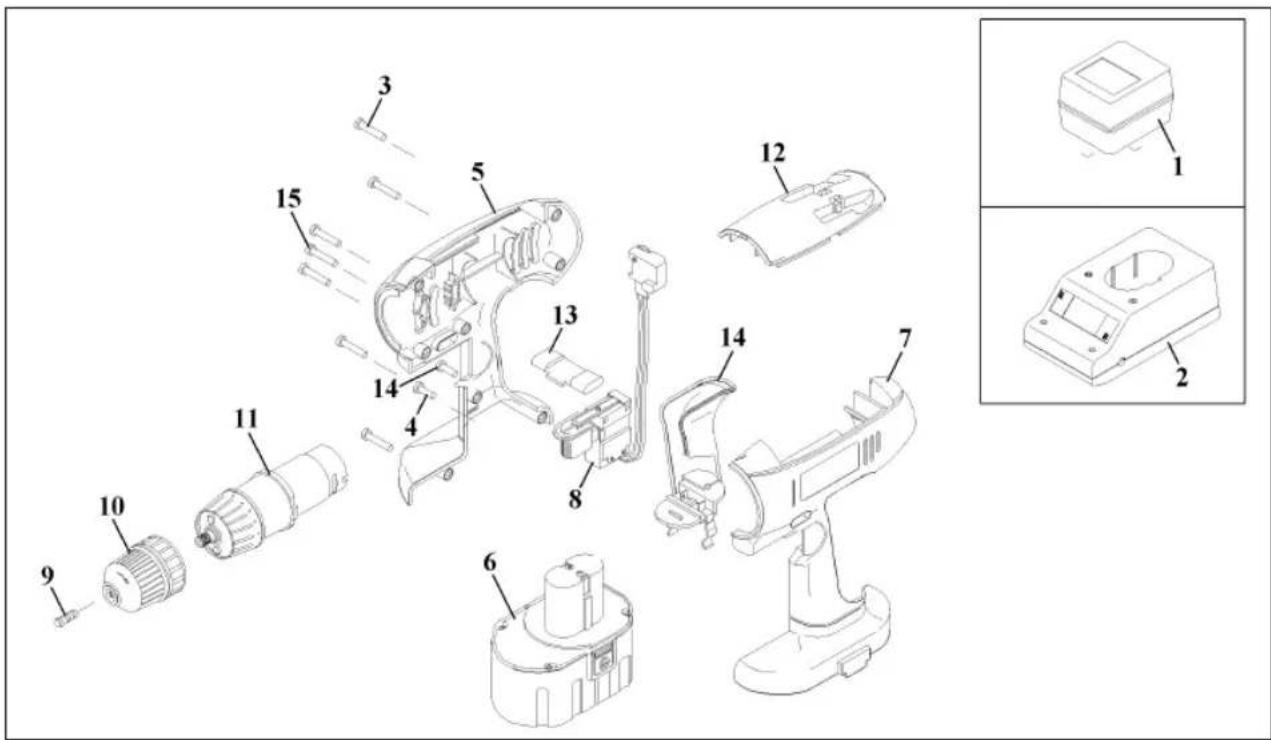
Spare part list ECD 16,8 Art.-No.: 45.196.07 Ident-No. 01010
Pos. Description Spare part-No.
| 01 Charger BS (16.8V) 45.196.07.01 | |
| 02 Charging Base Ass'y 45.196.07.02 | |
| 03 Screw M3.5x8 Black 45.196.43.02 | |
| 04 Screw M3.5x12 Black 45.196.43.03 | |
| 05 Cover Housing 45.196.07.03 | |
| 06 16 8V Power Pack Ass'y 45.115.55 | |
| 07 Support Housing 45.196.06.02 | |
| 08 Switch Variable Ass'y 45.196.07.04 | |
| 09 M/C Screw M5x21 (L.H.) 45.196.82.06 | |
| 10 Keyless Chuck 10mm 45.126.10.04 | |
| 11 Gear Box & Motor Ass'y | 45.196.10.06 |
| 12 Top Cover W/Bits Space | 45.196.07.05 |
| 13 Push Bar | 45.196.07.06 |
| 14 Handle Cover Ass'y 45.196.12.03 | |
| 15 Screw M3x18 Black 45.196.12.05 |
EC-Declaration
| D | GB | F | NL | E | P |
| EG KonformitätserklärungDer Unterzeichnende erklärt im Namen der Firma | EC Declaration of ConformityThe Undersigned declares, on behalf of | Déclaration de Conformité CELe soussigné déclare, au nom de | EC ConformiteitsverklaringDe ondertekenaar verklaart in naam van de firma | Declaracion CE de ConformidadPor la presente, el abajo firmante declara en nombre de la empresa | Declaração de conformidade CEO abaixo assinado declara em nome da empresa |
| ISC GmbH · Eschenstraße 6 · D-94405 Landau/Isar | |||||
| daß die | that the | que | dat de | que el/la | que |
| Maschine/Produkt | Machine / Product | la machine / le produit | machine/produkt | máquina/producto | a máquina/o produto |
| Akku-Bohrschrauber | Electronic battery-powered screw drill | Foreuse à visser électronique à accumulateur | Electronische accu-boorschroover | Taladro altornillador electrónico | Furadelra aparafusadora electrónica de acumulador |
| Marke | produced by: | du fabricant | merk | marca | marca |
| CRAFT | |||||
| Typ | Type | Type | type | tipo | tipo |
| ECD 16,8 | |||||
| – Seriennummer auf dem Produkt – der☑EG Niederspannungs-richtlinie 73/23 EWG☑EG Richtlinie Elektromagnetische Verträglichkeit 89/336 EWG mit Änderungen entspricht. | – Serial number specified on the product - is in accordance with the☑EC Directive regarding low-voltage equipment 73/23 EEC;☑EC Directive regarding electromagnetic compatibility 89/336 EEC, as amended. | – no. série indiqué sur le produit - correspond(ent) à la☑Directive CE relative aux basses tensions 73/23 CEE;☑Directive CE relative à la compatibilité électromagnétique 89/336 CEE avec les modifications y apportées. | – serienummer op het produkt-conform de volgenderichtlijnen is:☑EG laagspanningsrichtlijn 73/23 EWG☑EG richtlijn Elektromagnetische compatibilité 89/336 EWG met wijzigingen | – No. de serie en el producto: satisface las disposiciones pertinentes siguientes:☑Disposición de baja tensión de la CE 73/23 CEE☑Disposición de la compatibilidad electro-magnética de la CE 89/336 CEE con modificaciones. | – cujo número de série encontra-se no produto - corresponde à☑Directiva da CE de baixa tensão 73/23 CEE☑Directiva da CE de compatibilidade electro-magnética 89/336 CEE, com alterações |
| HD 400.1; HD 400.2; EN 50082-1; EN 55014; EN 60555-2; EN 60555-3 | |||||
| Landau/Isar, den12.07.2000 | Landau/Isar, (date)12.07.2000 | Landau/Isar, (date)12.07.2000 | Landau/Isar, datum12.07.2000 | Landau/Isar12.07.2000 | Landau/Isar12.07.2000 |
| PflaumProdukt-Management | PflaumProdukt-Management | PflaumProdukt-Management | PflaumProdukt-Management | PflaumProdukt-Management | PflaumProdukt-Management |
Achivierung / For archives: ITM-0495-20-897-E
GB WARRANTY CERTIFICATE
The guarantee period begins on the sales date and is valid for 1 year.
Responsibility is assumed for faulty construction or material or functional defects.
Any necessary replacement parts and necessary repair work are free of charge.
We do not assume responsibility for consequential damage. Your statutory rights are not affected.
Your customer service partner
Service UK:
GB Einhell UK Ltd
Brook House, Brookway
North Chesire Trading Estate
Prenton, Wirral, Chesire
CH 43 3DS
Tel. 0151 6084802, Fax 0151 6086339
Technical specification subject to change
EH 07/00
- GB Items supplied:
- GB
- Tool illustration:
- Figure 1: Torque adjustment facility Figure 2: Bit holder
- Important notes:
- Safety regulations:
- Putting into operation:
- Loading the Ni-Cd battery pack
- Adjusting the torque (Figure 1)
- Drilling
- Forward/Reverse switch (Figure 3)
- On/Off switch (Figure 4)
- Screwdriving
- Expulsion drawing: ECD 16,8 Art.-No.: 45.196.07 I.-No.: 01010
- Spare part list ECD 16,8 Art.-No.: 45.196.07 Ident-No. 01010
- GB WARRANTY CERTIFICATE
Marke : Power Craft
Modell : ECD 16 8
Kategorie : Bohrmaschine