
DCP-B7640DW - Fax BROTHER - Kostenlose Bedienungsanleitung
Finden Sie kostenlos die Bedienungsanleitung des Geräts DCP-B7640DW BROTHER als PDF.


| Produkttyp | Multifunktionsdrucker (Fax, Drucken, Scannen, Kopieren) |
| Modell | Brother DCP-B7640DW |
| Abmessungen (B x T x H) | ca. 410 x 410 x 320 mm |
| Gewicht | ca. 11,5 kg |
| Stromversorgung | 220–240 V Wechselstrom, 50/60 Hz |
| Drucktechnologie | Laserdruck (Schwarzweiß) |
| Faxfunktionen | Fax senden/empfangen, Kurzwahl, Rundsendefax |
| Druckgeschwindigkeit | bis zu 30 Seiten/min (A4) |
| Papierfachkapazität | 250 Blatt (Standard) |
| Konformität | CE-Kennzeichnung, RoHS |
| Betriebssystemkompatibilität | Windows, macOS, Linux, iOS, Android |
| Netzwerkanschlüsse | Wi-Fi (WLAN) und Ethernet (RJ-45) |
| USB-Anschluss | USB 2.0 (Typ B) |
| Telefonanschluss | RJ-11 für Faxleitung |
| Verbrauchsmaterial | Tonerpatrone TN-3420 (ca. 3.000 Seiten) und Trommeleinheit DR-3420 (ca. 15.000 Seiten) |
| Wartung & Reinigung | Reinigung der Trommel und des Scannerglases mit trockenem, fusselfreiem Tuch; regelmäßige Verwendung des Reinigungsblatts empfohlen |
| Sicherheitshinweis | Standard-Passwort auf der Rückseite des Geräts; nach Erstinstallation ändern |
| Reparaturfreundlichkeit | Ersatzteile über Brother-Händler oder Online-Shop erhältlich; Trommel und Toner einfach austauschbar |
Häufig gestellte Fragen - DCP-B7640DW BROTHER
Benutzerfragen zu DCP-B7640DW BROTHER
0 Frage zu diesem Gerät. Beantworten Sie die, die Sie kennen, oder stellen Sie Ihre eigene.
Eine neue Frage zu diesem Gerät stellen
Laden Sie die Anleitung für Ihr Fax kostenlos im PDF-Format! Finden Sie Ihr Handbuch DCP-B7640DW - BROTHER und nehmen Sie Ihr elektronisches Gerät wieder in die Hand. Auf dieser Seite sind alle Dokumente veröffentlicht, die für die Verwendung Ihres Geräts notwendig sind. DCP-B7640DW von der Marke BROTHER.
BEDIENUNGSANLEITUNG DCP-B7640DW BROTHER
D02XKD001-00
ASA/GLF
Version 0
EN
Quick Setup Guide
brother
DCP-B7600DB / DCP-B7620DW / DCP-B7620DWB / DCP-B7640DW / DCP-B7640DWB / MFC-B7810DW / MFC-B7810DWB / MFC-B7811DW
Read the Product Safety Guide first, then read this Quick Setup Guide for the correct installation procedure.
Not all models are available in all countries.

The latest manuals are available at the Brother support website: support.brother.com/manuals
Unpack the machine and check the components
Remove the protective tape or film covering the machine and the supplies.
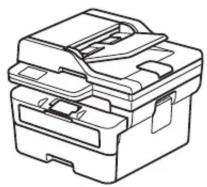
A
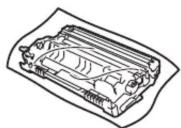
Drum Unit Toner Cartridge
B
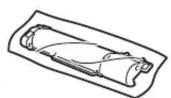
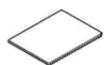
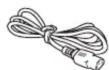
AC Power Cord Quick Setup Guide Product Safety Guide
NOTE:
- The components included in the box may differ depending on your country.
- The available connection interfaces vary depending on the model. If you use a wired connection, you must purchase the correct cable for the interface you want to use.
- USB cable
We recommend using a USB 2.0 cable (Type A/B) that is no more than 2 metres long.
• Network cable (for wired network models only)
Use a straight-through Category 5 (or greater) twisted-pair cable.
- The screens and images in this Quick Setup Guide show the MFC-B7810DW.
- Save all packing materials and the box in case you must ship your machine.
1 Remove the packing materials and install the toner cartridge and drum unit assembly
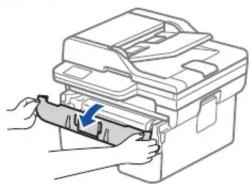
natural_image
Illustration of hands inserting a file into a printer into a folder (no text or symbols visible)▶
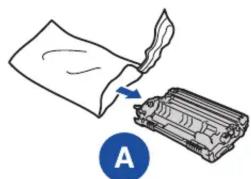
natural_image
Diagram showing a fabric being placed into a mechanical component, with a blue circle labeled 'A' in the corner (no text or symbols on the diagram itself)▶
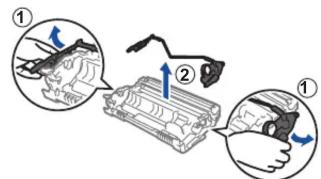
▶
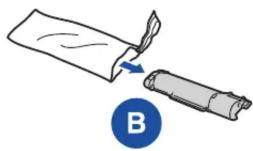
▶
Remove the orange part.
▶
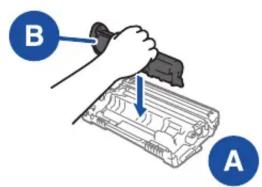
▶
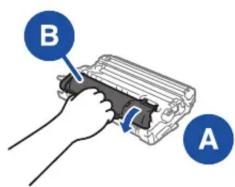
▶
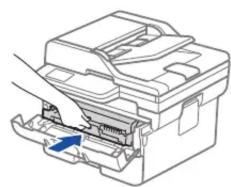
natural_image
Diagram of a printer or printer with a blue arrow indicating a component, no text or symbols present▶
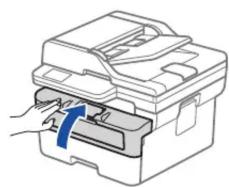
natural_image
Illustration of a printer with a blue arrow indicating a press or scroll operation (no text or symbols present)Push firmly.
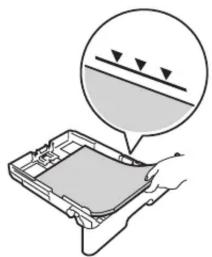
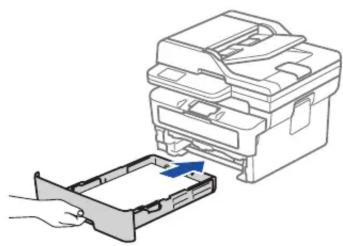
2 Load paper in the paper tray
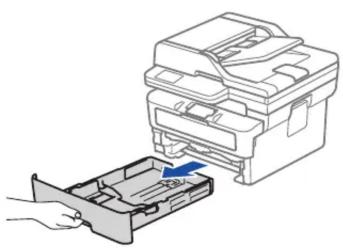
natural_image
Diagram showing a printer being inserted into a plastic case, with no visible text or symbols.▶
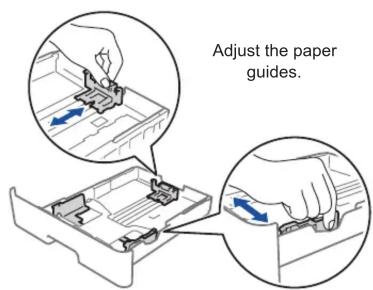
Do not exceed this mark.
▶
natural_image
Diagram of a device with a screen and directional arrows, no text or symbols present▶
natural_image
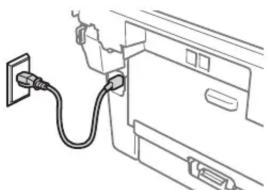
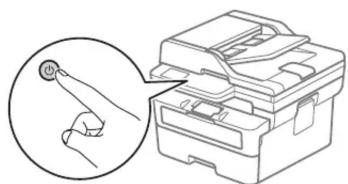
Diagram showing a printer being inserted into a rack with a hand holding the tray (no text or symbols present)3 Connect the power cord and turn the machine on
natural_image
Line drawing of a car electrical outlet with cable and plug (no text or symbols)Back Front
▶
natural_image
Illustration of a hand inserting a tool into a device (no text or symbols present)4 Select your country/language (Initial setup only)
After turning the machine on, you may be required to set your country or language (depending on your machine).
If required, follow the on-screen instructions.
5 Select your language (if needed)
- Press Menu.
- Press ▲ or ▼ to display [Initial Setup], and then press OK.
- Press ▲ or ▼ to display [Local Language], and then press OK.
- Press ▲ or ▼ to select your language, and then press OK.
- Press Stop/Exit.
6
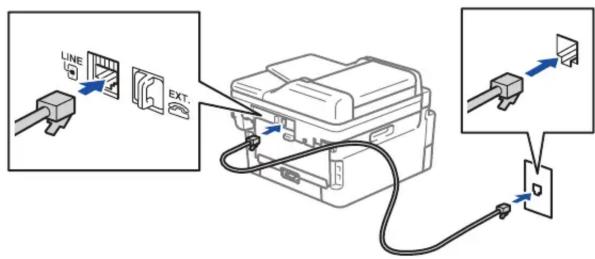
Connect the telephone line cord (For MFC models only)
If you do not plan to use the fax feature on this machine, go to step .7
7 Connect your computer or mobile device to your machine
Follow these steps to complete the setup using one of the connection types available on your machine.
Visit setup.brother.com to download and install Brother software.
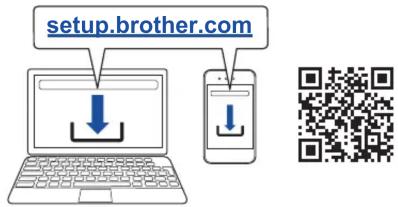
Follow the on-screen instructions and prompts.
Setup Finished
You can now print and scan using your machine.
Important Notice for Network Security: The default password to manage this machine's settings is located on the back of the machine and marked "Pwd". We recommend immediately changing the default password to protect your machine from unauthorised access.
NOTE:
For Windows only, CD installation is also available (for some countries).
Can't Connect? Check the following:

Wireless network
Restart your wireless access point or router. If this is not possible, go to the next step.
Restart your machine and computer, and then go to 7
If still unsuccessful, go to .8

Wired network
USB connection
Disconnect the cable.
▶
If still unsuccessful, visit support.brother.com for FAQs and Troubleshooting.
8 Manual wireless setup (Wireless models)
If the wireless setup is unsuccessful, set up the connection manually.
Find your SSID (Network Name) and Network Key (Password) on your wireless access point or router and write them in the table provided below.
| SSID (Network Name) | |
| Network Key (Password) |
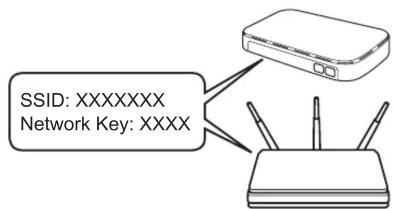
If you cannot find this information, ask your network administrator or wireless access point or router manufacturer.
Press Menu, and then select [Network] >
[WLAN(Wi-Fi)]> [Find Network].
Follow the LCD instructions.
Select the SSID (Network Name) for your access point or router and enter the Network Key (Password).
- For DCP models:
Press and hold (or press repeatedly)
▲ or ▼ to select one of the following characters:
0123456789 abcdefghijklmnopqrstuvwxyz ABCDEFGHIJKLMNOPQRSTUVWXYZ
(space)!"#\$%&'()*+,-./:;<=>?@[]\^_'{}\~
(space)!"#\$%&'()*+,-./:;<=>?@[]^_'{}\~
When the wireless setup is successful, the LCD displays [Connected].
Go to 7 to install software.
If the setup is unsuccessful, restart your Brother machine and your wireless access point or router, and repeat 8. If still unsuccessful, visit support.brother.com.
- EN
- Quick Setup Guide
- brother
- Unpack the machine and check the components
- NOTE:
- - USB cable
- • Network cable (for wired network models only)
- Remove the packing materials and install the toner cartridge and drum unit assembly
- Load paper in the paper tray
- Connect the power cord and turn the machine on
- Select your country/language (Initial setup only)
- Select your language (if needed)
- 6
- Connect the telephone line cord (For MFC models only)
- Connect your computer or mobile device to your machine
- Setup Finished
- Can't Connect? Check the following:
- Manual wireless setup (Wireless models)
Marke : BROTHER
Modell : DCP-B7640DW
Kategorie : Fax