
Touch Interactive 29590 - Projektor Zubehör DA-LITE - Kostenlose Bedienungsanleitung
Finden Sie kostenlos die Bedienungsanleitung des Geräts Touch Interactive 29590 DA-LITE als PDF.


| Typ | Montagehalterung für interaktives Touch-Modul |
| Marke | Da-Lite (Milestone AV Technologies) |
| Modell | Touch Interactive 29590 |
| Kompatibilität | IDEA Screen und IDEA Panoramic |
| Material | Stahl |
| Farbe | Schwarz |
| Montageart | Schraubbefestigung am IDEA-Rahmen |
| Lieferumfang (kleine Halterung) | 2x #8 x 1/2" Schrauben, 2x #4 x 1/2" Schrauben, 2x #4 Muttern |
| Lieferumfang (große Halterung) | 2x M4 x 30mm Schrauben, 2x M4 Muttern, 2x #8 x 1/2" Schrauben |
| Werkzeuge | Kreuzschlitzschraubendreher, 1/4"-Schlüssel (klein), 7mm-Schlüssel (groß) |
| Gewicht (ca.) | 200 g |
| Stromversorgung | Keine (passiv) |
| Funktionen | Befestigung des Touch-Moduls, Positionierung an der Bildschirmoberseite, Ausrichtung des IR-Vorhangs |
| Besonderheiten | Optionale Magnethalterung, Schraubbefestigung empfohlen |
| Installation | Gemäß beiliegender Anleitung, Position nach Projektorhersteller |
| Wartung | Keine spezielle Wartung erforderlich |
| Sicherheitshinweise | Nur für den vorgesehenen Zweck verwenden; Schrauben fest anziehen |
| Hersteller | Milestone AV Technologies, www.milestone.com |
| Garantie | 2 Jahre Herstellergarantie (typisch) |
Häufig gestellte Fragen - Touch Interactive 29590 DA-LITE
Benutzerfragen zu Touch Interactive 29590 DA-LITE
0 Frage zu diesem Gerät. Beantworten Sie die, die Sie kennen, oder stellen Sie Ihre eigene.
Eine neue Frage zu diesem Gerät stellen
Laden Sie die Anleitung für Ihr Projektor Zubehör kostenlos im PDF-Format! Finden Sie Ihr Handbuch Touch Interactive 29590 - DA-LITE und nehmen Sie Ihr elektronisches Gerät wieder in die Hand. Auf dieser Seite sind alle Dokumente veröffentlicht, die für die Verwendung Ihres Geräts notwendig sind. Touch Interactive 29590 von der Marke DA-LITE.
BEDIENUNGSANLEITUNG Touch Interactive 29590 DA-LITE
Small Bracket Installation
NOTE: Interactive module terminology may vary from manufacturer to manufacturer.
Tools Required for Installation Installation

Phillips Screwdriver

1/4" Wrench
Required Hardware - Provided
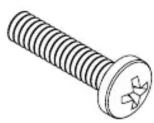
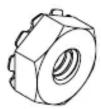

(2) #8 x 1/2" Screws(2) #4 x 1/2"
- Using the provided #4 x 12 " screws and #4 nuts, attach the touch module base plate to the bracket.
NOTE: Some touch modules will attach to the bracket with magnets. If the touch module allows attachment using hardware or magnets, hardware attachment is recommended. - Remove the cover from the touch module. Using the screws provided with the projection system, attach the touch module to the touch module base plate.
- Position the bracket with touch module along the top of the IDEA Screen or IDEA Panoramic according to the projector manufacturer's instructions. Using the two provided #8 x 1/2" Screws (2) #4 Nuts screws, attach the bracket and touch module to the IDEA frame with the touch module facing towards the audience.
NOTE: If the projector instructions do not specify a position, center the bracket relative to the projected image. The flat vertical surface of the touch interactive bracket should be flush to the face of the IDEA frame.
- Follow manufacturer's instructions for aligning the IR curtain.
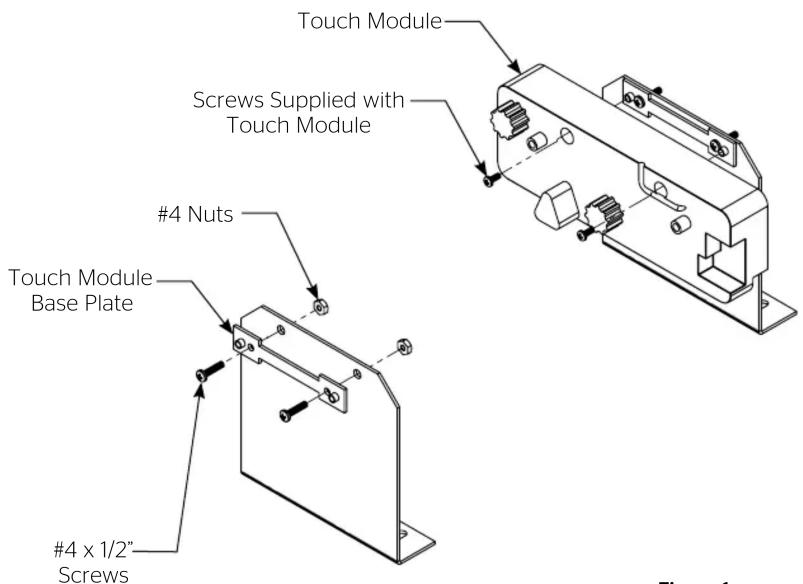
Figure 1
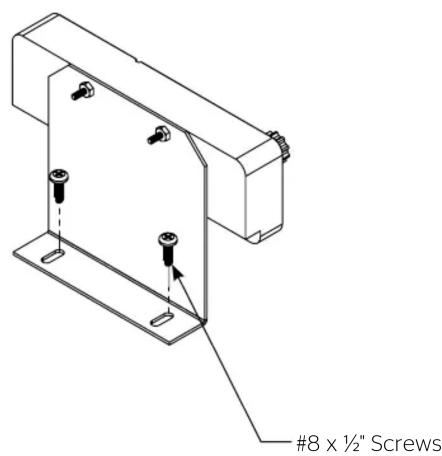
Large Bracket Installation
NOTE: Interactive module terminology may vary from manufacturer to manufacturer.
Tools Required for Installation

Phillips Screwdriver

7mm Wrench
Required Hardware - Provided

Screws

(2) M4 Nuts

(2) #8 x 1/2" Screws(2) M4
Installation
- Remove the cover from the touch module. Using the provided M4 x 30mm screws and M4 nuts, attach the touch module to the touch interactive bracket as shown.
NOTE: Some touch modules will attach to the bracket with magnets. If the touch module allows attachment using hardware or magnets, hardware attachment is recommended.
- Position the bracket with touch module along the top of the IDEA Screen or IDEA Panoramic according to the projector manufacturer's instructions. Using the two provided #8 x 1/2" screws, attach the bracket and touch module to the IDEA frame with the touch module facing towards the audience.
x 30 NOTE: If the projector instructions do not specify a position, center the bracket relative to the projected image. The flat vertical surface of the touch interactive bracket should be flush to the face of the IDEA frame.
- Follow manufacturer's instructions for aligning the IR curtain.

Figure 2


A BRAND OF MILESTONE AV TECHNOLOGIES | www.milestone.com
P 800.622.3737 / 574.267.8101 F 877.325.4832 / 574.267.7804
E info@da-lite.com
In British Columbia, Milestone AV Technologies ULC carries on business as MAVT Milestone AV Technologies ULC.
©2017 Milestone AV Technologies. DL-0712 (Rev. 2) 06.17. Da-Lite is a registered trademarks of Milestone AV Technologies. All other brand names or marks are used for identification purposes and are trademarks of their respective owners. All patents are protected under existing designations. Other patents pending.


Marke : DA-LITE
Modell : Touch Interactive 29590
Kategorie : Projektor Zubehör