VA-5 - Stativ Sirui - Kostenlose Bedienungsanleitung
Finden Sie kostenlos die Bedienungsanleitung des Geräts VA-5 Sirui als PDF.


Benutzerfragen zu VA-5 Sirui
0 Frage zu diesem Gerät. Beantworten Sie die, die Sie kennen, oder stellen Sie Ihre eigene.
Eine neue Frage zu diesem Gerät stellen
Laden Sie die Anleitung für Ihr Stativ kostenlos im PDF-Format! Finden Sie Ihr Handbuch VA-5 - Sirui und nehmen Sie Ihr elektronisches Gerät wieder in die Hand. Auf dieser Seite sind alle Dokumente veröffentlicht, die für die Verwendung Ihres Geräts notwendig sind. VA-5 von der Marke Sirui.
BEDIENUNGSANLEITUNG VA-5 Sirui
图纸名称:思锐VA-5说明书
物料编号:YV37-1
材质:100g双铜纸
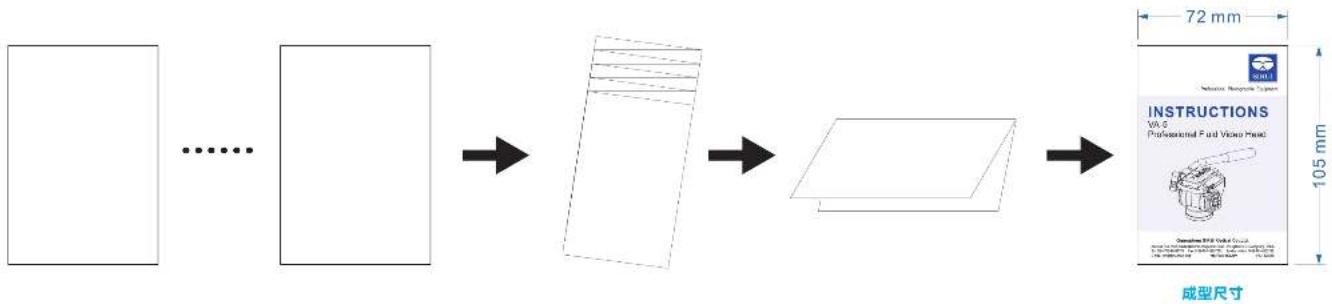
展开尺寸:504x210mm
成型尺寸:72×105mm
说明书正面:
text_image
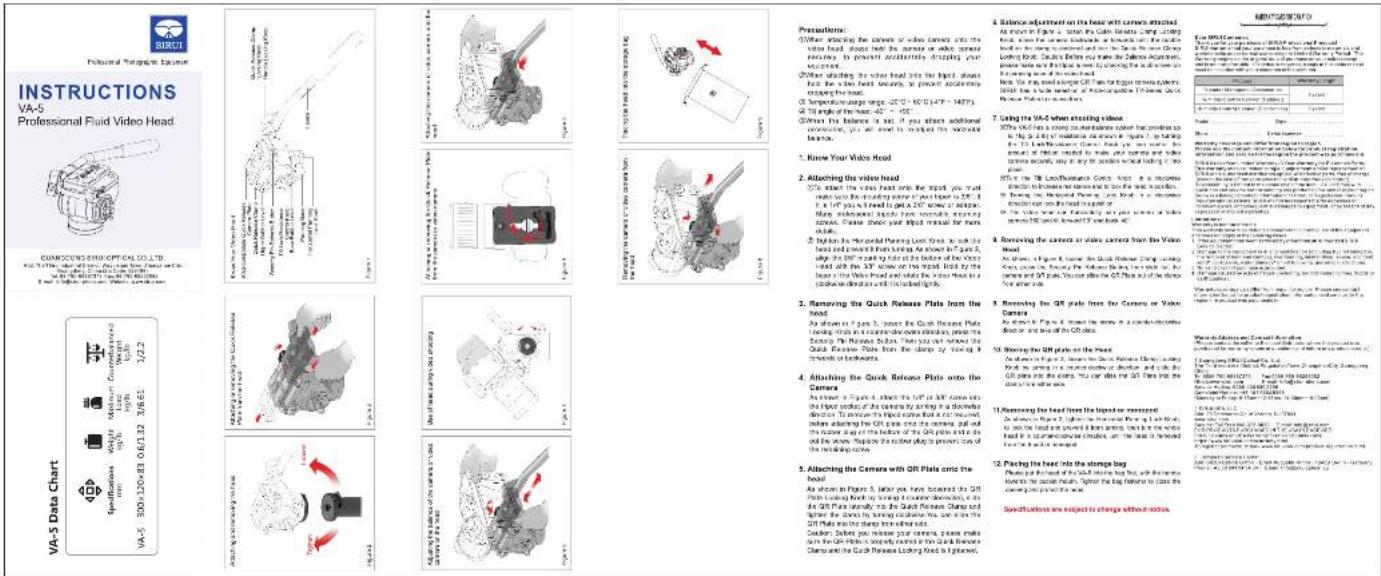
INSTRUCTIONS VA-5 Professional Fluid Video Head CAUROCCING SHIR OPTICAL CO.,LTD. Rally, 1/2.2 Medium Current warning Long Time Weight 100% Specification: VAS-5 Data Chart Perspective: (1) Select the video head with the camera or video camera into the video head, should hold the camera or video camera necessary in prevent accidents, dropping your head. (2) When standing the video head into the input, should hold the video head necessary, to prevent accidenting. (3) Temperature range range: -20.0~60.0 (4.7~149.7) (4) 30 min of the head is -100°C. (5) Even the balance is set if you share additional consecutive, you will need to make out the previous device. 1. Know Your Video Head 2. Attaching the video head 3. Apply the video head onto the input, you must make sure the standing screen of your body to 20% if it is 100% in a fixed time to get a 20% image. Please encourage inputs from more complete recording screens. Please check your input manual for more details. 2. Optimize the Maxial Position Locks. As soon as the head and presses from being Annotated by 4% part, only on the 30° setting up to the before of the video head with the 30° screen on the input. I don't use the best video head and inside the video head to a circular device instead of a closed ring. 3. Removing the Quick Release Plate from the head As shown in Figure 3, covers the Quick Release Plate leading up to 100% in a circular device instead of a closed ring. Because the Quick Release Plate has been removed, please allow the output to be open and write out the next page. 4. Attaching the Quick Release Plate onto the Camera As shown in Figure 4, select the 100% of 30% frame into the input section of the camera by inserting a discrete device. To ensure that the input section is not allowed, then adjusting the QF plate into the camera and click the output section of the QF plate and click the next page. Remove the next page's power, loss, or noise in the remaining room. 5. Attaching the Camera with QR Plate onto the head As shown in Figure 5, before you have become an QR Plate leading up by inserting a discrete device, it can be used to create a new sensor. Suppose the next page's power, loss, or noise in the QR Plate is taken into either side. Sealion: Before you receive your camera, please make out the QR Plate correctly turned out at the Quick Release Plate on the QR Plate leading up in front panel. 6. Avoiding the second page's power, loss, or noise in the QR Plate is taken into either side. 7. Avoiding the first page's power, loss, or noise in the QR Plate is taken into either side. 8. Avoiding the second page's power, loss, or noise in the QR Plate is taken into either side. 9. Avoiding the third page's power, loss, or noise in the QR Plate is taken into either side. Supplementation: 1. Balance adjustment on the head with camera attached. An action in Figure 2: select the QF Plate with a step, using a single point above a 20% point above a 10% point above a 10% point above a 10% point above a 10% point above a 10% point above a 10% point above a 10% point above a 10% point above a 10% point above a 10% point above a 10% point above a 10% point above a 10% point above a 10% point above a 10%. 2. Use of a 2x2 inch diameter is made up to 2x2 inch diameter. If there is no longer than 2x2 inches, we can be able to use a 2x2 inch diameter. For example, we can use a 2x2 inch diameter. We can use a 2x2 inch diameter. We can use a 2x2 inch diameter. We can use a 2x2 inch diameter. We can use a 2x2 inch diameter. We can use a 2x2 inch diameter. We can use a 2x2 inch diameter. We can use a 2x2 inch diameter. We can use a 2x2 inch diameter. We can use a 2x2 inch diameter. We cannot use a 2x2 inch diameter. We can use a 2x2 inch diameter. We can use a 2x2 inch diameter. We can use a 2x2 inch diameter. We can use a 2x2 inch diameter. We can use a 2x2 inch diameter. We can use a 2x2 inch diameter. We can use a 2x2 inch diameter. We can use a 2x2 inch diameter. We can also use a 2x2 inch diameter. We can use a 2x2 inch diameter. We can use a 2x2 inch diameter. We can use a 2x2 inch diameter. We can use a 2x2 inch diameter. We can use a 2x2 inch diameter. We can use a 2x2 inch diameter. We can use a 2x2 inch diameter. We can use a 2x2 inch diameter. We can be used to store this video camera. The VR headset is also used for installation of an electronic VR headset. You can use a virtual computer connected to your phone. The VR headset is also used for installation of an electronic VR headset. You can use a virtual computer connected to your phone. The VR headset is also used for installation of an electronic VR headset. You can use a virtual computer connected to your phone. The VR headset is also used for installation of an electronic VR headset. You can use a virtual computer connected to your phone. The VR headset is also used for installation of an electronic VR headset. You can use a virtual computer connected to your phone. The VR headset is also used for installation of an electronic VR headset. We can use a virtual computer connected to your phone. The VR headset is also used for installation of an electronic VR headset. You can use a virtual computer connected to your phone. The VR headset is also used for installation of an electronic VR headset. You can use a virtual computer connected to your phone. The VR headset is also used for installation of an electronic VR headset. You can use a virtual computer connected to your phone. The VR headset is also used for installation of an electronic VR headset. The VR headset is also used for installation of an electronic VR headset. You can use a virtual computer connected to your phone. The VR headset is also used for installation of an electronic VR headset. You can use a virtual computer connected to your phone. The VR headset is also used for installation of an electronic VR headset. You can use a virtual computer connected to your phone. The VR headset is also used for installation of an electronic VR headset. You can use a virtual computer connected to your Phone. The VR headset is also used for installation of an electronic VR headset. You can use a virtual computer connected to your Phone. The VR headset is also used for installation of an electronic VR headset. You can use a virtual computer connected to your Phone. The VR headset is also used for installation of an electronic VR headset. You can use a virtual computer connected to your Phone. The VR headset is also used for installation of an electronic VR headset. You can use a virtual computer connected to your Photo. The VR headset is also used for installation of an electronic VR headset. You can use a virtual computer connected to your Phone. The VR headset is also used for installation of an electronic VR headset. You can use a virtual computer connected to your Phone. The VR headset is also used for installation of an electronic VR headset. You can use a virtual computer connected to your Phone. The VR headset is also used for installation of an electronic VR headset. You can use a virtual computer connected to your Radio. The VR headset is also used for installation of an electronic VR headset. You can use a virtual computer connected to your Radio. The VR headset is also used for installation of an electronic VR headset. You can use a virtual computer connected to your Radio. The VR headset is also used for installation of an electronic VR headset. You can use a virtual computer connected to your Radio. The VR headset is also used for installation of an electronic VR headset. You can use a virtual computer connected to your Audio. The VR headset is also used for installation of an electronic VR headset. You can use a virtual computer connected to your Audio. The VR headset is also used for installation of an electronic VR headset. You can use a virtual computer connected to your Audio. The VR headset is also used for installation of an electronic VR headset. You can use a virtual computer connected to your Audio. The VR headset is also used for installation of an electronic VR headset. You can use a virtual computer connected to your Radio. The VR headset is also used for installation of an electronic VR headset. You can use a virtual computer connected to your Radio. The VR headset is also used for installation of an electronic VR headset. You can use a virtual computer connected to your Radio. The VR headset is also used for installation of an electronic VR headset. You can use a virtual computer connected to your Air Photo Photo Photo Photo Photo Photo Photo Photo Photo Photo Photo Photo Photo Photo Photo Photo Photo Photo Photo Photo Photo Photo Photo Photo Photo Photo Photo Photo Photo Photo Photo Photo Photo Photo Photo Photo Photo Photo Photo Photo Photo Photo Photo Photo Photo Photo Photo Photo Photo Photo Video Video Audio Audio Session Audio Session Audio Session Audio Session Audio Session Audio Session Audio Session Audio Session Audio Session Audio Session Audio Session Audio Session Audio Session Audio Session Audio Session Audio Session Audio Session Audio Session Audio Session Audio Session Audio Session Audio Session Audio Session Audio Session Audio Session Audio Session Audio Session Audio Session Audio Session Audio Session Audio Session Audio Session Audio Session Audio Session说明书背面:
text_image
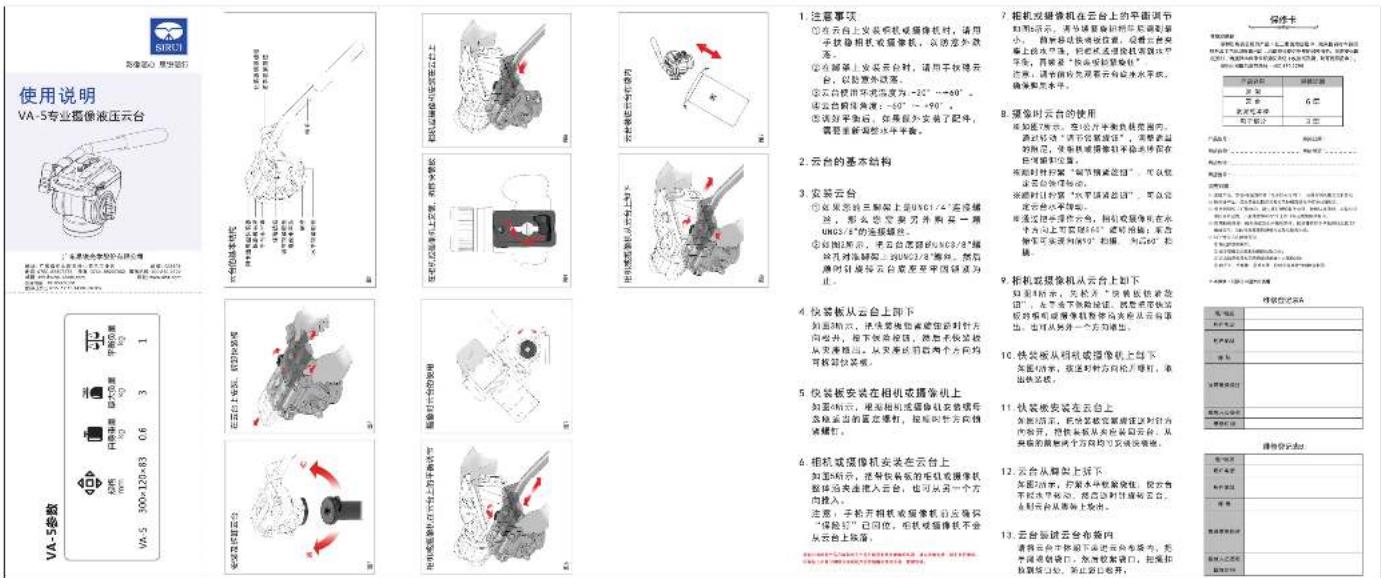
使用说明 VA-5专业摄像液压云台 VA-5参数 注意事项 ①在云台上安装相机或摄像机时,请用 子相机相机或摄像机,从该处外滚 落。 ②在脚踏上安装云台时,请用手机摆开 台,以防意外伤害。 ③云台使用不改变为-20°~+90°, 该云台将保持不变。④请为平衡后,如果是外安装了配件, 需要重新测得水平平衡。 2.云台的基本结构 3.安装云台 ①如果要的三脚架上是UN01/74°连接螺 丝,那么您安装另外购有一扇 UN03/8°的连接螺纹。 ②如图所示,云台底座的与UN03/8°错 线及对角脚架上UN03/8°前后,然后 测时可连续将云台底座平面固定为 止。 4.快装板从云台上卸下 如图所示,快速安装后直接在定时针方向 起升,按下快装按钮,然后手按安装 从安装推出。从安装后再两个方向均 可立即切换。 5.快装板安装在相机或摄像机上 如图所示,地面相机或摄像机安装后 选择合适的蓝色螺钉,按顺序方向切换 螺钉。 6.相机或摄像机安装在云台上 如图所示,选择快装机的电机或摄像机 整体沿直线进入云台,也可以从另一个方 向推入。 注意:手机开相机或摄像机后会确保 “保险杠”已到位。在相机或摄像机不会 从云台上安装。 7.相机或摄像机在云台上的平面调节 的测试示,需自动调整到实际时点数和 最小。但需要经过快速检查,会继续安装 面上的水平运动,把相机或摄像机调到正常 水平。再需要“快装机调整模型” 注意,请单击允许屏幕有近似水平波, 确保相关水平。 8.摄像时云台的使用 采用磁共振式,在10片平衡负载作用下, 表示时钟选“无浮霍霍波”,完整且超 的制芯,使相机或摄像机不稳定性提供在 位置和位置。 采用定时针控制“调节频繁监控”,可以设 该系统将移动移动。 该定时针的第“水平调速返回”,可以设 定的水平滑降。 并通过数字操作台,例如视频可在水 个方向上可重复60°或短缩量;系统 输出可实现时间的90°扫描。例如60°批 接。 9.相机或摄像机从云台上卸下 如果时钟示,先检点“放载板检查组” 后,是否属于故障检测、检查者可快速 时的相对速度随机等指令来从云台的基 当,也可从另外一个方向发出。 10.铁面板从相机或摄像机上卸下 如果时钟示,按定时针方向松开螺钉。 单击快安装。 11.铁面板安装在云台上 加振指示,把相机或摄像机通过定时针方 内展开,按菜单从其开始安装。从夹锁的限制两个方向均可完成安装。 12.云台从舞台上卸下 加振指示,应测水中频繁性。投检台 于提升生产效率,降低对日平均耗时正台, 未到云台从舞台上看。 13.云台加链云台布袋内 请将云台于拆卸下面云台布袋内,把 中间减震器口、放散胶紧管口、把绳扣 拉钢加工口、防止出口离开。折叠方法:
flowchart
graph LR
    A["Blank"] --> B["..."]
    B --> C[" "] --> D[" "] --> E[" "] --> F["72 mm"] --> G["105 mm"] --> H["INSTRUCTIONS\nV6.2\nProfessional Find Video Head\nCognitive 8.0 V6.2 Core"]
    H --> I["成型尺寸"]