
P-Touch M95 - Etikettendrucker BROTHER - Kostenlose Bedienungsanleitung
Finden Sie kostenlos die Bedienungsanleitung des Geräts P-Touch M95 BROTHER als PDF.


| Produkttyp | Etikettendrucker |
| Marke | Brother |
| Modell | P-Touch M95 |
| Abmessungen (B x H x T) | ca. 156 mm x 111 mm x 61 mm |
| Gewicht | ca. 250 g (ohne Batterien und Etikettenkassette) |
| Stromversorgung | 4 AAA-Alkalibatterien (LR03) oder optionales Netzteil AD-24ES |
| Etikettenkassette | Brother P-Touch M-Bänder, Breiten 9 mm und 12 mm |
| Display | LCD, 1 Zeile mit 12 Zeichen |
| Maximale Textlänge | 80 Zeichen (Normalmodus), 50 Zeichen (DECO MODE) |
| Anzahl Zeilen | max. 2 |
| Etikettenlänge | Auto oder manuell 30–300 mm (Normalmodus), 30–200 mm (DECO MODE) |
| Schriftarten | Normal, Fett, Umriss, Schatten, Kursiv, Vertikal |
| Rahmen/Unterstreichungen | 8 Stile (z.B. rund, Blatt, Stern, Herz) |
| Dekorationsmodus (DECO MODE) | 8 Vorlagen für einzigartige Etiketten |
| Druckauflösung | 180 dpi (Standard) |
| Etikettenvoransicht | ja |
| Etikettenzufuhr (Tape Feed) | ca. 25 mm Leerband |
| Mehrfachkopien | bis zu 9 Stück |
| Speicher | 3 Etiketten speicherbar |
| Abziehhilfe (Peeler) | eingebaut zum Entfernen der Trägerfolie |
| Spracheinstellung | mehrere Sprachen (u.a. Deutsch, Englisch) |
| Einheit | mm oder Zoll wählbar |
| Automatische Abschaltung | nach 5 Minuten Inaktivität |
| Kopfschutz | automatische Abkühlung bei Überhitzung |
| Zubehör (optional) | Netzteil AD-24ES |
| Garantie | Herstellergarantie (je nach Land) |
Häufig gestellte Fragen - P-Touch M95 BROTHER
Benutzerfragen zu P-Touch M95 BROTHER
0 Frage zu diesem Gerät. Beantworten Sie die, die Sie kennen, oder stellen Sie Ihre eigene.
Eine neue Frage zu diesem Gerät stellen
Laden Sie die Anleitung für Ihr Etikettendrucker kostenlos im PDF-Format! Finden Sie Ihr Handbuch P-Touch M95 - BROTHER und nehmen Sie Ihr elektronisches Gerät wieder in die Hand. Auf dieser Seite sind alle Dokumente veröffentlicht, die für die Verwendung Ihres Geräts notwendig sind. P-Touch M95 von der Marke BROTHER.
BEDIENUNGSANLEITUNG P-Touch M95 BROTHER
brother
m
TAPE
P-touch
M95M95
User's Guide
English
Installing the Power Supply and Tape Cassette
1
2
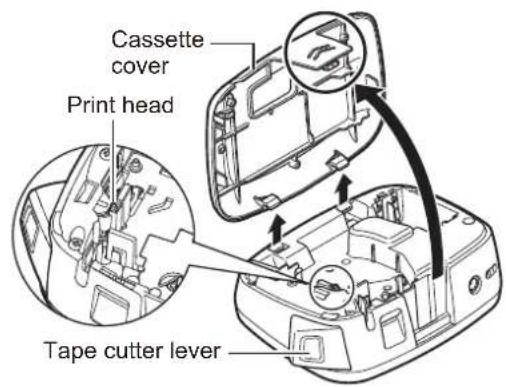
Remove the cassette cover by pressing the highlighted area.
If you already installed a tape cassette, remove it by pulling it straight up. If you already installed batteries, remove them as well.
- Make sure the power is turned off when replacing batteries or tape cassettes.
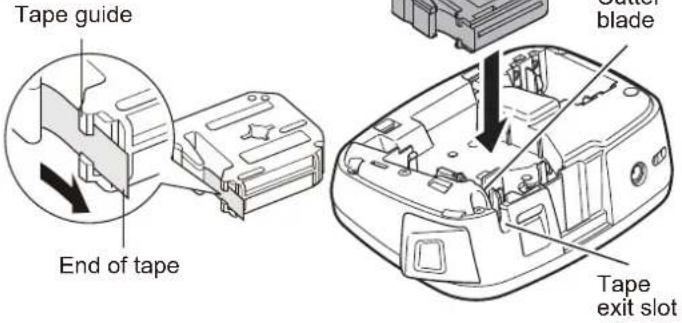
Insert a tape cassette, making sure it snaps into place.
• Make sure the end of the tape feeds under the tape guide.
- Use only Brother M tapes with this P-touch labelling machine.
3
4
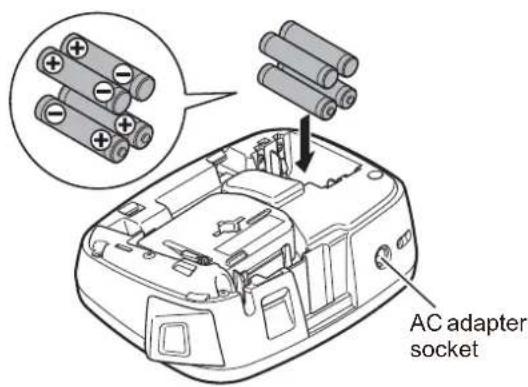
Insert four new AAA alkaline batteries (LR03), making sure their positive and negative ends point in the correct directions.
• Always replace all four batteries at the same time using brand new ones.
- For details of the optional AC adapter (AD-24ES), see "Using the Optional AC Adapter".
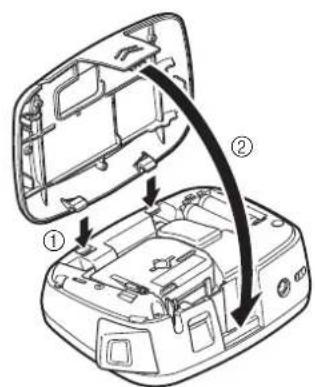
Insert the two hooks at the bottom of the cassette cover into the slots on the machine (①), and then close the cover securely until it snaps into place (②).
After you have installed the tape, feed the tape (see "Feeding (Tape Feed)") once, and then press the tape cutter lever to cut the tape.
Using the Optional AC Adapter
1 Insert the small plug on the adapter cord into the AC adapter socket at the top of the machine.
2 Insert the power plug into the nearest standard electrical socket.
NOTE
For the memory backup feature, we recommend using AAA alkaline batteries (LR03) together when using the AC adapter.
Keyboard
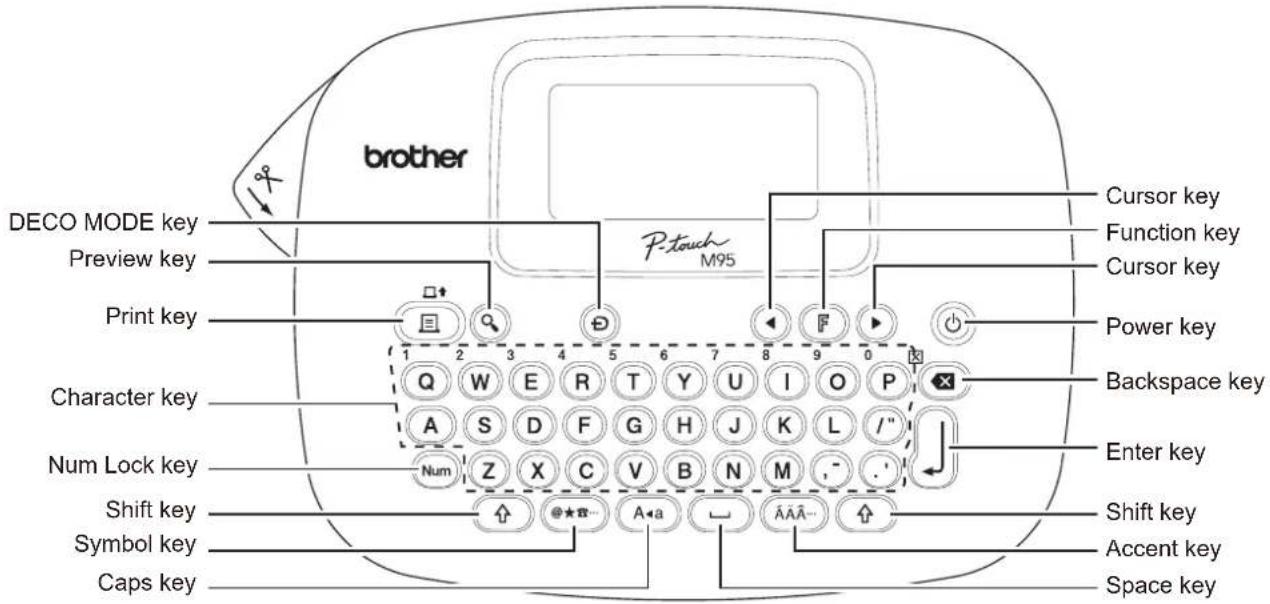
LCD
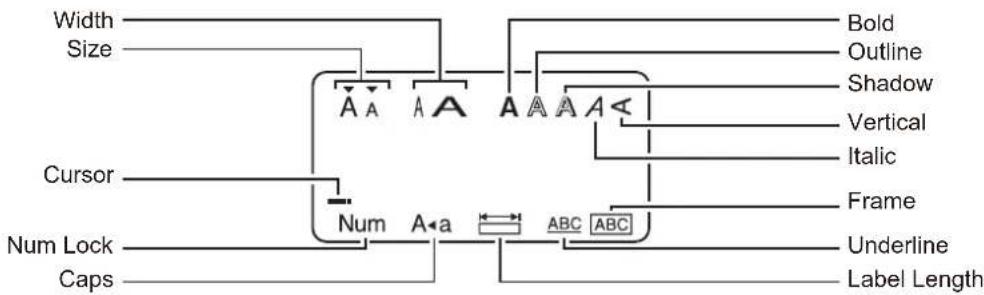
flowchart
graph TD
    A["Width"] --> B["A"]
    C["Size"] --> D["A"]
    E["Cursor"] --> F["Num"]
    G["Num Lock"] --> H["A"]
    I["Caps"] --> J["A"]
    K["Bold"] --> L["A"]
    M["Outline"] --> N["A"]
    O["Shadow"] --> P["A"]
    Q["Vertical"] --> R["A"]
    S["Italic"] --> T["A"]
    U["Frame"] --> V["ABC"]
    W["Underline"] --> X["ABC"]
    Y["Label Length"] --> Z["Label"]
NOTE
The LCD displays one row of 12 characters; however, you can enter up to 80 characters in length.
Initial Settings
1 Turn your machine on.
Supply power using four AAA batteries (LR03) or the optional AC adapter, and then press to turn the power on.
2 Set the language.
The default setting is [English].
F → ◀ [Language]
[English/Espanol/Français/Italiano/
Nederlands/Norsk/Português/Svenska/
Türkçe/Dansk/Deutsch]
- You can also display [Language] by pressing and at the same time.
3 Set the unit of measurement.
The default setting is [mm].

F → ◀ ▶ [Unit] →
[mm/inch]
- You can also display [Unit] by pressing and .

NOTE
- The machine automatically turns off if no keys are pressed within five minutes.
- To cancel an operation, press
- To reset the machine back to factory settings, see "Resetting the machine".
Entering Text and Accented Characters
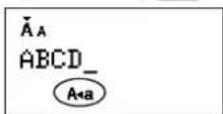
▶Switching Upper-Case/Lower-Case

A←a
Upper-case (ON) Lower-case (OFF) A*a
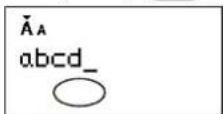
▶Entering Numbers
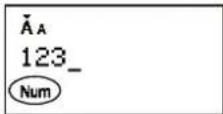
Num


Num Lock ON Num Lock OFF
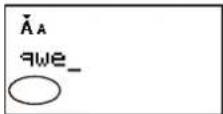
▶Making a Two Line Label
- Enter the text for the first line and press
- Enter the text for the second line and press .且

Do not press after the second line; otherwise the "Line Limit!" error message will be displayed.
Display Label image
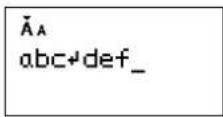
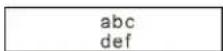
▶Entering Accented Characters

A
Z
→
A ^A …
→
ÄÄÄ...
#
▶
→
J
| Accented Characters | |
| A | ÁÀÄÄÄEÄÄÄÄÄÄ |
| C | ÇČĆ |
| D | ĐĐ |
| E | ÉÈÊËEÊËE |
| G | GĞ |
| I | | | | | | | |
| K | K |
| L | ŁÍLL |
| N | ÑÑÑÑ |
| O | ÓÓÓÓÓŒÓ |
| R | ŘŘŘ |
| S | ŠSSß |
| T | ŤTP |
| U | ÚÚÚÚÚÚÚ |
| Y | ŸŸ |
| Z | żzz |
| Accented Characters | |
| a | á à à æ æ ä a à à à |
| c | ç č c |
| d | d ß d |
| e | é è è è e è è è |
| g | g ĝ |
| i | í l l l l l l |
| k | k |
| l | l l l r |
| n | ñ ñ ñ ñ |
| o | ó ò ò ø ò ò ø ò |
| r | r r r |
| s | š s s s s β |
| t | t t p |
| u | ú ú ú ú ú ú ú ú |
| y | ý ŷ |
| z | ž z z |
• To cancel an operation, press
- The order of accented characters differs by the selected LCD language.
▶Deleting Text (+) Y
By pressing ,characters are deleted one by one.

X
![NOTE To delete all text and settings: ↑ + → [Text&Format] To delete text only: ↑ + → [Text Only]](/content/2026/05/812837/images/2c634338797513ae9dd5cf27e5b1b62029fc65aa0d55950632f19f83182c61ea.jpg)
Adding Symbols
▶Entering Symbols
Example: Entering


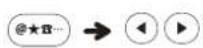
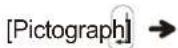
Display Label image
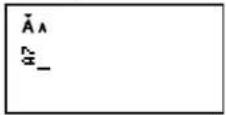
Pictographs appear on the LCD with the corresponding letter and number of the Pictograph table.
The following symbols are available:
Basic
| 01 | |||||||
| 02 | @ | - | & | ~ | - | \ | / |
| 03 | % | ? | i | i | * | ||
| 04 | + | - | × | ÷ | ± | = | ≥ |
| 05 | ≤ | ≠ | ∴ | ( ) | [ | ] | |
| 06 | < | > | § | « | » | 【 | 】 |
| 07 | ↑ | ↔ | ↔ | ↑ | |||
| 08 | ® | © | TM | ¢ | € | £ | |
| 09 | ¥ | ° | ♪ | α | β | γ | |
| 10 | δ | μ | Ω | φ | Σ | 0 | 1 |
| 11 | 2 | 3 | 4 | 5 | 6 | 7 | 8 |
| 12 | 9 | 0 | 1 | 2 | 3 | 4 | 5 |
| 13 | 6 | 7 | 8 | 9 | I | II | III |
| 14 | IV | V | ★ | ||||
| 15 | |||||||
| 16 | |||||||
| 17 | |||||||
| 18 | |||||||
Pictograph
| 1 | 2 | 3 | 4 | 5 | 6 | 7 | |
| A | |||||||
| B | |||||||
| C | |||||||
| D | |||||||
| E | |||||||
| F | |||||||
| G | |||||||
| H | |||||||
| I | |||||||
| J | |||||||
| K | |||||||
| L |
• To display the next group, press
- To cancel an operation, press
- Symbols surrounded by a box in the Basic table are available only in DECO MODE.
- You can select the rows of symbols (A to L) in the Pictograph table by pressing the symbol you want.
- Images are only for illustrative purposes.


▶ Printing the Pictograph List




Label image
A A A A C E F B D F
Designing Labels
1 Press ,use to select a function under column [A], and then press (You can also select the function with the shortcut keys listed under column [C]. ( + to ^1 ) ^5 T
2 Use to select a setting listed under column [B], and then press .
| Design | [A] | [B] | Label image | [C] |
| Size | Size | Large*1 | J.SMITH | F1+Q |
| Small | J.SMITH | |||
| Width | Width | Normal*1 | J.SMITH | F2W |
| ×2 | J.SMITH | |||
| ×1/2 | J.SMITH | |||
| Style | Style | Normal*1 | J.SMITH | F3E |
| Bold | J.SMITH | |||
| Outline | J.SMITH | |||
| Shadow | J.SMITH | |||
| Italic | J.SMITH | |||
| Italic Bold | J.SMITH | |||
| Italic Outline | J.SMITH | |||
| Italic Shadow | J.SMITH | |||
| Vertical | →·∞Σ-→I | |||
| Under-line/Frame | Undl/Frame | Off*1 | ABC | F4R |
| Underline | ABC | |||
| Round | ABC | |||
| Leaf | ABC | |||
| Tile | ABC | |||
| Star | ★★ABC★★ | |||
| Heart | ♥ABC♥ | |||
| Square | ABC | |||
| Bubble | ABC | |||
| Flower | ABC | |||
| Candy | ABC | |||
| Label length | Label Length | Auto*1/30 mm - 300 mm)*2 | The label is printed with the specified length. | F5T |
*1 Default setting. To return to the default setting, press
*2 To select the length, enter the length with the Number
Keys 1. To return to [Auto], press .
Adding Deco Mode Patterns
This function allows you to create unique labels using built-in templates. You can select from eight types of template.
| Design | Label Image | Cooling |
| 1 | ABC ABC ABC ABC | |
| 2 | ||
| 3 | ABC ABC ABC ABC ABCABC ABC ABC ABC ABC | |
| 4 | ABC ABC ABC ABC ABCCBV CBV CBV CBV CBV | |
| 5 | CBV CBV CBV CBV CBVABC ABC ABC ABC ABC | |
| 6 | ABC ABC ABC ABC ABCCBV CBV CBV CBV CBV CBV | may occur |
| 7 | ABC ABC ABC ABC ABCABC ABC ABC ABC ABC | |
| 8 |
![Example: Design 8 ABC ABC ABC ABC Label Length 30 - 200 mm ABC [Print]](/content/2026/05/812837/images/ac7a6bbd7c593c811cda4086718227bdc8b779fdbf2590062ba7f83ce90fb9b4.jpg)
NOTE
- Prolonged usage of the DECO MODE templates may cause the print head to overheat. If this occurs, the machine automatically stops printing while it cools down. The cool down time appears. When the print head is cool, printing automatically continues.
Do not touch the machine while it is cooling. - You can enter only one line of text in DECO MODE.
- Depending on the selected format, the entire text entered may not be printed.
- You cannot change the formats of the DECO MODE templates.
- Symbols surrounded by a box in the Basic table are also available in DECO MODE. For the Basic table, see "Adding Symbols".
- To clear all entered text, press and at the same time. When "Clear?" appears, press to clear the text, or cancel this operation.
- When you access DECO MODE, your most recently printed DECO MODE text and label length are recalled.
- Press return to the previous step.
- To exit DECO MODE, press ✗ until the display returns to the text entry screen. You can also exit this mode by pressing when [Print] appears, and selecting [Quit].
- We recommend 12 mm wide tape cassettes when using the DECO MODE feature.
• The maximum label length is 200 mm for DECO MODE. - When you select [Auto] for [Label Length], the label automatically adjusts to the correct length for printing the text one time.
- Press to return to [Auto] for [Label Length] mode.
Printing Labels
▶ Text Preview
You can preview the text before printing.


- The LCD displays the whole text and the label length (mm/inch), then returns to the original text.
- You can only preview the text. Style, size, underline, frame, or any additional features cannot be previewed.
▶Feeding (Tape Feed)

This function feeds approximately 25 mm of blank tape.
▶ Printing


- To prevent damage to the tape, do not touch the cutter lever while the message "Printing..." or "Feeding..." appears.
- To cut the label, press the tape cutter lever on the upper-left corner of the machine.
- Peel the printed label from the label backing and apply the label.
▶ Printing multiple copies (+) 且
You can print up to nine copies of each label.

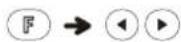


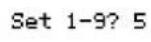

You can also select the number of copies by entering it with the Number Keys ^1 ^2 ^3 ^4 ^5 ^6 ^7 ^8 ^9
▶Removing the Label Backing
This machine is equipped with a peeler that allows you to remove the backing from labels.
- Insert the label, with the printed surface facing down, as far as possible into the built-in peeler.
- Fold back the label to the right and quickly pull out the label. The end of the backing is slightly separated from the label.
- Peel the printed label away from the label backing and apply the printed label.

flowchart
graph LR
    A["Medical Tool"] --> B["Surgical Tool"]
    B --> C["BCD Placement"]
    C --> D["BCDE Placement"]
Saving Label Files
▶ Memory ( + ) 7 U
You can save your original labels onto your machine. Up to three labels can be saved and recalled for printing at a later time. You can also edit and overwrite the stored label.
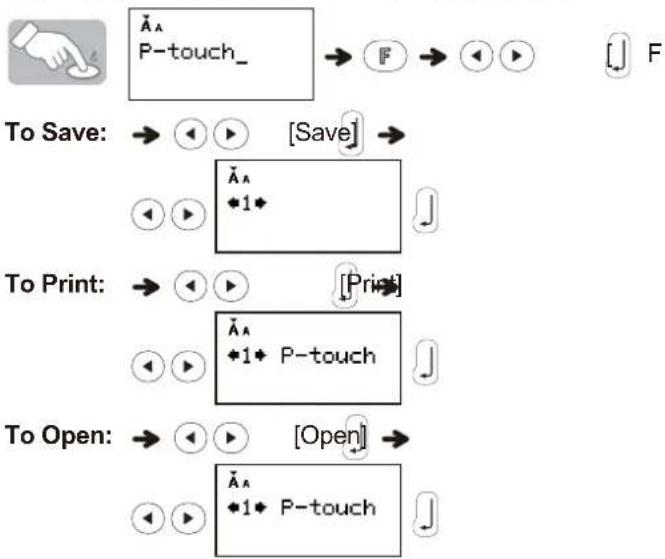
flowchart
graph TD
    A["User Hand icon"] --> B["Ä_A P-touch_"]
    B --> C["Save"]
    C --> D["Ä_A 1*"]
    E["To Save"] --> F["◀ ▶ [Save"] →]
    G["To Print"] --> H["◀ ▶ [Print"] →]
    I["To Open"] --> J["◀ ▶ [Open"] →]
    K["To Open"] --> L["Ä_A 1* P-touch"]
NOTE
If you try to store a label when there is already a label stored to that number, a message "Overwrite?" appears. Press ⏻ to save your new label. Press 📧cancel.
Resetting the machine
You can reset the machine when you want to restore it to factory settings, or when the machine is not working correctly.
1 Press to turn the power off.
2 While holding down ⬆ and 4 R, press ⏻ to turn the power on.
3 Release ⏻, and then release ⏻ and ⁴ R. The internal memory is reset, and all text, settings and stored files are cleared.
Troubleshooting
▶Error message
| Message Cause/Remedy | |
| Low Battery! | The batteries are low. Replace them with four new AAA alkaline batteries. Do not use old and new batteries together or mix alkaline batteries with other battery types. |
| Full! | Make sure you do not exceed the maximum number of characters allowed (80 characters for regular text, or 50 characters for DECO MODE). |
| No Text! | Make sure you enter text before you try to use the print, preview or copy functions.Do not press when no text is entered in the text entry screen of DECO MODE. |
| Line Limit! | Make sure you do not exceed the maximum number of lines allowed (two). |
| Invalid! | Make sure you select a valid [Label Length]. |
| Text Limit! | The text length exceeds the selected label length.The text length exceeds 200 mm when you set [Label Length] to [Auto] in DECO MODE.If you select the minimum label length 30 mm, some frame types (Leaf or Star) do not allow you to enter additional text. |
| Cooling XXX | If the print head becomes too hot, your machine stops printing and automatically starts to cool down. The cool down time message appears. When the print head is cool, printing automatically continues. Do not touch the machine while it is cooling. |
What to do when...
| Problem Solution | |
| The display stays blank after you have turned the machine on. | · Check that you installed the batteries with the positive and negative ends in the correct position· If the batteries are low, replace them with four new AAA alkaline batteries. Do not use old and new batteries together or mix alkaline batteries with other battery types. |
| The machine does not print, or the printed characters are not formed correctly. | · Check that you have inserted the tape cassette correctly.· If the tape cassette is empty, replace it.· Check that you closed the cassette cover correctly. |
| The machine's settings have reset themselves. | · The batteries may be low. Replace them with four new AAA alkaline batteries. Do not use old and new batteries together or mix alkaline batteries with other type batteries.· When power is disconnected for more than three minutes, all text, format settings, and any text files stored in the memory are cleared. Language and Unit settings are also cleared. |
| A blank horizontal line appears through the printed label. | There may be some dust on the print head. Remove the tape cassette and use a dry cotton swab to gently wipe the print head with an up-and-down motion. |
| The machine has “locked up” (that is, nothing happens when you press a key, even though the machine is on). | See “Resetting the machine”. |
| The power turns off when you try to print. | · The batteries may be low. Replace them with four new AAA alkaline batteries. Do not use old and new batteries together or mix alkaline batteries with other battery types.· Check that you inserted the batteries correctly. |
| The tape does not feed correctly or the tape gets stuck inside the machine. | · Remove the M tape from the machine and ensure the tape feeds under the tape guides.· You used the cutter lever while printing. Do not touch the cutter lever while the message “Printing...” or “Feeding...” appears. |
| All text and format settings must be cleared to create a new label. | Press ☑ while holding down , or go into Function mode and select . |
| To change the language setting. | See “Initial Settings”. |
Specifications
Dimensions: Approx. 156 mm × 111 mm × 61 mm
(W × D × H)
Weight: Approx. 250 g
(without batteries and tape cassette)
Power supply: Four AAA alkaline batteries (LR03)
Optional AC adapter (AD-24ES)
Tape cassette: Brother P-touch M tape widths: 9 mm, 12 mm
Contact Information
Contact details may differ by country.
Visit the website http://www.brother.eu, and select your country.

- brother
- P-touch
- M95M95
- User's Guide
- Installing the Power Supply and Tape Cassette
- Remove the cassette cover by pressing the highlighted area.
- Insert a tape cassette, making sure it snaps into place.
- Insert four new AAA alkaline batteries (LR03), making sure their positive and negative ends point in the correct directions.
- Insert the two hooks at the bottom of the cassette cover into the slots on the machine (①), and then close the cover securely until it snaps into place (②).
- Using the Optional AC Adapter
- NOTE
- Keyboard
- LCD
- Initial Settings
- Turn your machine on.
- Set the language.
- Set the unit of measurement.
- Entering Text and Accented Characters
- ▶Switching Upper-Case/Lower-Case
- ▶Entering Numbers
- ▶Making a Two Line Label
- ▶Entering Accented Characters
- ▶Deleting Text (+) Y
- Adding Symbols
- ▶Entering Symbols
- ▶ Printing the Pictograph List
- Designing Labels
- Adding Deco Mode Patterns
- Printing Labels
- ▶ Text Preview
- ▶Feeding (Tape Feed)
- ▶ Printing
- ▶ Printing multiple copies (+) 且
- ▶Removing the Label Backing
- Saving Label Files
- ▶ Memory ( + ) 7 U
- Resetting the machine
- Troubleshooting
- Specifications
- Contact Information
Marke : BROTHER
Modell : P-Touch M95
Kategorie : Etikettendrucker