
Venture 350 - Zelt Vango - Kostenlose Bedienungsanleitung
Finden Sie kostenlos die Bedienungsanleitung des Geräts Venture 350 Vango als PDF.


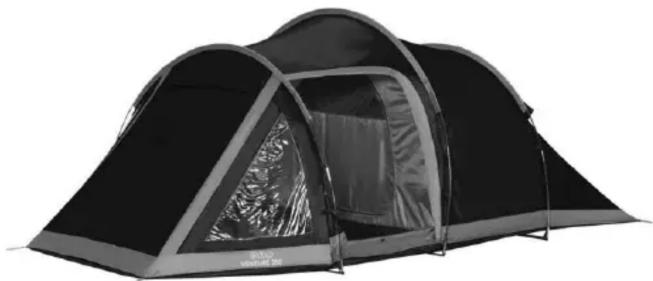
| Produkttyp | Tunnelzelt |
| Marke | Vango |
| Modell | Venture 350 |
| Personenkapazität | 3 Personen |
| Außenmaße (L×B×H) | 330 × 210 × 130 cm |
| Innenmaße (L×B×H) | 210 × 210 × 125 cm |
| Packmaß | 60 × 20 × 20 cm |
| Gewicht | ca. 5,5 kg |
| Material Außenzelt | Polyester 190T, Wetterfest |
| Material Boden | Polyethylen 120 g/m² |
| Gestänge | Fiberglas 8,5 mm |
| Wassersäule | 3000 mm |
| Eingänge | 2 (Vorder- und Hintereingang) |
| Vorraum | Ja, mit Gepäckbereich |
| Belüftung | Seitenbelüftung mit Moskitonetz |
| Innenzelt | Abnehmbar, mit Moskitonetz |
| Aufbauart | Freistehend, mit Abspannleinen |
| Empfohlene Nutzung | Camping, Wandern, Festival |
| Pflegehinweise | Handwäsche, nicht maschinenwaschbar, an der Luft trocknen |
| Lieferumfang | Zelt, Gestänge, Heringe, Abspannleinen, Reparaturflicken |
Häufig gestellte Fragen - Venture 350 Vango
Benutzerfragen zu Venture 350 Vango
0 Frage zu diesem Gerät. Beantworten Sie die, die Sie kennen, oder stellen Sie Ihre eigene.
Eine neue Frage zu diesem Gerät stellen
Laden Sie die Anleitung für Ihr Zelt kostenlos im PDF-Format! Finden Sie Ihr Handbuch Venture 350 - Vango und nehmen Sie Ihr elektronisches Gerät wieder in die Hand. Auf dieser Seite sind alle Dokumente veröffentlicht, die für die Verwendung Ihres Geräts notwendig sind. Venture 350 von der Marke Vango.
BEDIENUNGSANLEITUNG Venture 350 Vango
TENT PITCHING INSTRUCTIONS – VENTURE (EN)
Flysheet First Pitching
- Assemble poles and lay them parallel on the ground. (3 poles) Each pole is colour coded to match the corresponding pole sleeve.
- Open flysheet on ground and position tent in desired direction.
- Locate pole sleeves on the flysheet and insert poles, one at a time. Locate one end of each pole into corresponding pin system on flysheet.
- Push poles into an arch from opposite side and locate pole ends into corresponding pin system on flysheet.
- Peg out elasticated pegging points at both corners of one end of tent using pin-pegs supplied.
- Pull flysheet taut, away from pegged points, until tent takes shape. Peg the opposite two elasticated pegging points using the pin-pegs. Ensure the tent is in a straight line.
- Peg down poles through metal rings and remaining flysheet pegging points using alloy pin-pegs.
- Peg out ALL guy lines using the pin-pegs.
Inner
- Open out inner tent inside flysheet and position doorway to correspond with the porch entrance of the flysheet.
- Starting from the rear corners of the tent, attach the hooks on the groundsheet to corresponding rings on the base of the flysheet.
- Suspend the inner by attaching hooks of inner tent with rings on inside of flysheet. Start at the rear and work forwards.
- Attach hooks on front of groundsheet, to corresponding rings on base of flysheet.
- Attach porch groundsheet using the hooks to attach to the rings at the base of the poles and at the front of the tent. Use the flat top groundsheet pegs in the eyelets across the entrance to the tent to secure the groundsheet.
The inner tent and flysheet can remain attached when pitching or packing. However, in humid or very wet weather, the underside of the flysheet may be coated with condensation. If this occurs, it may be advisable to detach the inner and pack it separately to avoid the inner tent becoming wet.


Marke : Vango
Modell : Venture 350
Kategorie : Zelt