XQC-1912DVC - Fernseher Onn - Kostenlose Bedienungsanleitung
Finden Sie kostenlos die Bedienungsanleitung des Geräts XQC-1912DVC Onn als PDF.


Benutzerfragen zu XQC-1912DVC Onn
0 Frage zu diesem Gerät. Beantworten Sie die, die Sie kennen, oder stellen Sie Ihre eigene.
Eine neue Frage zu diesem Gerät stellen
Laden Sie die Anleitung für Ihr Fernseher kostenlos im PDF-Format! Finden Sie Ihr Handbuch XQC-1912DVC - Onn und nehmen Sie Ihr elektronisches Gerät wieder in die Hand. Auf dieser Seite sind alle Dokumente veröffentlicht, die für die Verwendung Ihres Geräts notwendig sind. XQC-1912DVC von der Marke Onn.
BEDIENUNGSANLEITUNG XQC-1912DVC Onn
ON
19" LCD TV
With DVD &DVB-T Combo
natural_image
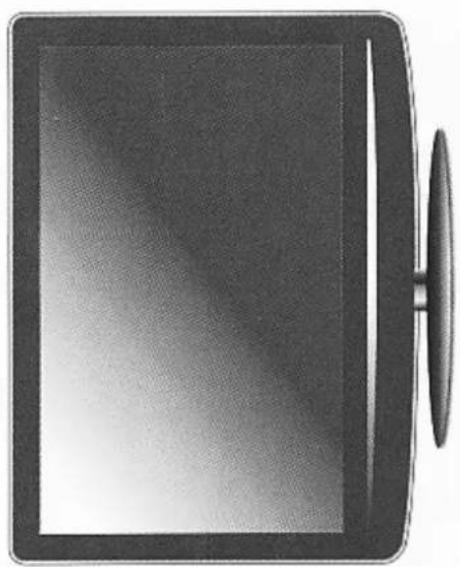
Front view of a flat-screen television displaying (no visible text or symbols)Model: XQC-1912DVC
USER'S MANUAL
Read this manual carefully and retain for future reference IMPORTANT: Retain these instructions for future reference
natural_image
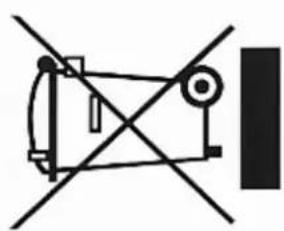
Symbol of a trash bin crossed with no text or numbers, representing waste sorting or restriction (no text present)"This symbol is known as the 'Crossed-out Wheelie Bin Symbol'. When this symbol is marked on a product, it means that the product should not be disposed of with your general household waste. Only discard electrical/electronic items in separate collection schemes which cater for the recovery and recycling of the materials contained within. Your co-operation is vital to ensure the success of these schemes and for the protection of the environment."
28 day no quibble refund
If you need delighted to your product, simply bring 2 blocks within 20 days for no applicable request. But I target to include all of the first original components in the example module (cutter to power color) and packaging using your receipt or other point of purchase. FREE 1 year guarantee
Although we have been created by a full 1 part 412.4 guarantee from the day you say it, if the criteria were that you protect a facility in you are simply struggling to set up and continue to alter you would do
- National Customer Service Hall on the you are able to pay with the police. Copyright: 14
Customer Helpline 0845 300 7775
Monday - Friday Bars - Art, Saturday Bars - Art Sunday Bars - Bars East Marginal of Mathematics
CE
Produced for
ASDA Stores Ltd
Leeds LS115AD
Asda Technical helpline phone number: 0845 300 7775

natural_image
Completely blank white image with no visible content, text, or symbols.Specifications
Contents
| 1 | PREFACE | 3 | |
| 2 | SAFETY PRECAUTIONS | 3 | |
| 3 | IN THE CARTON | 5 | |
| 4 | FRONT BACK CONNECTIONS OF LCD | 6 | |
| 5 | TV INSTALLTION DRAWINGS | Power Cord Connection | 7 |
| Antennas Connection | 7 | ||
| SCART Connection | 8 | ||
| VIDEO Connection | 8 | ||
| S-Video Connection | 9 | ||
| VGA Connection | 9 | ||
| HDMI Connection | 10 | ||
| 6 | REMOTE CONTROL | Remote control instructions in TV mode | 11 |
| Remote control instructions in TELETEXT mode | 12 | ||
| Remote control instructions in DVB mode | 13 | ||
| Remote control instructions in DVD mode | 14 | ||
| Remote control setup | 15 | ||
| 7 | ACCESSORIES | 15 | |
| 8 | TV OPERATION | First Time Installation | 16 |
| TV Information | 17 | ||
| VIDEO MENU options | 17 | ||
| AUDIO MENU options | 18 | ||
| SETUP MENU options | 19 | ||
| SETUP menu of TV input: | 20 | ||
| SETUP menu of VGA input | 21 | ||
| SETUP menu of HDMI input | 22 | ||
| SETUP menu of DTV input | 22 | ||
| TIMER MENU options | 22 | ||
| FUNCTION MENU options | 23 |
| Screen Size | 19 inch | |
| Display Type | TFT LCD | |
| Resolution(Pixel) | 1440 X 900 | |
| Aspect Ratio | 16:10 | |
| AC INPUT | (Adapter)AC100-240V 47-63Hz 1.3A LCD TV unit DC12V 5A 60W | |
| TV System | PAL/SECAM | |
| Video Input Format | PAL/NTSC | |
| Antenna Input | Standard antenna socket 75Ω | |
| Audio Output | L/R 2X3W | |
| Input | Video | 1.0Vp-p +/-5%, RCA |
| S-Video | S-Y: 0.714Vp-p +/-5%, S-C: 0.286Vp-p +/-5% | |
| SCART | Full | |
| PC | 640X 480/60Hz 800X 600/60Hz 1024X 768/60Hz 1440 X 900 60Hz | |
| Audio (Video/S-Video/PC) | (RMS) TYP 1.0V MAX 1.3V RCA | |
| Audio (SCART) | (RMS) TYP 1.0V MAX 1.3V | |
| Output | SCART Video | Video 1.0Vp-p +/-5% |
| SCART Audio L/R | (RMS) TYP 500mv | |
| Disc Physical Format | DVD/CD/VCD/MP3/JPEG/CD-R/RW DVD±R/RW | |
| DVD Video Output Format | PAL/NTSC | |
★ This manual is only for your reference, any change to the design and specification will not be advised.
Asda Technical helpline phone number: 0845 300 7775
Contents
Troubleshooting and advice
11. TROUBLESHOOTING AND ADVICE
Please check if you can solve the troubleshooting by yourself
| Troubleshooting | Control |
| No signal | Please check that all cables and cord's are correctly plugged in |
| No color shades | Adjust the contrast, the color and the brightness |
| Stain show on the screen | Maybe result from a lighting signal from car, motor, neon light and other electrical devices or appliances. |
| Double or multiple display image | Maybe the result of an electrical wave disturb from other TV. Computer and Game machine or Radio |
| Snow on the screen | The cables of the antenna are not correctly plugged in. |
| The remote control does not work | Please check the batteries order and alignment Check that the IR of the remote control is not hidden by something |
| "Zip" made noise on TV cover | Even if the display image is correct, the noise may come from an unsteady fixation of the panel. |
| No sound | Make sure that you have not press the MUTE button of the panel or of the remote control. |
| No DVD | Make sure if the TV Set have been switched to DVD mode |
| DVD player not working properly | Ensure disc is correctly inserted into the player. Ensure the disc does not damaged and with correct format. Please wait patiently as some discs need longer time to play |
Aada Technical helpline phone number: 3845 390 7725
| 9 | DTV OPERATION | CI Card options | 25 |
| Program List | 25 | ||
| DTV SETUP MENU options | 26 | ||
| EPG options | 27 | ||
| 10 | DVD OPERATION | Basic operation | 28 |
| MP3/JPEG Playback | 28 | ||
| Function Settings | 29 | ||
| DVD Function General setup | 29 | ||
| System Setup | 29 | ||
| Language Setup | 32 | ||
| Audio Setup | 33 | ||
| Dolby Digital Setup | 34 | ||
| 11 | TROUBLESHOOTING AND ADVICE | 35 | |
| 12 | SPECIFICATIONS | 36 |
Asda Technical helpline phone number: 0645 300 7775
Dolby Digital Setup
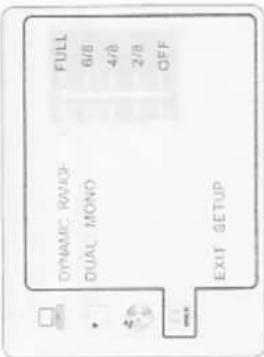
DYNAMIC RANGE
- When switch the compress mode to "Audio output", adjust the compress ratio for different effect. When selected FULL, the peak signal value is smallest. When selected OFF, the peak signal value is biggest
text_image
DYNAMIC RANGE FULL DUAL MONO 6/8 4/8 2/8 OFF EXIT SETUPDUAL MONO
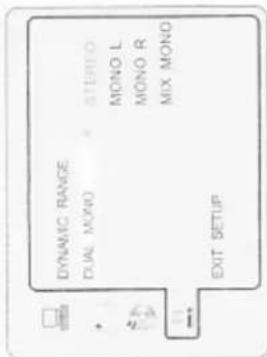
- You can select four different audio output. STEREO, MONO L, MONO R, MIX MONO. The audio out description of these. Selections is shown in the table below.
text_image
DYNAMIC RANGE DUAL MONO STEREO MONO L MONO R MIX MONO EXIT SETUP| MODE | LEFT SPEAKER | RIGHT SPEAKER |
| STEREO | STEREO-L | STEREO-R |
| L-MONO | L-MONO | L-MONO |
| R-MONO | R-MONO | R-MONO |
| MIX-MONO | L-MONO+R-MONO | L-MONO+R-MONO |
1. PREFACE
Thank you for buying this TV! Please read this manual thoroughly before operating the TV. Make sure the TV was not damaged in transit. Should the TV is damaged, do not install it and contact your dealer. Check that you have all the accessories according to the model.
2. SAFETY PRECAUTIONS
Preparation
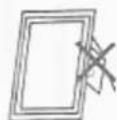
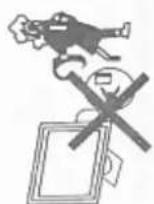
Put the TV on a stable surface
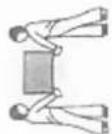
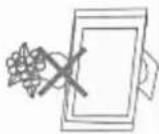
Do not place any material on the TV.
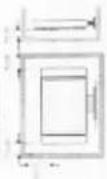
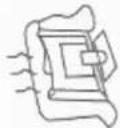
Connexion cables
Power cord and cables must be properly routed and protected to prevent people from stepping on them and causing the TV to fall.
Andx Technical helpline phone number: 0845 300 7775
MENU LANGUAGE
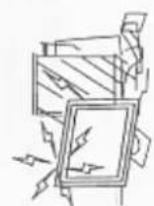
Keep the TV dry and away from humidity.
(1) 2017年1月1日至2018年1月1日,公司与关联方累计发生关联交易的总金额为人民币45,000万元。
Keep the TV away from heat sources

Cleaning and maintenance
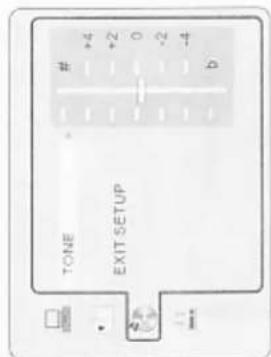
AUDIO setup
The audio setup options are illustrated below:
text_image
TONE EXIT SETUP # +4 +2 0 -2 -4 bTONE
- Use the Up and Down arrow button to move the scroll and adjust the TONE
Unplug the TV before cleaning it. Do not use solvent or liquid to clean the TV.
Only clean the TV with a soft and dry cloth.
In case of troubleshooting, do not use spare parts other than those suggested by the manufacturer. Using inadequate spare parts can lead to electric shocks, short-circuits fire or other incidents.
Departure in holidays
Unplug the TV during lightening storms or when unused for long periods of time.
- The apparatus shall not be exposed to dripping or splashing and that no objects filled with liquids, such as vases, shall be placed on the
The adapter shall be connected to a mains socket outlet with a
protective earthing connection.
Batteries shall not be exposed to excessive heat such as sunshine.
fire or the like
• The mains plug shall remain readily operable.
text_image
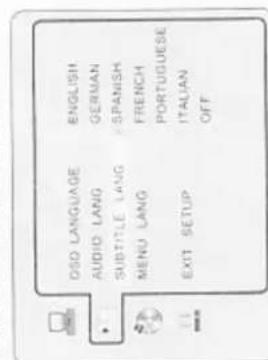
OSD LANGUAGE ENGLISH AUDIO LANG GERMAN SUBTITLE LANG SPANISH MENU LANG FRENCH PORTUGUESE EXIT SETUP ITALIAN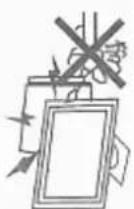
- IN THE CARTON
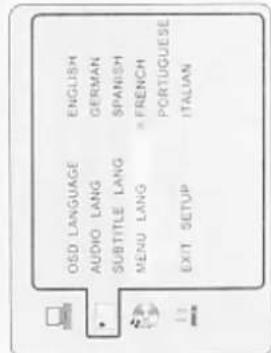
Language Setup
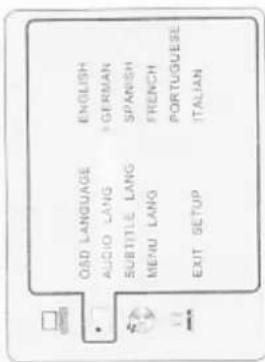
Press DVD SETUP button to enter the DVD OSD menu.
OSD Language
Use navigation buttons to select the OSD
LANGUAGE setup icon, press ENTER button to
confirm. There are 6 languages for your selection.
press ▲ & ▼ buttons to toggle between different
languages (ENGLISH/GERMAN/SPANISH/
FRENCH/PORTUGUESE/ITALIAN).Press
ENTER button to confirm
natural_image
Front view of a flat-screen computer monitor (no visible text or labels)AUDIO LANGUAGE
LCD TV SET
Use navigation buttons to select the AUDIO LANG setup icon, press ENTER button to confirm.
There are 6 languages for your selection, press ▲ & ▼ buttons to toggle between different
languages. (ENGLISH/GERMAN/SPANISH/FRENCH/PORTUGUESE/ITALIAN). Press ENTER
button to confirm
text_image
OSD LANGUAGE ENGLISH AUDIO LANG F.GERMAN SUBTITLE LANG SPANISH MENU LANG FRENCH PORTUGUESE EXIT SETUP ITALIANSUBTITLE LANGUAGE
Use navigation buttons to select the SUBTITLE LANG setup icon, press ENTER button to
confirm. There are 6 languages for your selection, press ▲ & ▼ buttons to toggle between
different languages. (ENGLISH/GERMAN/SPANISH/FRENCH/PORTUGUESE/ITALIAN/OFF)
Press ENTER button to confirm.
text_image
OSO LANGUAGE ENGLISH AUDIO LANG GERMAN SUBTITLE LANG SPANISH MENU LANG FRENCH PORTUGUESE EXIT SETUP ITALIAN OFFAsda Technical helpline phone number: 0245 300 7775
natural_image
Front view of a black remote control with multiple circular buttons and a central square dial (no visible text or symbols)Remote Control
AAA Batteries
text_image
Onn Onn 2014, 2015, 2016 In the following description of the Onn brand: Anon's product is designed to be a standard product with a standard design. The product is designed to be an open or closed.Quick-start Guide
Asda Technical helpline phone number: 0845 300 7775
natural_image
Front view of a flat-screen computer monitor (no visible text or labels)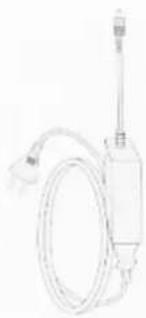
natural_image
Pure electrical circuit lines without any symbolsAdapter & Power Cord
text_image
ONN 19" LCD TV With DVD & DVB-T Combo Model: AEC-CPB/PC USER'S MANUALUser Manual
4. FRONT, BACK, CONNECTIONS OF LCD
Front View
- Press "POWER" button to turn standby mode
on or off.
2 Press "P+" or "P-" to scan through channels
Press "V+" of
the sound level - Press "MENU" to bring up the main menu on
the screen. - Press "SOURCE" to select the input source
6 Press PLAY/PAUSE in DVD mode.
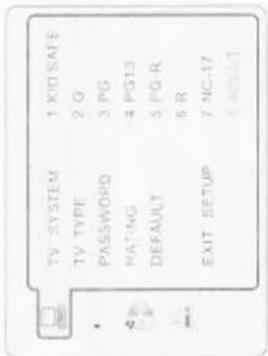
- Playback for some discs with rating, you can select the rating setting according to your preference. Rating restriction divided in eight different category from KID SAFE to ADULT
RATING
text_image
TV SYSTEM 1 KID SAFE TV TYPE 2 G PASSWORD 3 PG RATING 4 PG13 DEFAULT 5 PG-R 6 R EXIT SETUP 7 NC-17Left View and Control Connections
1 DC 12V DC input socket
-
HDMI IN: Connect the HDMI output jack of DVD
-
VGA Connect the PC-RGB output jack of PC
-
SCART Connect the SCART jack of VCR or DVD
5 S-VIDEO Connect the S-VIDEO output jack of
DVD or VCR
-
VIDEO: Connect the Video output jack of DVD or VCR
-
AUDIO LR Connect the right Audio out put jack of
DVD or VCR for Video/S-VIDEO
-
PC AUDIO: Connect the Audio output jack of PC
-
Connect the headphone.
10 RF Connect the antenna.
- CI Port. Insert CI card.
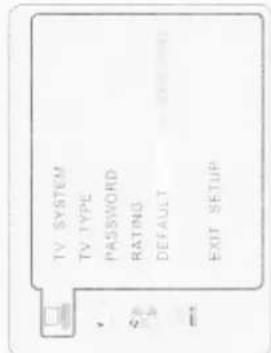
DEFAULT SETTING
Press ENTER button to restore factory default
NOTE Only editable when password is unlocked. And only can function when password is locked. It does not, however, reset either the Password or the Rating setting.
text_image
TV SYSTEM TV TYPE PASSWORD RATING DEFAULT EXIT SETUPAsda Technical telephone phone number: 0845 300 7775

text_image
DC IV 0-5-8 HOMA VGA SCART B VIO/D VIDEO L R AUDIO IN PC AUDIO ( ) RF1 2 3 4 5 6 7 8 9 10
Asda Technical helpline phone number: 0845 300 7775
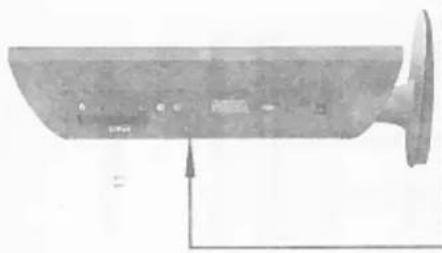
natural_image
Side view of a computer monitor with a stand and cable, no visible text or symbolsDVD Operation
TV installation drawings specifications
5. TV INSTALLTION DRAWINGS
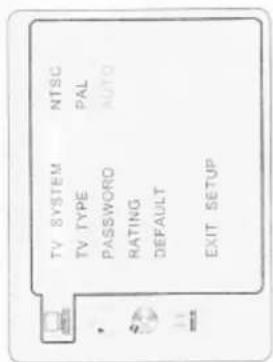
NTSC This format is used by some other countries, e.g. USA
PAL This is the format used in the UK and the default setting.
AUTO This is
This format can be used if your DVD is capable of both PAL and NTSC formats.
TV TYPE
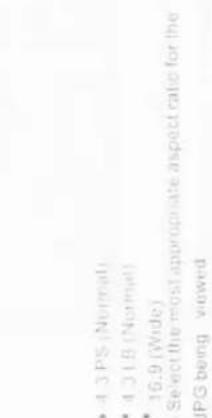
DVD are produced in a variety of screen aspect ratios. This menu enables you to select one of the three aspect ratios
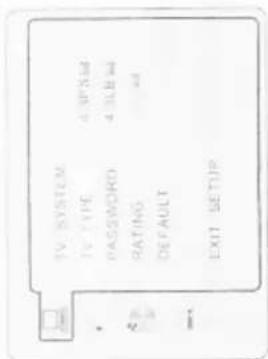
text_image
TV SYSTEM TV TYPE 4.5PSM PASSWORD 4.3LB M RATING DEFAULT EXIT SETUP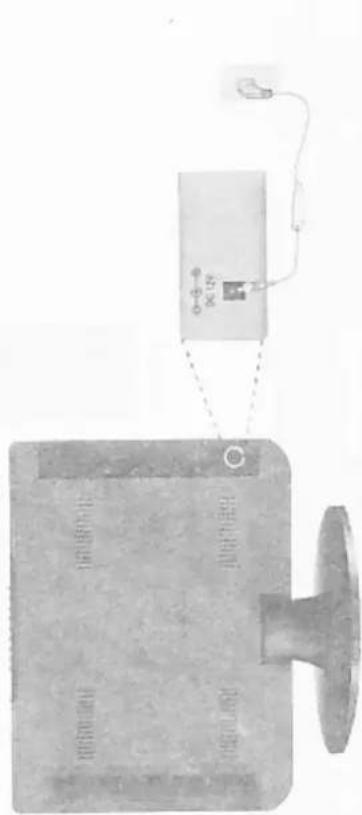
text_image
Diagram showing a computer monitor connected to a device labeled 'DC 12V' with wiring, indicating connection or data transfer.Antennas Connection
To ensure good picture and sound, TV antenna system needs to be installed. The antenna system as shown can be sourced from TV equipment shops, which will provide service for correct installation and connection. After installation, insert the 75-chim antenna plug into the antenna jack as shown
VHF ANTENNA
VHF ANTELMA
Password
- The default setting is locked. No Rating selection or change password could be done. To edit the Rating setting, please enter default password "0000" by numeric buttons, then press ENTER button to confirm
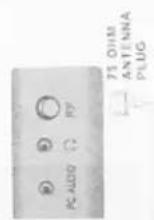
POWER PLUG OF ANTENNA AMPLIFIER
Asda Technical helpline phone number: 0845 300 7775
Anda Technical helplessness phone number: 0345 200 7775
text_image
• 4.3 PS (Normal) • 4.3 USB (Normal) • 16.9 (Wide) • Select the most appropriate aspect ratio for the JPG being viewedNOTE:
TV installation drawings specifications
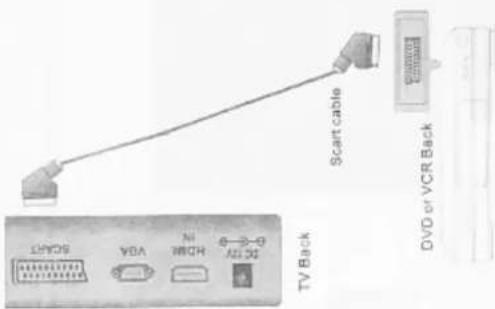
SCART Connection
Connect the SCART connector on the external video device to the SCART connector on the set using a SCART cable.
text_image
SCART VGA HDIM IN TV Back Scart cable DVD or VCR BackVIDEO Connection
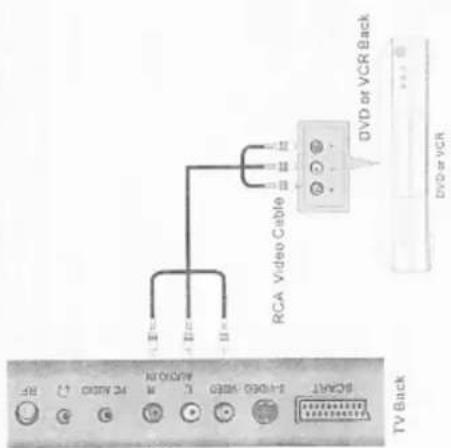
Connect the VIDEO and AUDIO output jack of the DVD or VCR to the VIDEO jacks on the set using the RCA cable. Match the jack colors: Video is yellow, Audio left is white, and Audio right is red. Select the CVBS input source with using the SOURCE button on the remote control.
text_image
TV Back RCA Video Cable DVD or VCR Back DVD or VCR- When play or pause with picture playback, you may use D MENU button to enter preview mode to display 6 pictures
Press 🎨 / 🎨 button to select next / previous page or press numeric buttons to view the
corresponding pictures
The maximum JPEG image size that can be displayed is 1280 x 1024.
Function Settings
DVD Function General setup
text_image
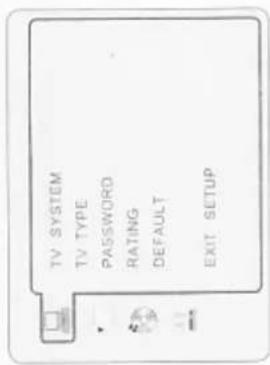
TV SYSTEM TV TYPE PASSWORD RATING DEFAULT EXIT SETUP- Press DVD SETUP button to activate the DVD player OSD menu;
- Press ◀ / ▶ button to move and highlight between different sub-menu. Press ▲ / ▼ ENTER button to enter the highlighted sub-menu.
- Press DVD SETUP button to exit the OSD menu, or move the highlight to EXIT DVD SETUP then press ENTER button to exit.
System Setup
TV SYSTEM
- Press ▶ button to enter the TV SYSTEM, and then press ▲ / ▼ to select one from below.
text_image
TV SYSTEM NTSC TV TYPE PAL PASSWORD AUTO RATING DEFAULT EXIT SETUPAsda Technical Helpline phone number: 0845 300 7775
Asda Technica) helpline phone number: 0845 300 7775
DVD Operation
TV Installation drawings specifications
10. DVD Operation
Basic operation
- Turn ON and OFF the DVD function
- Turn on the LCD TV and then press SOURCE button Next, press ▲/▼ button to select DVD mode.
Finally, press ENTER or ▶ button to confirm.
- Sequential playback
- For Super VCD & DVD discs, if PBC is "ON" status, press 📄 button will enter the disc menu. Press 📄 button to start in sequent. For others, while it stopped, press 📄 button to start in sequent.
- Program playback
- Using Program playback, you can select max. 16 tracks from the disc to playback in
programmed order
- OSD for program playback as below
MP3/JPEG Playback
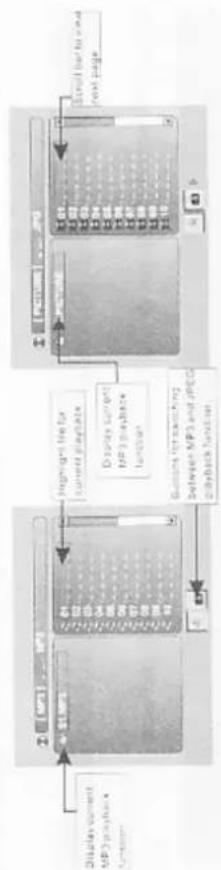
After loading the MP3 / JPEG CD&DVD, it will start to scan for the stored MP3 / JPEG folders. Then will firstly display the MP3 contents automatically and start to play the first file (highlighted file). Screen as follow:
flowchart
graph TD
    A["Display current MP3 playback function"] --> B["Highlight line for current playtable"]
    B --> C["Display current MP3 playtable function"]
    C --> D["Buttons for switching between MP3 and jPCG playback function"]
    D --> E["Screen behavior panel page"]
- Using the navigation buttons to check your favorite folder and playback the first file or move to your favorite folder.
NOTE:
- Press ◀▶ buttons to move the highlight to folders, documents or mode selection.
- Press numeric buttons to select the contents directly. For number over 10, press -/-- button
first. (e.g. File number 15, press -/- then 5.)
- When playback Mp3 files, there is no picture display, only audio output.
- Playing the JPEG discs press PROGRAM button to select slide effects. Press PROGRAM
button to toggle between different modes in sequent. (WIPE TOP / WIPE BOTTOM / WIPE LE
/ WIPE RIGHT / DIGONAL WIPE LEFT TOP / DIGONAL WIPE RIGHT TOP / DIGONAL WIPE
LEFT BOTTOM/DIGONAL WIPE RIGHT BOTTOM/EXTEND FROM CENTER H/EXTEND
FROM CENTER V / COMPRESS TO CENTER H / COMPRESS TO C
WINDOW V / WIPE FROM EDGE TO CENTER / RANDOM / NONE).
- When play or pause with picture playback, you may use navigation buttons to flip / rotate the picture. - ▲ button to flip horizontally.
- ▼ button to flip vertically.
- button to rotate left 90°
- button to rotate right 90°
Aside Technical helpline phone number: 0845 300 7775
Asda Technical helpline phone number: 0845 380 7775
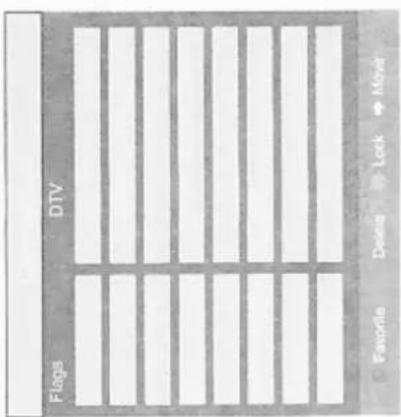
Program Edit
This function allows you to edit the DTV programs according to your preferences, as following:
text_image
Flags DTV Favorite Delete Lock MoveEPG options
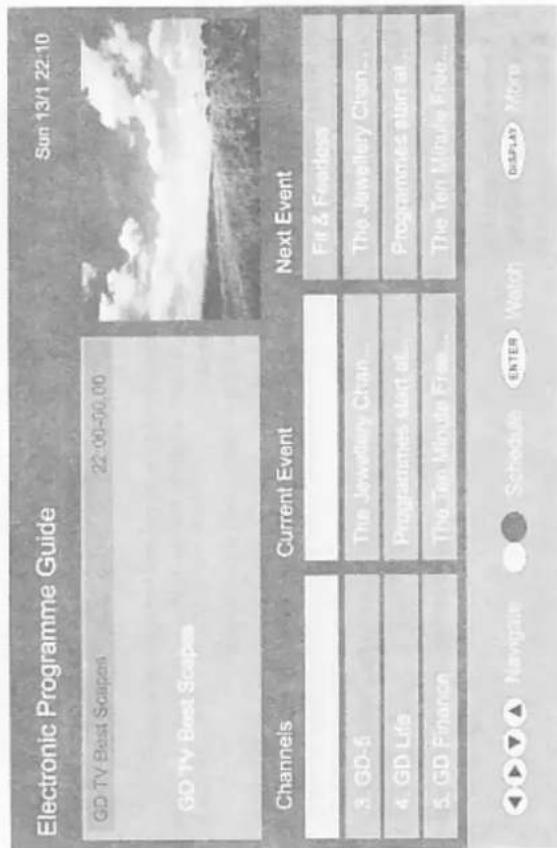
Use EPG button on the remote control to display the EPG menu directly as below:
text_image
Electronic Programme Guide Sun 13/1 22:10 GD TV Best Scapes 22:00-00.00 GD TV Best Scapes Channels Current Event Next Event 3. GD-5 The Jewellery Chan... Fit & Feardless 4. GD Life Programmes start at... The Jewellery Chan... 5. GD Finance The Ten Minute Free... Programmes start at... The Ten Minute Free...HDMI Connection
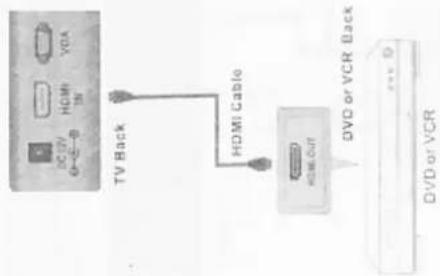
flowchart
graph TD
    A["DC 1V 0-2-0"] --> B["HDMI IN"]
    B --> C["TV Back"]
    C --> D["HDMI Cable"]
    D --> E["HOME OUT"]
    E --> F["DVD or VCR Back"]
    F --> G["DVD or VCR"]
Connect HDMI output of the DVD to the HDMI input jack on the LCD TV set. Select the HDMI input source using the SOURCE button
DTV Operation
6. REMOTE CONTROL
Remote control instructions in TV mode
NOTE: Only the channels that you selected to FAV in Program Edit Menu could be
displayed in Favorite List.
Channel Search options
- Press the ◀ / ▶ button to select SETUP in
the main menu.
-
Press the ▲/▼ button to select your option what you want to adjust in the SETUP menu
-
Press the ◀ / ▶ button to adjust.
(1) 2017年 ,中国证券报、上海证券报
- When you are satisfied with your adjustment, shows the TV MENU button to
adjustment press the TV menu button to return to the previous menu or press the EXIT button to exit the main menu.
Press ▲/▼ button to select Manual Search. Press ENTER or ▶ button to set the Manual Tuning
Channel
Press ◀/▶ to select the upper or lower channel. Press 0-9 to select the channel directly
Start Search
To select whether to start searching in begin/searching/finished.
Services Found
The services be found
Signal Quality
The signal quality of current channel.
Signal Strength
The signal strength of current channel.
Frequency
The frequency of current channel.

| Manual Tuning | |
| Channel | 21 |
| Start Search | Begin |
| Sectional Offset | 1 |
| Signal Quality | 0% |
| Signal Strength | 0% |
| Frequency | 474.00 MHz |
Aada Technical helpline phone number: 0845 300 7775
Asda Technical helpline phone number: 0845 300 7775
9. DTV OPERATION
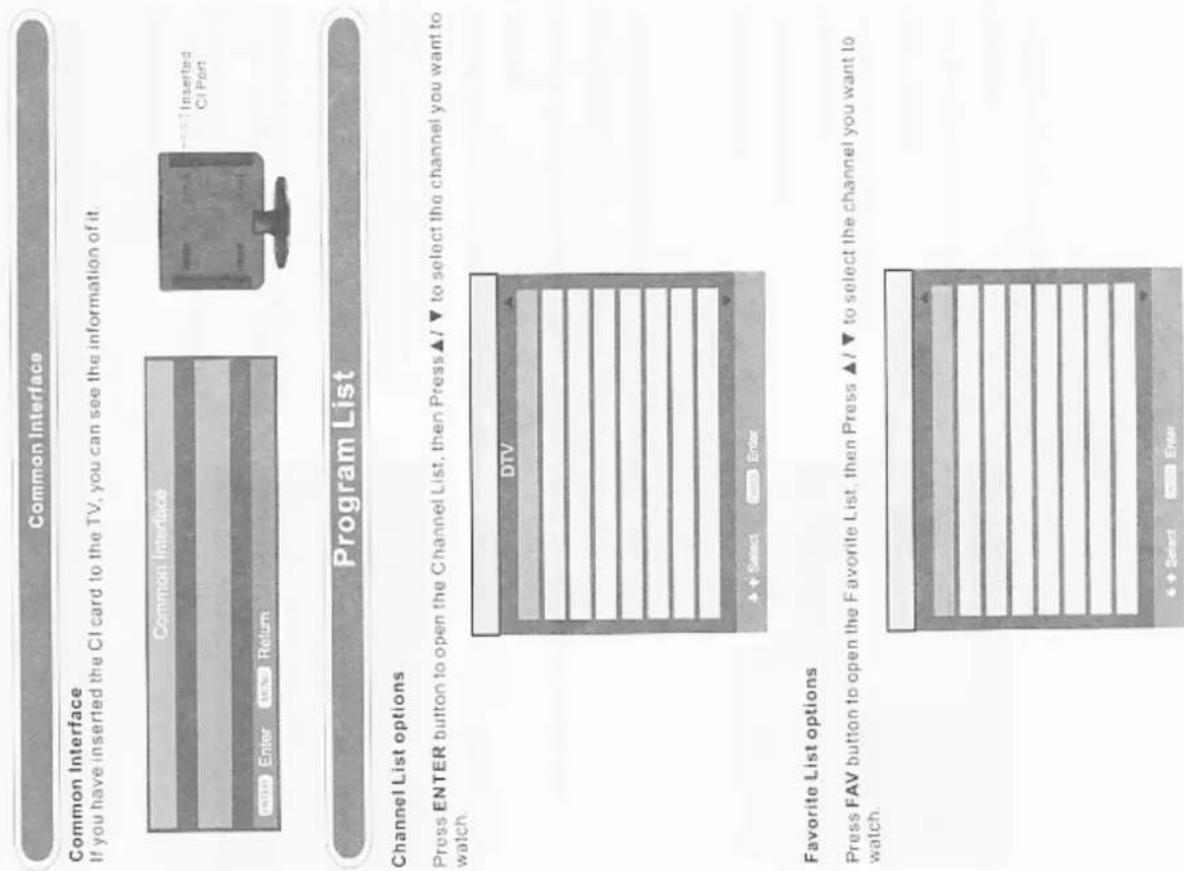
Channel List options
Press ENTER button to open the Channel List, then Press ▲/▼ to select the channel you want to watch.
Favorite List options
Press FAV button to open the Favorite List, then Press ▲/▼ to select the channel you want to watch.
Asda Technical helpline phone number: 8845 300 7775
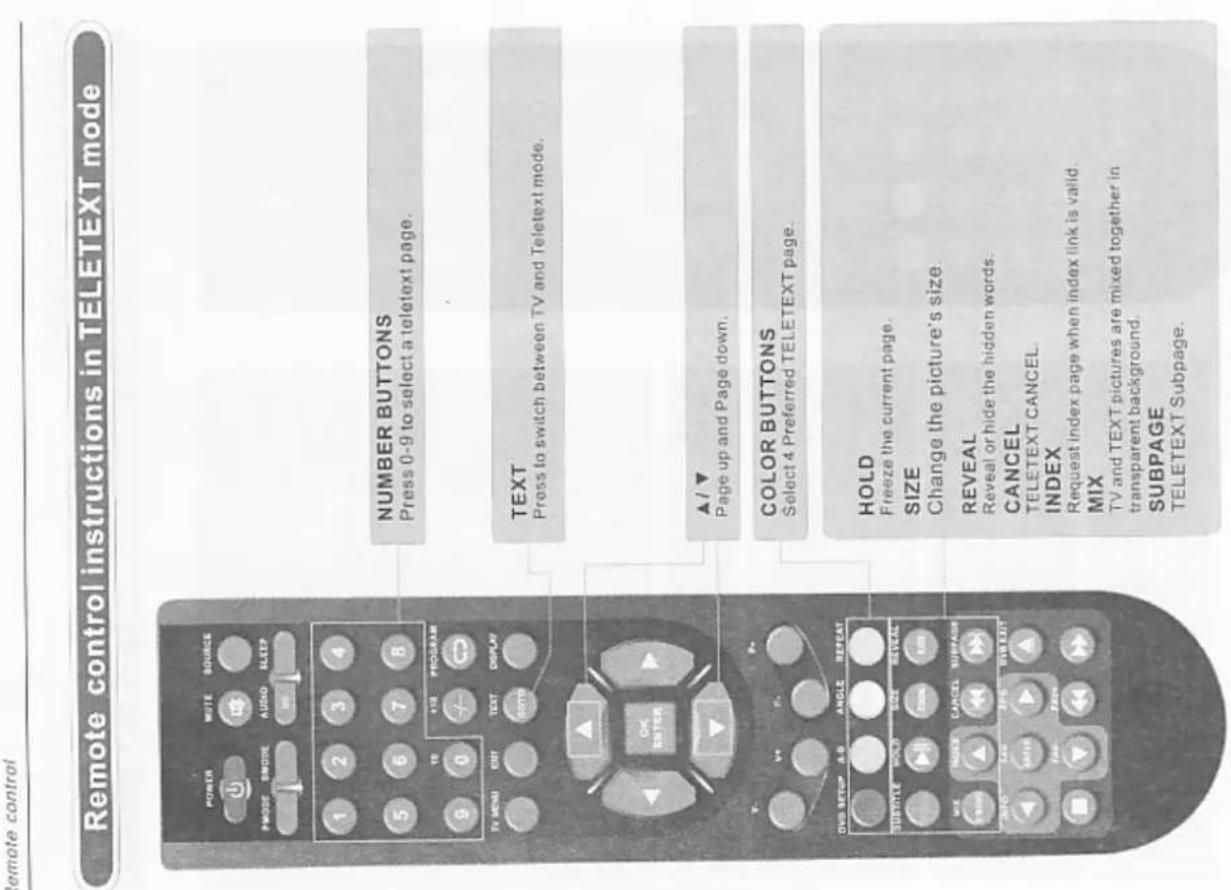
text_image
Remote control instructions in TELETEXT mode POWER MUTE SOURCE PMODE BMODE AUDIO SLEEP 1 2 3 4 5 6 7 8 TE 1/2E PROGRAM TV MENU EDIT TEXT DISPLAY ON ENTER V- V+ F- DVD SETUP A-D ANGLE REPEAT SUBTITLE WORK SIZE REVEAL DINUM RED MIX MASTER CANCEL SUBPAGE SUNION CALL INFO SUBVEET SUPPORT RESET NUMBER BUTTONS Press 0-9 to select a teletext page. TEXT Press to switch between TV and Teletext mode. ▲/▼ Page up and Page down. COLOR BUTTONS Select 4 Preferred TELETEXT page. HOLD Freeze the current page. SIZE Change the picture's size. REVEAL Reveal or hide the hidden words. CANCEL TELETEXT CANCEL. INDEX Request index page when index link is valid. MIX TV and TEXT pictures are mixed together in transparent background. SUBPAGE TELETEXT Subpage.TV OPERATION
Child Lock
Press ENTER or ▶ button to set the child lock.
You need to enter the PIN code if the Child lock is set "on", and the default PIN code is empty, you can press ENTER button directly to enter.

TIPS: The superuser's (administrator's) password is 4711.
Child Lock
Press ENTER or ▶ button to set the child lock.
KeyLock
Press ENTER or ▶ button to set the key lock.
Change PIN Code
Press ▶ button to enter Change PIN Code menu.
Old PIN Code
Press 0-9 buttons to enter the correct old PIN code, you can not change the PIN code if you entered a wrong PIN code.
New PIN Code
Press 0\~9 buttons to enter the new PIN code you want.
Change PIN Code
Press 0\~9 buttons to enter the PIN code you entered in the New PIN Code menu again to confirm the new PIN code.
First Time Installation
Press ▶ button to open the first time installation menu, and the operation of this menu is in page 16.
Reset
Press ENTER or ▶ button to reset the TV to the factory default
Asda Technical helpline phone number: 0845 300 7775
Remote control instructions in DVB mode
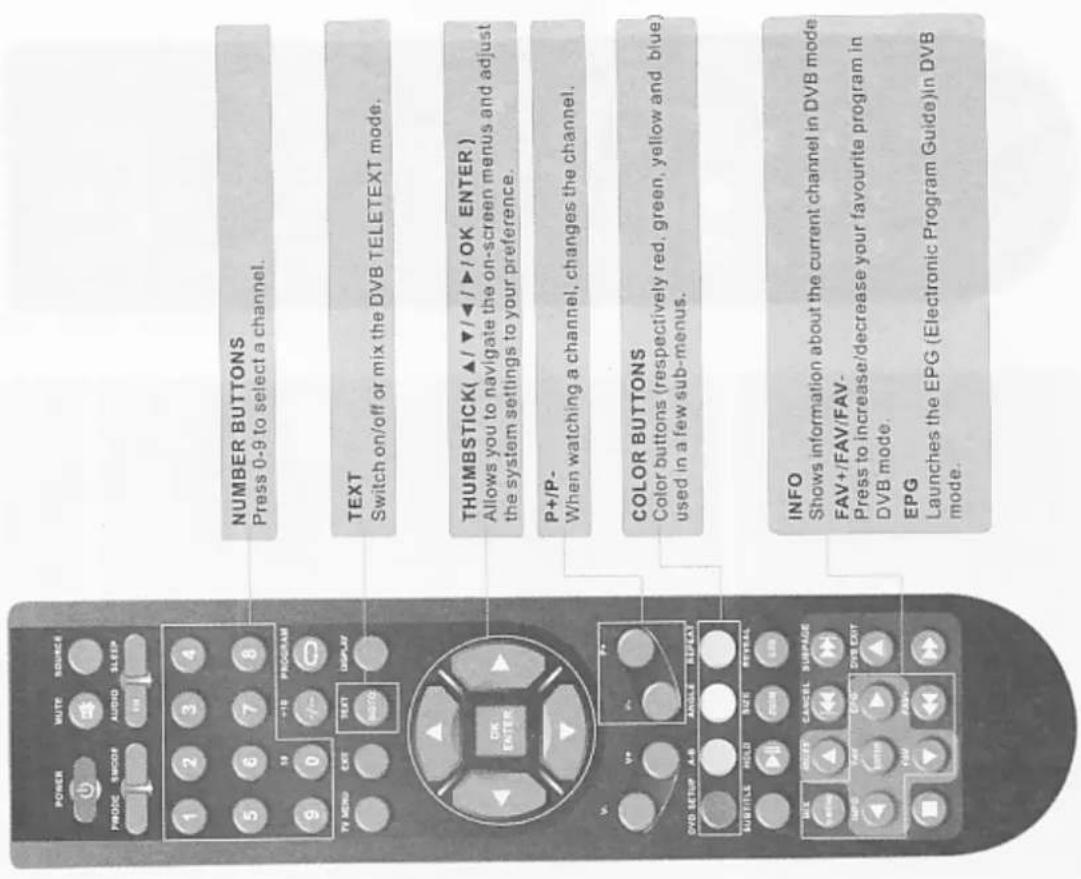
text_image
POWER MUTE SOURCE FROOD SMOOD AUDIO SLEEP 1 2 3 4 5 6 7 8 10 +10 PROGRAM 9 0 TV MENU EXT TEXT DISPLAY OK ENTER V+ V- + DVD SETUP A-B ANGLE REPEAT SUBTITLE HOLD SIZE REVEAL HOLD CANCEL SURPAGE INFO Shows information about the current channel in DVB mode. FAV+/FAV/FAV- Press to increase/decrease your favourite program in DVB mode. EPG Launches the EPG (Electronic Program Guide)In DVB mode.Remote control instructions in DVD mode
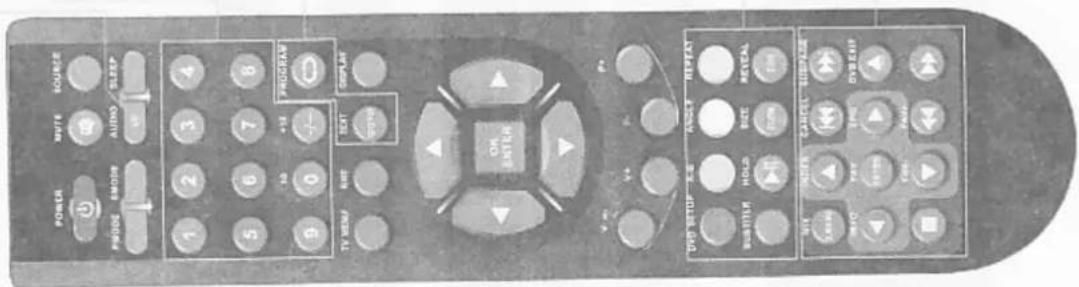
AUDIO(I/II) AUDIO selection buttons in DVD mode
NUMBER BUTTONS Numerical buttons for various data.
PROGRAM
Program a disc playing in a desired sequence.
GOTO
It is possible to get access to any point on the directly using the 'GOTO' menu. Press GOTO to access the 'GOTO' menu.
DVD SETUP
Used for selecting programs. It may also be used to execute commands.
A-B This button enables you to repeat a selected section
from the disc.
ANGLE Selects various camera angles for certain scenes or passages on the DVD during playback.
REPEAT
Press REPEAT to cycle through the repeat play options SUBTITLE Select a different subtitle language(the DVD disc must
have the subtitle you selected.
PLAY/PAUSE in DVD mode.
ZOOM
In play state, press ZOOM, the player will zoom in the picture one time.
D.DIS Press to display the DVD information
THUMBSTICK(▲/▼/◄/►/OK ENTER)
text_image
POWER WRITE SOURCE PMODE ENMODE AUDIO SLEEP 1 2 3 4 5 6 7 8 10 +15 PROGRAM 9 0 -/ TV MENU RENT EXT DISPLAY ON ENTER V+ P+ V+ P- DIN SETUP & AN ANGLE REPEAT SUBTITLE HOLD SIZE REVEAL TIME MATER CANCEL SUBPARE MFC TAY TIME ODBC#P TEN FLOWAnda Technical helpline ph
text_image
TIMER SleepTimer 0 Min OSDTimer 10Sec Select EnterSleep Timer
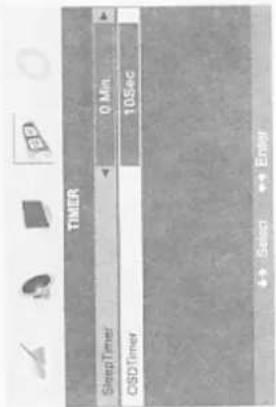
Select the sleep time to put automatically the TV in standby mode. Timer can be selected as 0min, 15min, 30min, 45min, 60min, 75min, 90min, 105min, 120min. Also you can select the sleep time by pressing SLEEP button repeatedly.
OSD Timer
You can select the time when the OSD display on the screen such as 5Sec, 10Sec, 15Sec, 20Sec, 25Sec, 30Sec.
FUNCTION MENU options
Press MENU button on the front panel or TV MENU on the remote control to display the
main menu.
- Press the ◀/▶ button to select FUNCTION in
the main menu.
-
2017年1月1日,公司发布《关于召开股东大会的通知》
-
Press the ▲▼ Button to select your option what you want to adjust in the FUNCTION menu
what you want to adjust in the PONS ON Items.
- Press the ◀/▶ button to adjust.
(1) 2017年 ,公司及子公司对外担保情况
- When you are satisfied with your adjustment, you see the TV MENU button in salute to the
press the TV MENU button to return to the previous menu or press the EXIT button to exit
the main menu.
(二)本说明仅供参考。
Language
Press ◀ / ▶ to select the OSD language
Video Size
This option allows you to select the screen display mode which best corresponds to your viewing requirements. Note: The available aspect mode may be different in different input signal. Blue screen This option allows you to select the blue background on or off. If on, the screen background will turn blue at very weak or no signal condition.
Asda Technical helpline phone number: 6845 100 7775
Allows you to navigate the on-screen menus and adjust the system settings to your preference.
A
To eject the disc.
■
DVD STC
16.28
Jump to
Sump to
Fast bac
D MENU
DVD disc menu Access to menu
Allows you to navigate the on-screen menus and adjust the system settings to your preference.
To elect the disc
to effect this idea.
-
DVD STOP
16.28
图 1
Jump to
Eastbac
D MENU
DVD disc
| 项目 | 本期金额 | |
| 2018年6月30日 | 2017年12月31日 | |
| FUNCTION | |
| Language | English |
| Video Size | Fullscreen |
| Blue Screen | On |
| Child Lock | |
| First Time Installation | |
| Reset | |

Auto Sync
Remote control setup
a) Open the cover. b) AAA size batteries. When inserting the batteries, make sure correct polarities as per"and"marks on the batteries and within the battery compartment. c) Replace the battery cover
R.V. Position Repos A / ▼ Ir
Press ▲ 1 ▼ to and then use ▲ 7 ▼ to adjust the picture's position
Position Rese Press ▲ / ▼ to factory default

Phase
Press ▲ / ▼ to and then use ◀ / ▶ to adjust the phase of the picture.
Press ▲ / ▼ to and then use ◀ / ▶ to adjust the
clock phase o
H.V.Position
Position Reset Press ▲ / ▼ to and then use ◀ / ▶ to adjust the picture's position. Position Reset Press ▲ / ▼ to and then use ◀ / ▶ to select it, next press ENTER or / ▶ to reset the settings to the factory default
| PC Position | |
| Auto Sync | Begin |
| Phase | 51 |
| Clock | 50 |
| H Position | 50 |
| V Position | 50 |
| Position Reset | |
Position Reset Press ▲ / ▼ to a factory default
SETUP menu of HDMI input
This menu is available only have HDMI signal input.
| HDMI Position | |
| H Position | 50 |
| V Position | 50 |
| Position Reset | |
SETUP menu of DTV input
This menu is available only have DTV signal input.
| SETUP | |
| Country | UK |
| Auto tuning | -2 |
| Manual tuning | -0 |
| Program Edit | -0 |
| Common Interface | -0 |
TIMER MENU options
7. ACCESSORIES
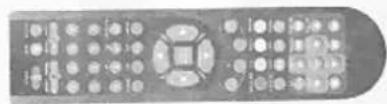
1 One Remote Control
2 One Adapter&Power Cord
3 2 Batteries 1.5V
4 One User Manual
5 Quick-start Guide
Asila Technical helpline phone number: 0845 300 7776
Asda Technical helpline phone number: 0845 300 7775
Press MENU button on the front panel or TV MENU on the remote control to display the
main menu
2017年第三次临时股东大会
TV OPERATION

In one source, if OSD is same with other source, we will not explain them, otherwise, we will give explanation.
8. TV OPERATION
First Time Installation
| Country | UK |
| Language | English |
| Delete Analog Program | |
| Analog Program Search | |
| Delete Digital Program | |
| Digital Program Search | |
| OK | Cancel |
Country
Press ▲/▼ button and then use ◀/▶ to select the country.
Language
Press ▲/▼ button and then use ◀/▶ to select the OSD language.
Delete Analog Program
Press ▲/▼ button and then use ◀/▶ to select whether to delete all the analog programs.
Analog Program Search
Press ▲/▼ button and then use ◀/▶ to select whether to start searching analog programs.
Delete Digital Program
Press ▲/▼ button and then use ◀/▶ to select whether to delete all the digital programs.
Digital Program Search
Press ▲/▼ button and then use ◀/▶ to select whether to start searching digital programs.
menu.
If you cancelled the first time installation, it will remind you whether to set the first time
First Time Installation
| YES | Do it next time | NO |
Asda Technical helpline phone number: 0845 300 7775
TV OPERATION
Program Label
This option allows you to label a channel, you can also relabel the programs have been labeled.
-
Select a channel you want to labeled.
-
Press▲/▼ select Program Label in SETUP menu.
-
Press ▲/▼ to perform your selection. The menu of program label will display as below:

-
Press the numeric buttons to input the numbers directly or press ▲/▼ to select the letters.
-
Press ENTER, TV MENU or EXIT button to confirm and return to previous menu.
AFT (Auto Fine Tune)
Due to weak signals or a wrong antenna configuration, some of the channels may not be tuned to the best reception condition. AFT function allows you to fine tune channel selected (the frequency of channel is around the value in Manual Search option).
Manual Search

This option has two functions:
-
Set the frequency of channel for AFT option.
-
Press ▶ button for 3+ seconds and it will start auto tuning from this frequency.
Program Edit
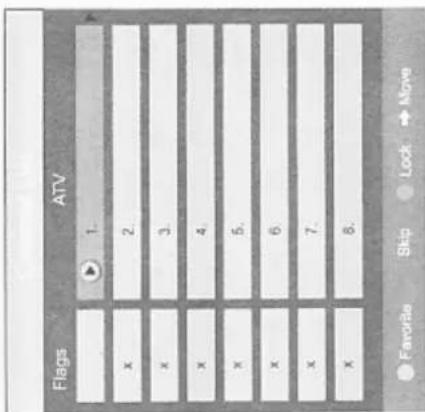
This function allows you to sort the TV programs according to your preferences, as following:
- Press ▲ / ▼ to select Program Edit in SETUP
menu.
-
Press ◀ / ▶ to enter into the sub menu, a channel list will display
-
Press ▲ / ▼ to select the channel in the list
(1) 本说明仅供参考。
-
Press ▶ to perform your selection.
-
Press ▲ / ▼ to select the location you would like to place the channel.
-
Press ◀/▶ to perform you selection
-
Press TV MENU to return to the previous
(1) 本次股东大会的决议的有效期
NOTE: This menu is unavailable in SCART and S-VIDEO mode.
SETUP menu of VGA mode: This menu is available only have VGA signal input.
Asda Technical Helpline phone number: 0845 300 7775
text_image
Flags ATV 1. x 2. x 3. x 4. x 5. x 6. x 7. x 8. Favorite Skip Lock MoveTV Information
Program Information
Press DISPLAY or NICAM button to display the program information.

text_image
1 2 3 4 5 6- The number of current program.
- The colour system of current pro of SETUP menu).
3 The name of current program.
4 The label of current program, you can label it in Manual Tuning menu (an option of SETUP
5. The sound system of current program, could be selected in Manual Tuning menu (an option
of SETUP menu).
6. The NICAM mode of current program.
If the icon of NICAM mode is red, it means the current program supplies multi NICAM Signals, and you can select it by pressing NICAM button.
The NICAM modes and relative icons:
Mono Stereo Dual Dual

VIDEO MENU options
Press MENU button on the front panel or TV MENU on the remote control to display the menu.
-
Press ◀ / ▶ button to select PICTURE in the main menu.
-
Press ▲ /▼ button to select the option that you want to adjust in the PICTURE menu.
-
Press ◀ / ▶ button to adjust.
-
When you are satisfied with your adjustment, press the TV MENU button to return to the previous menu or press the EXIT button to exit the main menu.
Picture Mode
Select Picture Mode in PICTURE menu. (Available picture mode: Standard, Personal, Movie, Sport, Mild, Game.)
Asda Technical helpline phone number: 0845 300 7775
| SETUP | |
| Country | UK |
| Auto Tuning | +2 |
| Manual Tuning | +2 |
| Program Edit | +2 |
SETUP menu of TV input:
1. Press the ◀ / ▶ button to select SETUP in the
main menu.
2. Press the ▲/▼button to select your option what you want to adjust in the SETUP menu.
3. Press the ◀/▶ button to adjust.
- When you are satisfied with your adjustment, press the TV MENU button to return to the previous menu or press the EXIT button to exit the main menu.
Country
Auto Tuning
This option allows you to select the country.
Auto tuning
This option allows you to tune the channels that can be received automatically.
Note: Before you perform Auto Tuning, you must choose the country where you are by selecting COUNTRY option.
Manual Tuning
This option allows you to perform Manual Tuning
Note: Before you perform Manual Tuning, you must choose the country where you are by selecting Country option.
-
Press ◀/▶ to select Manual tuning in SETUP menu.
-
Press ▲/▼ to perform your selection, the menu of Manual tuning will display on the screen.
Program
| Manual Tuning | |
| Program | 23 |
| Sound System | 1 |
| Colour System | PAL |
| Program Lable | |
| AFT | On |
| Manual Search | 471.43 MHz |
The current program number. Press ◀ / ▶ to select the upper or lower program.
Sound System
Press ◀ / ▶ to select a corresponding sound system, such as DK.L/L',BG.I.
Colour System
Press ◀ / ▶ to select a corresponding colour system, such as Auto, PAL, SECAM
Asda Technical helpline phone number: 0845 300 7775
TV OPERATION

In this manual, the OSD (On Screen Display) may be different from your TV's because it is used as examples to help the user with the TV operation.
If you change the value of Contrast, Brightness, Colour, Tint, Sharpness or Colour temperature on the picture menu, the picture mode will be changed to "Personal" automatically. You may select the picture mode directly by pressing PMODE button.
TIPS: You can press PMODE button on the remote control to select the Picture Mode directly.
Contrast
Press ▲ /▼ button and then use ◀ / ▶ to adjust the contrast of the picture.

text_image
Contrast 28After adjust the value you want, press TV MENU button to return to the preview MENU.
Brightness
Press ▲ /▼ button and then use ◀ /▶ to adjust the brightness of the picture.
Colour
Press ▲ /▼ button and then use ◀ /▶ to adjust the colour saturation.
NOTE: This option is invalid in PC mode, and it will be shown in gray.
Tint
Press ▲ / ▼ button and then use ◀ / ▶ to adjust the tone of colour when your system is in NTSC.
Sharpness
Press ◀/▶ to select the sharpness mode of your
TV. (Available Sharpness
Normal, Sharp, Sharpest, Softest, Soft.)
| PICTURE | |
| Brightness | 50 |
| Colour | 50 |
| Tint | 50 |
| Sharpness | Normal |
| Colour Temperature | Normal |
| DNR | Off |
DNR (Digital Noise Reduction)
If the broadcast signal received is weak, you can
select the DNR option to reduce the level between Off, Low, Mid and High
AUDIO MENU options
Press MENU button on the front panel or TV MENU on the remote control to display the
main menu
Asda Technical helpline phone number: 0045 300 7775
-
Press the ◀/▶ button to select SOUND in the main menu
-
Press the ▲/▼ button to select the option that you want to adjust in the SOUND menu.
-
Press the ◀ / ▶ button to adjust.
-
When you are satisfied with your adjustment, press the TV MENU button to return to the previous menu or press the EXIT button to exit the main menu.
Volume
Press ▲ / ▼ button and then use ◀ / ▶ to adjust the sound level

After adjust the value you want, press TV MENU button to return to the preview MENU.
Sound Mode
Select Sound Mode in SOUND menu. (Available sound mode: Personal, Voice, Music, Theatre.) If you change the value of Bass and Treble on the Sound menu, the sound mode will be changed to "Personal" automatically. You may select the sound mode directly by pressing SMODE button.
TIPS. You can press SMODE button on the remote control to select the Sound Mode directly.
Bass
Press ▲ / ▼ button and then use ◀ / ▶ to increase or decrease the level of the lower-pitched sounds.
Treble
Press ▲/▼ button and then use ◀/▶ to increase or decrease the level of the higher-pitched
sounds.
Balance
Press ▲/▼ button and then use ◀/▶ to adjust the audio output between left and right speakers.
[Non-Text]
m = 311
Press MENU button on the front panel or TV MENU on the remote control to display the
main menu.
NOTE: SETUP menus are different for different input sources, if the input source is selected VGA and there are no relative input signal. SETUP menu will be unavailable.
Asda Technical helpline phone number: 0045 300 7775